froggy
|
| posted on 30/9/11 at 05:28 PM |

|
|
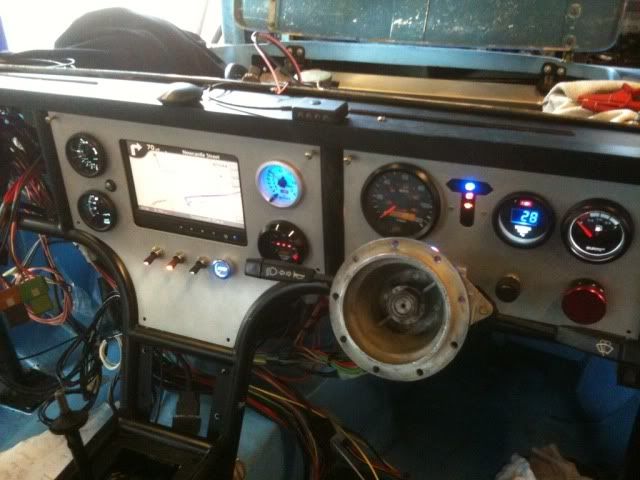
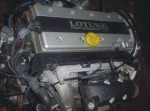
dash wiring finished and pc up and running

[IMG]http://i144.photobucket.com/albums/r187/froggy_0[IMG]
|
|
|
|
|
MikeCapon
|
| posted on 30/9/11 at 06:05 PM |
|
|
WOW! How  is that? is that?
|
|
|
alister667
|
| posted on 30/9/11 at 06:58 PM |
|
|
Just fantastic.
|
|
|
T66
|
| posted on 30/9/11 at 08:03 PM |
|
|
Is the computer, as per the one on ecuproject with the live sid etc ?
ipod,mp3
|
|
|
froggy
|
| posted on 30/9/11 at 08:06 PM |
|
|
It's a car pc with t5 and various other guff on it so I can log etc but I will be running a bdm into the ecu so I cam hard flash with the ecu
still fixed in the car
[IMG]http://i144.photobucket.com/albums/r187/froggy_0[IMG]
|
|
|
T66
|
| posted on 30/9/11 at 08:21 PM |
|
|
Good stuff - Never followed that route with mine, as the open sid did everything I wanted.
Dash looks good !
http://www.youtube.com/watch?v=tSM51B5mguE
[Edited on 30/9/11 by T66]
|
|
|
froggy
|
| posted on 5/11/11 at 10:15 PM |
|
|
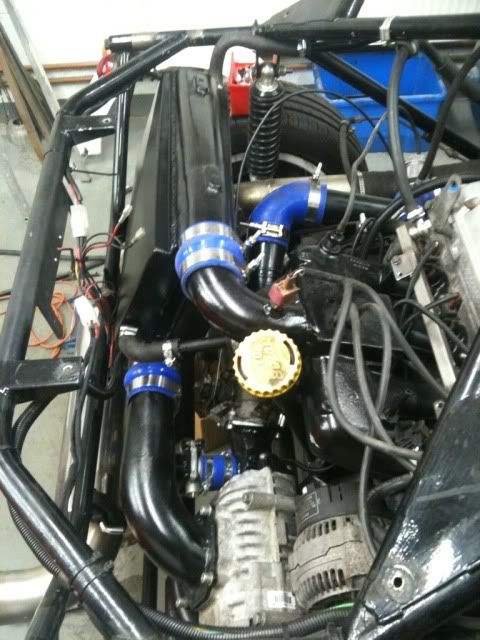
A few gentle trips show that it all works ok with no major issues but a few mods needed on the twin charged set up . Firstly I forgot to add a second
blow off valve between the turbo and the supercharger inlet which meant the charger got a shove of boost whilst trying to Open the the bypass with vac
from the shut throttle which caused the belt to slip .
Next issue was a load of boost leaks which are now sorted but I need to get the extra dump valve in before any more testing . The main issue is the
bypass which is the original butterfly valve on the s/c operated by a vac actuator . I need to rig up a cable to hold it shut as I'm pretty sure
it's getting pushed open by the turbo and it would be better to replace it with an external wastegate with a line from either side of the
throttle body so it looks for pressure difference which with the throttle open
Should be zero and oriented so that boost pushes the valve against it's seat should seal well and depending on spring strength should be pretty
linear in response where the butterfly probably only needs a few degrees of movement to unload the supercharger .
Having said that despite all the issues I saw 7psi from the turbo and 15psi coming out of the s/c and 1bar at 2500rpm .
If I was going for all out power it probably needs the s/c unloading to let the turbo do it's thing but judging on the performance I don't
see that becoming an issue , I have the boost control solenoid running through a switch in the car so a simple way of doing it would be to run a
straight signal to the turbo actuator and use the solenoid to bleed boost off one side of the bypass wastegate to unload the charger once the turbo is
really into it's stride at 1.2 bar
[IMG]http://i144.photobucket.com/albums/r187/froggy_0[IMG]
|
|
|
froggy
|
| posted on 23/12/11 at 09:36 PM |
|
|
whilst looking at building a bypass for the supercharger i pulled the outlet cover off to find this 


at first i thought something had gone through the charger but looking closer the damage is towards the rear of the rotors where they sit in needle
bearings. the first couple of drives showed that the single dump valve was struggling to vent enough air causing the belt to slip so i put another one
in and it improved but the noise from the valves blowing off was horrendous although having no idea what a twin charged car should sound like blowing
off i didnt think it was a problem but i know better now.
the issue was having the throttle before the supercharger which isnt normally an issue but put a turbo behind it and every time you lift there is a
slight delay before the dump valves open where the supercharger pumps against a closed throttle and pressures rise high enough to push the rotors
apart and contact the case 
the next issue is that what i thought was an m62 turns out to be an m45 which merc went back to in 2000 so picked up an earlier m62 and converted the
huge clutch pulley to fixed drive at 2-1 ratio

the charger will run in vacuum now so im using a bypass from a supercharged mini which is self contained

taken another look at the pipe work and coolers and have gone for a big single chargecooler and have ended up with a much neater system with only 3
bends in total .losing the old log manifold wil help too as i used to get knock from cyl 1 as it got a bit more than the other at 2 bar so the later
saab 900 centre inlet will work better


the big air to air unit will become a chargecooler with water going in underneath and pumped through the core ,will need another pump to help shift
the water to the pump at the front .
[IMG]http://i144.photobucket.com/albums/r187/froggy_0[IMG]
|
|
|
Minicooper
|
| posted on 25/12/11 at 12:14 PM |
|
|
Hello,
What is the width of the 4 links on the dion axle? I'm almost certainly going to use the Saab turbo engine and gearbox now and I need to know if
I have enough room to get it in comfortably, I'm also considering reducing the track on my car as it's very wide
Cheers
David
|
|
|
froggy
|
| posted on 25/12/11 at 07:08 PM |
|
|
end to end from crank pulley to end of gearbox is 35" my links are 42" apart centerline and 23" long 
[IMG]http://i144.photobucket.com/albums/r187/froggy_0[IMG]
|
|
|
Minicooper
|
| posted on 26/12/11 at 03:39 PM |
|
|
Thanks very much, I've got loads of room, 47" to the centres, so if I reduce the track by 2" per side I will have 43" to the
centreline plenty of room for the 35" wide engine/gearbox, just got to make sure I can reduce the track on the front without problems to match,
otherwise it will have to stay comically wide
Cheers
David
|
|
|
froggy
|
| posted on 26/12/11 at 03:45 PM |
|
|
if you havent bought a motor yet the 9-3 9/5 boxes have slightly stronger cases than the saab 9000 and are dirt cheap ,if i hadnt got so many spares i
would re work the mount and use the later box as ive had several trashed boxes running 500hp hopefully the 700kg weight reduction will cure it
[IMG]http://i144.photobucket.com/albums/r187/froggy_0[IMG]
|
|
|
froggy
|
| posted on 17/1/12 at 08:40 PM |
|
|
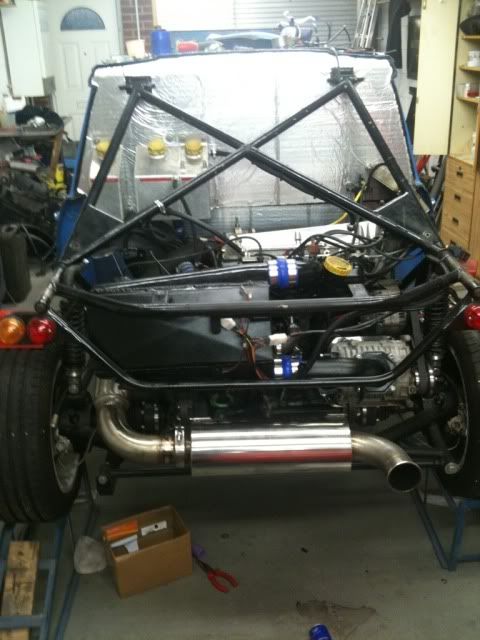
one more pipe and its build up time again


[IMG]http://i144.photobucket.com/albums/r187/froggy_0[IMG]
|
|
|
froggy
|
| posted on 18/1/12 at 08:05 PM |
|
|
second chargecooler pump under manifold

discharge pipe 3" down to 2.5"

separate vac points for each pipe rather than tees

quick painting session and touch wood running properly this time

[IMG]http://i144.photobucket.com/albums/r187/froggy_0[IMG]
|
|
|
froggy
|
| posted on 28/1/12 at 05:25 PM |
|
|
back up and running again today ,seems ok so far and the charger is making 0.6 bar so pretty much what i thought it would . response seems a bit
woolier than before and the revs do hang a little but my mate who helpswith the mapping has a plan to sort that in the map for the idle valve .
a couple of electrical issue to resolve though , the fuel pump keeps dropping out so i need to change the relay as it also powers the lambda sensor
,not sure if thats how it is on the 9k so may have to put the o2 supply on its own relay if its struggling as i have two fuel pumps to power .

[IMG]http://i144.photobucket.com/albums/r187/froggy_0[IMG]
|
|
|
froggy
|
| posted on 29/1/12 at 09:51 PM |
|
|
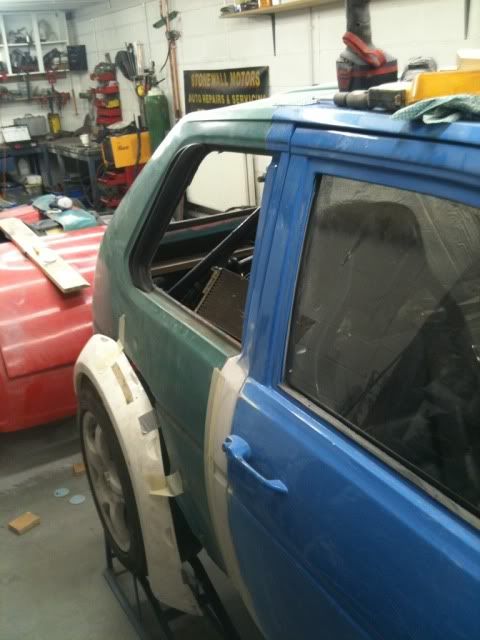
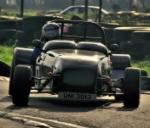
un out of mechanical stuff to do so time to tackle the body .cant believe how heavy the front arches were but doing it right this time taking a mould
off the front end and making glass panels this time rather than mountains of mesh,spray foam and cag 
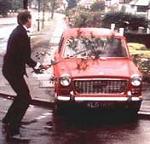
the kit is for a mk1 fiesta and just about right for the 15" wheels ,there wont be much left of them once im happy with the lines blending into
the spoiler at the front and the sill behind the front wheel


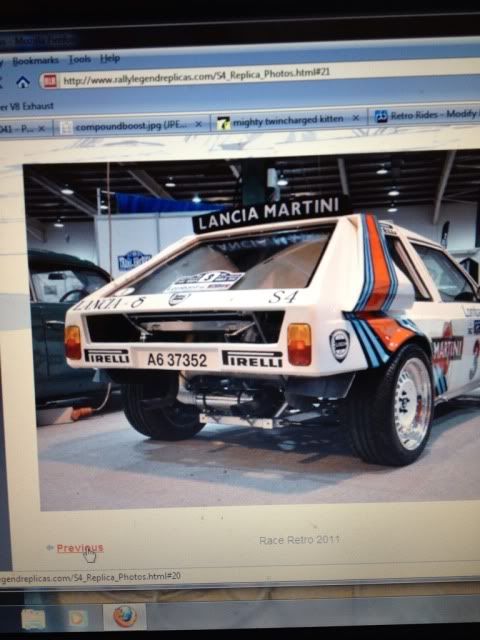
the proportions once the rear tub is back on means i can pinch a few details from my favourite group b cars

a bit of s1 at the front as i dont have much overhang to make the box arches like the shortie quattro


[IMG]http://i144.photobucket.com/albums/r187/froggy_0[IMG]
|
|
|
froggy
|
| posted on 30/1/12 at 06:19 PM |
|
|
quite enjoyable sticking it together today , the current mess is just to bond the arches and form a surface for the marathon cag session next .
the big gap will have the same detail as the main grill just need to cut the section out of a scrap shell tomorrow


[IMG]http://i144.photobucket.com/albums/r187/froggy_0[IMG]
|
|
|
froggy
|
| posted on 4/2/12 at 01:43 PM |
|
|
its a major job to get this rear tub to line up properly as there were several different moulds for different models so the van and saloon were not
designed to go together .
i think the body need 4 " removing from the length and the bumper bar extending out by 2 " to break up large rear end .this will also mean
that the bottom of the rear arch will blend into the back edge of the rear valance . my plan is to stretch the body a bit like putting a straw up a
frogs arse to meet up with the new bits so it doesnt look like its had lumps of plastic thrown at it .
check out the bio degradable spoiler


[IMG]http://i144.photobucket.com/albums/r187/froggy_0[IMG]
|
|
|
froggy
|
| posted on 11/2/12 at 03:27 PM |
|
|
got the rear tub stretched to roughly the right shape and have left it for a few days with the heat on in the garage and it does line up a little
better so il have another go at fitting it next week.
slow progress on the front end but its getting better and the more work i do now the less needs doing once the moulded part is made .did a few other
little jobs in between to keep sane
bit of carbon bling at the back and a heat shield to protect the chargecooler


looks no different than it did on monday but its got to be right before taking a mould off it

[Edited on 11/2/12 by froggy]
[IMG]http://i144.photobucket.com/albums/r187/froggy_0[IMG]
|
|
|
plentywahalla
|
| posted on 11/2/12 at 05:31 PM |
|
|
quote:
Originally posted by Neville Jones
You said you are using the supercharger to blow into the turbo.
Normal practice is to do it the other way, with a simple mechanical diverter to bypass the super when the turbo exceeds the blower pressure.
This system has been in use on Detroit diesels since the second war or more. I've seen your system tried on race boat engines, and it can have
problems with the seals on the turbo. When reverted to the reverse, no problems.
Unless you're going to run the engine like this hard for extended periods, then you'll probably be OK. Hope so.
Cheers,
Nev.
Agreed ... thats how the Volvo KAD's that we fitted into the boats we built were set up. Only difference was the roots blowers had electric
clutches which disengaged at set RPM then a flap would shut when they went off boost taking them out of line to the turbo.
Rules are for the guidance of wise men ... and the obedience of fools. (anon)
|
|
|
froggy
|
| posted on 12/2/12 at 12:42 PM |
|
|
ended up cutting a lot more out of the tub to get the overhang right once the rear bumper bar is extended
 

[Edited on 12/2/12 by froggy]
[IMG]http://i144.photobucket.com/albums/r187/froggy_0[IMG]
|
|
|
imp paul
|
| posted on 12/2/12 at 12:58 PM |
|
|
looks cool mate i do like this post keep up the good work awesome
|
|
|
froggy
|
| posted on 16/2/12 at 09:26 PM |
|
|
first off i have to say ive pinched this idea from someone else but its a corker of an idea
ive got a water injection kit on the shelf as ive got a nagging doubt about being able to keep charge temps under control when pushing the
supercharger hard but ive always thought that putting something into the cylinder that isnt fuel has to be at the expense of something else so what
can you do ??
as we dont have the option of e85 here its the octane that ultimately limits how far you can go and even thinners doesnt work out any cheaper than
fuel ,when you only need the extra octane in full boost mode how about being able to add octane only when you need it ?
ive used nitrous with good results at high boost levels but its still expensive even though i only use nos when i need to .
my cunning plan is to run another fuel rail with my spare 870cc injectors and use another t5 ecu looped into the original so that it sees all the same
signals but with the features like enrichment ,knock etc turned off or the cells zeroed so that it just sees no values in the cells it looks up until
i need to start adding methanol .
using middle of the road super unleaded and mapping just to the edge of knock the "slave" ecu can add fuel which it turn means you can go
to the main ecu map and start pushing the timing and so on to reach the desired power but with the protection of 110 octane adding however much meth
is needed to achieve it. the downside is you need to inject a larger volume of meth to achieve the same calorific value as petrol but it means more
heat removed from the charge .
if i needed to spend a bit of cash to try this it would be a different matter but i have the walbro from my old 9k and the injectors ,loom and ecu so
other than a small stainless tank and some fab work its a goer ,plus the fact that buying meth from a suppier using your own container is 50p per
litre !!


[IMG]http://i144.photobucket.com/albums/r187/froggy_0[IMG]
|
|
|
unijacko67
|
| posted on 6/3/12 at 10:39 PM |
|
|
Looks like a lot of fun, is it the done thing to squirt methanol in with petrol?
I put some methanol in my two stroke motorbike petrol tank with petrol and didnt expect what happened next, it tried to rev itself to destruction,
about 28 years ago so cant remember what ratio I mixed it, but petrol would have been 4 star. After turning off the ignition and it still running I
pulled ht lead off and it was still screaming, seemed to take ages to stop it, but prob only 10 seconds or so, I had to stall it to stop it. It must
have been dieseling or combusting under compression or something, but didnt try that again. I think my brother used to run compression up around 14:1
on his grasstrack bike which ran on methanol.
[Edited on 7/3/12 by unijacko67]
http://www.kittenkitcar.co.uk
|
|
|
froggy
|
| posted on 7/3/12 at 09:30 PM |
|
|
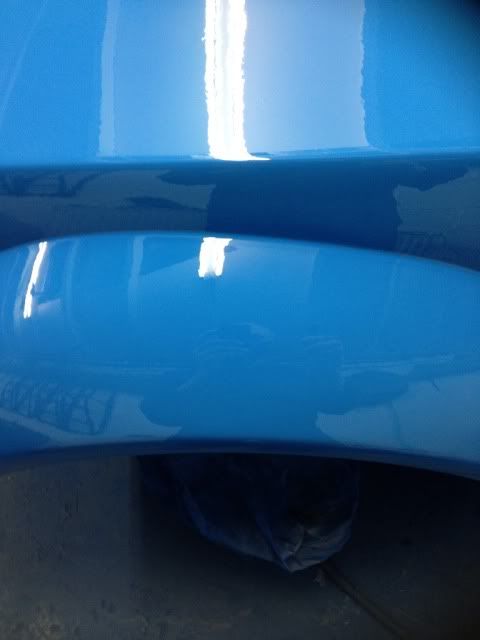
thank god its done im sure a fly landed in the first coat but its had 3 litres and its now submerged :lol: cant touch it now for a week then a
quick flat and polish .


not a bad finish from the gun , i can nearly see myself
[IMG]http://i144.photobucket.com/albums/r187/froggy_0[IMG]
|
|
|


.JPG)