ceebmoj
|
| posted on 20/4/13 at 04:16 PM |

|
|
looks lovely. are you going to leave the rain gutter / seam on your body?
|
|
|
|
|
John Bonnett
|
| posted on 20/4/13 at 08:40 PM |
|
|
quote:
Originally posted by ceebmoj
looks lovely. are you going to leave the rain gutter / seam on your body?
Thank you very much. I'm keeping the rain gutter because the two part gutter is the means of holding the roof on. All the other seams will
disappear.
I'm going to re-model the rear end and make it more rounded and tapering. The final design depends on which rear lights I can find which fill
the criteria. These are; Provide good illumination, fit on a curved panel, inexpensive and easy to source. The curvature of the rear wings will be
tailored to the light unit. But which light?
|
|
|
John Bonnett
|
| posted on 27/4/13 at 04:14 PM |
|
|
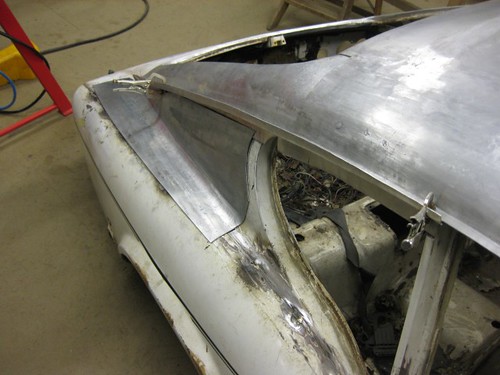
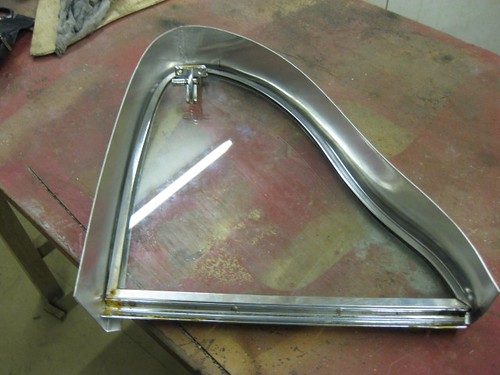
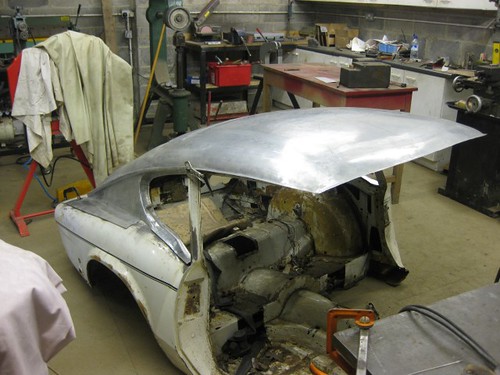
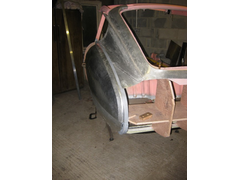
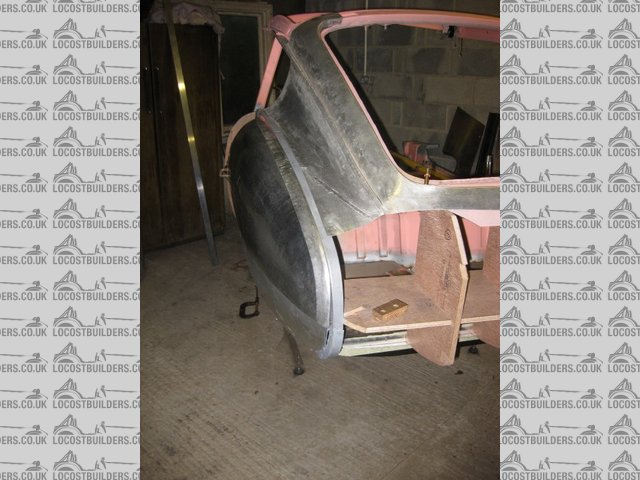
A bit more progress. I've made the rear quarter light aperture and the gutter, side panel and the aperture are now all welded up. Attached are a
few pictures bringing everything up to date. Let's hope the other side goes as well as this one!
|
|
|
rdodger
|
| posted on 27/4/13 at 06:29 PM |
|
|
Stunning work!
Can I ask a stupid question?
Since you are using the steel body as a buck won't it end up a few mm bigger than the original car? Therefore standard glass etc may not fit?
|
|
|
John Bonnett
|
| posted on 27/4/13 at 06:39 PM |
|
|
quote:
Originally posted by rdodger
Stunning work!
Can I ask a stupid question?
Since you are using the steel body as a buck won't it end up a few mm bigger than the original car? Therefore standard glass etc may not fit?
Not a stupid question. You are quite right but the difference is only the thickness of the aluminium (1.5mm) so overall not a problem. However, the
tailgate aperture will be 3mm undersize which will be okay and still allow clearance for the standard tailgate. But, the rear quarter lights will not
allow the same approach. I had to remove the steel frame and replace it with the one I made in aluminium identical in size to the steel one so the
opening window should fit. I say should because I haven't tried it yet.
|
|
|
rdodger
|
| posted on 27/4/13 at 06:47 PM |
|
|
Ah good. I will tell the Mrs I'm not as stupid as I look!
|
|
|
TheGecko
|
| posted on 28/4/13 at 02:07 PM |
|
|
John,
Hadn't noticed the updates typo this thread for a little while. Looking very good. Is that a timber hammerform that was used to make the
quarter window aperture?
|
|
|
John Bonnett
|
| posted on 28/4/13 at 04:57 PM |
|
|
quote:
Originally posted by TheGecko
John,
Hadn't noticed the updates typo this thread for a little while. Looking very good. Is that a timber hammerform that was used to make the
quarter window aperture?
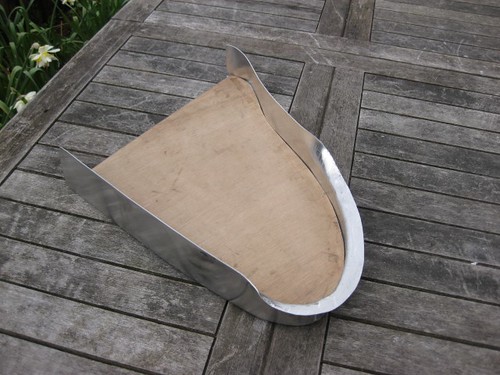
No it's just a template Dominic. I started with a flat strip of aluminium, folded a 12mm flange to a right angle and using the
shrinker/stretcher, formed the profile. I then broke a line for the return using the jenny, annealed in the area of the fold and again with the jenny,
tipped the flange to 90 degrees.
|
|
|
John Bonnett
|
| posted on 3/5/13 at 05:29 PM |
|
|
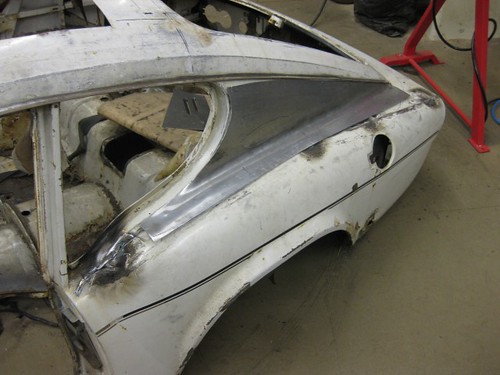
Nothing spectacular to report but progress has been made. The passenger side quarter light panel is now formed together with the quarter light
aperture. Today, the associated gutter was made. In order to fit the window aperture it is necessary first to remove the steel one because they are
the same size as each other. This entails removing the spot welds; a job I'm not yet comfortable with. I've caused a fair bit of damage
mostly to myself 
|
|
|
John Bonnett
|
| posted on 12/5/13 at 05:18 PM |
|
|
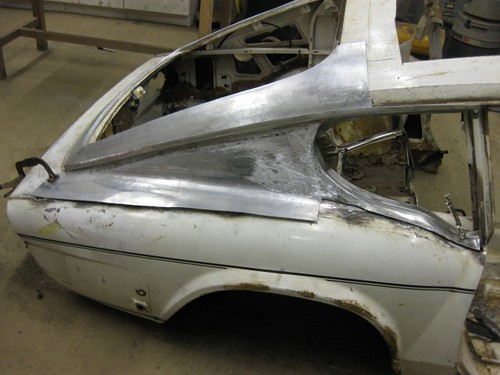
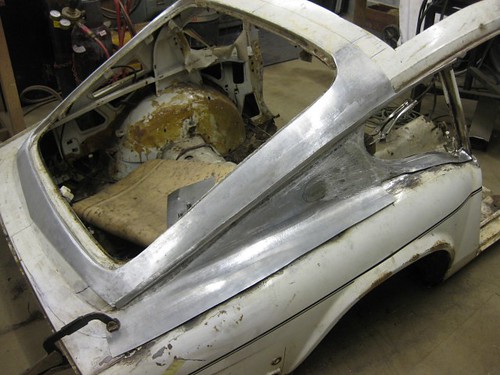
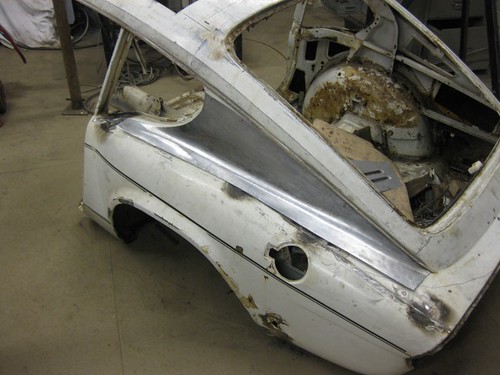
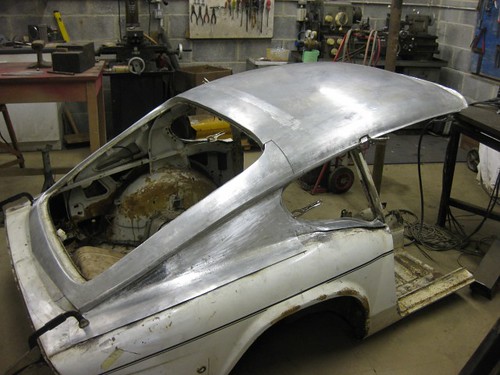
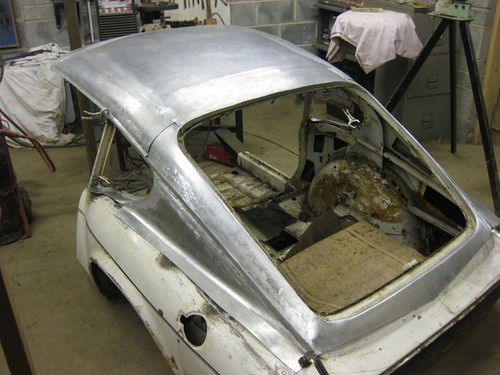
A couple more pictures to bring everything up to date. Apart from welding the panel surrounding the tailgate aperture to the main roof this part of
the body is pretty much there.
[Edited on 12/5/13 by John Bonnett]
[Edited on 12/5/13 by John Bonnett]
|
|
|
rdodger
|
| posted on 12/5/13 at 05:44 PM |
|
|
Looking FANTASTIC!
|
|
|
John Bonnett
|
| posted on 12/5/13 at 06:03 PM |
|
|
quote:
Originally posted by rdodger
Looking FANTASTIC!
That's really kind of you; thank you.
|
|
|
MikeRJ
|
| posted on 12/5/13 at 06:56 PM |
|
|
quote:
Originally posted by rdodger
Looking FANTASTIC!
It certainly is, I have to admire the dedication and enthusiasm going into this project.
|
|
|
blowden86
|
| posted on 12/5/13 at 08:21 PM |
|
|
Happy to see this pop up on here, the GT6 Mk3 is my dream classic to own/re-build one day. Very much looking forward to seeing the finished results!
My MK Indy R GSXR 1000 Build Diary: http://www.suma-uk.com/indy/
|
|
|
John Bonnett
|
| posted on 14/5/13 at 05:28 PM |
|
|
With the roof just about done, we've reached the stage where I'm going to do my own bit of styling. The square tail and the external seams
are going to disappear along with the pronounced haunch of the rear wing just aft of the B post. I've just sourced a complete bodyshell, (well a
complete GT6 actually although in pieces) onto which I can hang the doors to see how the design will "Flow"
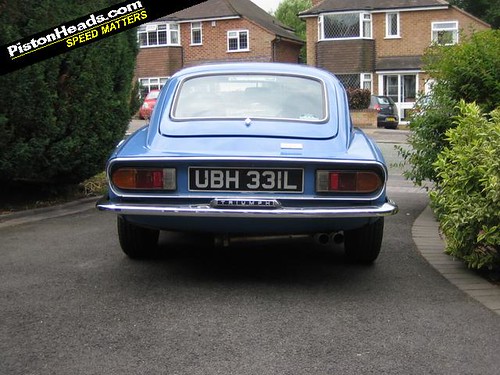
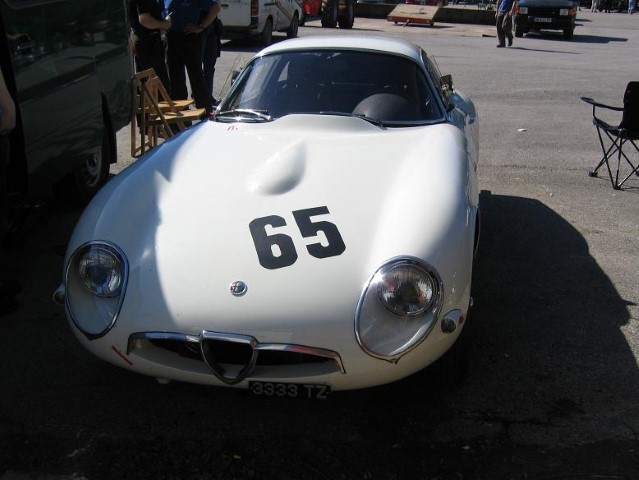
The picture shows the rear of a MK3 GT6 (not mine) and the taper of the cabin area flowing into a fairly flat deck which meets the flange of the rear
wing. I'm going to try mimic this curve in the rear wings. The panel immediately below the tailgate will continue to slope down rather than
becoming horizontal after the crease; something along the lines of an E Type.
So, a bit of thought and work to make a buck before any more panel work but I'll update as more progress is made.
[Edited on 14/5/13 by John Bonnett]
|
|
|
John Bonnett
|
| posted on 28/9/13 at 08:41 AM |
|
|
Although it has been several months since updating, work has never stopped and the project is progressing well. Main reason for not posting is my
inability to insert full size pictures. But until somebody lets me into the secret this is the best I can do.
Description
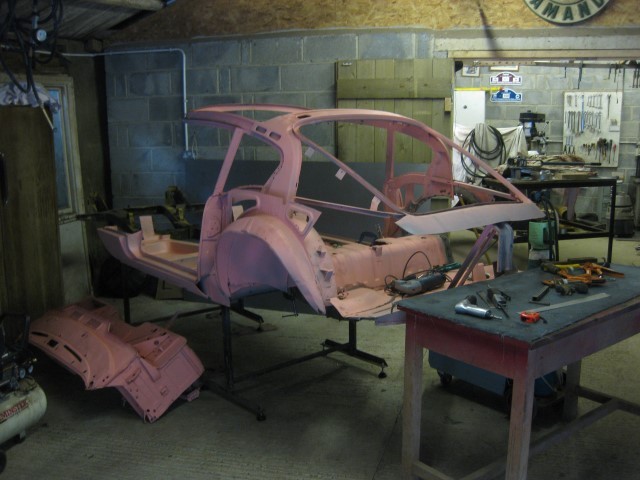
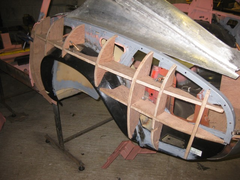
With the outer skin removed the skeleton stiffening structure was shot blasted and primed. This revealed a lot more corrosion than expected with the
knock-on effect of increasing the cost and time and blowing the budget out of the water. But, undeterred, we ploughed on.
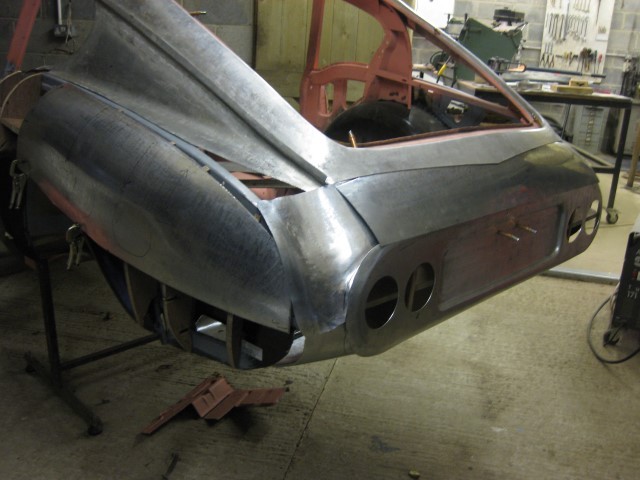
I mentioned earlier that I'm taking a bit of licence with the design of the GT6 and making the rear end a bit more tapering and curvaceous.
Rear wing buck
Description
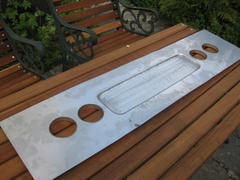
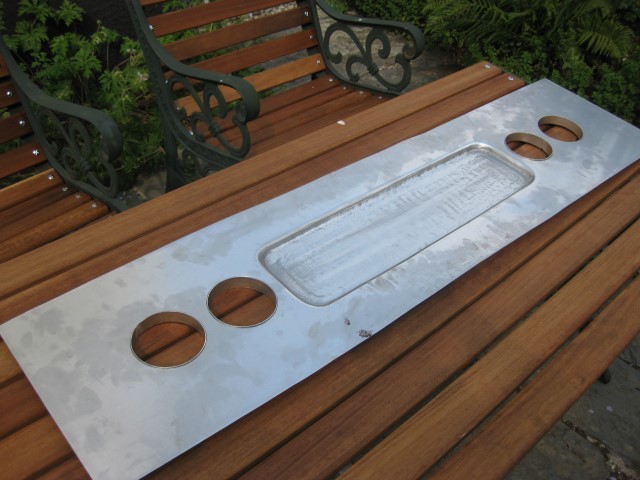
I have recently acquired a pneumatic planishing hammer which has turned out to be one of the best buys I have ever made. It is very controllable and
great for raising lows and shaping parts that are too small to wheel. Another benefit is that the air tool can be demounted and used on its own for
flow forming. I made the number plate panel using it.
Description
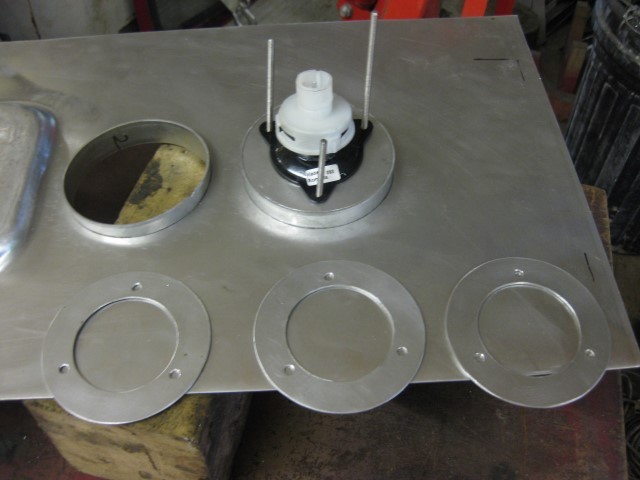
After a lot of thought I decided on round rear lights comprising inners and outer rings which can be LED. These are from the
"Mix'n'Match range from Stafford. In order to mount them on my panel I rolled some cylinders and cut end plates. These were TIG
welded together.
Description
 
Description
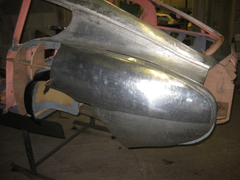
I've now wheeled up quite a few panels but not yet ready to weld together.
Description
The rear wings are bolt on and here is the arrangement showing the captive screws
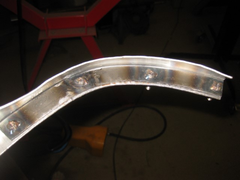 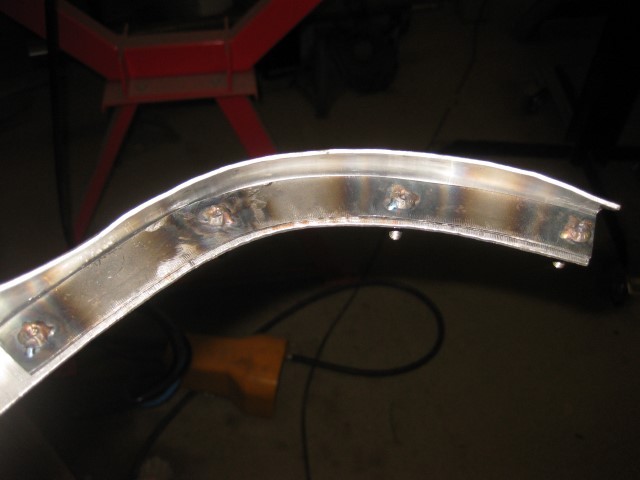
Description
The shaped angle is ready to be welded to the wing panel.
Description
Description
More to follow
[Edited on 28/9/13 by John Bonnett]
[Edited on 28/9/13 by John Bonnett]
|
|
|
imp paul
|
| posted on 28/9/13 at 09:38 AM |
|
|
Wow John this is awesome you have so much skill it unreal lol I wish I had that kind of skill top job John it looks mint
|
|
|
John Bonnett
|
| posted on 28/9/13 at 09:48 AM |
|
|
quote:
Originally posted by imp paul
Wow John this is awesome you have so much skill it unreal lol I wish I had that kind of skill top job John it looks mint
That's very kind of you Paul, thank you. I have no drawings to work to, I'm just carrying an image of what I want in my head.
Trev D is my friend and mentor and he is always ready to offer a telephone help line whenever needed. After a few words with him, it's like
magic and all of a sudden the job goes right.
I'm absolutely delighted with the way the project is progressing and enjoying every minute of it.
|
|
|
rdodger
|
| posted on 28/9/13 at 10:13 AM |
|
|
Awesome!
It's really starting to come together. The back end looks fantastic! Well done!
|
|
|
Fred W B
|
| posted on 28/9/13 at 10:17 AM |
|
|
Thats looking fantastic, excellent work!
To insert full size pics what I do is:
Once the picure in is your archive, click into it to open it.
Right click to see the properties of the picture and save the properties to the clipboard
Go back to your post and click the "add image" yellow icon.
Paste the properties into the box that opens and enter
It helps to have the website open twice in 2 windows so youc can jump between your archive and the post you are working in.
Thier probabably is an easier way but that works for me
Cheers
Fred W B

[Edited on 28/9/13 by Fred W B]
You can do it quickly. You can do it cheap. You can do it right. Pick any two.
|
|
|
imp paul
|
| posted on 28/9/13 at 11:21 AM |
|
|
it sounds like your doing the same as me john, its all in my head and i just keep going ,and hope it turns out good mate but thats very cool love it
mate
|
|
|
John Bonnett
|
| posted on 28/9/13 at 12:07 PM |
|
|
quote:
Originally posted by Fred W B
Thats looking fantastic, excellent work!
To insert full size pics what I do is:
Once the picure in is your archive, click into it to open it.
Right click to see the properties of the picture and save the properties to the clipboard
Go back to your post and click the "add image" yellow icon.
Paste the properties into the box that opens and enter
It helps to have the website open twice in 2 windows so youc can jump between your archive and the post you are working in.
Thier probabably is an easier way but that works for me
Cheers
Fred W B
[Edited on 28/9/13 by Fred W B]
Thank you very much for that Fred. I'll give it a go and very nice to hear from you.
regards
John
|
|
|
John Bonnett
|
| posted on 28/9/13 at 12:11 PM |
|
|
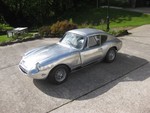
Just to prove to myself that I can now attach a full size picture here we go.
I just love the bonnet on this car and will do my best to make something along the same lines for the project. I particularly like the feature near
the windscreen that allows hot air to escape from the engine compartment and to blow onto the windscreen.
[Edited on 28/9/13 by John Bonnett]
|
|
|
PhillipM
|
| posted on 28/9/13 at 12:34 PM |
|
|
So, when are you making me a bodyshell for mine?

|
|
|
John Bonnett
|
| posted on 28/9/13 at 01:18 PM |
|
|
quote:
Originally posted by PhillipM
So, when are you making me a bodyshell for mine?
If you really want one I'm sure my friend Mark would be pleased to make whatever you'd like 
|
|
|


.JPG)


