John Bonnett
|
| posted on 24/9/20 at 05:40 AM |

|
|
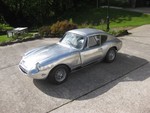
I saw this image and instantly thought of the austin allegro profile
Oh dear!
|
|
|
|
|
ettore bugatti
|
| posted on 24/9/20 at 11:01 AM |
|
|
Maybe worth considering bobtailing it a bit.
This sketch is with a much shorter rear overhang

It is also quite tricky to get the area between the front wheel and A-pillar to look good.
|
|
|
John Bonnett
|
| posted on 24/9/20 at 12:43 PM |
|
|
quote:
Originally posted by ettore bugatti
Maybe worth considering bobtailing it a bit.
This sketch is with a much shorter rear overhang
It is also quite tricky to get the area between the front wheel and A-pillar to look good.
I was thinking of a kamm tail, perhaps with a reverse angle, as well which I think would look okay. But I'm happy with the sloping profile as it
is where it drops down immediately after the B post as drawn in my sketch and maybe with a bit more overhang than you have shown in the above.
It's fascinating how ideas evolve particularly when people like yourself get involved and move the idea on; something I really appreciate.

[Edited on 24/9/20 by John Bonnett]
|
|
|
John Bonnett
|
| posted on 25/9/20 at 12:08 PM |
|
|
I've managed to drop the seat height by 50mm which will allow 50mm to be taken out of the height of the frame and this I'm hoping will
make a significant difference to the appearance of the side profile which itself is also going to be adjusted to be less bulbous. This is a good
example where a starting point is needed to have something to work with, to adjust and tweek to the point where it is close to what looks right. There
will be a knock on effect of lowering the frame which will probably prevent using the Fiesta dashboard complete but a small price to pay to get a
shape that pleases the eye.
|
|
|
John Bonnett
|
| posted on 26/9/20 at 12:45 PM |
|
|
Before getting down to the serious business of reducing the height of the frame I've just finished off the lower radiator mounting which brings
the top of the radiator well under the bonnet line which is a relief. I'm using a radiator and condensor from a MK1 Focus which although larger
than the one from the Fiesta is more suitable because both hose connections face the rear while one of the pipes from the Fiesta rad emerges to the
side which would cause problems with the hose fouling the front suspension. By insering spigots into the rectangular tubes I've been able to
retain the the rubber buffers of the standard Ford mounting. The top mounting needs to be removable so there's still more work to be done.


[Edited on 26/9/20 by John Bonnett]
|
|
|
ettore bugatti
|
| posted on 26/9/20 at 01:19 PM |
|
|
Dropping the seats by 50mm is quite a lot. That will give you a lot of design freedom.
Getting the hardpoints as low as possible will benefit CoG height and it always easier for the bodywork if you have space to play with.
|
|
|
John Bonnett
|
| posted on 26/9/20 at 05:41 PM |
|
|
quote:
Originally posted by ettore bugatti
Dropping the seats by 50mm is quite a lot. That will give you a lot of design freedom.
Getting the hardpoints as low as possible will benefit CoG height and it always easier for the bodywork if you have space to play with.
I've dropped the height of the frame down by 65mm which has made a huge difference to the proportions and I'm very happy with the result.
The diagonal bracing was always coming out but depending on the position of the seat I may have to either put a bow in the cross tube from the B
posts or fab something up in its place should additional headroom be needed. I think today we have made a very good step forward. Thank you for your
patient guidance EB. I may be slow but I hope and believe I'm getting there.
With the help of son Chris the job went very well. We used a guide to cut the tube square and removed 65mm from each leg also using a guide. Sleeve
inserts will ensure a strong joint and perfect realignment. At the moment the frame is just lodged in place with welding due tomorrow.
The chassis is sitting on 200mm thick blocks and the overall height is now 47.5 inches or 1207mm. Ride height will be 7.5 inches which will bring the
overall height down to 47 inches. Maybe slightly highter in the centre of the roof taking into account the crown.


[Edited on 26/9/20 by John Bonnett]
|
|
|
John Bonnett
|
| posted on 27/9/20 at 12:46 PM |
|
|
Refitting the lowered frame proved remarkably easy using the thick wall steel tube sleeves. The top just slipped onto the spigots and welded round.
Job done and what a difference it has made to the side view. It really does look right now.


[Edited on 27/9/20 by John Bonnett]
|
|
|
John Bonnett
|
| posted on 27/9/20 at 04:03 PM |
|
|
Now this is really exciting. Superimposing the scaled sketch onto the scaled photo of the reduced height frame the two images line up almost
perfectly. I'm not sure how clear the picture will be but we're marching now!

[Edited on 27/9/20 by John Bonnett]
|
|
|
ettore bugatti
|
| posted on 28/9/20 at 01:16 PM |
|
|
What a difference a couple of inches make!
This might interesting youtube series to follow:
https://www.youtube.com/channel/UCaBjCZNX9ufeOwbR7FtRghw
|
|
|
John Bonnett
|
| posted on 28/9/20 at 01:49 PM |
|
|
quote:
Originally posted by ettore bugatti
What a difference a couple of inches make!
This might interesting youtube series to follow:
https://www.youtube.com/channel/UCaBjCZNX9ufeOwbR7FtRghw
Indeed it does EB. I'm amazed at the transformation which has gone from not what I was hoping for to being pretty near spot on.
Thank you for the link which funnily enough I subscribed to yesterday. I always enjoy metal shaping videos and admire not only the skills of the
craftsmen but also the variety of ways they go about getting the results they want. I've always gas welded the panels together as he does and
the big advantage of gas welding is that the weld bead and heat affected zones are fully annealed and maleable making further working easy with little
risk of cracking. But the downside is the cost of the gas and this time I'm considering TIG welding which many of the American metal shapers do.
With no flux to wash away afterwards it is a much cleaner process and maybe less distortion as well. If i find I need oxy/acetylene for bending tube I
may well gas weld after all. I'm a fair way from being at that stage but I'm hopeful now of having the basic dimensions to produce a
sports car rather than an SUV which I absolutely do not want to do.
The Plasma cutter arrives tomorrow so I'll be able to cut some metal out of the Fiesta. I'm resigned to not being able to use the
dashboard but that's a small price to pay against achieving the car I really want to build. The dashboard and column rake on the Fiesta is too
tall making for an upright seating position. As a minimum I should be able to transfer over the scuttle and windscreen wiper motor mounting and
anything else will be a bonus. I'm expecting to still to be able to use the instrument cluster and switches.
At one point I thought the Fiesta rear screen was out of the question but now I'm hopeful that it might fit in quite nicely and being free I
shall make a special effort.
Probably the next stage will be to fabricate a structure to support the floor and transmission tunnel. The tunnel isn't structural but it does
need to be substantial enough for the handbrake and seatbelt mountings.
[Edited on 28/9/20 by John Bonnett]
|
|
|
John Bonnett
|
| posted on 29/9/20 at 09:21 PM |
|
|
The R-tech plasma cutter arrived today, nicely made and well packed. It came with a dryer which took a bit of time to fit to the compressor but
essential to good results and longevity of the machine and consumables. I had a brief play with it and it was evident that a bit of practice will be
needed to be able to sense the optimum speed of moving the torch over the job. Mr Urch recommends running at maximum power irrespective of the
material thickness to avoid pumping undue heat into the material which makes perfect sense.
We'll try it for real tomorrow on the Fiesta.


|
|
|
John Bonnett
|
| posted on 30/9/20 at 03:30 PM |
|
|
Today has been a landmark transferring over the scuttle from the Fiesta and this really does give an indication of how the car might look. I
don't know if you'd agree EB but I'm very happy with the proportions both from the side and the front.
The interface between my frame and pillars and the Fiesta part will need a bit of work to blend in but considering that in getting to this point
there was a lot of guess work and only a little measuring the result is to me anyway astounding and very encouraging. The Fiesta scuttle is only
tacked in and may well have to come out at least once before it's finally fixed in place.
The plasma cutter was awesome cutting through the multi skins with ease and being able to cut to whatever shape was necessary. I was really impressed
by the construction of the Ford bodywork which gives so much inherent strength from relatively thin metal.


[Edited on 30/9/20 by John Bonnett]
|
|
|
John Bonnett
|
| posted on 1/10/20 at 03:54 PM |
|
|
This must be the firstbuild in history where the windscreen wipers have been installed before just about anything else. But I just needed confirmation
that the linkage would clear the cam covers and it does. Only having had experience with the Lucas Bundy tubes and rack systems this is amazingly
simple both to fit and to get at if necessary.
Trial fitting the steering column to the Fiesta mounting produced for me, a perfect setat/steering wheel position. But and this is a big but, the
column mount is relatively low and the edges of the bracket would be lethal in a crash. I'm hoping that chamfering and padding may be possible.
The alternative is to mount the column higher but this would put the wheel more towards vertical if you understand me and at present, the angle feels
just right and I'm reluctant to change it.


[Edited on 1/10/20 by John Bonnett]
|
|
|
HowardB
|
| posted on 1/10/20 at 04:01 PM |
|
|
that looks good, I see what you mean about crash test dummy impaling points, perhaps some sort of cowling might help, or an anti-submarine strap?
I like the wiper fit test, that seems logical, to be fair I feel that it works to test and trial the parts as they come up
Howard
Fisher Fury was 2000 Zetec - now a 1600 (it Lives again  and goes zoom) and goes zoom)
|
|
|
rdodger
|
| posted on 1/10/20 at 04:47 PM |
|
|
How close is it to your knees? We need a picture with you sat in the seat. From that angle it looks like it would be between your knees.
|
|
|
John Bonnett
|
| posted on 1/10/20 at 05:12 PM |
|
|
quote:
Originally posted by rdodger
How close is it to your knees? We need a picture with you sat in the seat. From that angle it looks like it would be between your knees.
It is between the knees Roger and doesn't cause an obstruction but my fear is that in the event of a crash, if the knees were pushed sideways it
could do serious damage and I would like to avoid the risk both to me and anybody else who might be driving. I haven't had a chance to see what
can be done but I'm hopeful that the problem can be got round.
I will put a photo on showing what I mean.
|
|
|
John Bonnett
|
| posted on 2/10/20 at 09:45 AM |
|
|
Here are a couple of photos which show my concerns over the sharp edges of the bracket retaining the steering column. Looking at it, I think the whole
thing can be sculpted to smooth without losing the integrity of the mounting.


[Edited on 2/10/20 by John Bonnett]
|
|
|
rdodger
|
| posted on 2/10/20 at 09:53 AM |
|
|
I see what you mean
Perhaps it could be smoothed and a bit reduced? Maybe make a high density foam cover around it with a thin GRP skin?
|
|
|
John Bonnett
|
| posted on 2/10/20 at 10:30 AM |
|
|
My second attempt at plotting the body profile has been much more successful and conforms very well to what I'm hoping to achieve.

|
|
|
John Bonnett
|
| posted on 2/10/20 at 10:32 AM |
|
|
quote:
Originally posted by rdodger
I see what you mean
Perhaps it could be smoothed and a bit reduced? Maybe make a high density foam cover around it with a thin GRP skin?
I'm sure we can do something with it Roger. The steering position is too good to compromise and settle for second best.
|
|
|
John Bonnett
|
| posted on 2/10/20 at 03:16 PM |
|
|
With the outline put onto a piece of ply and offered up, it all looks pretty close now with only the valence to be adjusted to give a bit more ground
clearance.

|
|
|
ettore bugatti
|
| posted on 2/10/20 at 06:25 PM |
|
|
That is great progress!
Have you trial fitted the pedal box yet? If you can left foot brake then I would say the column is at the right height.
Difficult to judge the steering column position, I guess in a Locost the steering column is more horizontal in combination with a different mounting
scheme.
Although I drove a modern Merc SL the other day that had the ignition key sticking out from the column and only 5cm away from my knee.
Any further development/ ideas on the doors?
|
|
|
steve m
|
| posted on 2/10/20 at 07:52 PM |
|
|
If you were to look at most tin tops, the steering cowl behind the steering wheel is probably not much different to how you have it now
I dont think you will get a good refection untill the steering wheel is on, and cowls etc under
steve
Thats was probably spelt wrong, or had some grammer, that the "grammer police have to have a moan at

|
|
|
John Bonnett
|
| posted on 2/10/20 at 08:03 PM |
|
|
quote:
Originally posted by steve m
If you were to look at most tin tops, the steering cowl behind the steering wheel is probably not much different to how you have it now
I dont think you will get a good refection untill the steering wheel is on, and cowls etc under
steve
Yes at the moment I agree it is only an indication of how it is going to be but I'm very happy with the seat wheel position so I want to work
around that if I can.
|
|
|