micksalt
|
| posted on 2/7/15 at 02:31 PM |

|
|
Jim,
That's great news, I kicked myself when I damaged the lower universal joint, but since my shaft will have the wrong spline on the other end
anyway, and MNR will provide the appropriate Escort UJ, then it looks like I'm home and dry.
I was there at Stoneleigh, I was the guy with the mad sideburns that went out for a passenger ride in the orange Mazda-powered Vortx (can't
remember the guy's name, both of us forgot eye protection which was amusing). Glad to hear you're almost finished 
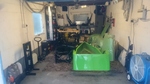
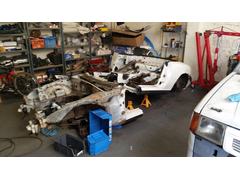
Going to have another full session on the donor this Saturday. Hoping to get to a point I can lift the shell off the subframes and PPF assembly.
Cheers,
Mick
quote:
Originally posted by jim87
Mick, I think we spoke at Stoneleigh a month or two ago. Glad you hear you're on your way.
I've just about finished my Mazda Vortx.
Anyway, on mine the upper column had two short tubes welded onto it by MNR for mounting it to the scuttle. Also the lower shaft has the Mazda spline
at the top end, and an appropriate Escort spline at the other end for connecting to the rack via a couple of UJs.
[Edited on 3/7/2015 by micksalt]
|
|
|
|
|
jim87
|
| posted on 2/7/15 at 04:17 PM |
|
|
Yep, I remember the side burns
I spoke to you just after you'd got back from your drive out
|
|
|
micksalt
|
| posted on 2/7/15 at 06:26 PM |
|
|
I think I can just about recall the face. I'll be better with faces and names come Stoneleigh 2016, even if I'm not finished, because I
suspect I'll be part of the MNR stable.
More happy progress today, didn't have enough time to get dirty, so I thought I'd tackle the steering wheel instead. I was a bit nervous
about this, particularly since the Rapfix gets in the way of marking holes straight through it. After a bit of thinking, I drew up a template in
Powerpoint at a PCD of 50.8 mm and with vertices spaced at 120 degrees. I stabbed a pencil through the centre of the template to engage with the
dimple on the steering wheel, and centre-punched at the vertices. I'm pleased to report that it was absolutely spot on, not a single hole had to
be enlarged for any mis-measurement
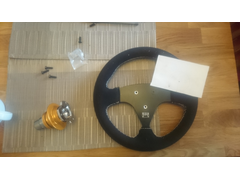 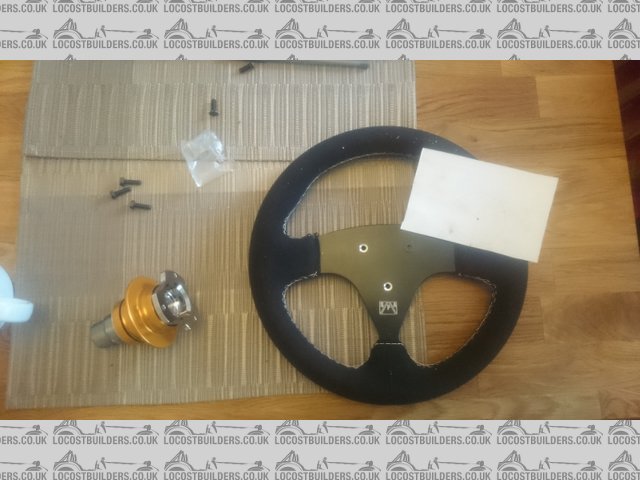
PerfectlyDrilled
Now, after my oversight on the IVA requirements for the padded steering wheel, I bought Pack of: 5 x Self Adhesive Peel Off - Black
Foam Sheets 175mm x 135mm x 3mm . At first I tried cutting a rough shape first just to apply to the front face of the wheel, however, it looked
awful and peeled off too easily, which would upset Mr IVA. The holes were cut using a socket and a hammer . At first I tried cutting a rough shape first just to apply to the front face of the wheel, however, it looked
awful and peeled off too easily, which would upset Mr IVA. The holes were cut using a socket and a hammer 
 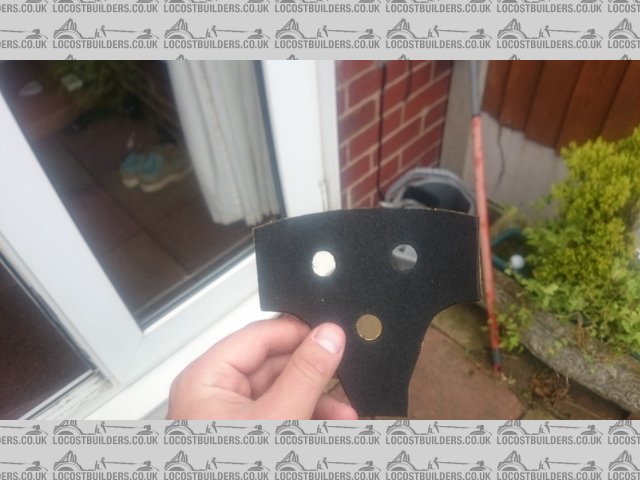
PadPrototype
I decided that it would be better to wrap the sheets around the back of the wheel to give a better fit. As luck would have it, the sheets were
perfectly the right width, so I cut my holes again, peeled off the backing, and this time, folded around the back of the wheel, trimming to fit where
necessary.
 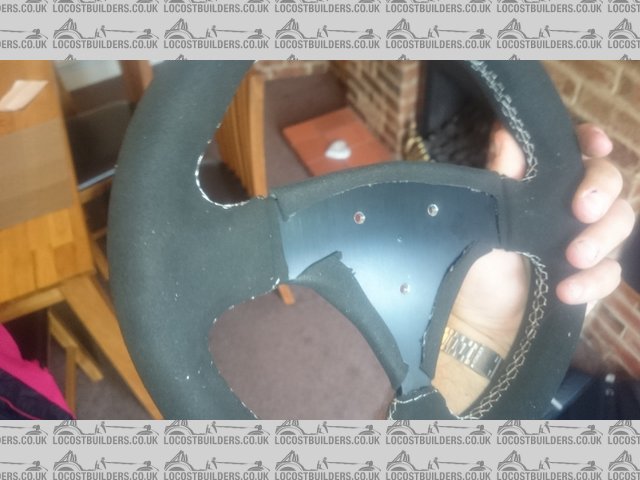
PadRear
And finally, I fitted it all to my quick-release boss. I might have another attempt at the foam covering, try to get the holes centred on the bolts,
but all-in-all, not a bad attempt for the second try.
 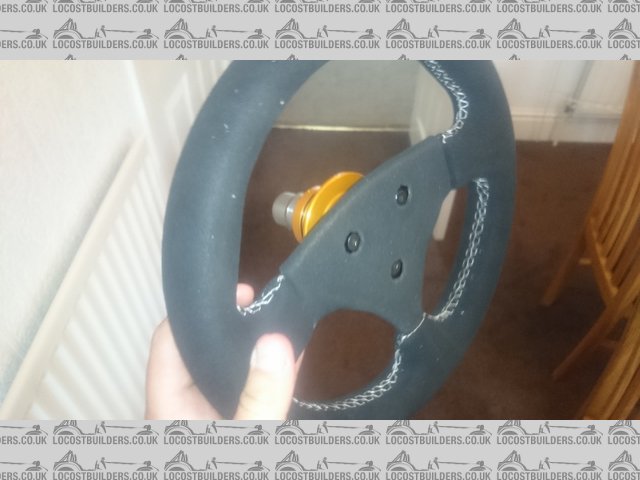
WorksBellFitted
[Edited on 3/7/2015 by micksalt]
|
|
|
micksalt
|
| posted on 4/7/15 at 05:12 PM |
|
|
For information, you need a stronger glue to do the DIY pad that I've demonstrated. The glue sticks to the steering wheel alright, but the
neoprene itself peels from the glue where I've wrapped it around the back. I'll take the opportunity to make a slightly better job on the
holes positions, and use a hot-melt glue gun next time.
Back to the donor, there's not much of the wiring loom left to disconnect now. What that does mean is that the interior has become all
Italian:
 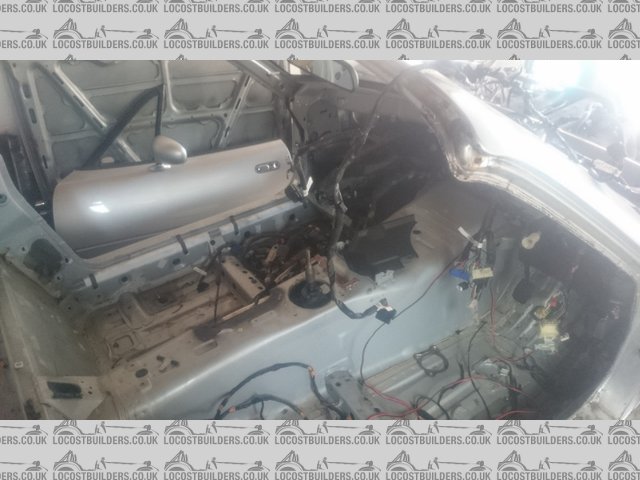
Spaghetti
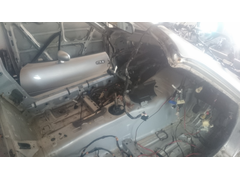
And the engine bay is looking very empty now having removed the carbon canister, air filter assembly, radiator, light motors, alarm, master cylinder,
bias valve, anti roll bar.
 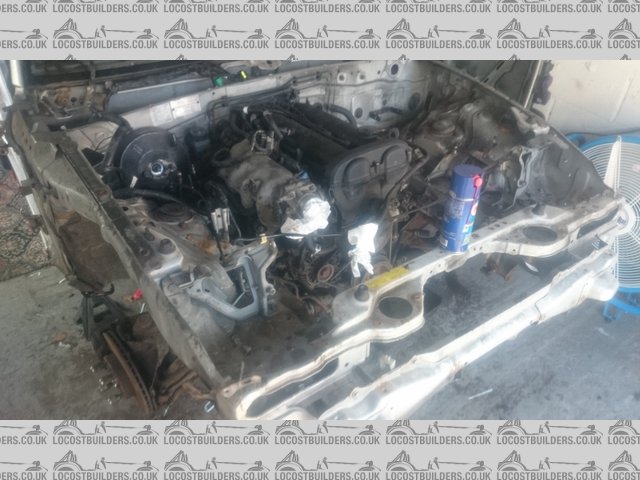
EmptyEngineBay
One thing I did notice is how much complexity there is for the emissions control systems. For instance, the purge control valve is not just a valve,
it's two valves, in series, like it's a critical system on an Apollo launch. I didn't expect such complexity for a 1997 car and
I'm glad not a lot of it will make it into the kit car. One last thing, I temporarily, and loosely fitted the steering rack so that the front
wheels didn't act like a dodgy supermarket trolley when I push it outside to lift the body off. Speaking of lifting the body, I think that could
be the next session
|
|
|
micksalt
|
| posted on 10/7/15 at 07:14 PM |
|
|
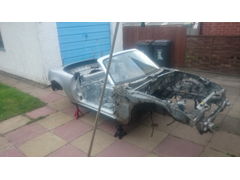
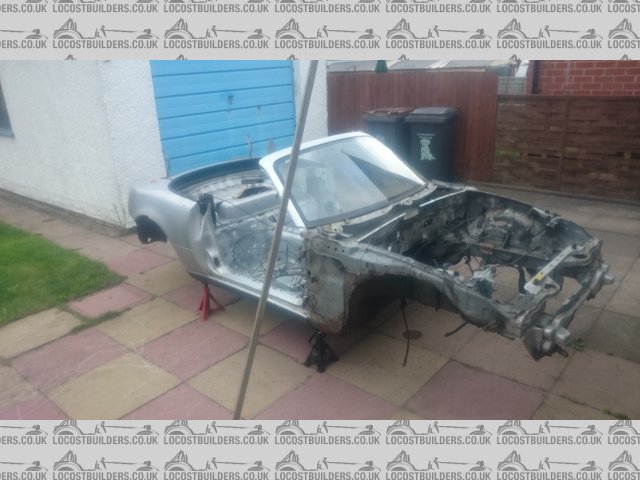
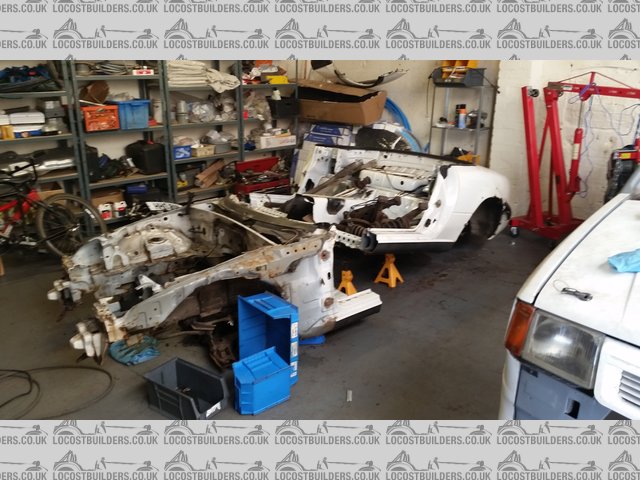
Will upload some photos later, but I am finally ready to lift the body off. Next session, assuming dry weather, the MX5 is going topless.
|
|
|
micksalt
|
| posted on 19/7/15 at 05:28 PM |
|
|
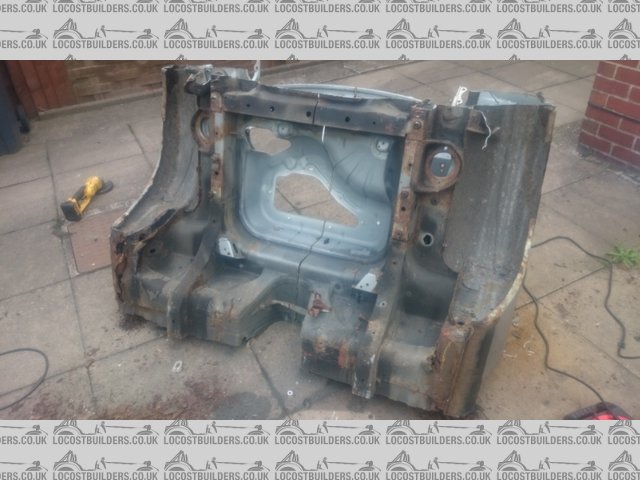
Finally, we have lift-off, so glad my mother convinced me to go for the 2 ton crane over the 1 ton, I'd missed two 14 mm head bolts at the
front, and another two at the back, so ended up lifting the car
 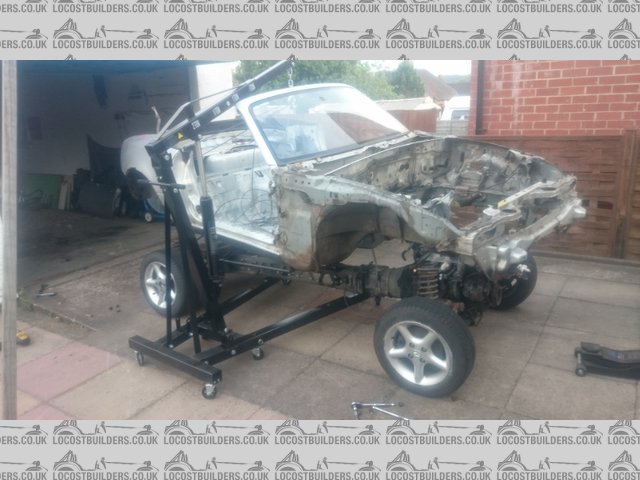
LiftOff
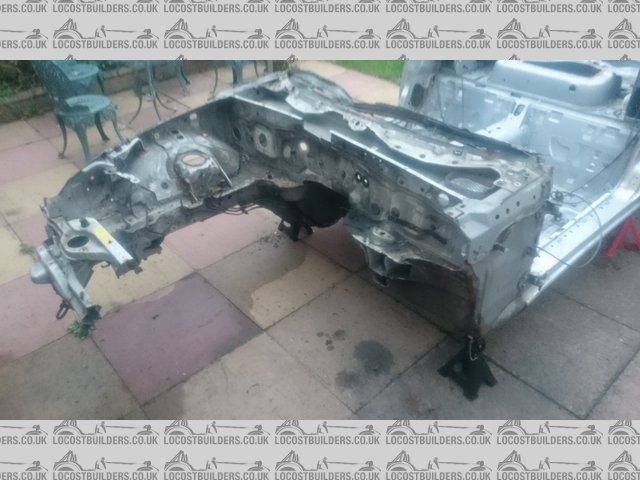
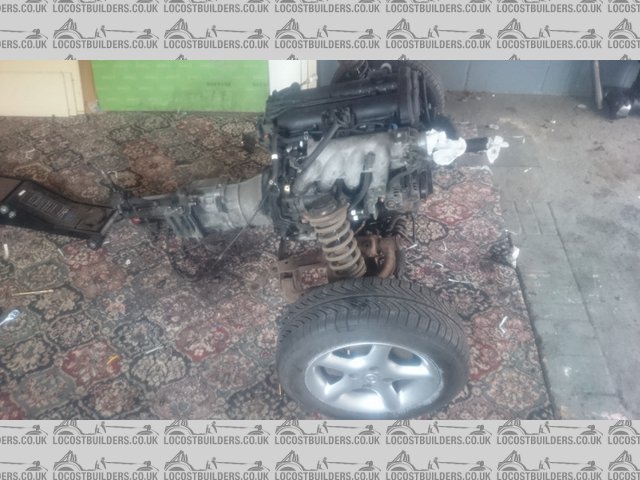
Now we're down to the rolling subframe, disassembly should come along nicely, and I can put the daily driver away. That is after I've
cleared the junk pile into stuff to use, stuff for sale, stuff for weighing in and stuff to bin. Any MX-5 owners looking for an obscure part that they
know I won't be using, shout up now.
RollingSubframe
Not sure the other half is convinced about the latest garden furniture 
GardenFurniture
She'd be even less impressed about my other purchase. Again, shhhh, doesn't count to the budget I declared to her 
 
Canems
|
|
|
paulc
|
| posted on 19/7/15 at 06:10 PM |
|
|
Nice garden furniture!
Could be worse though
This is my kitchen at the moment:
Paul
|
|
|
micksalt
|
| posted on 19/7/15 at 06:46 PM |
|
|
Paul,
I am using your photo as evidence to the wife to be why my MX-5 shell in the garden isn't so bad.
Cheers!
|
|
|
micksalt
|
| posted on 20/7/15 at 02:56 PM |
|
|
Shell is getting in the way of the washing line, tomorrow's job is cutting it up.
|
|
|
micksalt
|
| posted on 24/7/15 at 05:53 PM |
|
|
Progress was rubbish on the shell cut up. A 5" battery powered grinder is definitely not the way to go
SlowCut
|
|
|
sdh2903
|
| posted on 24/7/15 at 06:02 PM |
|
|
Haha. 9" angry grinder is the way to go.
Cutmx5
|
|
|
micksalt
|
| posted on 24/7/15 at 06:05 PM |
|
|
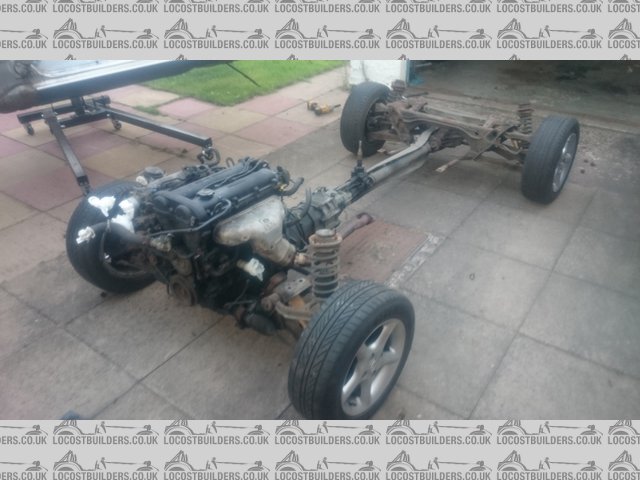
Having got myself a 2000 watt, 9" grinder, today's task was to finish cutting up the shell. Unfortunately, rain stopped play, so I turned
my attention to the rolling sub-frame assembly. Not quite as easy as I'd hoped, but I overcame the issues. One curious thing is that because the
bolts are so long, the spring tension of the bolt makes the impact gun pretty useless, 2' breaker bar it was then However, the front bolt of
the diff-to-PPF came undone from its threads alright, but got jammed trying to take it out. on further inspection, the lower diff spacer was actually
cracked, and the bolt had seized itself to it where the water had got in. Took a little thinking, but I undid the connections to the PPF at the front
first and then removed the prop-shaft. I could then put the assembly on end and angle-grind through the cracked spacer whilst causing no damage to the
PPF. After all that fun, I ended up with these.
FrontSub
 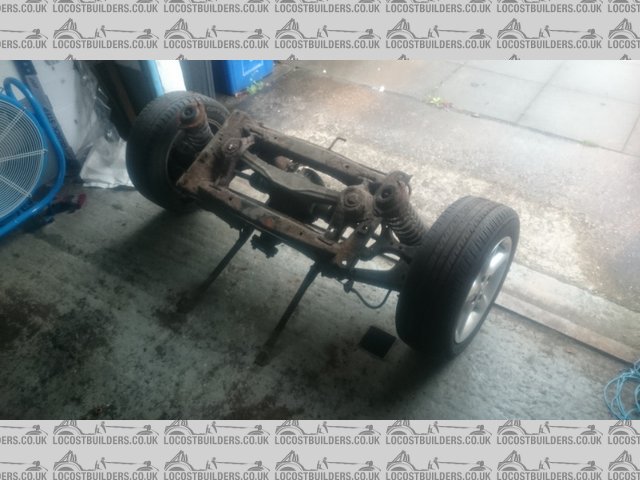
RearSub
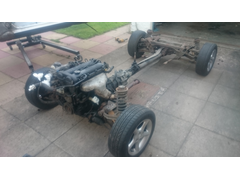
After moving the junk pile into the back shed, I created a SWB MX-5 in the garage.
ShortWheelbase
Finally, I have a usable garage again. I took the opportunity to cut the carpet around my inspection pit to save the faff of rolling it up each
time.
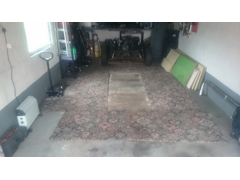 
TidyGarage
And crucially, I could get the daily driver back in the garage. I had declared it as 'normally garaged' to the insurance folk, and was
beginning to stretch that definition of 'normal' having had it outside for a month. Of course, come renewal this October, the daily driver
is getting permanently evicted, so I'll declare it as so.
Next dry day, excluding tomorrow due to heritage railway duties, I'll get that shell gone.
Cheers
|
|
|
micksalt
|
| posted on 29/7/15 at 08:33 AM |
|
|
Another "I broke something, do I need it?" question. The spacer under the differential (Part number 27-158 on page 2-H 3 of the
Parts Manual) got damaged on removal. Do I need it? Looks like
they don't tend to get sold seperately, so I may need to get a spare diff just to get this part, or use it as an excuse to get a Torsen
Cheers 
|
|
|
jim87
|
| posted on 29/7/15 at 03:46 PM |
|
|
quote:
Originally posted by micksalt
Another "I broke something, do I need it?" question. The spacer under the differential (Part number 27-158 on page 2-H 3 of the
Parts Manual) got damaged on removal. Do I need it? Looks like
they don't tend to get sold seperately, so I may need to get a spare diff just to get this part, or use it as an excuse to get a Torsen
Cheers
If its the part I think you mean, then yeah, you'll need it. Here's a pic of mine.
You mean the part between the diff and the chassis ?
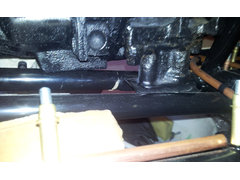 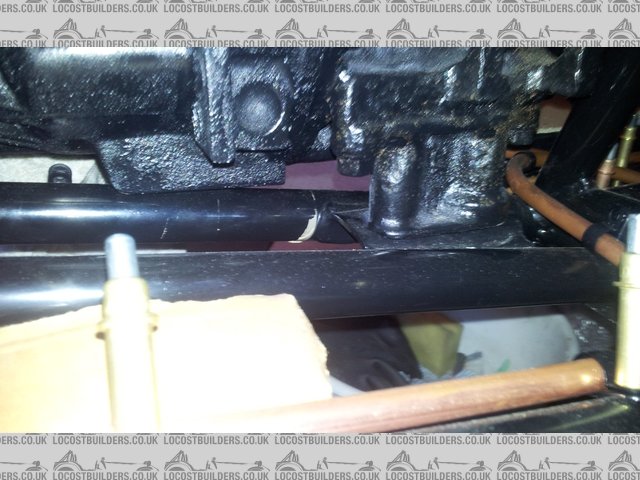
Description
[Edited on 29/7/15 by jim87]
|
|
|
micksalt
|
| posted on 29/7/15 at 07:50 PM |
|
|
Cheers Jim for clarifying, as luck would have it, Autolink had the part in stock for a mere tenner (+ VAT + Delivery). I've currently got the
bolt soaking in oil to free the cylindrical spacer from it. It was these two seizing together that caused the spacer to crack in the first place

Anyway, the rest of the project is going well. The body took no time at all with the addition of a 9" grinder
FinalCut
Leading to a self-assembly MX-5 body kit.
 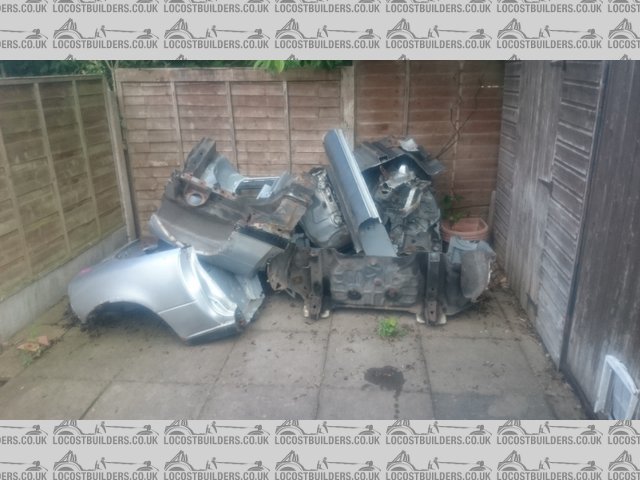
SelfAssemblyMX5
Crucially giving me a clear patio. Needs a good clean though after all the rust that fell off the donor. I've done the fellowship of the road a
favour taking this off the roads.
 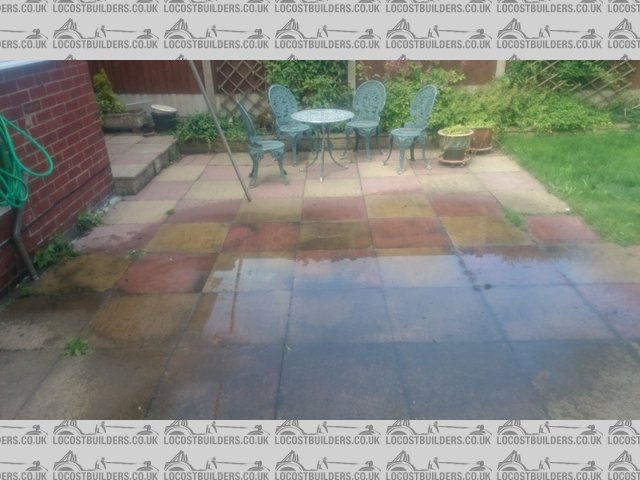
CleanPatio
|
|
|
micksalt
|
| posted on 30/7/15 at 07:18 AM |
|
|
Jim, did you reuse the diff bolts from the MX-5 or were new bolts provided with the Vortx kit? One of the bolts had to be cut due to it being seized
in there and the other has a mashed head and threads after being used as a drift to get the stuck one out. Ta in advance.
|
|
|
jim87
|
| posted on 30/7/15 at 07:50 AM |
|
|
quote:
Originally posted by micksalt
Jim, did you reuse the diff bolts from the MX-5 or were new bolts provided with the Vortx kit? One of the bolts had to be cut due to it being seized
in there and the other has a mashed head and threads after being used as a drift to get the stuck one out. Ta in advance.
They were brand new ones - supplied by MNR.
Destruction job on the MX5's looking good, you'll be able to fit it all into a wheely bin soon
|
|
|
micksalt
|
| posted on 30/7/15 at 08:41 AM |
|
|
quote:
Originally posted by jim87
Destruction job on the MX5's looking good, you'll be able to fit it all into a wheely bin soon
A lot of miscellaneous items have already ended up in the Wheelie bin. The component-form MX-5 will be taking two trip in the back of the Focus to the
scrap metals dealer, partly for a bit of cash, partly to see the look on their face as I deliver a car in bits
That's great news about the bolts, now I've just got to find where I put the top-hat spacer (part number 39-723 on page 2-C 6 of the
Parts Manual). Unless I don't need it of course.
|
|
|
micksalt
|
| posted on 30/7/15 at 10:04 AM |
|
|
Ah, I think the reason I cannot find it is that it was wedged in the spacer and also suffered at the blade of the angry grinder. I've found one
for sale anyway, I'd rather have it and not need it than come to fit it, need it and not have it 
|
|
|
jim87
|
| posted on 30/7/15 at 10:19 AM |
|
|
Where does it go ? Between the bolt head and PPF ? If so I don't think you'll need it. If it fits into the spacer (the one that cracked
and you got from autolink) then you might well need it if it makes the bolt whole the correct size ?
|
|
|
micksalt
|
| posted on 30/7/15 at 10:26 AM |
|
|
It does fit into the spacer that I cracked. I remember there being a strange section in the cut spacer that now I think of it would have been the
top-hat spacer, albeit wedged in so tightly I couldn't make out a difference in the cut. I bought a full bolt set that included the top-hat
spacer and the bolt that secures the spacer I broke onto the diff housing. I'll pretty much make my money back selling the bolts off seperately
so it'll only have been a couple of quid for peace of mind. Only thing left to do is unseize the cylindrical spacer from the cut bolt that goes
between the diff body and the spacer I broke.
Is anyone still with me? I've confused myself
|
|
|
micksalt
|
| posted on 30/7/15 at 07:27 PM |
|
|
Another productive day, cylindrical spacer successfully removed from the shoulder bolt, replacement spacer fitted (lots of copper grease) and the
diff, drive-shafts and hub carriers successfully removed from the rear sub-frame.
Now for the part that's got me puzzled, what tools and techniques are folk using to remove the push-in shafts from the diff? I've tried
various smaller levers in there, but no budge at all. Am I being too gentle, do I need a proper pry-bar?
|
|
|
sdh2903
|
| posted on 30/7/15 at 07:50 PM |
|
|
Just grab a hold and give it a good pull. (No pun intended)
|
|
|
micksalt
|
| posted on 30/7/15 at 08:36 PM |
|
|
quote:
Originally posted by sdh2903
Just grab a hold and give it a good pull. (No pun intended)
Ah right, I wasn't sure whether to do that for fear of damaging the CV joints. I'm going to renew the gaiters anyway so I can always
inspect for damage then. Thanks.
|
|
|
micksalt
|
| posted on 31/7/15 at 05:31 PM |
|
|
Turns out I was being a big Jessie about it, put my feet on the diff, and gave the drive-shafts a few hard tugs and they were free. CV joint feels
fine too.
 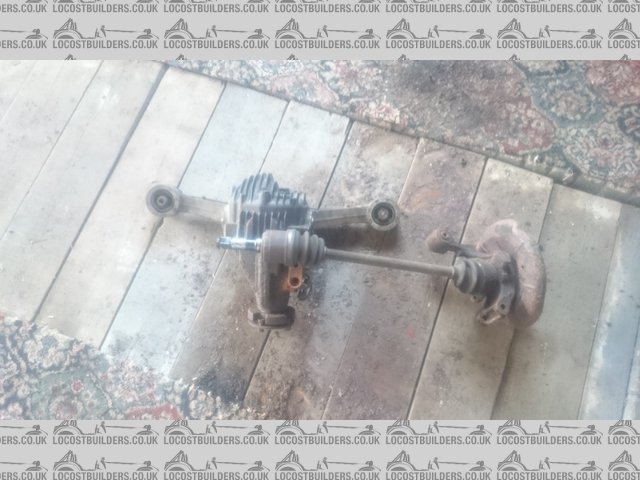
GoodTug
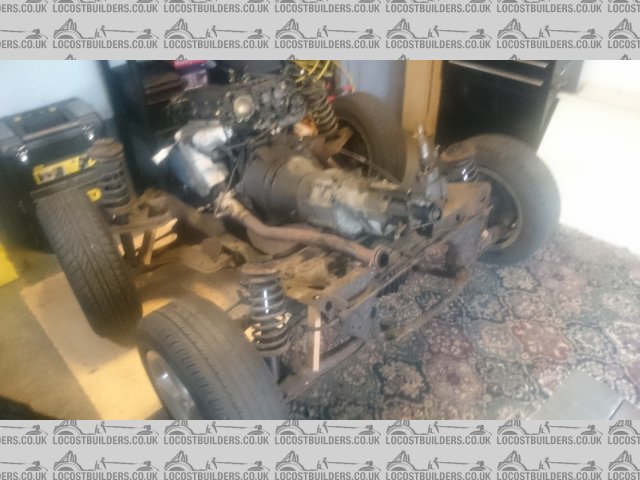
And it was a very productive afternoon, got the engine and gearbox assembly free from the sub-frame pretty easily once I'd figured out how to
attach my load leveller to it all.
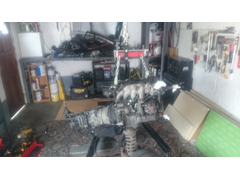 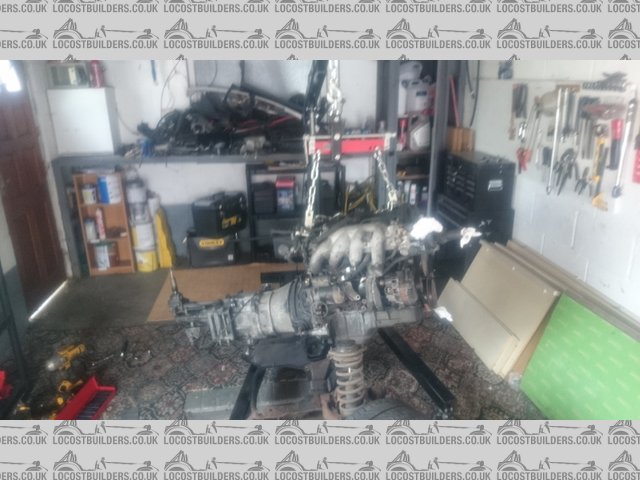
FlyingEngine
The front hub carriers and brake assemblies put up very little fight, with just the lower near-side ball joint nut needing the delicate touch of the
5" battery grinder. That's the teardown complete, I can now move onto parts restoration
Not wanting to feel left out though, I only made a half-hearted attempt to remove the drive-shafts from the rear hubs. The hub nuts are loose of
course, but I'd prefer to leave them standing drowning in some penetrating lubricant before I tackle them in anger
|
|
|