
Rosco's haynes Build
Rosco86 - 26/10/14 at 07:09 PM
Started my build last weekend, with the help of my Dad, just thought I would start a thread to share with you guys and get a few pointers along the
way
A bit of background info, I'm 28, and a cnc miller by trade and my dads a carpenter so between us we get on with things ok, I've always
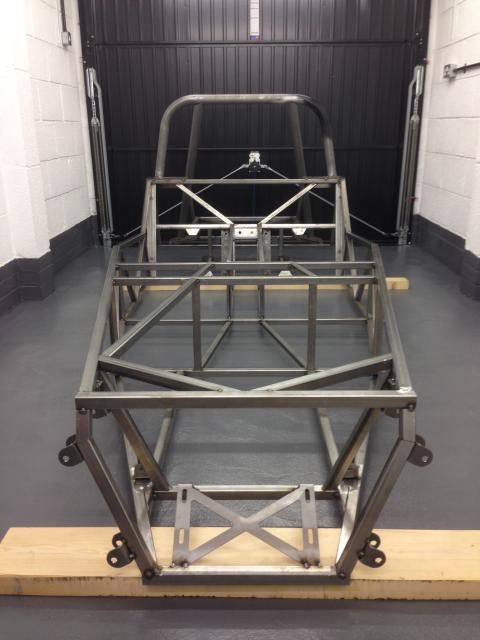
loved cars and always wanted to build a kit car, I'm going down the bike engine route in a bare bones track chassis no luxury much to my dads
disappointment, I'm going to work to the book and get it on the road as soon as I can, funds permitting, and then after that I will start
replacing the uprights for cnc aluminium ones etc, but if I start doing those things now I will never get finished
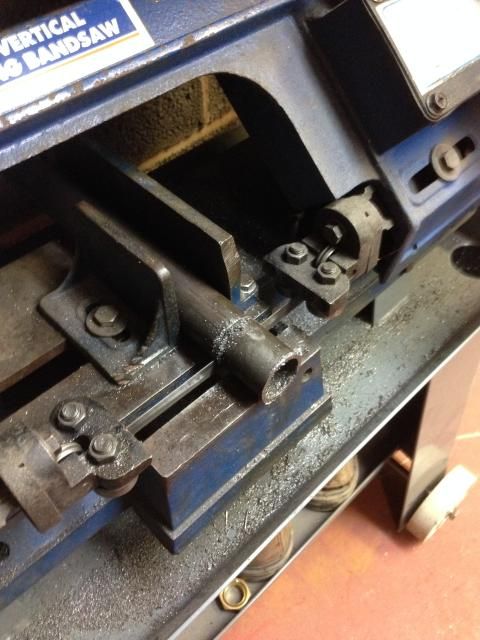
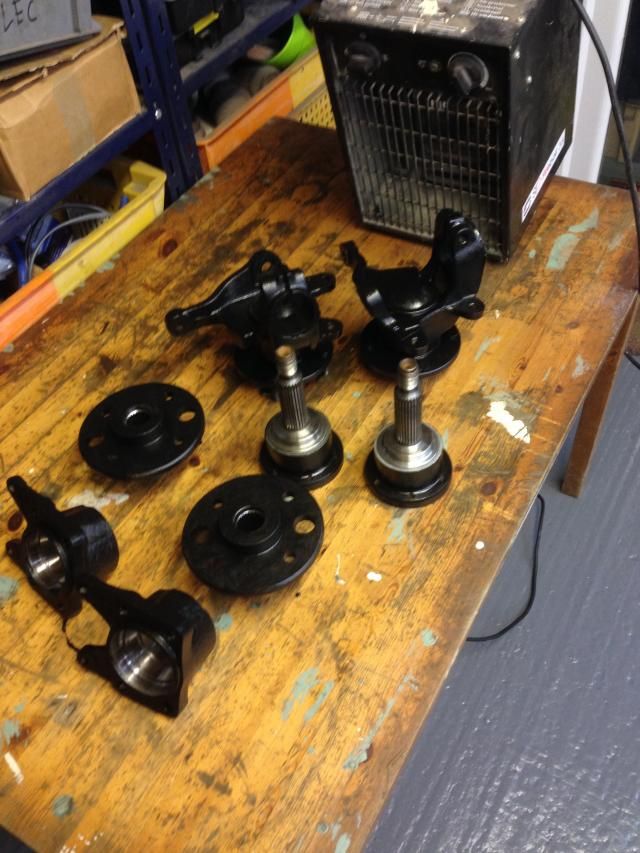
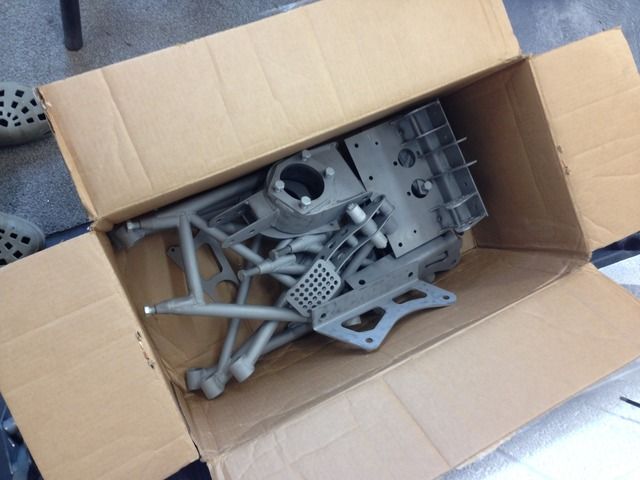
First I got some sierra bits from a breakers yard for a bargain price,
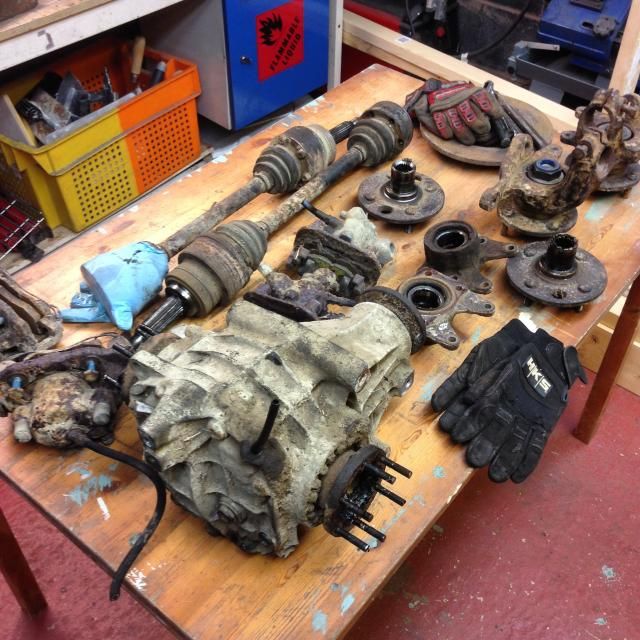
I have stripped the hubs and they are at the blasters as we speak
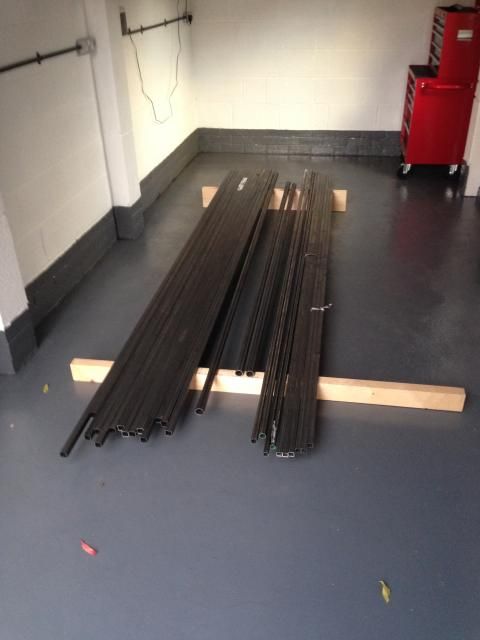
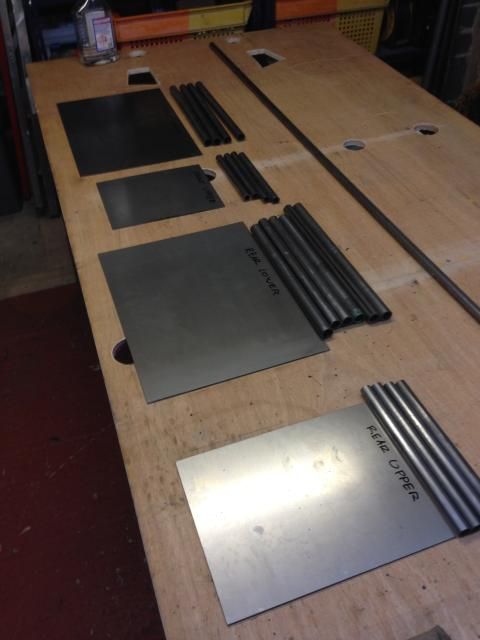
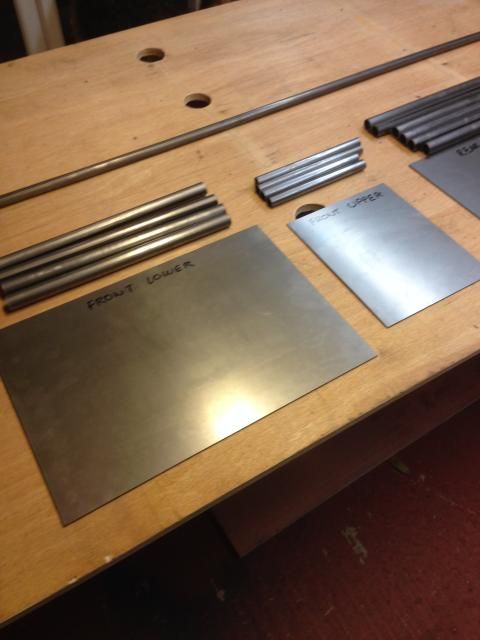
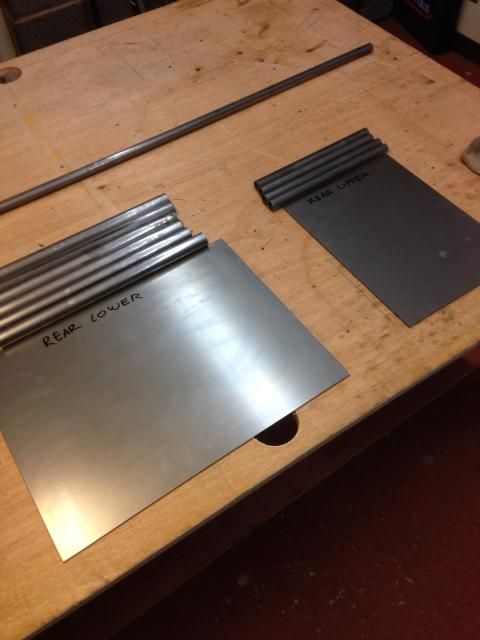
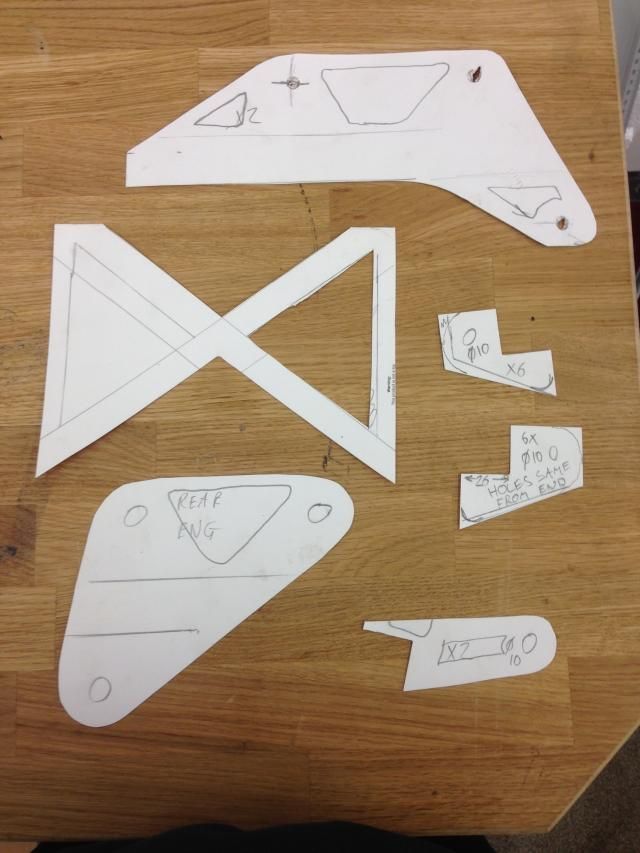
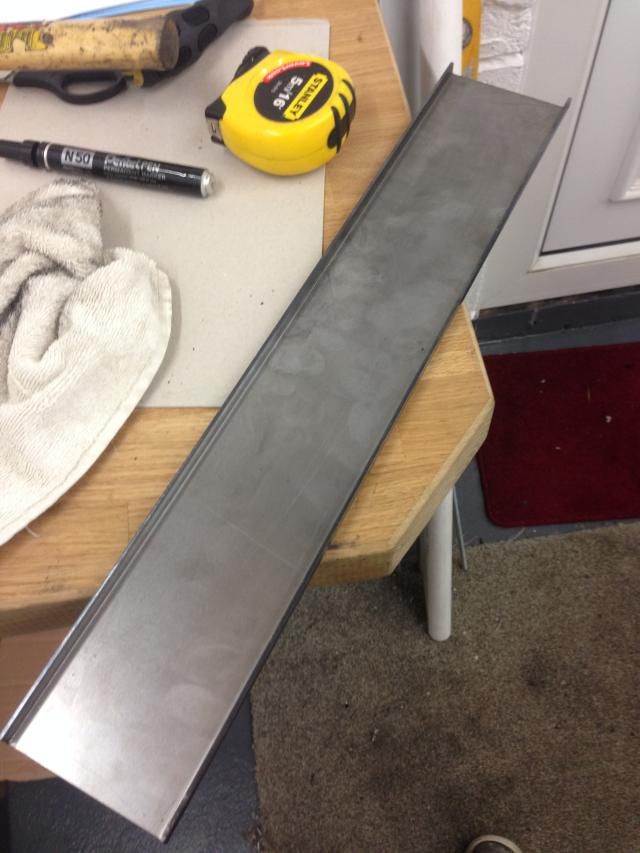
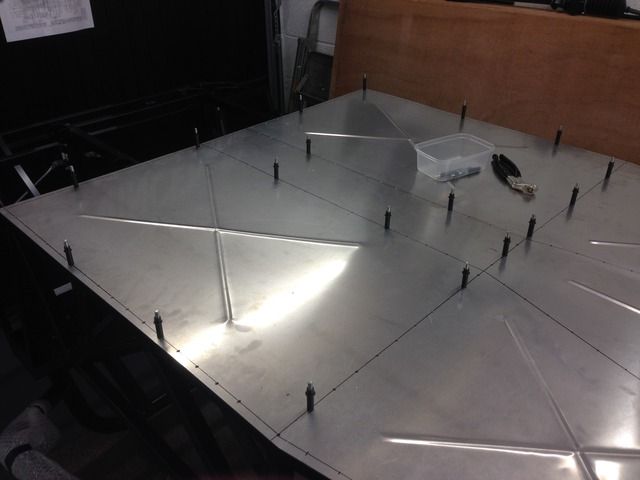
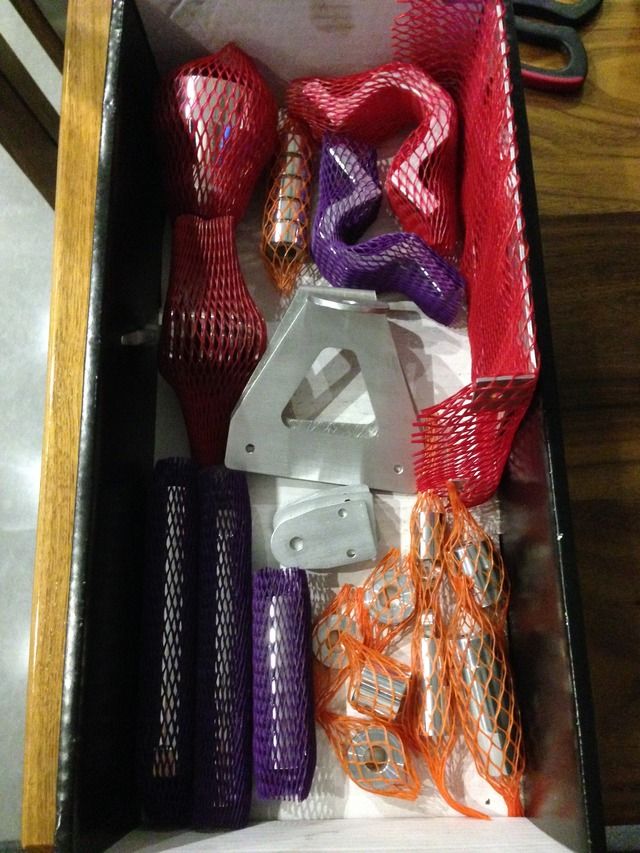
Material ready to get started
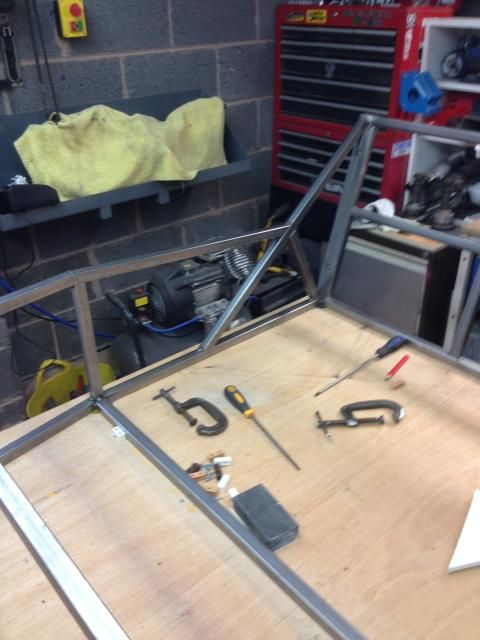
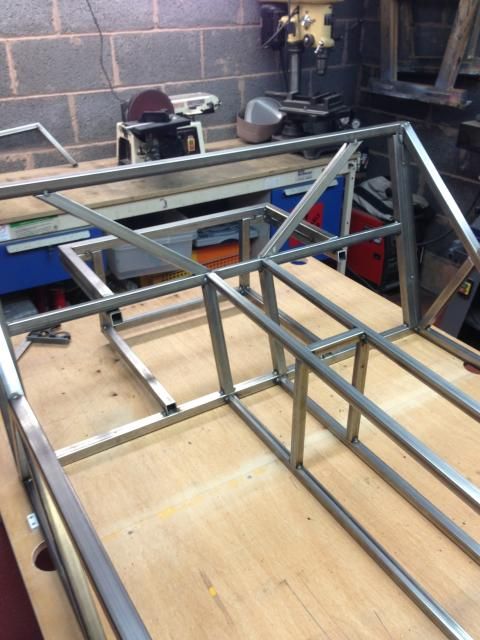
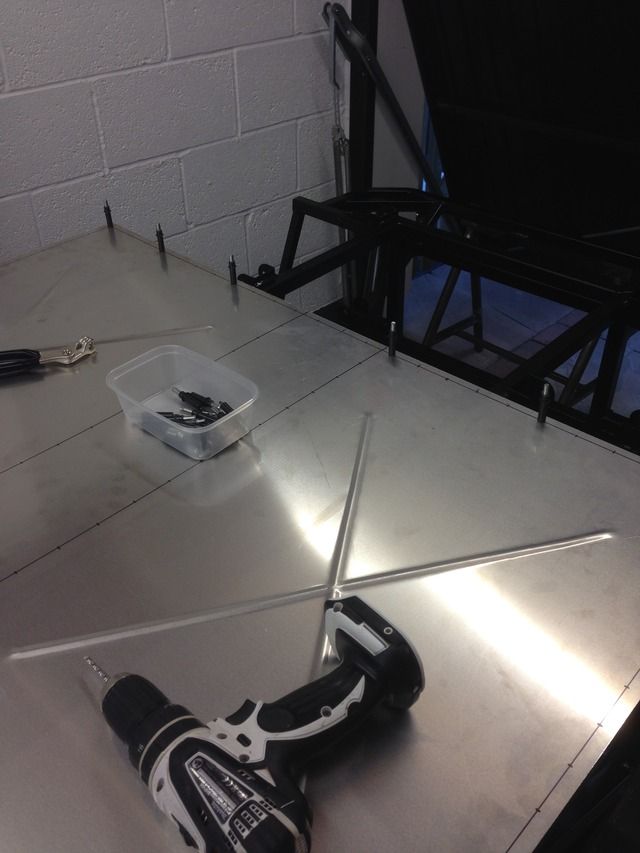
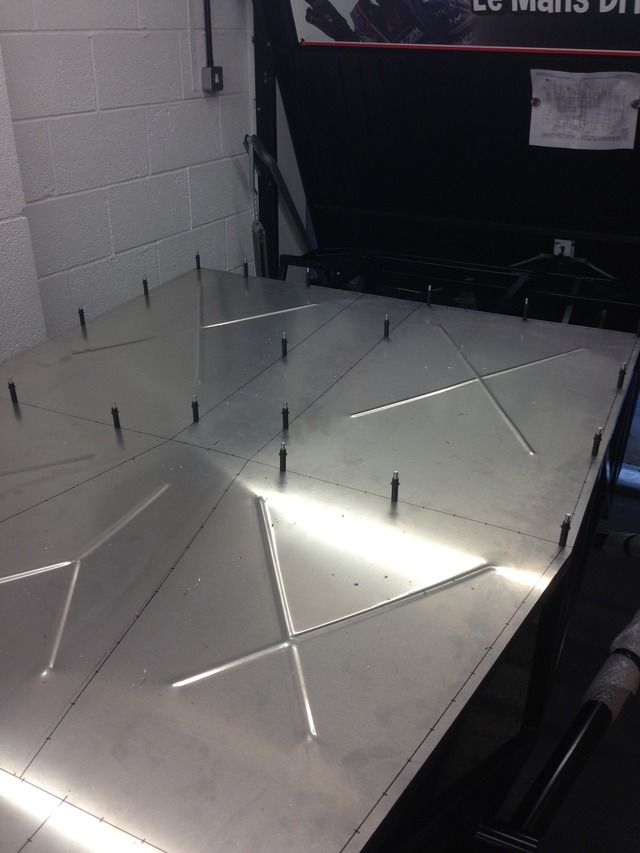
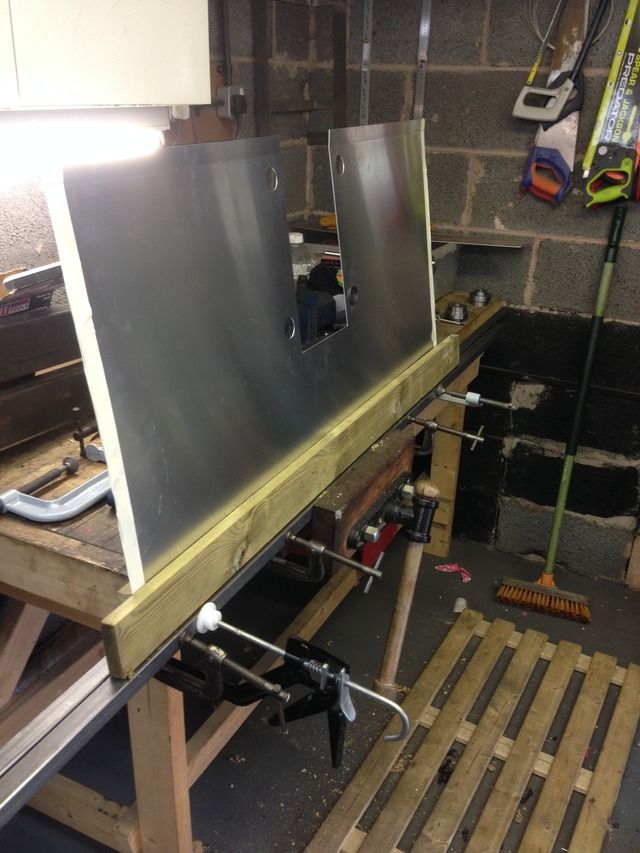
Next we built a build table, we used a sheet of ply for the frame, and a sheet for the top
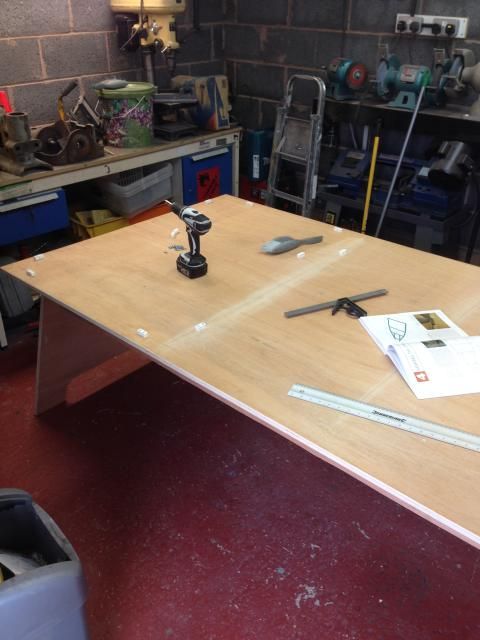
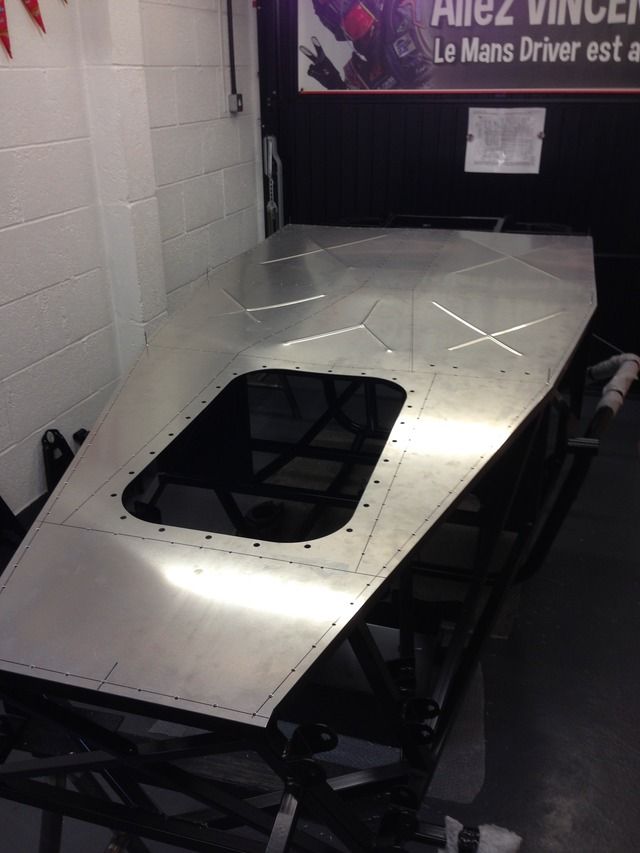
Then got things marked out and started cutting
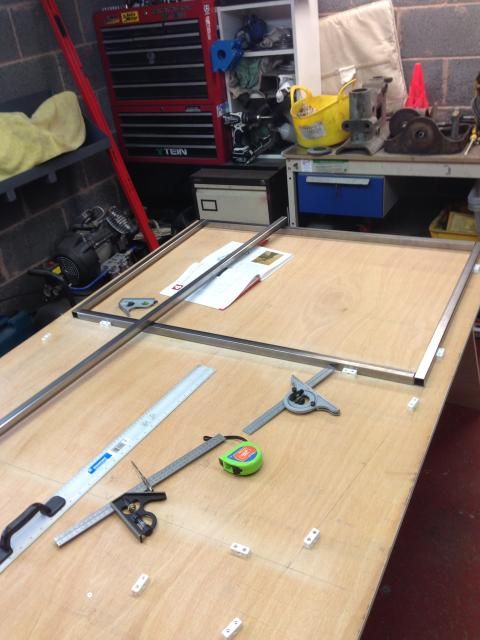
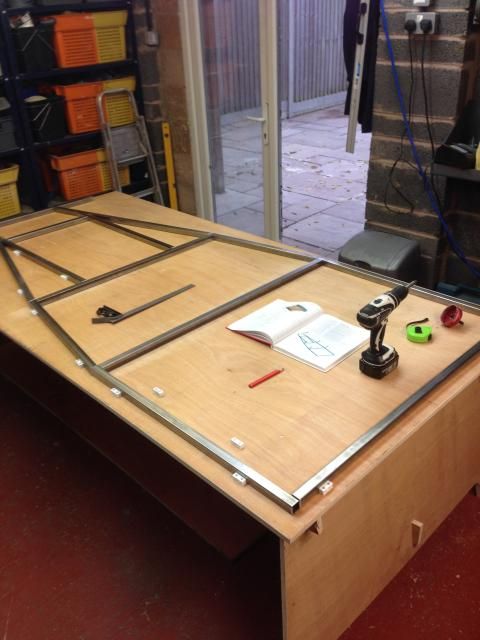
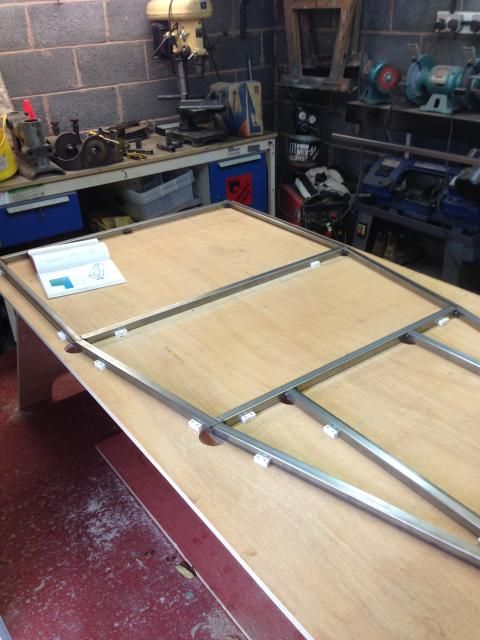
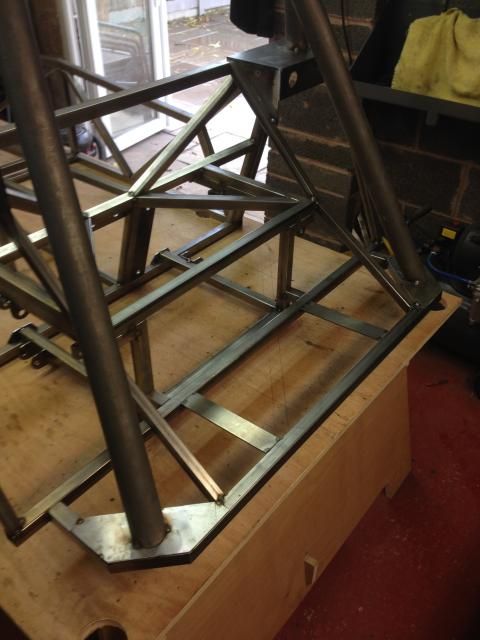
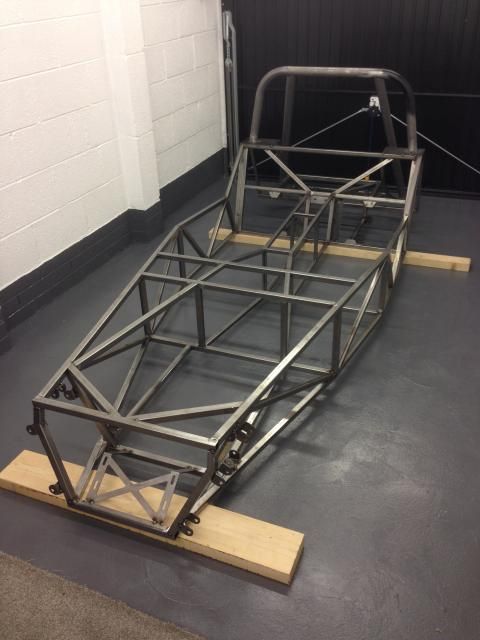
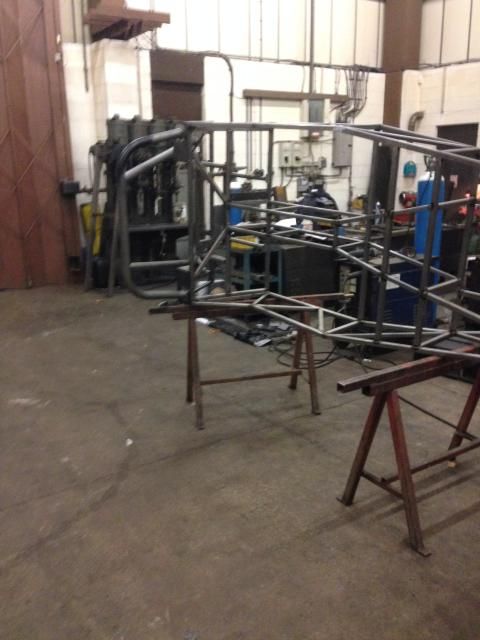
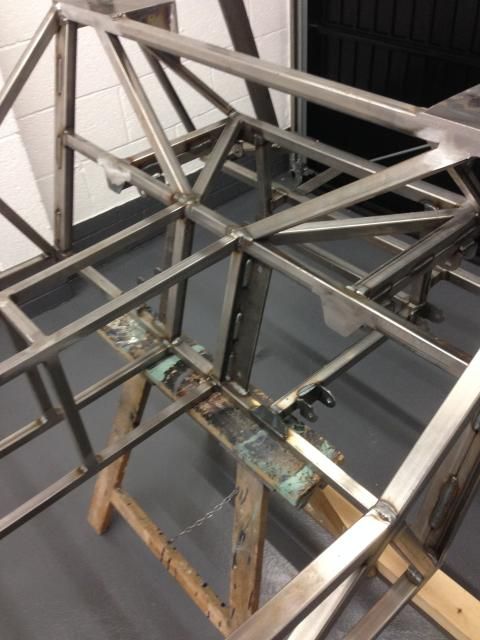
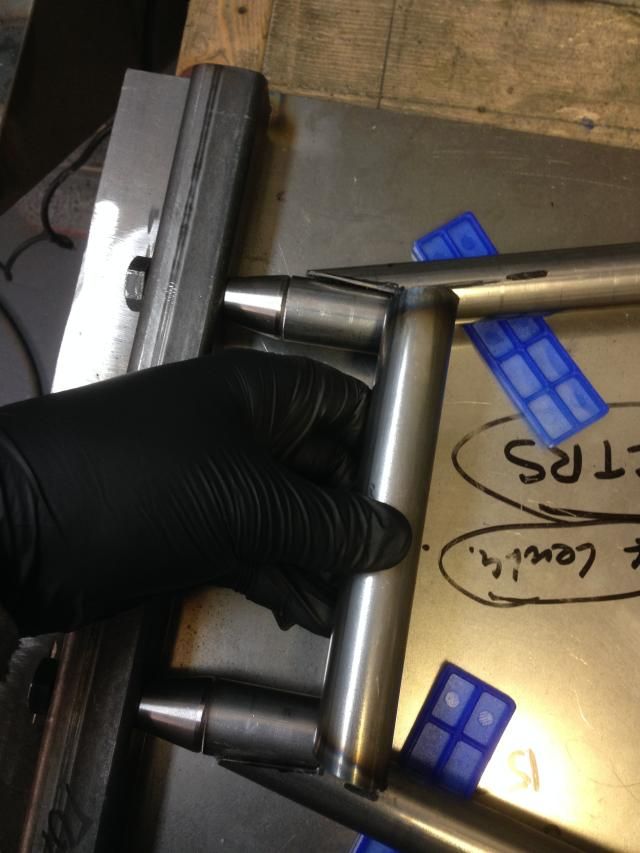
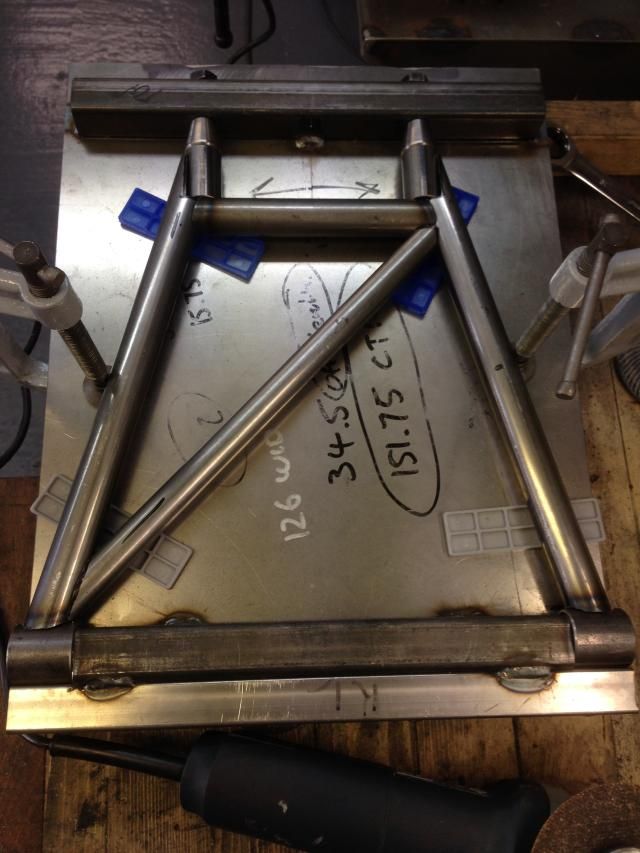
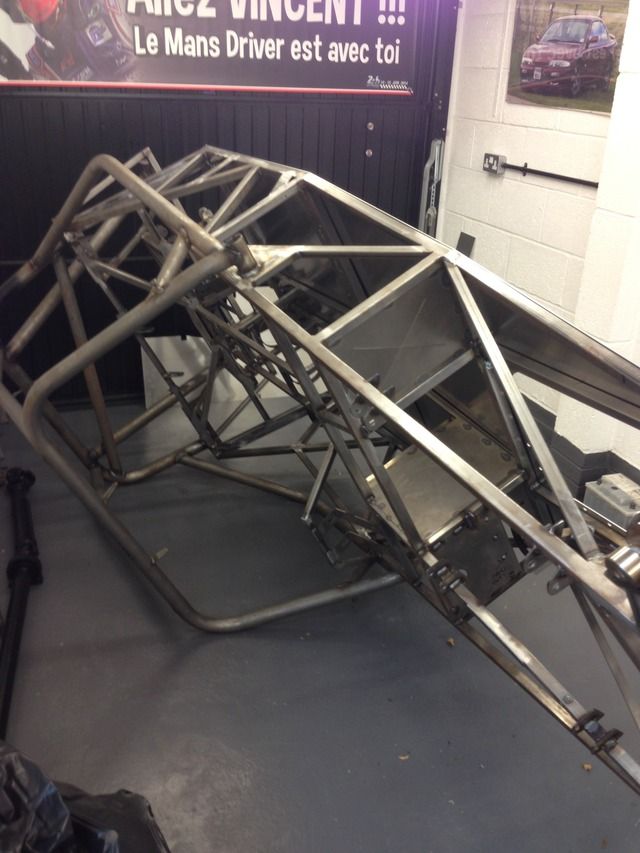
Front frame done
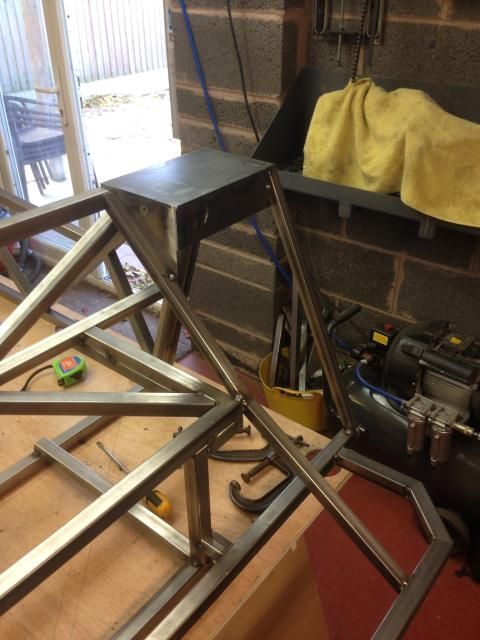
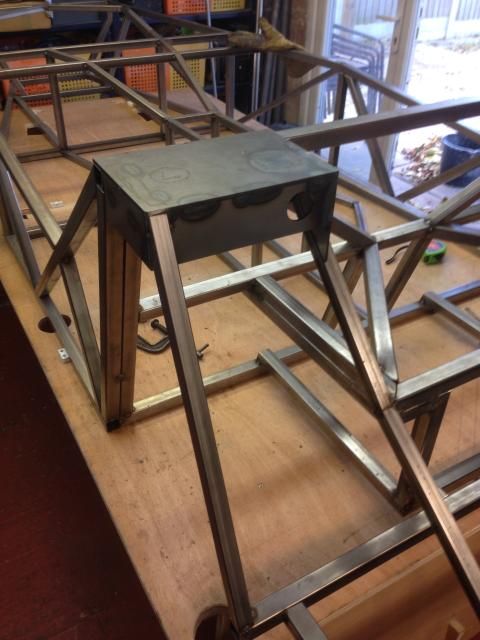
I was surprised how quick it started to take shape considering we cut the box as we went along
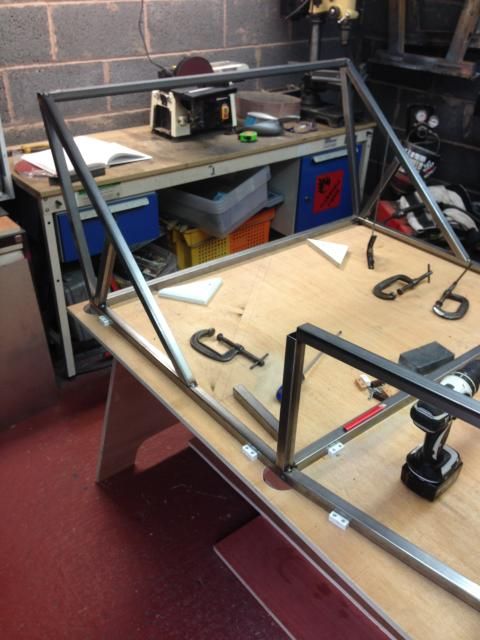

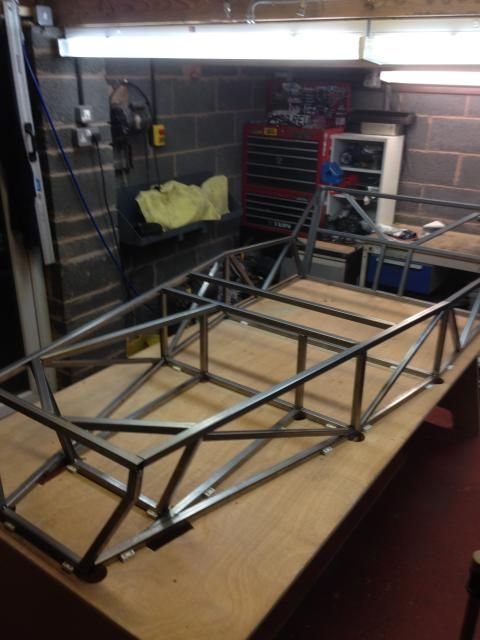
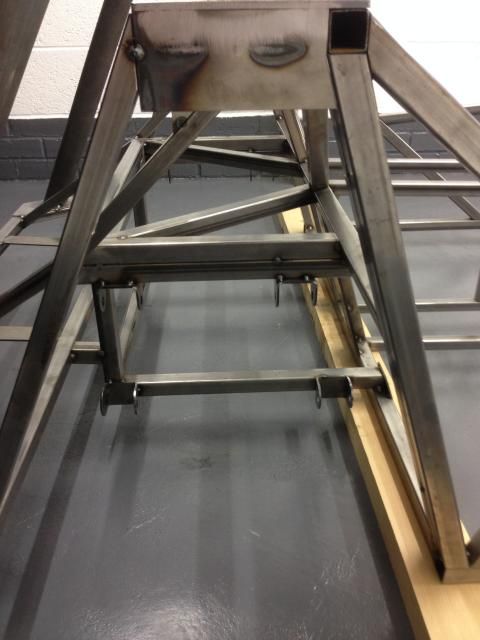
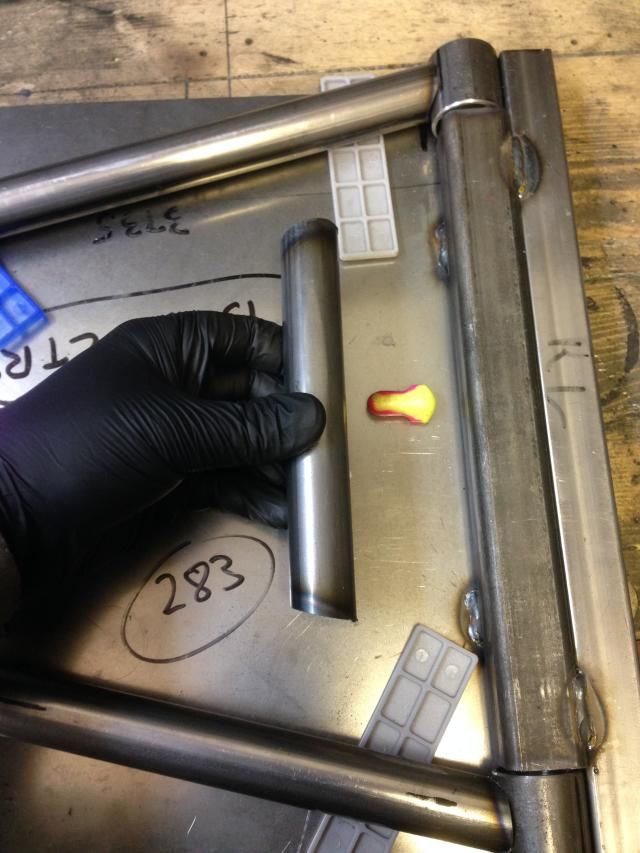
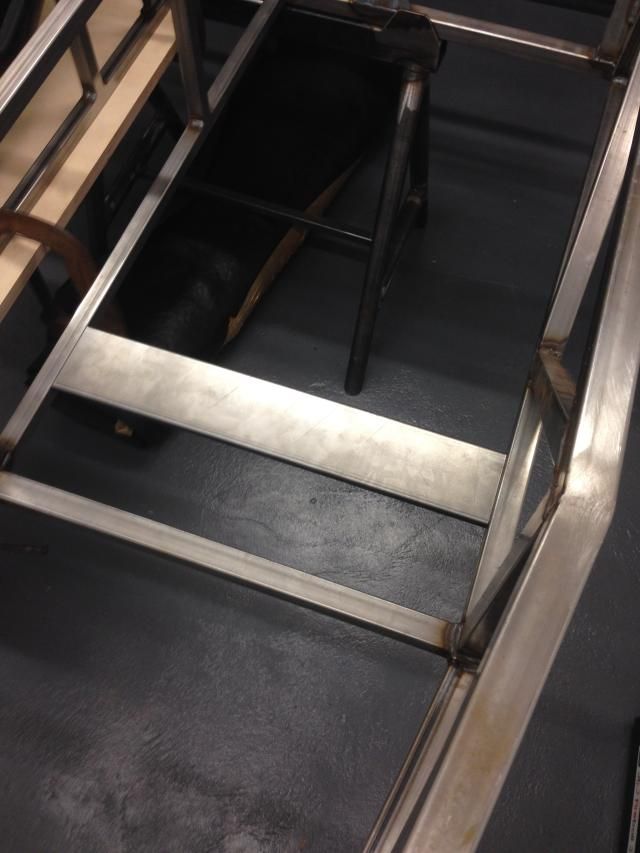
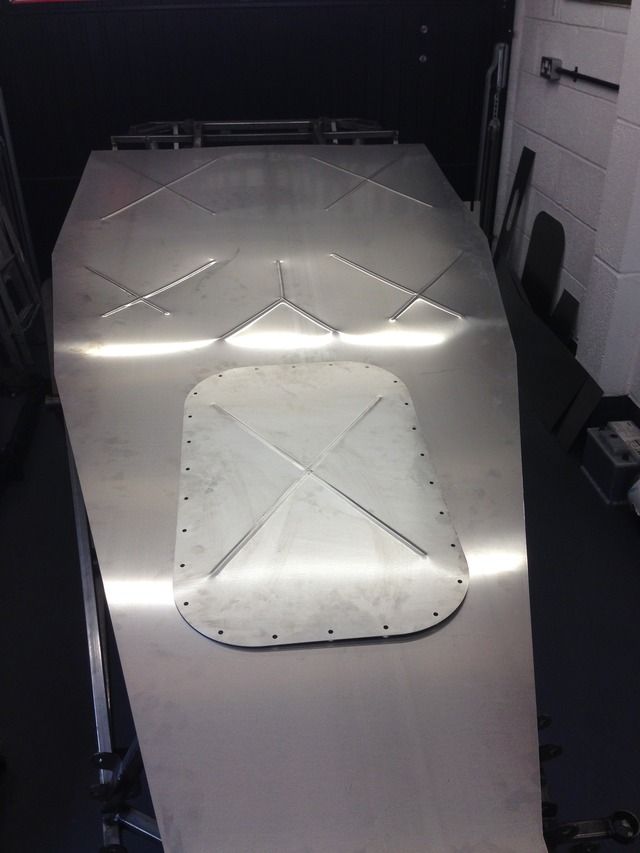
Next up the tunnel and cross braces
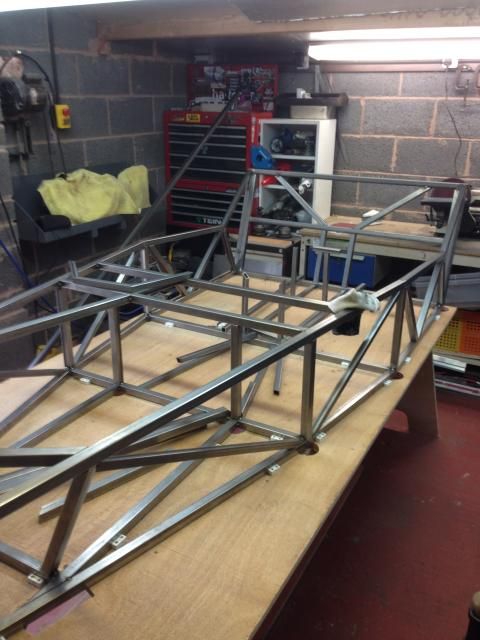
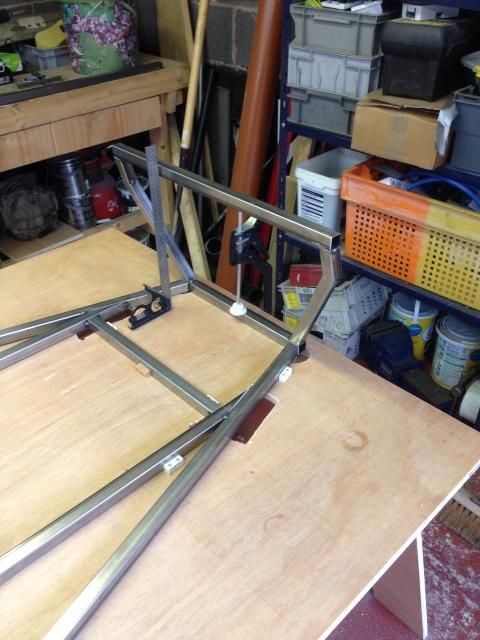
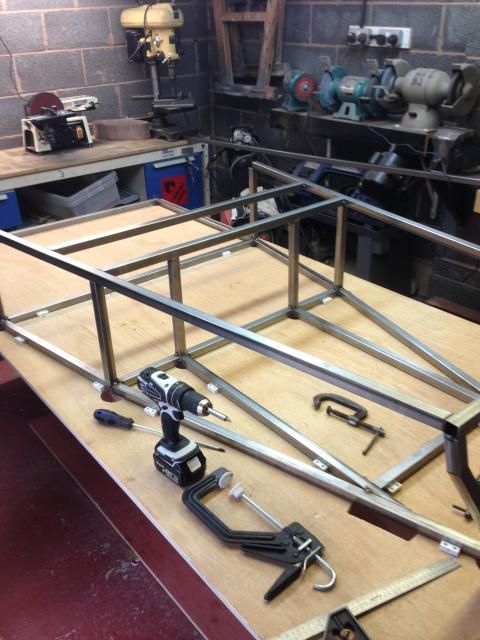
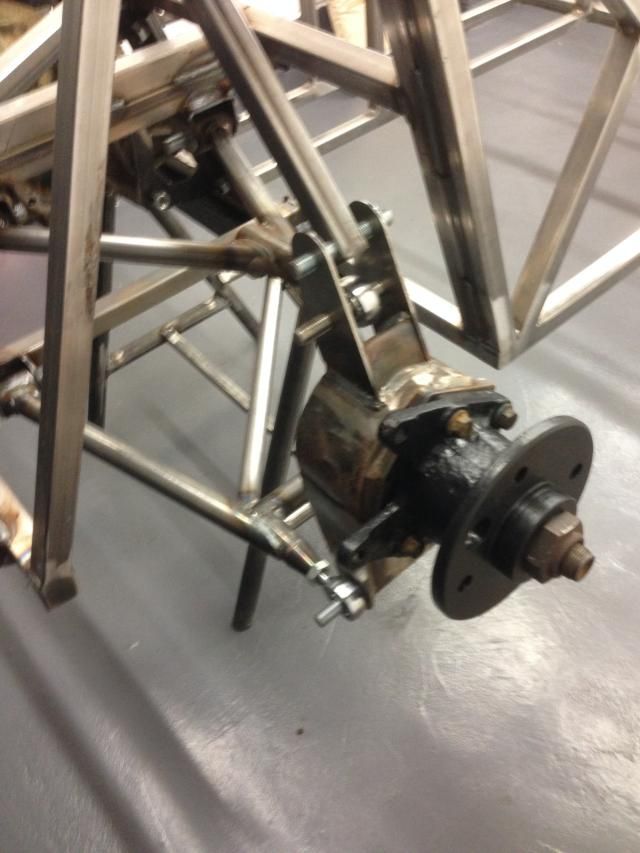
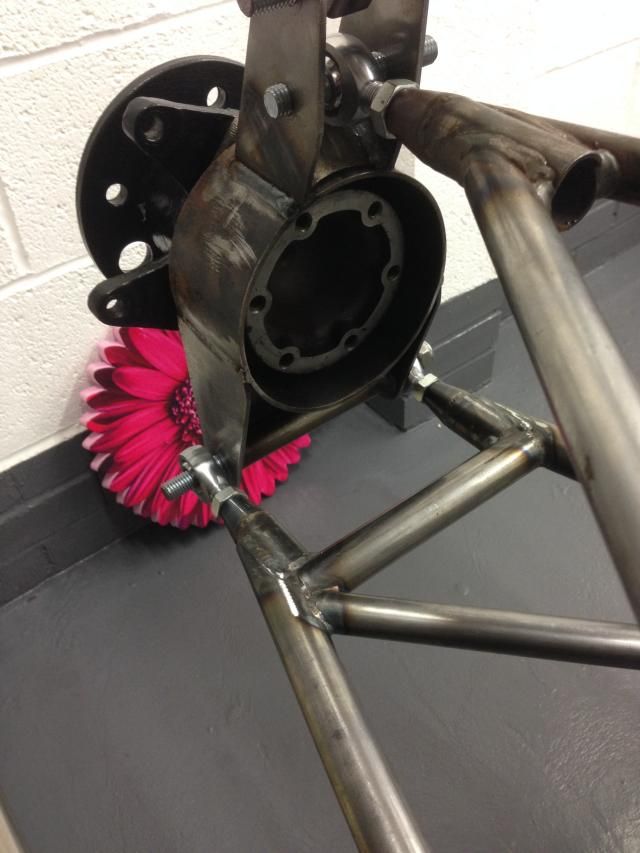
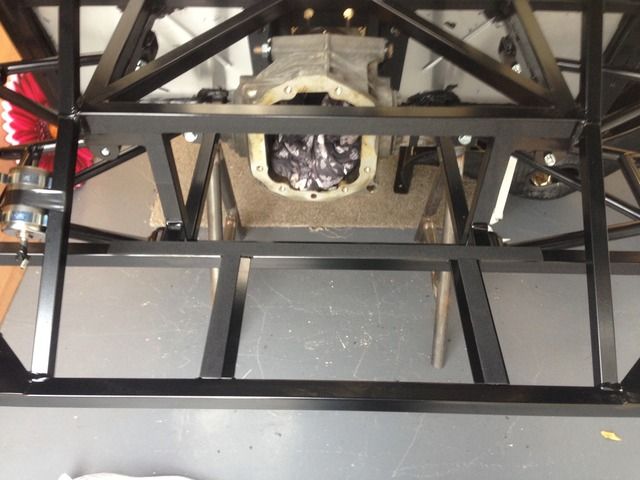
Then the diff cage
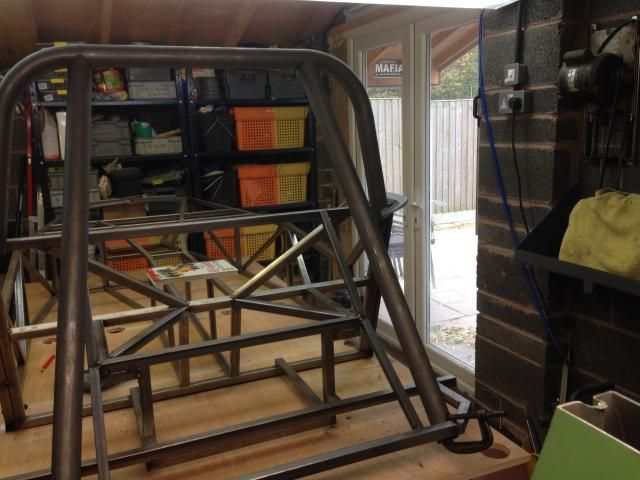
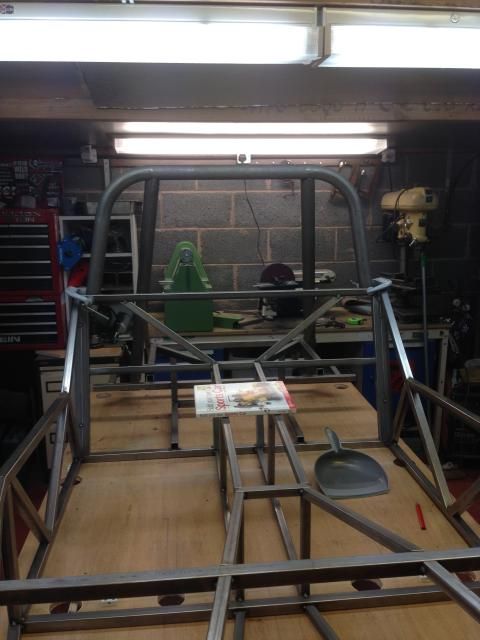
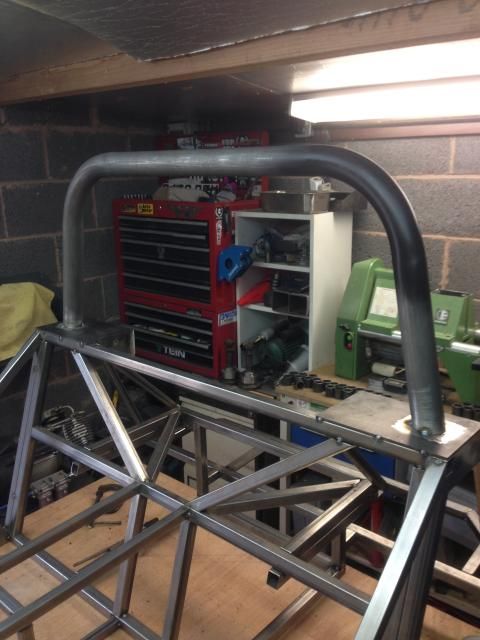
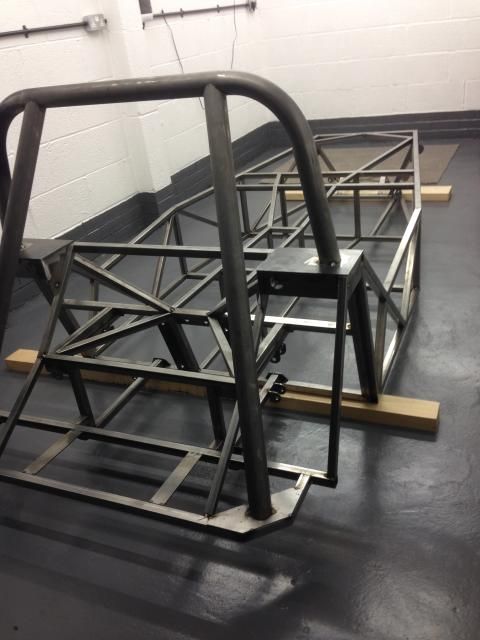
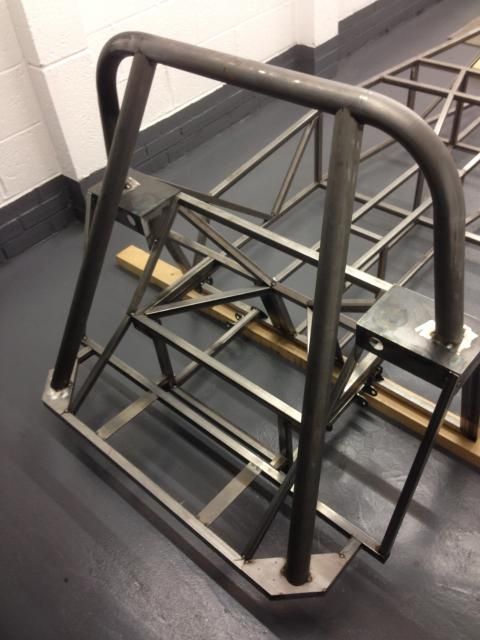
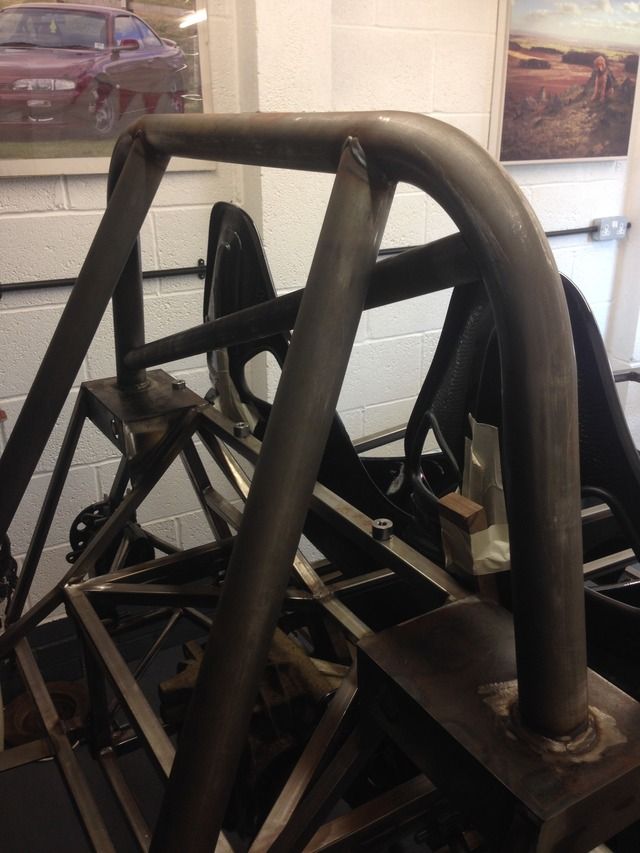
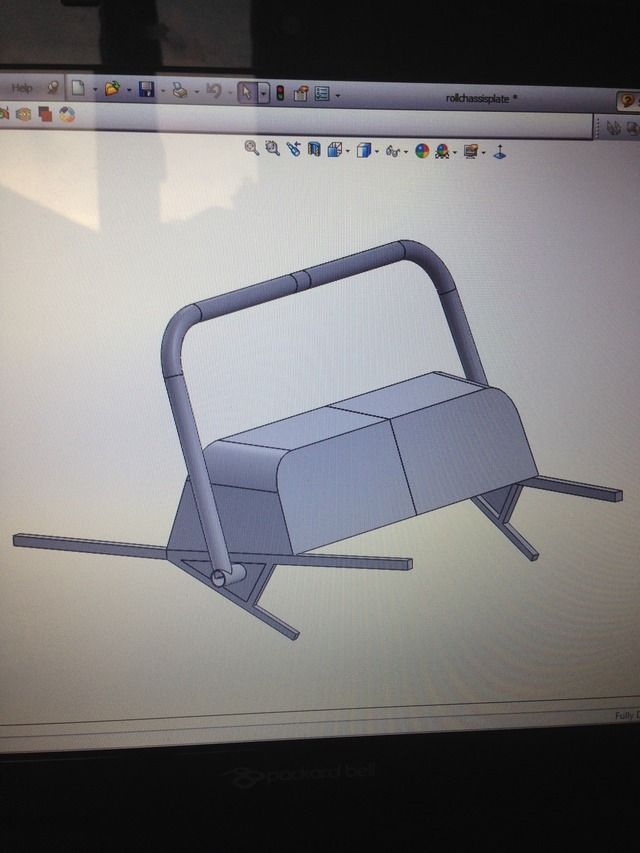
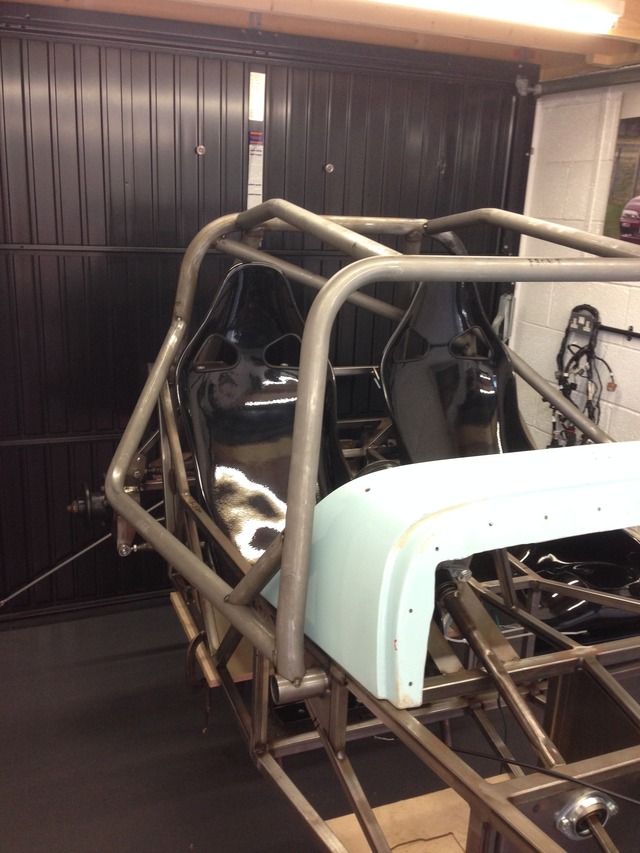
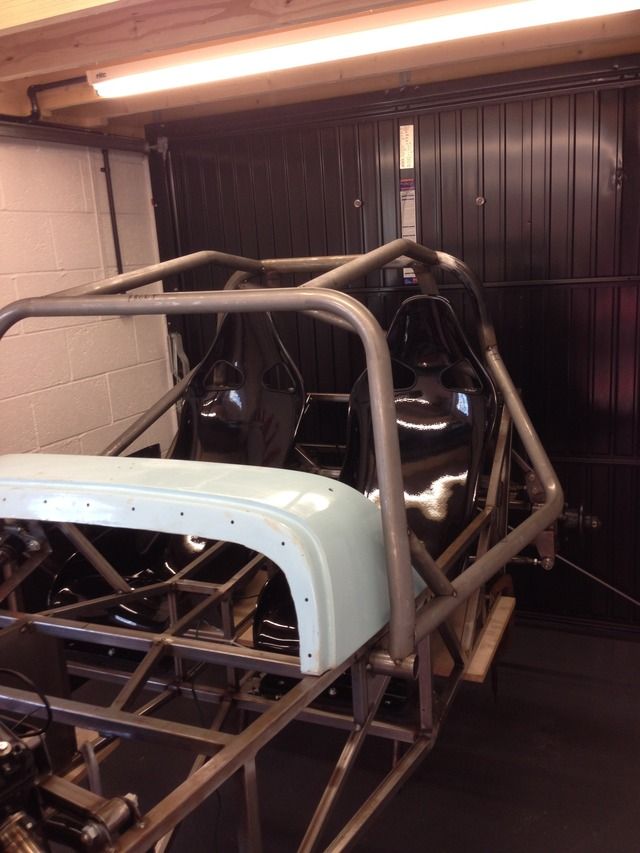
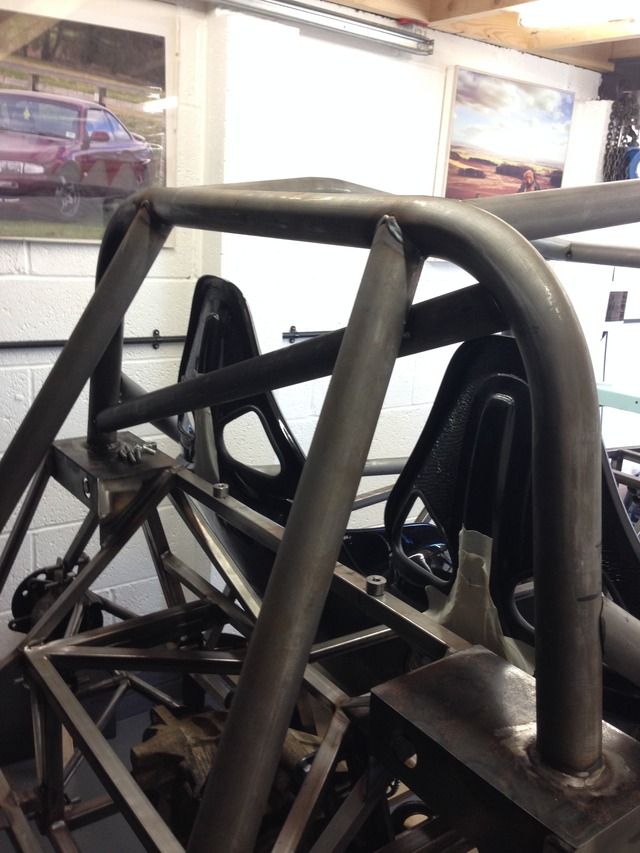
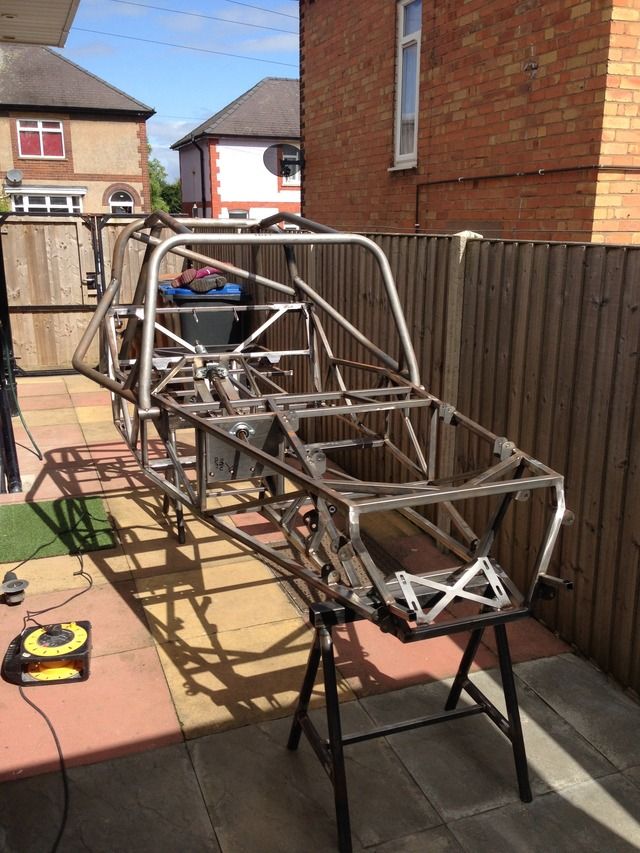
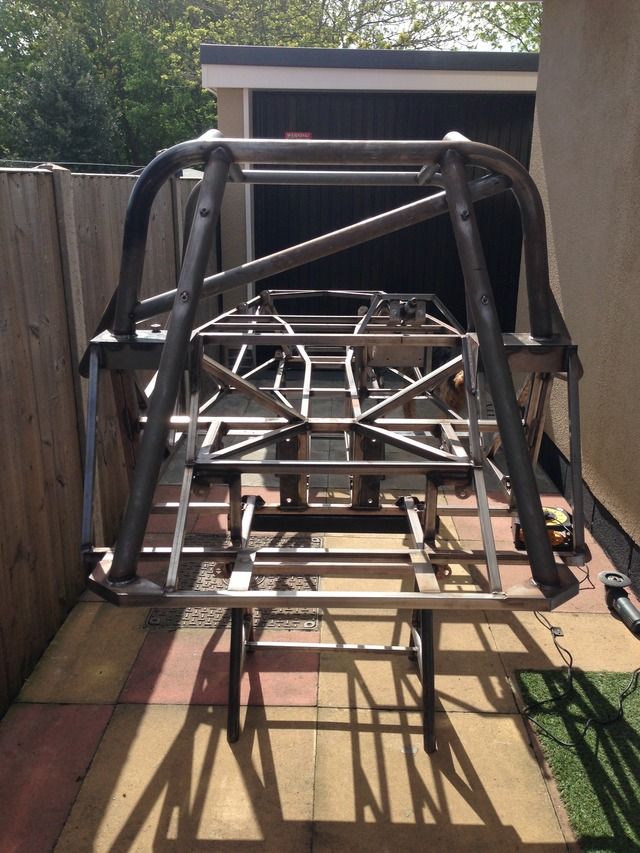
Got my roll bar bent up yesterday by Tom at www.tube-bender.co.uk, not to far from my house, bent out of 2" cds tube, well pleased with it,
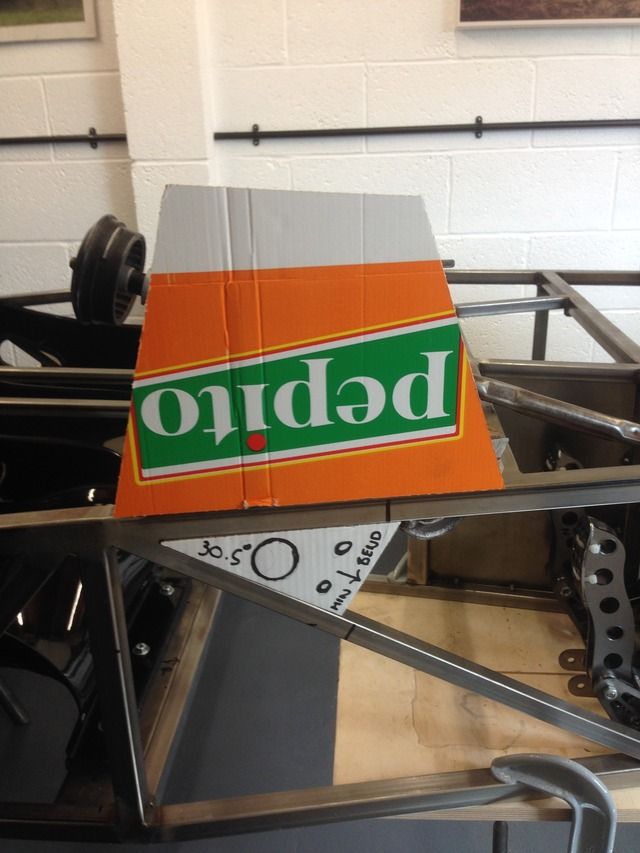
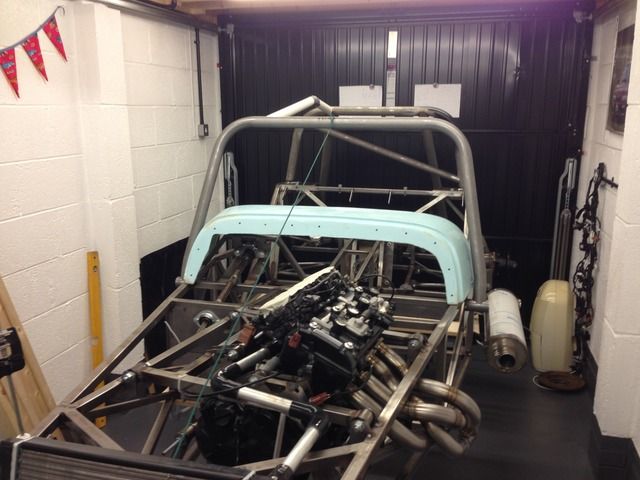
I'm aiming to meet msa spec but not sure if the rear stays can be angled out, I'm going for a full cage but just got the rear hoop until I
get my
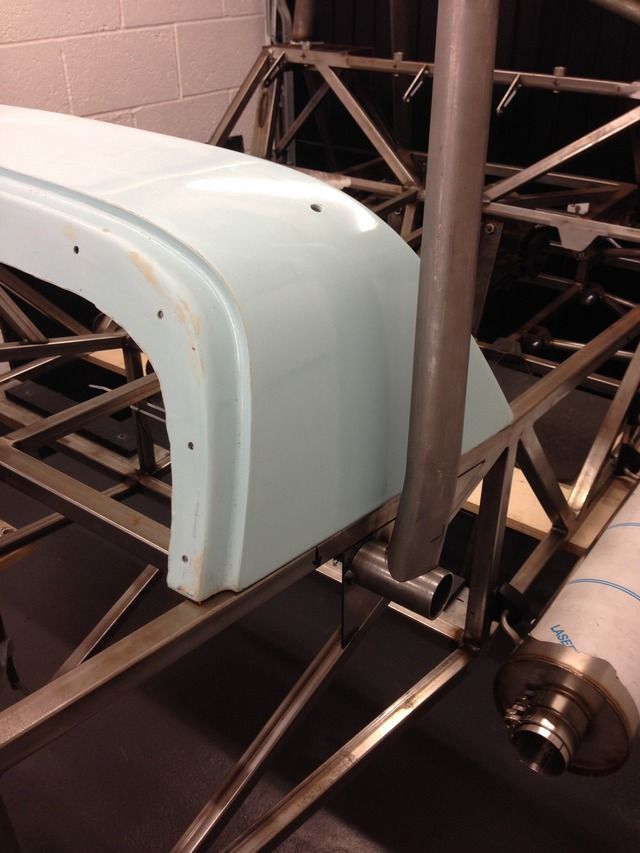
Scuttle mounted and see what room I've got
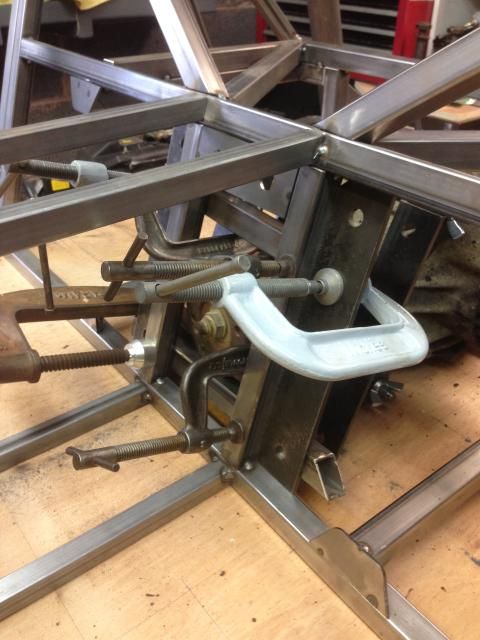
It's only clamped on for now as I've got to finish drawing up my parts for laser cutting this week hopefully
And that's about where I'm up to
Thanks for looking
Ben_Copeland - 26/10/14 at 07:34 PM
Good luck with the build. Any questions just ask
[Edited on 26/10/14 by Ben_Copeland]
RichieW - 26/10/14 at 07:54 PM
Nice to see a scratch build. There are fewer of them about these days.
madteg - 26/10/14 at 07:54 PM
Looks like you are doing a very good job, keep us up to date on your build.
gaz05 - 27/10/14 at 12:43 AM
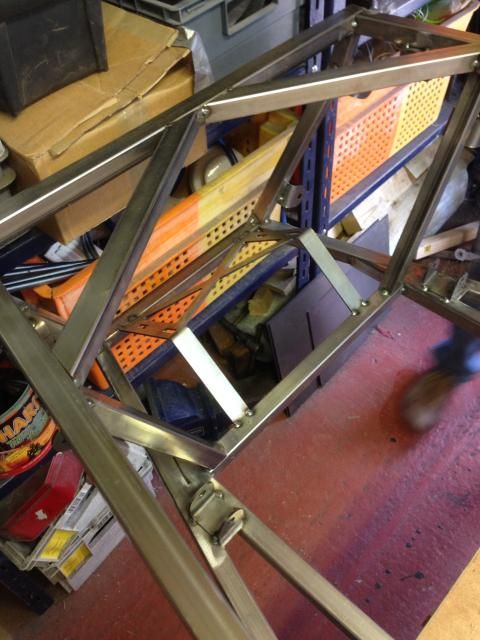
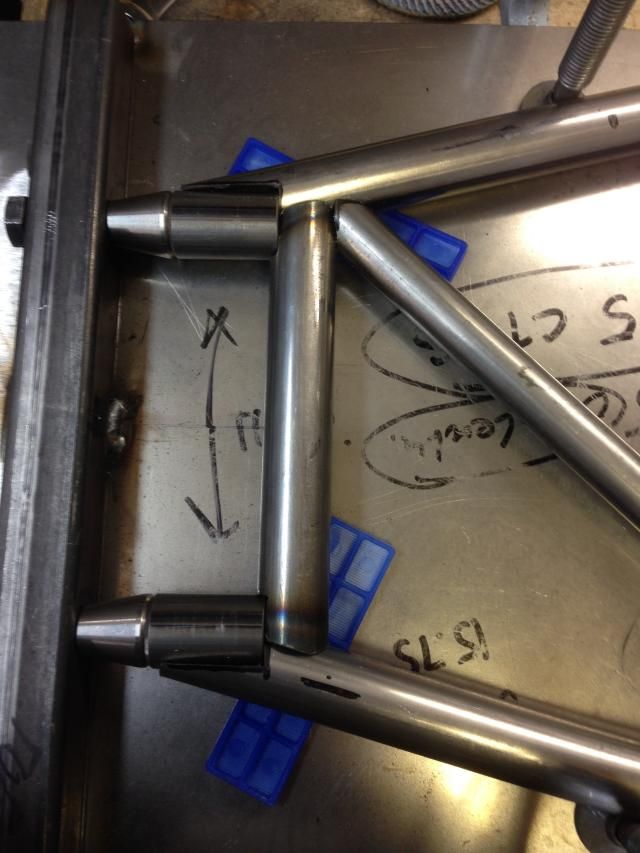
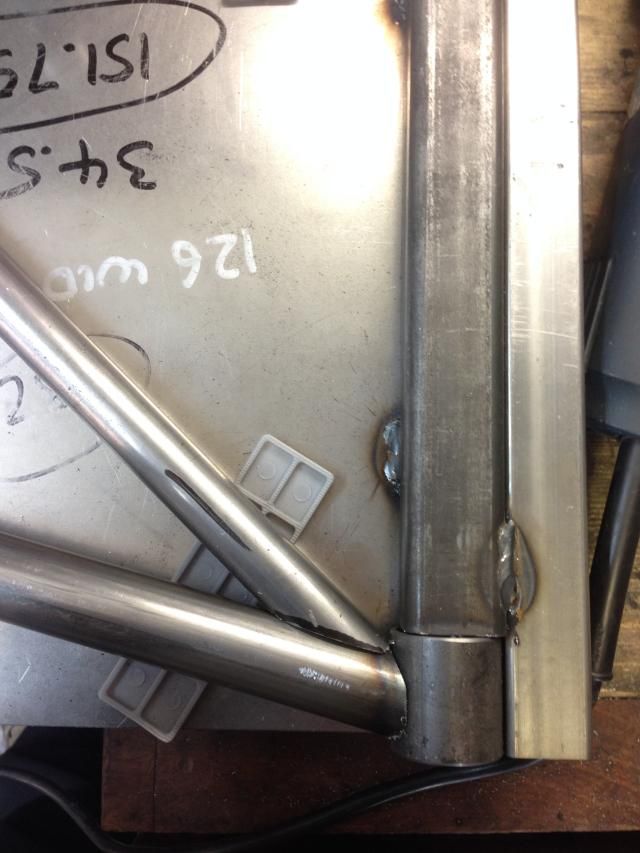
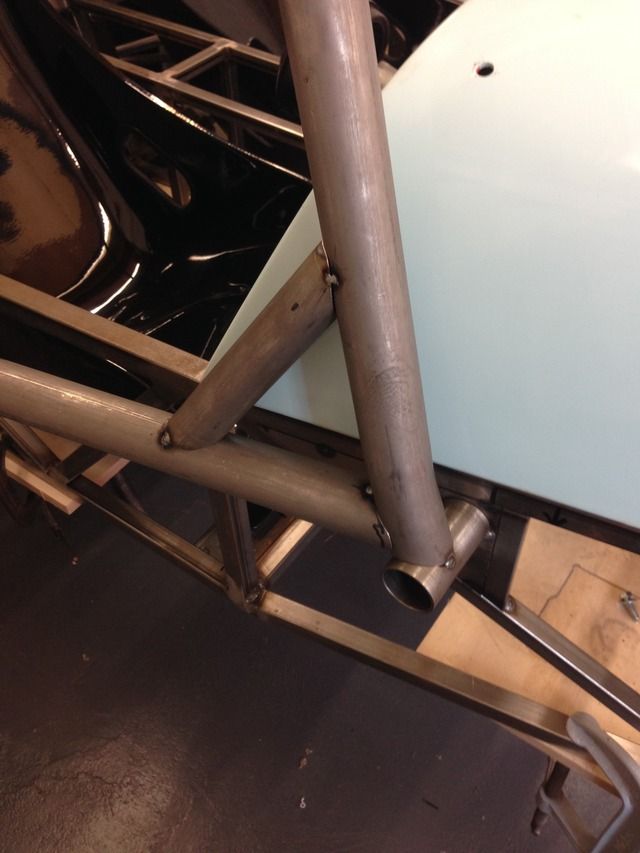
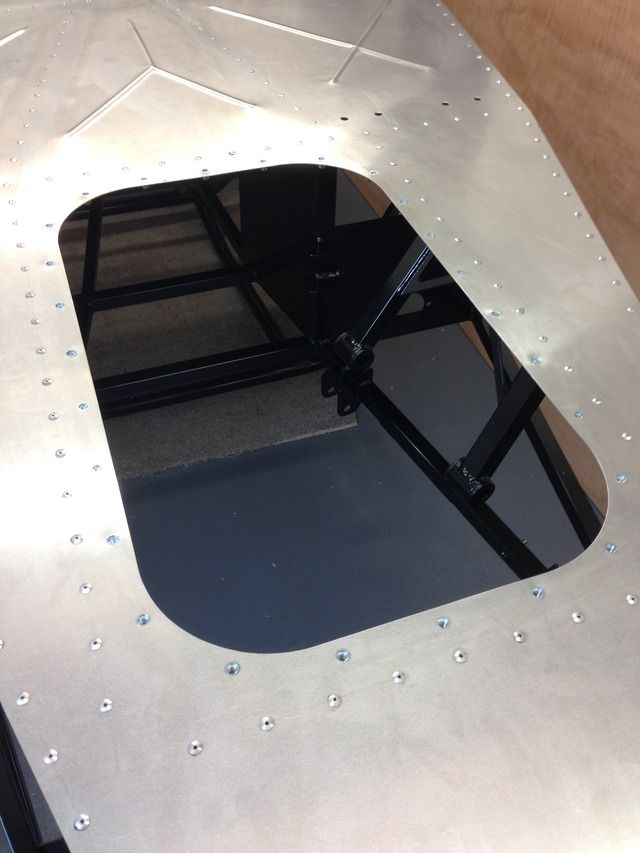
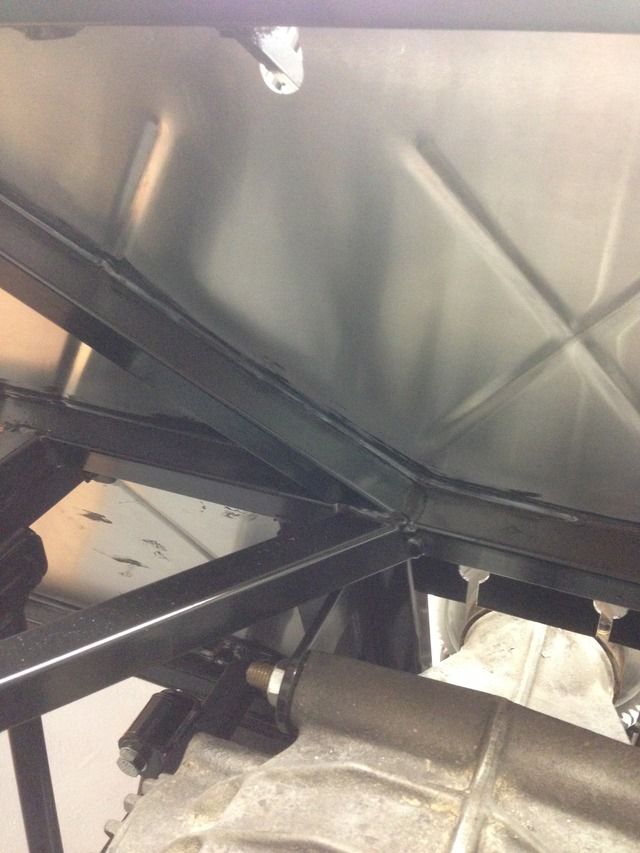
I think you've got U7 in the wrong place. It's a common mistake. I did it also. It's not welded level with BR9 but with the bottom
transmission tunnel tube. That way it leaves more space for the pedals and you can still get a type 9 box in if you ever want to change to cec
later.
Edit. I think I'd look into putting some decent supports to the centre of the table as well. Mine bowed and I had to stiffen it with some 4x2.
Best of luck. Mine took me four years and only got on the road last weekend. It was worth it
[Edited on 27/10/14 by gaz05]
big_wasa - 27/10/14 at 11:22 AM
quote:
Originally posted by RichieW
Nice to see a scratch build. There are fewer of them about these days.
second that 
Rosco86 - 27/10/14 at 08:09 PM
Cheers for the comments,
Yeah it was in the wrong place but I realised and moved it
The table has 3 200mm wide on edge ply strips running the length of the bench, you just can't see them lol
I was thinking about just putting a straight tunnel in, but wasn't really sure until I get an engine
nick205 - 27/10/14 at 08:14 PM
quote:
Originally posted by big_wasa
quote:
Originally posted by RichieW
Nice to see a scratch build. There are fewer of them about these days.
second that
Me too!
Something I'd like to do myself given time.
Rosco86 - 28/10/14 at 10:08 PM
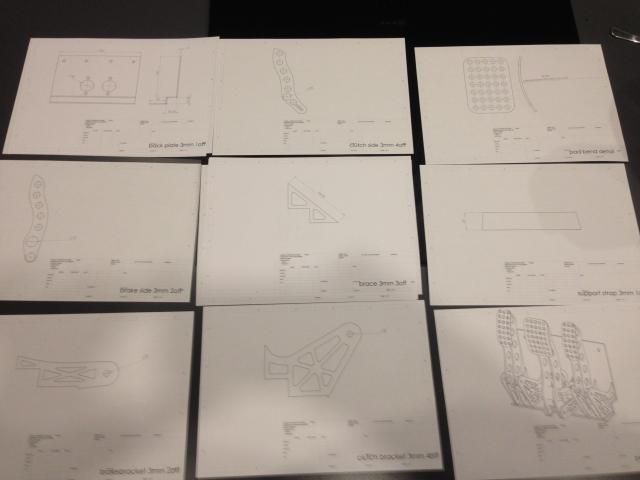
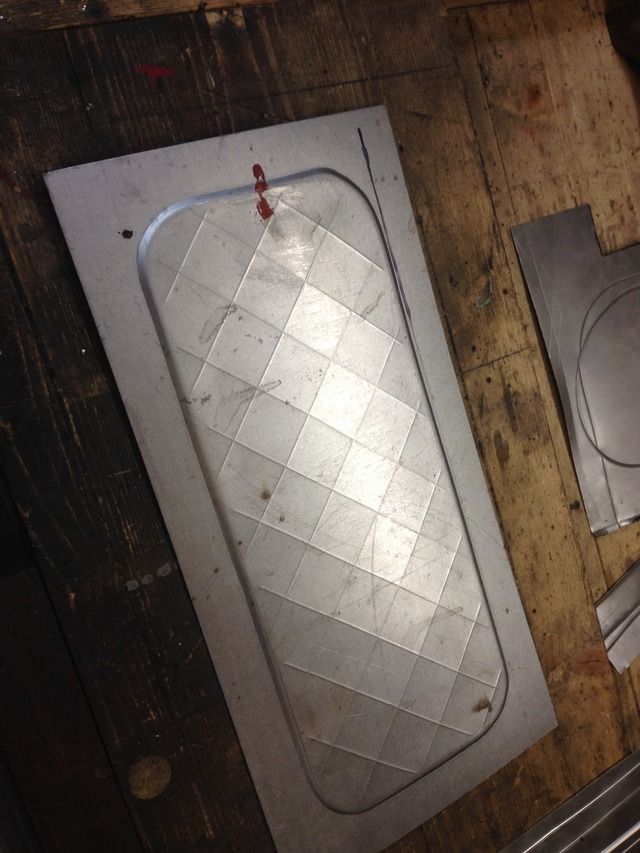
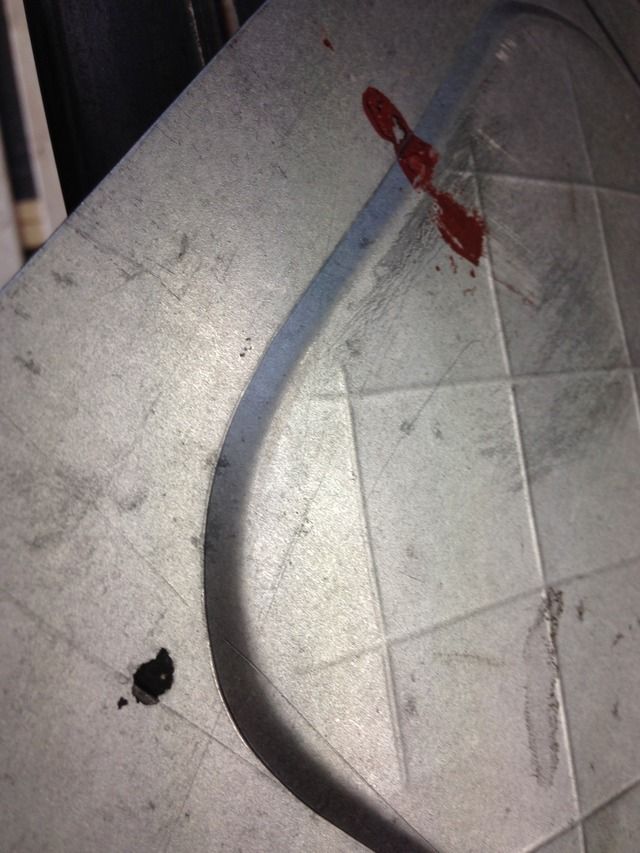
A bit more done tonight, took my cad drawings down to the laser cutters after work, hopefully get some bits back for the weekend!
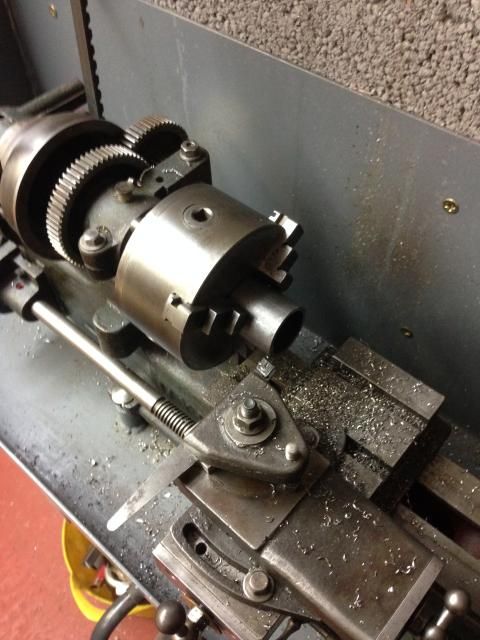
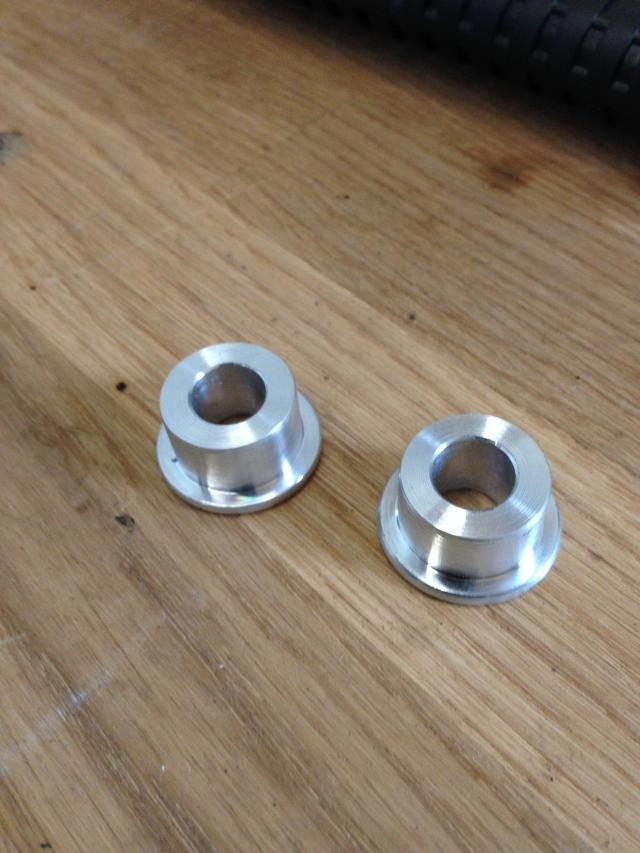
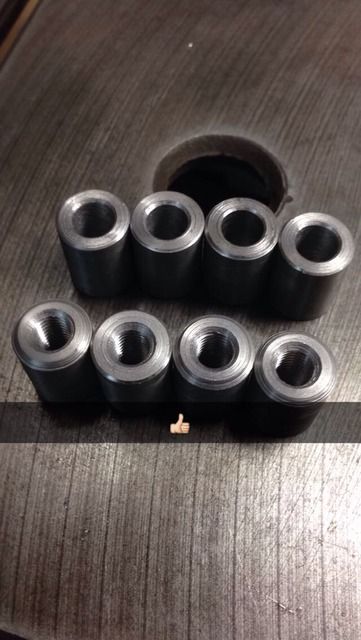
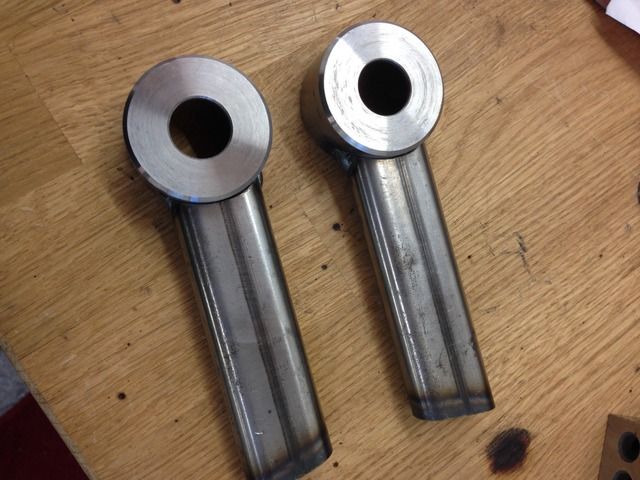
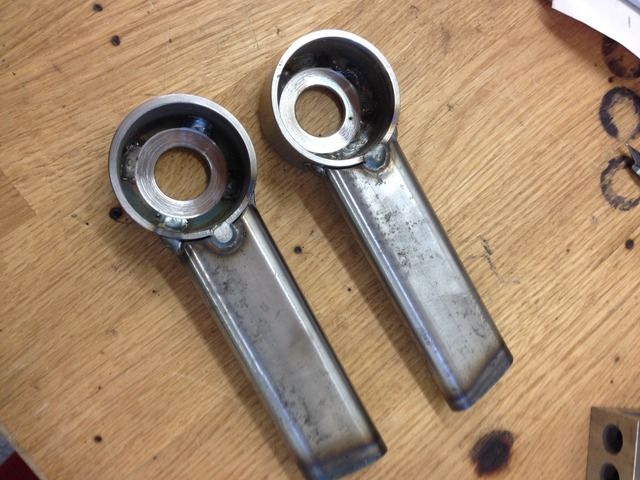
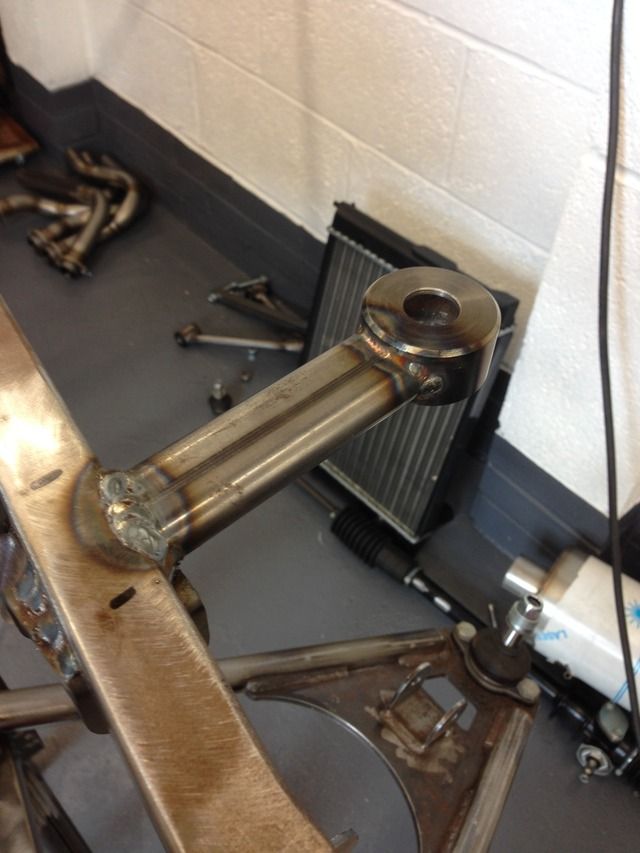
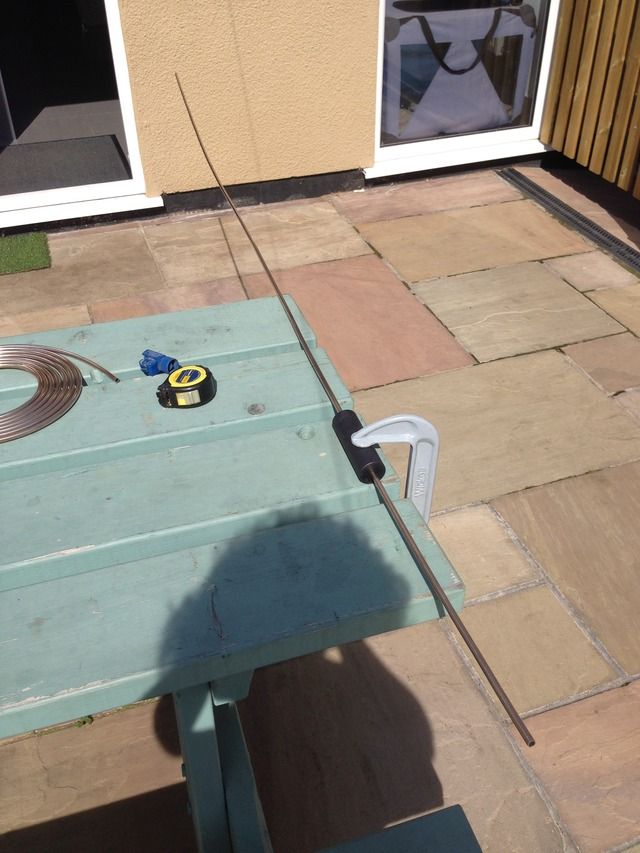
Also cut and turned to length the wishbone bush tubes, just got to bore them out to size, not sure if my little lathe will cope, might have to
upgrade!

Rosco86 - 30/10/14 at 07:35 PM
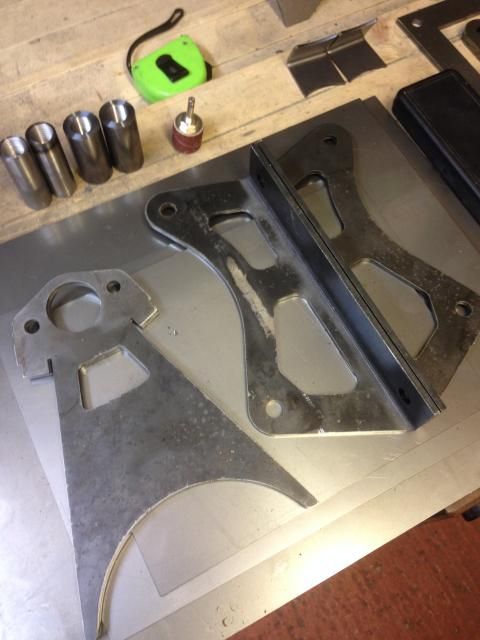
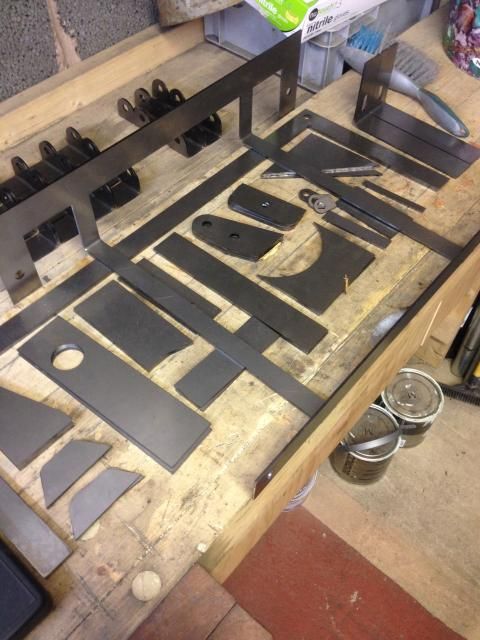
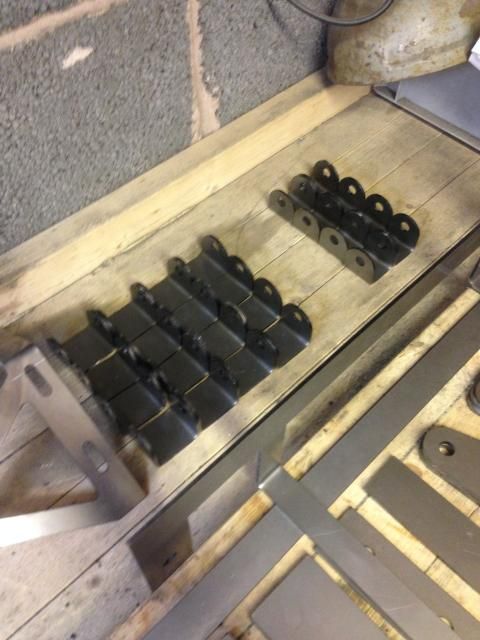
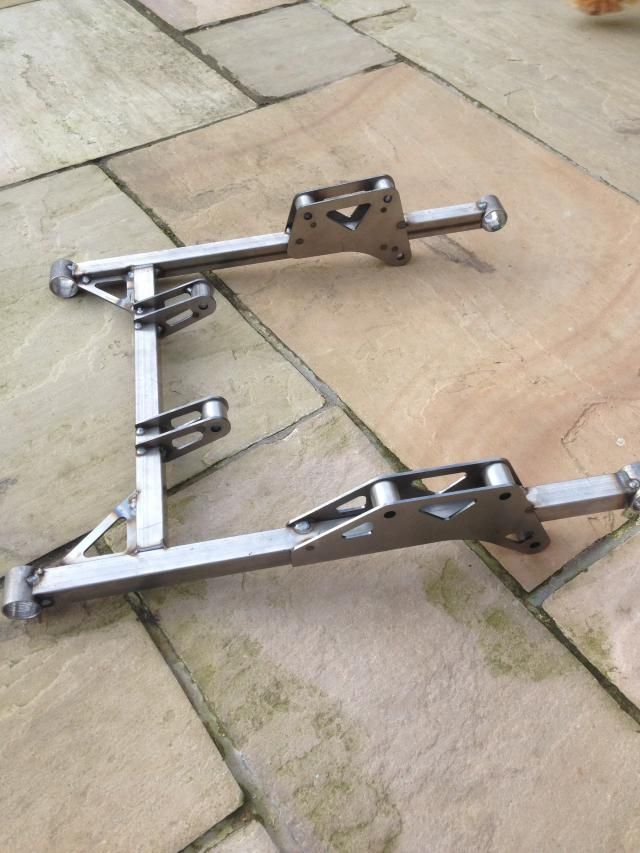
Some more progress ready for a busy weekend
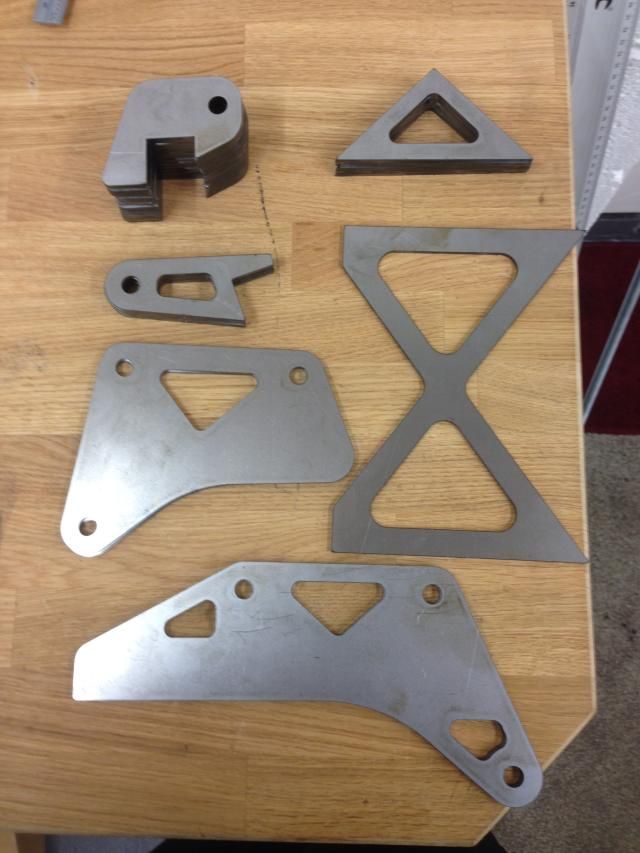
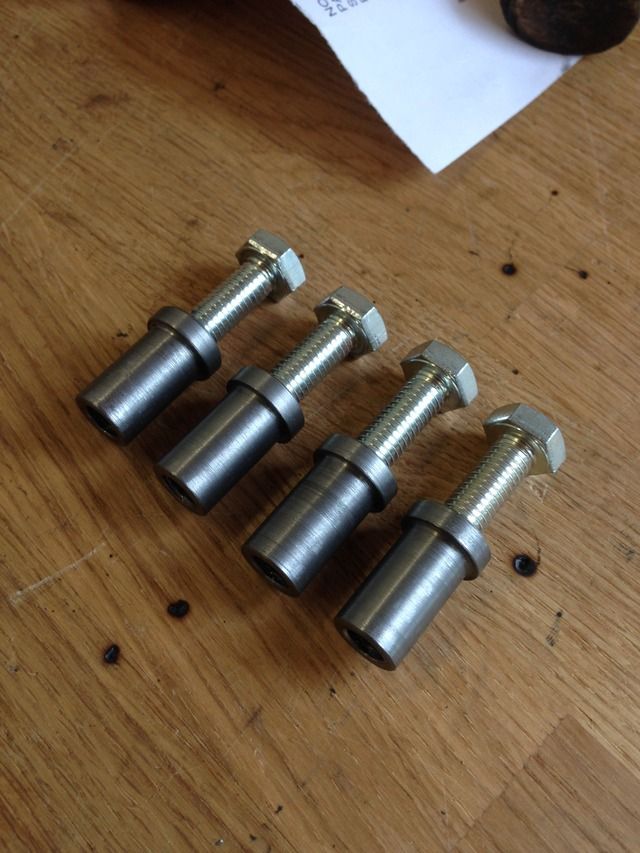
Made my wishbone end threaded tubes and got my laser cutting back, also I got the sheets cut out for the wishbones jigs so there nice and square

Digimon - 31/10/14 at 11:13 AM
Brilliant post so far Rosco, keep it up 
Rosco86 - 2/11/14 at 06:05 PM
We had another good weekend, my dad help too so got a bit done
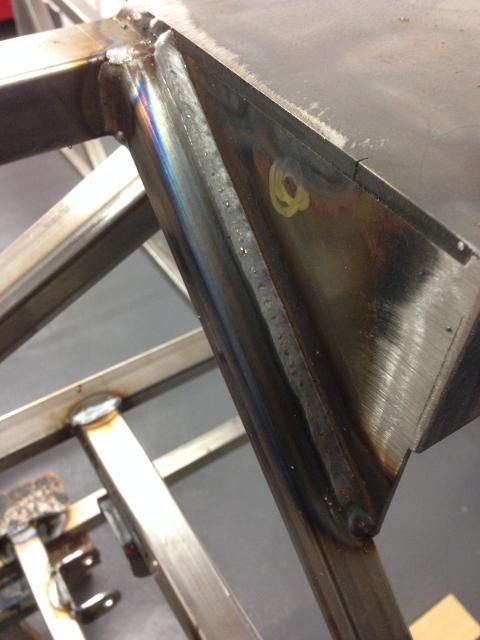
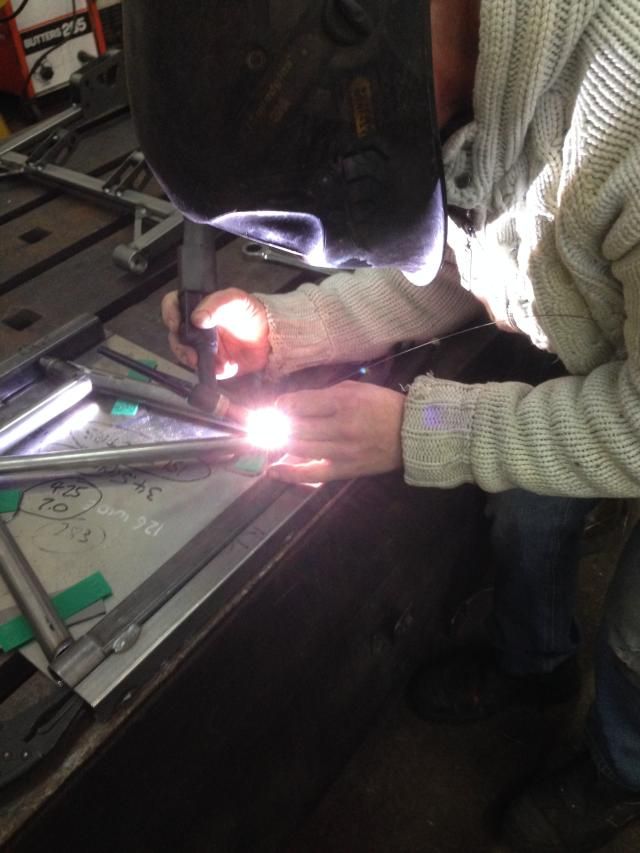
Started off welding up the shock towers, my weldings ok but my mate who's a pro is going to weld my chassis up
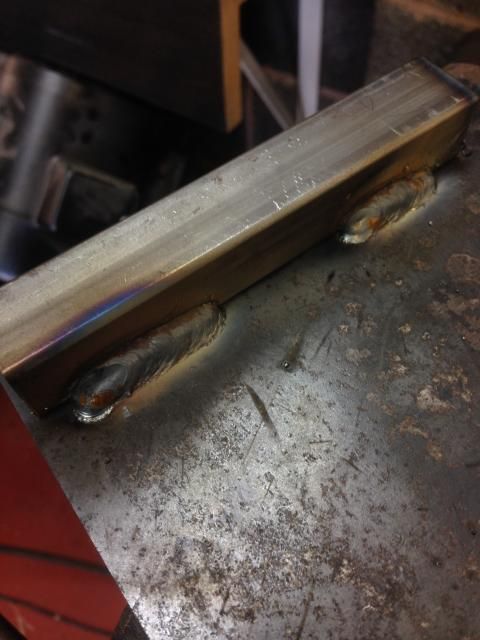
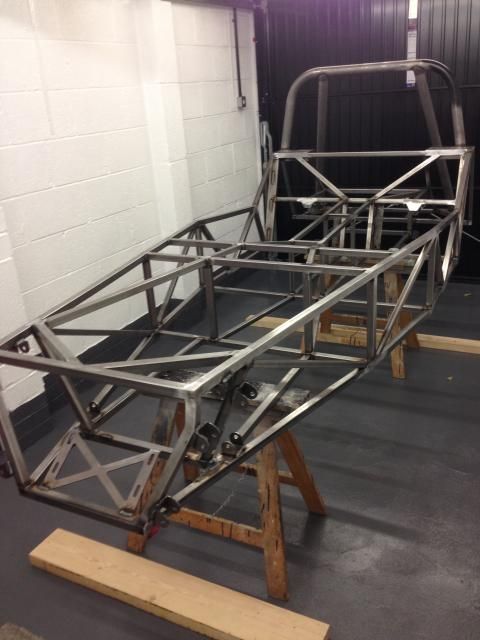
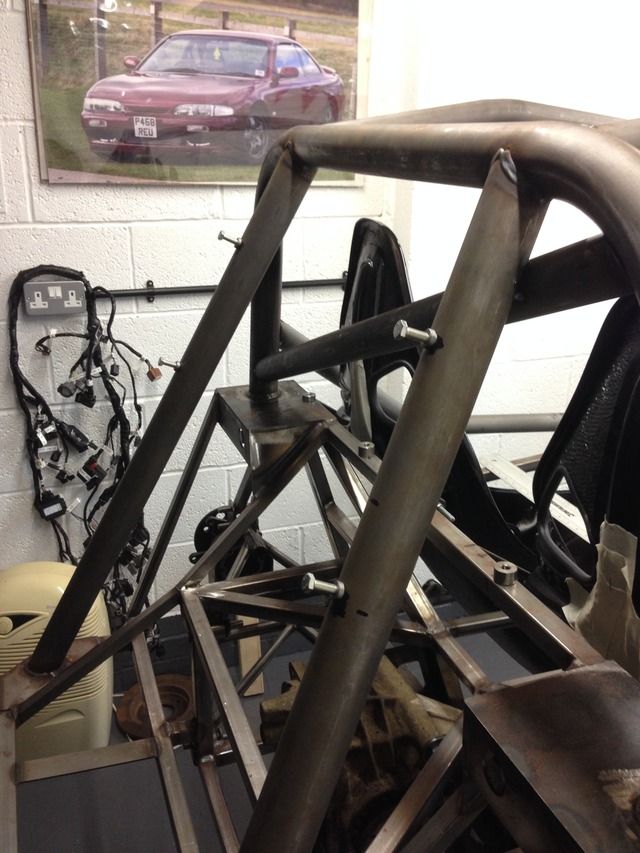
Then tacked the roll bar on
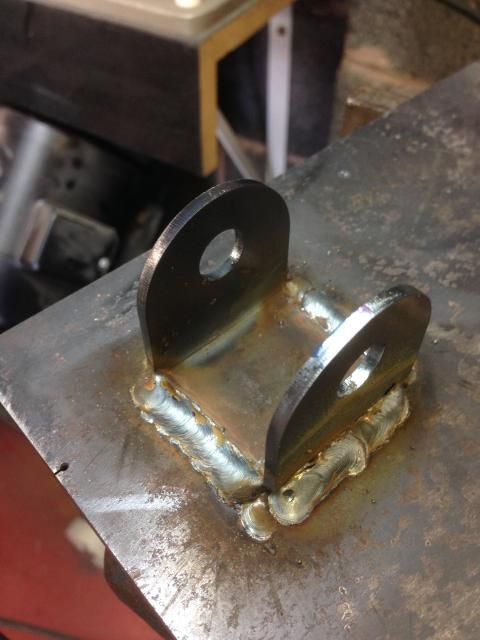
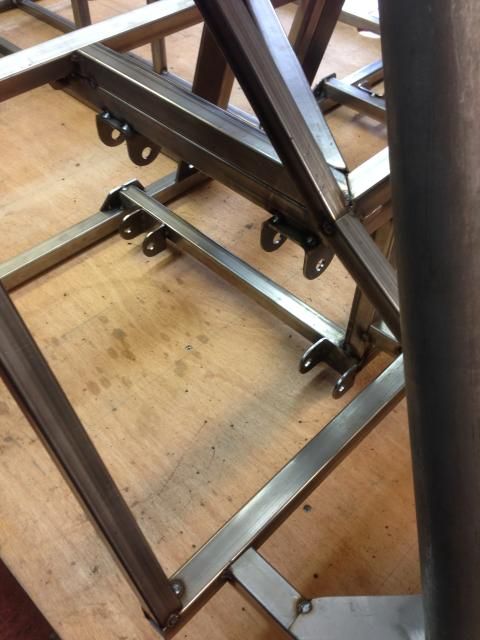
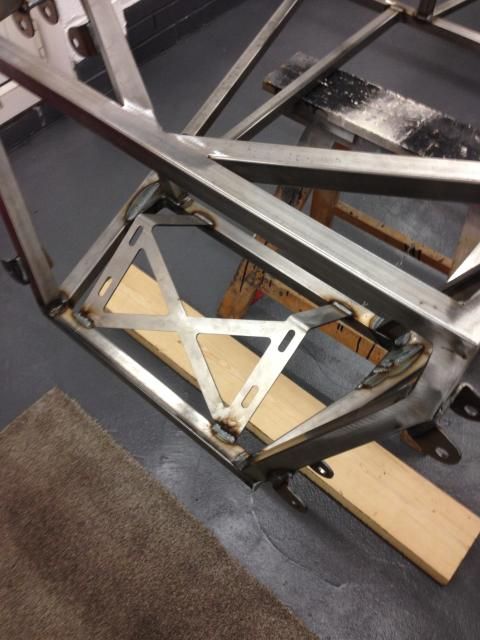
Then the diff mounts
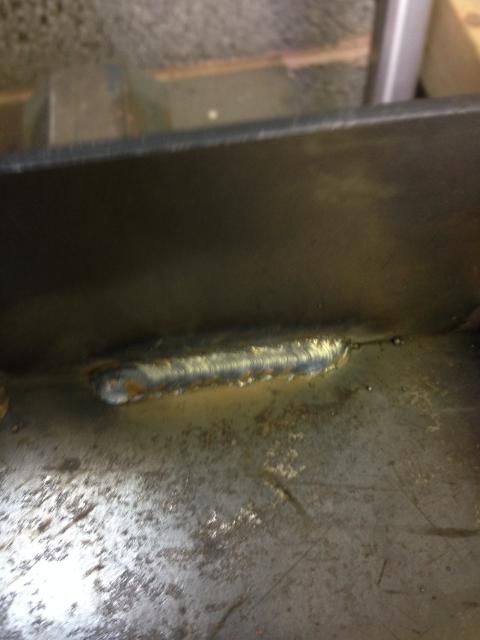
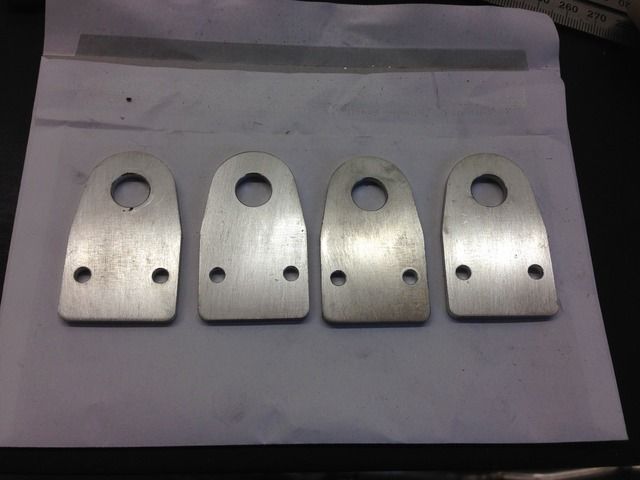
Then made some foot plates for the rear stays
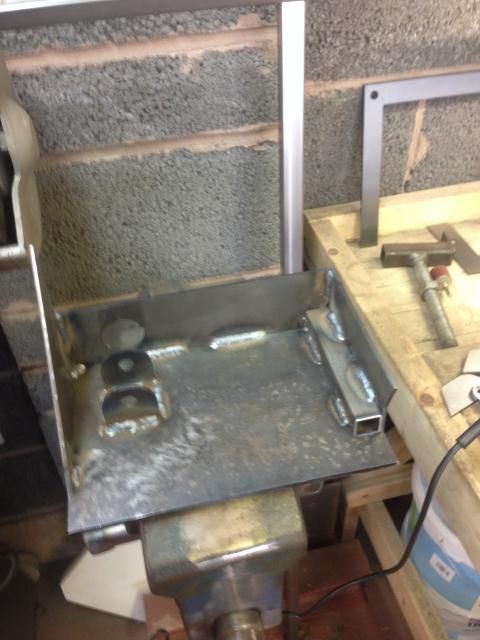
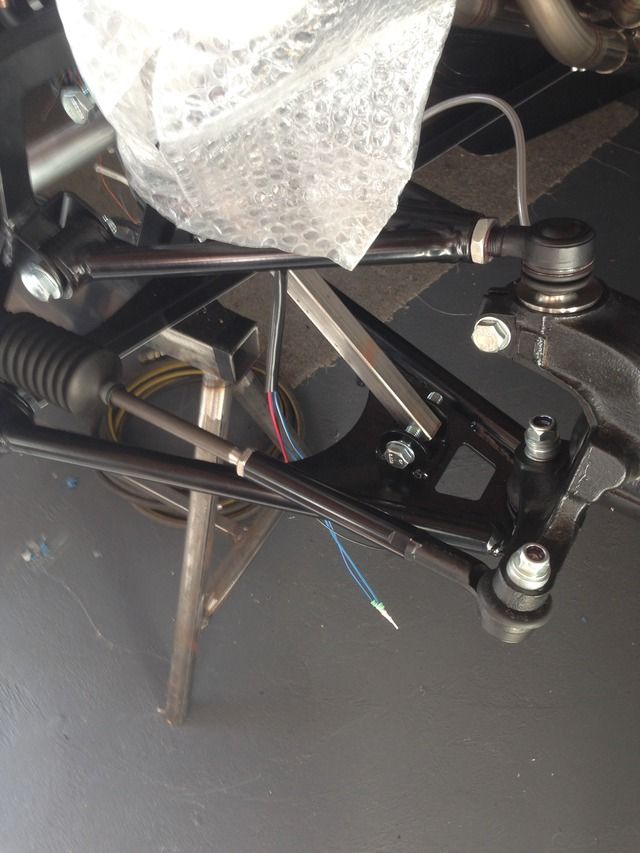
Next all the suspension brackets, which took a bit of time to make sure they were as good as they could be, we tweaked the legs of the front frame out
to close the gap between the brackets so no packing was needed
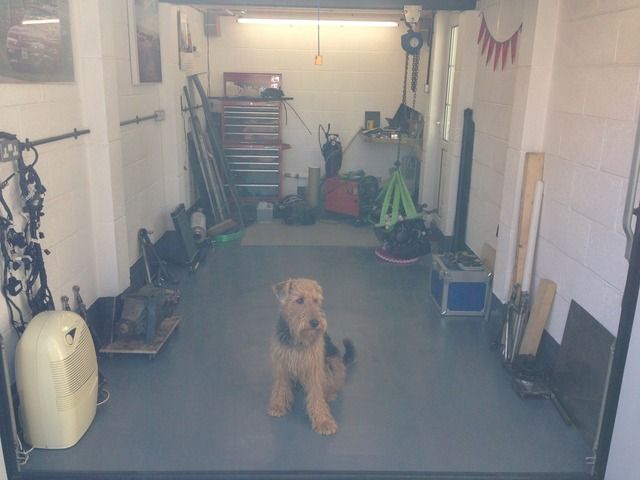
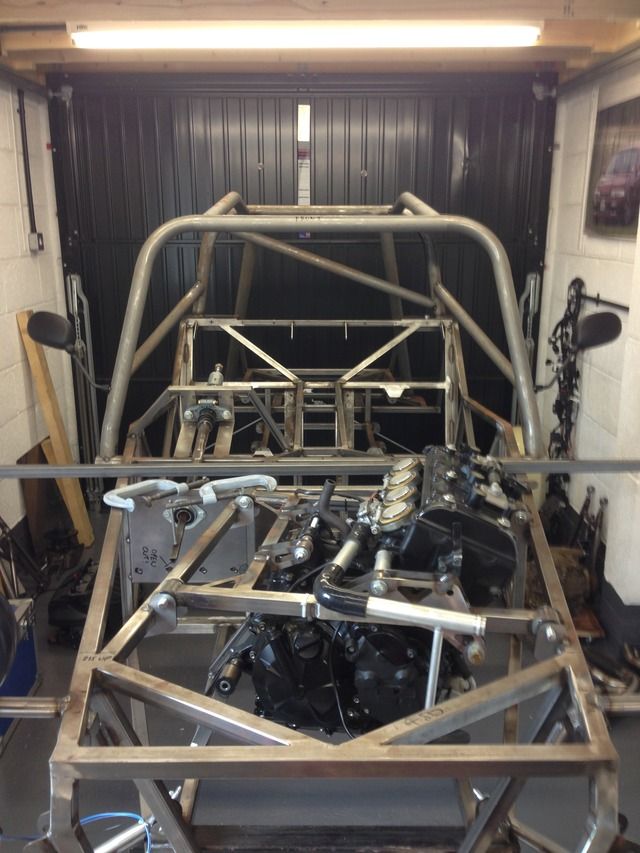
Then took it from my workshop into my garage ready to go for welding next week
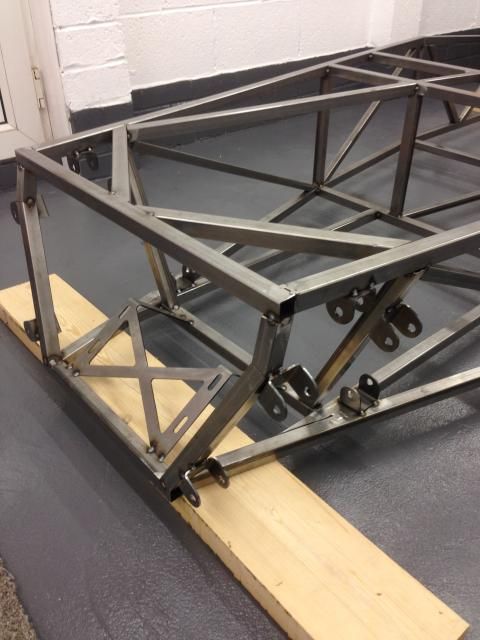
That's that, got the workshop tied out so we could move again as it was getting a bit tight with the chassis in there,
Then just cut the tube up ready for the wishbones
Thanks for looking!
Rosco86 - 9/11/14 at 07:31 PM
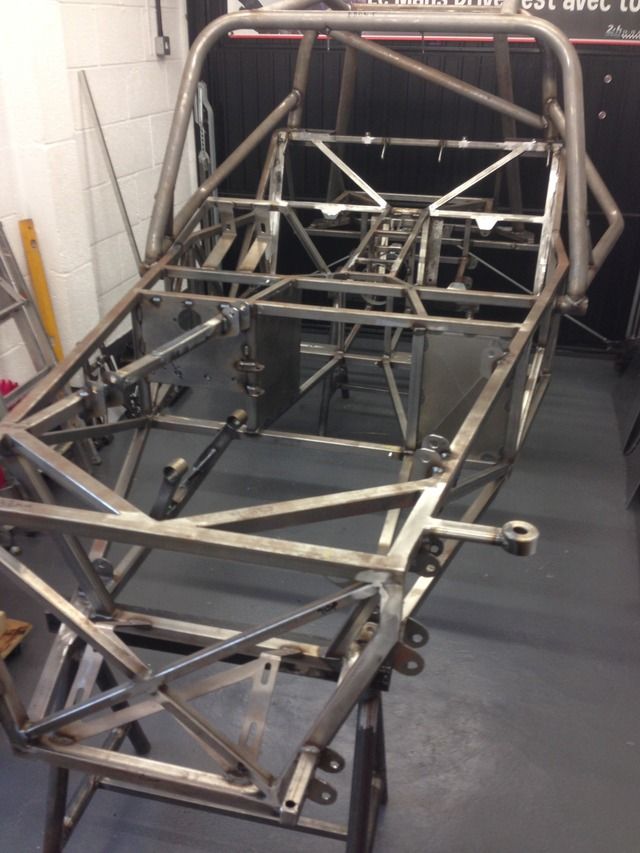
Got my chassis welded up this week
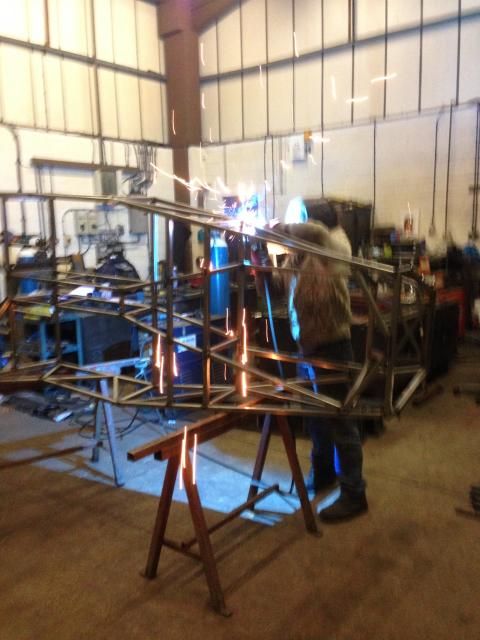
Sorry about the photo quality
Also I got my hubs back from the blasters so I can get them painted and built up
That's about it for this weekend
big_wasa - 9/11/14 at 07:45 PM
Nice work
Digimon - 18/11/14 at 10:31 AM
Any updates Rosco?
Rosco86 - 18/11/14 at 09:39 PM
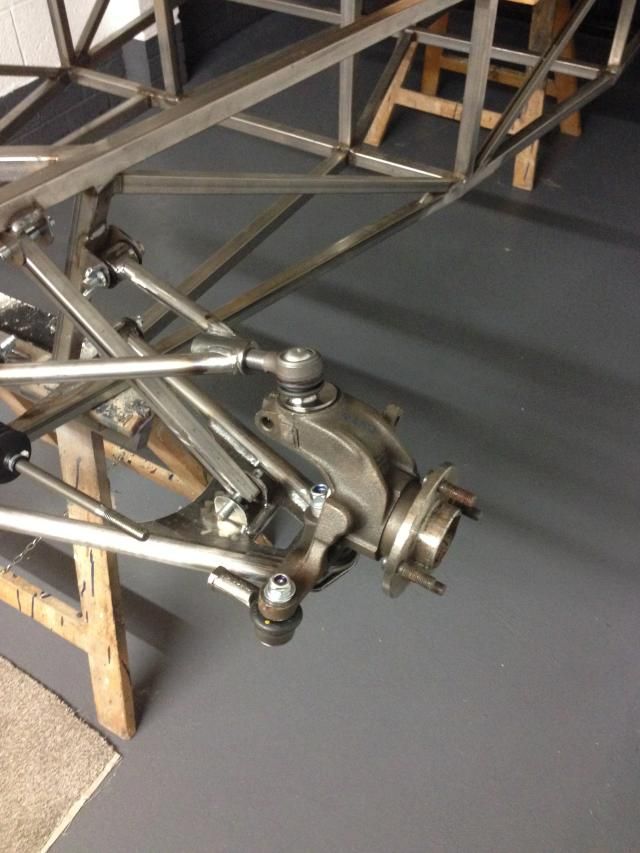
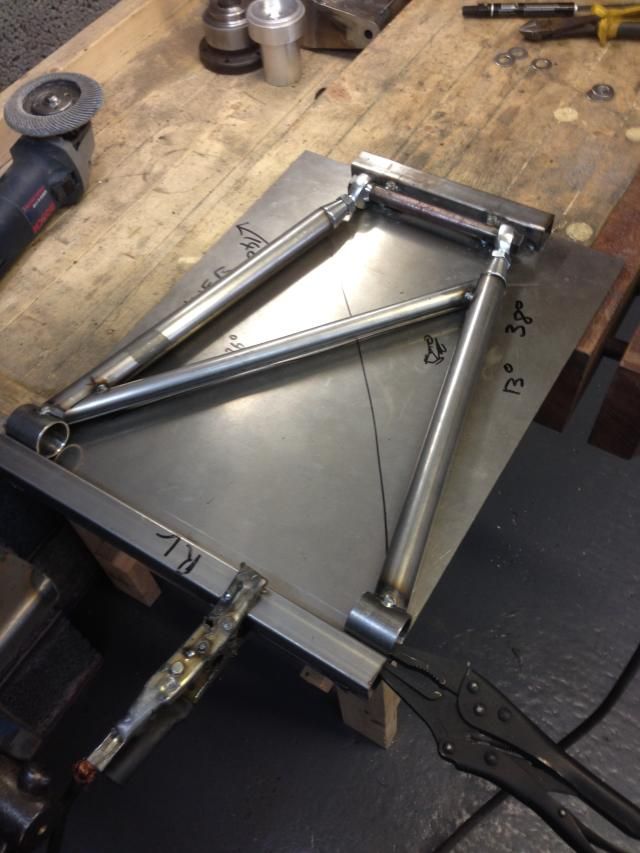
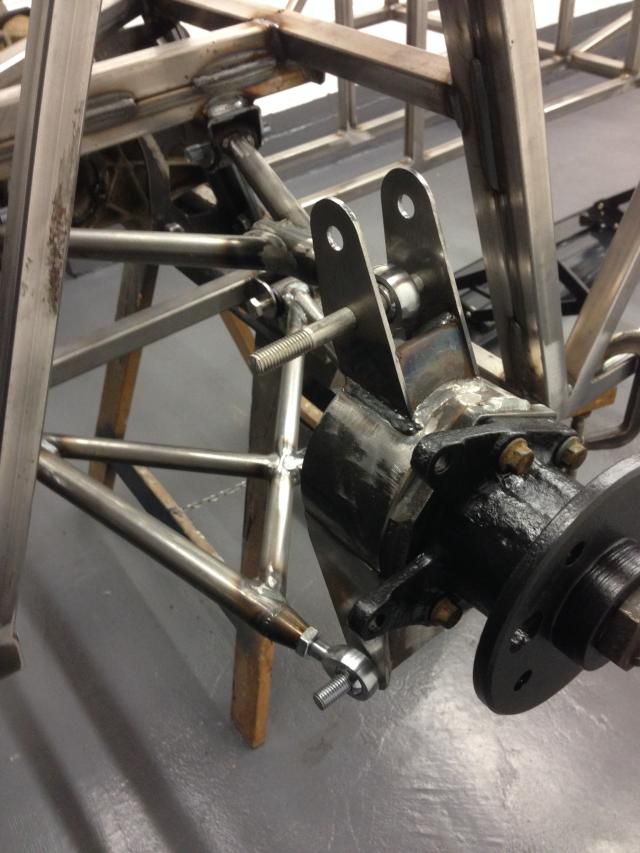
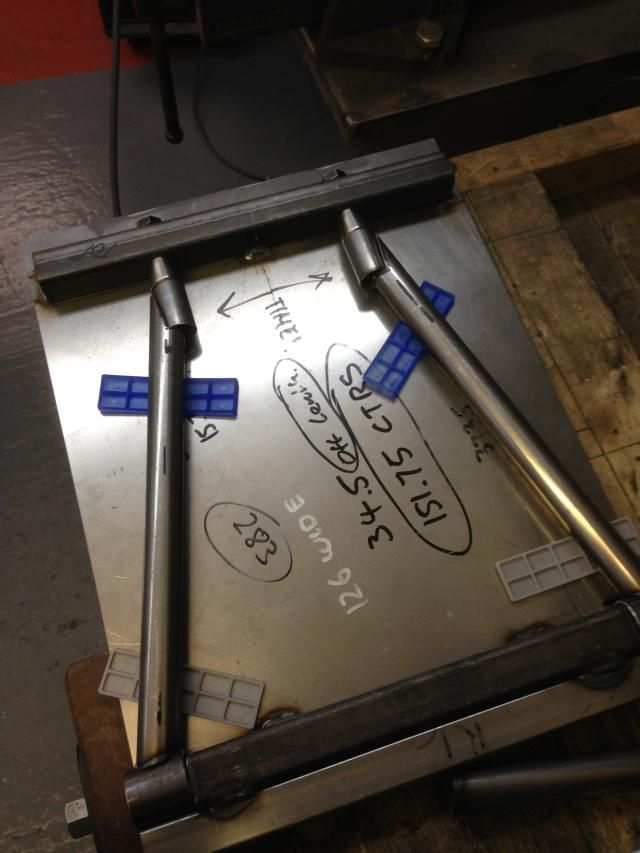
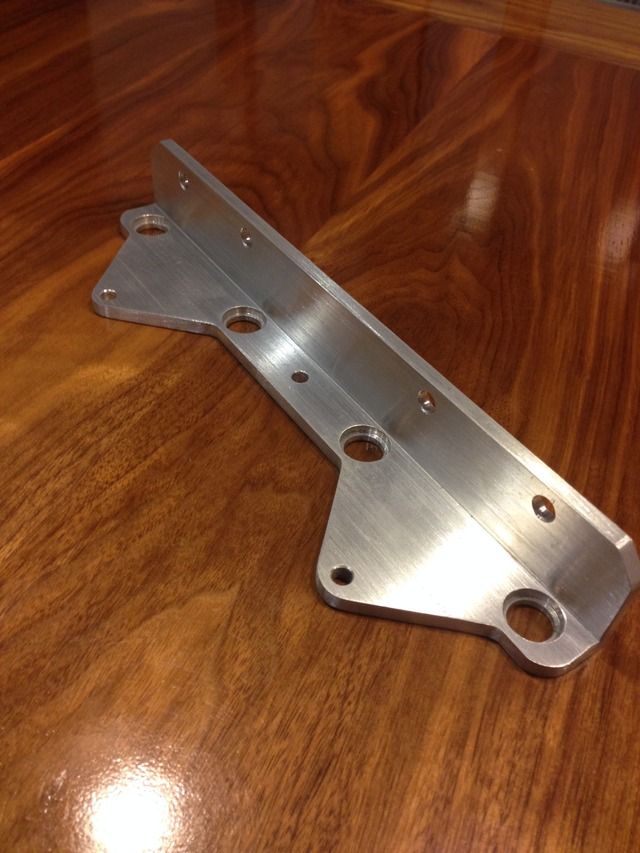
Not so much progress as as I would of liked but never the less, I've made all my wishbone jigs and made a start on them but got side tracked with
the rear uprights

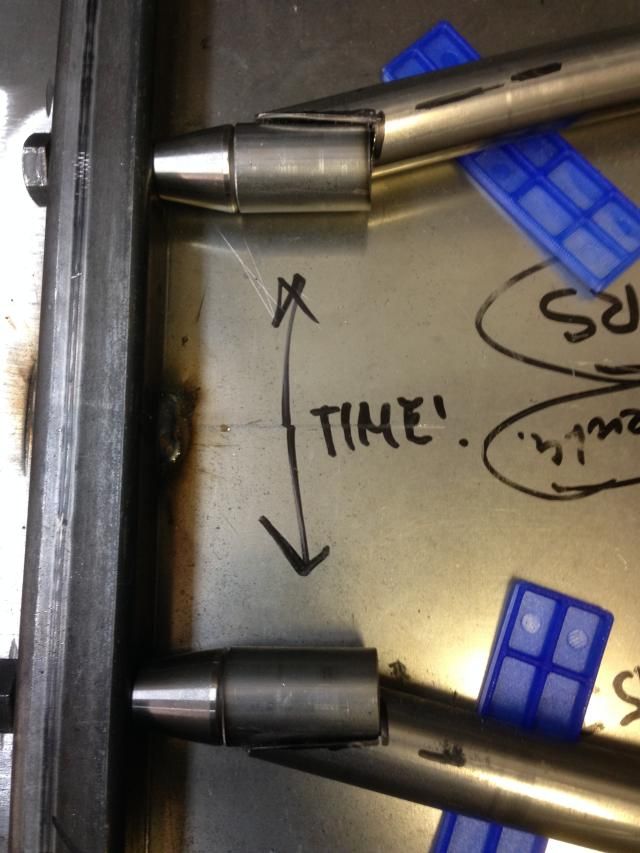
Added a bit to the jig to help position the tube and side plates
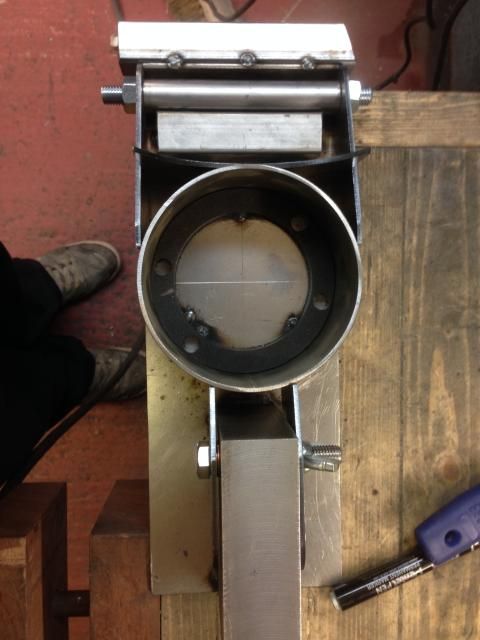
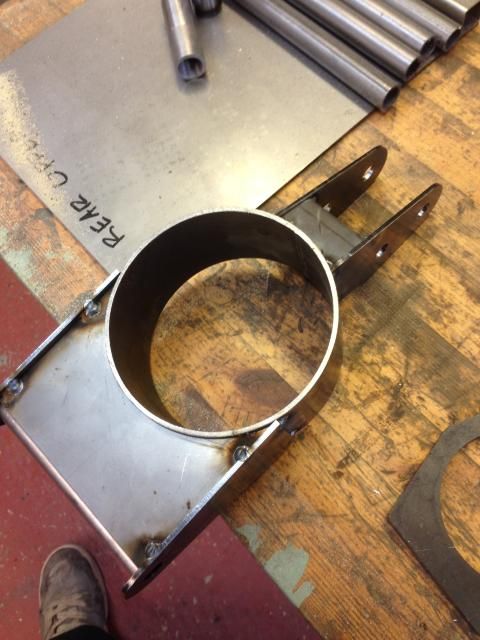
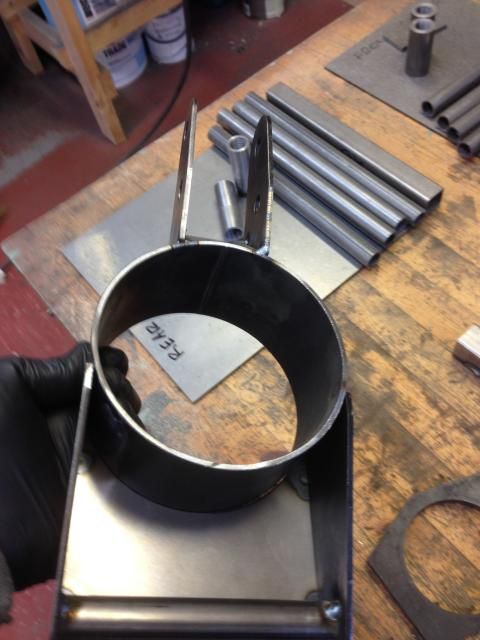
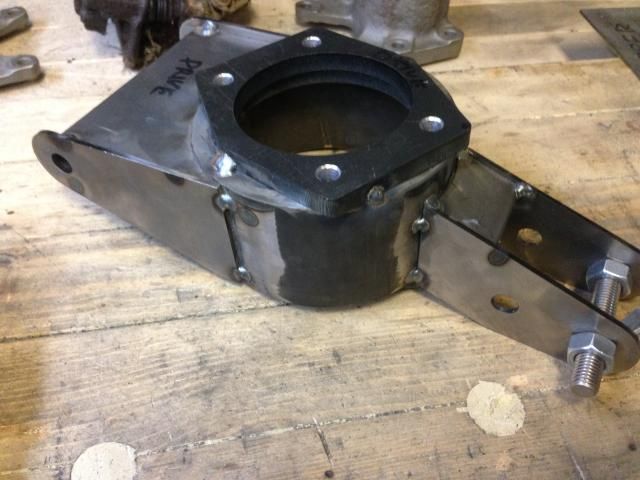
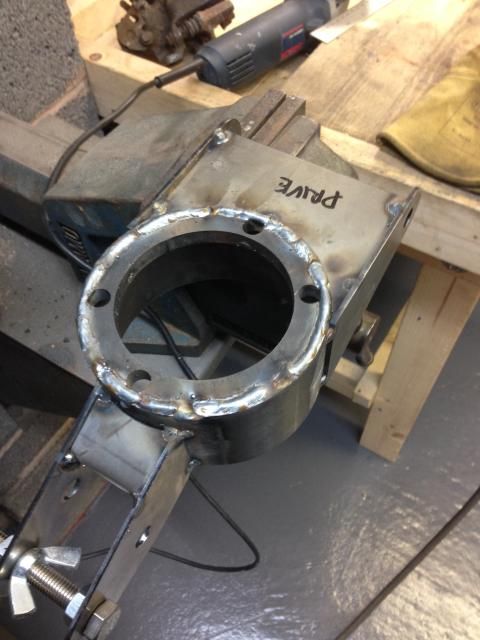
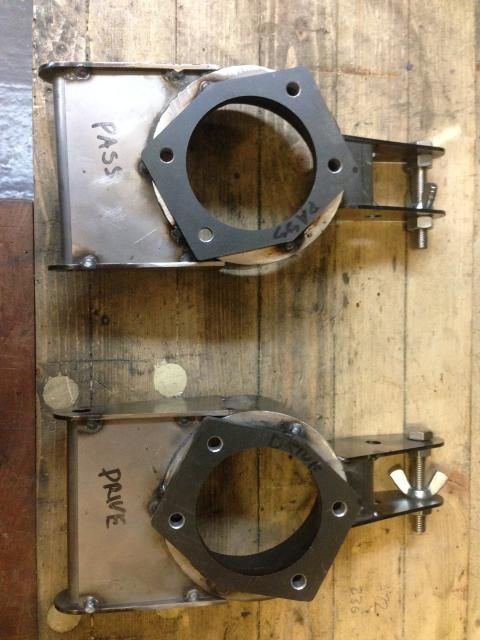
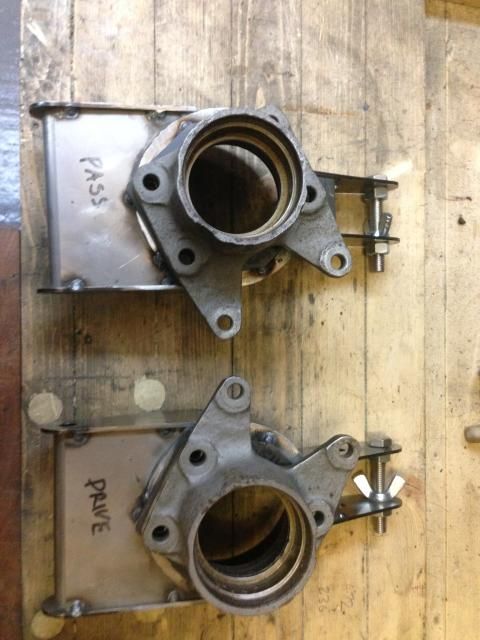

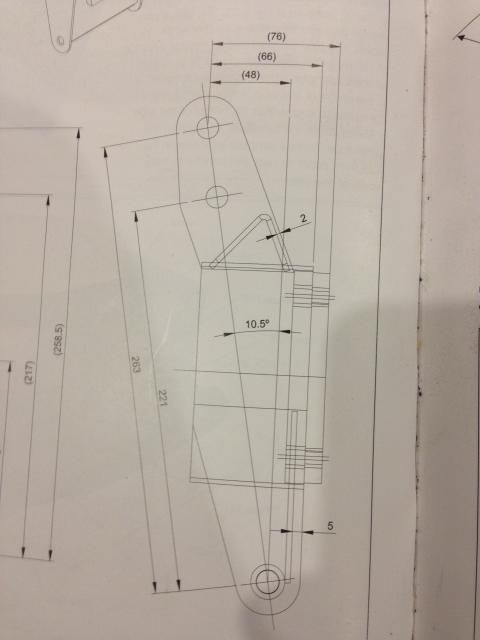
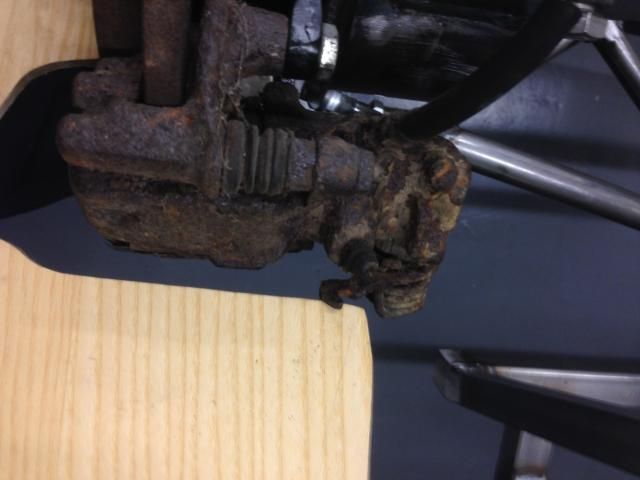
I've rotated the front plate as from what I can work out it should make the handbrake cable on the rear discs fit better,
Does it look right to everyone?
Also I think the 66mm in the drawing below should be 70mm, I've posted a thread here if anyone can help
http://www.haynes.co.uk/forums/showthread.php?p=99211#post99211
[Edited on 18/11/14 by Rosco86]
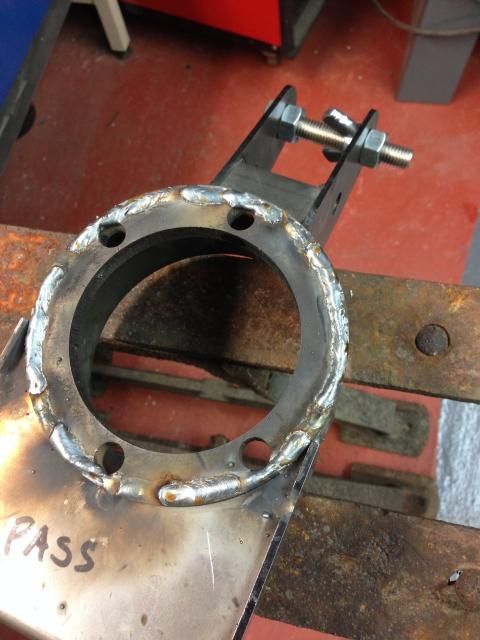
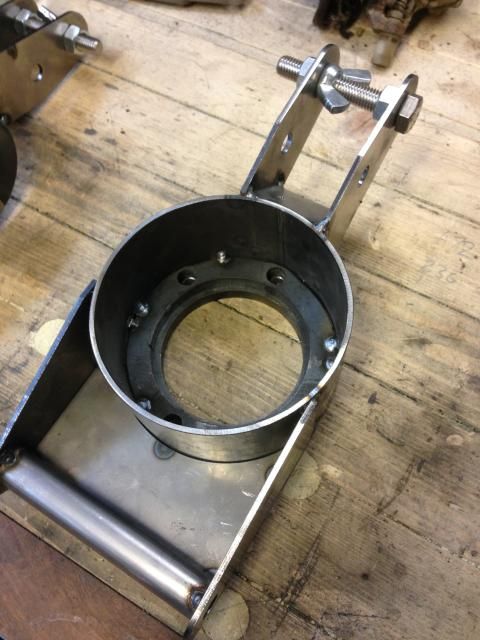
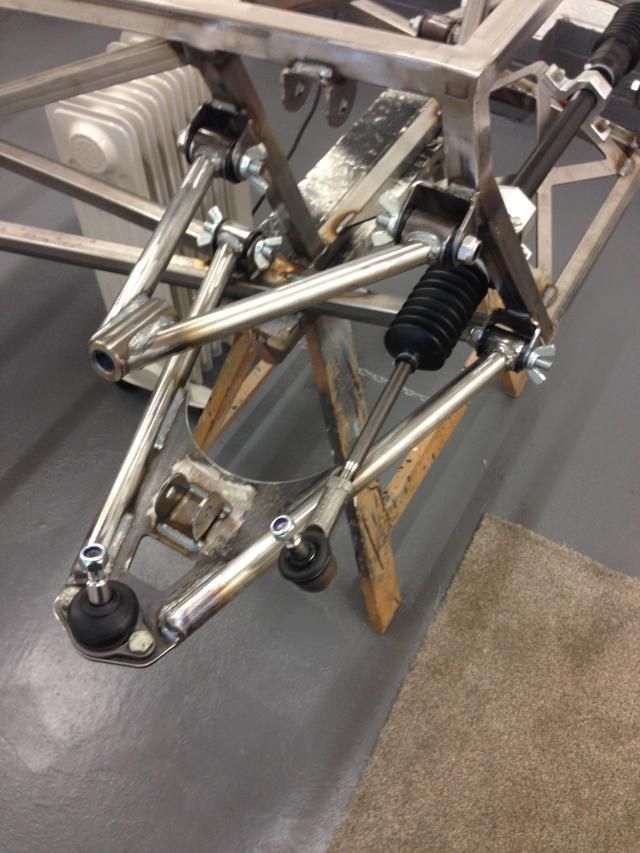
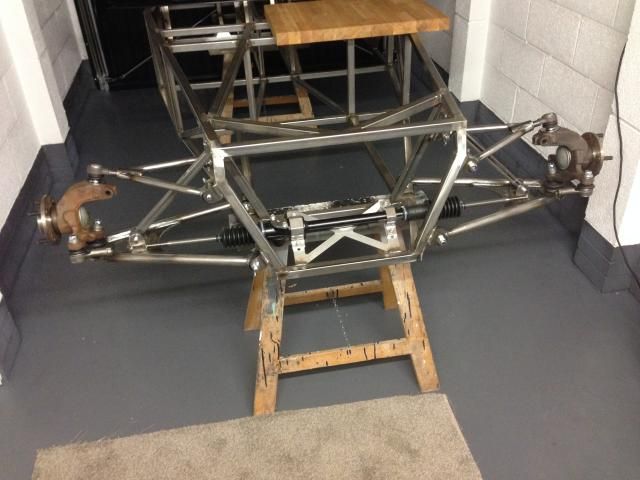
Rosco86 - 7/12/14 at 06:05 PM
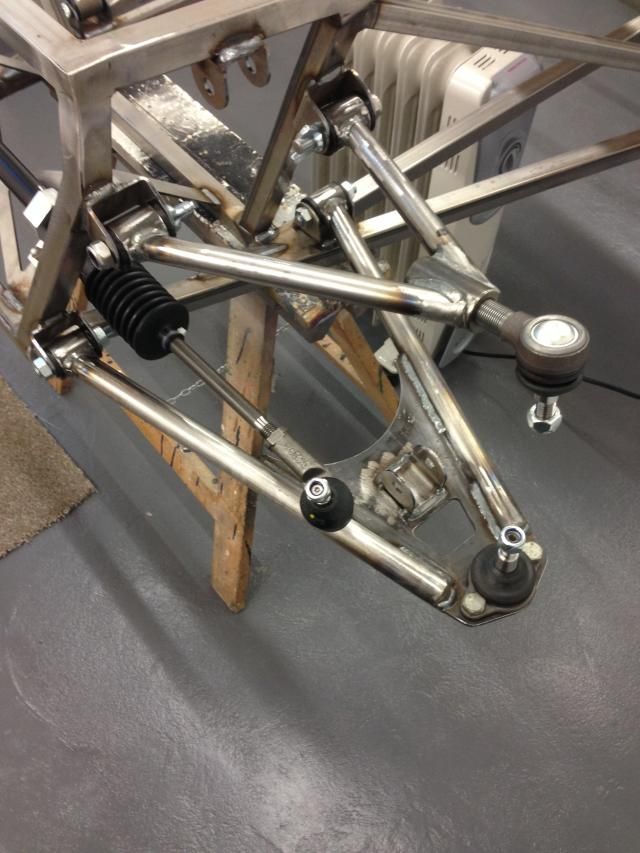
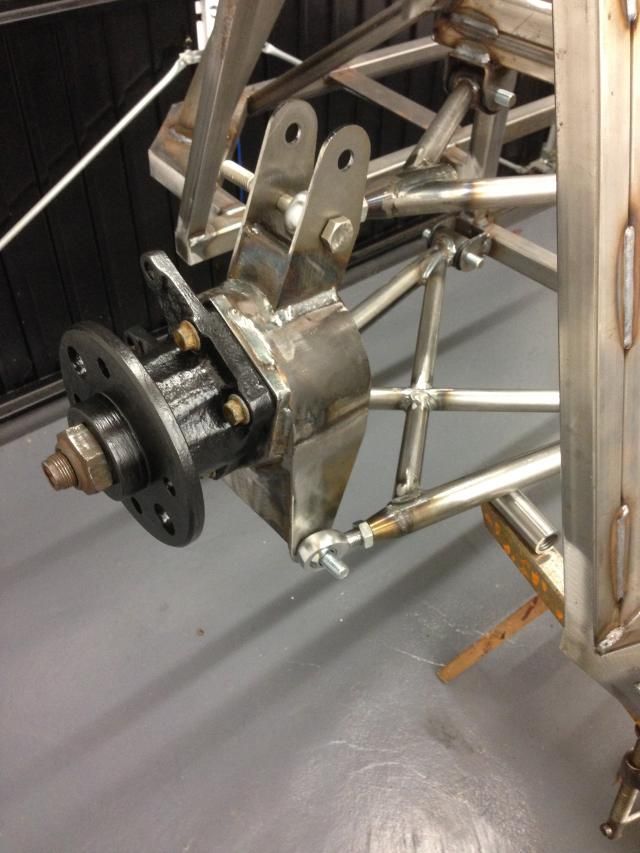
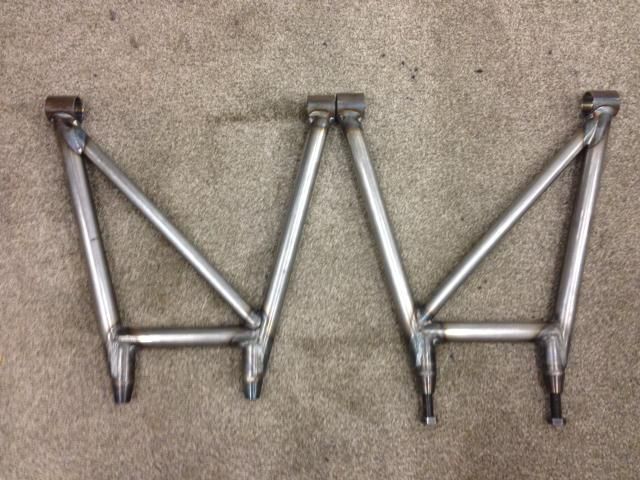
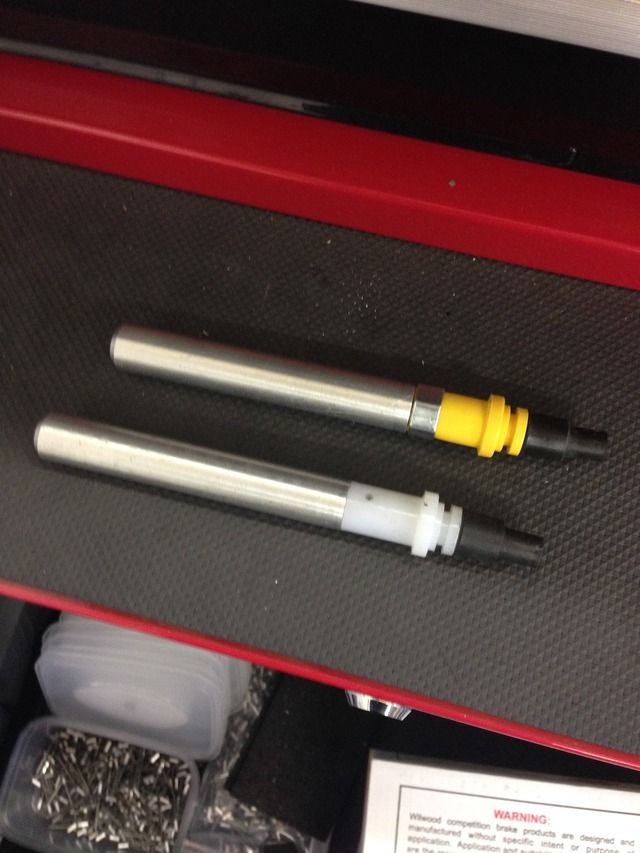
Bit of an update, got my rear hubs fully welded, and made my front wishbones, just waiting on my mushrooms for the front so I can fit my hubs
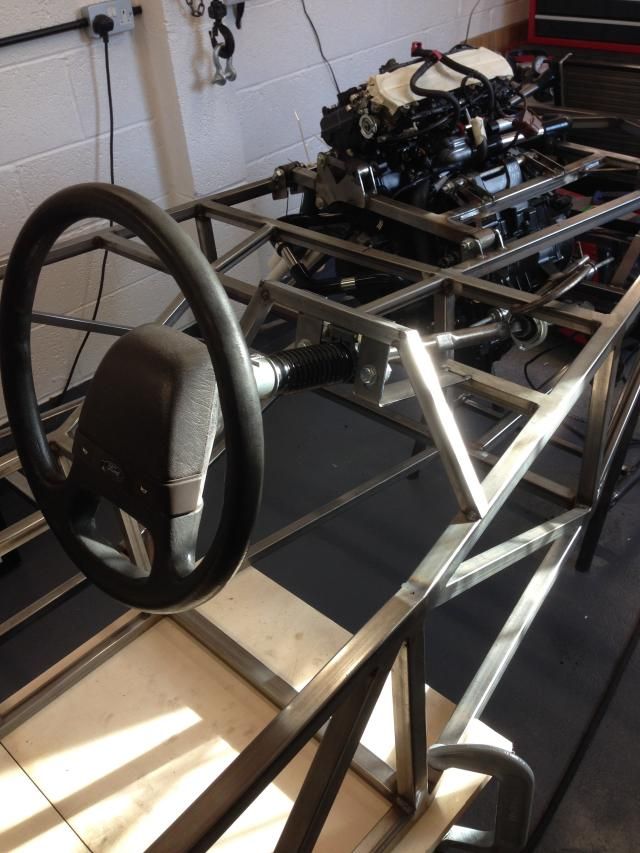
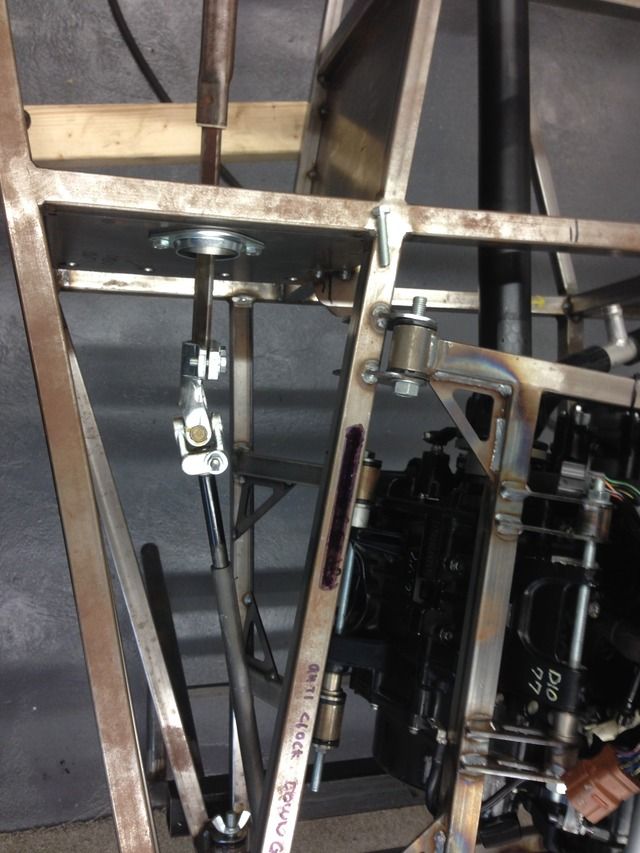
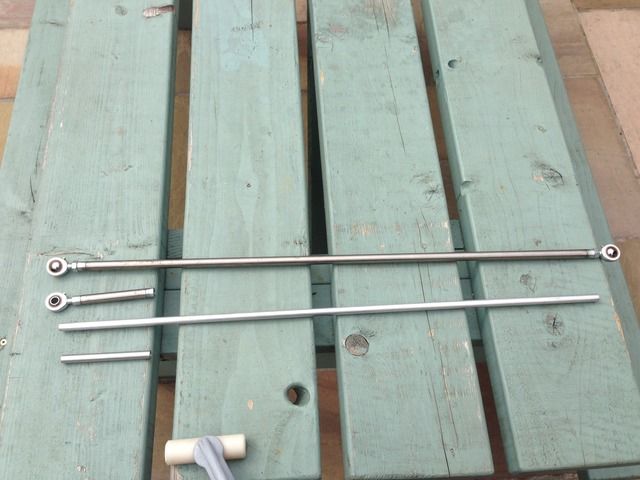
Oh and got my rack and got it fitted, need some steering extensions now
Also I'm after a column if anyone's got one?
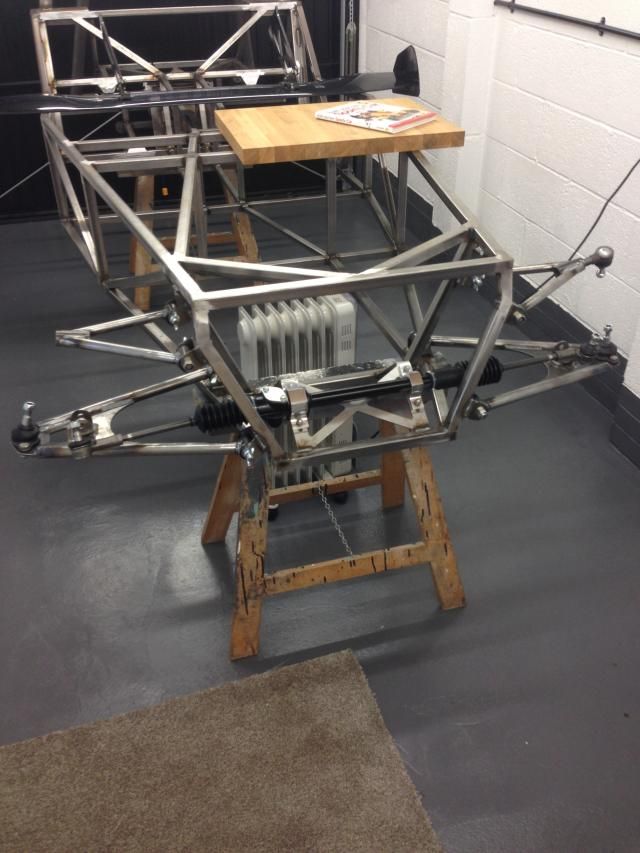
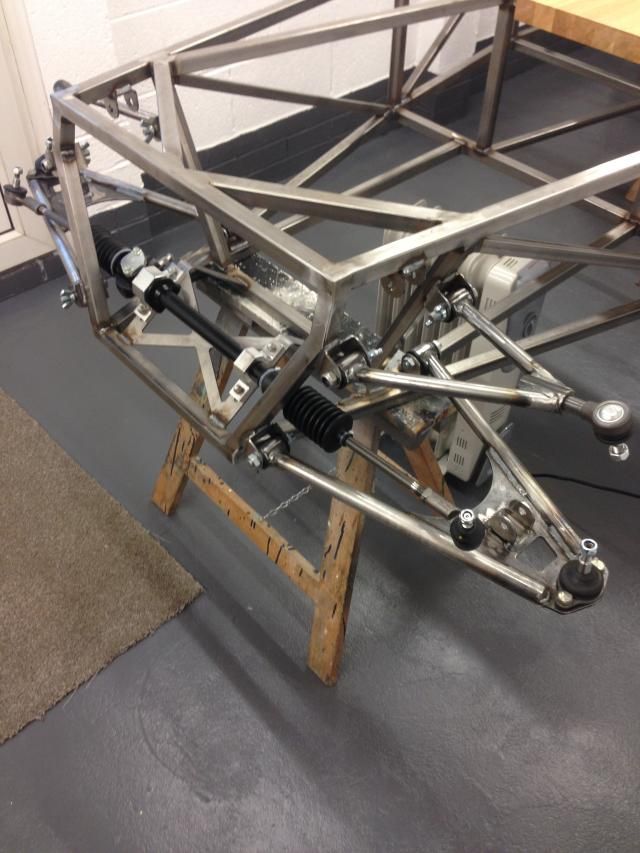
Onto the rears next, hopefully get some wheels on it before christmas
mark chandler - 7/12/14 at 07:27 PM
Great looking build, such a tidy workshop !
Rear roll bar stays, in the blue book there is a minimum angle that these must meet, be worth checking this angle is met.
With a bike engine all you should need is the hoop and stays due to engine size (depends on cc), however you would be wise to add a diagonal at this
point in the build, you must also be cognisant of the height rule when setting out your seat mountings, lower is of course better so mock up a nose
cone then stretch a piece of string.
Regards Mark
Rosco86 - 7/12/14 at 08:08 PM
quote:
Originally posted by mark chandler
Great looking build, such a tidy workshop !
Rear roll bar stays, in the blue book there is a minimum angle that these must meet, be worth checking this angle is met.
With a bike engine all you should need is the hoop and stays due to engine size (depends on cc), however you would be wise to add a diagonal at this
point in the build, you must also be cognisant of the height rule when setting out your seat mountings, lower is of course better so mock up a nose
cone then stretch a piece of string.
Regards Mark
Haha thanks, that's my garage, I do all my fabricating in my workshop at the bottom of my garden!
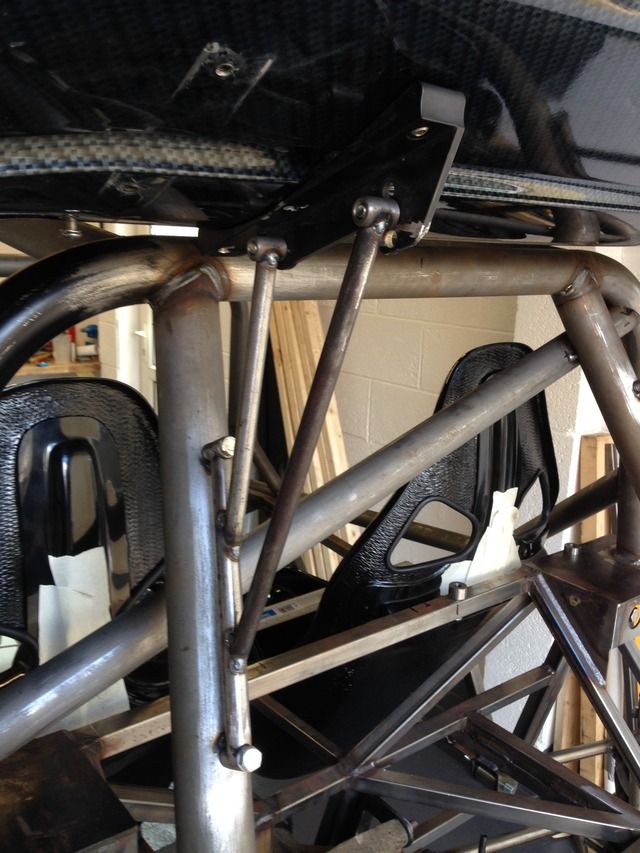
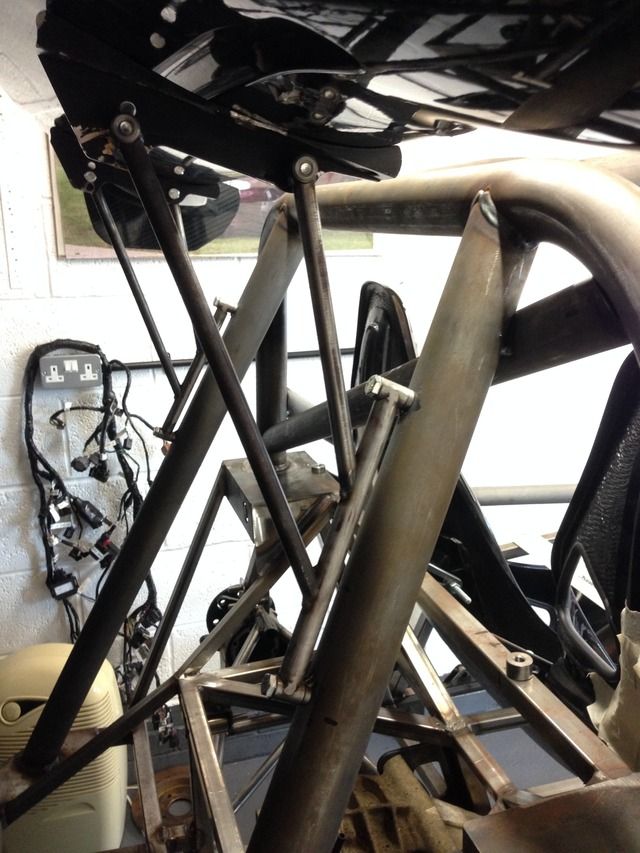
Yeah the min angle is 30deg mine are 27deg, but they are all the way back on the chassis so a bit rubbish really, I'm not building it to compete,
but would it fail do you think?
Yeah I'm going to use grp seats and they will be right on the floor, I want a rear hoop diagonal but the haynes book says to have a horizontal
with harness mounts in, so I'm waiting to get my seats to see if my harness will be ok in the top of the chassis, then I can have a diagonal
I'm going for a full cage I think, just waiting to get my scuttle before I sort the front hoop
tajgreidotu - 7/12/14 at 08:36 PM
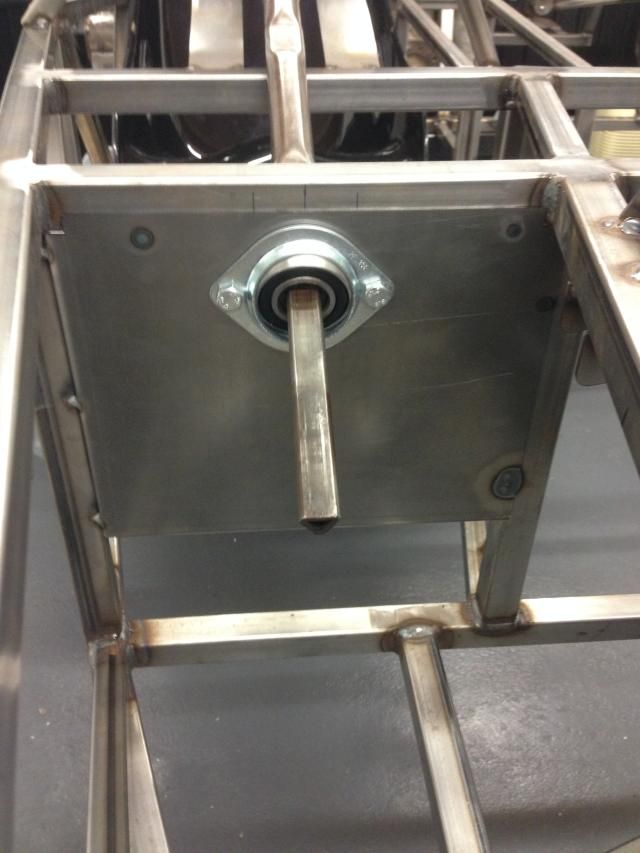
Congratulations for the clean build. I'm just 2 steps behind you, so its nice to see your progress.
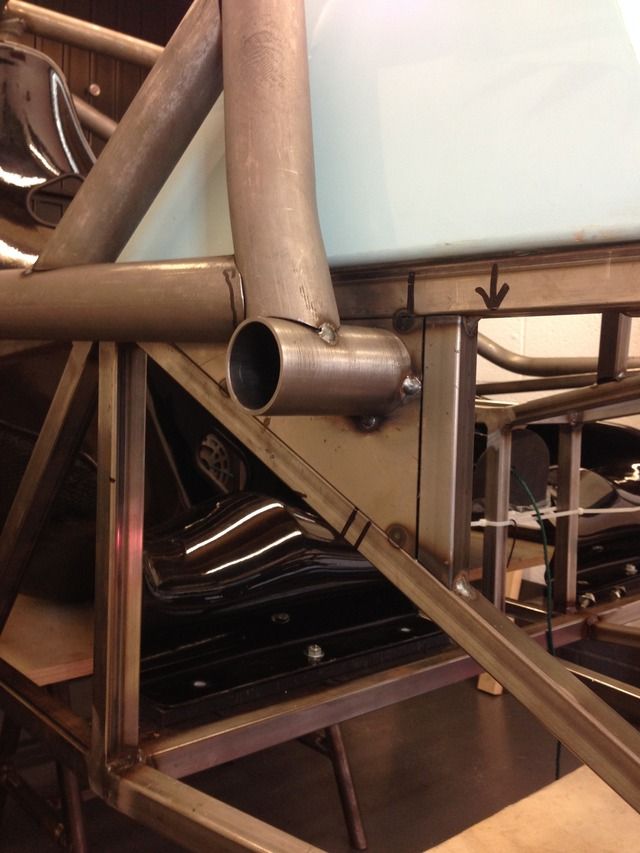
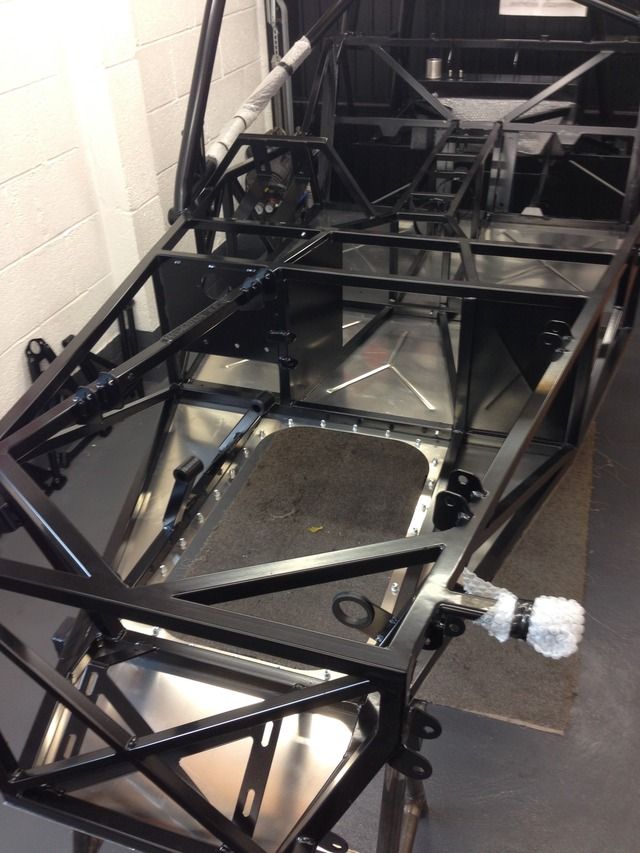
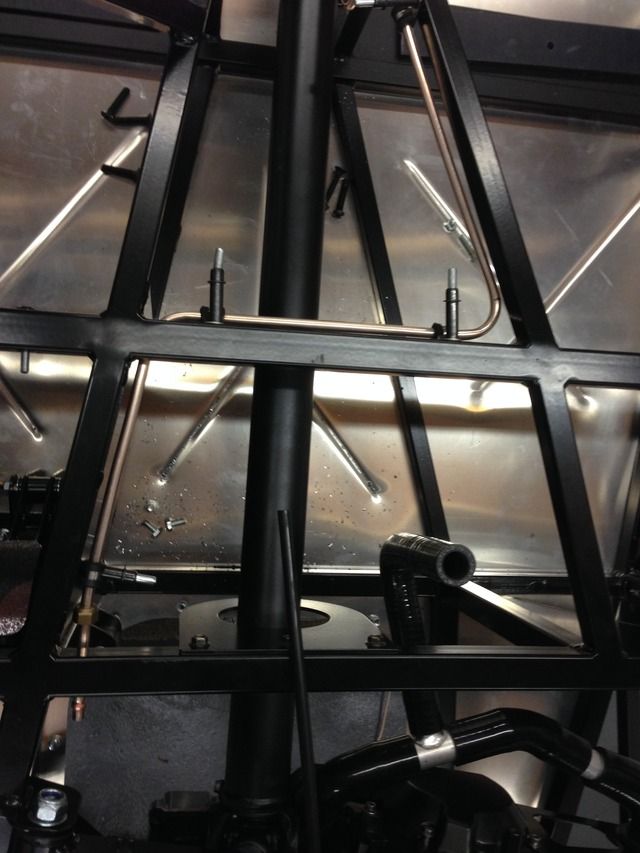
Just to clarify, in this picture the tube RS15 should go on the opposite side. Did you do it on purpose?
I forgot to weld it while doing the box, im afraid maybe is too late 
Have fun!
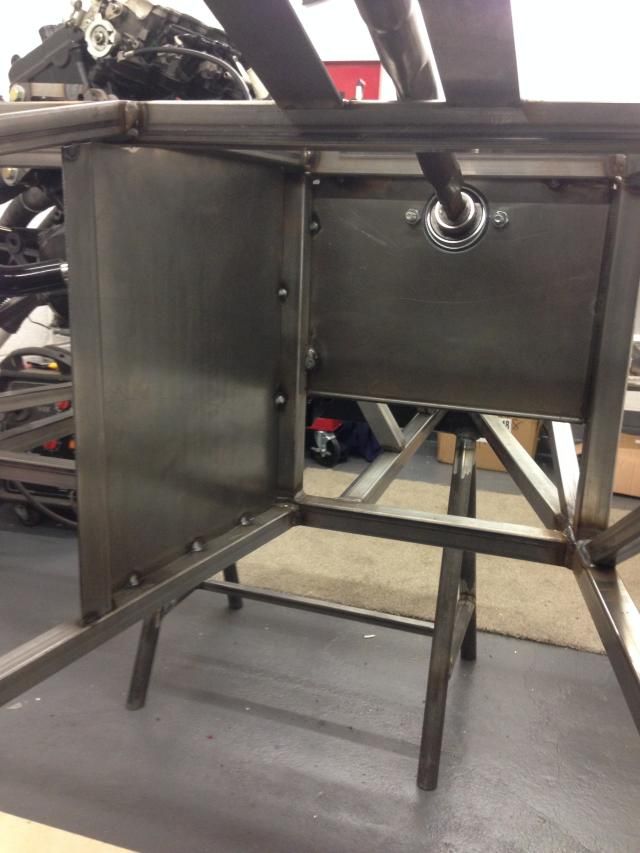
Rosco86 - 7/12/14 at 09:03 PM
Thanks, no I've done it wrong, just had to go and have a look in the book, I don't no how I managed that, I've used 5mm think plate
where the shock bracket mounts to, but I might still add another RS15 in the correct place
Well done for spotting it! Bit annoyed I've slipped up though!
mark chandler - 7/12/14 at 09:09 PM
I cannot see failing, plenty of cars are similar and do not get pulled up, mounting belts on a horizontal bar requires very short rear straps, mine
has a diagonal and the harness mounts are on the rear stays which gives a little more length.
It's best to build for as it opens options, just follow the blue book and you will be fine
Rosco86 - 7/12/14 at 09:54 PM
quote:
Originally posted by mark chandler
I cannot see failing, plenty of cars are similar and do not get pulled up, mounting belts on a horizontal bar requires very short rear straps, mine
has a diagonal and the harness mounts are on the rear stays which gives a little more length.
It's best to build for as it opens options, just follow the blue book and you will be fine
Ok that's cool then, it's a bit hard to measure the angle as they are splayed out so should be ok,
Mounting on the rear stays sounds good, do you have a picture?
Yeah I'm trying to meet msa spec, that's why I've used cds tube
Thanks for your advice too
tajgreidotu - 8/12/14 at 03:27 PM
quote:
Originally posted by Rosco86
Thanks, no I've done it wrong, just had to go and have a look in the book, I don't no how I managed that, I've used 5mm think plate
where the shock bracket mounts to, but I might still add another RS15 in the correct place
Well done for spotting it! Bit annoyed I've slipped up though!
Let me know how you fix it, ill have to do it too
nick205 - 8/12/14 at 04:16 PM
Very nice to watch it coming together.
I do like the use of wing nuts on the wishbone bolts whilst building. I made the mistake of fitting with nylon lock nuts, then making myself replace
them on final fitting.
Rosco86 - 14/12/14 at 08:33 PM
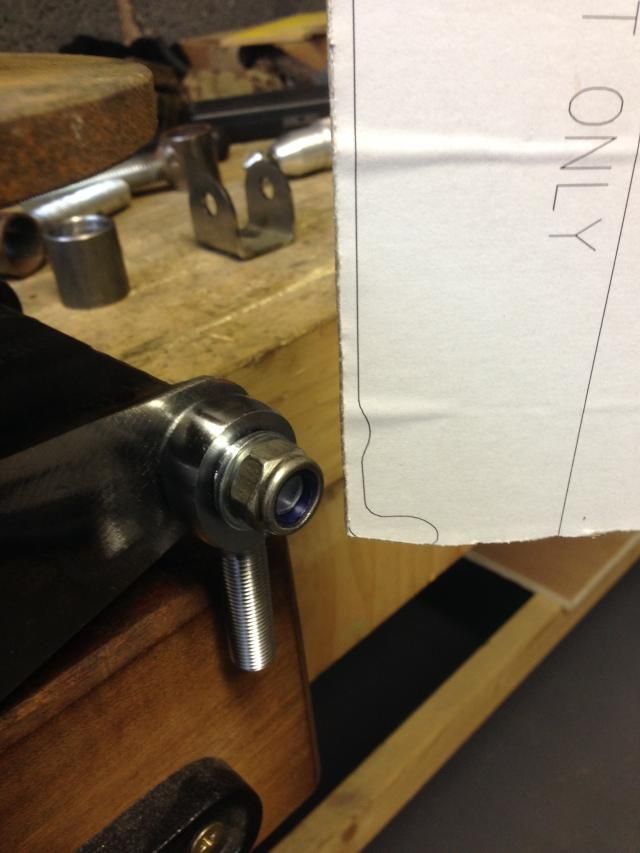
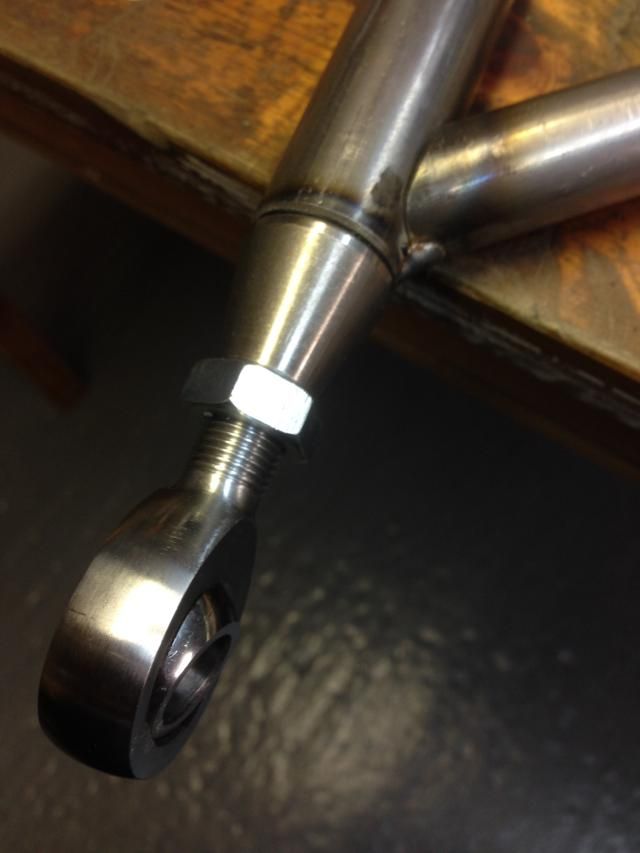
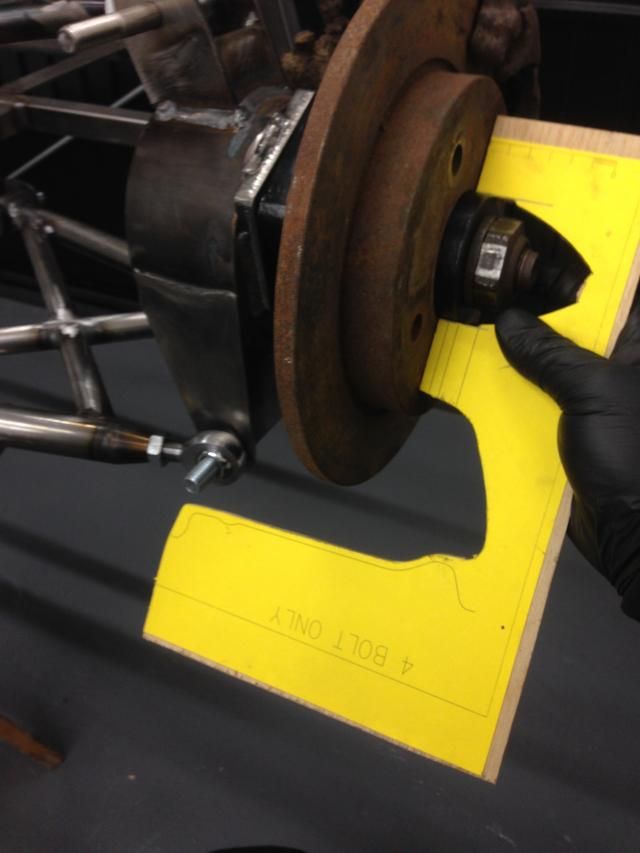
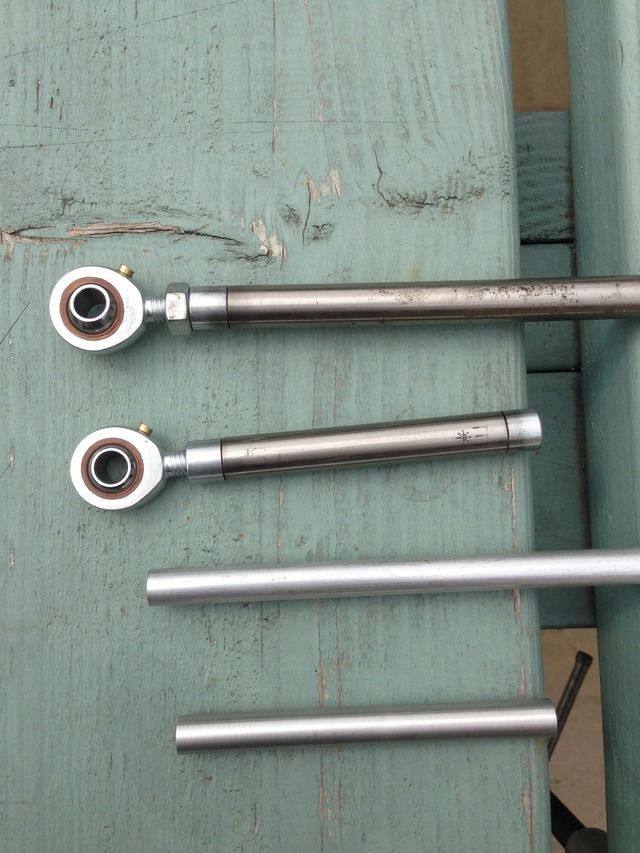
Well had a full day on the car today, got my front hubs fitted then cracked on with my rear wishbones,
I had offered up some rod ends on my rear hubs, and checked with a 13" wheel template from team dynamics, and they will fit
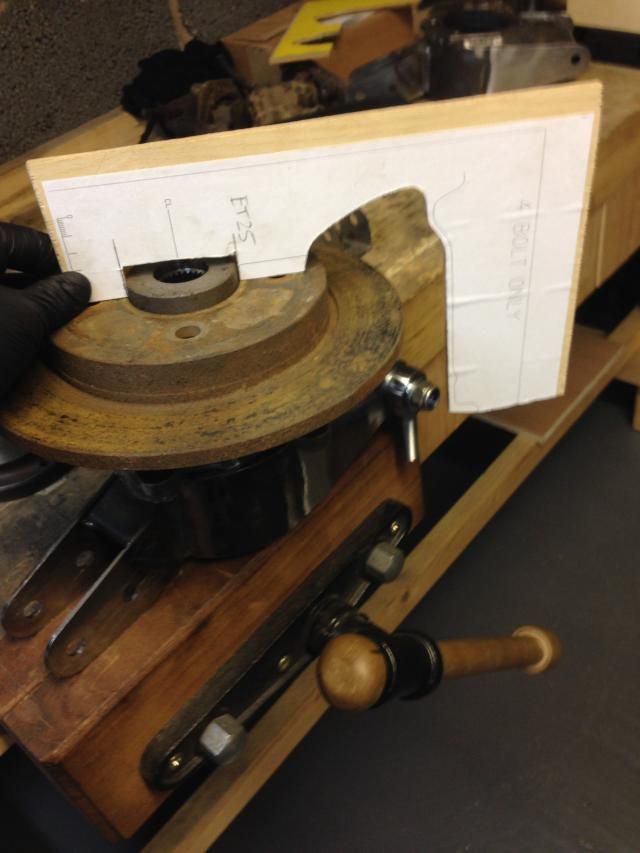

I don't no why but I have the latest book with the new 10mm longer wishbones but the jig drawings look like they haven't been changed, so I
had made my jigs to that, then when I had made a wishbone and checked the bush centres they were 10mm short, to say I was unhappy was an
understatement, I can't believe there's nothing on the amendments page just to give you a heads up, I think i will get away with it as I
have wound my rod ends out 5mm and I might skim 5mm off the matting face on the stub axle or put a spacer behind the hub, so a std driveshaft fits
The rod ends are still in the tube insert a full 1" and they are only threaded that much so that's ok, just didn't really want them
wound out to far


Just got to sort some spaces and washers out for either side of the rod ends
rdodger - 15/12/14 at 08:19 PM
Lovely build. Some really nice fabrication.
What rod ends are you using? M12 or 1/2"?
Rosco86 - 15/12/14 at 08:27 PM
quote:
Originally posted by rdodger
Lovely build. Some really nice fabrication.
What rod ends are you using? M12 or 1/2"?
1/2" just that bit bigger, seems the size most people use from my searches
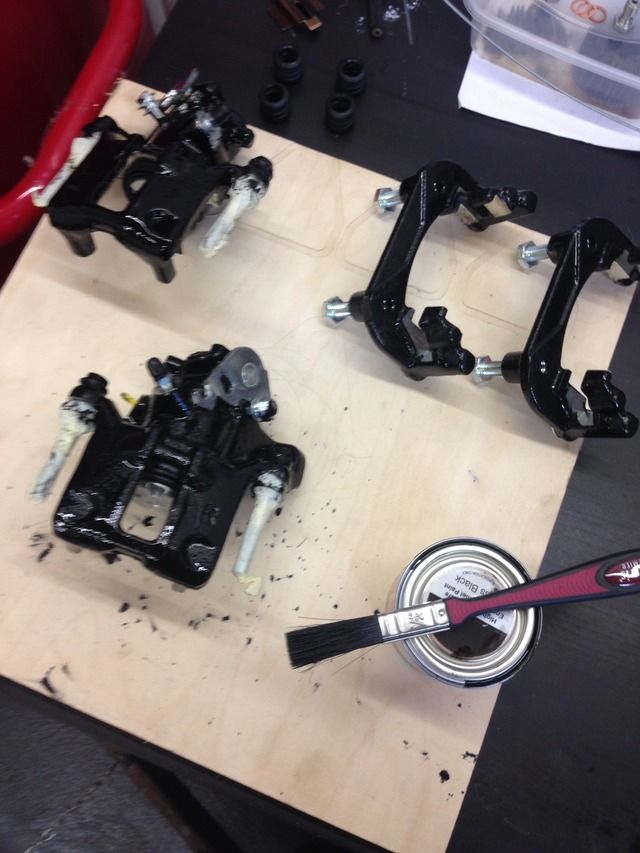
I like to get a bit done most nights, i got a spot of paint on a few of my sierra bits, only a thin coat so probably give them another coat
[Edited on 15/12/14 by Rosco86]
Ugg10 - 15/12/14 at 08:48 PM
Some nice work, cracking project.
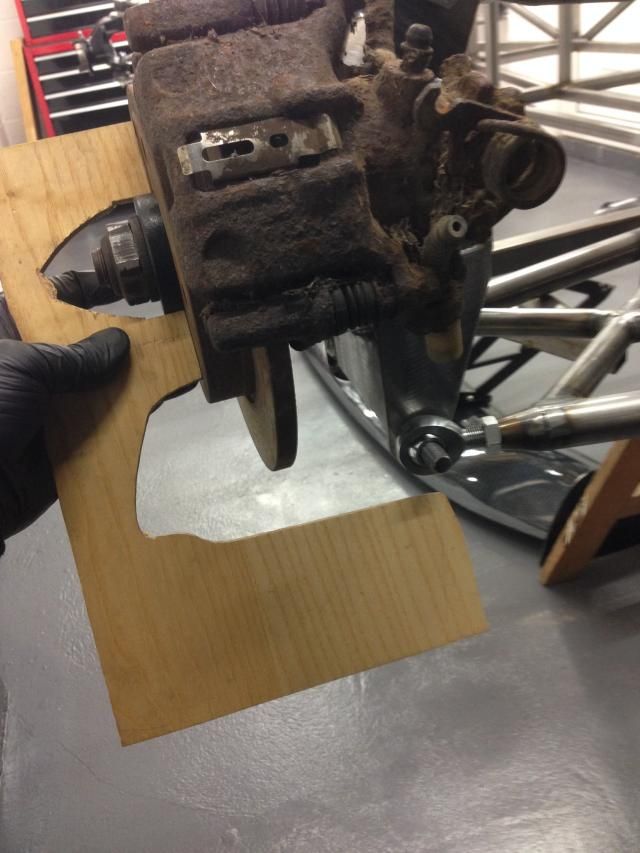
Stating the obvious, the template you did for the wheels also had to clear the calipers which is where it will foul if any where. I would double check
with the caliper in place on the disc as well.
Rosco86 - 20/12/14 at 07:56 PM
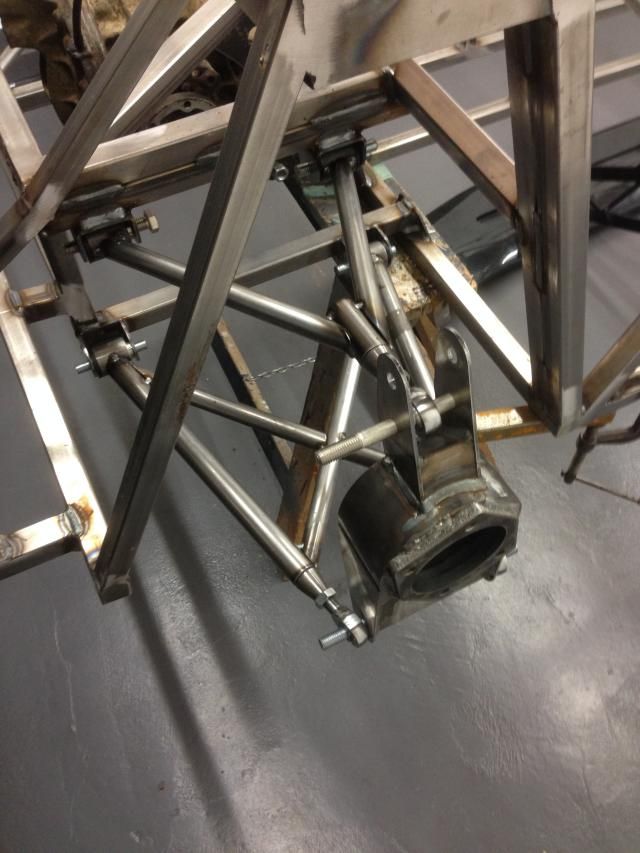
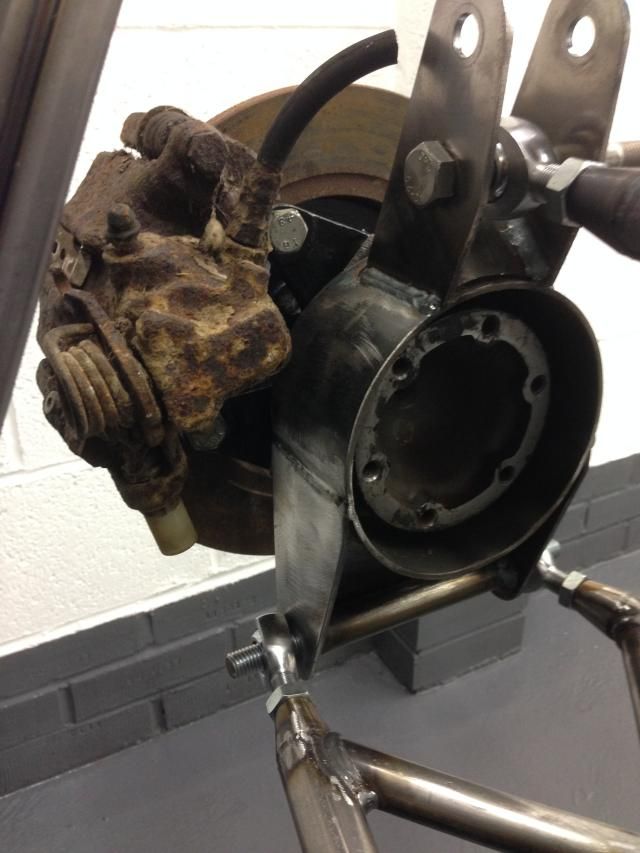
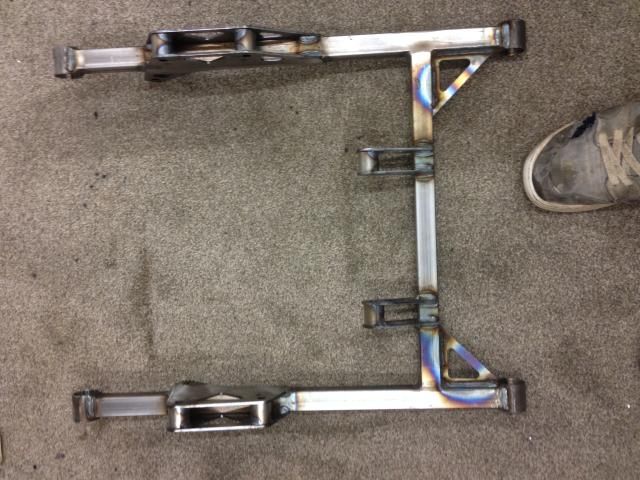
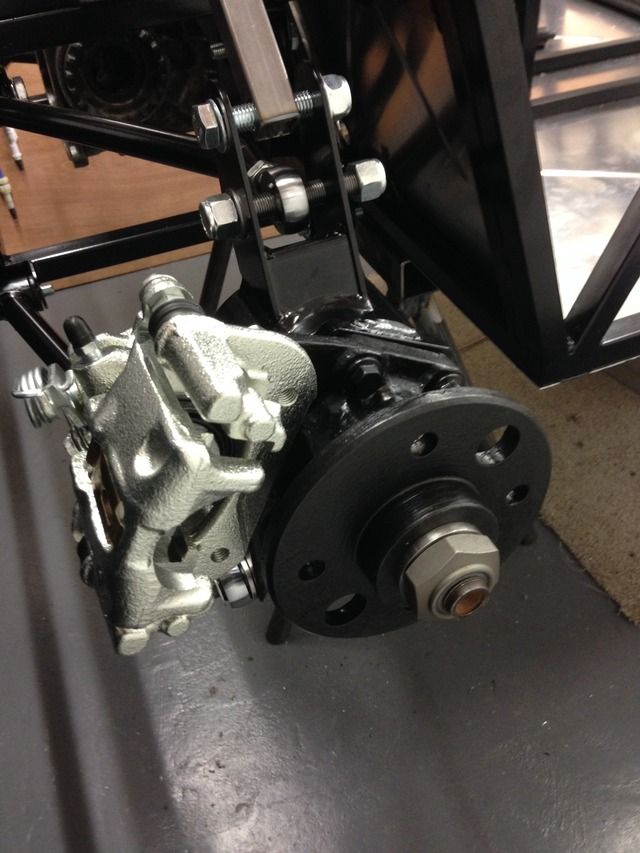
Got my rear wishbones back from the welders and built up my rear hubs and got it all together also put my front hubs back on
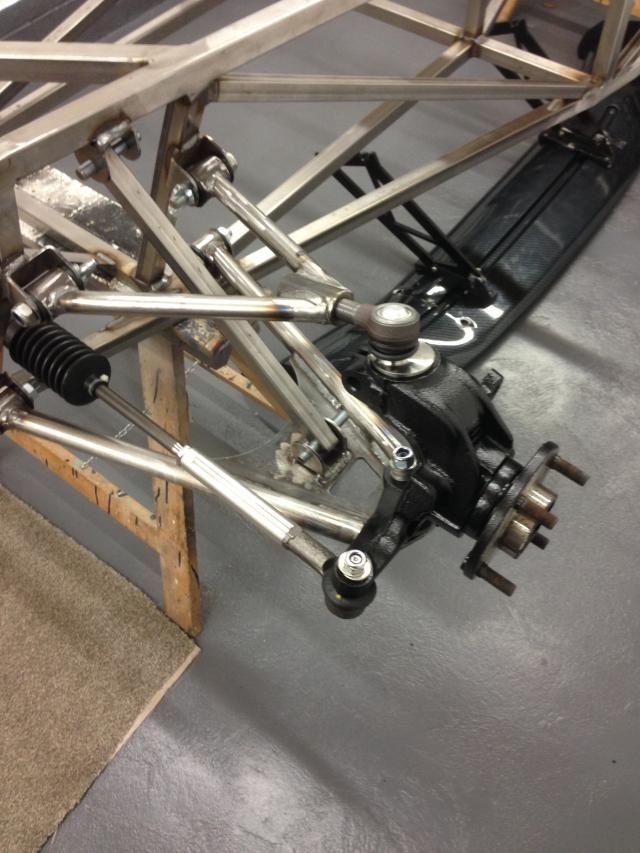
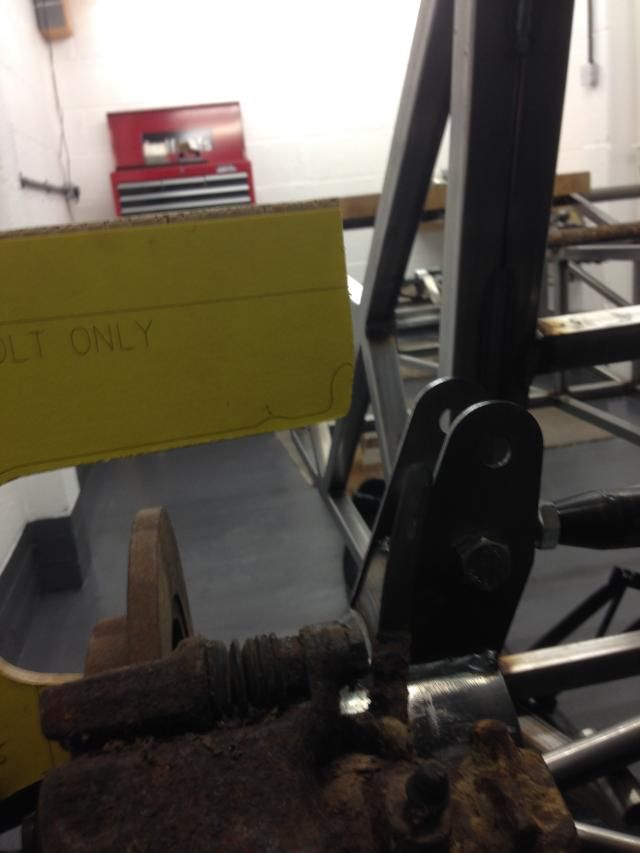
Fitted the old calliper to double check clearance, it's just the handbrake bit that needs modifying but I had read about this already

bart - 20/12/14 at 11:17 PM
good build keep going
Rosco86 - 22/12/14 at 07:35 AM
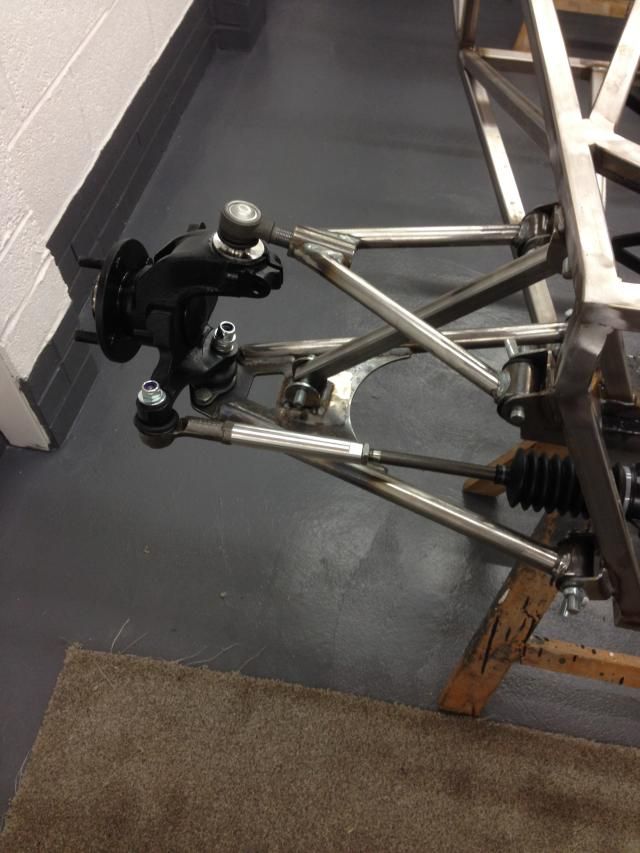
after sleeping on this a couple of nights, im going to remake the rear wishbones so the rod ends are straight, and have a bend in the side tubes, its
not because of the angle its more to do with the clearance either side of the hub, as when you wind the joints in and out the gap changes, also they
could do with being 5mm longer to suit std drive shafts, as the jig drawing in the book was wrong
Rosco86 - 26/12/14 at 08:28 PM
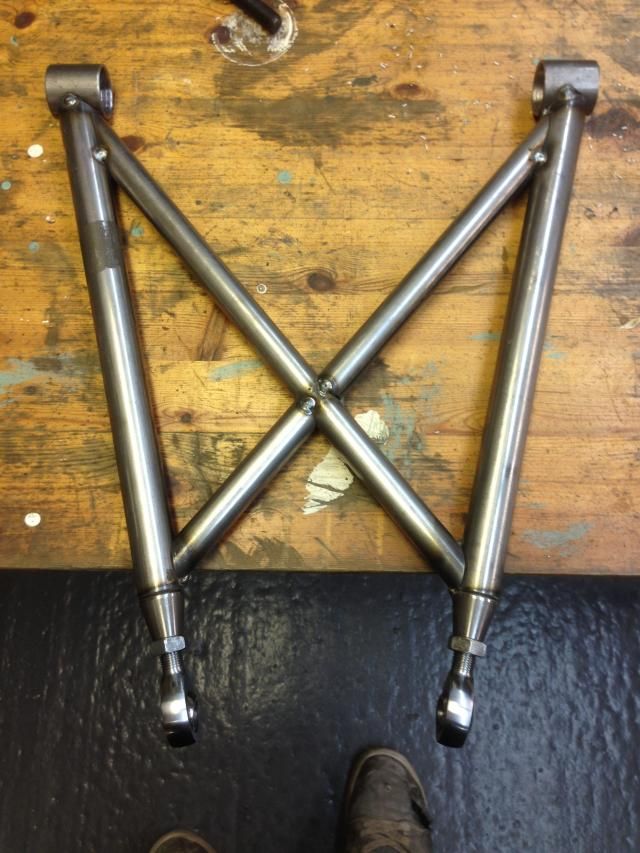
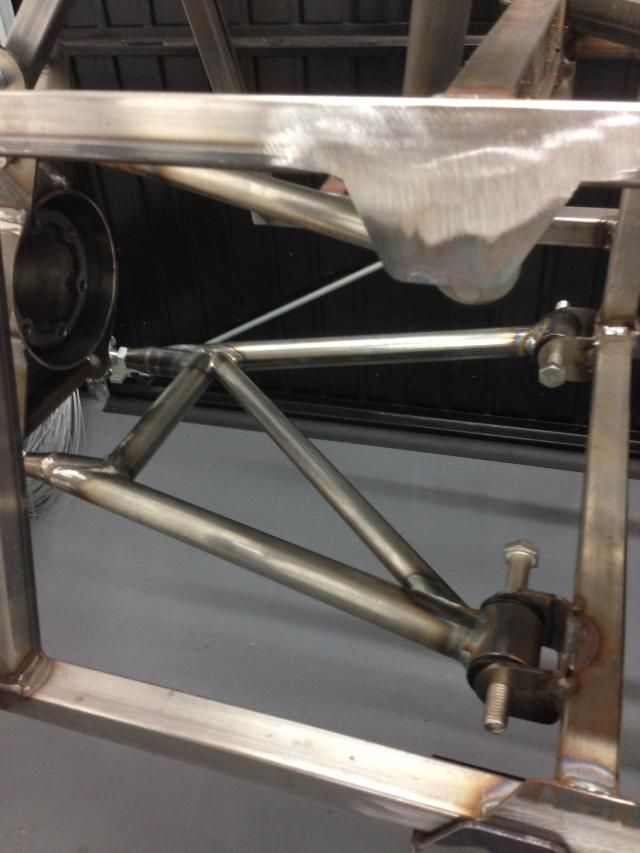
Well got a bit of time on my mk2 rear wishbones today, decided against the bend so notched them on the angle instead
I'm thinking about putting a tube here, notched round the two
And a tube at the back, obviously longer
These tubes are 25mm diameter, does anyone think I need a diagonal, I could use 19mm tube, just trying to keep the weight down, I have seen rear
wishbones with no diagonals just two cross bars like in my pictures
Rosco86 - 27/12/14 at 03:29 PM
Got a bit more done this morning
Rosco86 - 28/12/14 at 08:18 PM
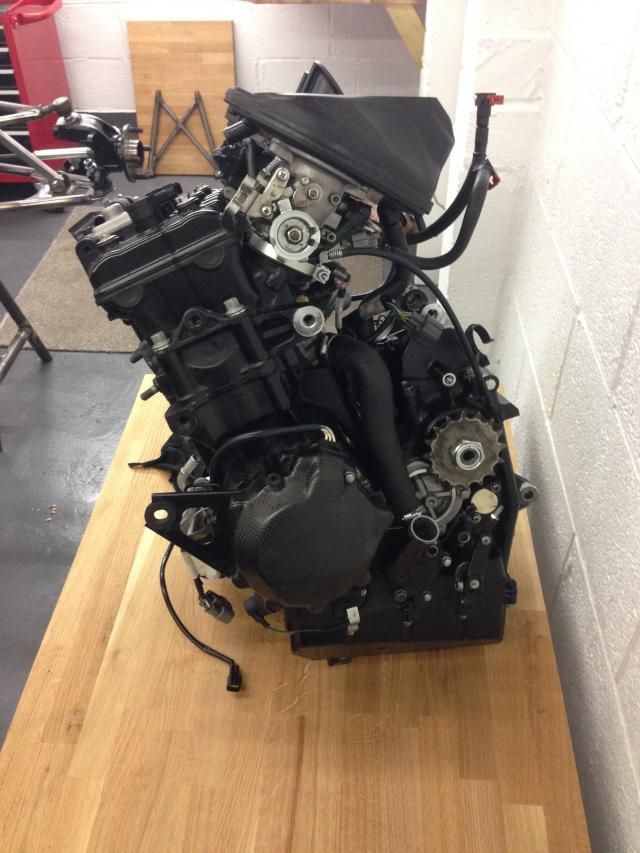
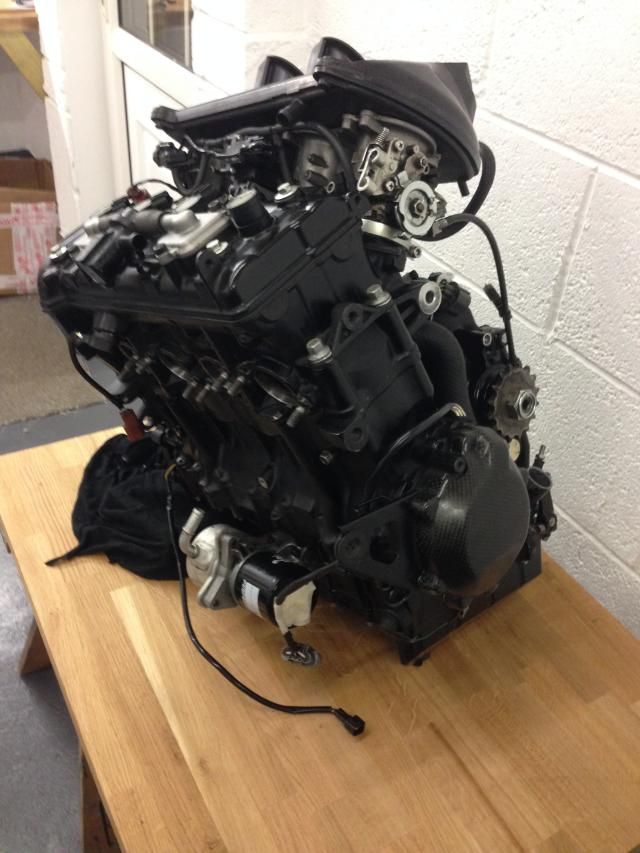
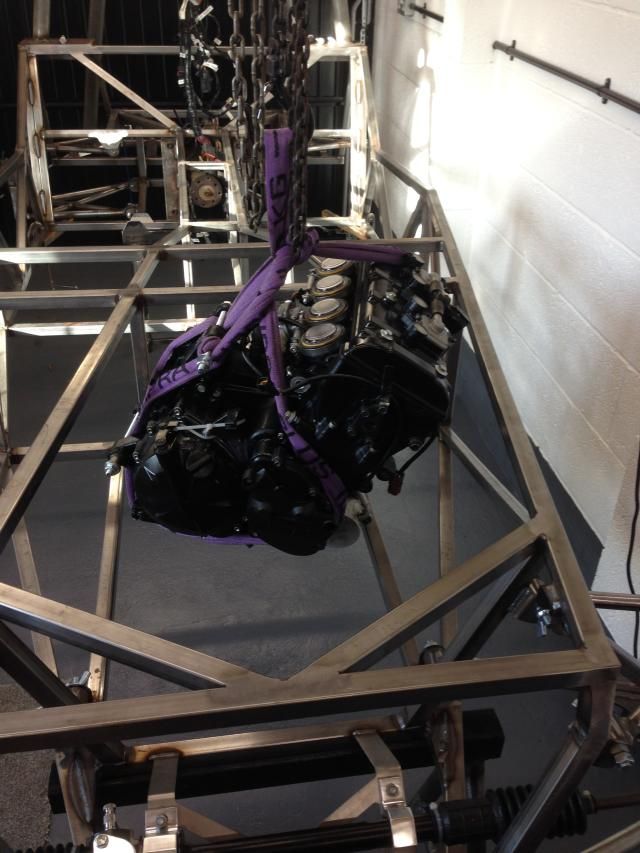
Well had a good day, went and collected an engine from Malc at Yorkshire engines, was a long drive there and back, left at 7:30 and got home about
2:30
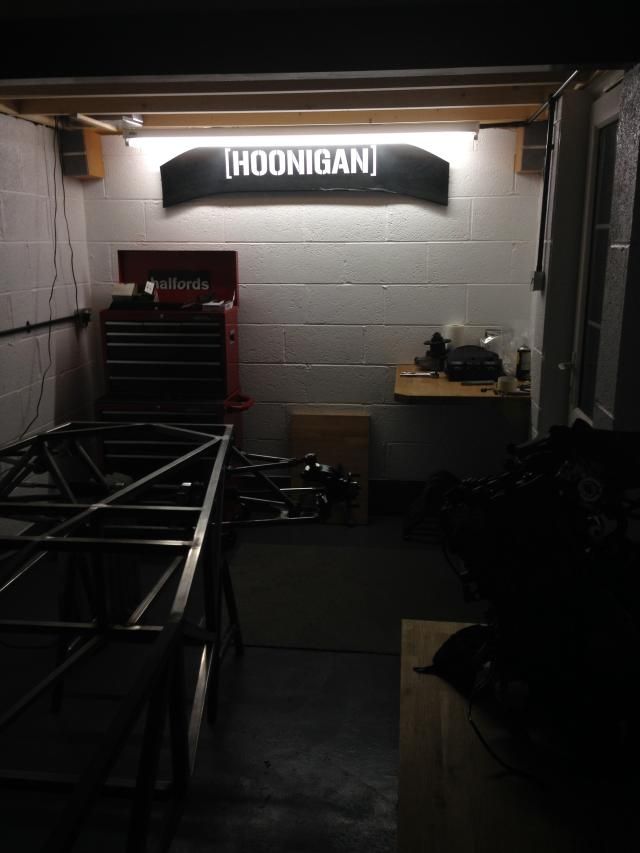
It's a 2010 zx10-r
And a fancy shot of my garage
YODI - 29/12/14 at 09:46 PM
Watching this now, keep up the good work mate
BigMac - 30/12/14 at 08:31 PM
Lovely job so far, methodical, great quality and looks great- I will watch with interest! Great job!
Rosco86 - 30/12/14 at 09:55 PM
Cheers for the comments!
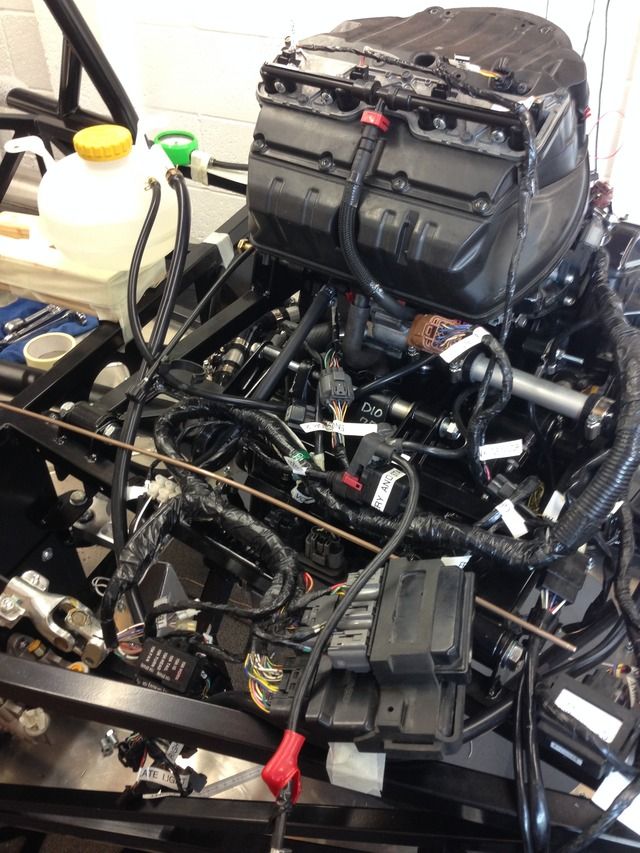
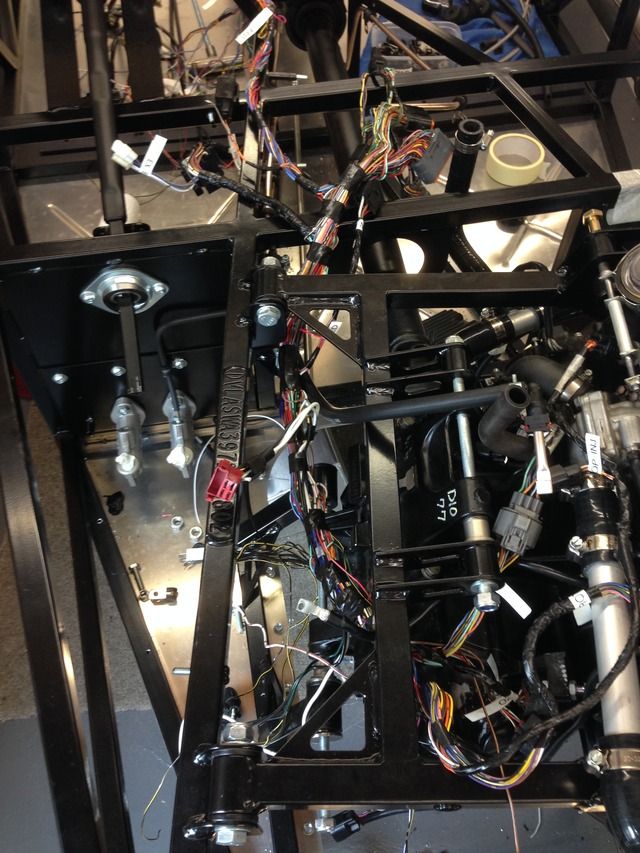
Sat down with my bike loom and labeled every plug using the wiring diagram to work out what's what
I think I'm going to use the bike loom as a base and extend and alter it to suit
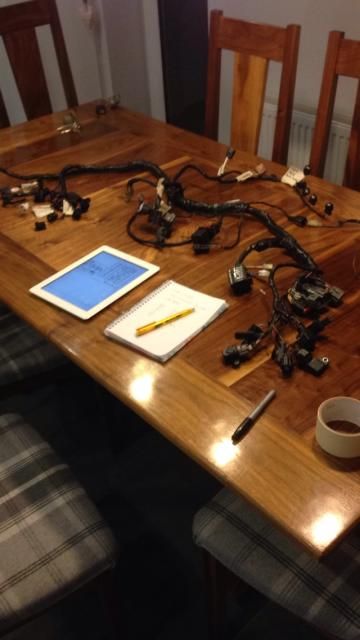
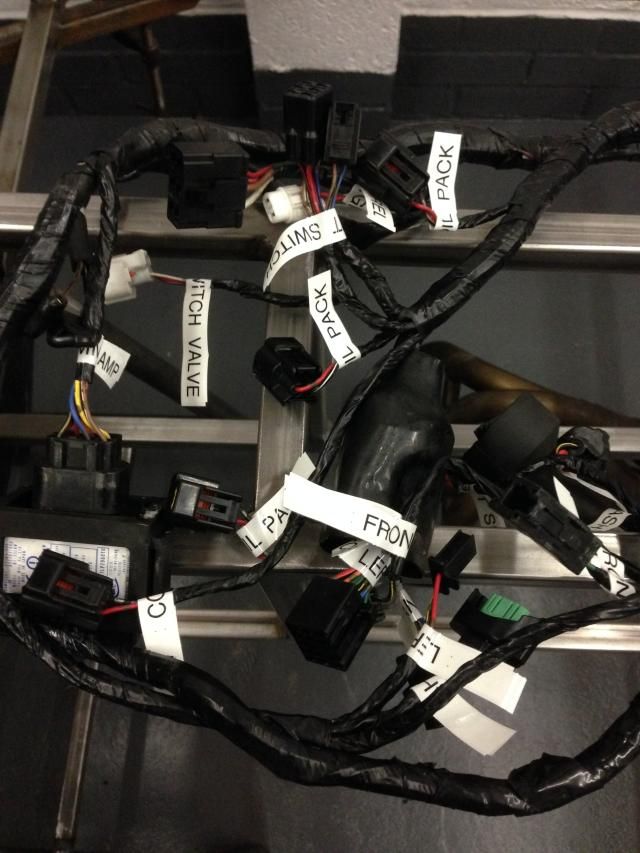
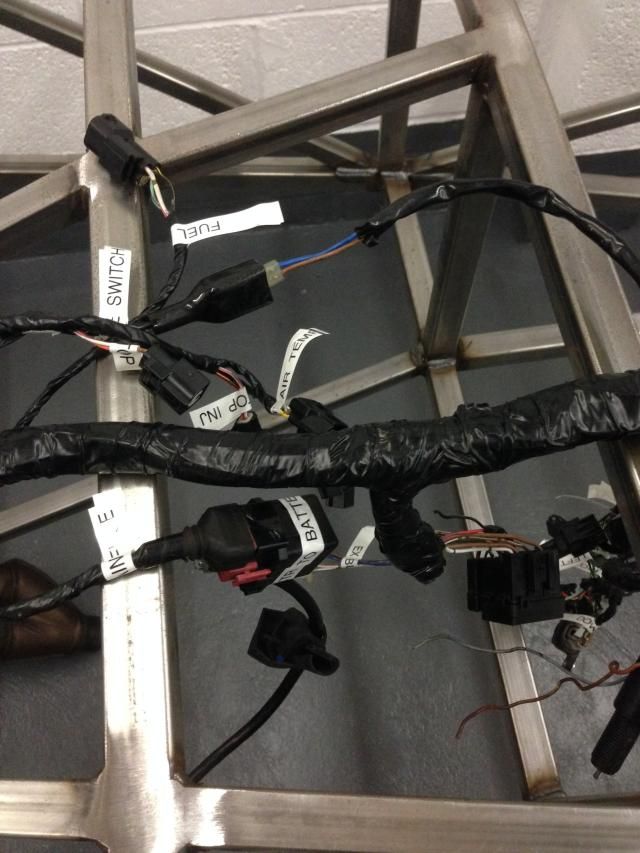
Oh how I love my label machine!
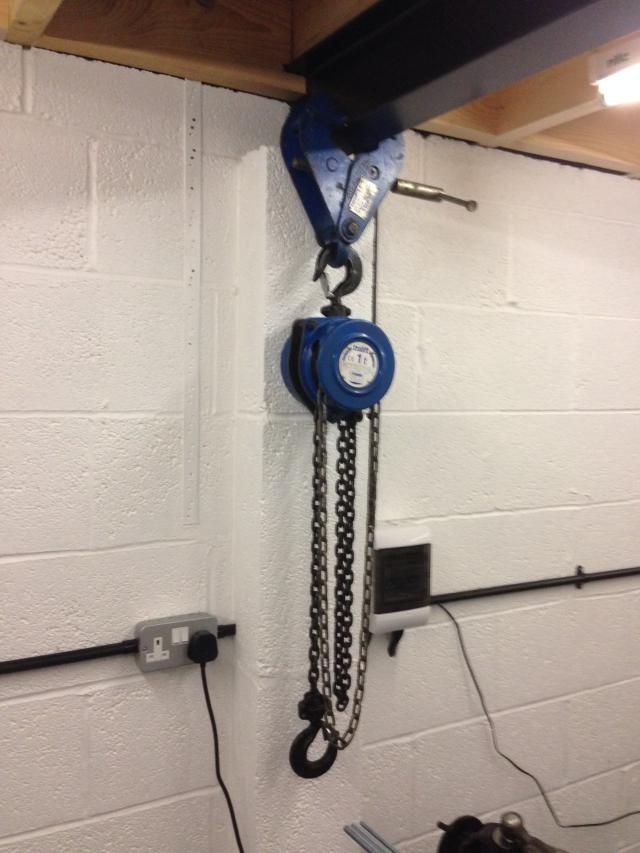
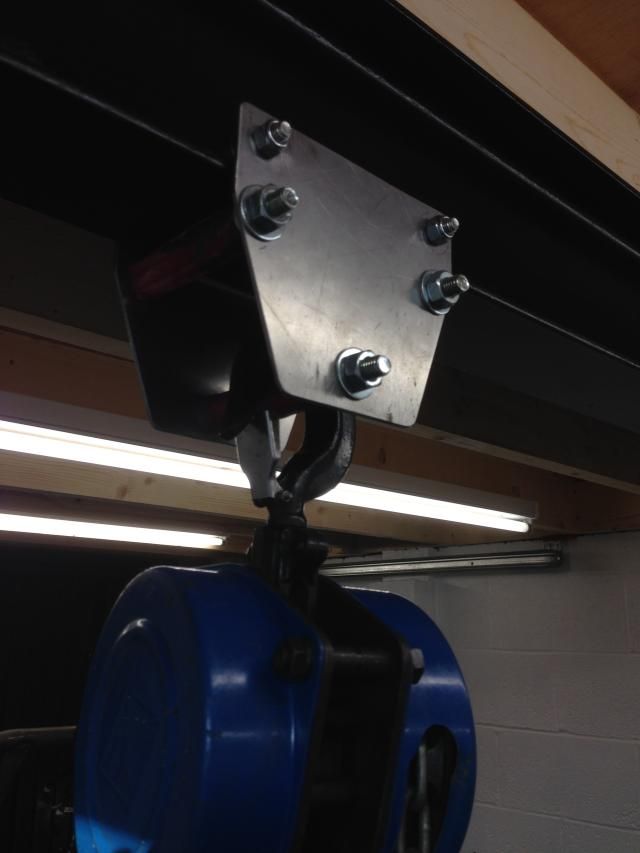
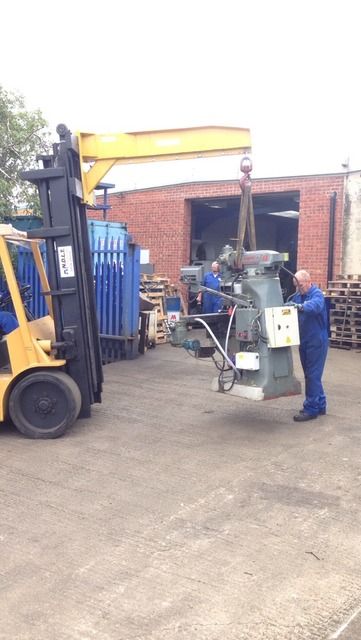
Also my mate gave me a hoist, it was filthy so gave it a good clean and re grease, also shortend the loop chain from about 4 meters to a small hoop
Rosco86 - 31/12/14 at 06:01 PM
Bit more done today, had my dad helping me today!
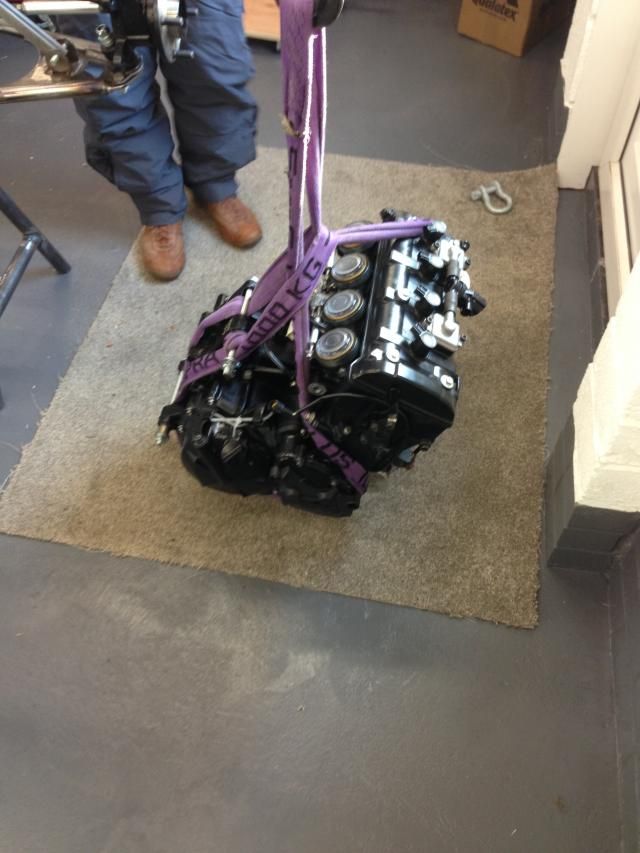
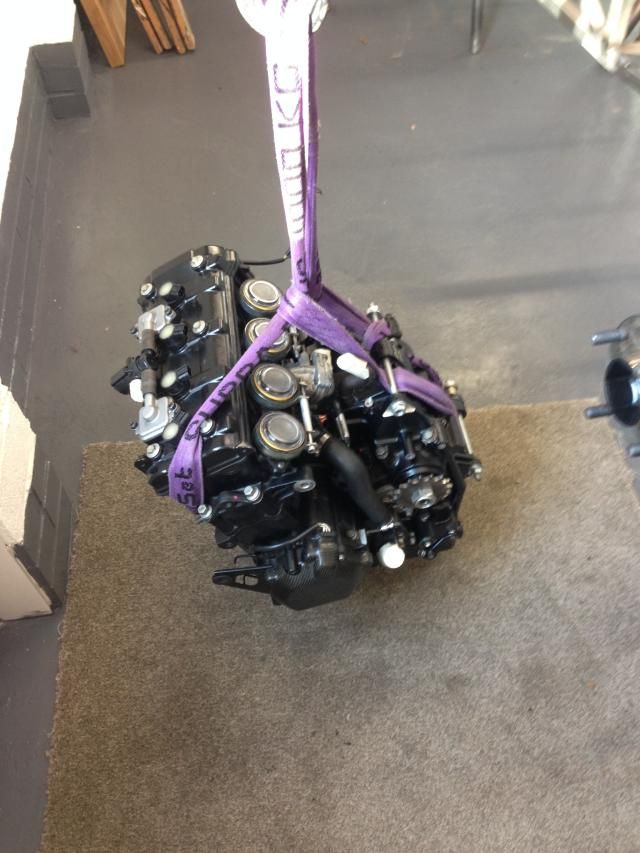
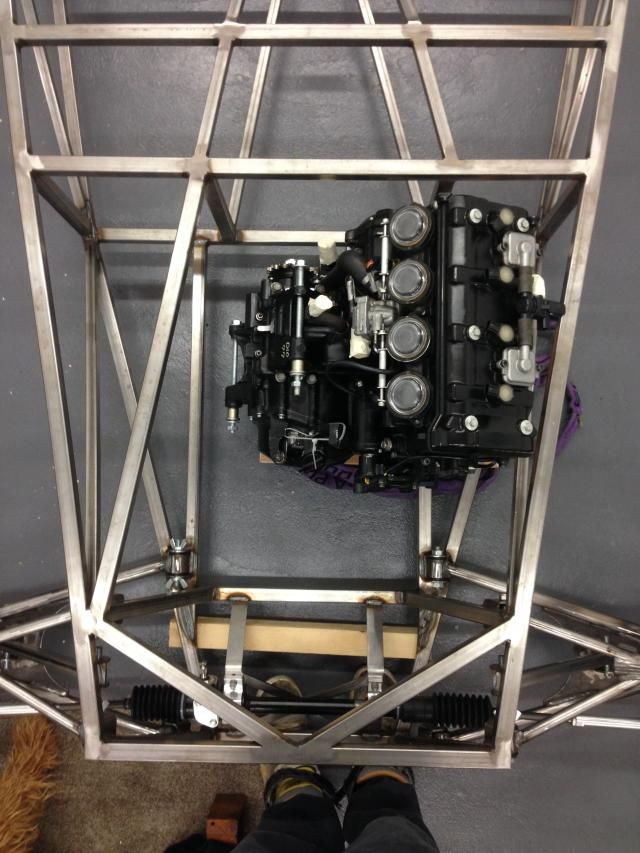
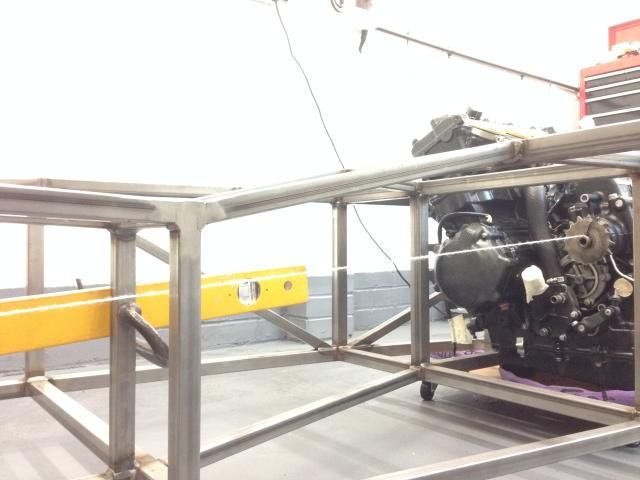
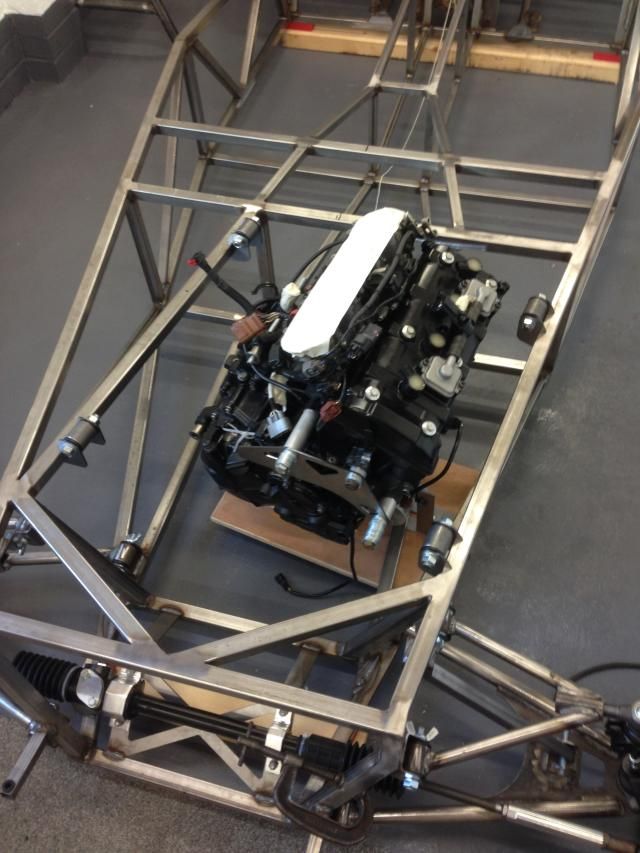
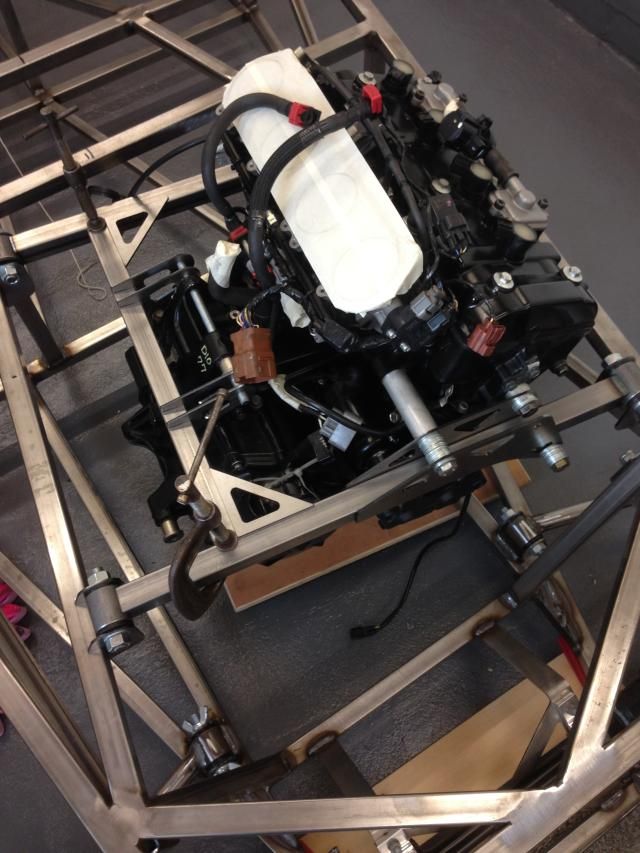
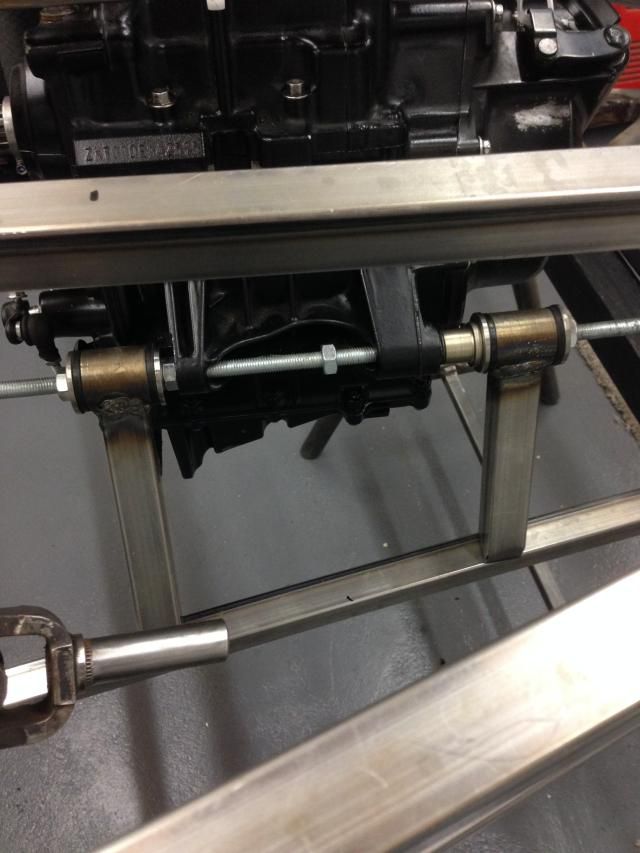
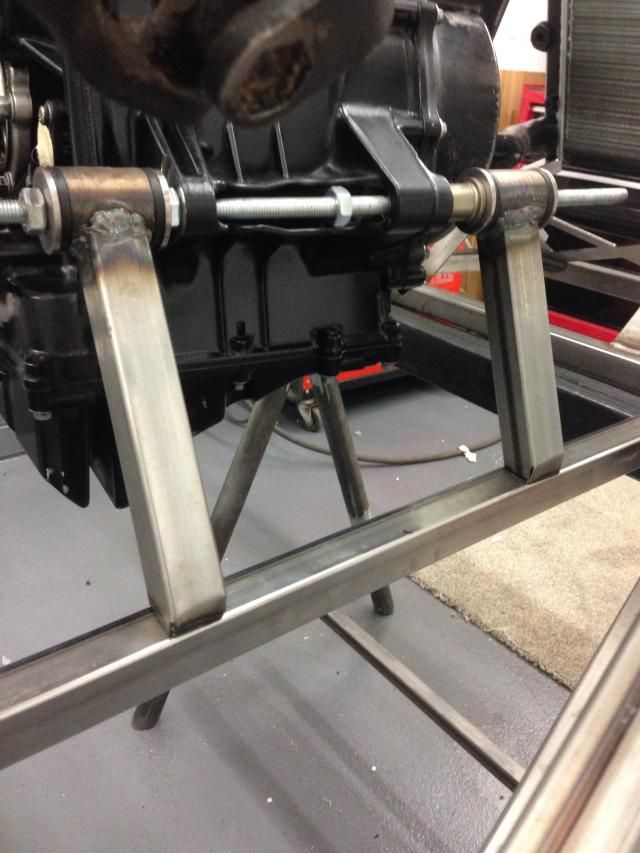
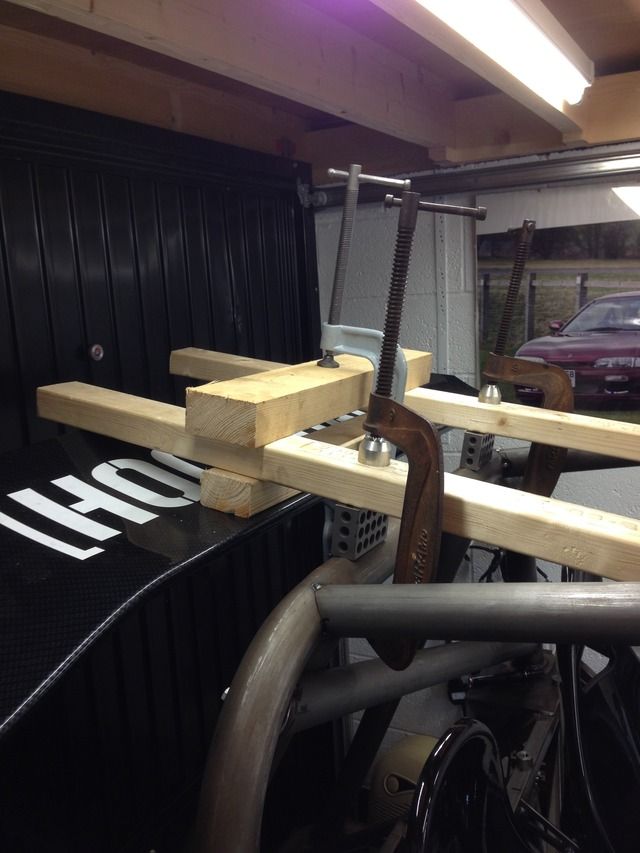
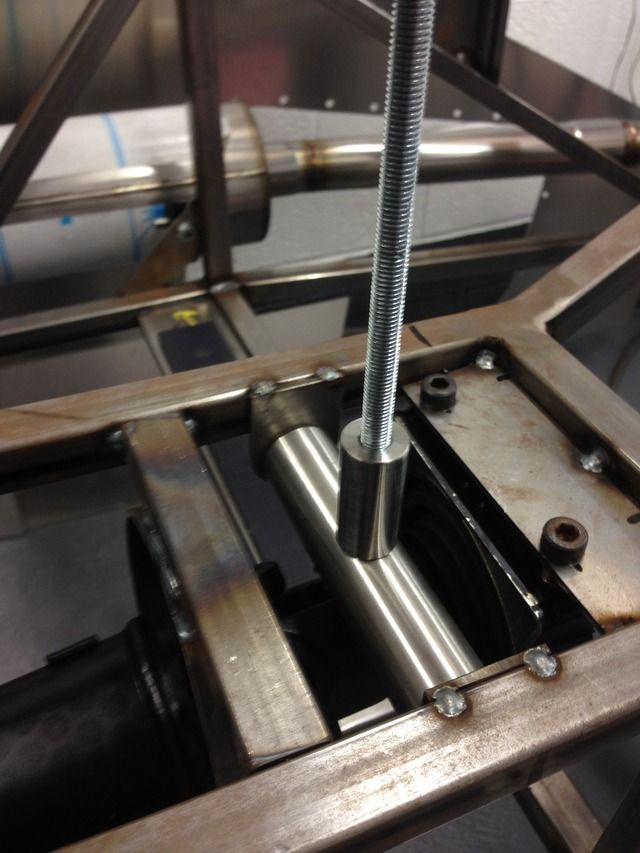
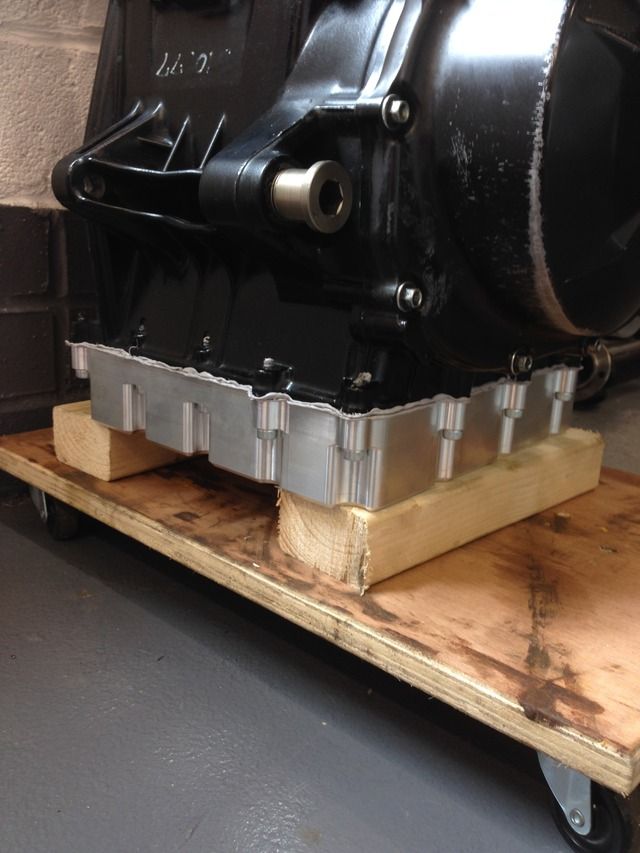
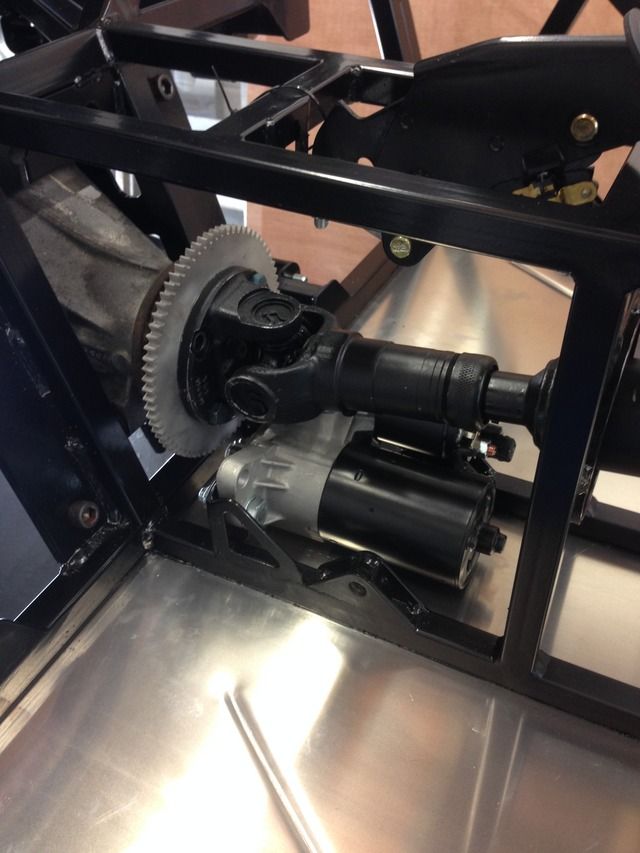
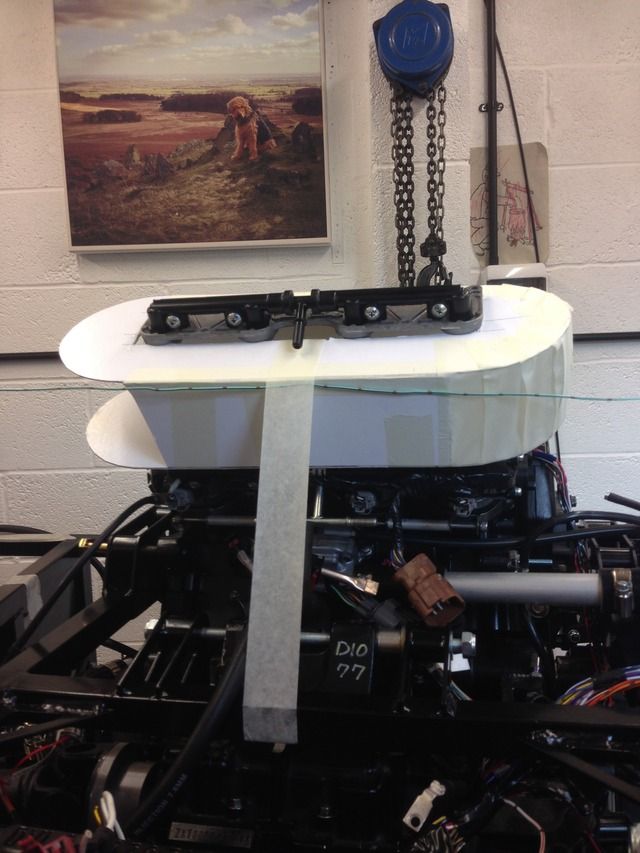
Got the engine slung up so it's picking it up somewhere near level of how it will sit in the car
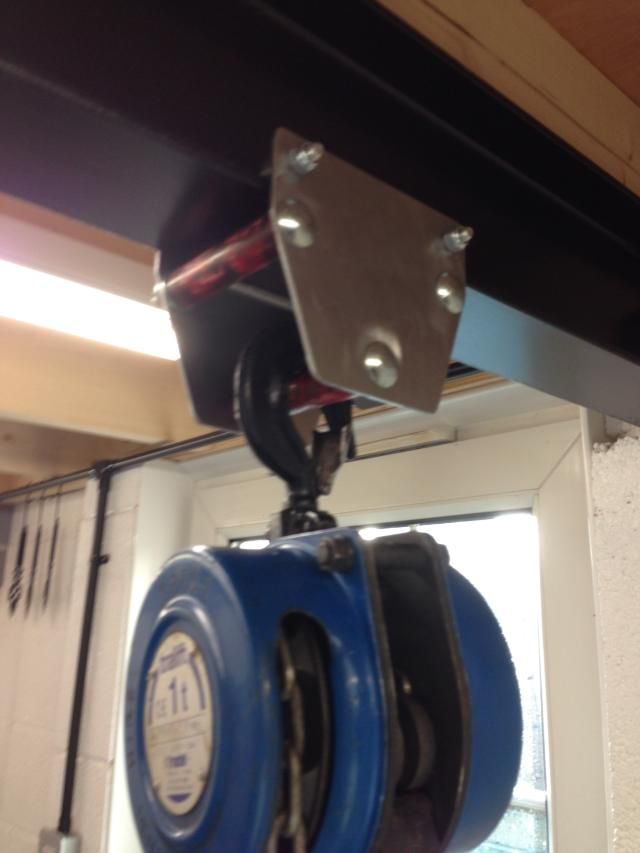
Then decided to make a trolly for the rsj as the clamp I had didn't slide very wheel

Then we made a trolly to sit the engine on, so we could drop the car over and move it around, then once happy with the position I get get the mounting
cradle sorted without having to have it dangling in mid air
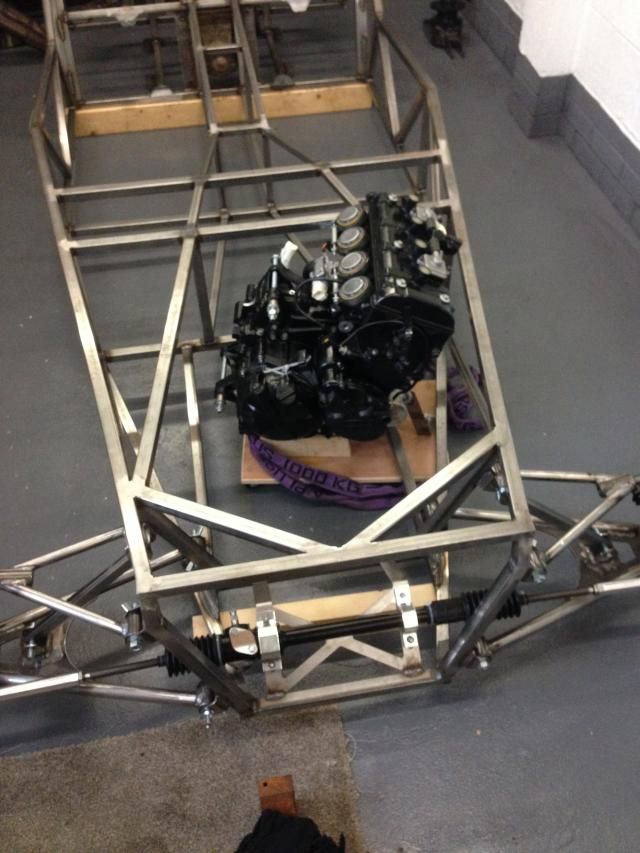
I can rase the car up or down to alter the mounting height, I'm just waiting to hear back from AB performance on his zx10 sump height, I'm
hoping to have the underside of the sump flush with the underside of the car
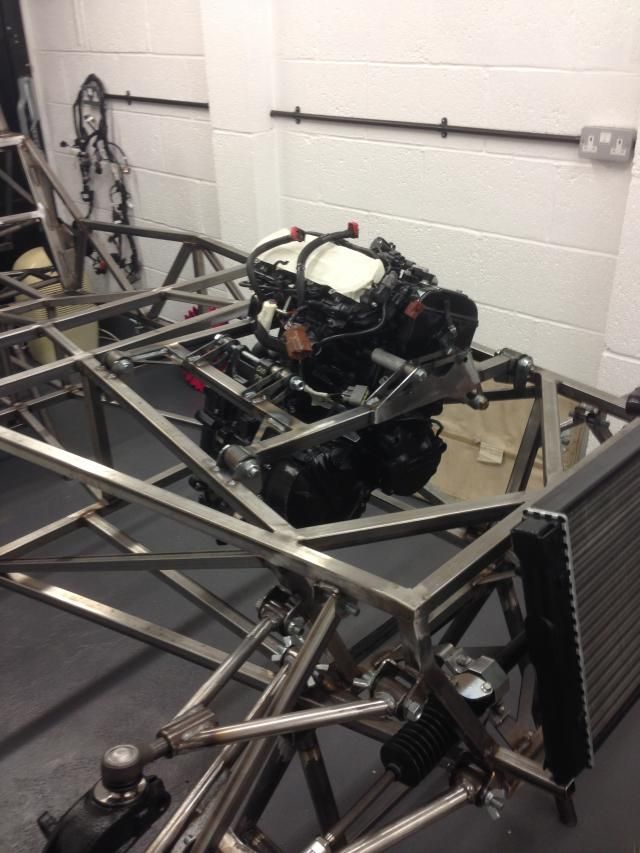
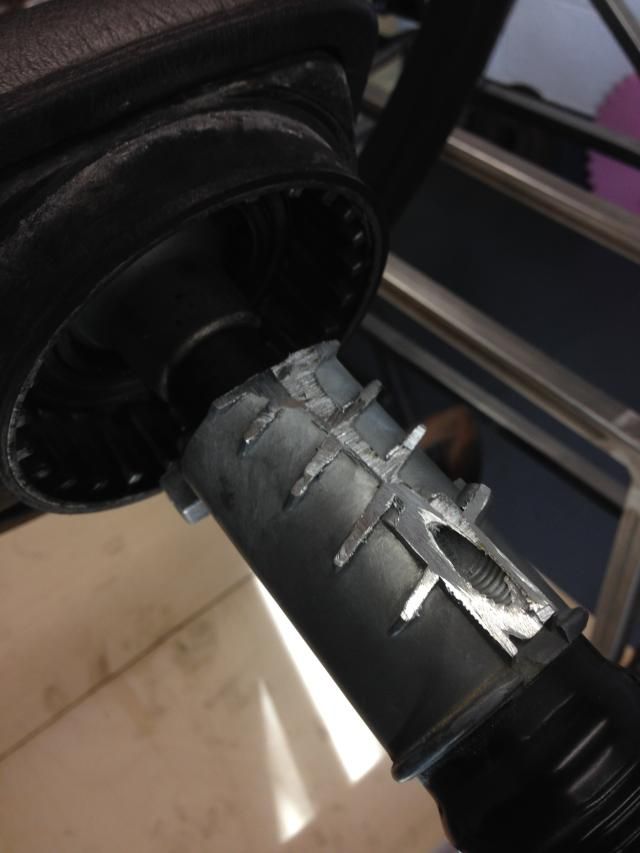
I need to decide on position next, from the pictures I've seen most seem to be mounted towards the rear of the engine bay
But some seem to be straight and some to be on an angle parallel with the side rail, on reading it looks like the output flange and the diff flange
are supposed to be parallel, if anyone could help out that would be great
Thanks for looking
Ben_Copeland - 31/12/14 at 06:18 PM
Good work so far !
big_wasa - 31/12/14 at 06:24 PM
Nice to see a scratch build take shape
Rosco86 - 1/1/15 at 12:56 PM
Cheers, slowly getting there!
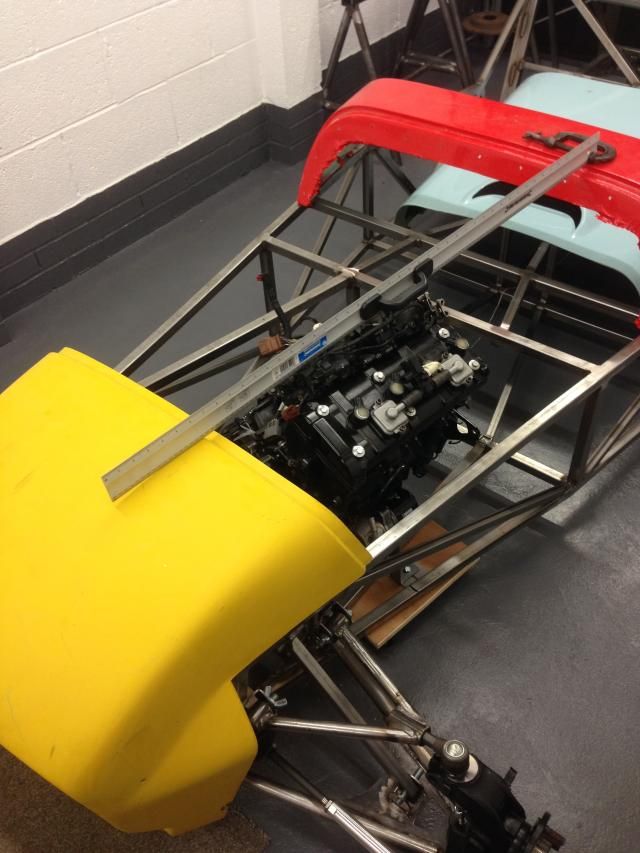
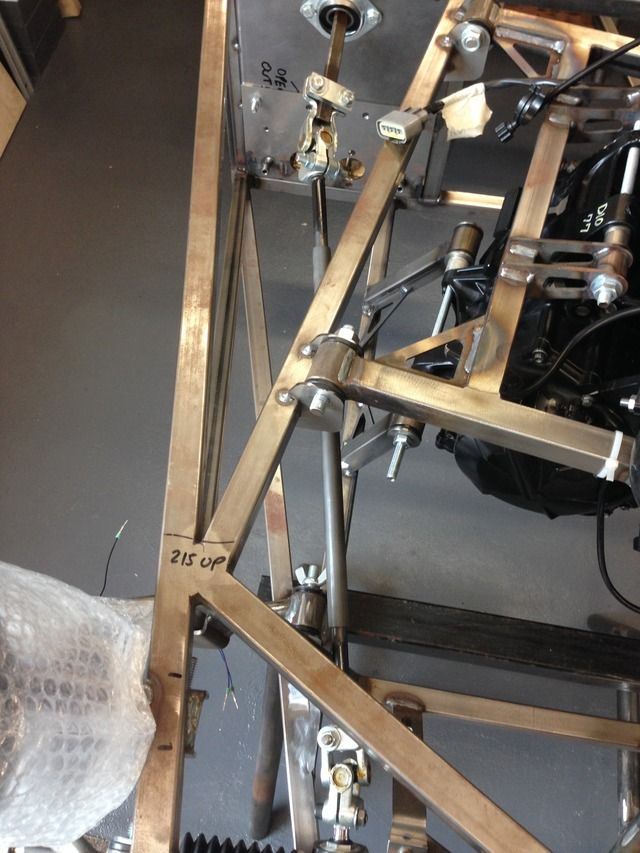
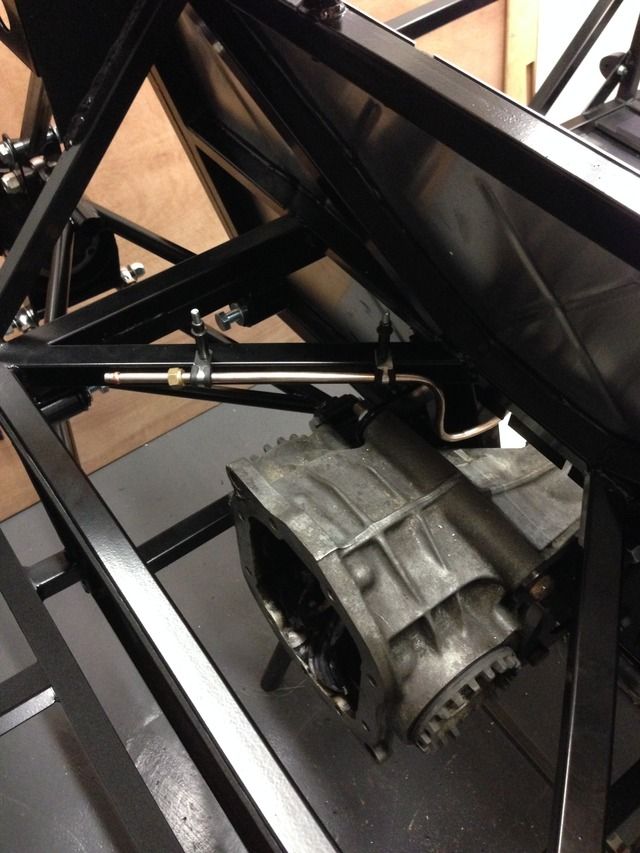
Rosco86 - 1/1/15 at 01:16 PM
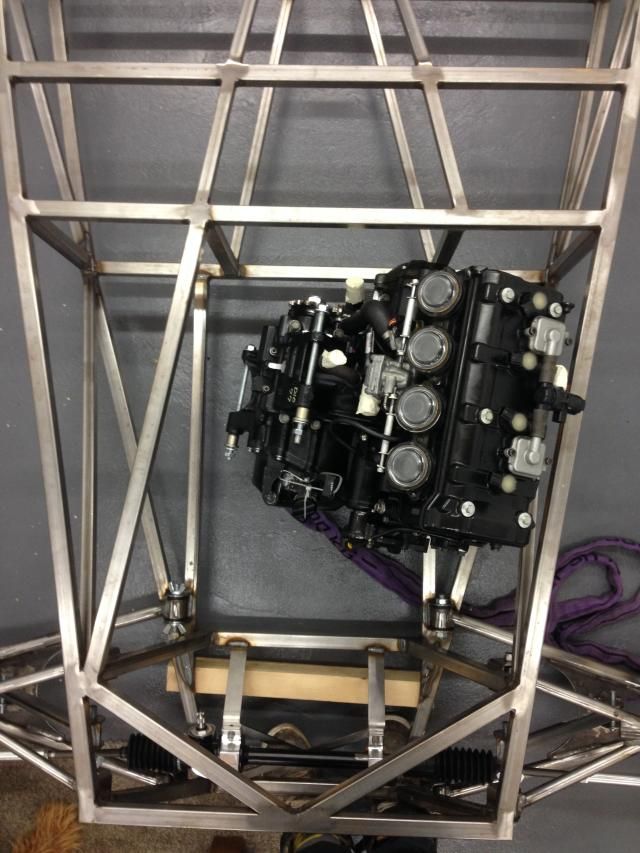
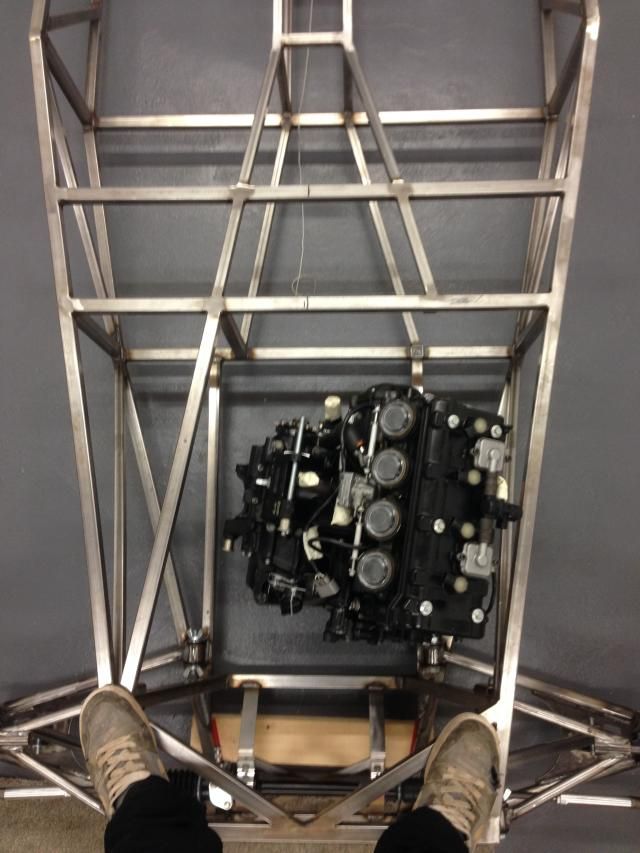
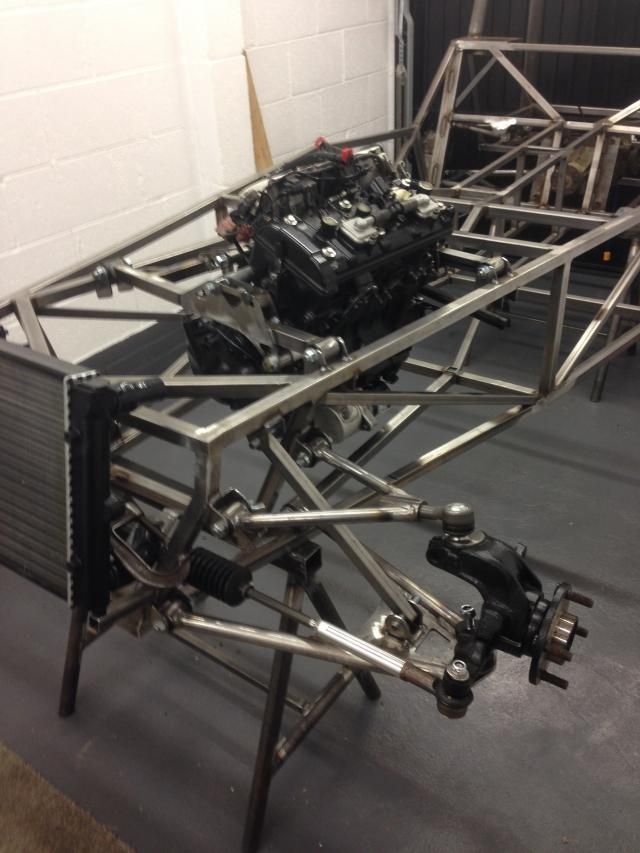
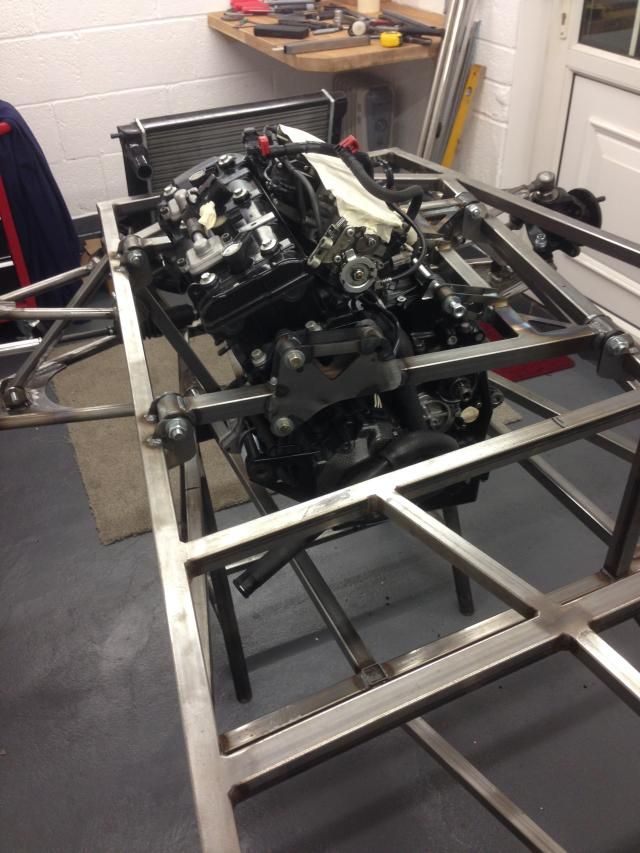
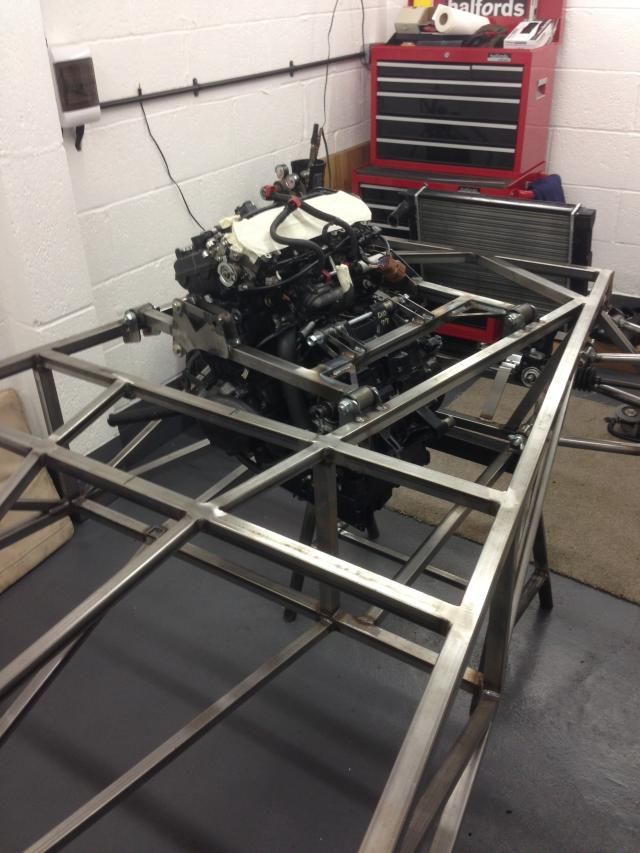
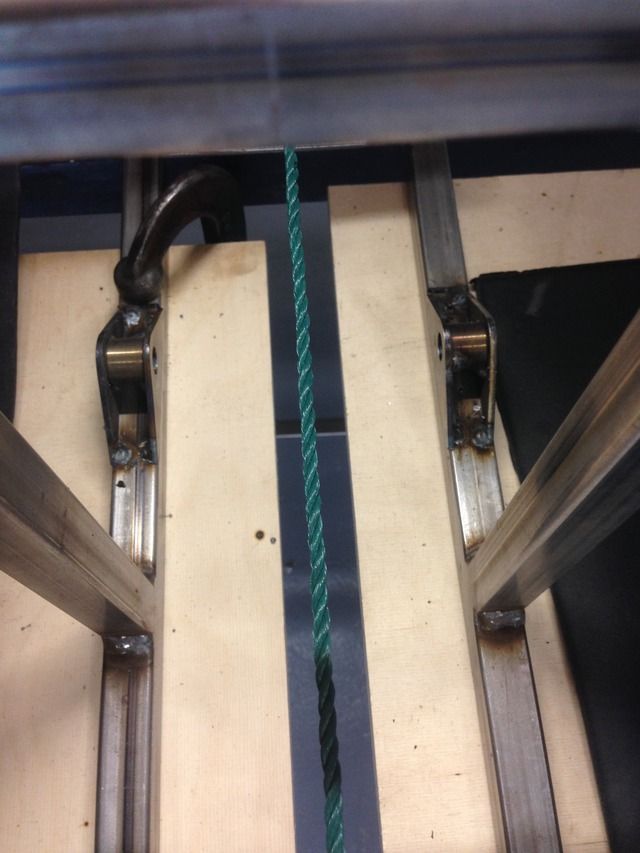
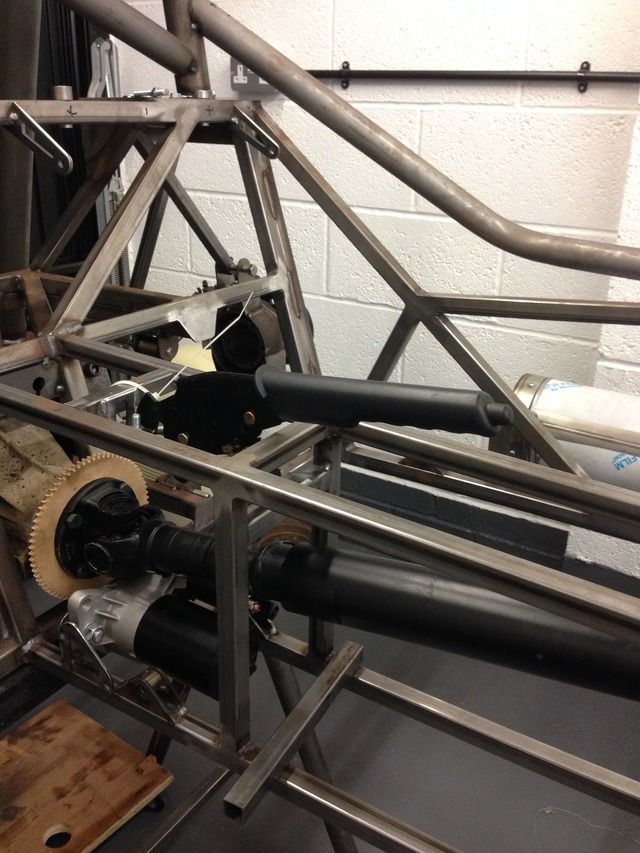
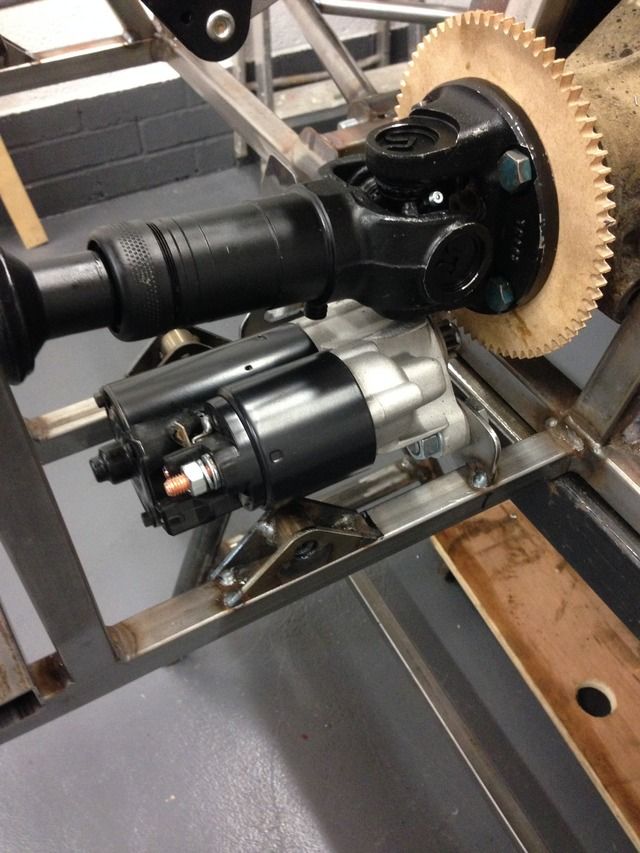
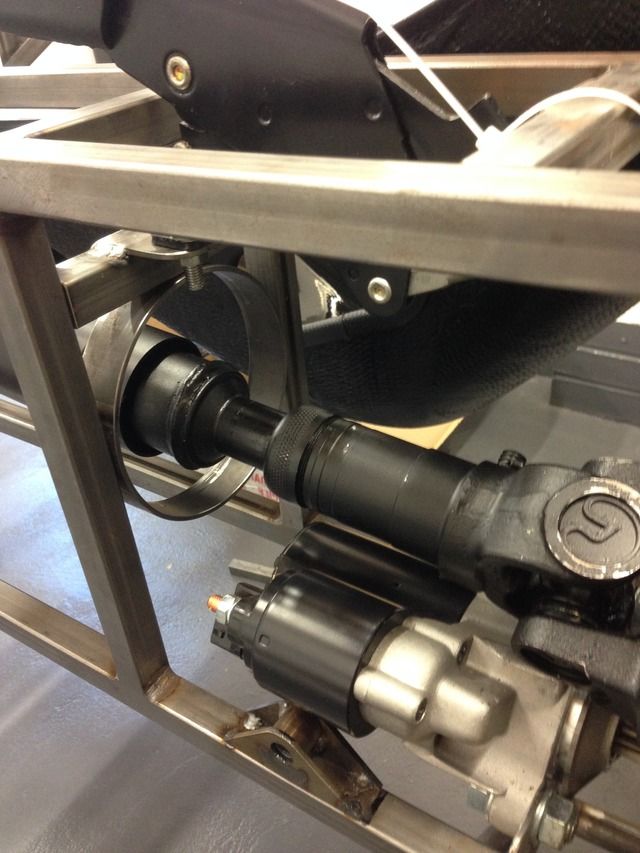
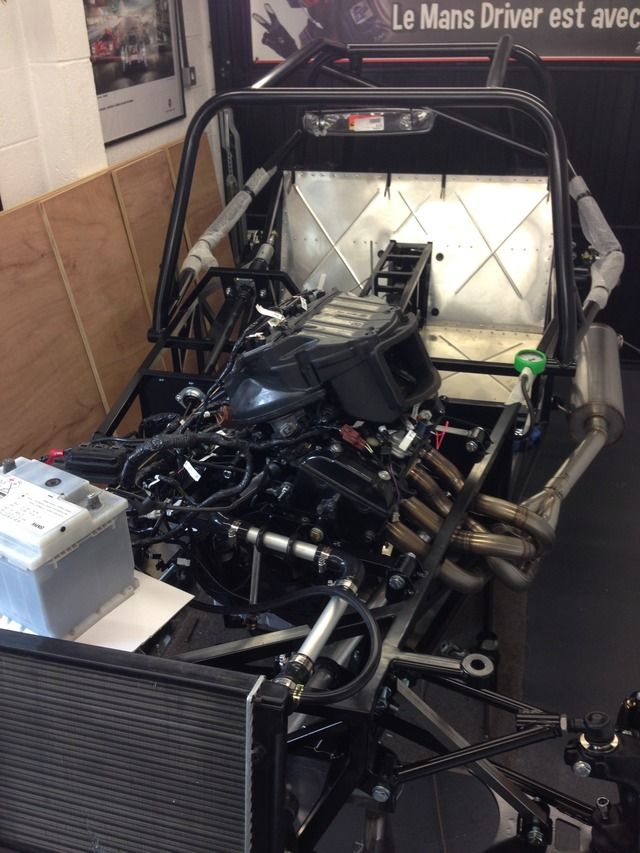
Just been looking at engine position and I'm sort of happy with this current position
Running the engine dead inline it seems to put the output shaft in a good position
If I turn the engine so it's parallel to the outer chassis rail it just skews the output shaft but doesn't improve the position for the
prop
And from what I've read it's better for the flanges to be parallel
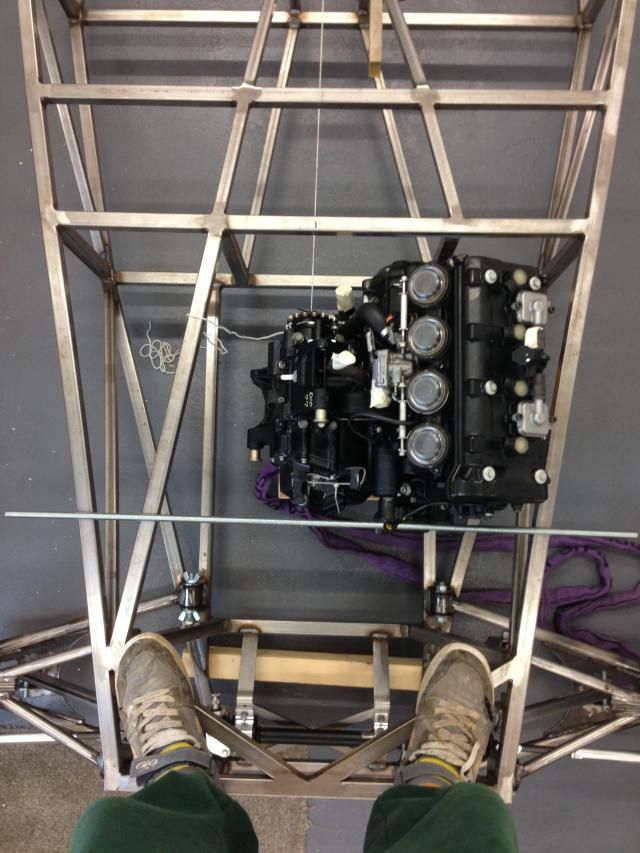
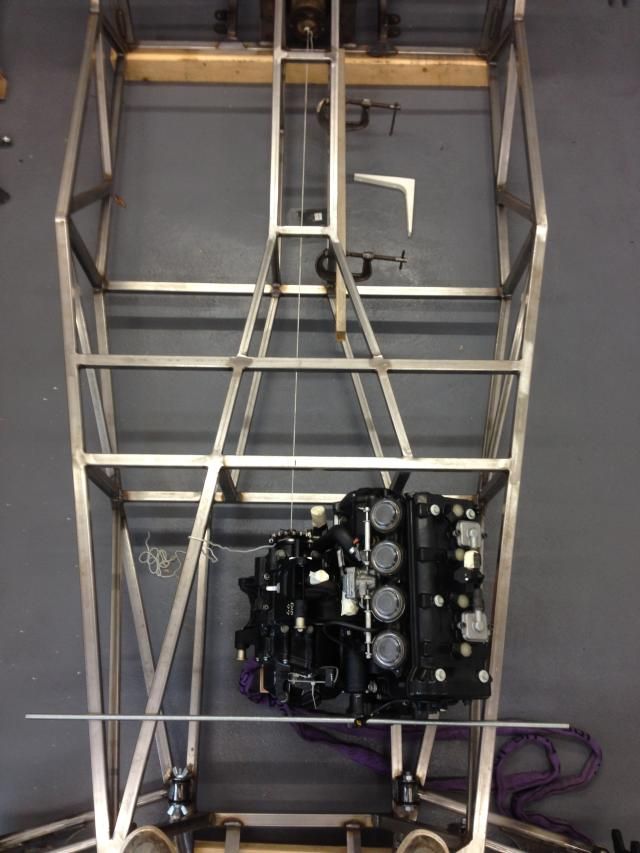
In this position the total prop length would be 1460mm but I could move the engine back 50mm if I moved the passenger footwell upright back
I have strung a ling between and it's at an angle from the horizontal of about 4 deg, I take it I will still need a 2 piece prop with a centre
bearing and a slight kink in the centre so the UJ's aren't running straight
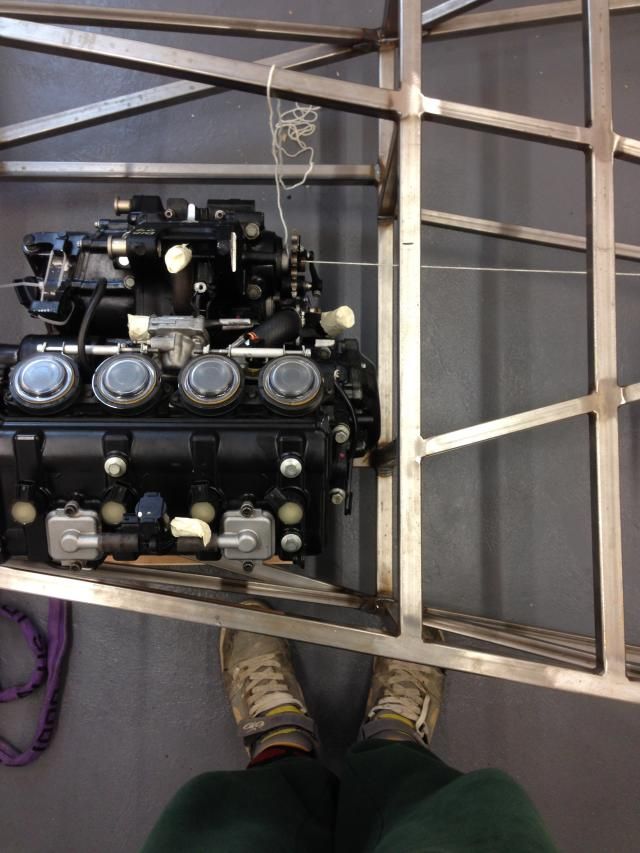
My main doubt is the more photos of people builds I look at the more seem to have the engine skewed
If anyone could agree or disagree that would be great!
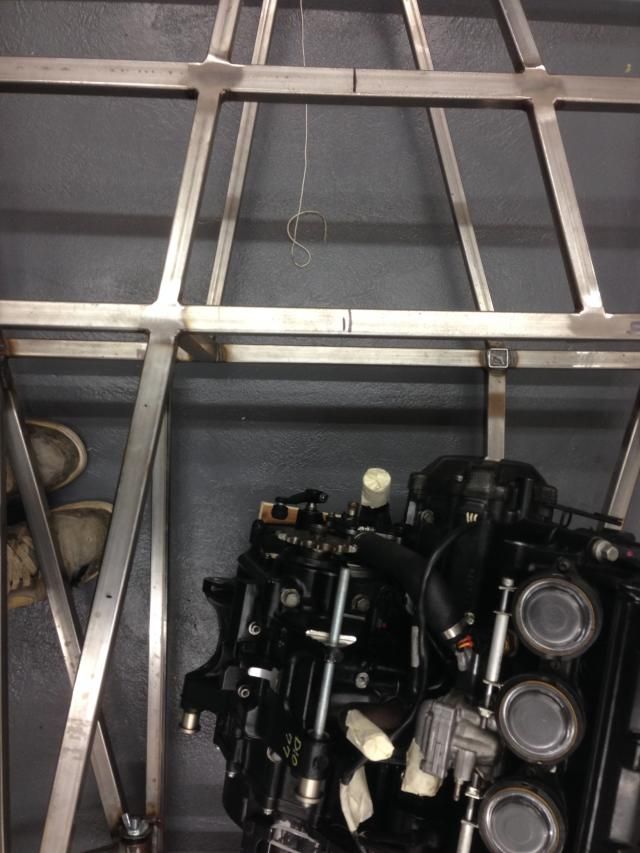
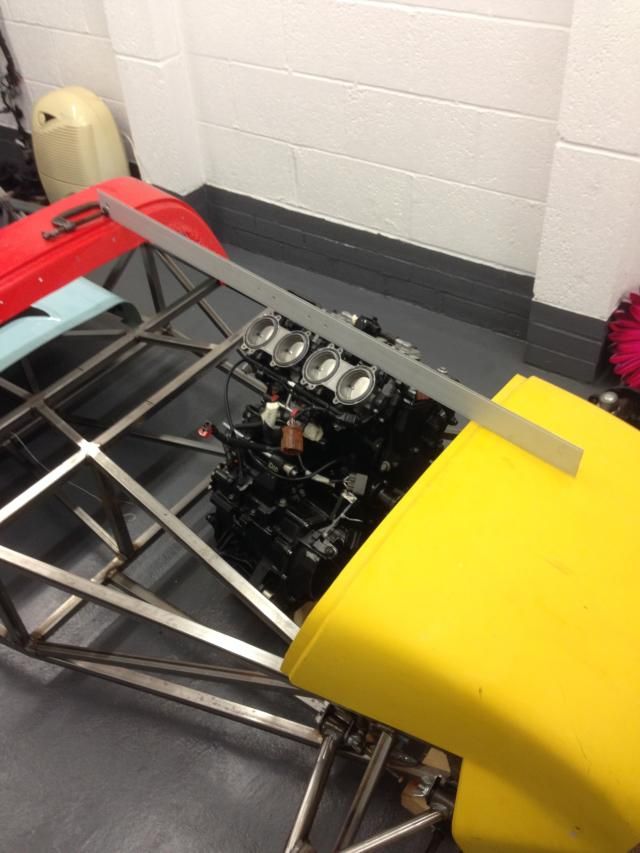
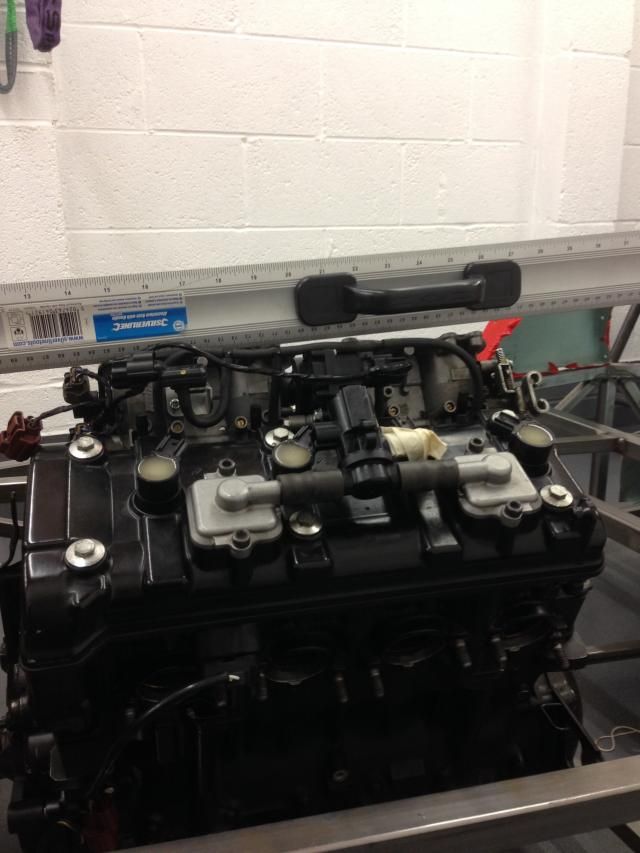
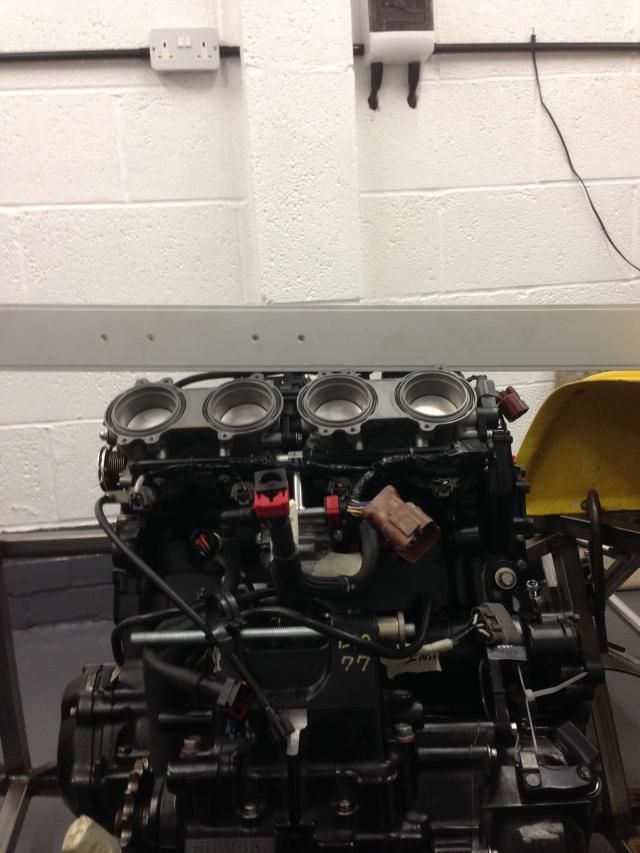
Rosco86 - 1/1/15 at 03:01 PM
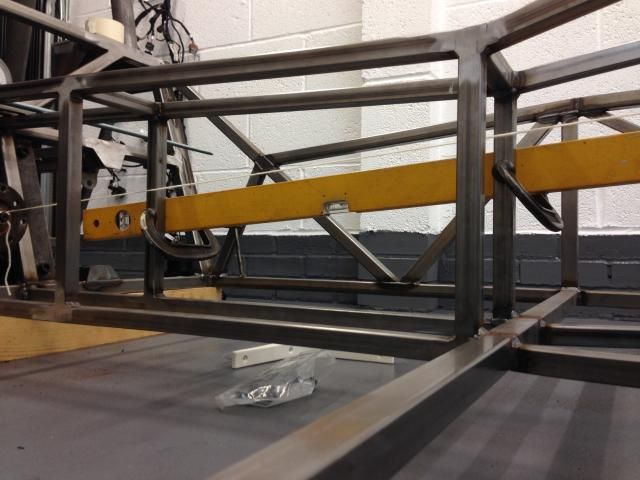
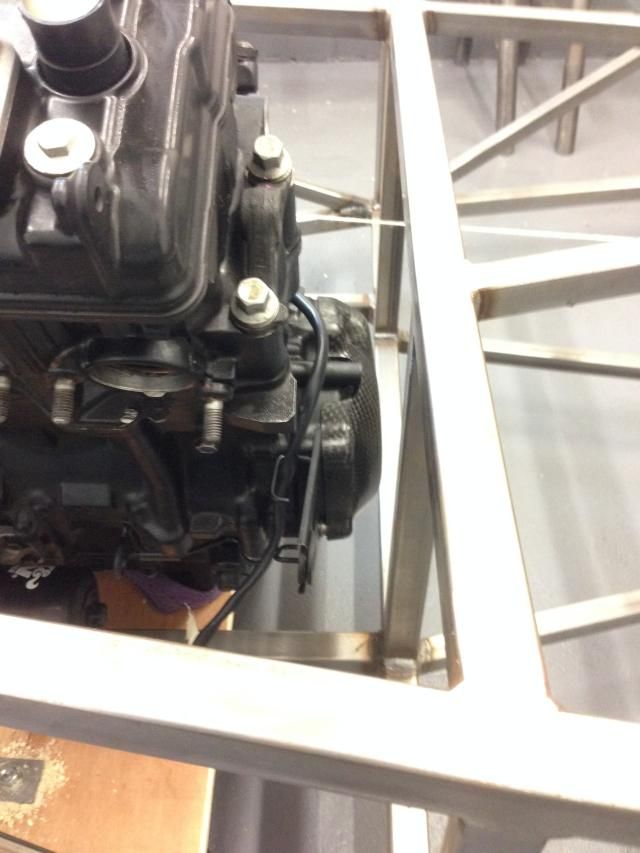
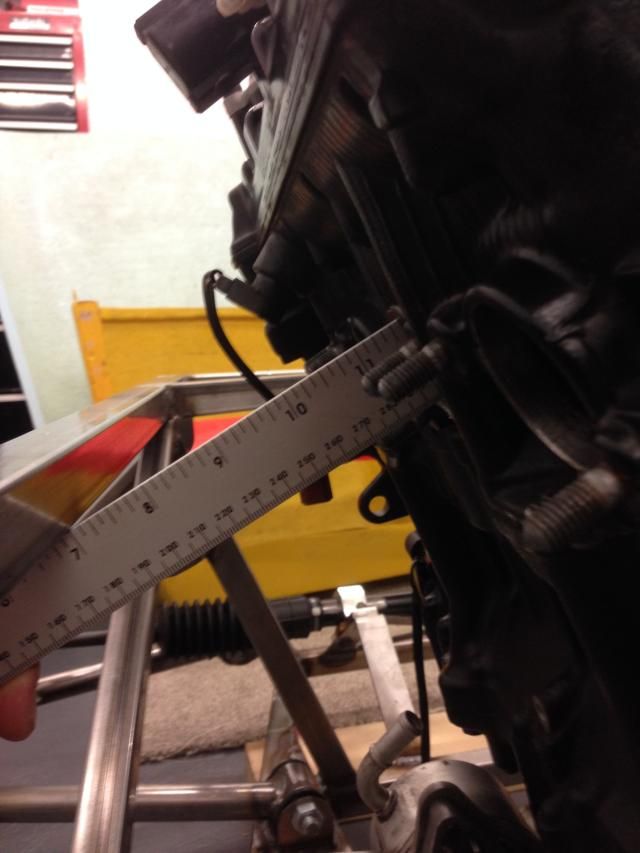
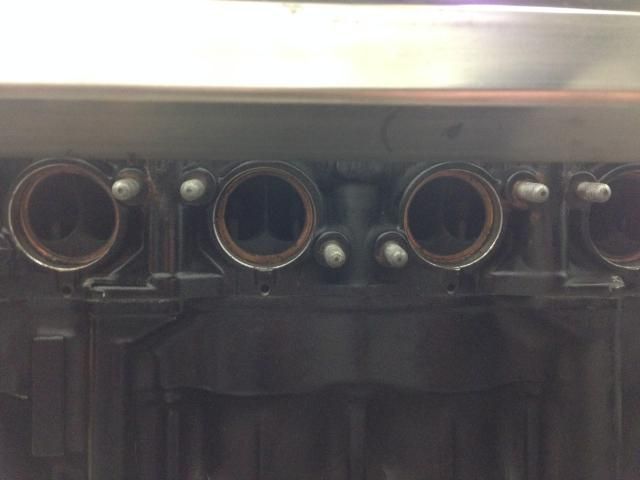
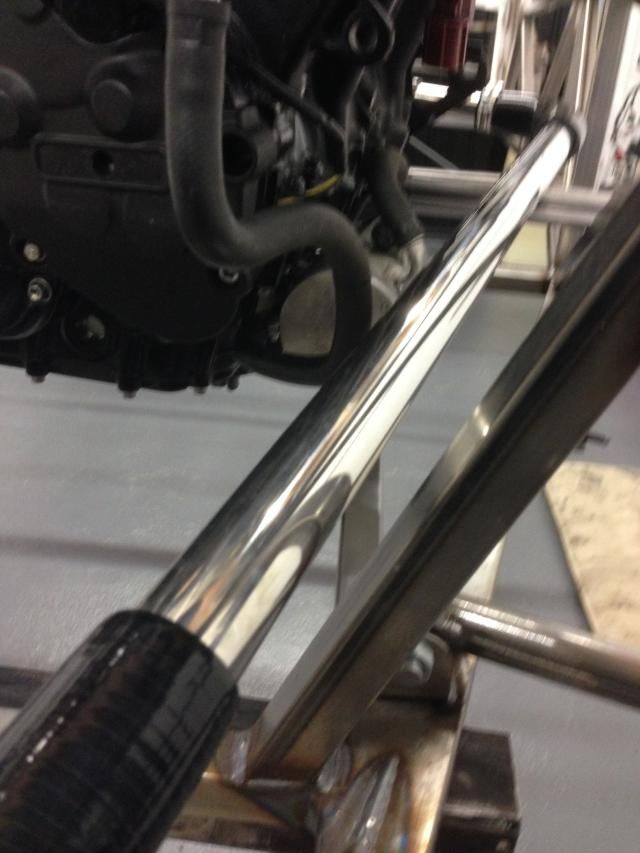
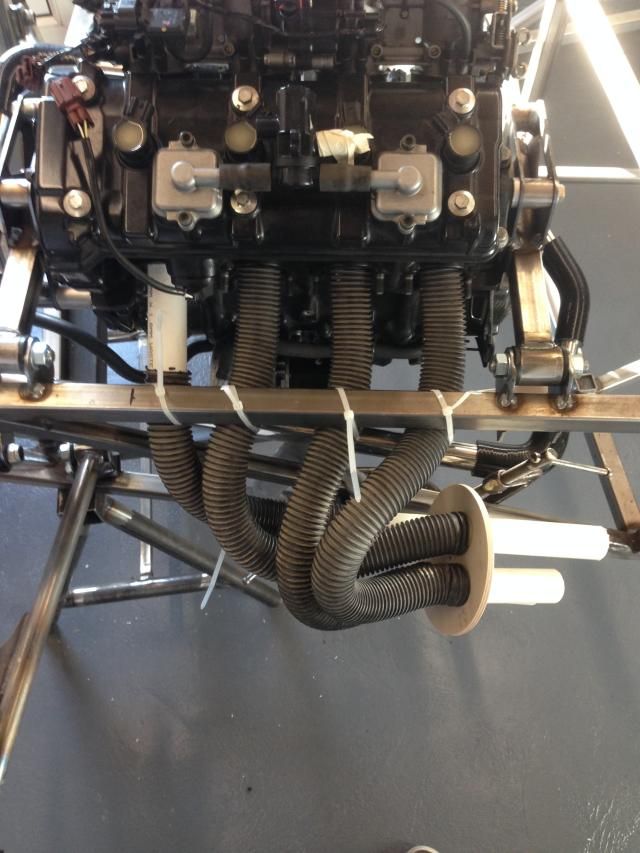
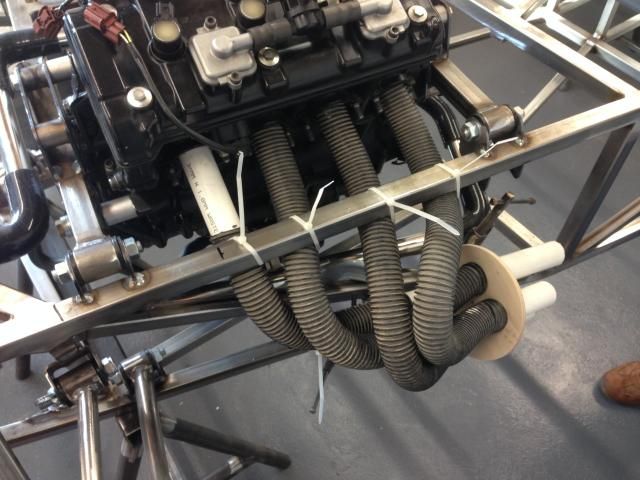
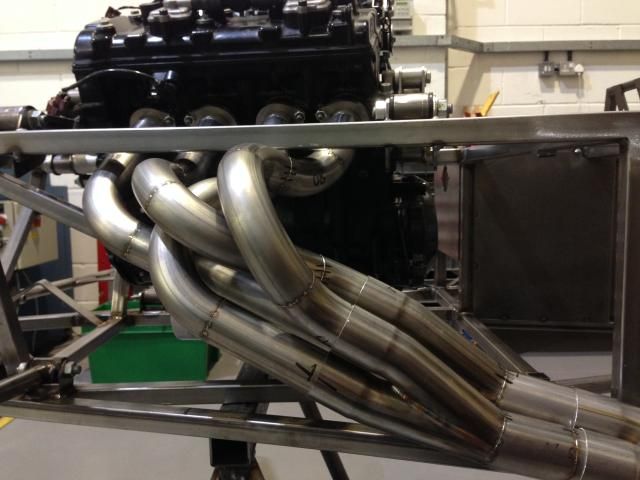
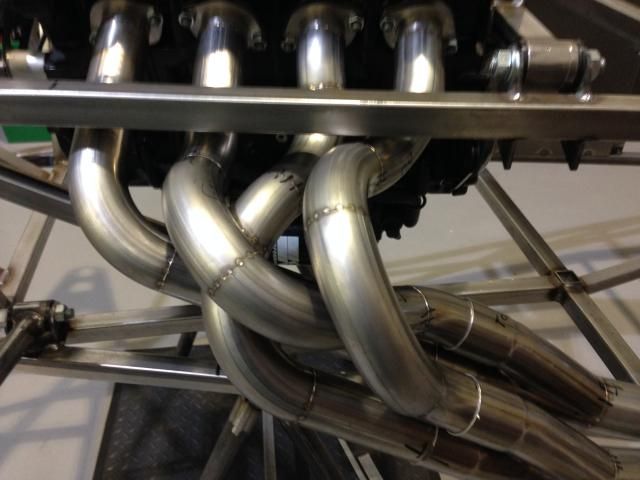
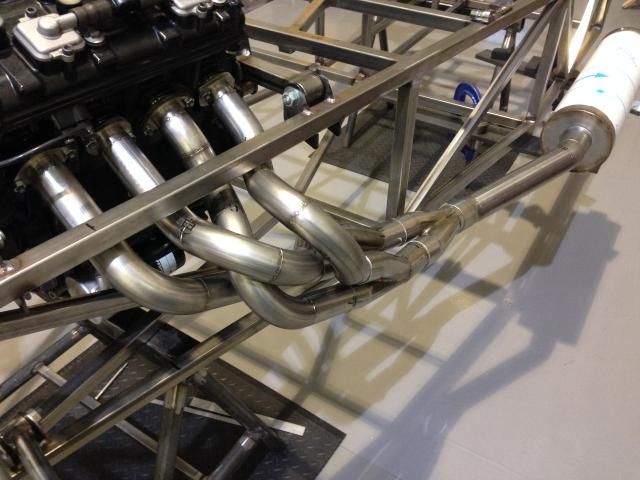
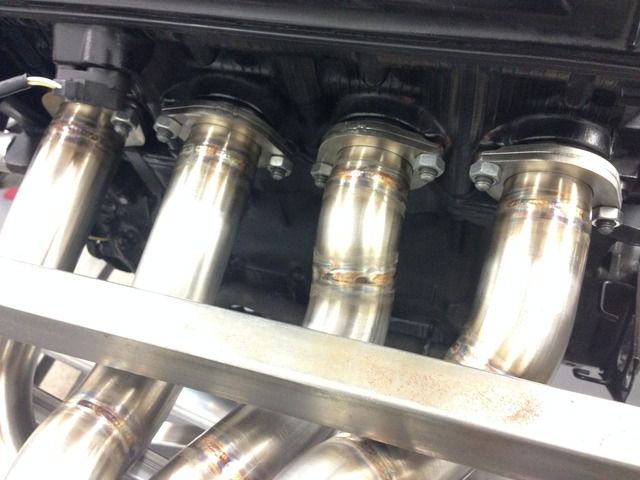
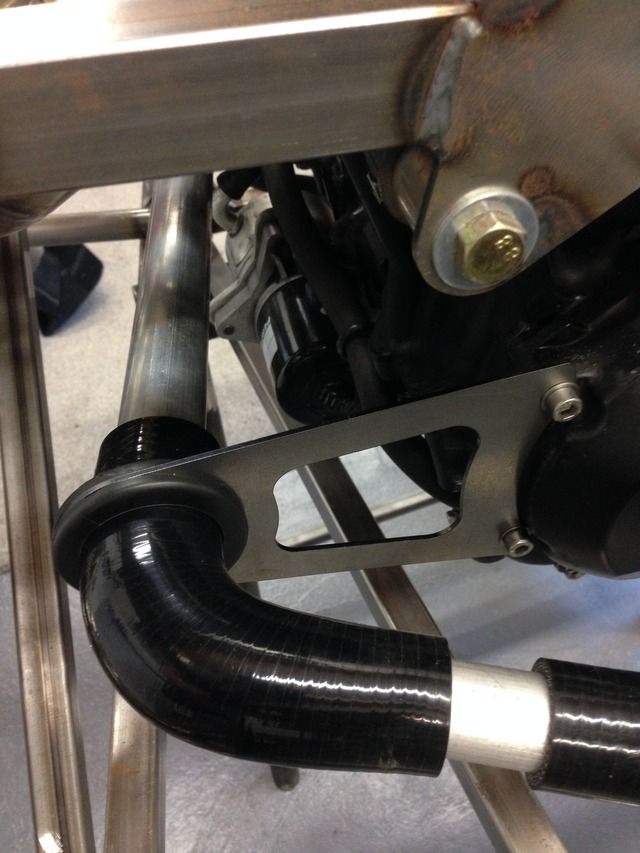
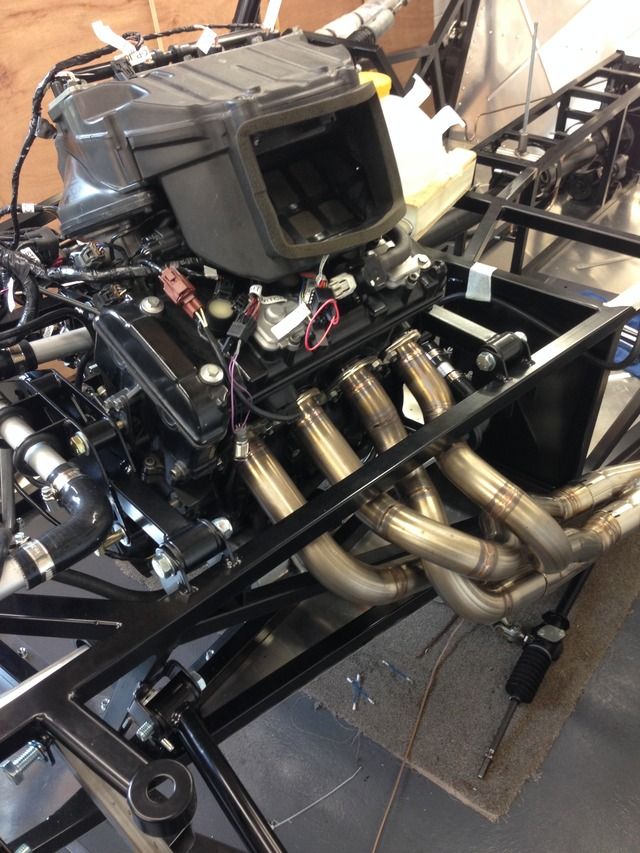
Few exhaust clearance pics
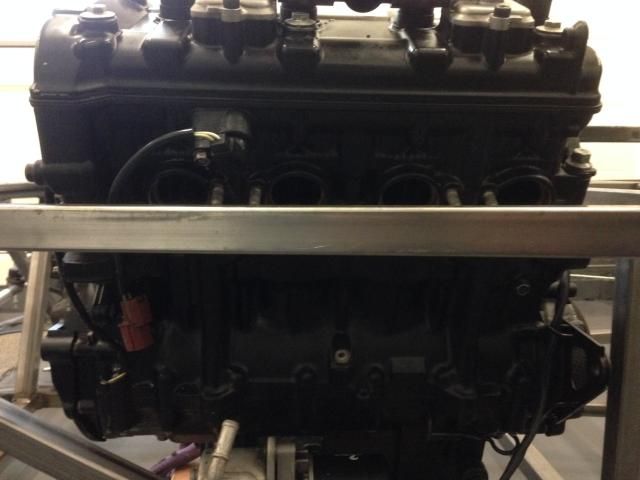
That's looking straight at the side
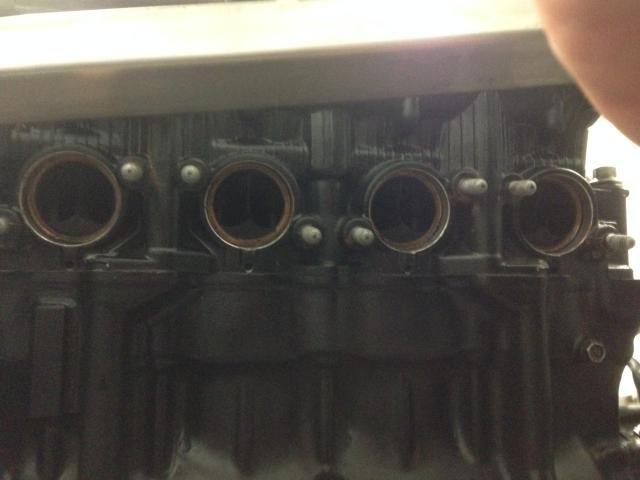
That's looking straight down the axis of the exhaust ports
And that's a ruler coming straight out of the port
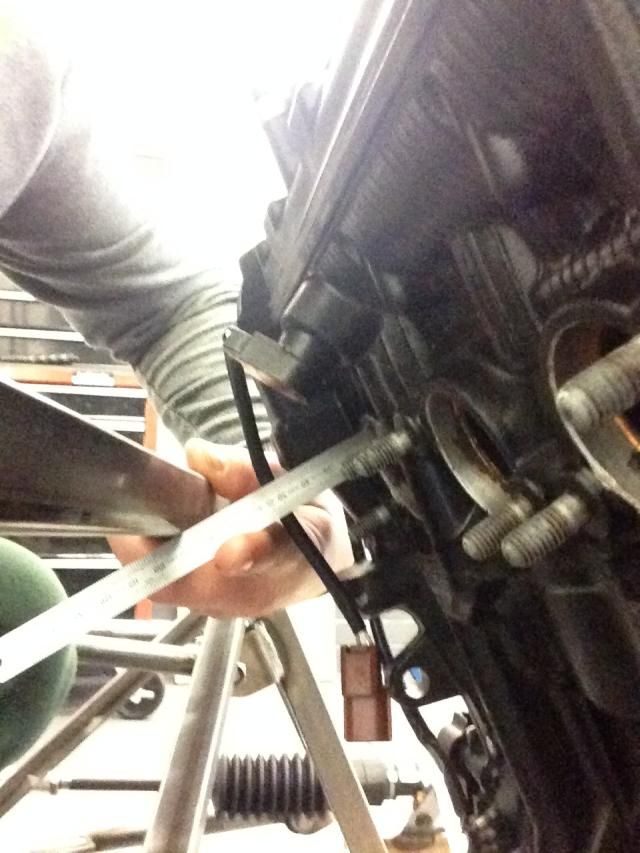
Hopefully I might be able to drop the engine down a tad more, just waiting on AB performance to give me some sump dimensions
CosKev3 - 3/1/15 at 10:20 AM
Great pics and workmanship!
Rosco86 - 5/1/15 at 09:08 PM
Well spoke to AB performance today, real nice chap with some good ideas backed up with some good evidence,
So I've moved it again, haha
Think I've got clearance around everything that I need to have
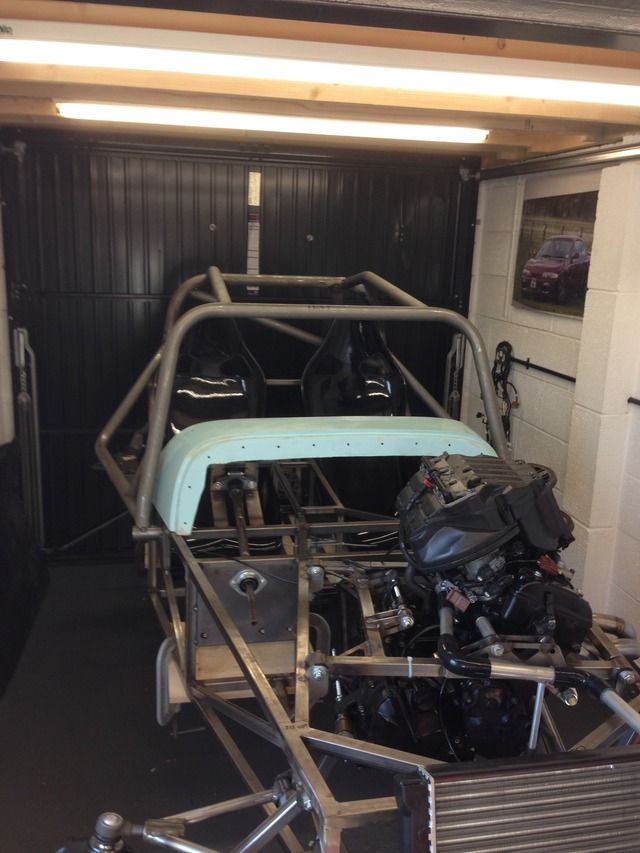
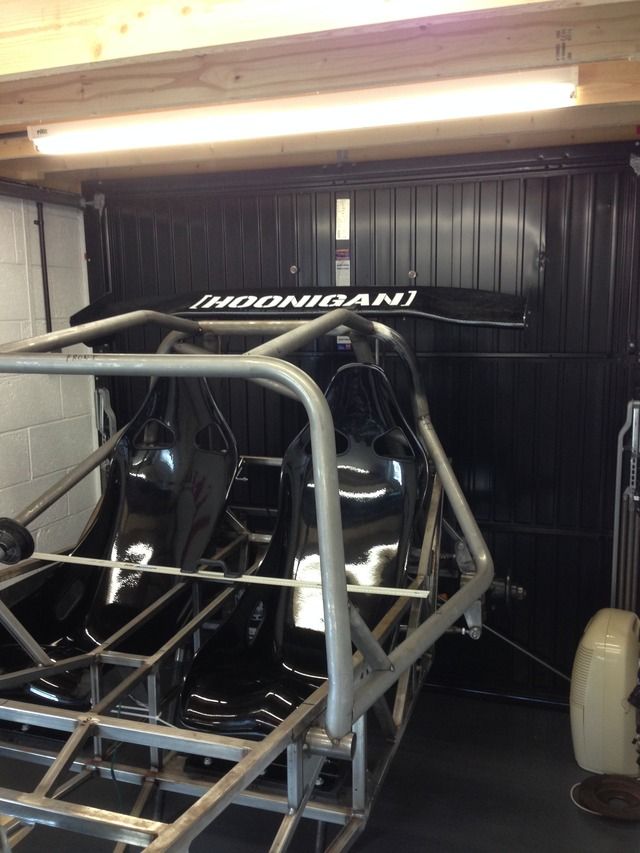
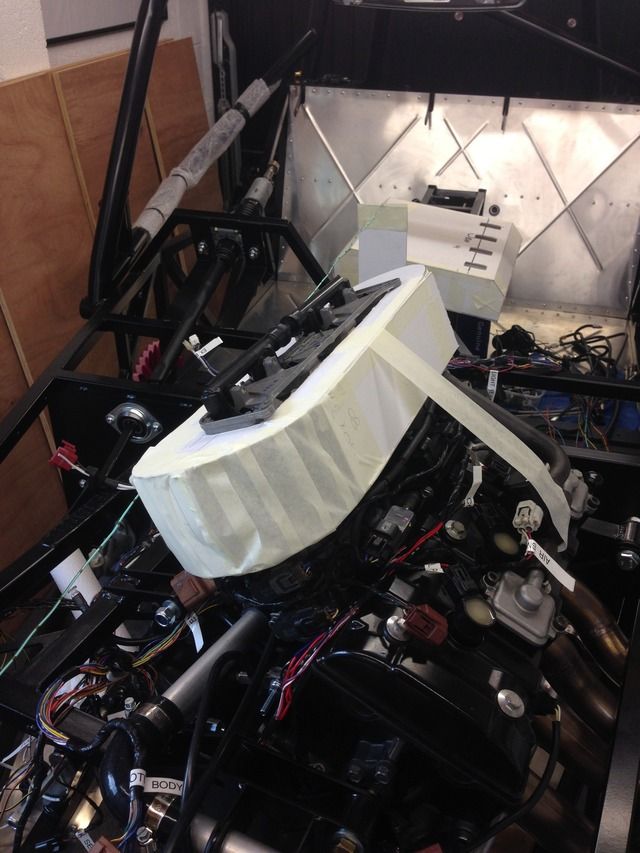
So Tatley off the haynes forum who lives not to far from me has kindly lent me his body work so I can mock things up
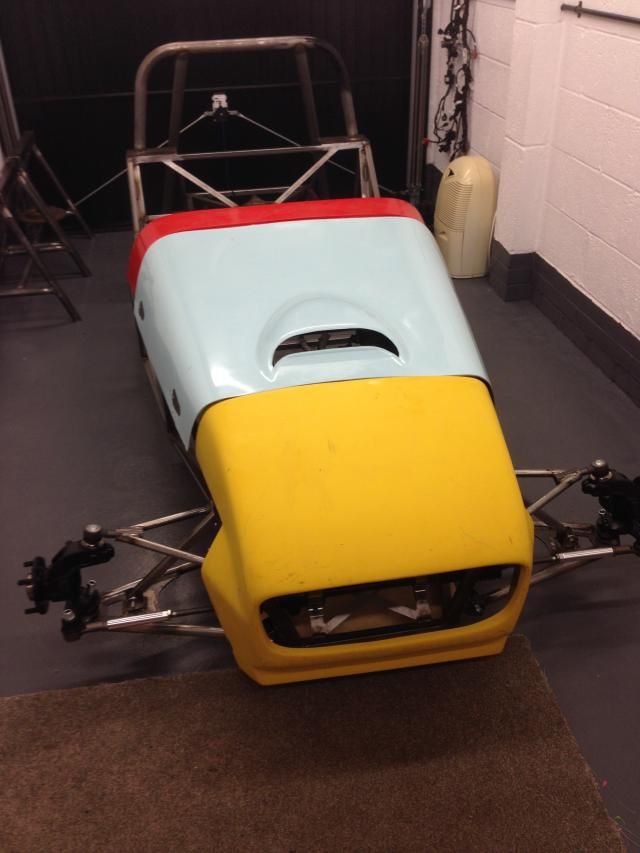
Looking a bit like a car!
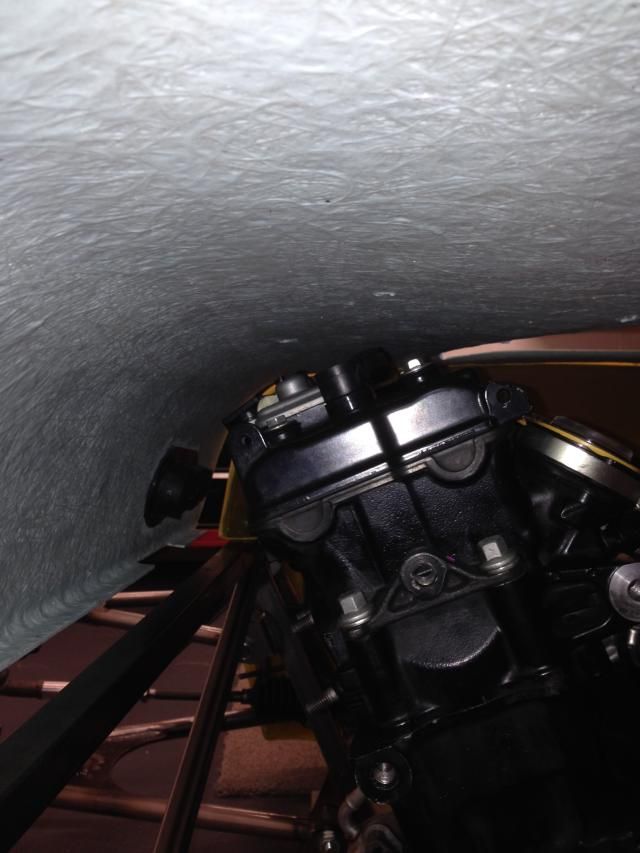
There's a bit of clearance over the top, this is saturn body work but I'm holding that the exquinox may be has a bit more
rdodger - 5/1/15 at 10:01 PM
What's the thinking behind the position of the engine? Is it just for clearance?
Rosco86 - 6/1/15 at 08:22 PM
Engine position thoughts
Access to all areas of the engine, to save removing the engine if anything needs replacing
Keeping some weight upfront to help keep some heat in the tyres
Height wise, keep the sump flush with the bottom of the chassis, this means you can run the whole car an inch lower than if the sump was sitting below
by an inch,
I thought this was really good advice and made a lot of sense
On the piss, just seems to fit better for the exhaust and loads are mounted like this so must be ok for the prop
I don't want to drop the engine down as I want the underside flush, and an inch wouldn't solve the problem, looks like I'm going to
have to mod the bonnet with a scoop or just use a filter like you say and let it sit out the top, also I've got to refit the top injectors,
CosKev3 - 6/1/15 at 10:01 PM
If it's track only the bonnet being cut/filter sticking out isn't a problem,just if IVA'ing would be a harder job.
Rosco86 - 9/1/15 at 08:01 PM
quote:
Originally posted by CosKev3
If it's track only the bonnet being cut/filter sticking out isn't a problem,just if IVA'ing would be a harder job.
Yeah, I will have to make a nice air box I think
Rosco86 - 9/1/15 at 08:01 PM
Well had a measure up for my engine cradle and made some paper templates
Looked ok so drew them up and got them laser cut out
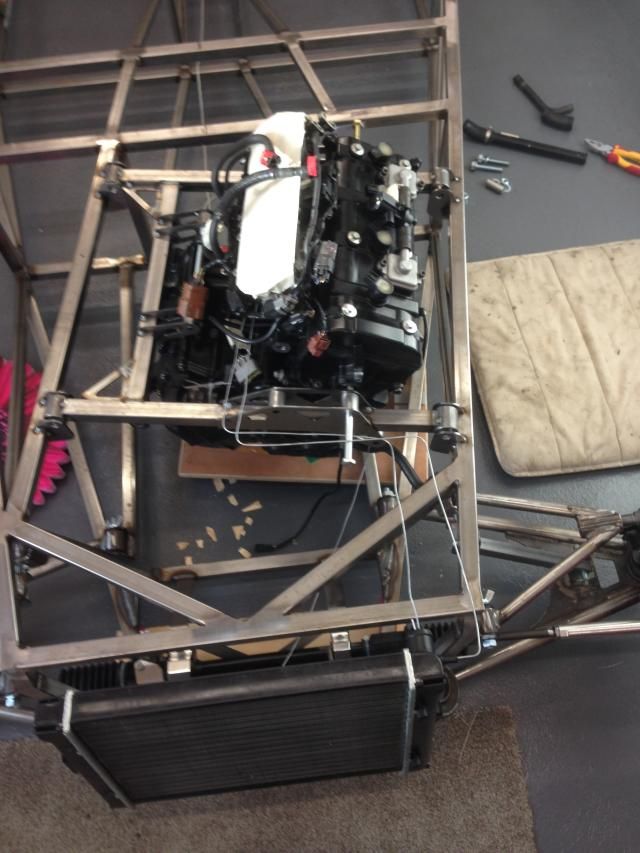
So that's a job for the weekend, also got a polo rad to get mounted
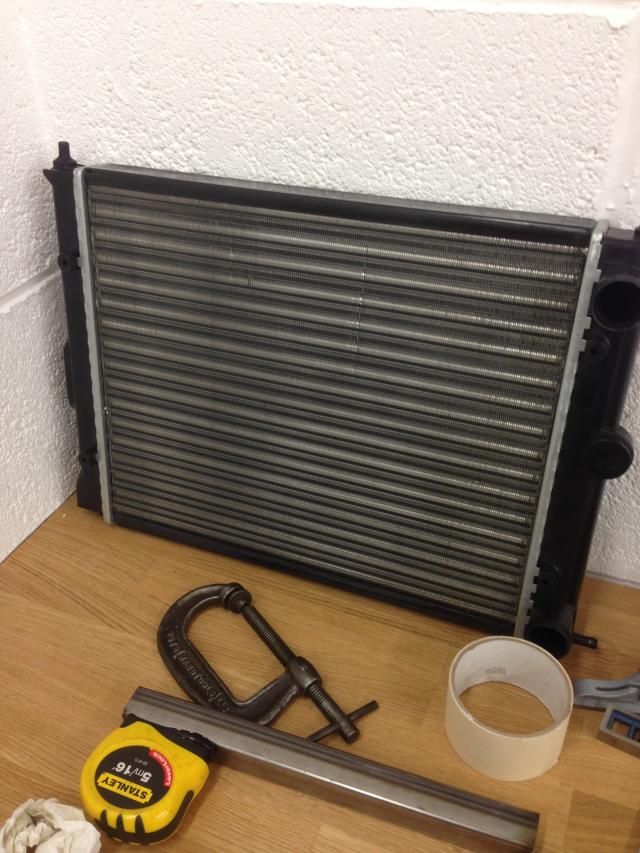
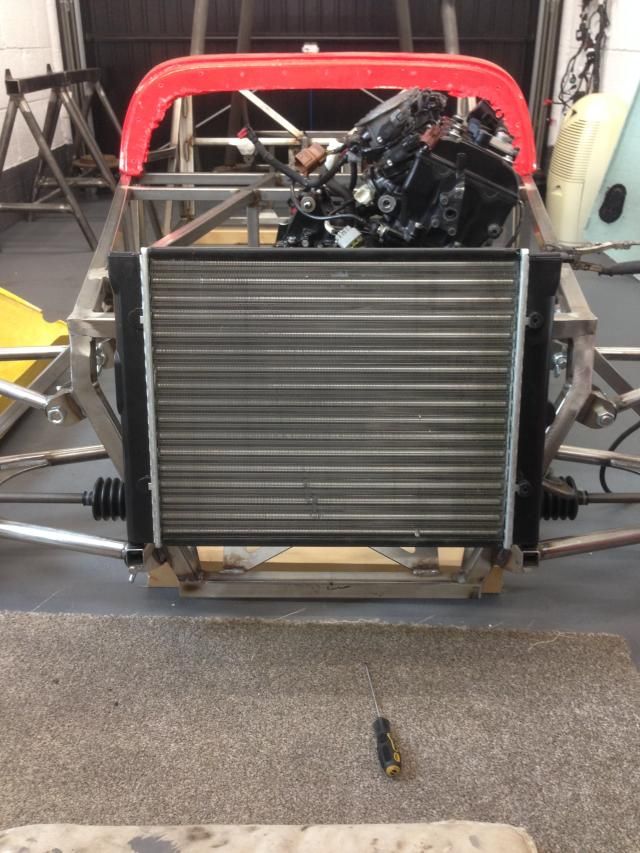
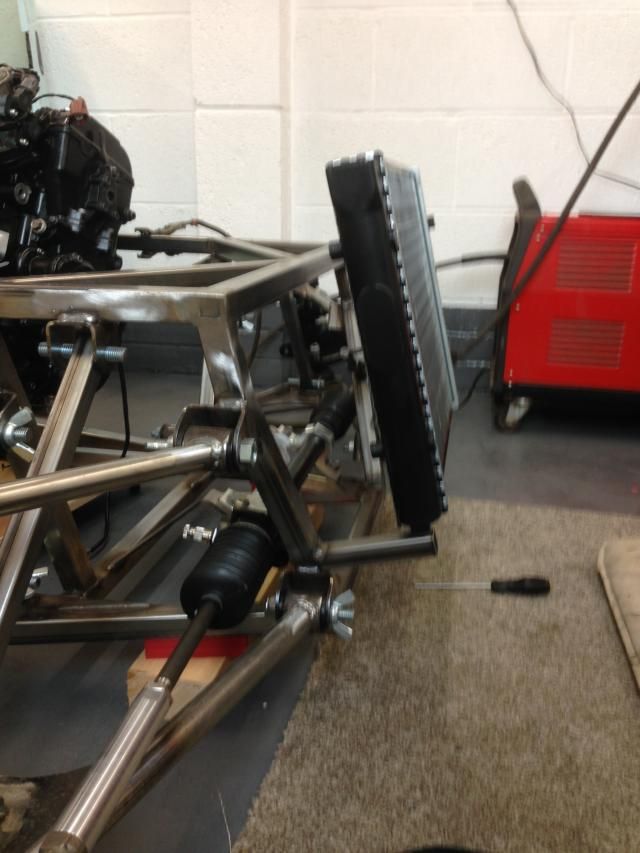
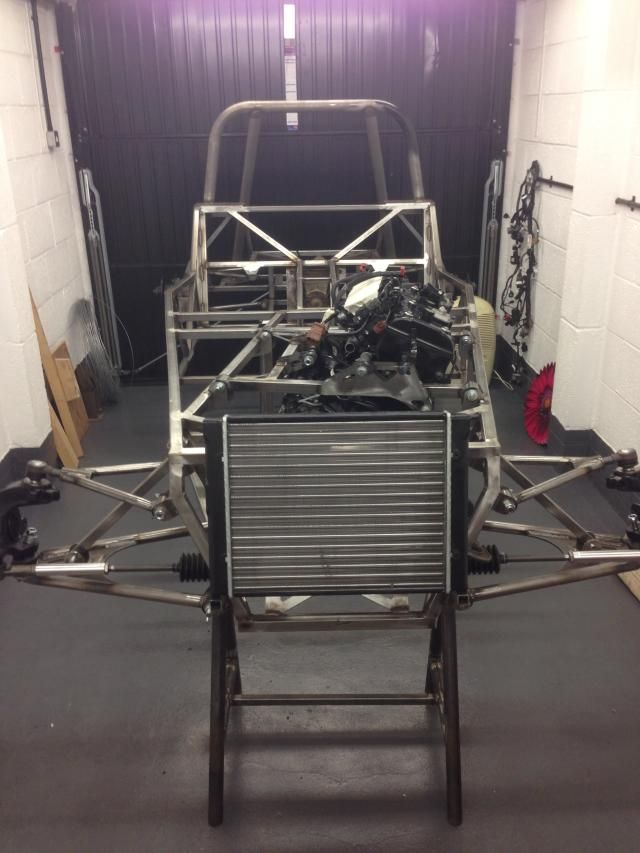
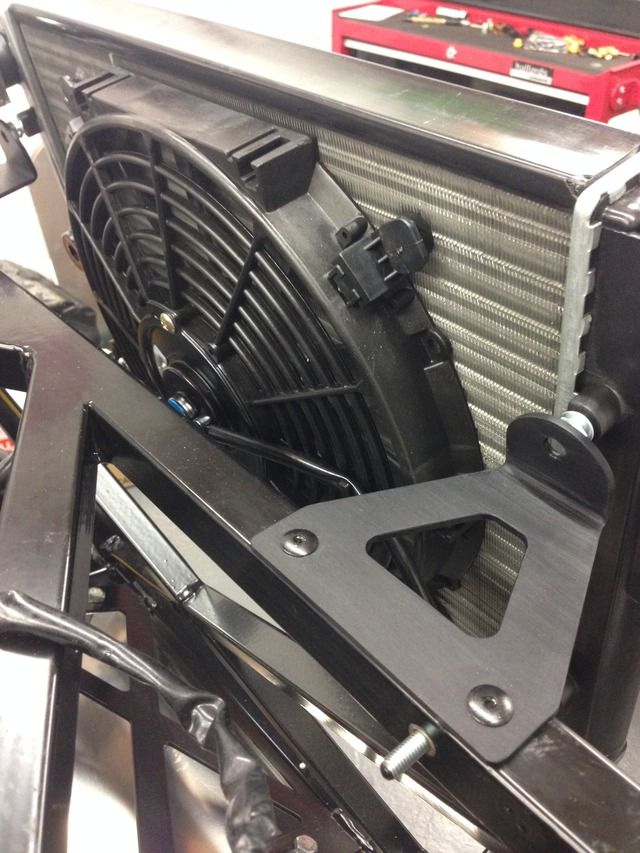
Rosco86 - 10/1/15 at 05:37 PM
Got my radiator mounted today while I still had my borrowed nose cone, I will sort the top brackets later
Some rubber grommets off ebay
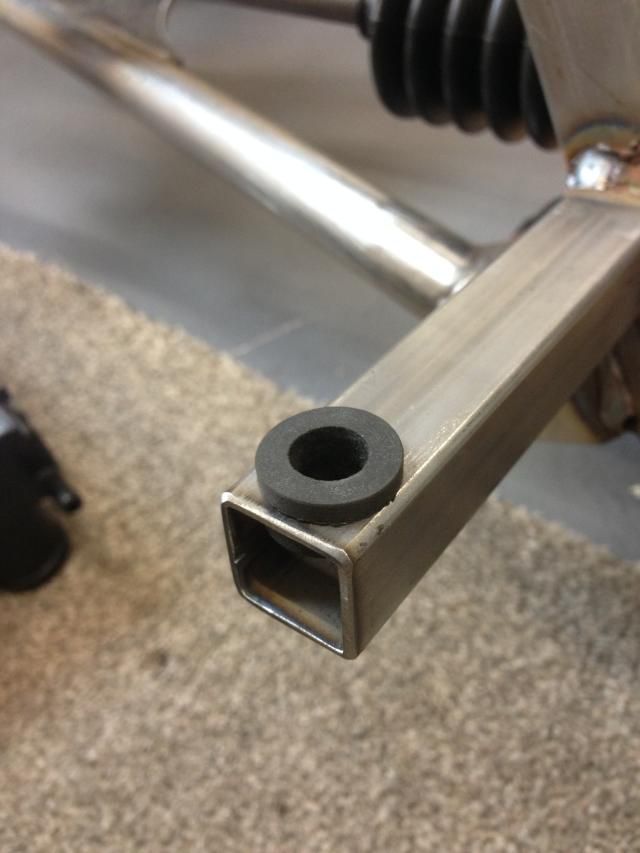
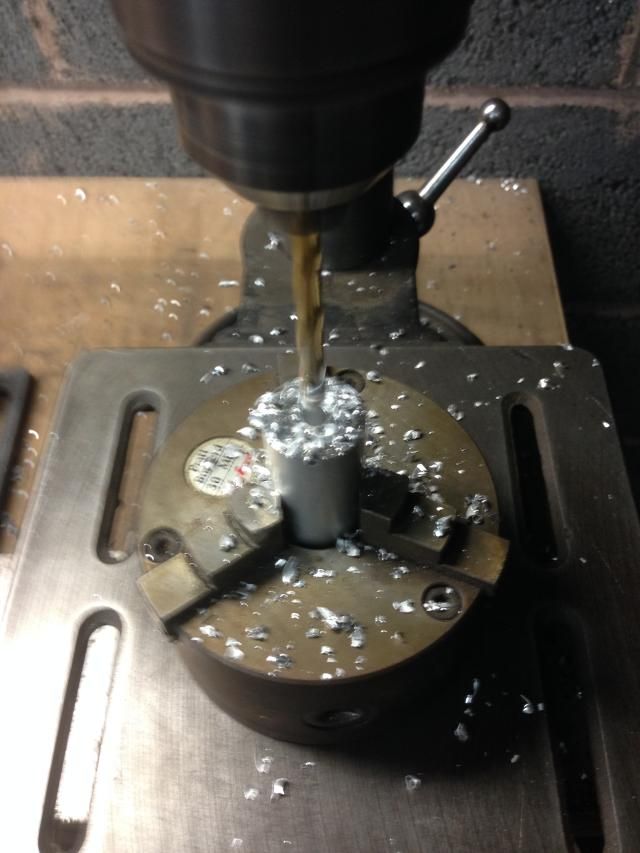
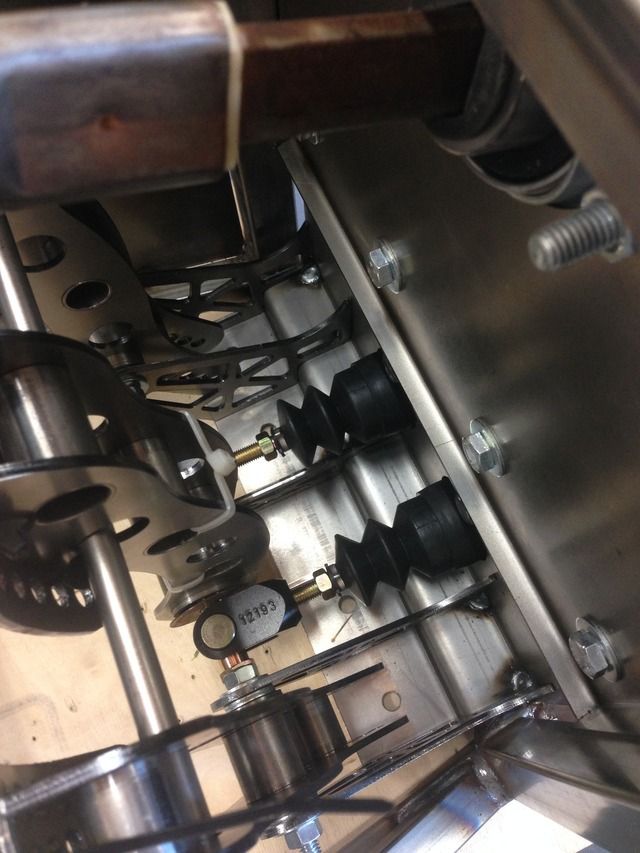
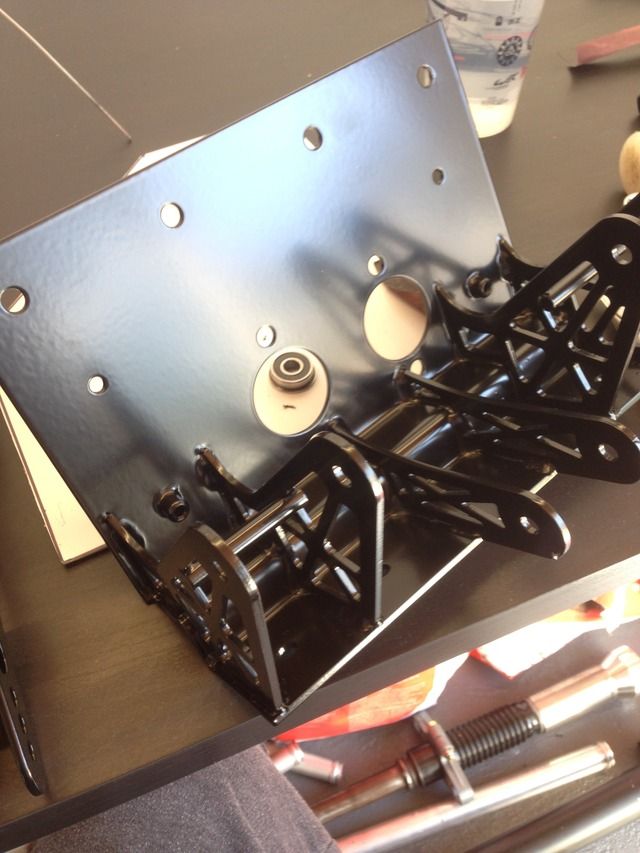
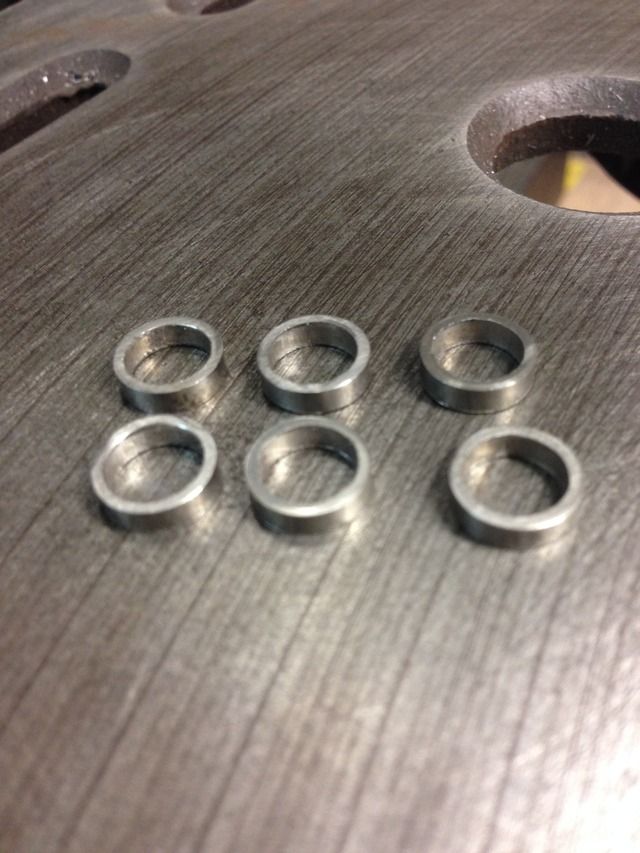
Then I set about making some spacers for my engine mounts, faced and centre drilled them in the lathe, then drilled
Them through on the pillar drill as my lathes a bit small for drilling
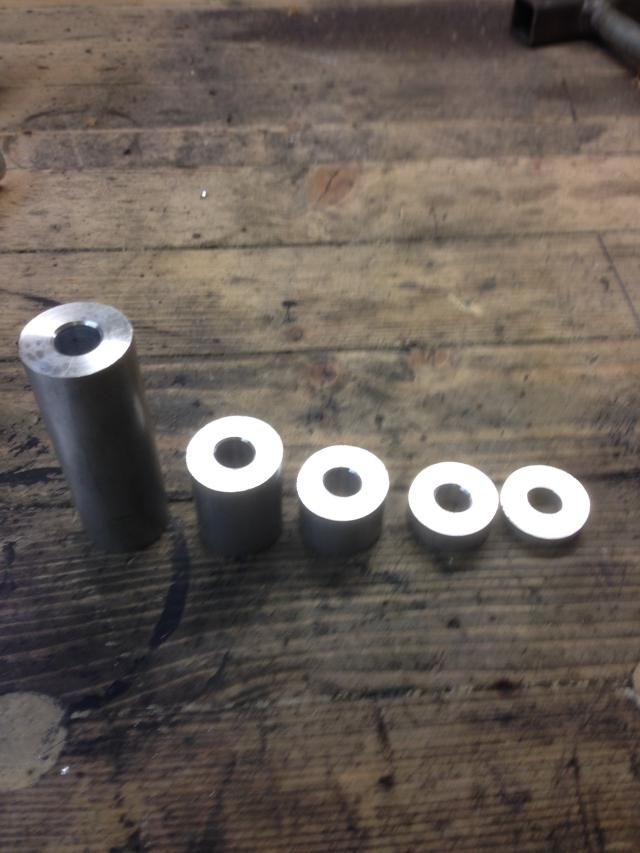
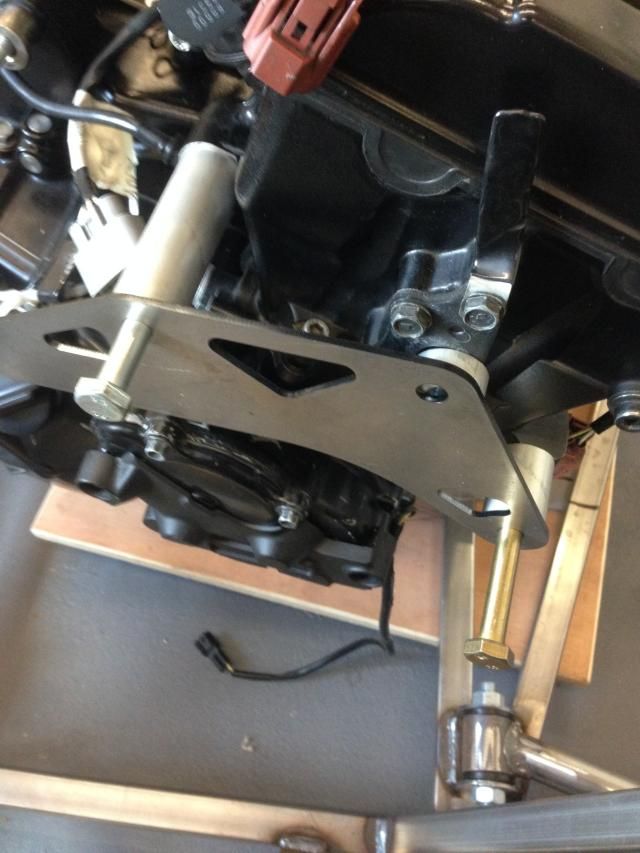
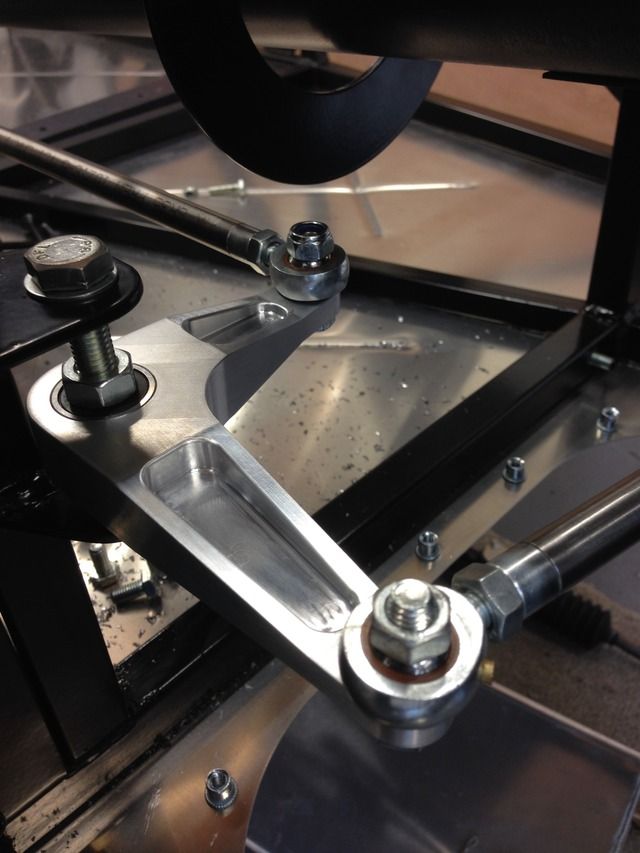
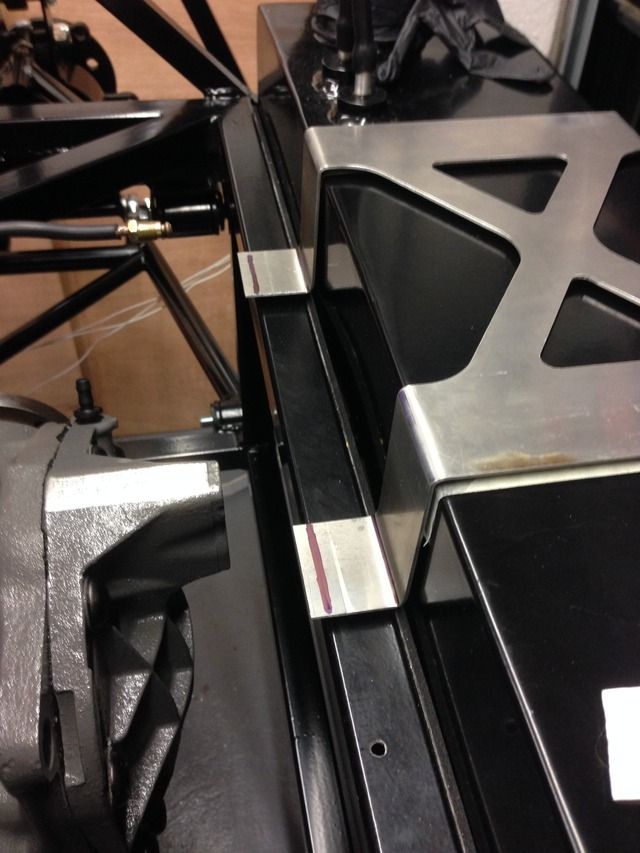
That's the rear mount offered up
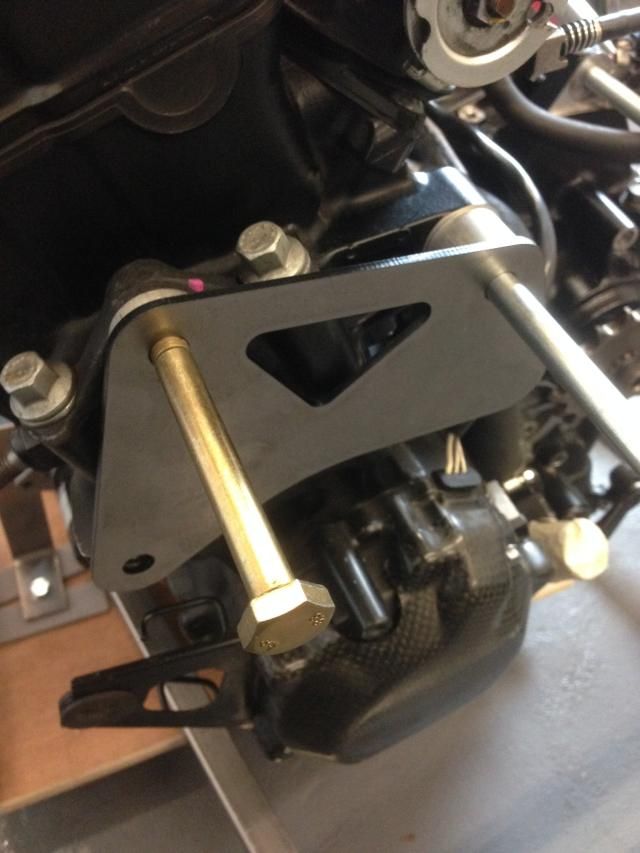
And that's the front
I decided to rubber mount my engine cradle, so have used some spare wishbone bushes I had left, I will see what it's like but could
Always make some softer bushes if I need to
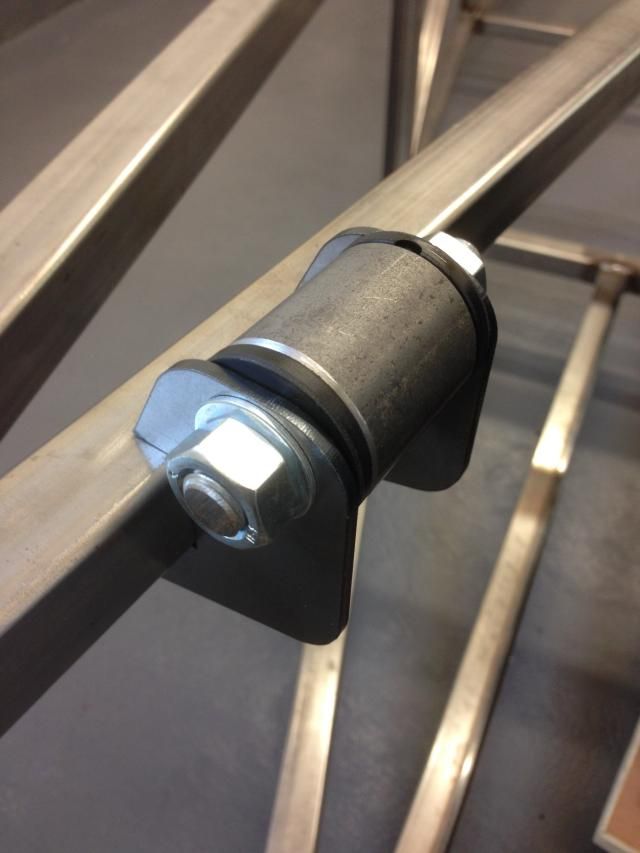
Struggling for bolts, hence the washers, there m10x1.25 so not really very comon
I'm going to weld spacer tubes In between the plates

Side engine mount
Ready to tack up tomorrow
rdodger - 10/1/15 at 06:18 PM
Beautifully done
wylliezx9r - 10/1/15 at 07:12 PM
Wow that's the best cradle I've ever seen. Good work.
Rosco86 - 11/1/15 at 04:42 PM
Cheers guys, pretty pleased with how it's turned out
I looked at other cradles and didn't really fancy mounting on just one bolt either side, I no it's going to be a bit heavier, but I will
lose the weight elsewhere if I can
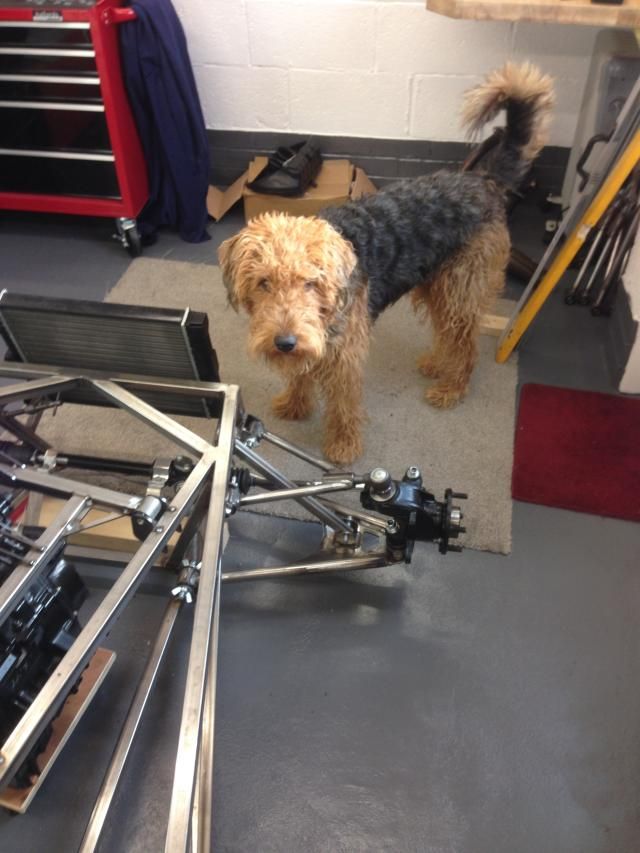
Got it tacked up today and worked out my coolant pipes
And one of the pooch
Digimon - 11/1/15 at 07:10 PM
quote:
Originally posted by Rosco86
That cradle is a piece of artwork, nicely done
Rosco86 - 11/1/15 at 08:27 PM
quote:
Originally posted by Digimon
That cradle is a piece of artwork, nicely done
Haha thanks, quite pleased with it myself
Ben_Copeland - 11/1/15 at 08:30 PM
Ross did you see the dimensions that where posted for equinox bodywork. I know you've asked me for a few but might help with the engine locations
CosKev3 - 11/1/15 at 09:16 PM
Cradle looks mint
Love the bottom rad mounts too,simple but brilliant idea.
Rosco86 - 11/1/15 at 10:04 PM
quote:
Originally posted by Ben_Copeland
Ross did you see the dimensions that where posted for equinox bodywork. I know you've asked me for a few but might help with the engine locations
Yeah ive seen them, i borrowed some bodywork to, think im happy with the position, hopefully all will work out ok
Rosco86 - 11/1/15 at 10:05 PM
quote:
Originally posted by CosKev3
Cradle looks mint
Love the bottom rad mounts too,simple but brilliant idea.
Cheers, just need to blank the ends off to stop them filling with crud!
Rosco86 - 12/1/15 at 10:04 PM
Busy evening tonight,
My mate tacking up my wishbones
All welded
Rear end assembled again
Might have to remake to top ones to, just because I made them to the book jig that hadn't been up issued although the wishbone drawing had!
Argh!!
Popped and got some bits off my mate who runs an ebay shop
Then got it back on the stands and the engine bolted back in
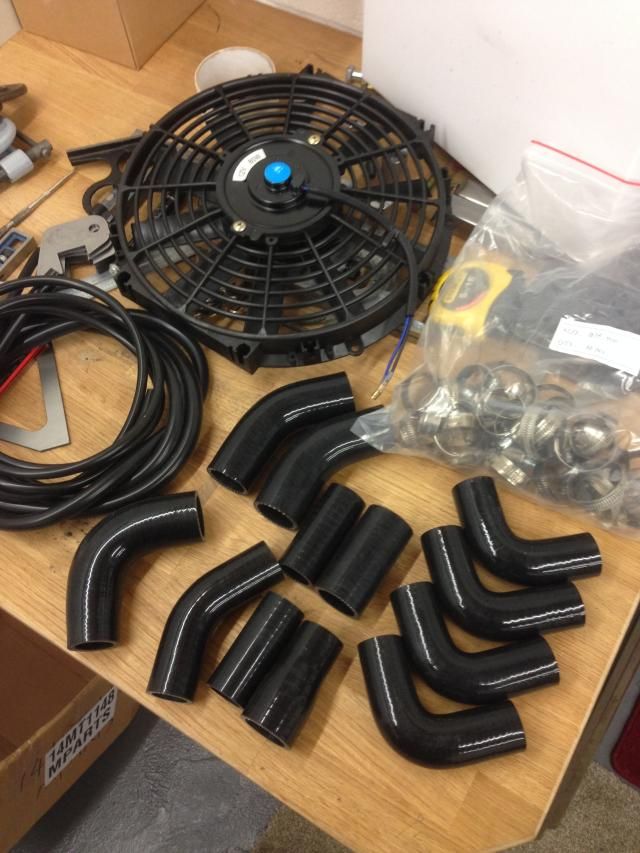
Got loads to do now, I've got everything to get my cooling hoses done, also going to start to look at making an exhaust manifold and a fuel
tank
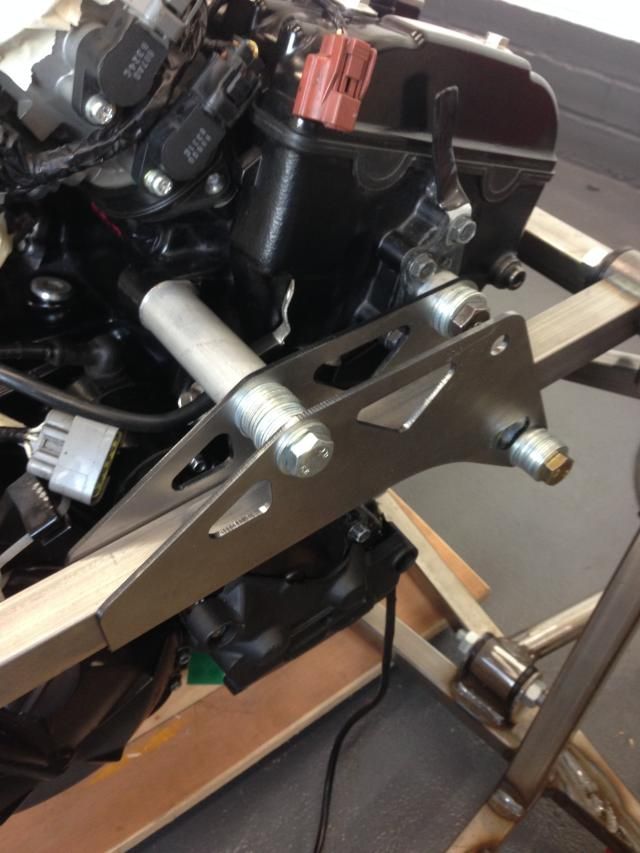
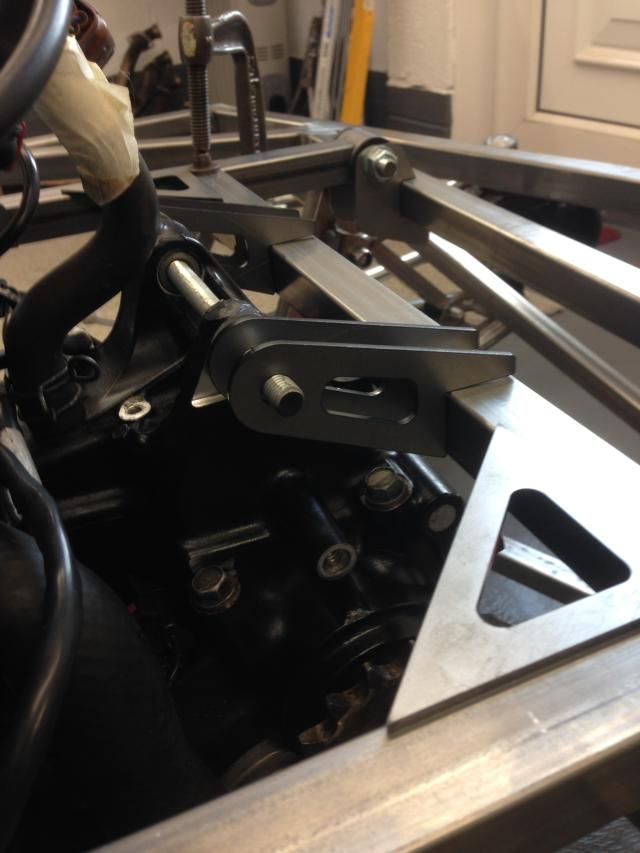
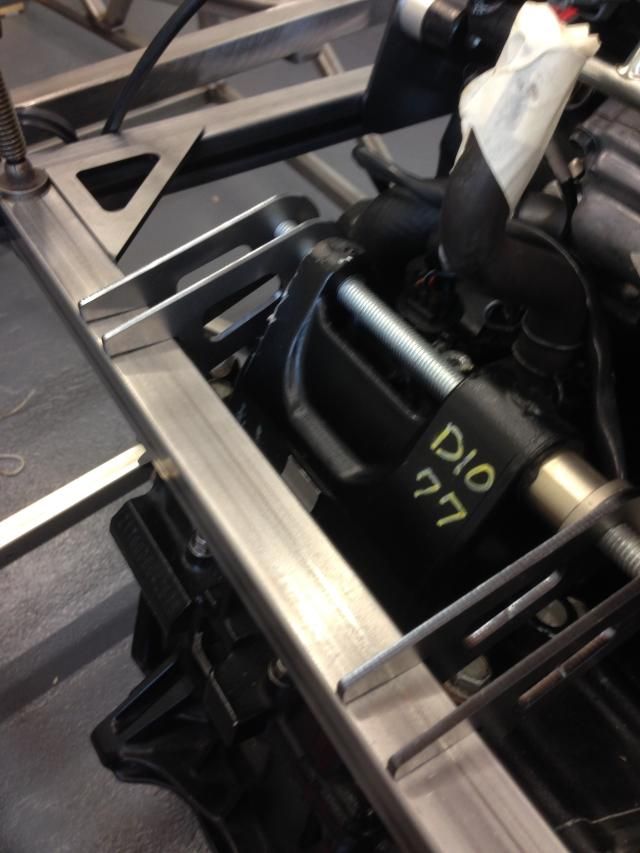
Also sort out my lower engine mount
Rosco86 - 13/1/15 at 09:14 PM
Got my coolant hoses on tonight
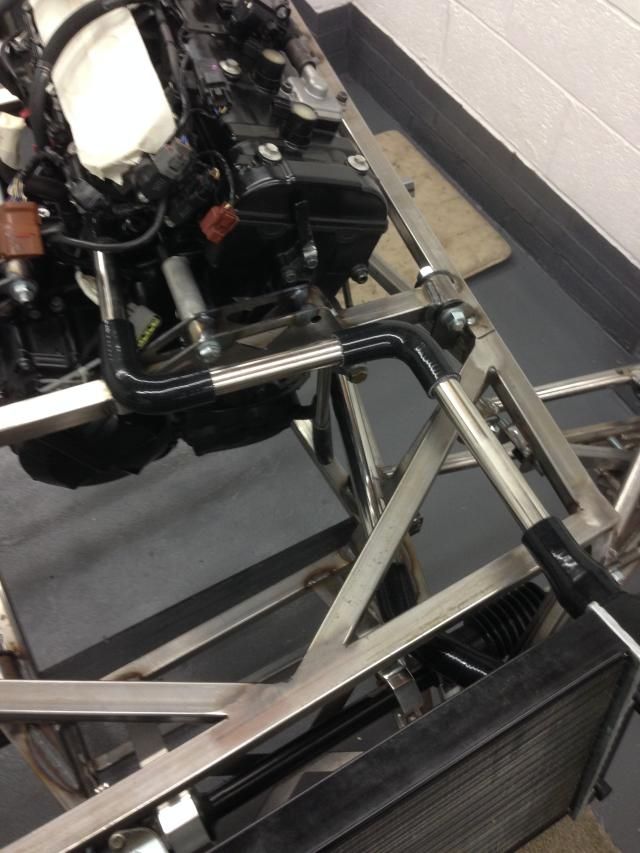
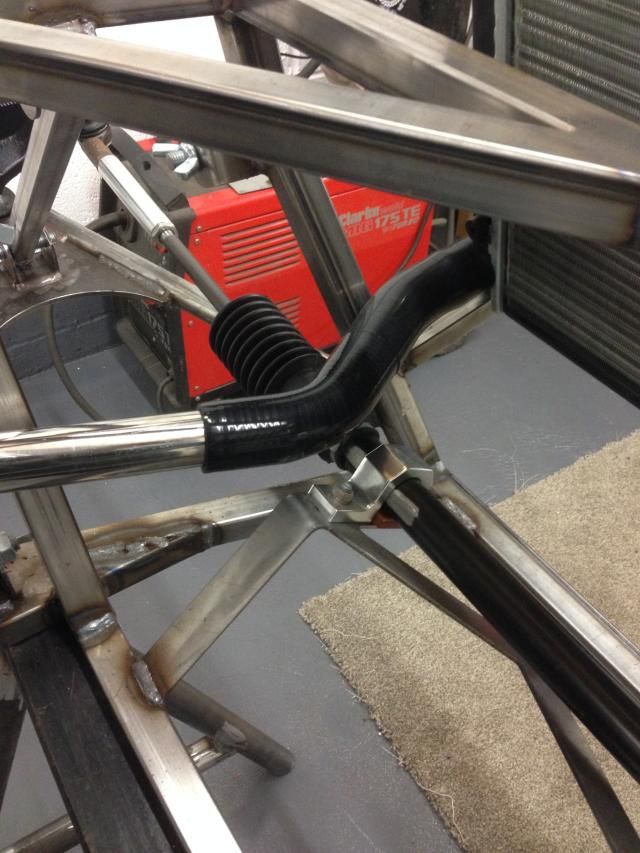
That's the oil cooler return T'ed into the out flow
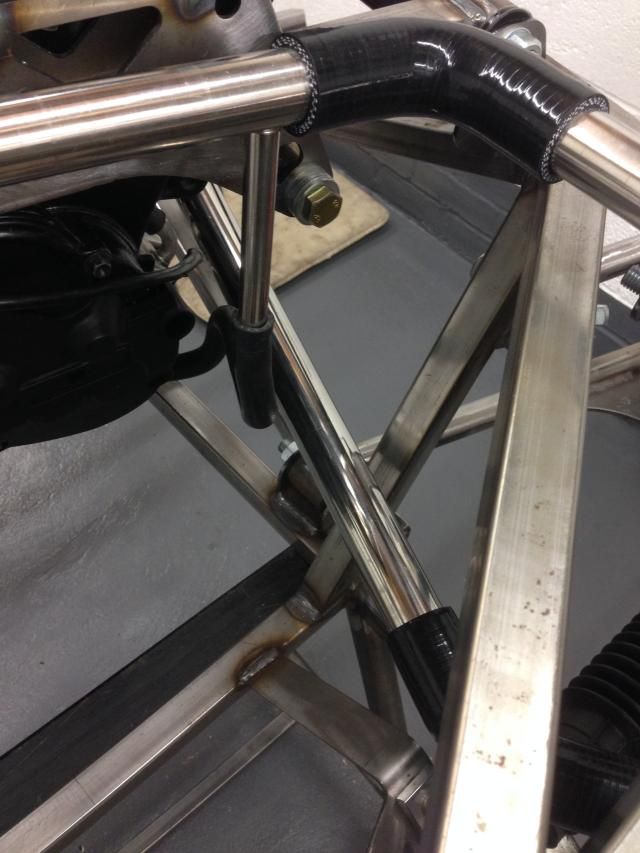
That's running from the lower rad to the back of the engine
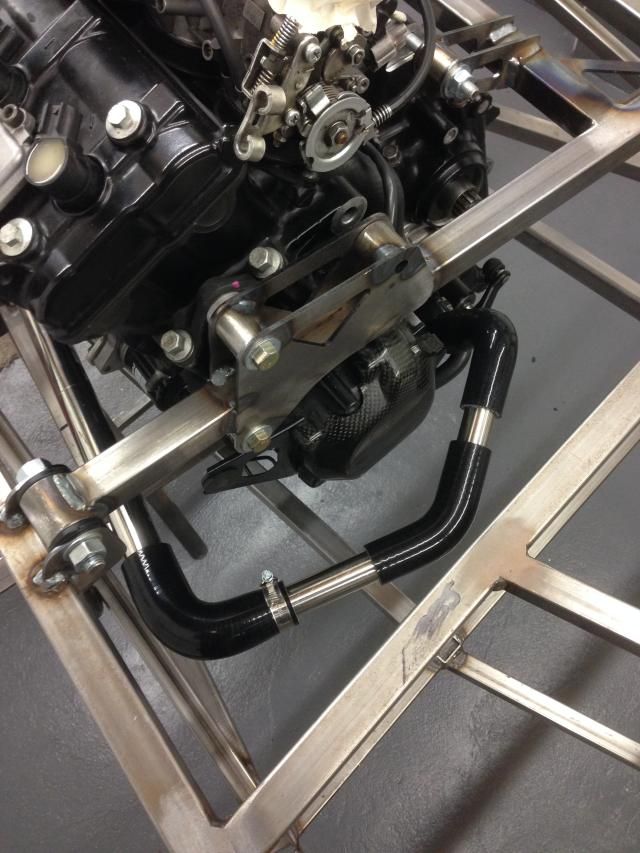
I've used 25mm and 32mm stainless pipe to make the joins and runs, I might get the outside blasted and powder coated to keep it looking factory
tho
Rosco86 - 13/1/15 at 09:17 PM
I just need to decide where I'm going to T my header tank into and make a few brackets to support the tube in places to stop the silicone rubbing
anywhere!
Rosco86 - 17/1/15 at 03:32 PM
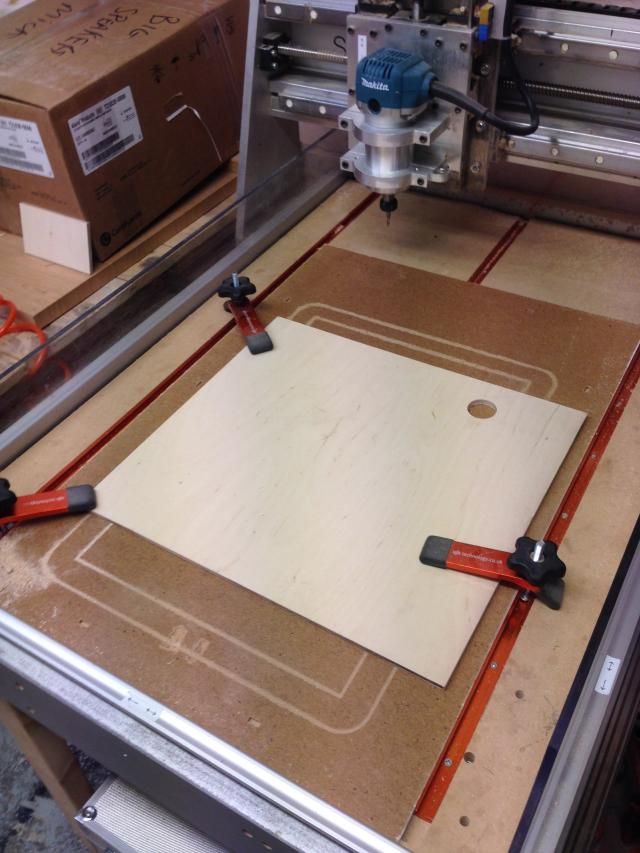
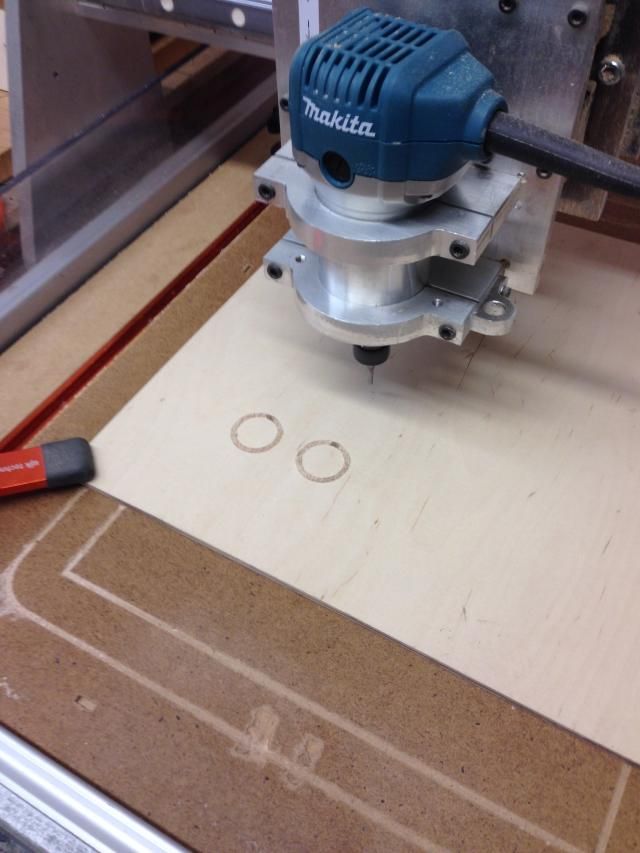
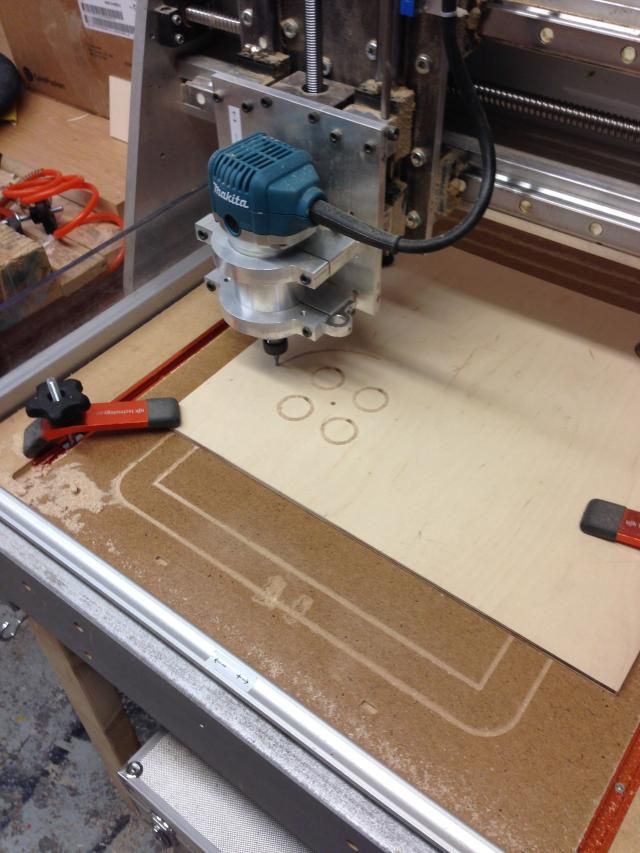
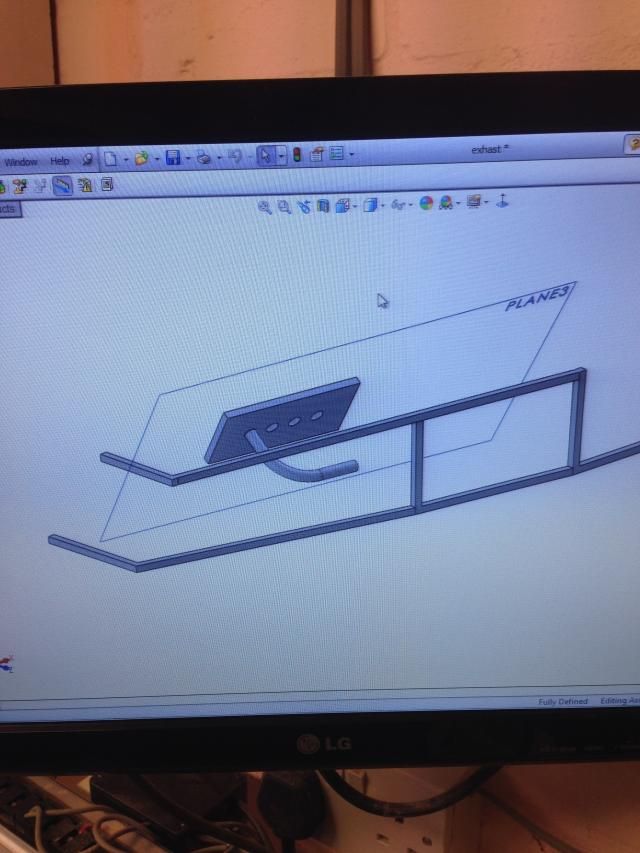
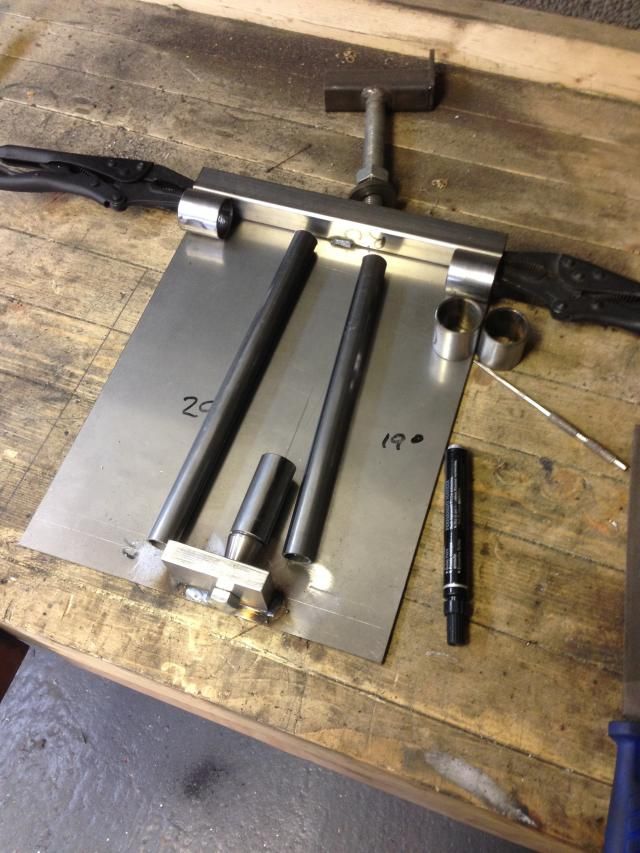
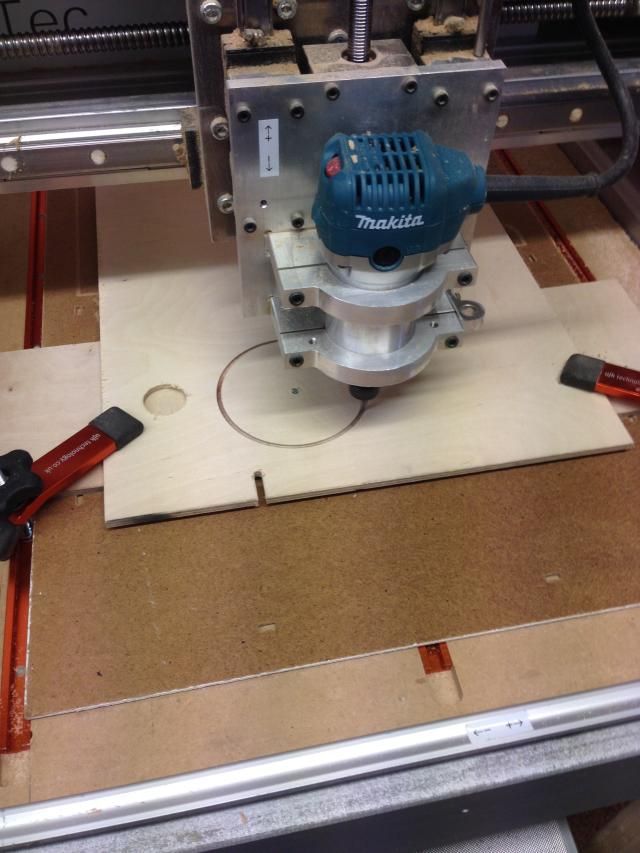
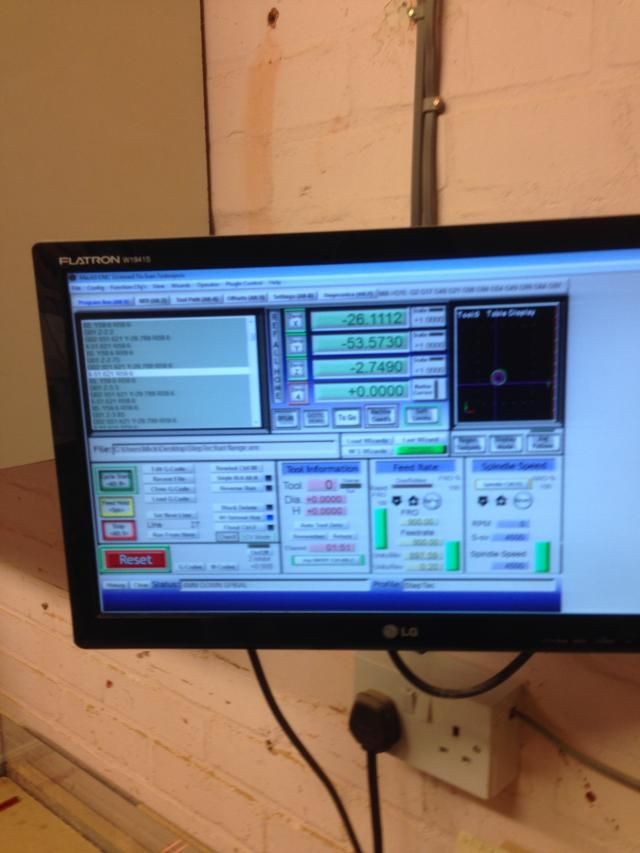
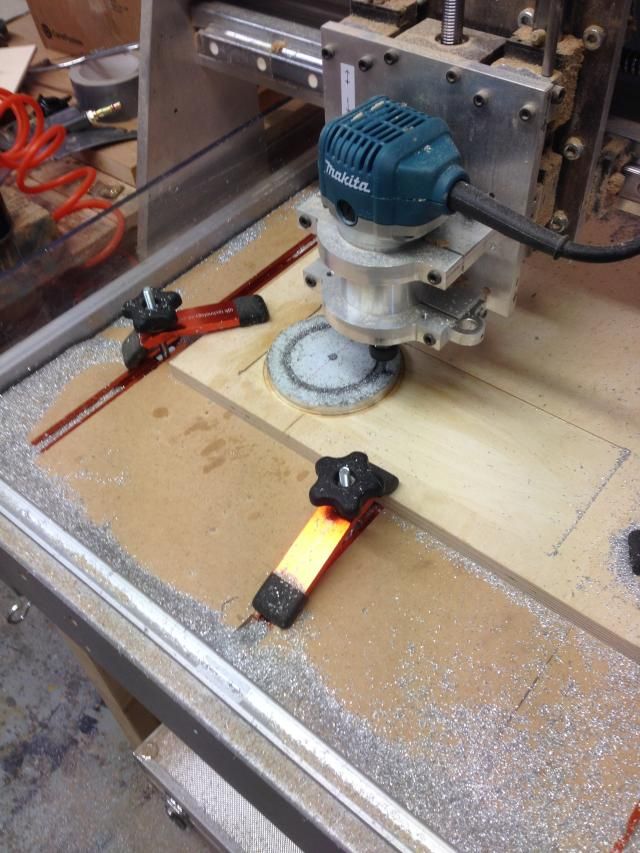
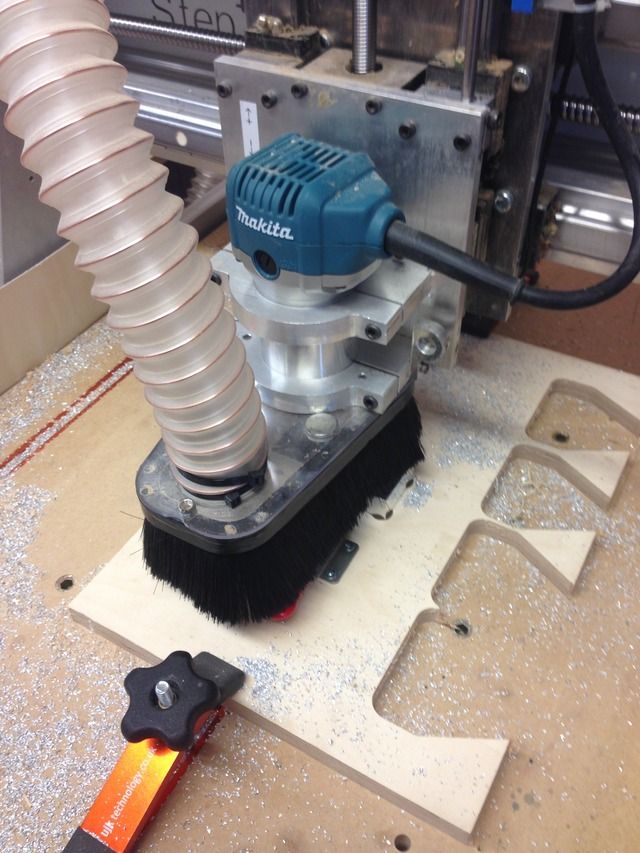
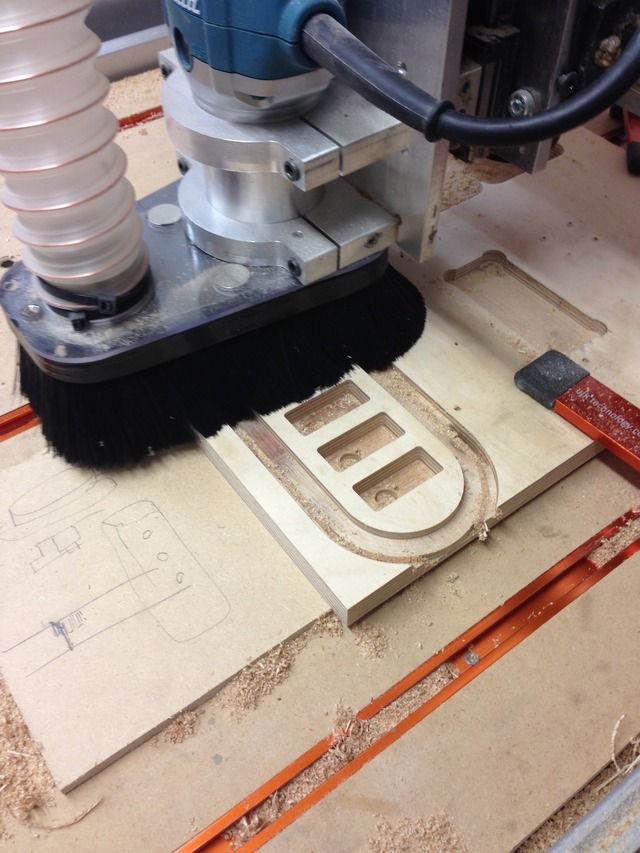
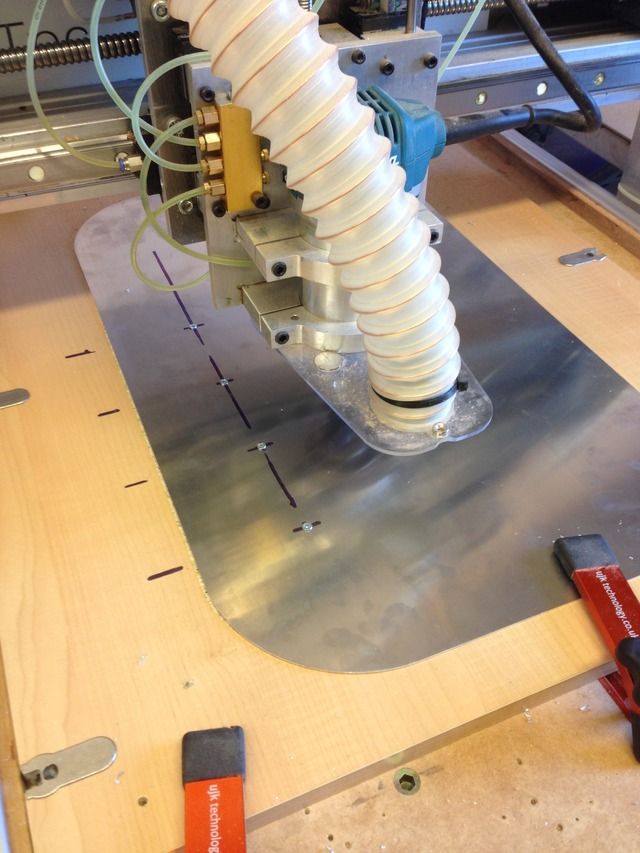
First job today make a dummy exhaust collector so I can mock up my exhaust, luckily my dads built a cnc router!
Then mocked up with four tubes of equal length
Then started to draw it up on the cad to work out my bends
Then made a start on remaking my rear upper wishbones
Rosco86 - 24/1/15 at 07:33 PM
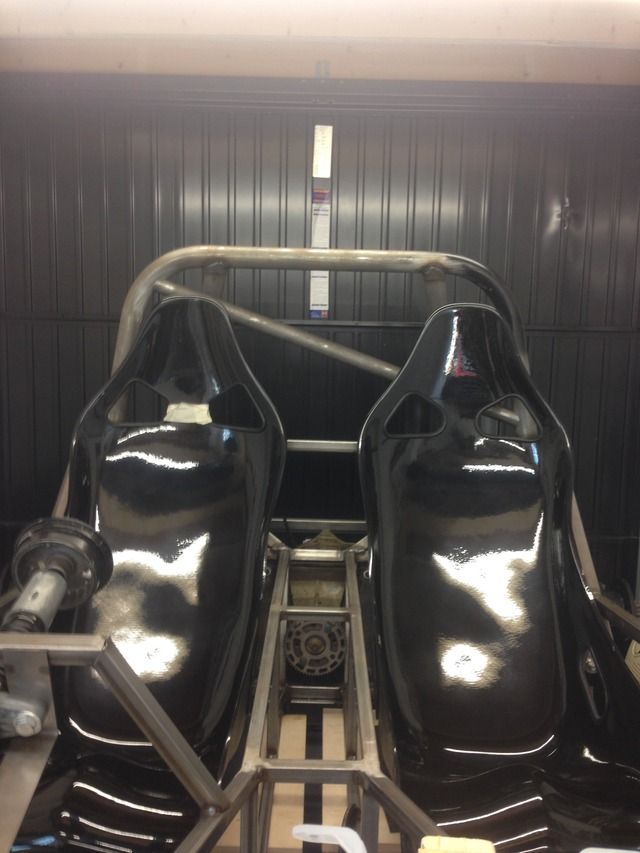
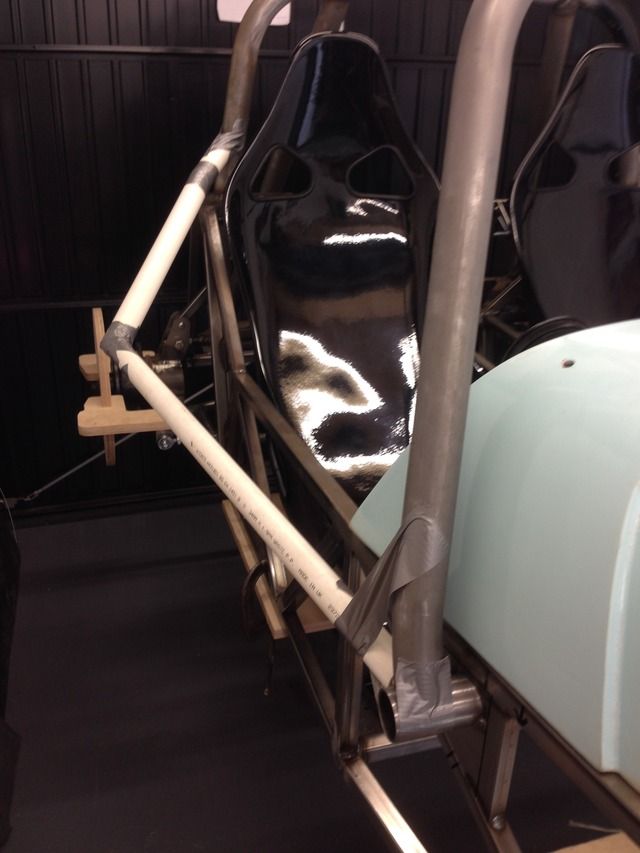
Got my seats from JK Composites this week
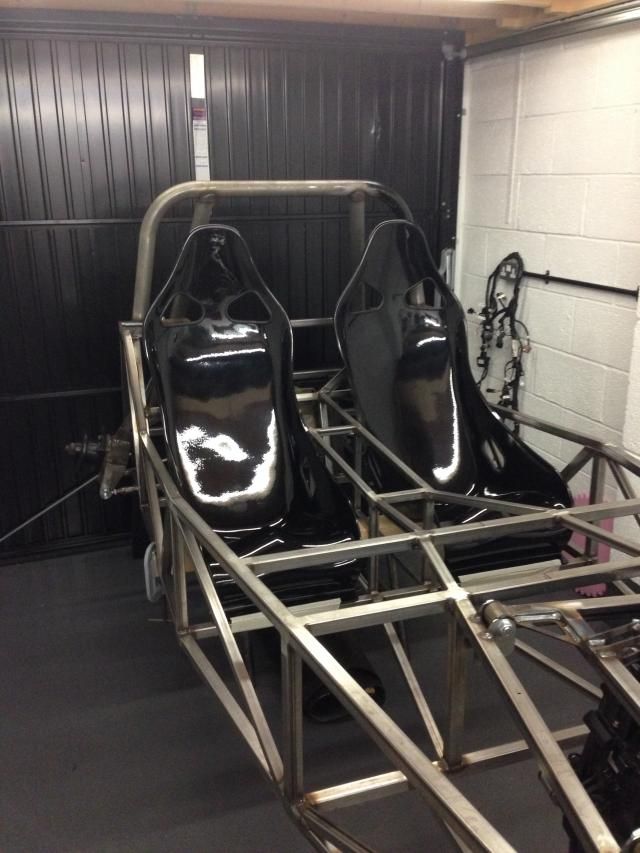

Really happy with the quality

Also got a column and got it mounted
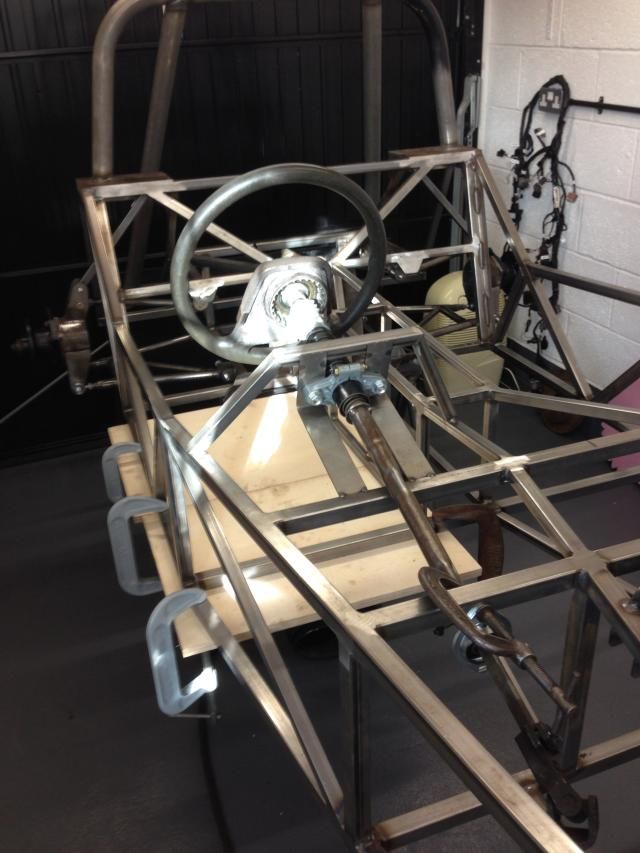
Just need to get a UJ joint that's fits the rack as the one I've got is to big
I've cut the steering lock off and I'm going to get the Ali bit turned town so it's nice a clean looking coming out of the dash
Got my lower engine mount sorted to!
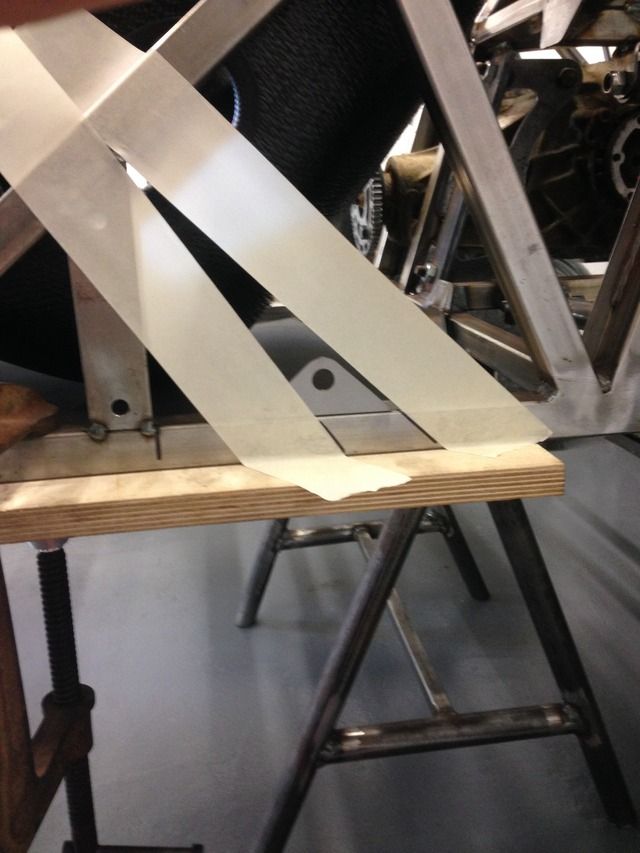
Here's a pic of where my upper harness holes fall, there a bit high up
 i
i
I was hoping to have some welded bosses in the top chassis rail like most people do must looks a bit high, I don't really want a cross rail as
I'm going to put
A diagonal across the rear hoop, what options do I have, anyone got any ideas?
rdodger - 24/1/15 at 08:05 PM
Is the seat reclined enough? They look very upright.
[Edited on 24/1/15 by rdodger]
Rosco86 - 24/1/15 at 08:15 PM
Yeah there about the same angle as the back panel of the car, feel pretty nice when sitting in them
rdodger - 24/1/15 at 08:34 PM
I would wait a while before doing anything
I found I reclined my seats a lot more when I had the pedals set to get more under thigh support.
The angle of my seat is also much greater than the rear panel.
[Edited on 24/1/15 by rdodger]
Rosco86 - 24/1/15 at 08:38 PM
quote:
Originally posted by rdodger
I would wait a while before doing anything
I found I reclined my seats a lot more when I had the pedals set to get more under thigh support.
Yeah cheers, think your right, that's my next job on my list, pedal box
CosKev3 - 24/1/15 at 10:22 PM
Looking good,as usual
Looking forward to the exhaust manifold taking shape,are you doing that yourself?
Rosco86 - 25/1/15 at 08:38 PM
quote:
Originally posted by CosKev3
Looking good,as usual
Looking forward to the exhaust manifold taking shape,are you doing that yourself?
Urm hopefully not lol, my mate builds f1 manifolds and hoping he's going to sort me out, just waiting to hear back from him
ste - 25/1/15 at 10:47 PM
Rosco, this has got to be up there with the best builds. Hats off to you.
Are those stainless pipes for the cooling system flared? as I had no end of troubles with silicon elbows slipping off regardless of how tight you get
the clips.
CosKev3 - 26/1/15 at 01:19 AM
A nice small bead of weld will work if they are not flared
quote:
Originally posted by Rosco86
quote:
Originally posted by CosKev3
Looking good,as usual
Looking forward to the exhaust manifold taking shape,are you doing that yourself?
Urm hopefully not lol, my mate builds f1 manifolds and hoping he's going to sort me out, just waiting to hear back from him
That should be a nice piece of work then
Rosco86 - 30/1/15 at 07:22 PM
quote:
Originally posted by ste
Rosco, this has got to be up there with the best builds. Hats off to you.
Are those stainless pipes for the cooling system flared? as I had no end of troubles with silicon elbows slipping off regardless of how tight you get
the clips.
Wow thanks for the complement, yeah there stainless but I'm going to swap for aluminium with beaded ends just to save a bit of weight
Rosco86 - 30/1/15 at 07:45 PM
Got a bit done this week,
Cut the lock etc off and made a stainless tube, still need to secure it
Also made some top hat washers for the column bracket
Got my plates for the footwell back from my fabricators

I've had these cut out of 2mm and a strengthening fold along the bottom where the pedal box bolts in
Also got a couple of front seat rails bent up, these will have nuts welded underneath
And sit somewhere like this, pedal box is next weeks job so then I can work out my seat position
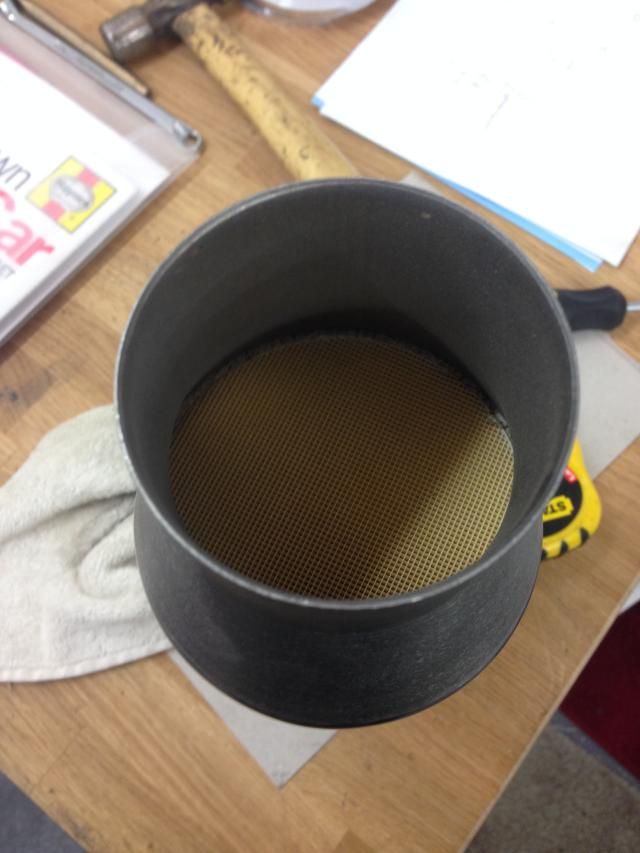
Picked up a cat today to, it's a 400 cel custom chrome one, there only down the road from me, could of got a 200 cell high flow but didn't
want any problem getting through my iva
[Edited on 30/1/15 by Rosco86]
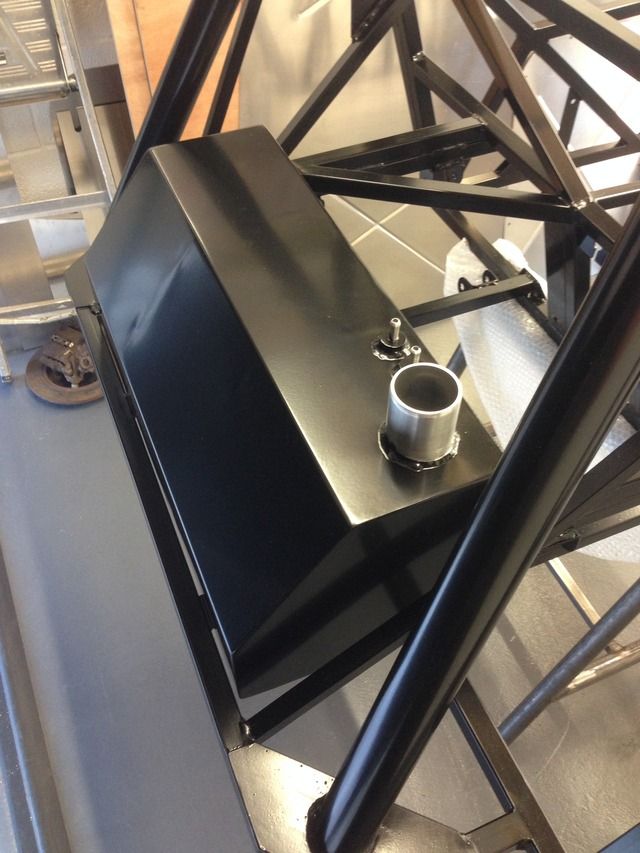
Rosco86 - 1/2/15 at 07:28 PM
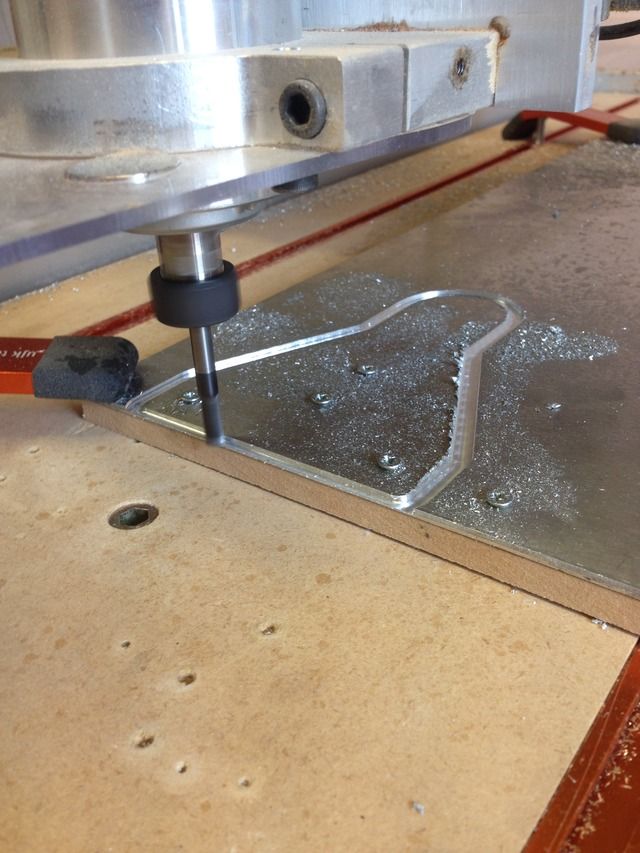
Down my dads all day today, he's built a cnc router, works like a dream
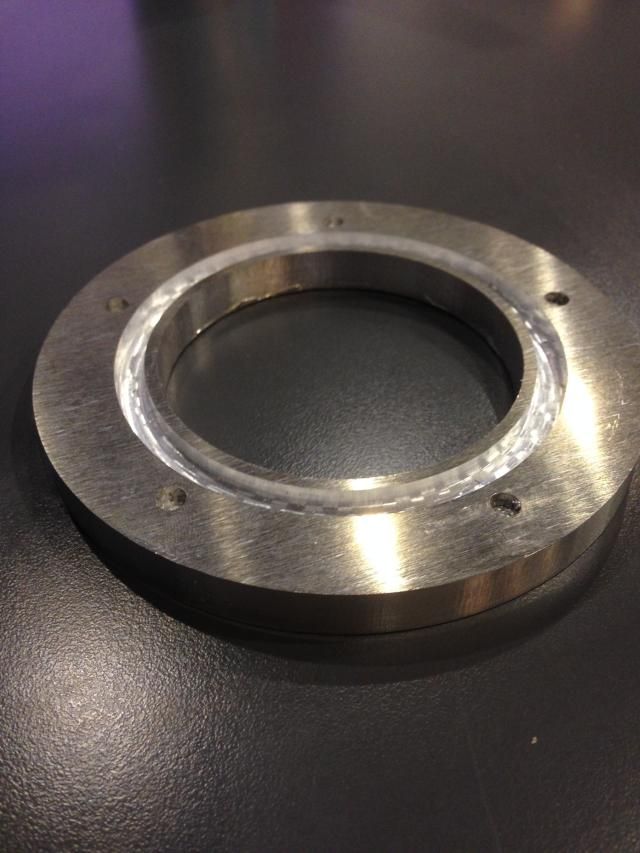
Made a flange for my zx10 fuel pump today, this will be welded to a tube then to the bottom of the tank to make a swirl/ sump
Made a ply one first to check holes and oring grove
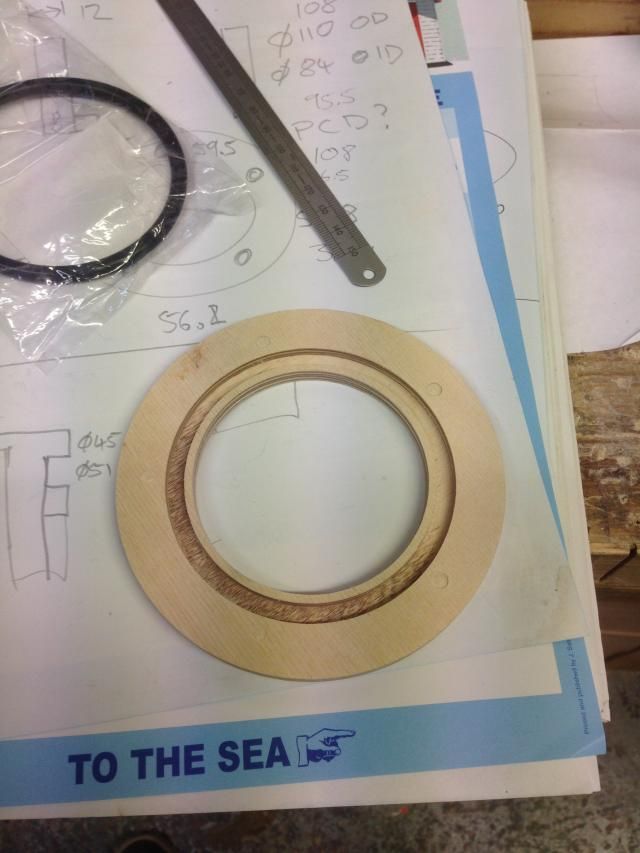
10mm Ali plate
Took 25mins to cut this out
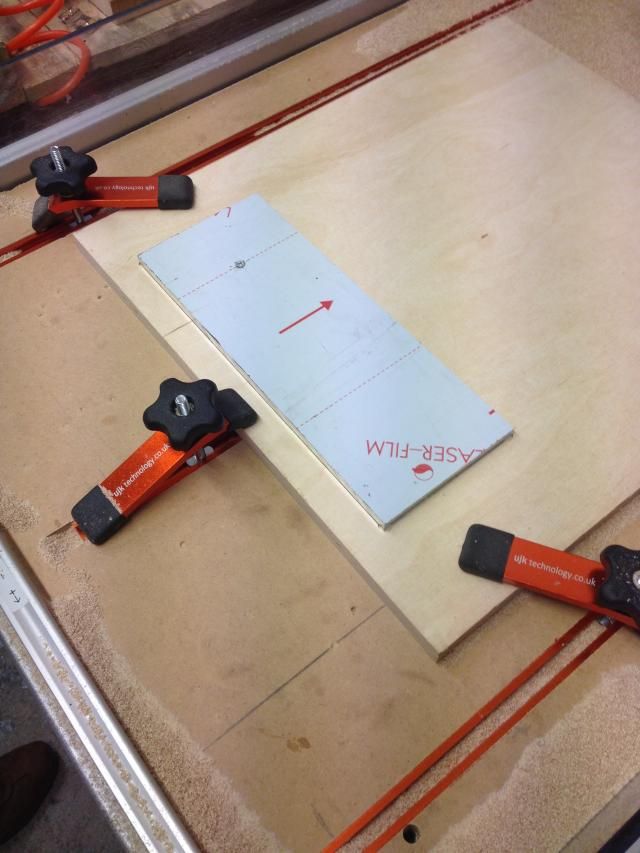
Then made a wheel with the correct offset so I can check clearance when we make the exhaust manifold
One side is a 205 tyre the other is a 185 tyre
12mins for this I think, it flys through timber!
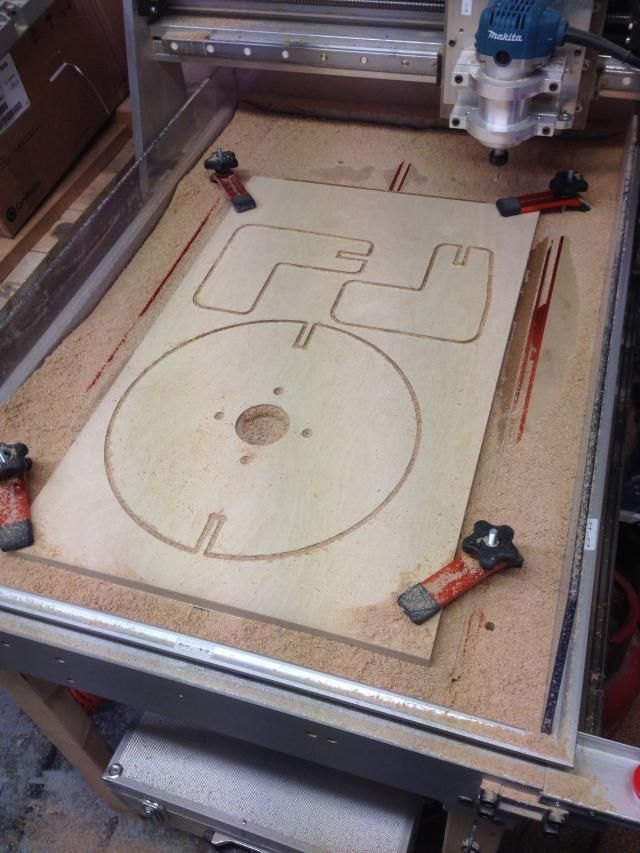
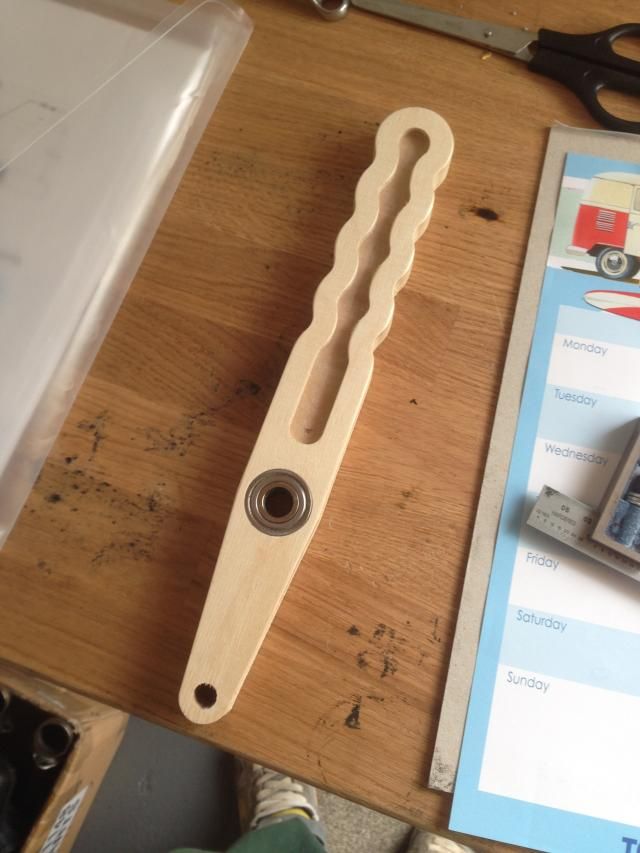
Then a mk1 gear lever, just as a starting point
Rosco86 - 2/2/15 at 09:11 PM
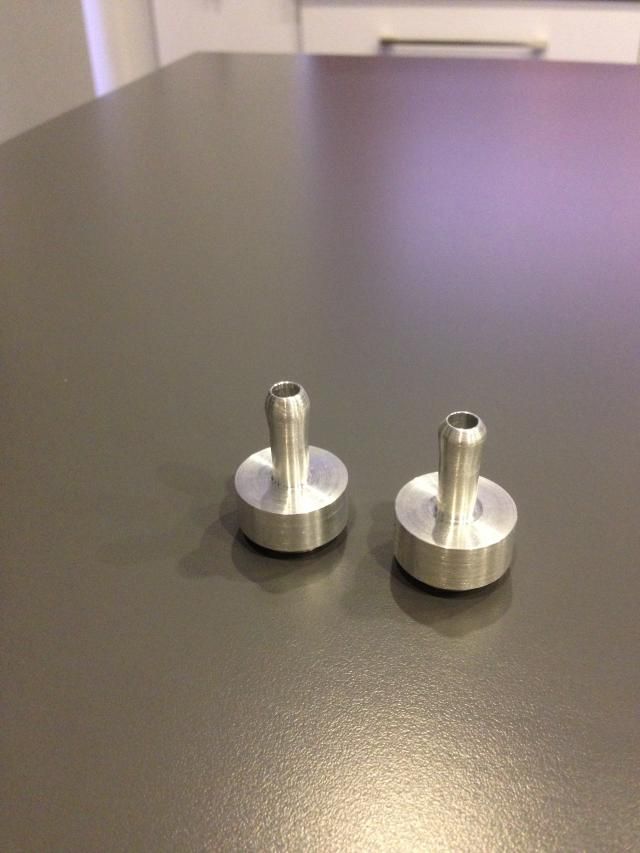
Got a bit done tonight, made two hose barbs for my fuel tank
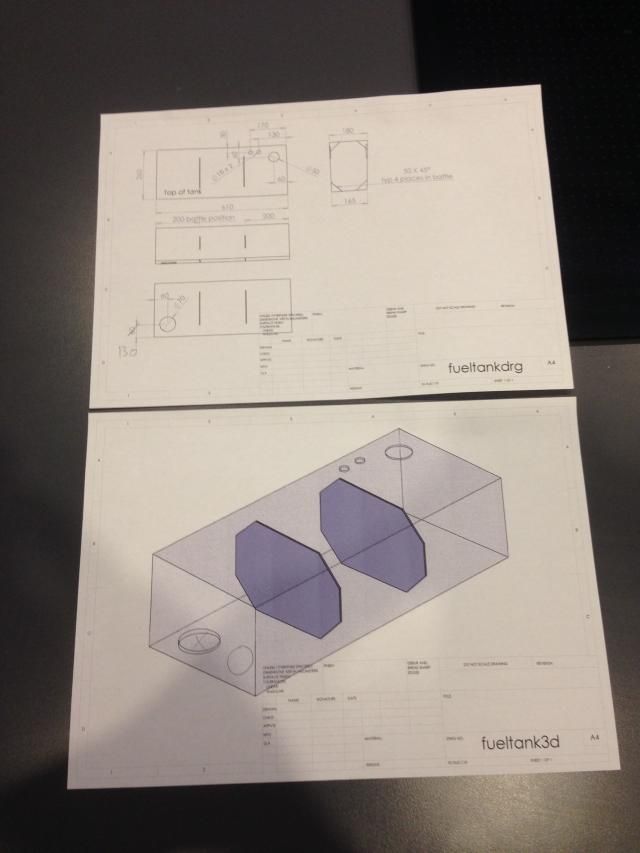
And drew my fuel tank up ready to get it laser cut and folded
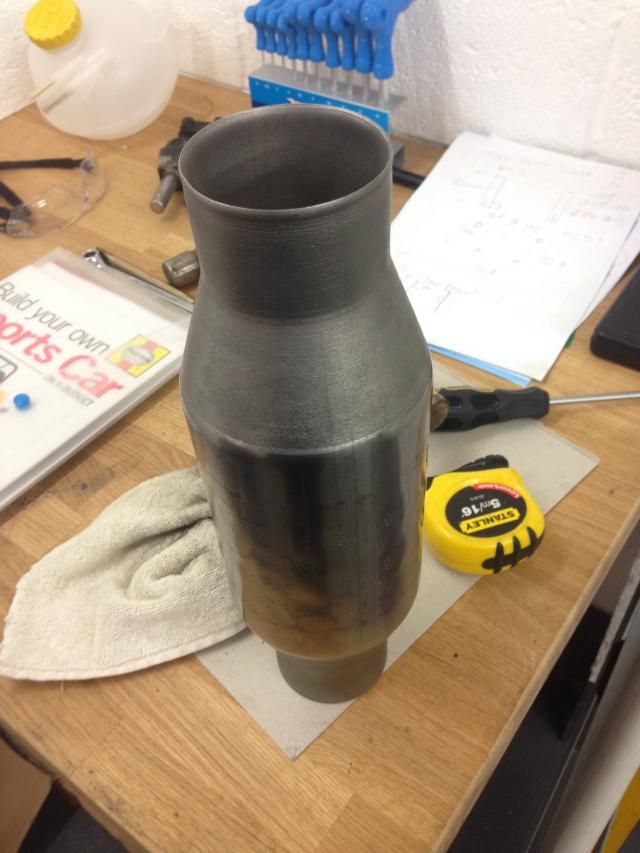
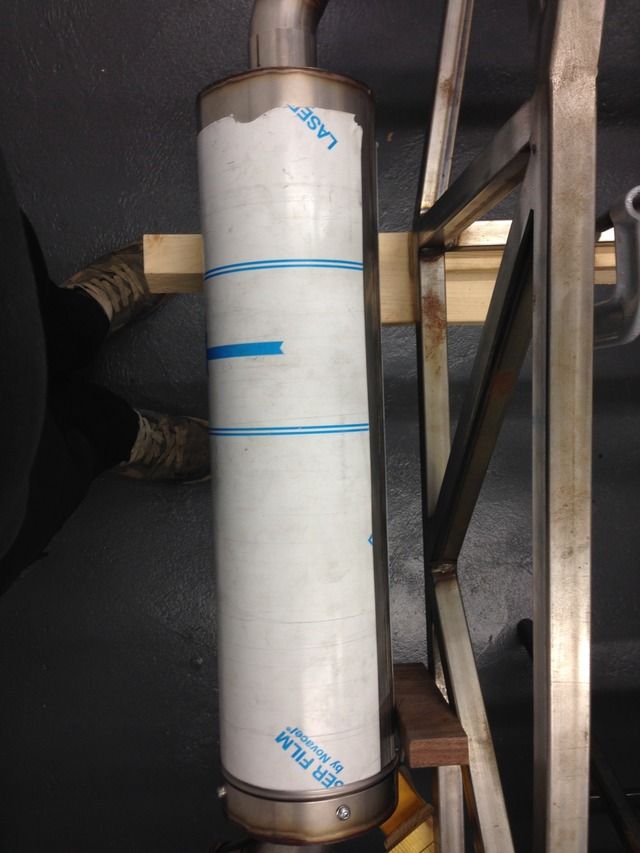
Also my mates started on my silencer, it's repackable

[Edited on 2/2/15 by Rosco86]
ste - 2/2/15 at 11:20 PM
How much for one of those cats?
bart - 3/2/15 at 12:54 AM
I like it !
might sue you over the gear change design handle though ! LOL
Rosco86 - 3/2/15 at 08:28 AM
quote:
Originally posted by ste
How much for one of those cats?
Sent a U2U
Rosco86 - 3/2/15 at 08:31 AM
quote:
Originally posted by bart
I like it !
might sue you over the gear change design handle though ! LOL
Haha, just looked at yours! Mines plywood so im safe!
Rosco86 - 4/2/15 at 07:41 PM
Few hours tonight but was getting cold!
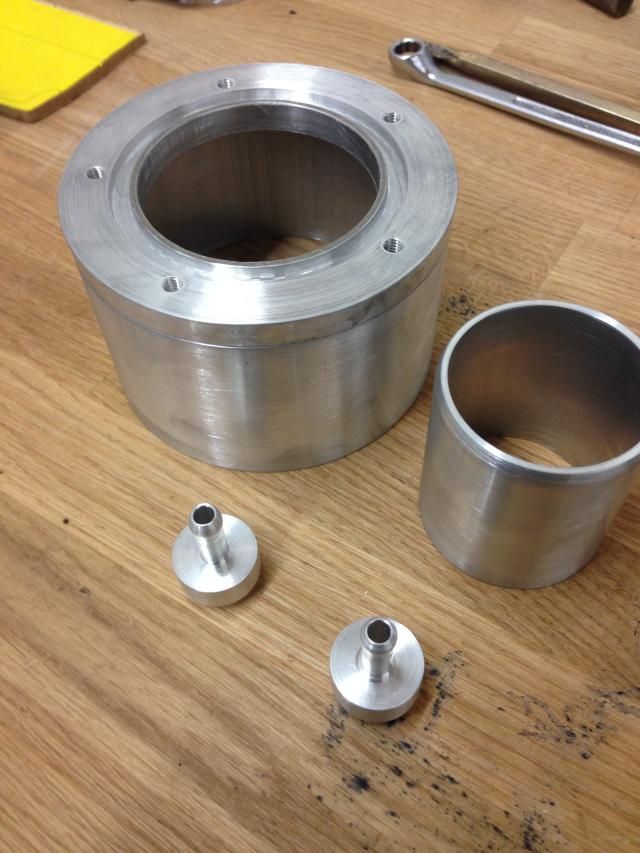
My tube for my fuel tank came today so made a bit for the filler and the larger bit for my swirl pot/ pump houseing, also drilled and tapped the pump
flange
Also Picked up my exhaust flanges and collars tonight ready for making my manifold
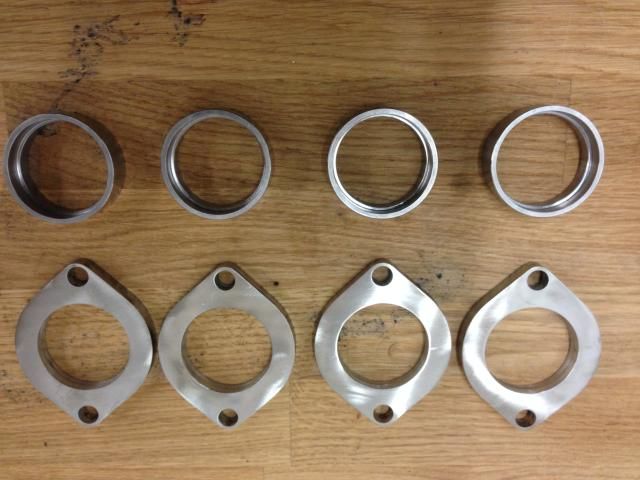
[Edited on 4/2/15 by Rosco86]
Rosco86 - 15/2/15 at 02:59 PM
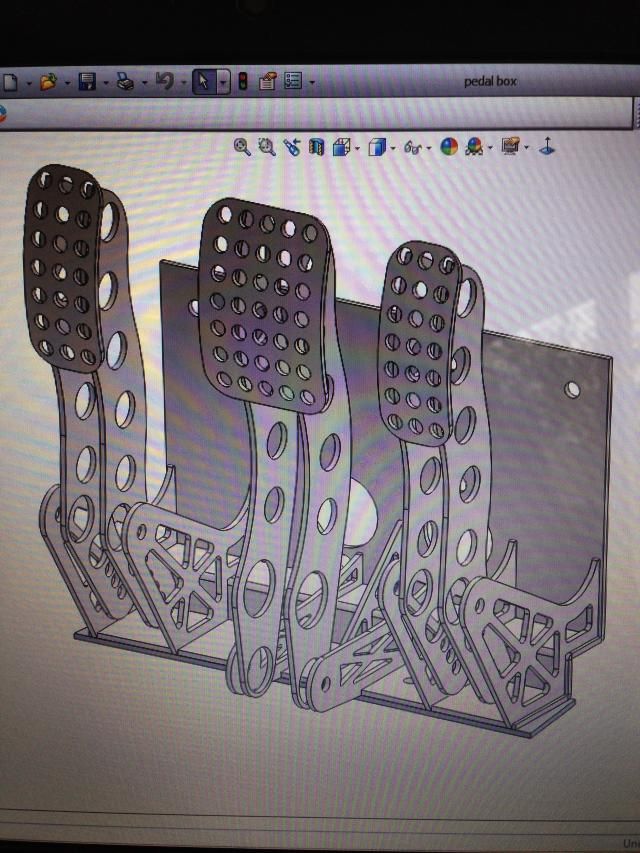
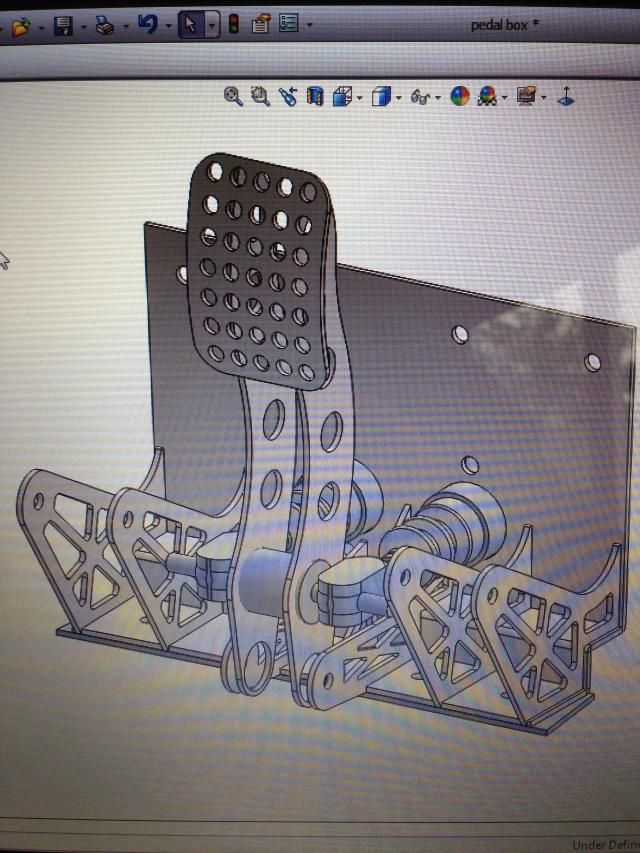
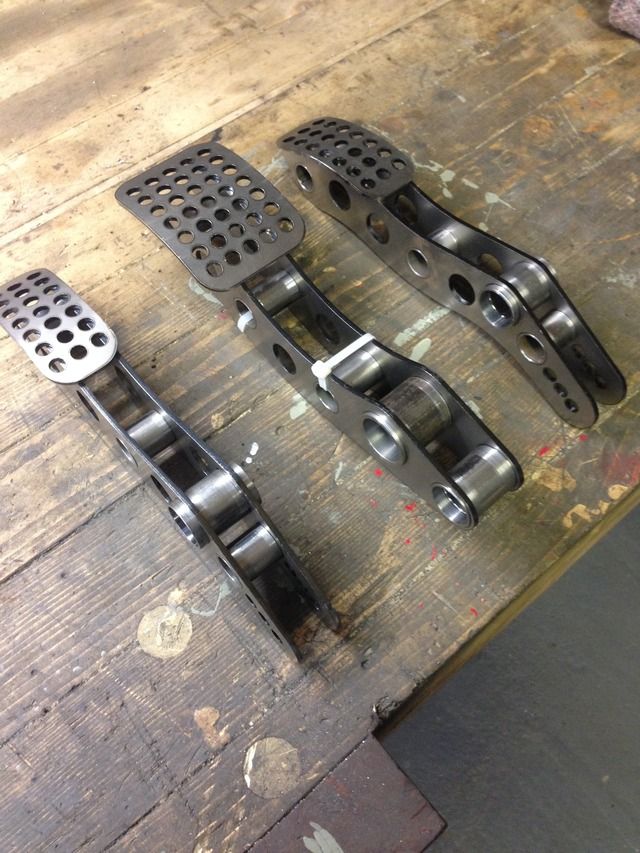
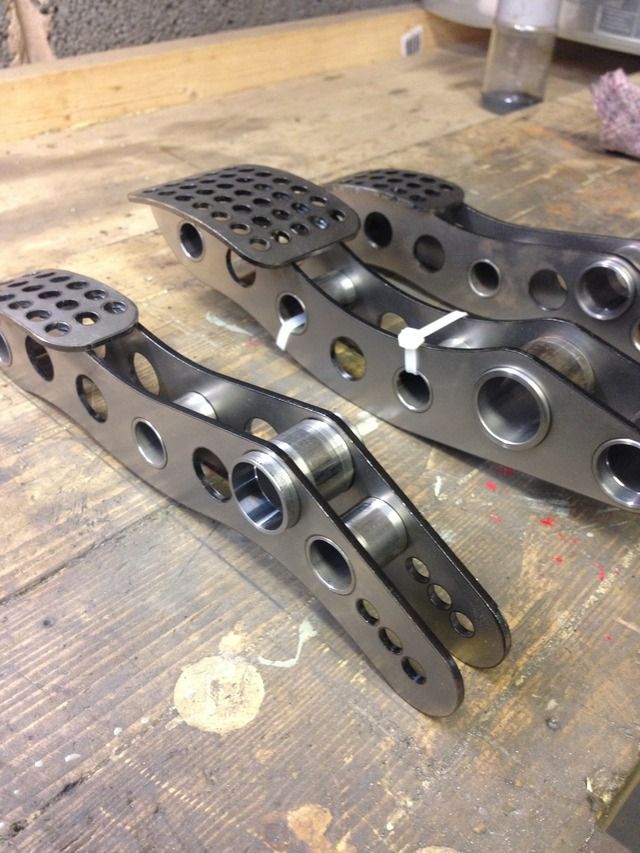
Well I've been doing a few jobs since my last update, my fuel tanks well on its way, I've been drawing up my pedal box for the last few
weeks and
I've spent all day on it today, pretty happy with it, should get it cut out next week, I was going to use Vouchts pedal box design off the haynes
forum
But with the bias bar and different cylinders I just couldn't get it to work, all my ratios have work out as I want them, so all being well it
will be sweet
The pedals will have tubes in between them
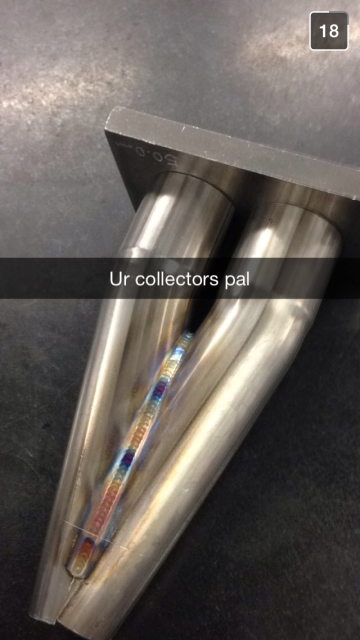
Also my mate sent me a pic of my exhaust collectors, possibly doing my manifold with him next weekend
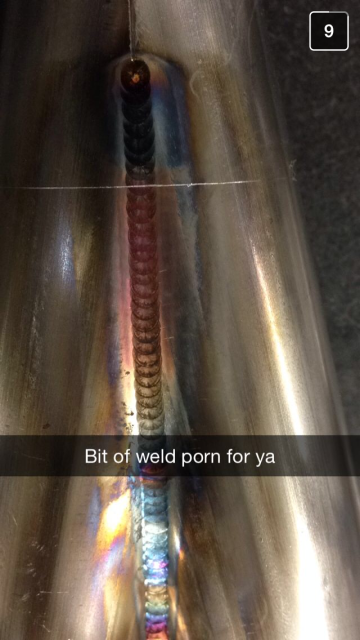
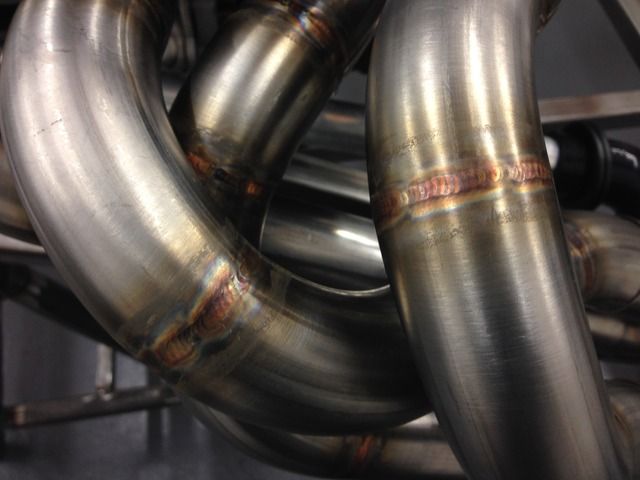
bart - 15/2/15 at 04:52 PM
I love weld porn
the best type
got to say very professional build lots of care and looks neat

big_wasa - 15/2/15 at 05:08 PM
I would love to be able to weld like that 
Rosco86 - 15/2/15 at 06:57 PM
quote:
Originally posted by bart
I love weld porn
the best type
got to say very professional build lots of care and looks neat
Thanks, yours is the same mate! If you ever get selling kits I think I would be interested in one
Rosco86 - 15/2/15 at 06:58 PM
quote:
Originally posted by big_wasa
I would love to be able to weld like that
Me to! Can't wait to see my manifold!
Rosco86 - 15/2/15 at 06:59 PM
Drawings ready for my laser man
bart - 15/2/15 at 09:13 PM
You probably have but shouldn't the drawings be in a dxf file format without dims and page format . You probably have just checking
Rosco86 - 15/2/15 at 09:30 PM
quote:
Originally posted by bart
You probably have but shouldn't the drawings be in a dxf file format without dims and page format . You probably have just checking
Yeah I've got the dxf's on a USB stick, I do him drawings for folding details and so he knows what needs cutting etc
CosKev3 - 18/2/15 at 09:59 PM
quote:
Originally posted by Rosco86
Also my mate sent me a pic of my exhaust collectors, possibly doing my manifold with him next weekend
Wow
What's the score with the different colours around the weld?
Rosco86 - 21/2/15 at 09:01 PM
Don't no if I'm honest mate, prob as it heats up as you weld along
Rosco86 - 21/2/15 at 09:10 PM
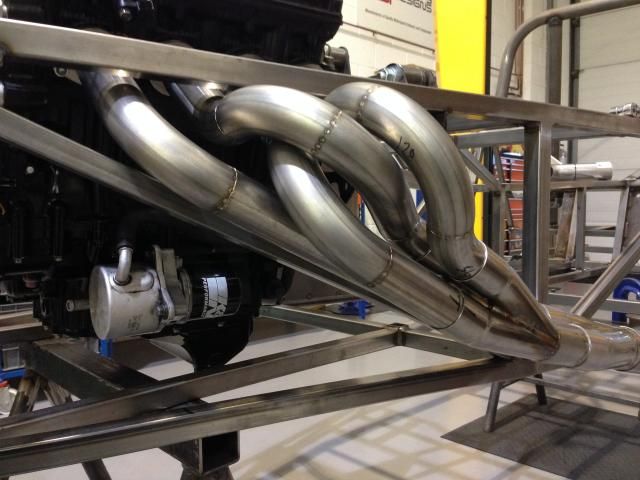
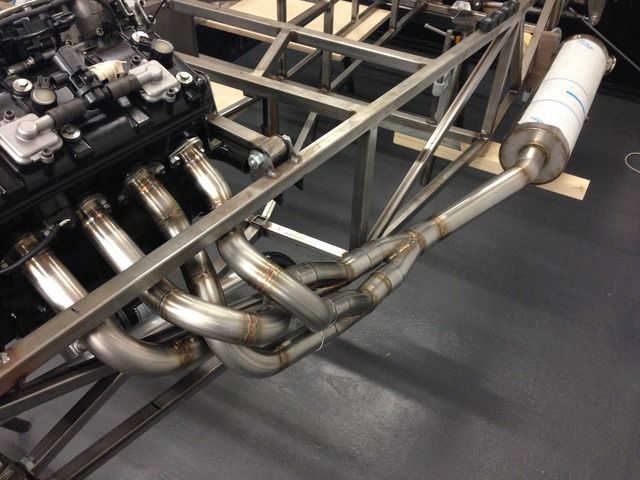
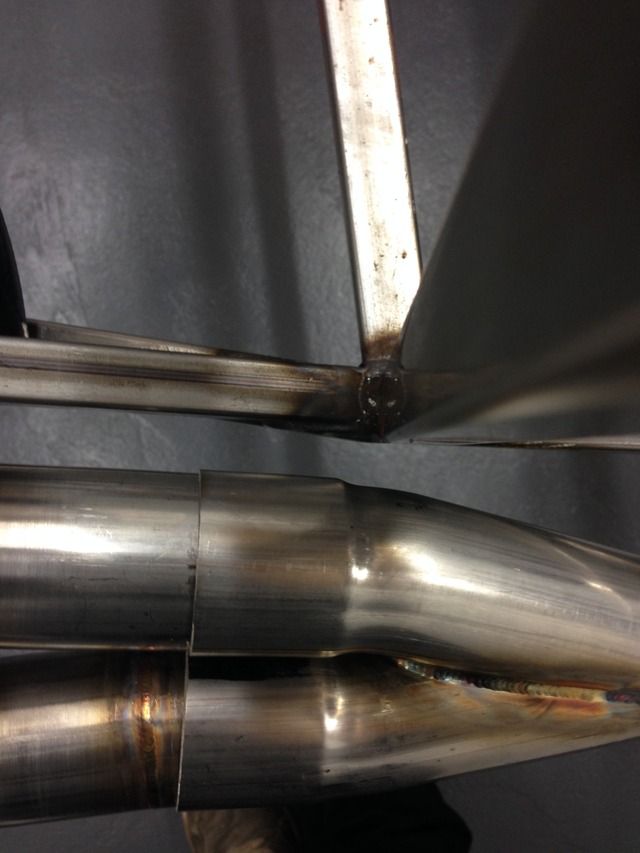
Well had a awesome day today! Been up and seen my mate at Primary Designs in Thame today, was a long day but we got my exhaust all fabricated and
tacked up, he's going to get it finish welded during the week, the primary lengths are all within 5mm! I will let the photos do the talking

bart - 21/2/15 at 09:14 PM
That reminds me
Spaghetti on toast for tea tomorrow
tajgreidotu - 25/2/15 at 06:21 PM
quote:
Originally posted by tajgreidotu
Congratulations for the clean build. I'm just 2 steps behind you, so its nice to see your progress.
Just to clarify, in this picture the tube RS15 should go on the opposite side. Did you do it on purpose?
I forgot to weld it while doing the box, im afraid maybe is too late
Have fun!
Hi mate,
great build you are doing!!
Did you manage to solve the RS15 issue somehow?
Keep pushing!
Rosco86 - 26/2/15 at 10:36 AM
not yet but im just going to put a fillet piece of 3mm plate across the corner where the box section should have gone
Rosco86 - 10/3/15 at 08:35 PM
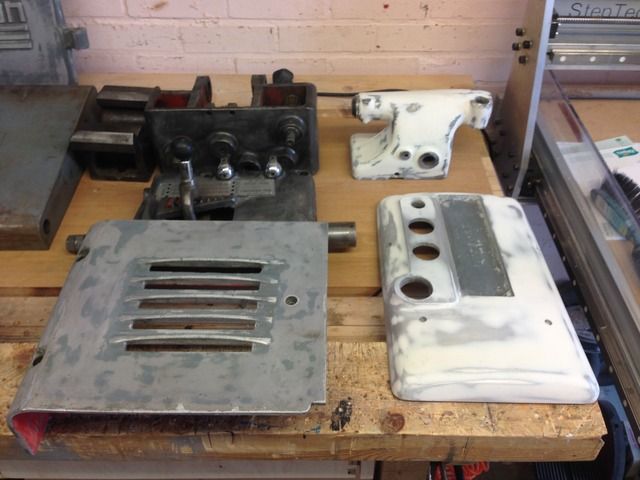
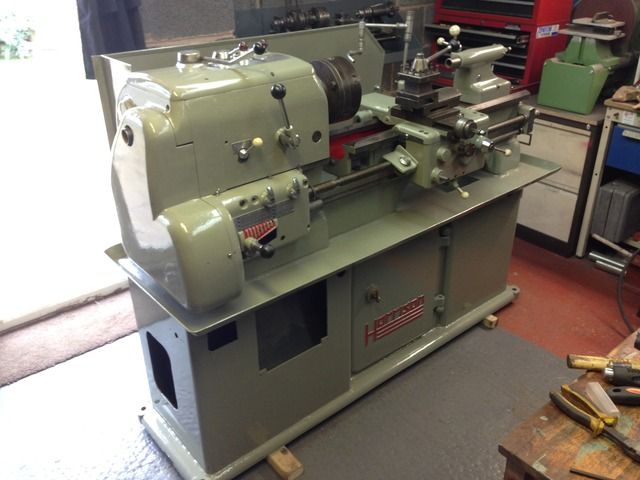
Right no updates for a few weeks, still waiting on laser cutting and to get my exhaust back so I've got a little side project to keep me busy
Ive been after this for about a year as it's been sitting in a blokes yard, he finally sold it me last Saturday afternoon
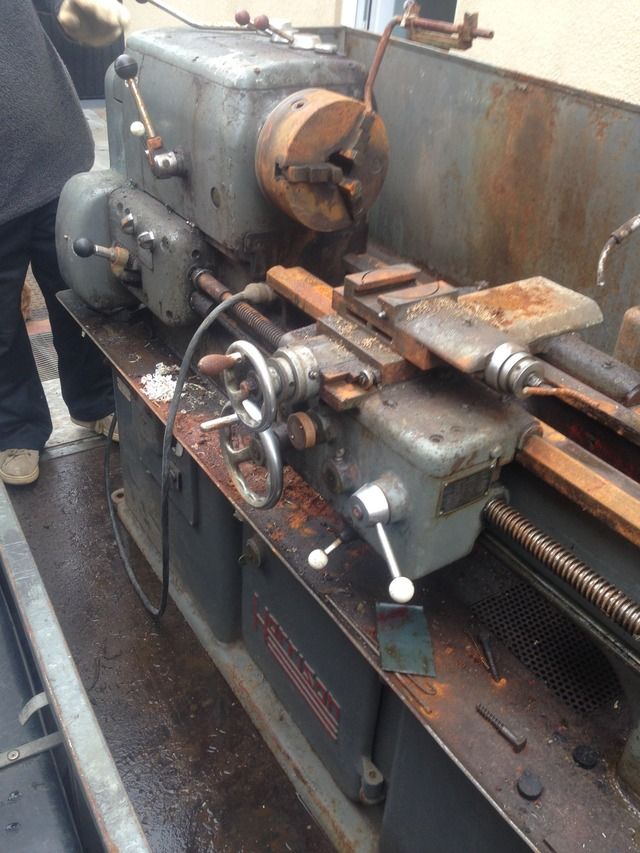
I borrowed a trailer to get it home on, but it weighs about a ton so we had to strip it to get it up the garden!
The bed took 4 of us to lift and so did the stand
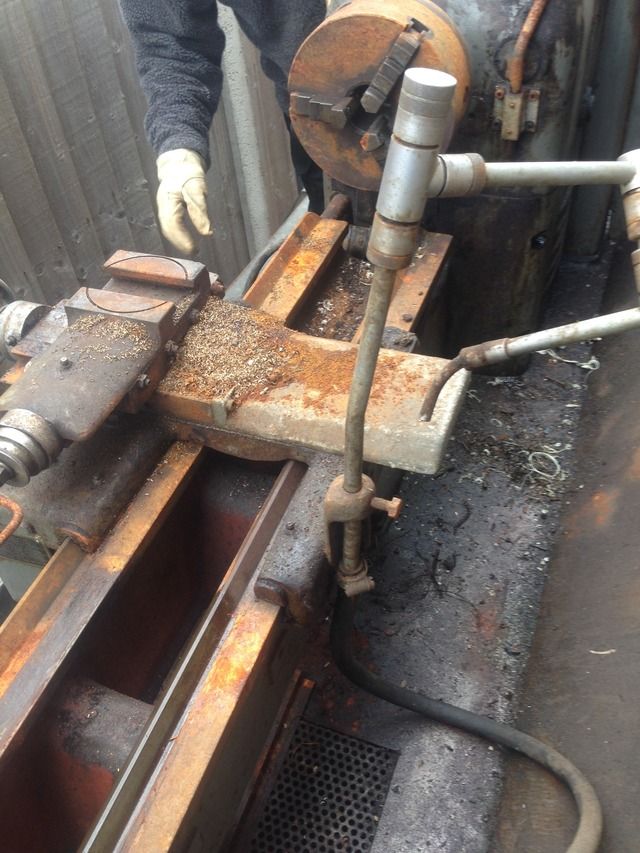
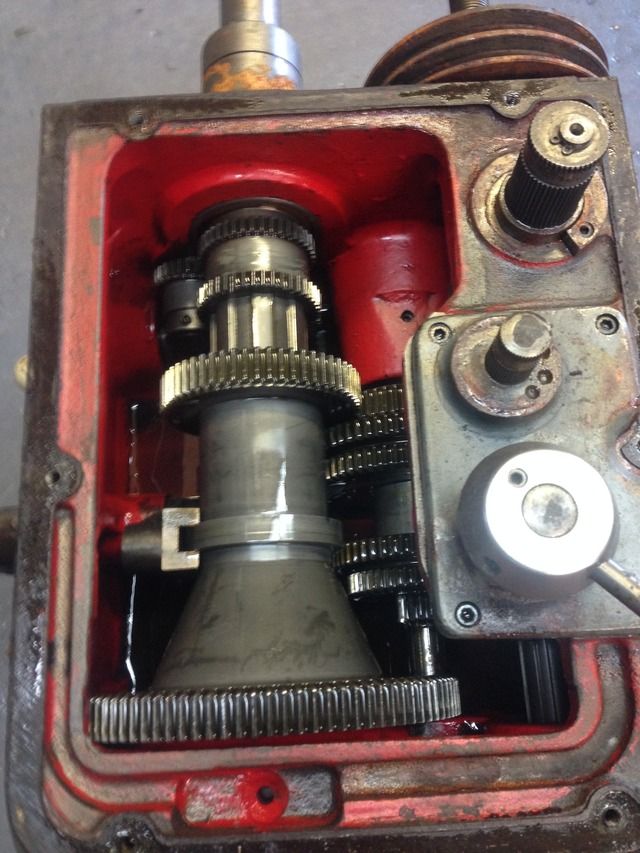
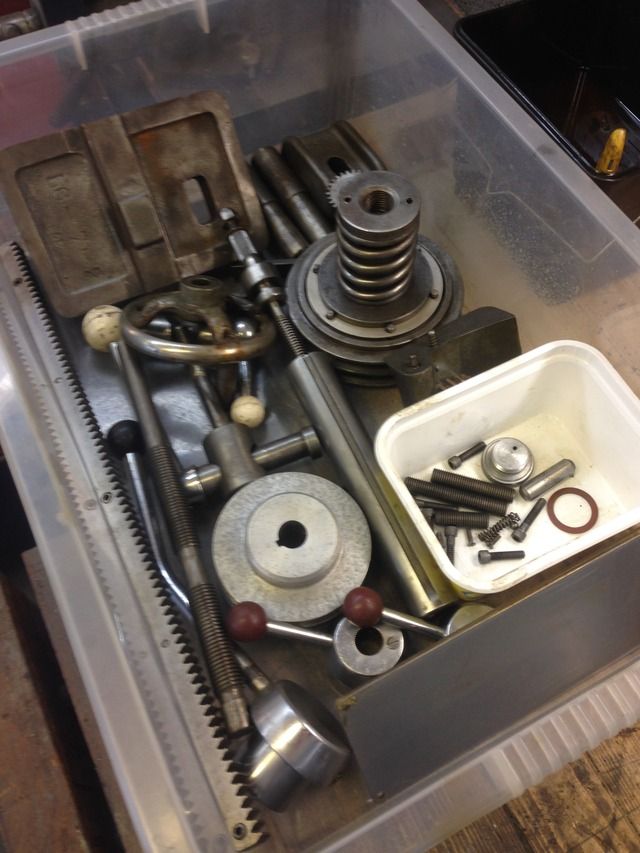
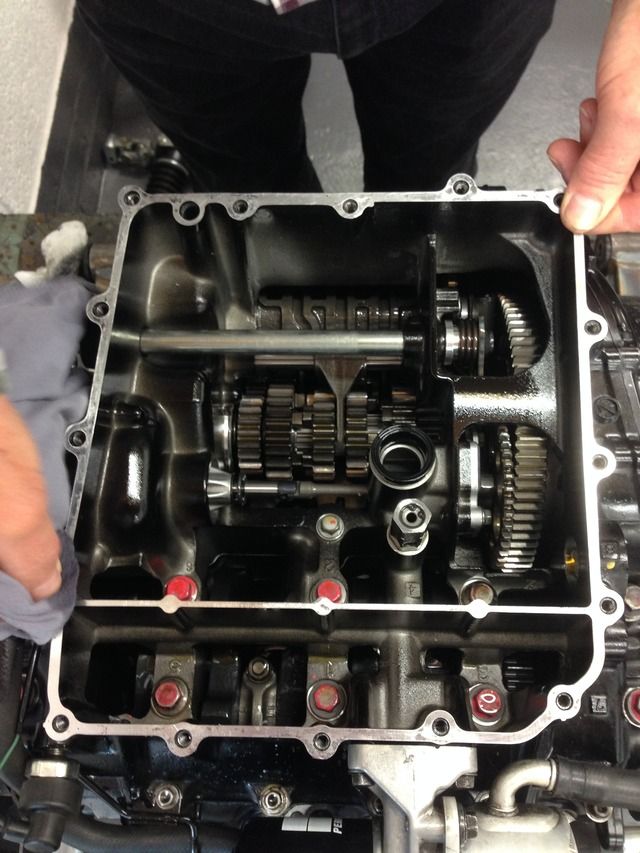
Gearbox was mint
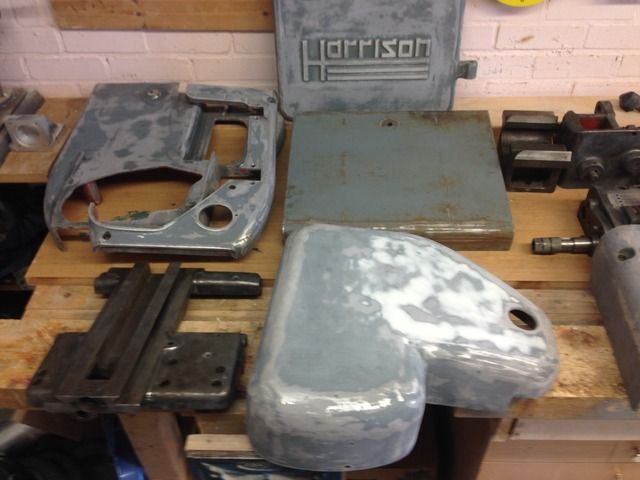
Loads of bits to clean up
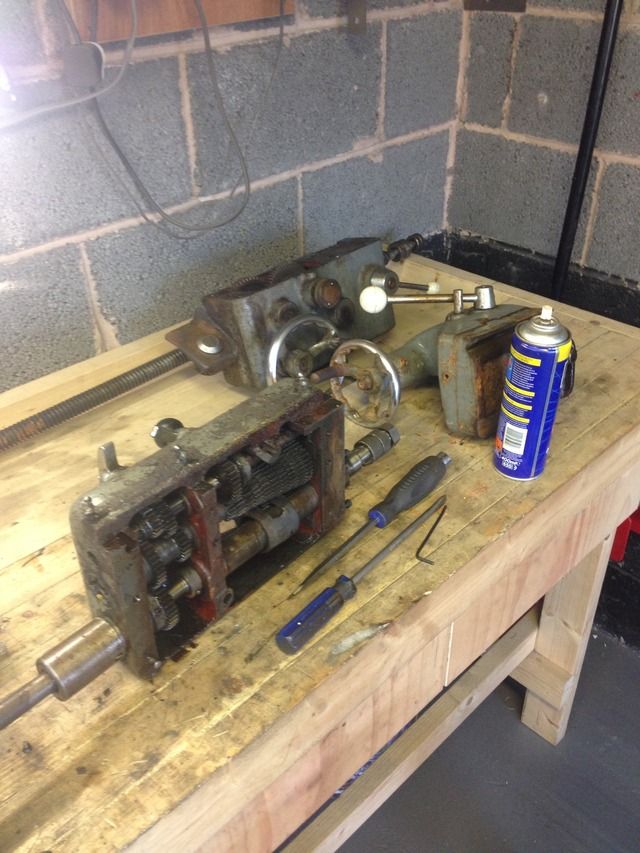
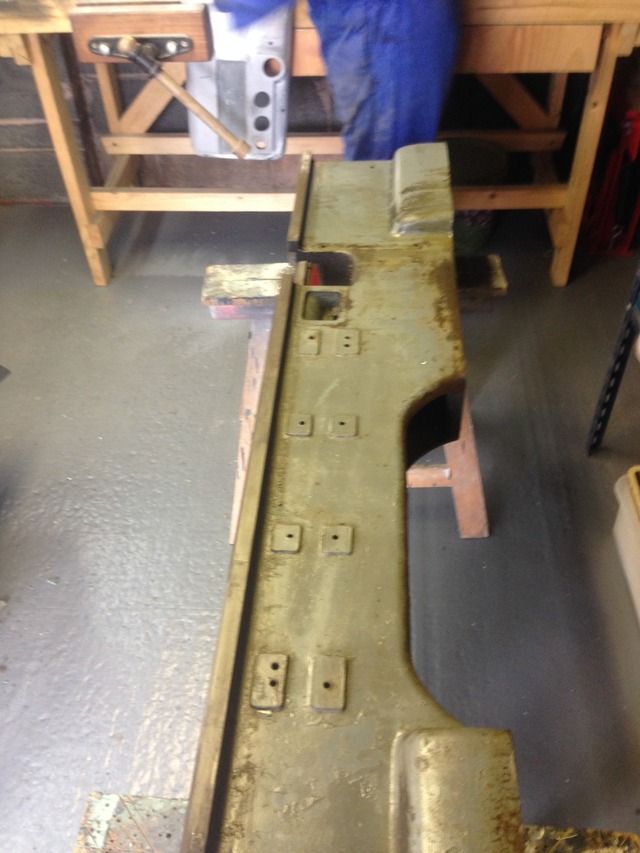
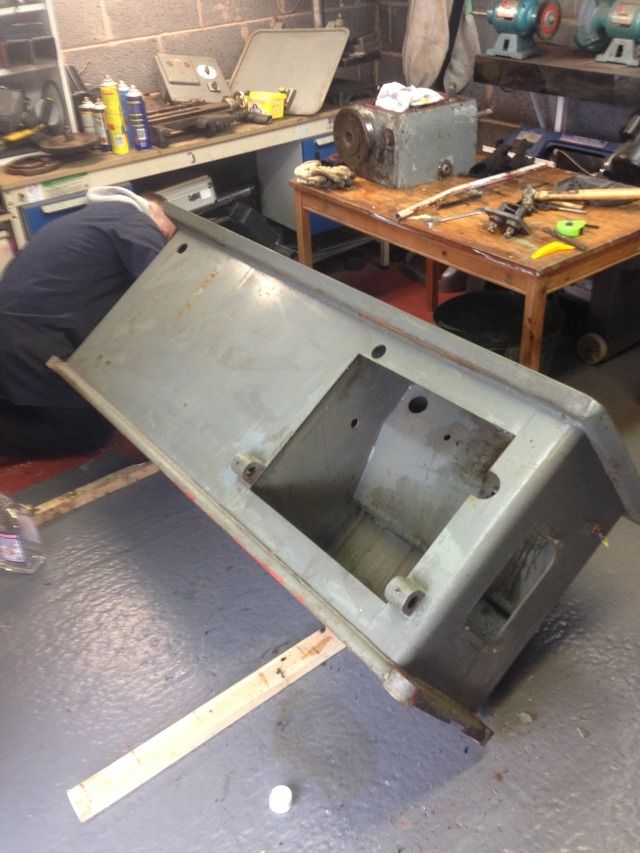
Base and bed ready for paint
Clean parts bin filling up
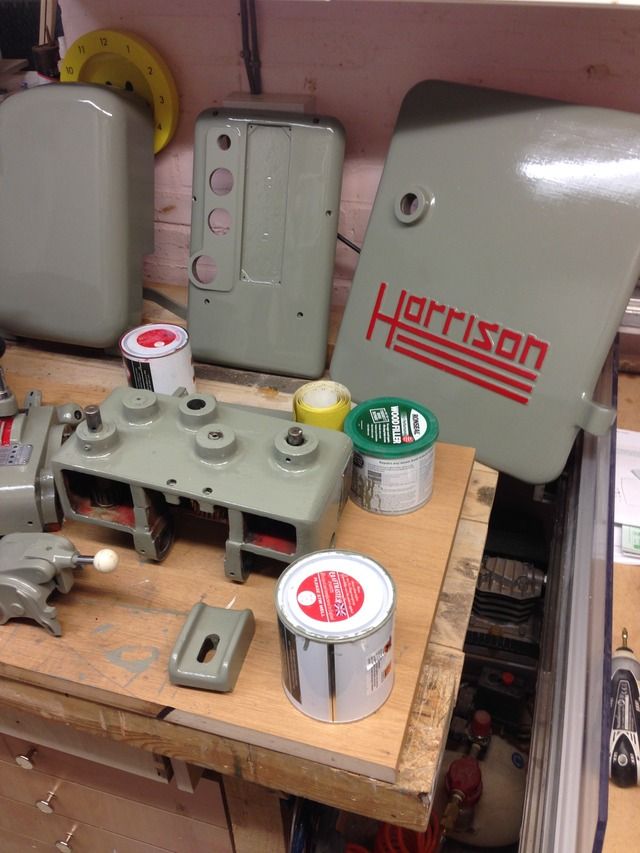
Covers and parts ready for paint
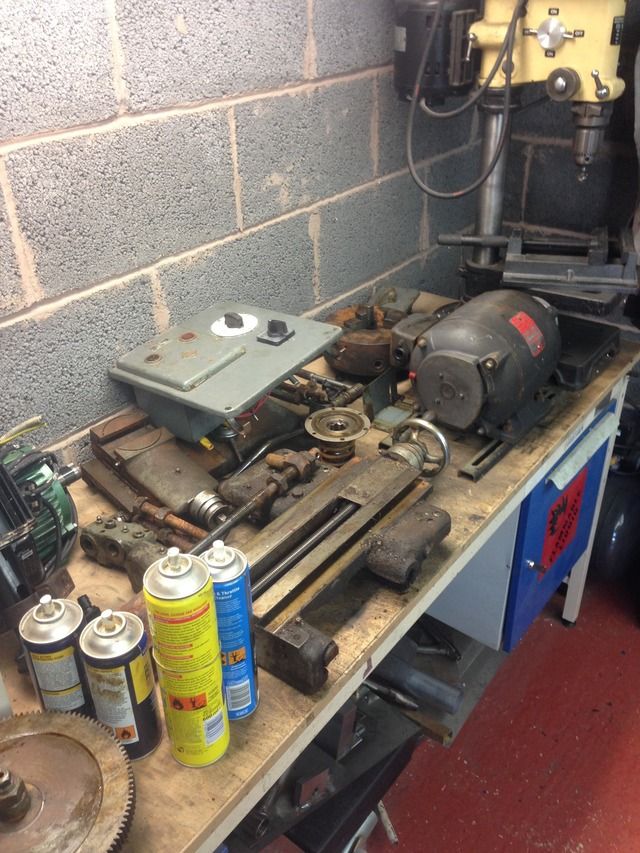
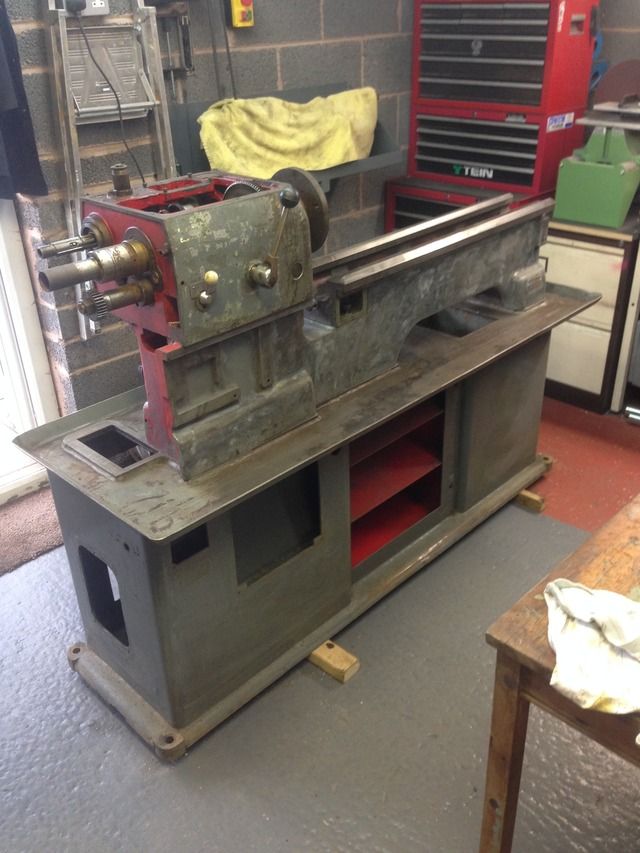
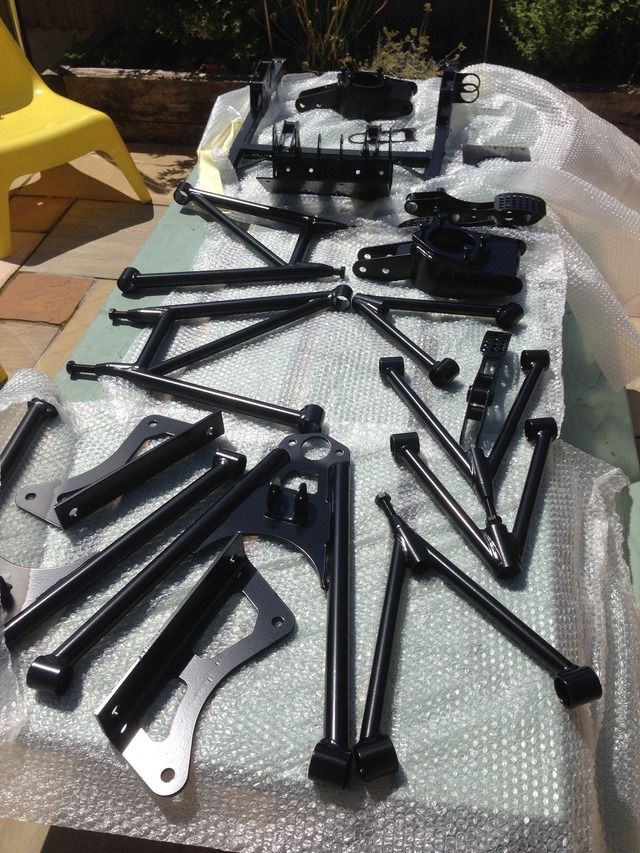
Parts painted by my dad while I've been at work
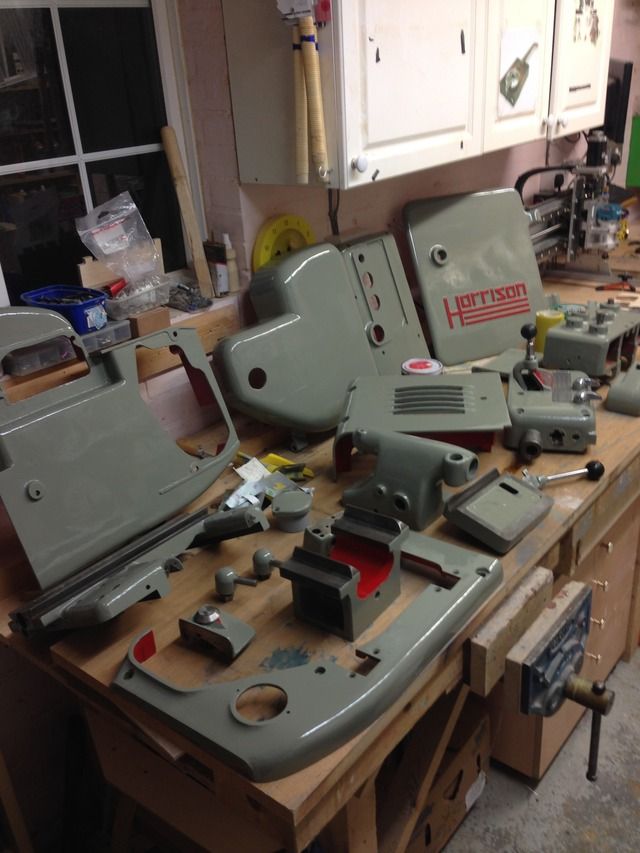

And that's where it's up to, cheers for looking
CosKev3 - 10/3/15 at 09:32 PM
Will look mint when back together!
Manifold looks great, but there's not much room for bodywork between chassis and manifold in collector area?
Rosco86 - 10/3/15 at 09:48 PM
quote:
Originally posted by CosKev3
Will look mint when back together!
Manifold looks great, but there's not much room for bodywork between chassis and manifold in collector area?
Yeah I've been thinking the same to be honest, will have to have a look when I get it back, can always be tweaked out or altered I guess
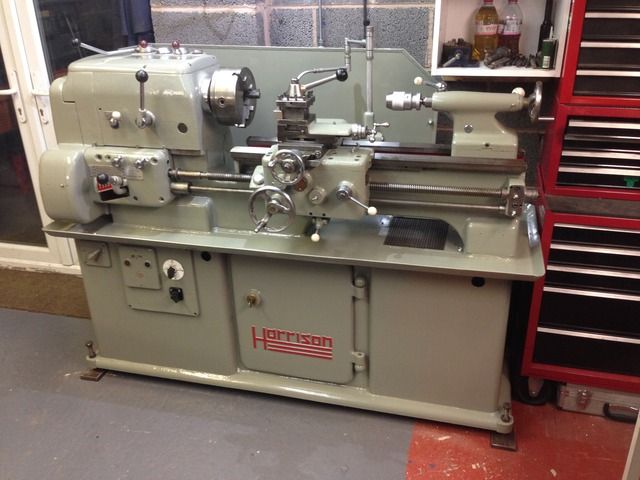
bart - 11/3/15 at 01:48 AM
Nice lathe
Make a good job of the slides and nuts and it will out live you
Consider covers ion to quick change tool post. Worth it in the long run
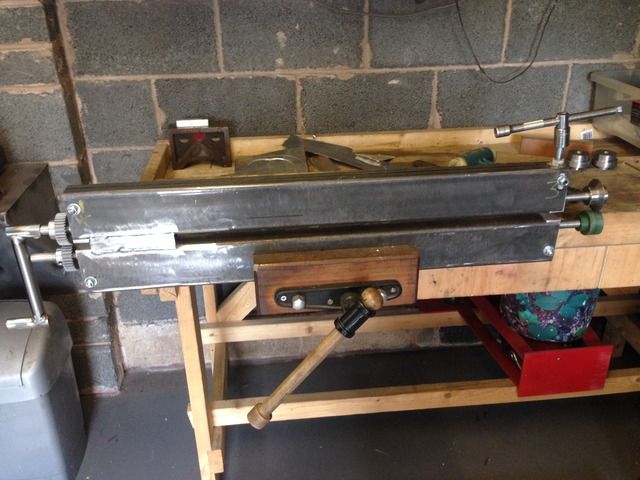
Rosco86 - 20/3/15 at 07:26 PM
quote:
Originally posted by bart
Nice lathe
Make a good job of the slides and nuts and it will out live you
Consider covers ion to quick change tool post. Worth it in the long run
Cheers pal, yeah it's on my never ending list!
Rosco86 - 20/3/15 at 07:36 PM
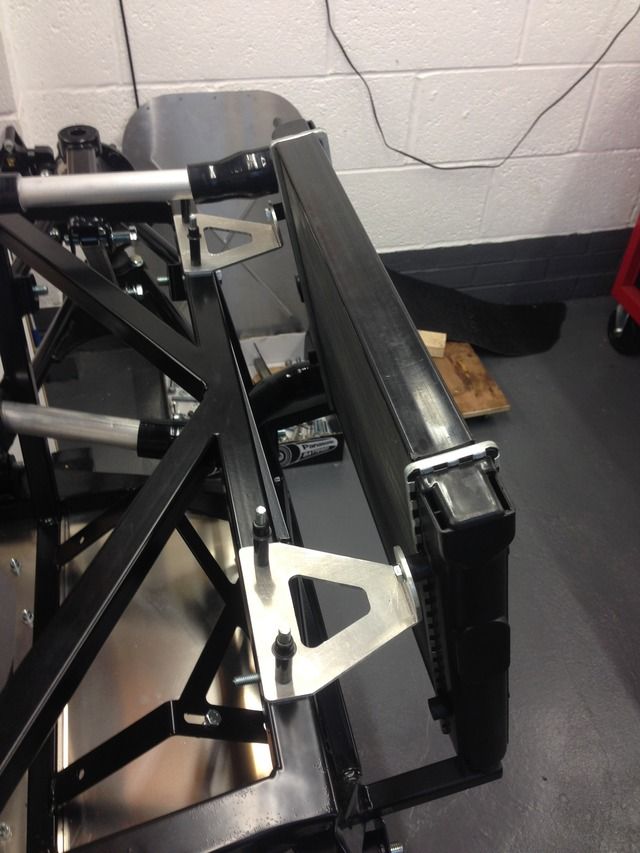
Well the lathes almost there, new motor fitted, just a bit of wiring up to do
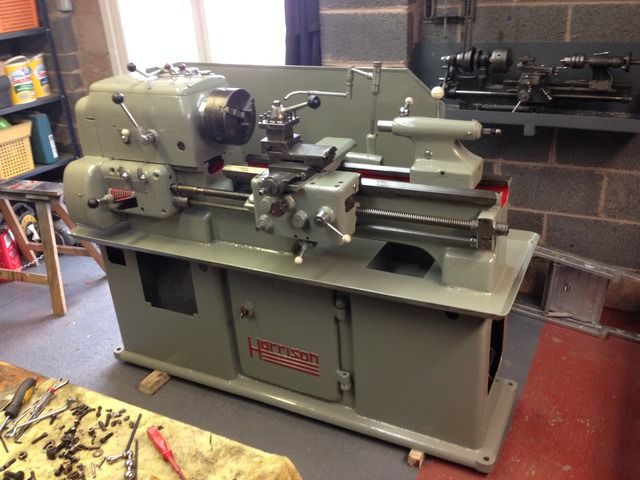
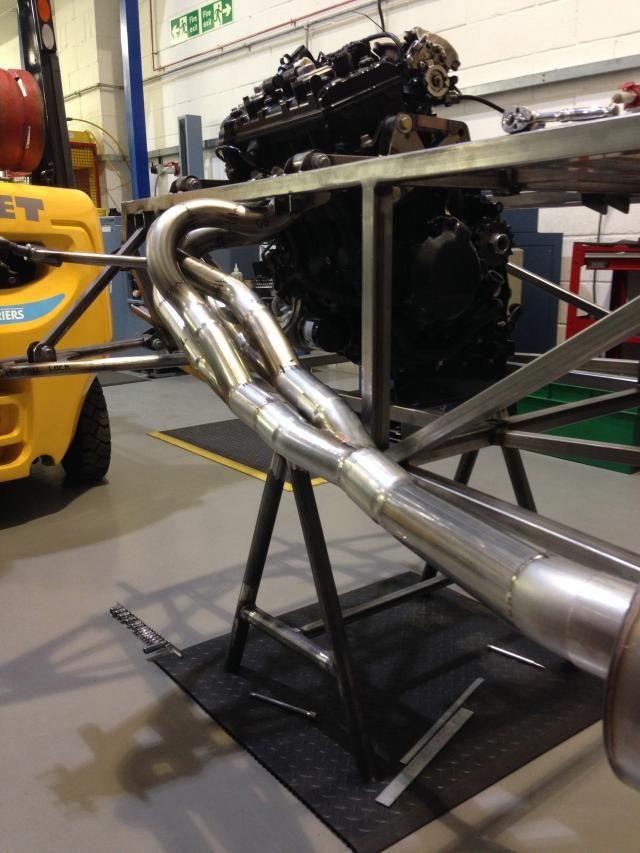
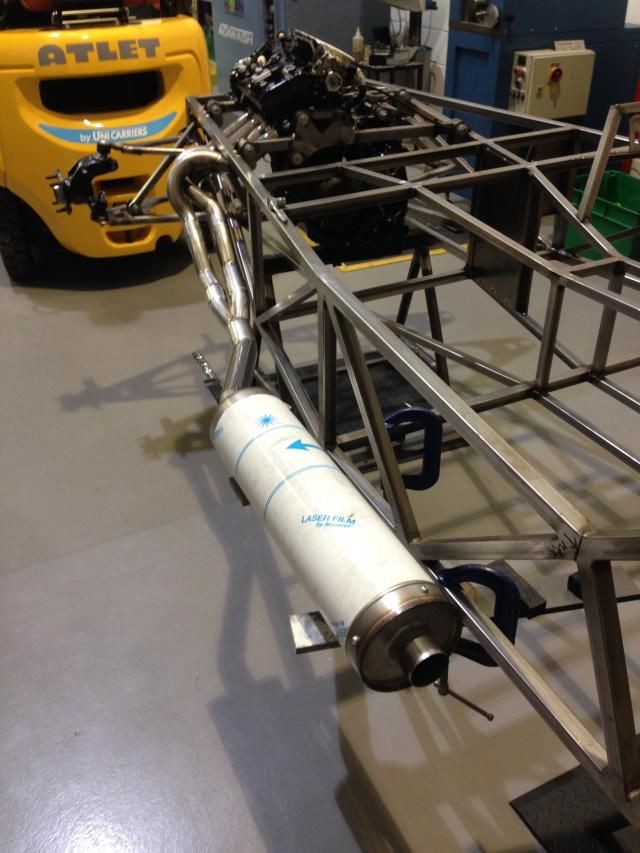
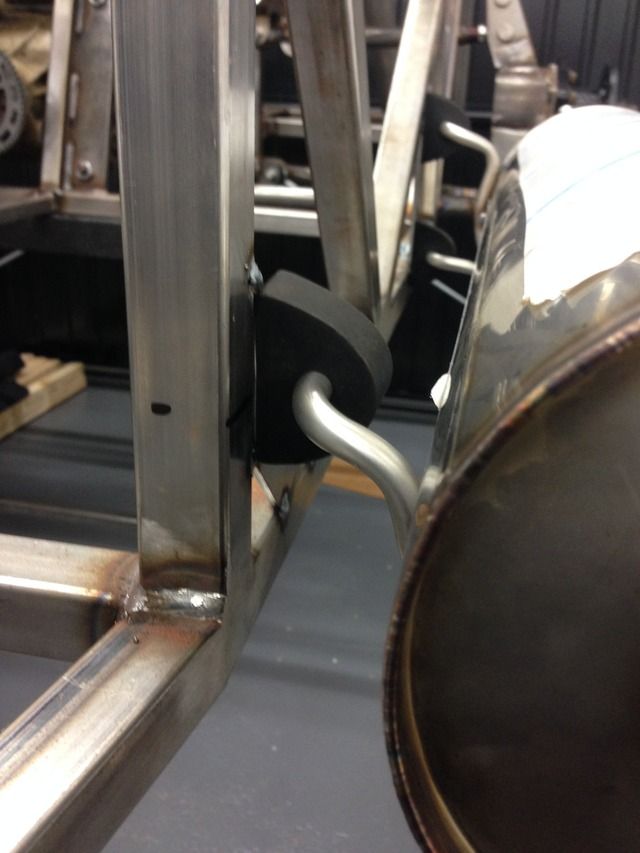
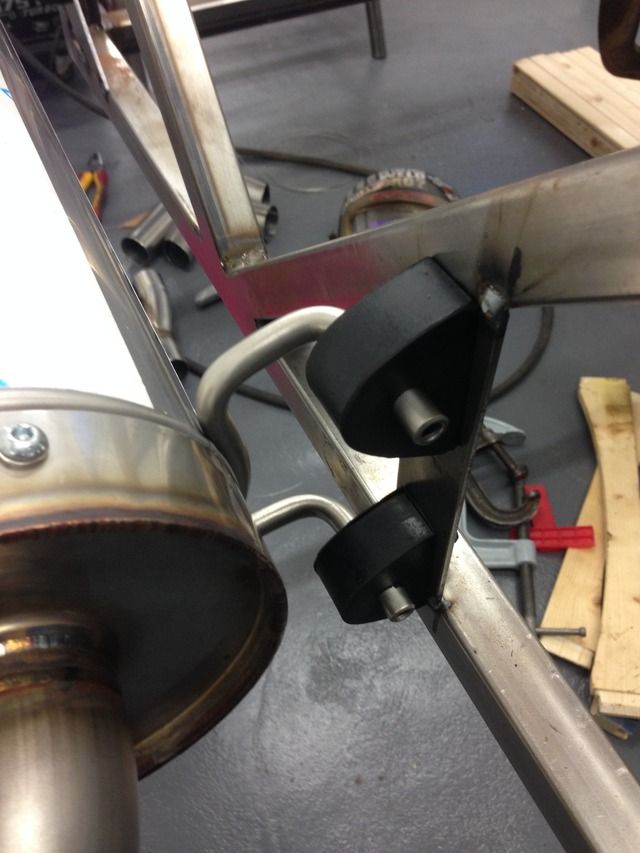
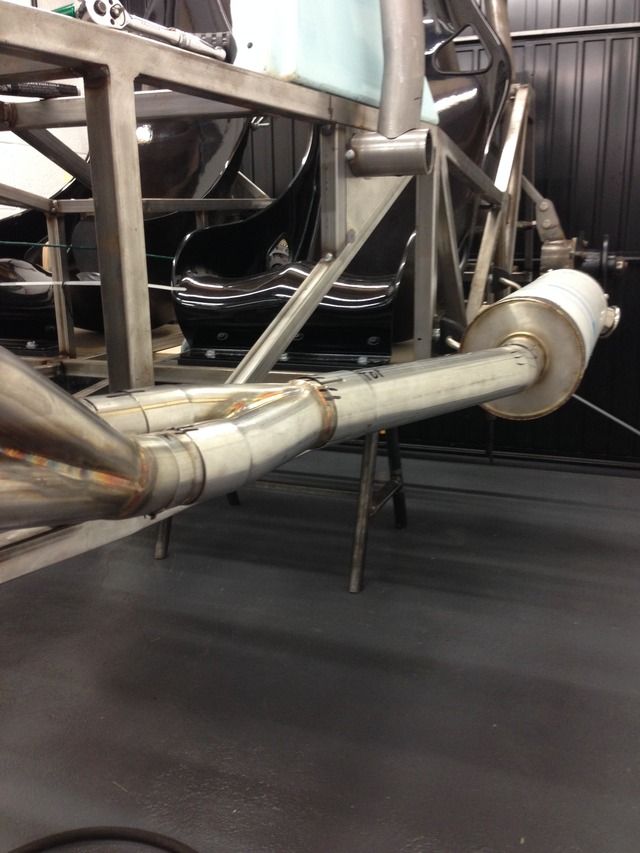
Also I've got my exhaust back all welded up
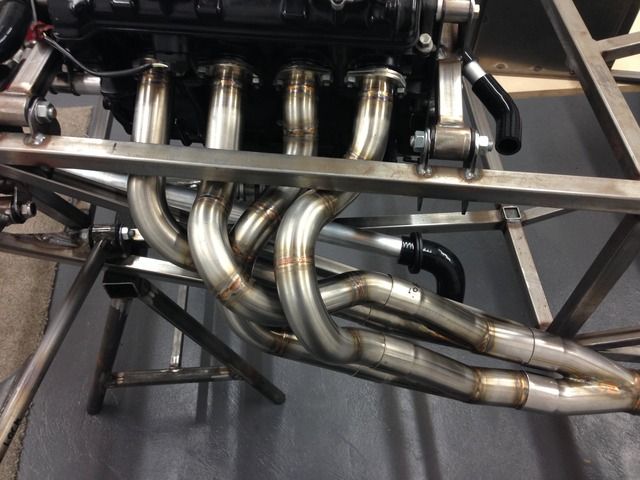
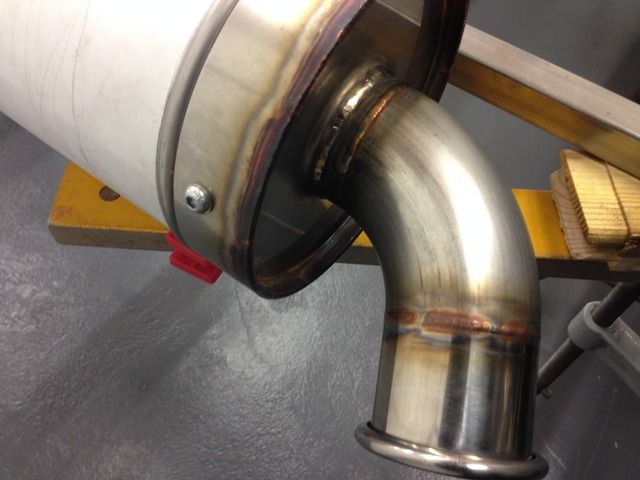
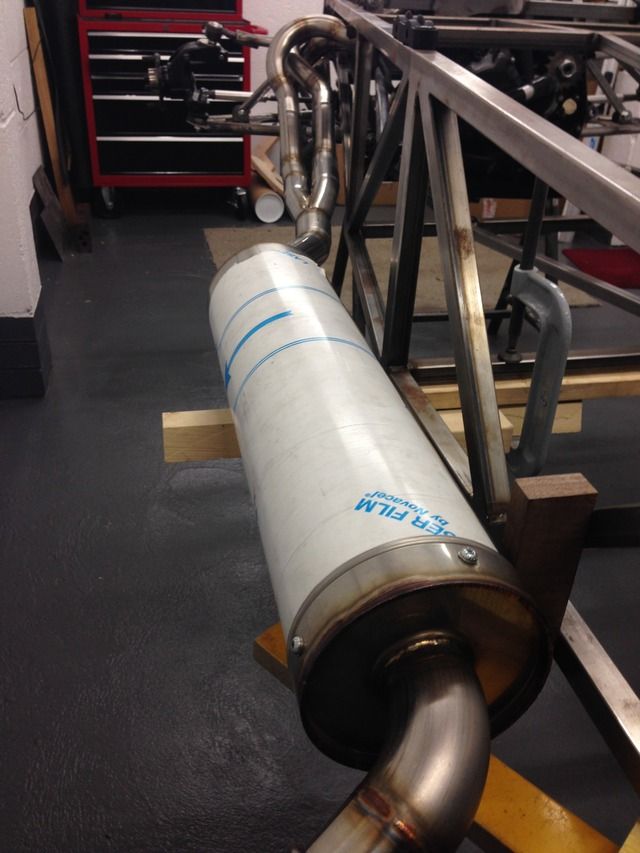
Going to use these rubber mounts I think
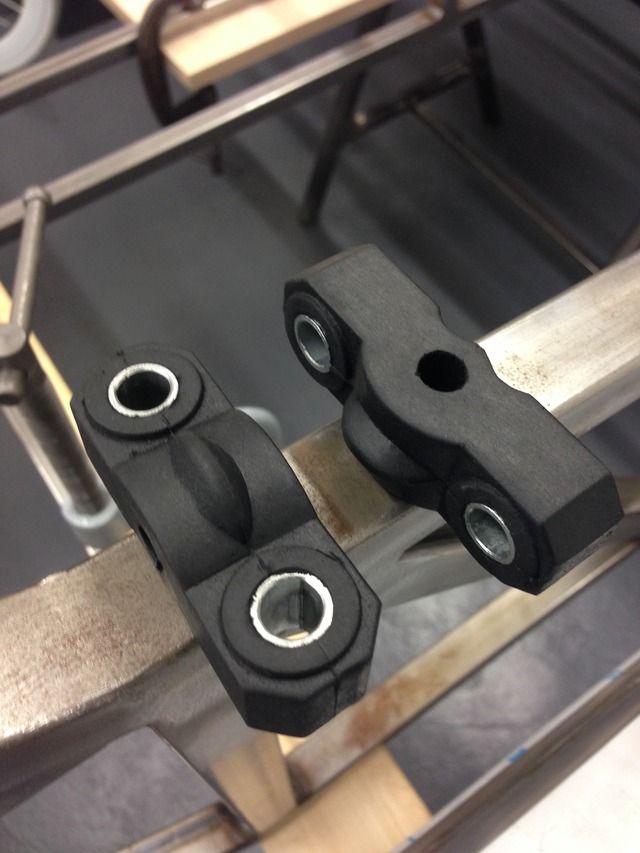
I'm a little worried about the clearance between the exhaust and my grp side panel, the gaps 15mm at the min
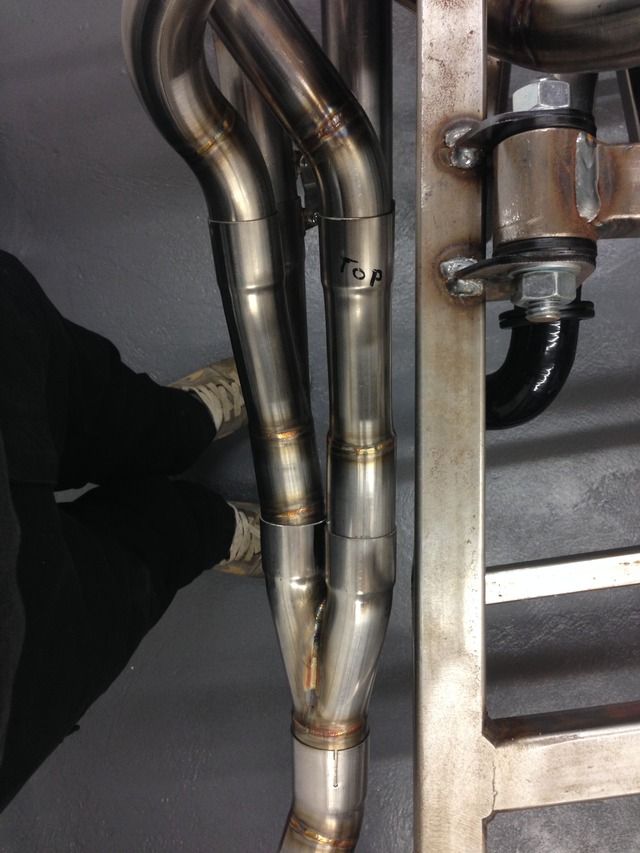
I'm happy with the silencer position though
Can anyone comment on my clearance issue?
bart - 20/3/15 at 07:51 PM
Nice lathe
Nice exhaust
Looking good
big_wasa - 20/3/15 at 08:34 PM
Lathe looks great.
Rosco86 - 24/3/15 at 10:22 PM
Cheers guys
Rosco86 - 30/3/15 at 07:53 PM
A bit of an update tonight, I was looking on speedhunters today like I do most days, and they decided to do a little wright up with some pictures I
sent in
http://www.speedhunters.com/2015/03/iamthespeedhunter-your-bike-powered-builds/
It's about half way down
Next on the list, the lathes all finished
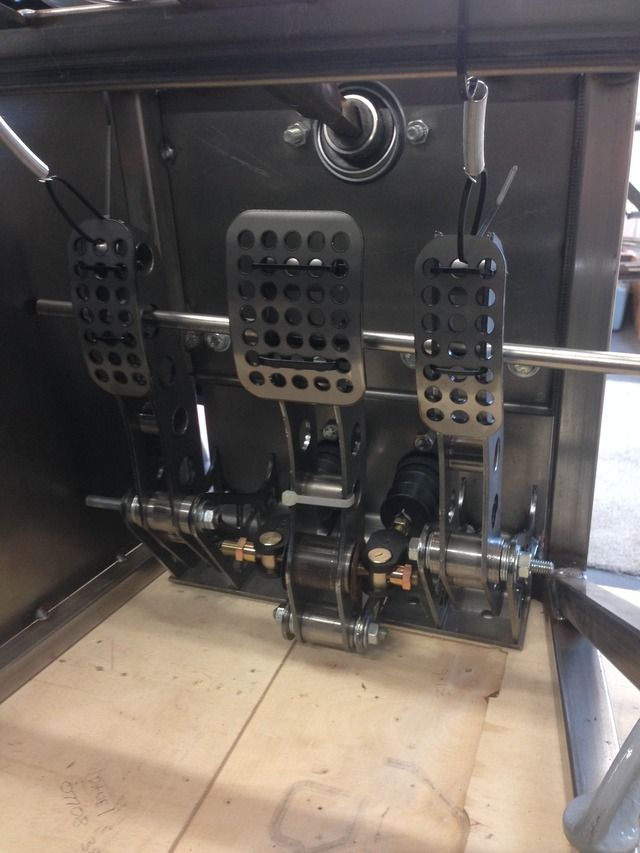
Also I'm back on my pedal box, should get it all tacked up this week
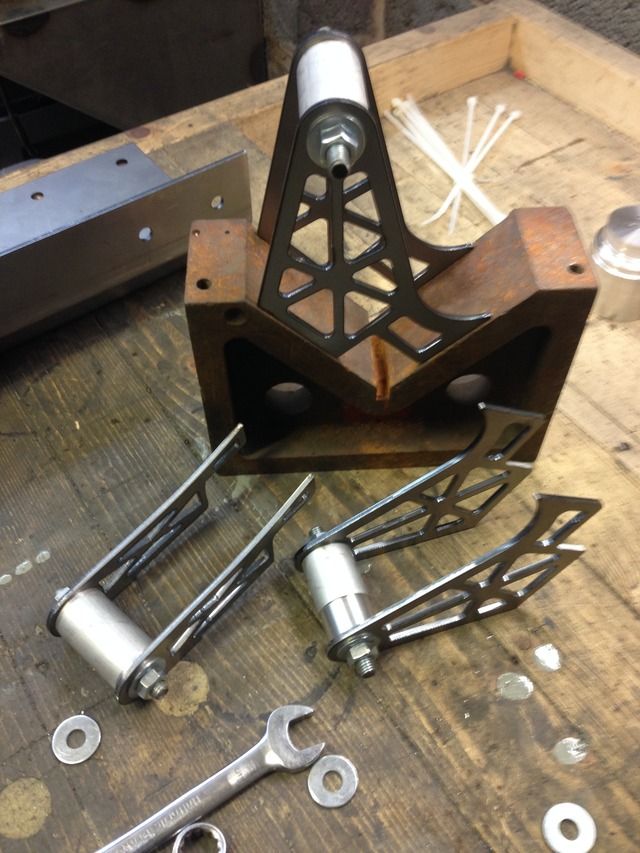
Clamping the sides up square
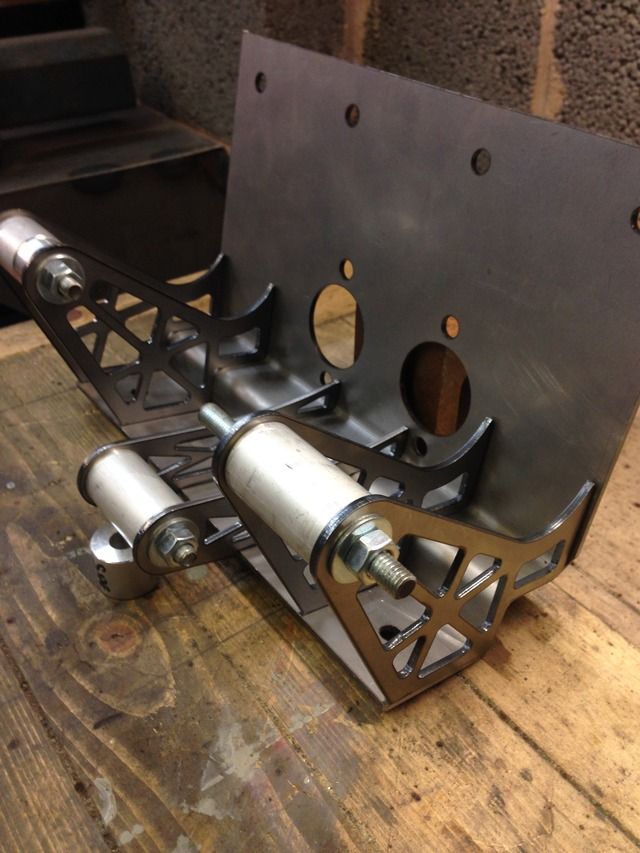
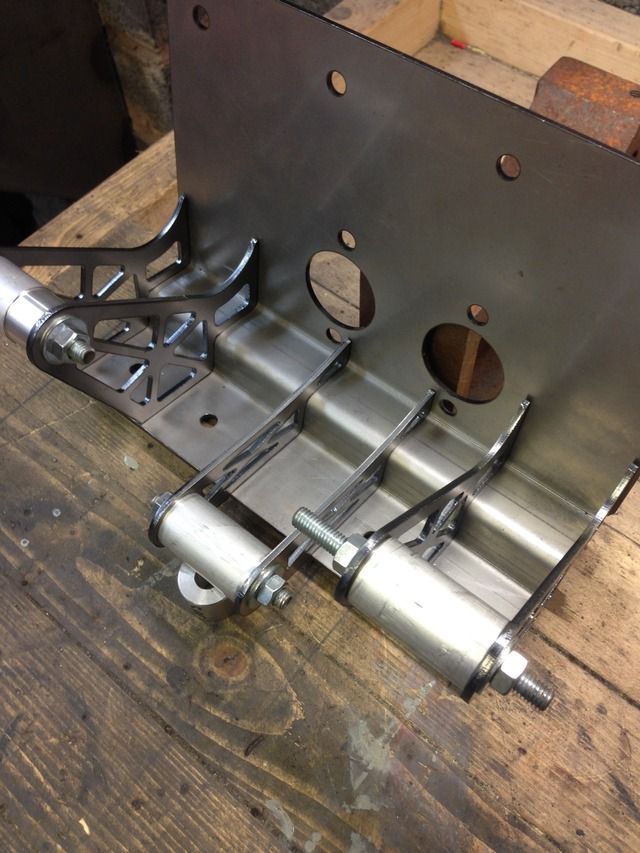
Pedals
Flange bearings for the pivots
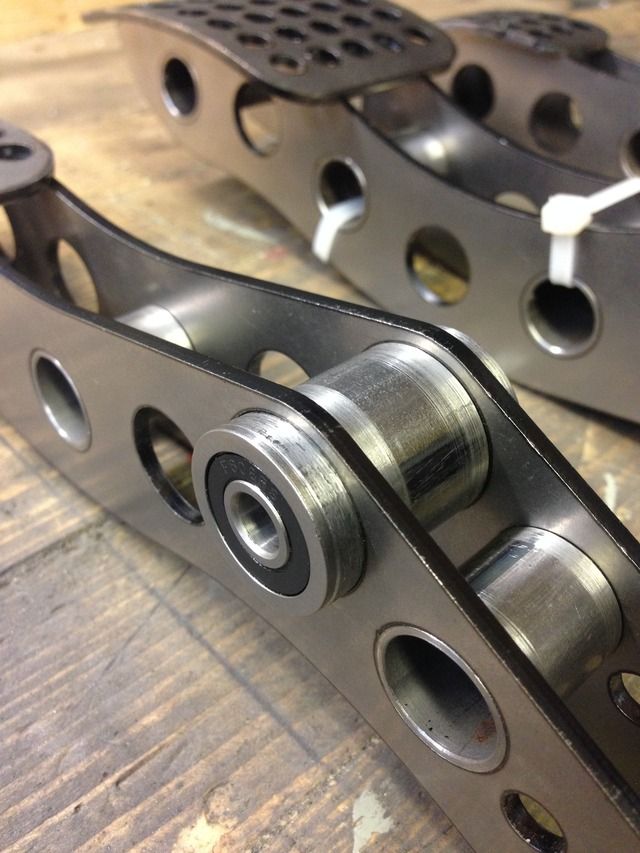
All the tubes will be tig welded in
And that's it for now
Andybarbet - 30/3/15 at 08:07 PM
Oooooh - I like that a lot :-)
rdodger - 30/3/15 at 08:56 PM
Very nice!
Rosco86 - 1/4/15 at 09:18 PM
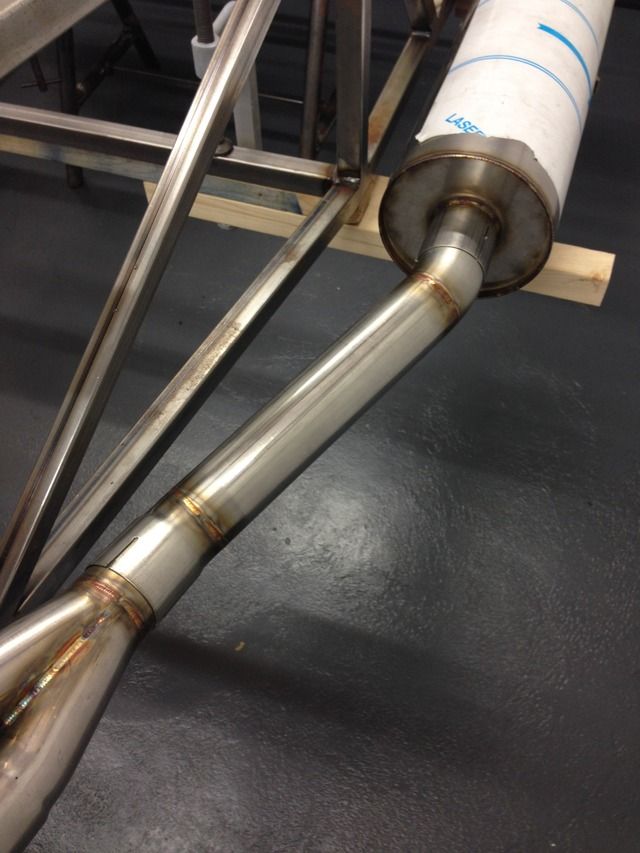
A bit more done tonight, I made some exhaust hangers at the weekend and my rubber mounts came today so got it all mounted and tacked up

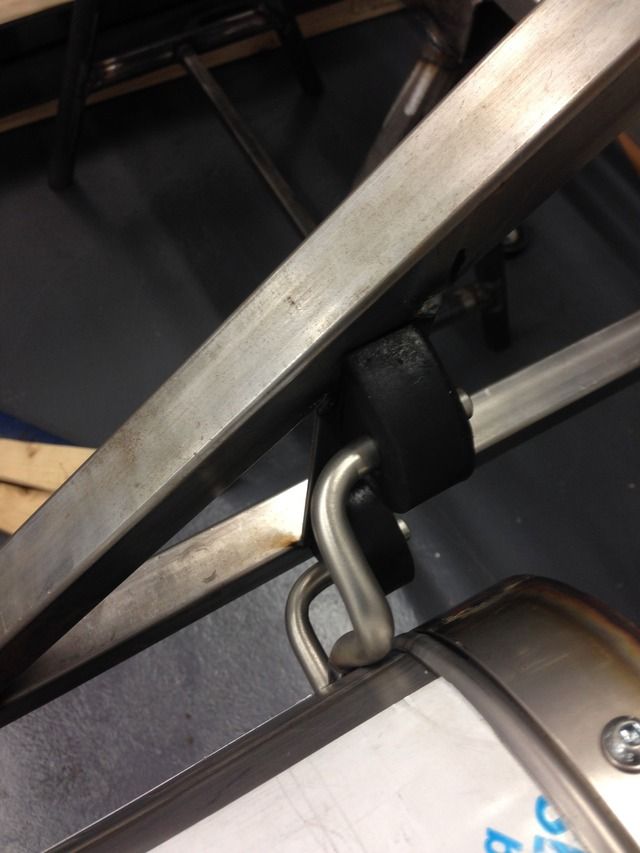
Pretty happy with how it's worked out, sits where I want it to which in good
[Edited on 1/4/15 by Rosco86]
Rosco86 - 6/4/15 at 04:10 PM
Had a good few days on the car this weekend, got a bit done
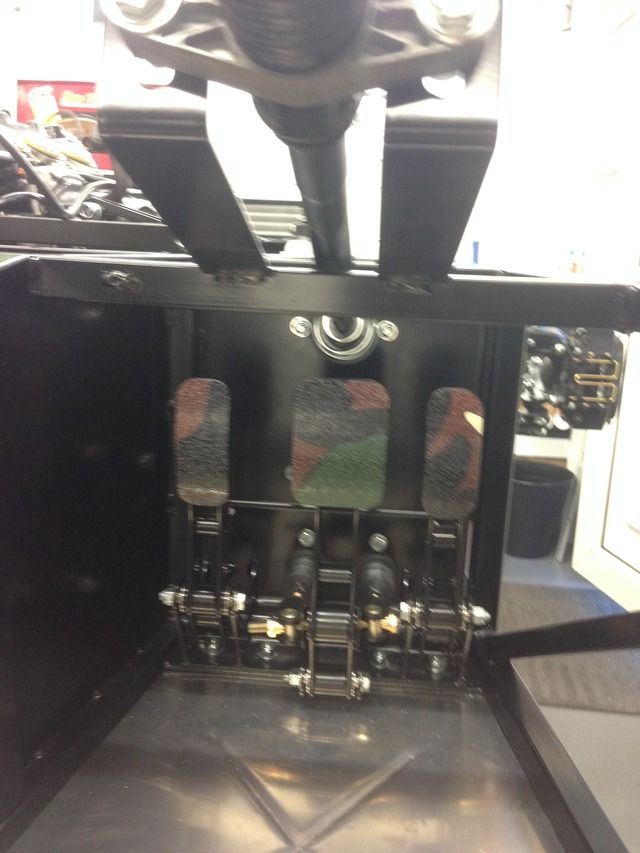
Pedal box tacked up and in the car, there's still a bit to do on it but at least I no where my seats going
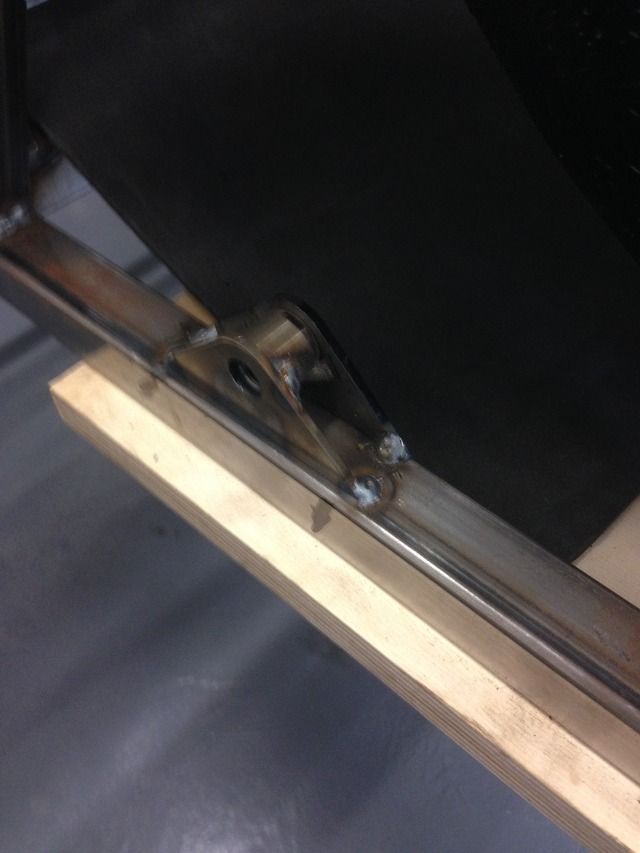
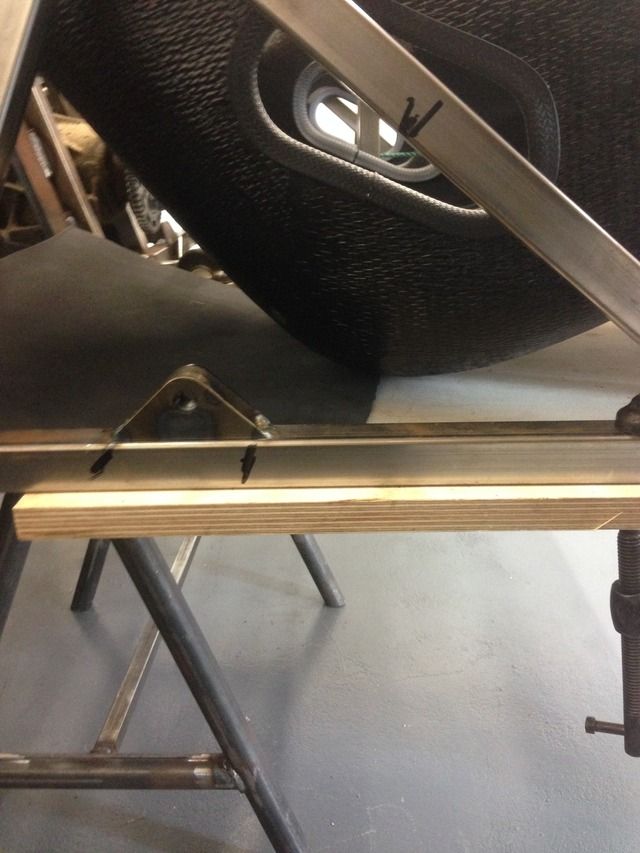
Front seat rails done, I've raised the front of the seat to lower the harness holes at the rear
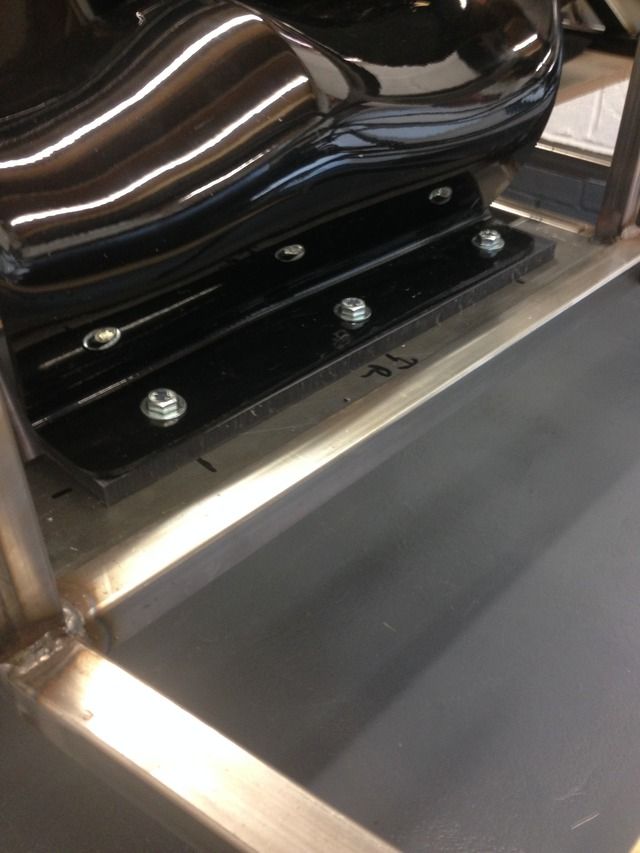
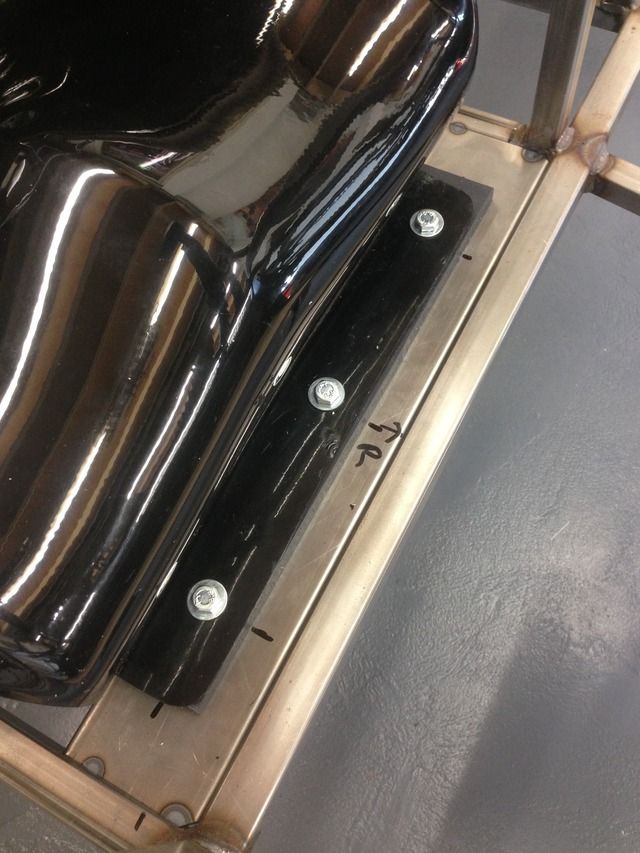
Nuts welded underneath
Harness mounting bosses made
Rear diagonal done
A shot from the rear, also a bit of artwork put up!
Also I've set my self a date of Easter next year to be Iva'ed and on the road
Rosco86 - 12/4/15 at 12:46 PM
This weeks progress
I started working out where my lower harness mounts were going according to the msa blue book
I've changed the book design a little, tacked in
Centre two
Upper seat brackets done, I no the top edge doesn't need a radius behind the seat, but it looks neater I think
Just need some side to side spacers sorting and some correct length bolts
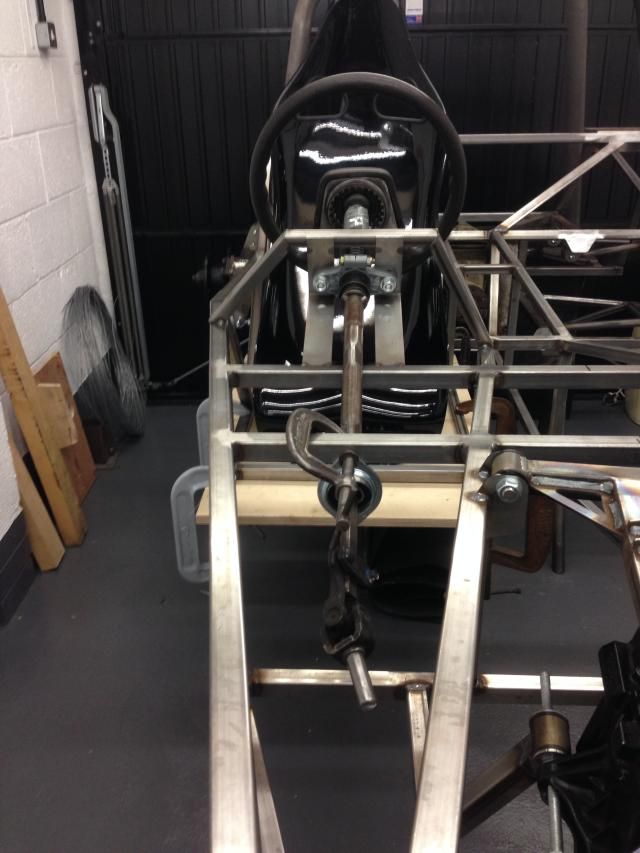
Next throttle cable sorted and temp return spring and the studding through the top is a temp forward stop
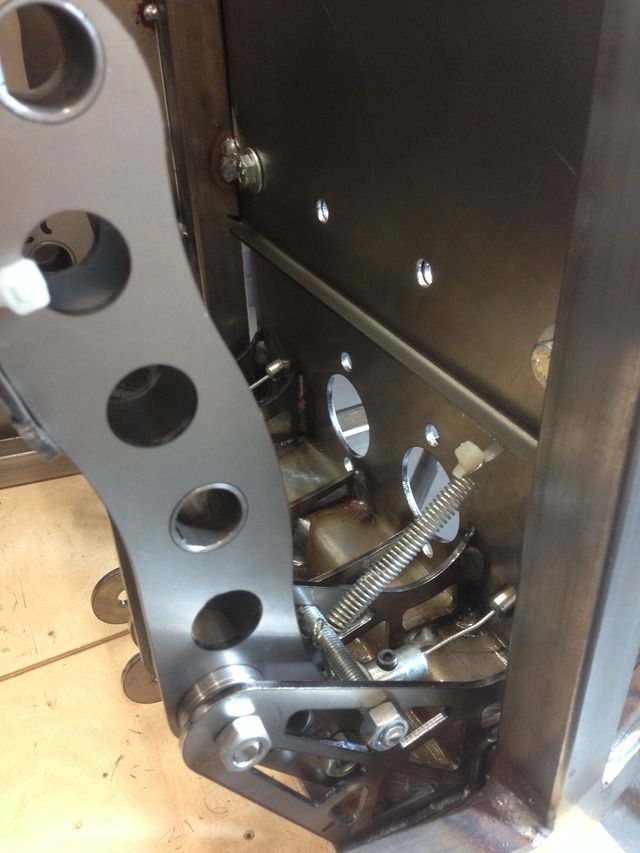
Full throttle
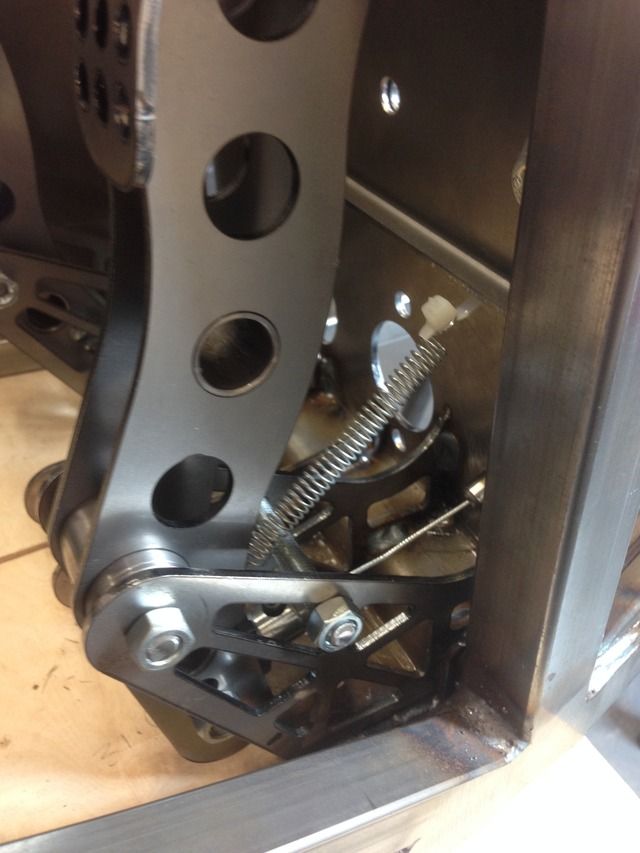
Clutch cable
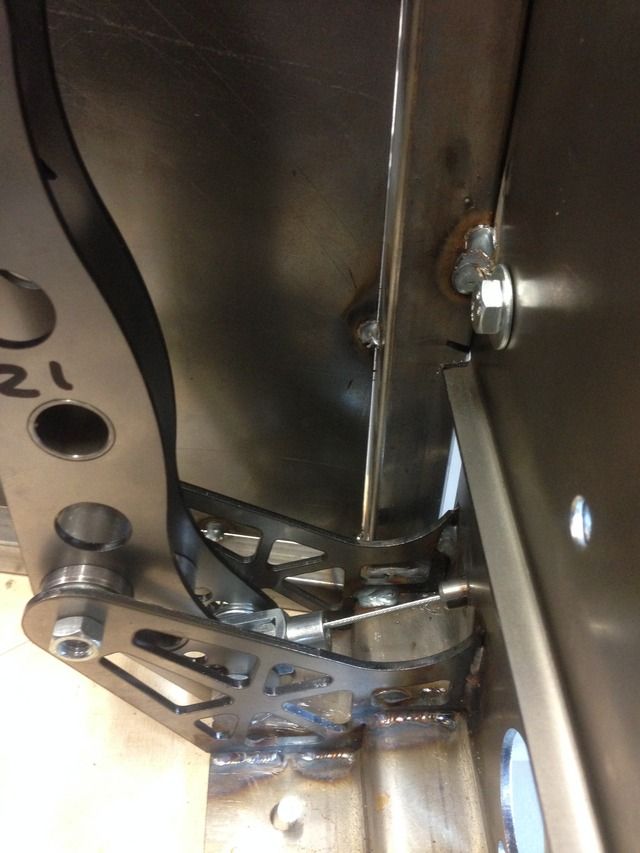
Full clutch
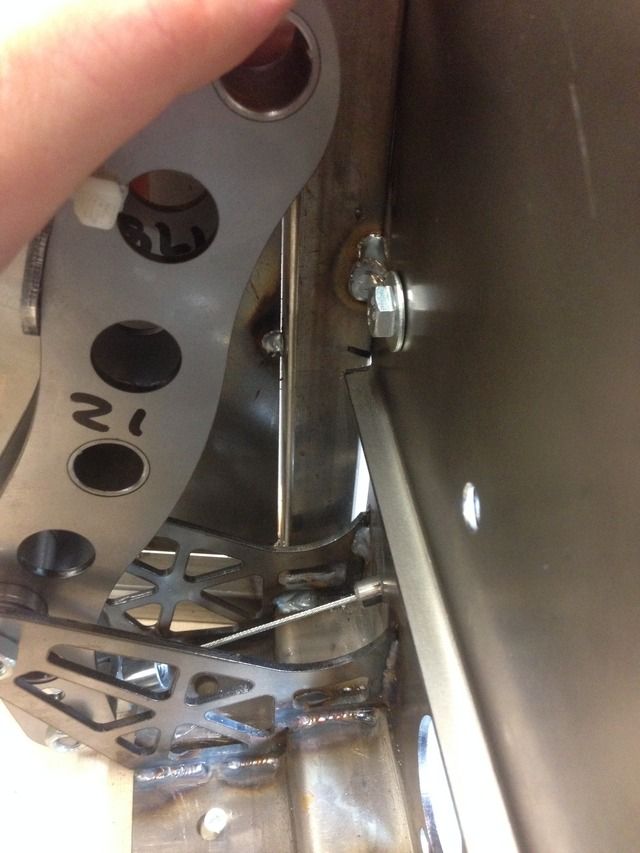
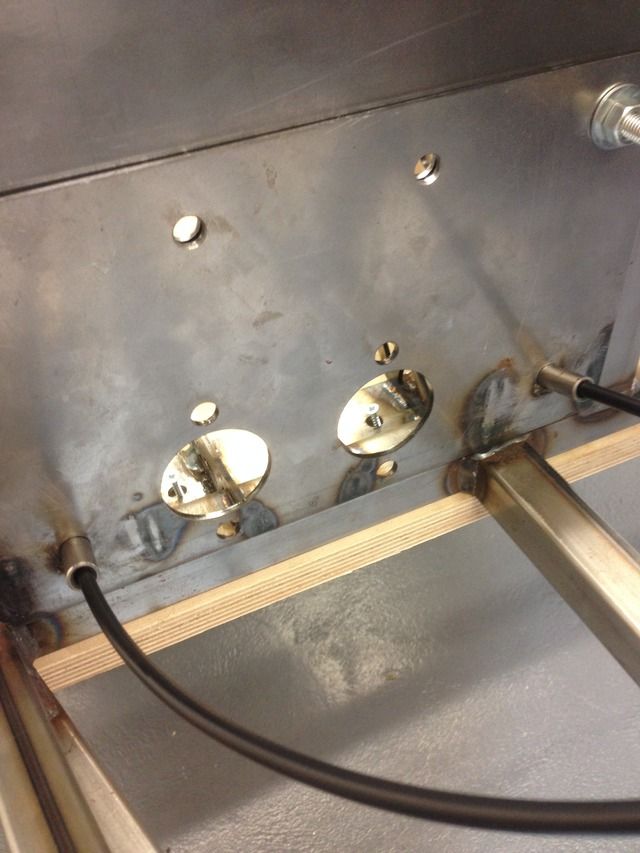
I made two tubes to hold the outer cables
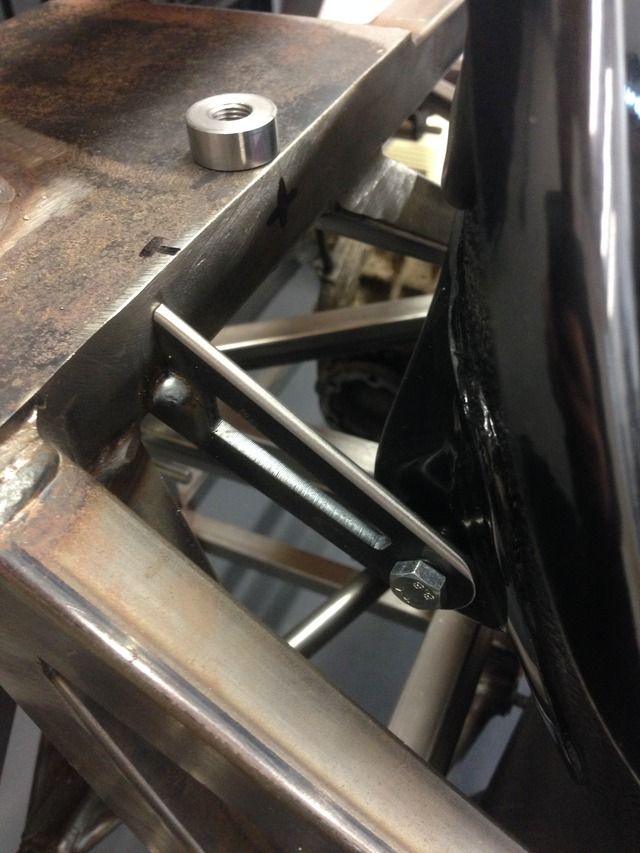
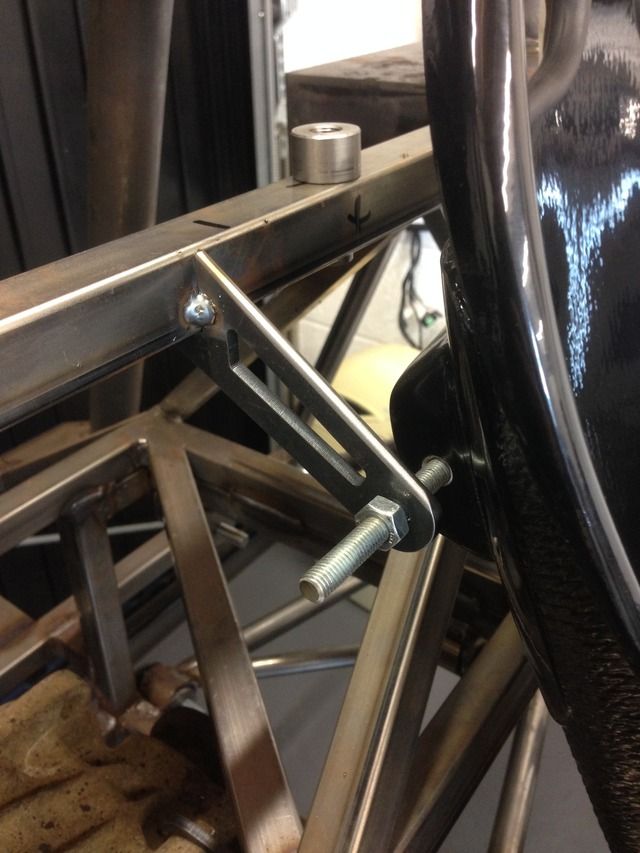
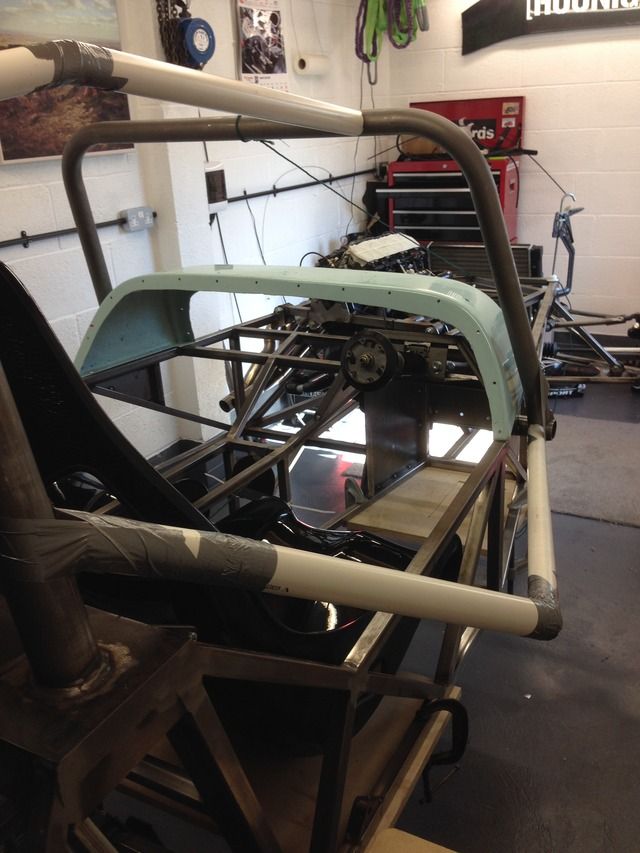
Next job, the rest of the roll cage, I've decided to mount the front hoop on the outside, as bashing my leg on it all the time not my idea of
fun
I mocked up the scuttle panel, and worked out a mounting plate
The tube will mount to a bit of tube on end with two more bolts so it meats msa spec, once the front hoops in place I will sort my roof bars and door
bars out
[Edited on 12/4/15 by Rosco86]
davidimurray - 12/4/15 at 02:25 PM
Be careful with those upper seat belt mounts. I can't remember if you're going for IVA, but if the belts touch the seats they will fail.
Mine are on a cross bar on the roll hoop about 4 inches higher and it was just right for IVA.
Cheers
Dave
Rosco86 - 12/4/15 at 05:10 PM
quote:
Originally posted by davidimurray
Be careful with those upper seat belt mounts. I can't remember if you're going for IVA, but if the belts touch the seats they will fail.
Mine are on a cross bar on the roll hoop about 4 inches higher and it was just right for IVA.
Cheers
Dave
Yeah im going for iva, ive tilted the seat back a bit and the mounts are going to have a spacer ontop to bring the mounts up a little, they dont need
a lot
Rosco86 - 13/4/15 at 07:03 PM
Just been looking at my front roll bar hoop, I think I'm going to mount it on the outside i think and welded on, I've had a quick draw up of
it, but I'm going to mock it up with plastic pipe while I'm sat in the car
CosKev3 - 14/4/15 at 09:16 PM
Nice.
Have you planned for a stop on your clutch pedal?
As you can pull bike clutches too far when using a pedal.
Rosco86 - 14/4/15 at 09:44 PM
quote:
Originally posted by CosKev3
Nice.
Have you planned for a stop on your clutch pedal?
As you can pull bike clutches too far when using a pedal.
Cheers, yeah I'm going to have an adjuster in the backplate on the clutch and throttle, and forward stops,
Does anyone no if you need a forward stop on your brake?
Also when I put the engine in first gear the output shaft obviously is turning the engine instead of spinning but when I dip the clutch it
doesn't spin
Rosco86 - 26/4/15 at 05:33 PM
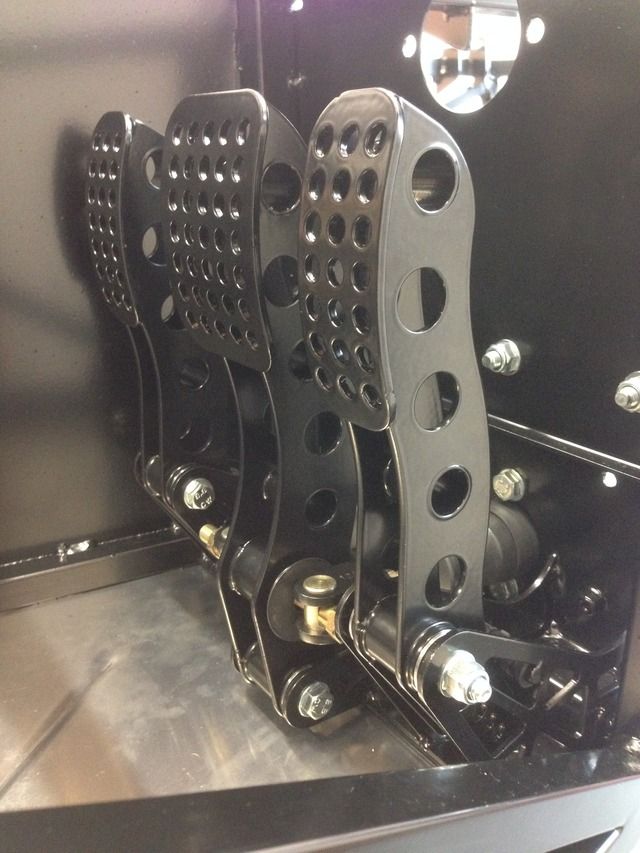
Good progress the last few weeks, pedal box and pedals are getting finish welded and then off for powder coat
Front hoop in position, roof bar in plastic
Side mounts
Door bar mocked up
Exhaust altered and posted back to my mate to tig weld
Door and roof bars fitted, notching the door bars what a bit tricky to get them both the same!
Rear diagonal redone in 45mm cds
Rosco86 - 9/5/15 at 08:22 PM
Bit of an update, didn't have much to do last week, I went stonleigh and brought all my lights,
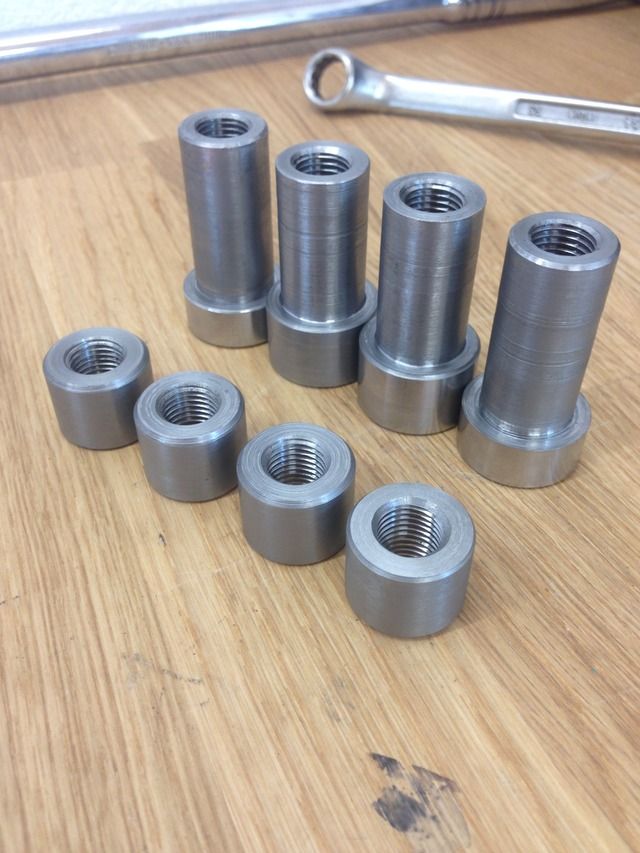
Made these threaded slugs
Drilled and fitted here
Rear spoiler held in position
More slugs made
Stays made
All done

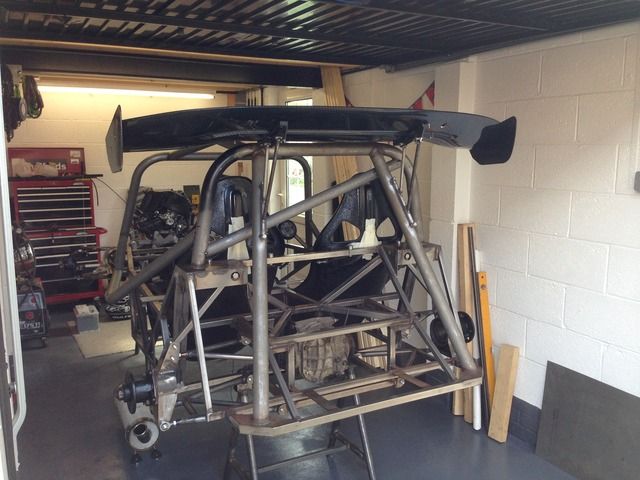
I no some people won't like it, but I got the spoiler for nothing, it's only for a mess about, that's why I've done it to bolt on
and off easily
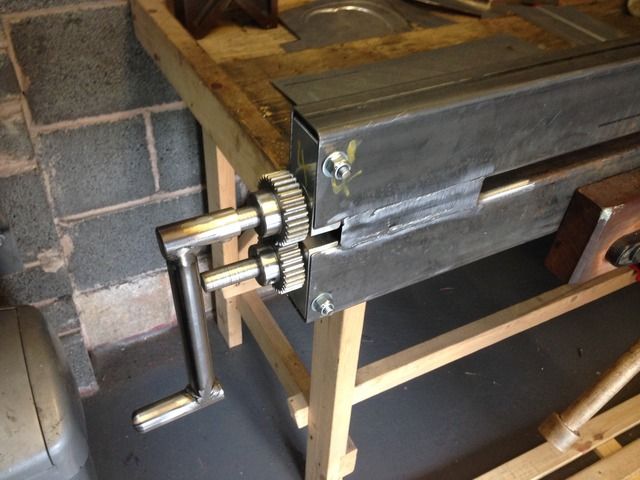
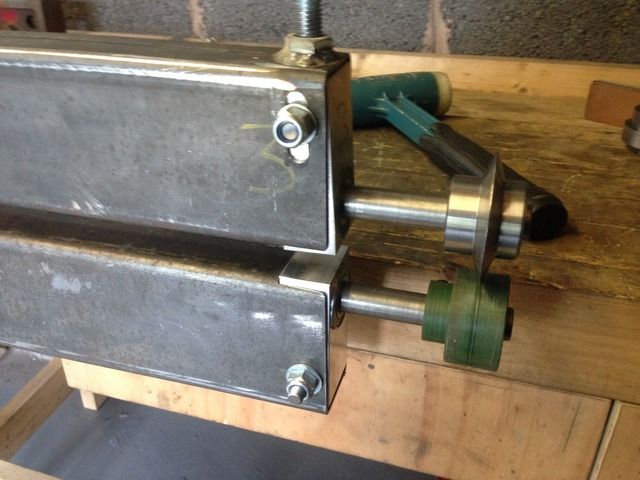
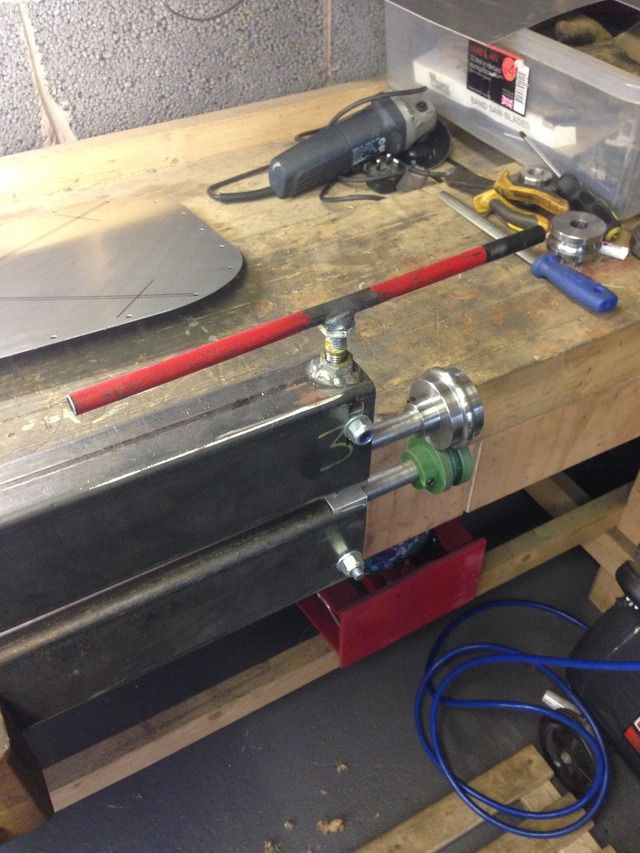
Today's job was to start making a bead roller like below
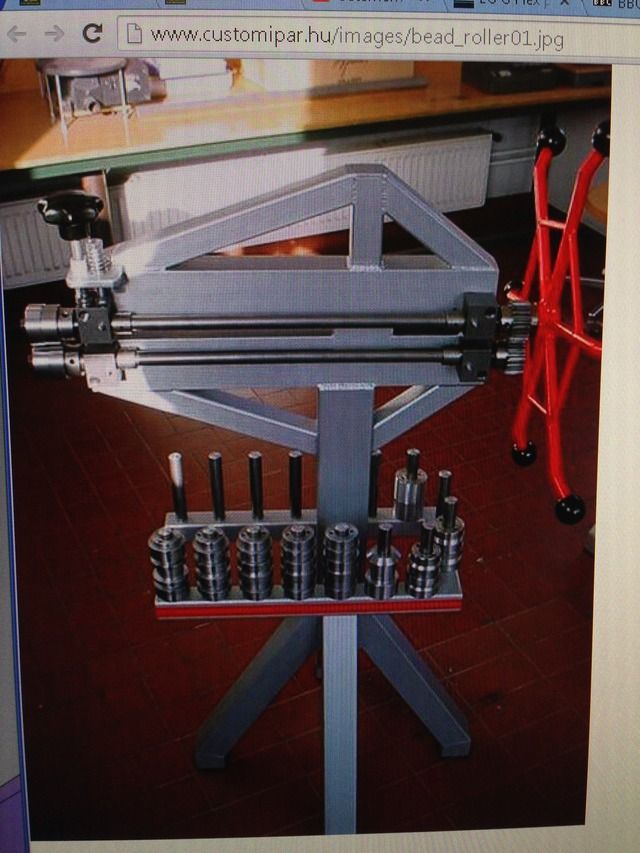
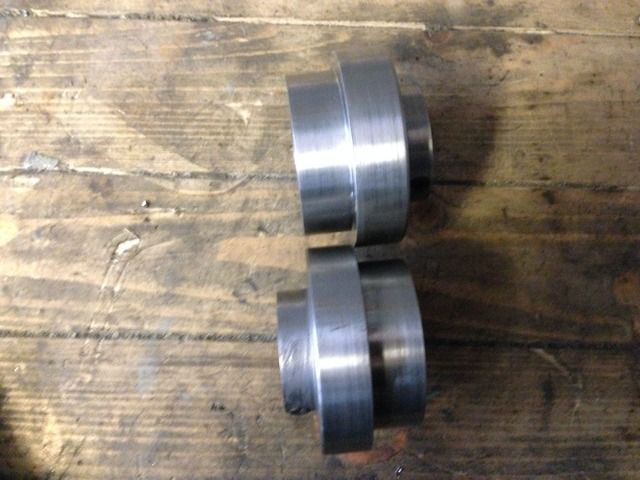
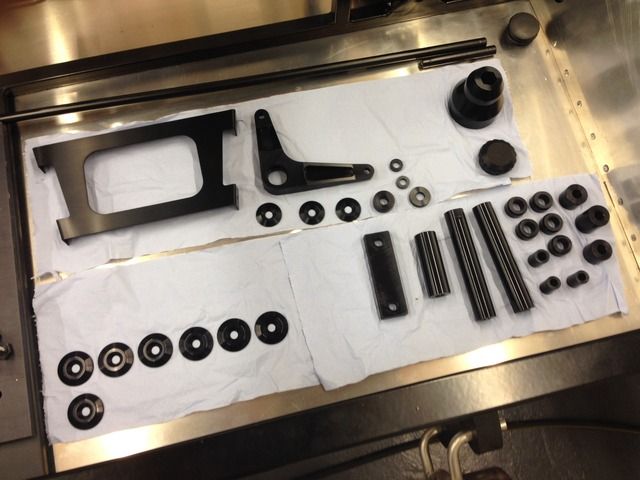
Bits required
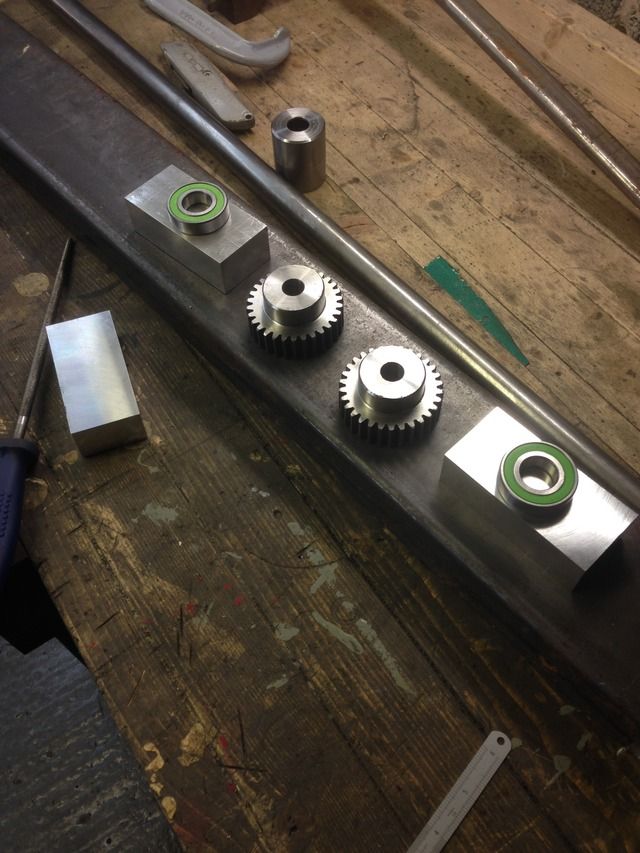
Machining the blocks to house the bearings on my dad's home built cnc
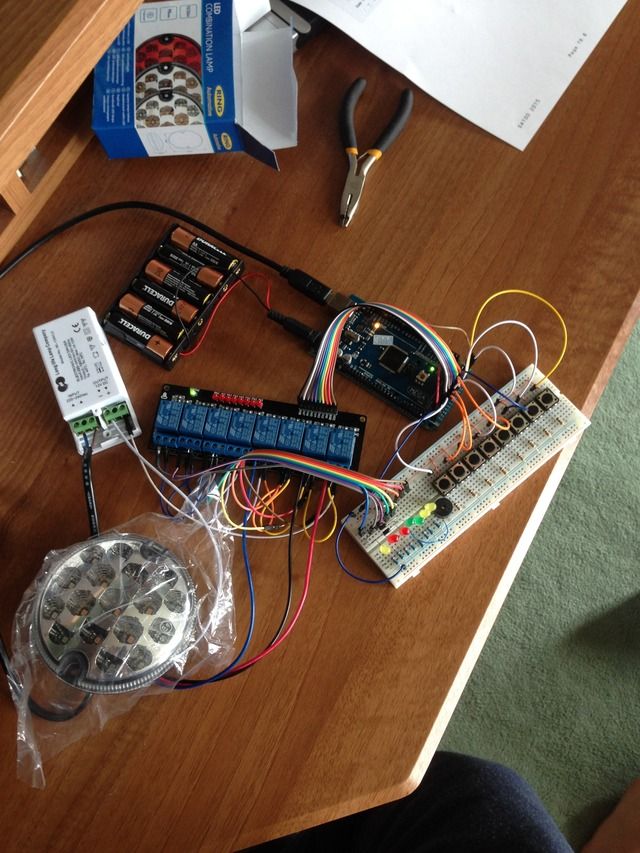
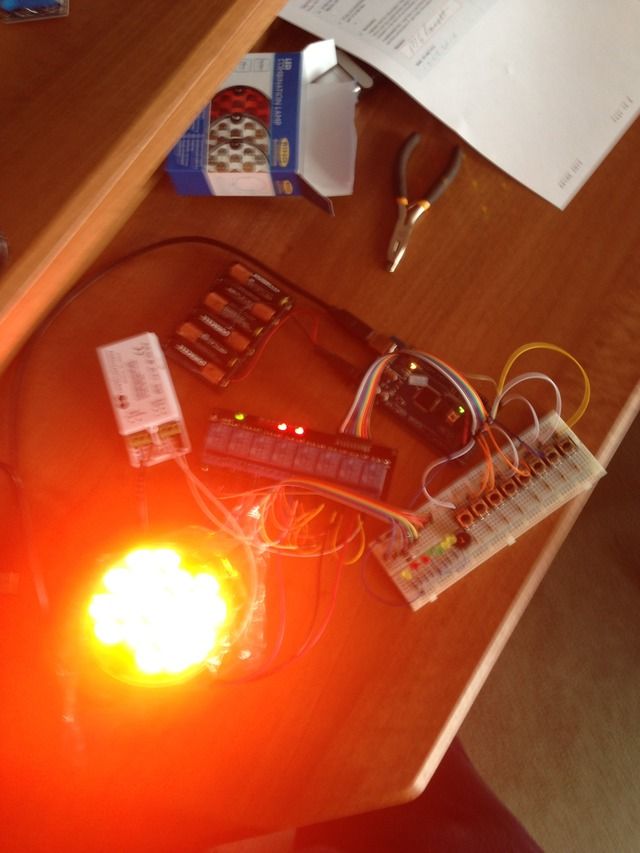
Last up my dads started on my dash buttons, we're having a go using an ARDUINO, it's a programable chip with ins and out, they can be used
with switches, sensors, relays just have a look on ebay to see what's available, the boards are about �8 and everything else like switches are
pence, it's programmed from a PC through USB, so things like indicator flashing can be programmed, if it works out ok it will all be soldered and
put in a little project box

dubzter - 10/5/15 at 08:41 AM
quote:
Originally posted by Rosco86
Last up my dads started on my dash buttons, we're having a go using an ARDUINO, it's a programable chip with ins and out, they can be used
with switches, sensors, relays just have a look on ebay to see what's available, the boards are about �8 and everything else like switches are
pence, it's programmed from a PC through USB, so things like indicator flashing can be programmed, if it works out ok it will all be soldered and
put in a little project box
Awesome work, not sure about the spoiler but it will be good to see it once there is some bodywork in place.
I've been looking at Arduino for building a boost type gauge for my other car, should be a nice cheap control unit for what you are planning if
it works out.
Lew The Machine - 14/5/15 at 09:49 PM
looking really good dude! I'd keep the wing, looks awesome! although i think the stays could do with a few tweeks!
I've just finished Uni for the summer so hoping to make some decent progress on mine over the next few months!
Pedal box looks INSANE... pretty sure you could sell those all day long!
Keep it up!
Rosco86 - 15/5/15 at 06:39 PM
quote:
Originally posted by dubzter
I've been looking at Arduino for building a boost type gauge for my other car, should be a nice cheap control unit for what you are planning if
it works out.
Yeah that should be doable, I'm sure you could get a pressure sensor linked up, I've got my dad on it so see how he gets on
Rosco86 - 15/5/15 at 06:40 PM
quote:
Originally posted by Lew The Machine
looking really good dude! I'd keep the wing, looks awesome! although i think the stays could do with a few tweeks!
I've just finished Uni for the summer so hoping to make some decent progress on mine over the next few months!
Pedal box looks INSANE... pretty sure you could sell those all day long!
Keep it up!
Cheers pal, what do you think needs doing to the stays then?
Cool, get cracking then!
Lew The Machine - 15/5/15 at 09:30 PM
quote:
Originally posted by Rosco86
quote:
Originally posted by Lew The Machine
looking really good dude! I'd keep the wing, looks awesome! although i think the stays could do with a few tweeks!
I've just finished Uni for the summer so hoping to make some decent progress on mine over the next few months!
Pedal box looks INSANE... pretty sure you could sell those all day long!
Keep it up!
Cheers pal, what do you think needs doing to the stays then?
Cool, get cracking then!
The angles of the stays look like they're "triangulated" the wrong way?
I can see why you need the distance between the top stay and the bolt as the acuteness of the angle would stop the bolt coming out, but the bottom one
could be much nearer the bolt head?
It just "looks wrong" and as most of the guys at work tell me... If it looks wrong it usually is!
It's a minor detail though and the whole build is beyond awesome!
I'm doing my best to play catch up... But I'm being side tracked by real life, buying a house! Solicitors don't appreciate that I need
time in the shed haha!
Rosco86 - 16/5/15 at 07:59 PM
Yeah I see what your saying, it's because that's how long the tube was that I used lol, I didn't want to buy any as it's only for
a mess around, I'm going to put some fancy laser cut gussets in it I think
Rosco86 - 16/5/15 at 08:08 PM
Steady progress this week I think
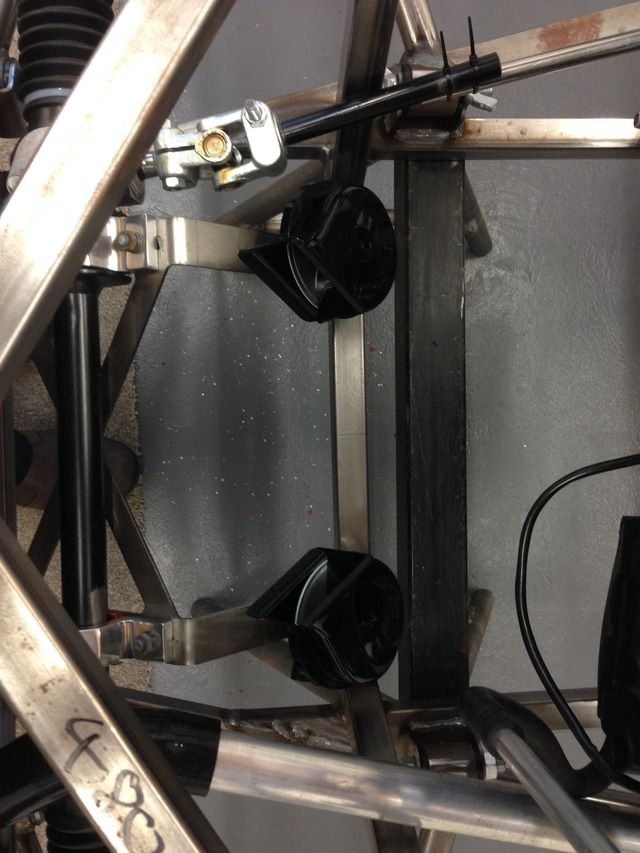
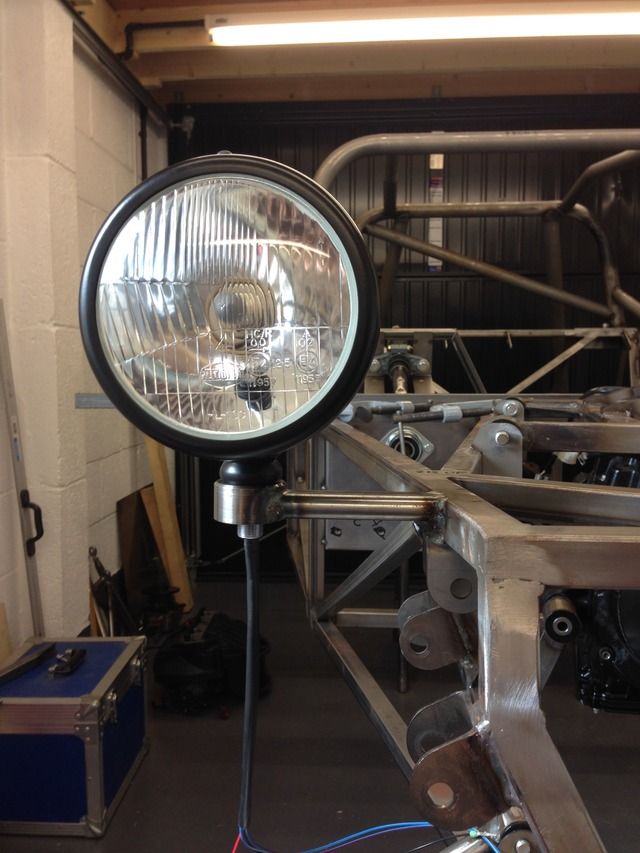
Horns mounted
Headlight mounts made
I stripped the whole chassis down so I could lift it outside, I needed to cut the front shock mounts off as I had got them in the wrong place, to far
back by about 10mm
My garage from outside while it's empty
Headlights on
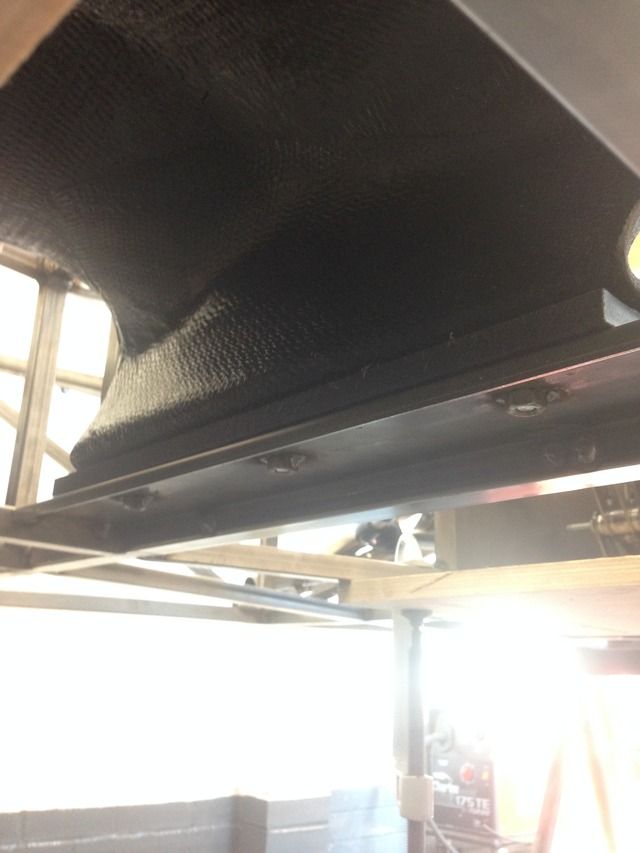
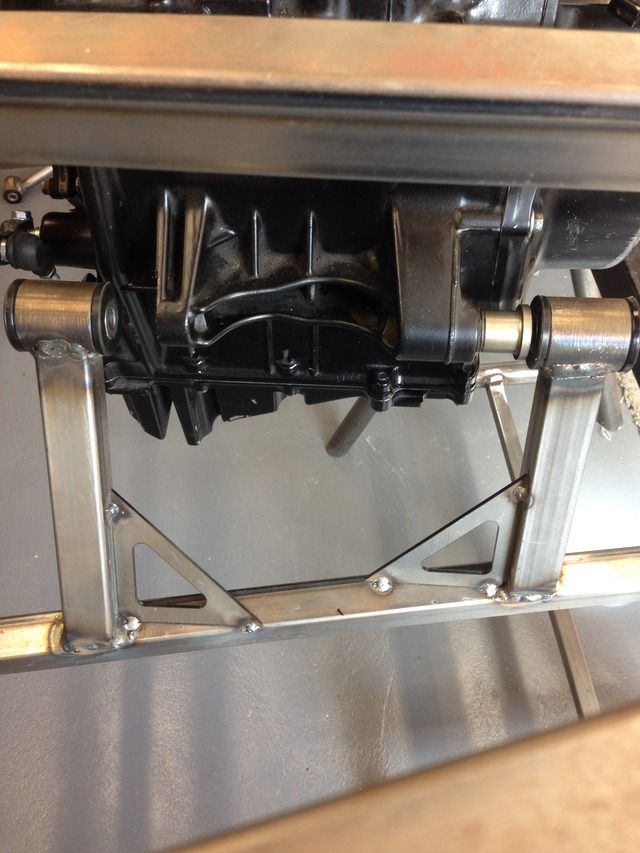
Lower engine mounts tacked on
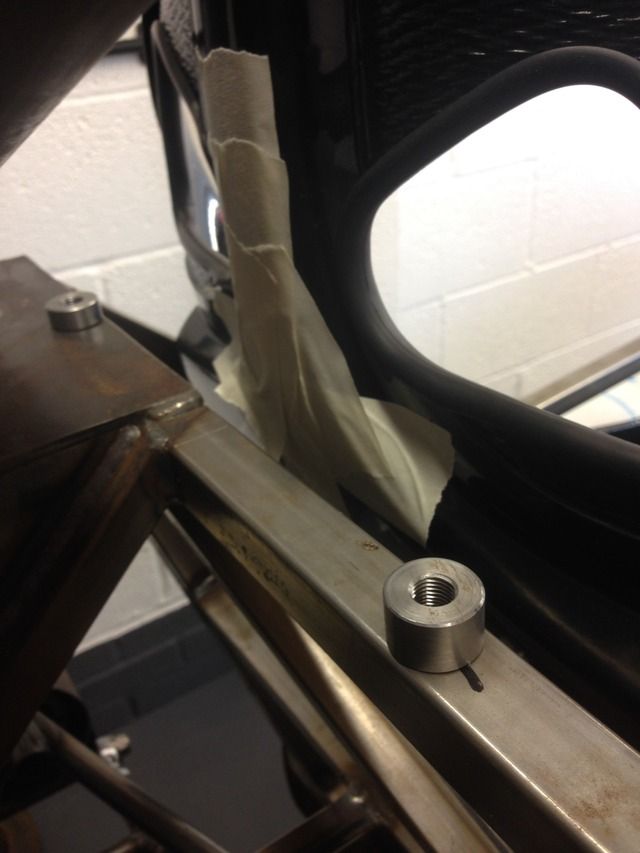
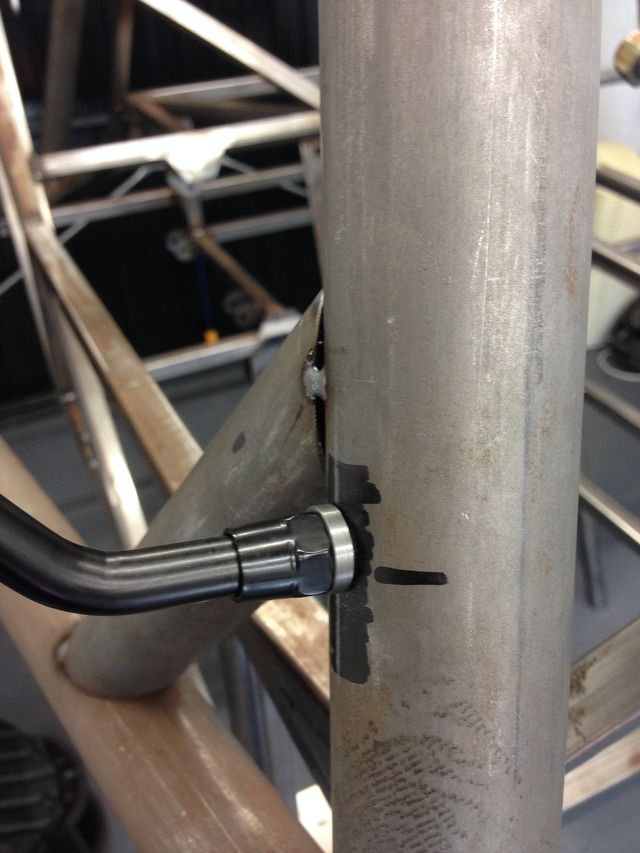
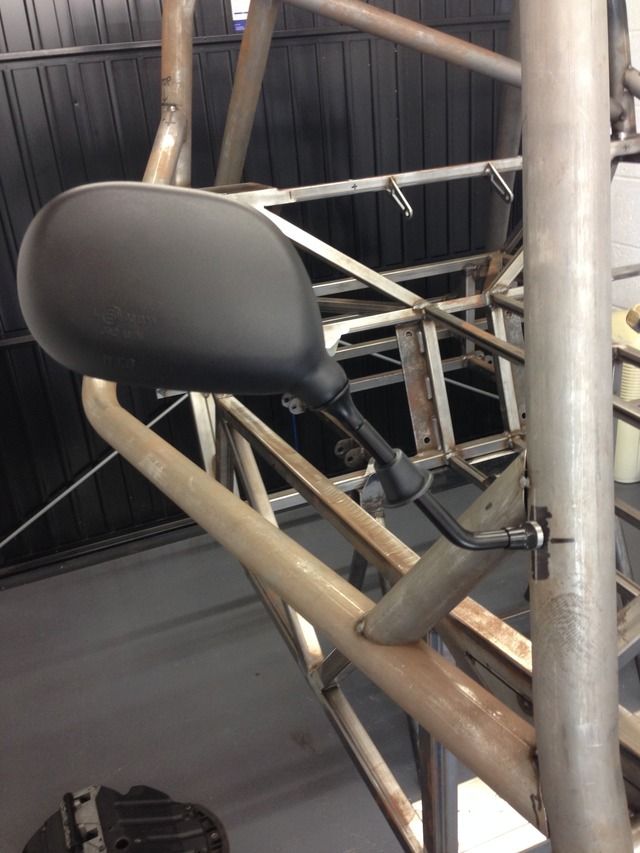
Next up I made some threaded bosses for my wing mirrors
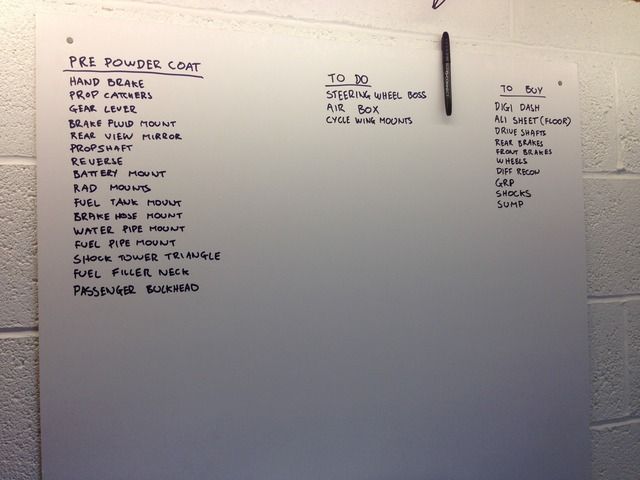
Also made myself a list, my main aim is to get the chassis ready for powder coating
big_wasa - 16/5/15 at 08:54 PM
looking good
Rosco86 - 17/5/15 at 04:50 PM
Cheers, my dad's made good progress on the dash circuit, if you click the picture below its a video

There's still a bit to do but I think he's sorted the hardest bits of code
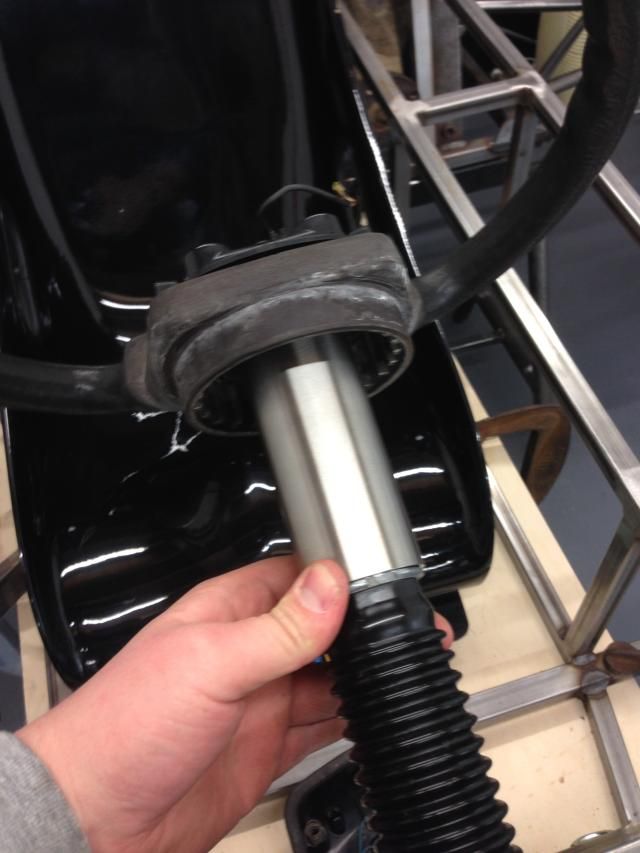
Also I've sorted my steering shaft out with some thick walled tube, I heated it up to get the shaft in, just needs tiging around the ends and
possibly a few pins
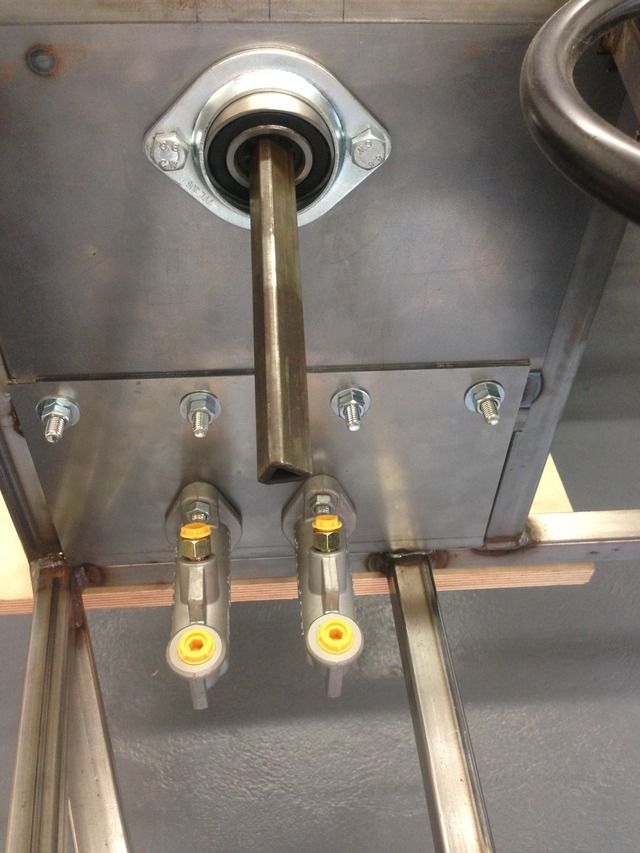
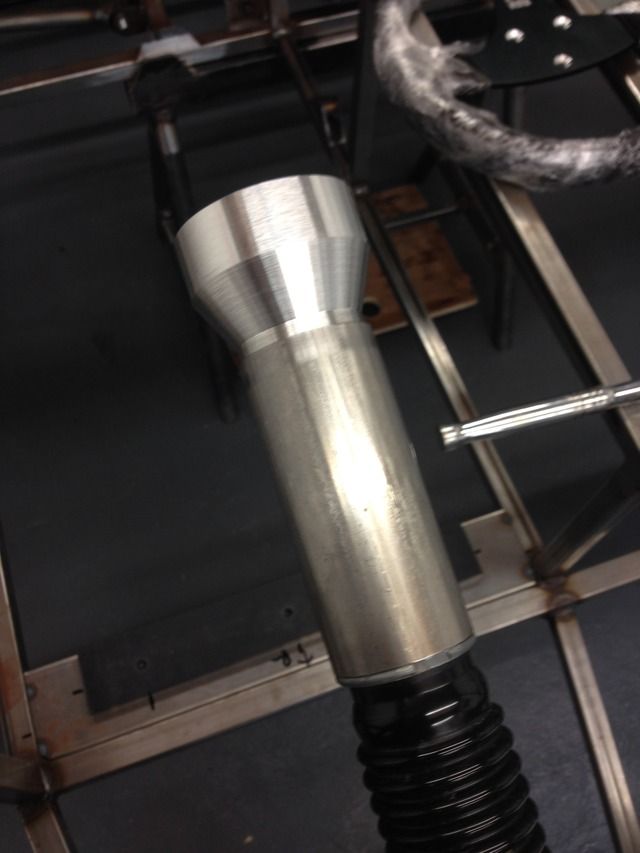
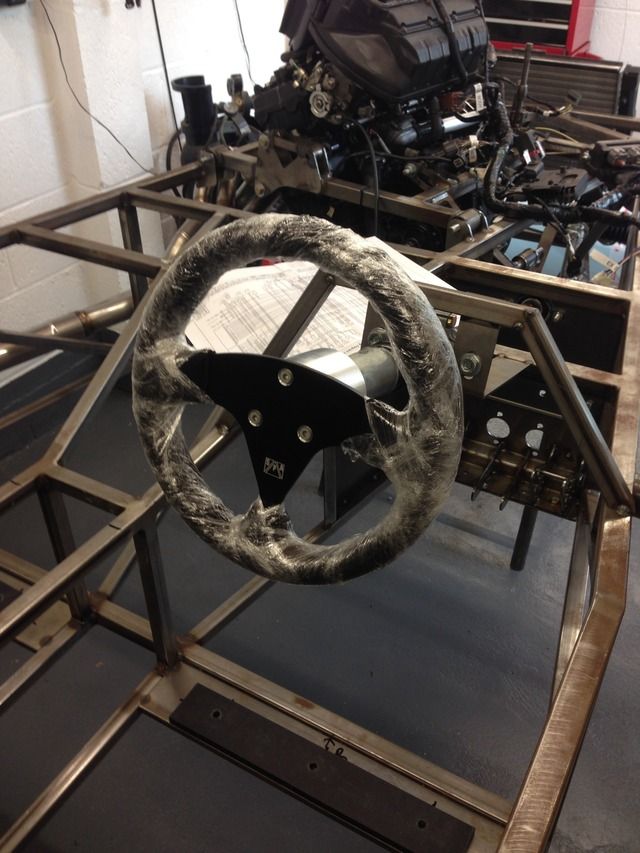
Rosco86 - 24/5/15 at 06:55 PM
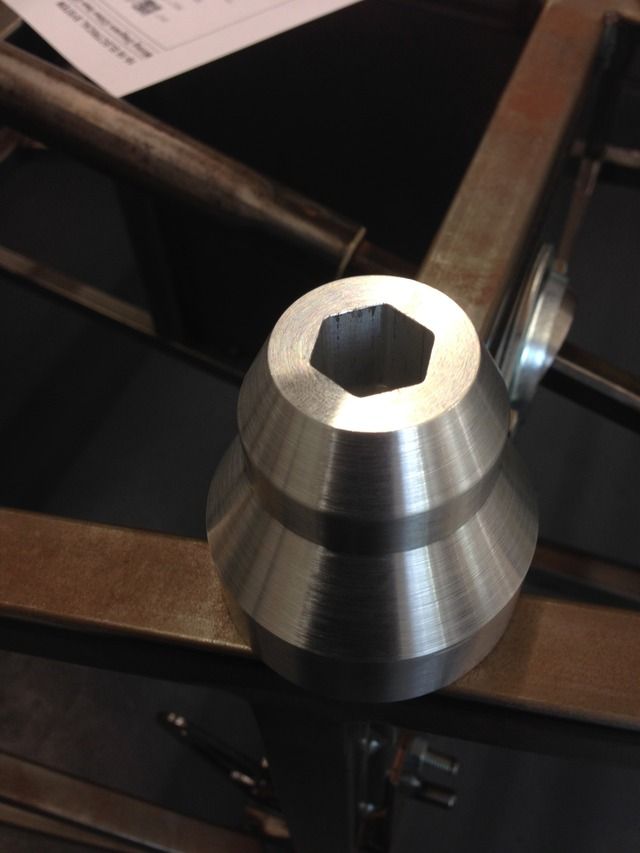
Got my stearing wheel last week, but needed a boss to mount it so turned one up on my lathe and milled the hex in on my dads cnc, also needed to drill
the wheel so marked it on his cnc so I new it was right, real happy with this as it not like you can buy them off the shelf
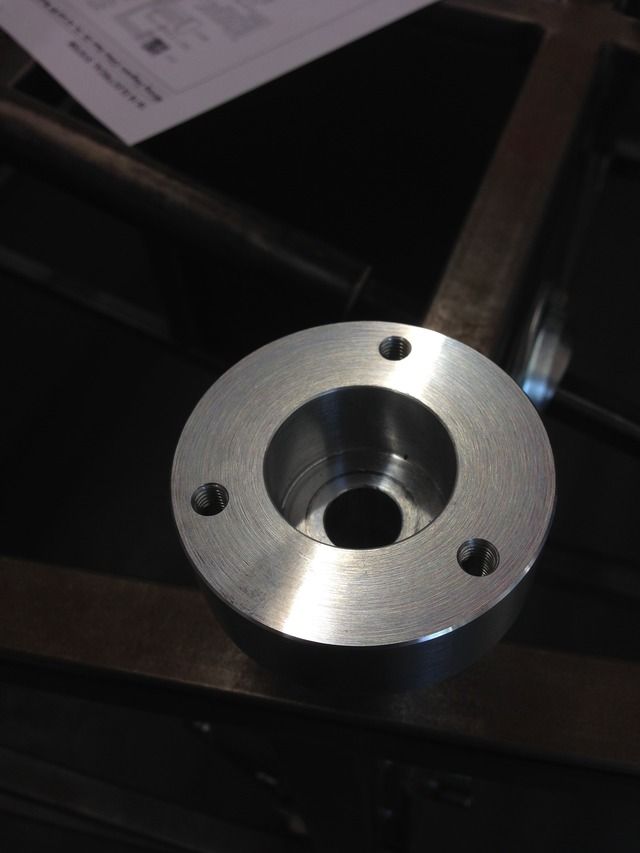
I copied the tapered hexigan from the standard sierra wheel
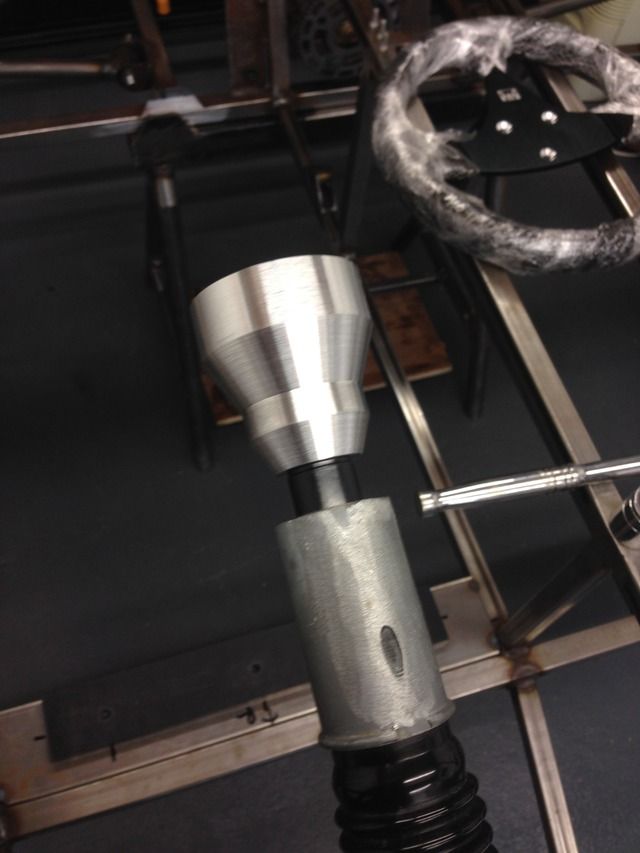
A stainless cover tube to hide the column, still not 100 percent how I'm finishing this bit yet
Then looked at the wiring loom and got it plugged in and the ignition on ready for a start up when I get my fuel tank
tilly819 - 25/5/15 at 07:31 AM
Great looking build, before you paint/coat the chassis it is worth putting a single diagonal or full cross into the front frame. There are quite high
torsional loads at that point of the chassis and there is a distinct lack of any proper bulkhead in the original design.
This is mine for reference.
Cheers Tilly
[Edited on 25/5/15 by tilly819]
[Edited on 25/5/15 by tilly819]
Rosco86 - 26/5/15 at 07:02 PM
Cheers mate, added to my list, looks like your right to as there's not much in strength in that part of the chassis
Rosco86 - 26/5/15 at 07:09 PM
Went off up to Race Technology today to pick up my Dash2, really nice chap who owns it and he couldn't be more helpful,
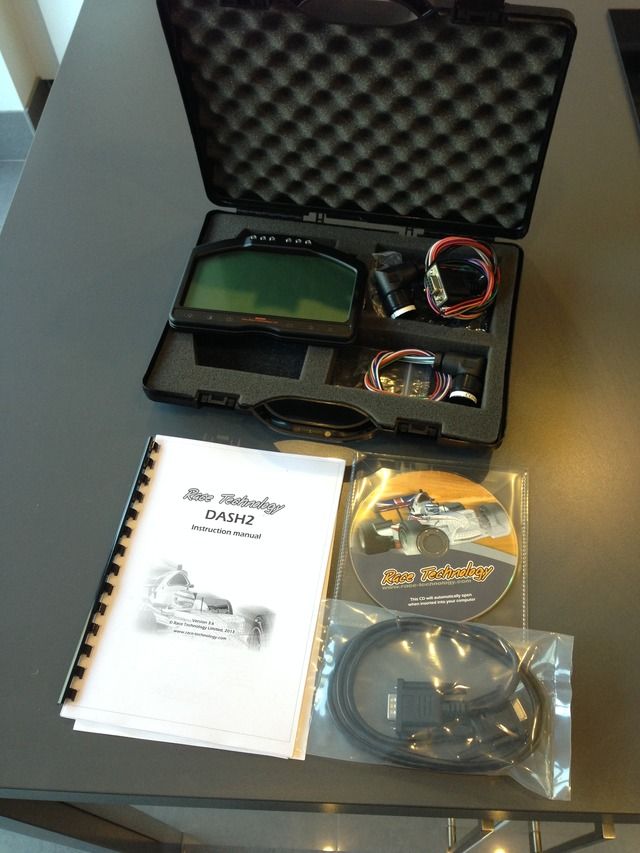
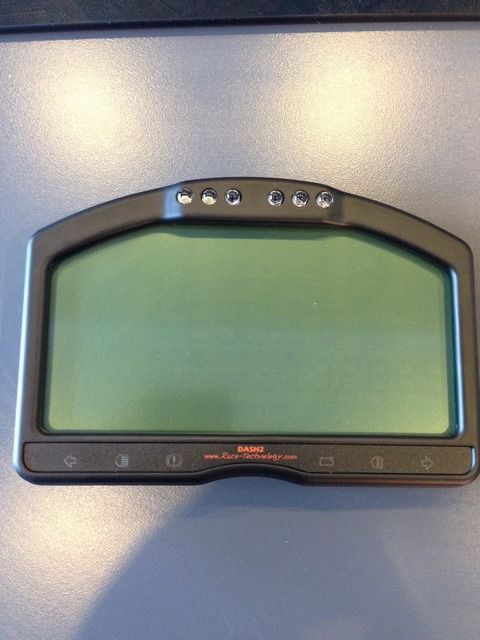
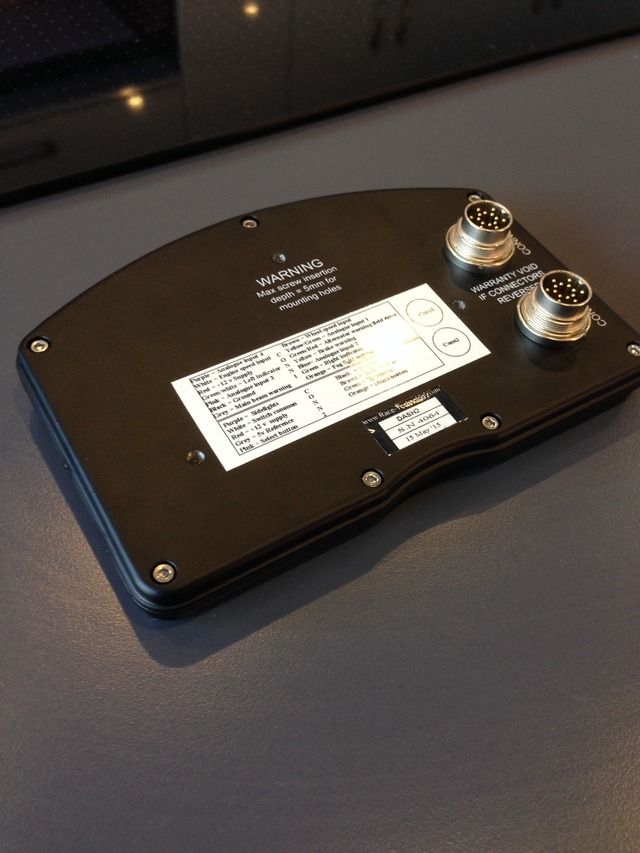
To say I love it would be an understatement, even before I've wired it up, I've always wanted a digi dash on one of my cars, so hopefully I
might make a start on wiring it up at the weekend.
Here's a pic of them lit up for those that are interested
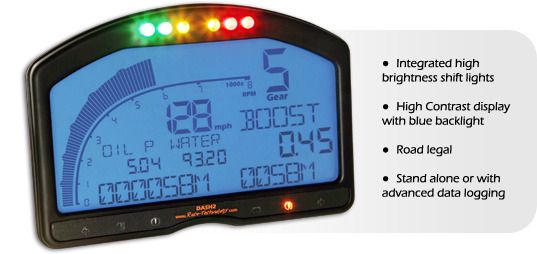
matt5964 - 26/5/15 at 07:25 PM
You will love it, I got the ecu interface with mine as it makes it so simple to set up and leaves you analogue inputs free for other sensors. They do
them for most excuse, only thing I need to do is set up the fuel level indicator.
big_wasa - 26/5/15 at 08:59 PM
Very nice
bart - 26/5/15 at 09:35 PM
Very very very nice
Class build
Rosco86 - 31/5/15 at 02:40 PM
quote:
Originally posted by matt5964
You will love it, I got the ecu interface with mine as it makes it so simple to set up and leaves you analogue inputs free for other sensors. They do
them for most excuse, only thing I need to do is set up the fuel level indicator.
Yeah I did ask, but they don't do one for bikes excuse 
Cheers for the comments
matt5964 - 31/5/15 at 02:50 PM
quote:
Originally posted by Rosco86
quote:
Originally posted by matt5964
You will love it, I got the ecu interface with mine as it makes it so simple to set up and leaves you analogue inputs free for other sensors. They do
them for most excuse, only thing I need to do is set up the fuel level indicator.
Yeah I did ask, but they don't do one for bikes excuse
Cheers for the comments
Bummer 😔
Rosco86 - 31/5/15 at 02:51 PM
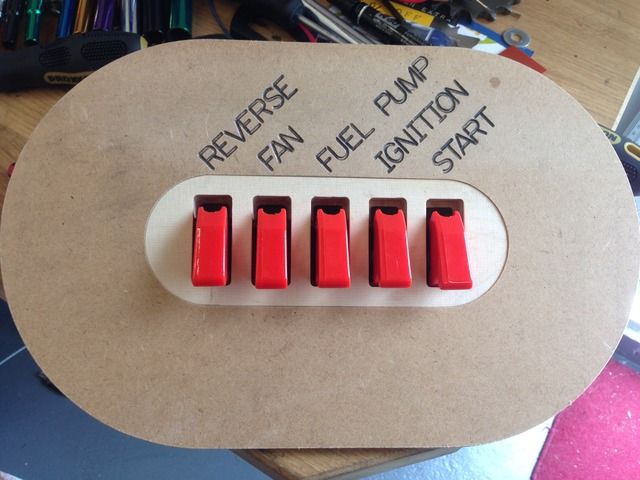
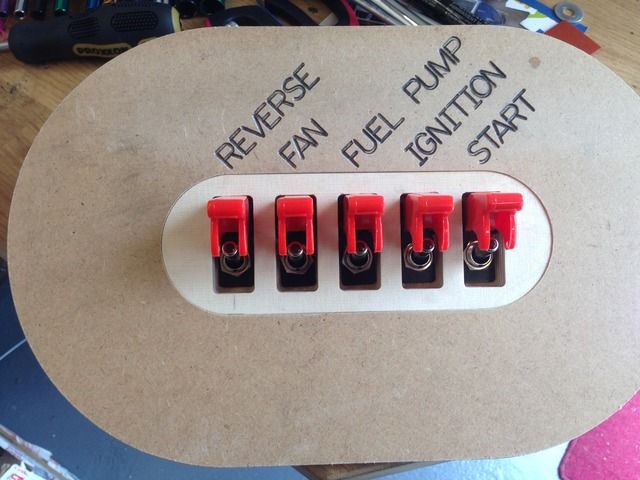
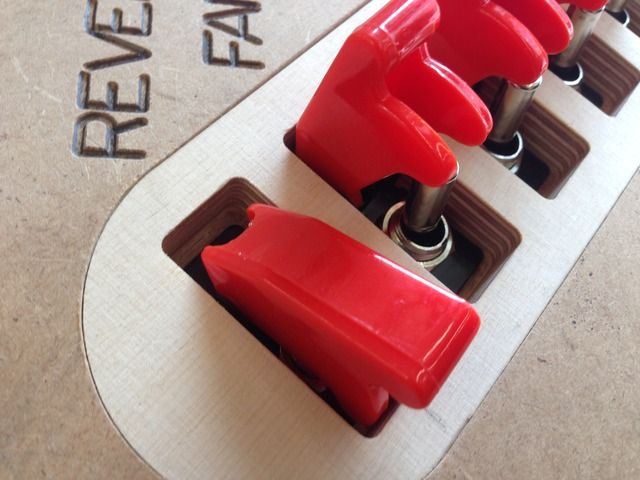
Not much to get on with this week as I'm waiting on my prop shaft, but some switches turned up from china so decided to make a prototype panel,
it's no way near the finished design and the large outer plate sort of represents the dash, I've recessed the switches as they would have
stuck out a bit to far otherwise I think
The fished housing will be out of aluminium or plastic I think
Also got my bead roller finished and did a test panel
Rosco86 - 7/6/15 at 08:25 PM
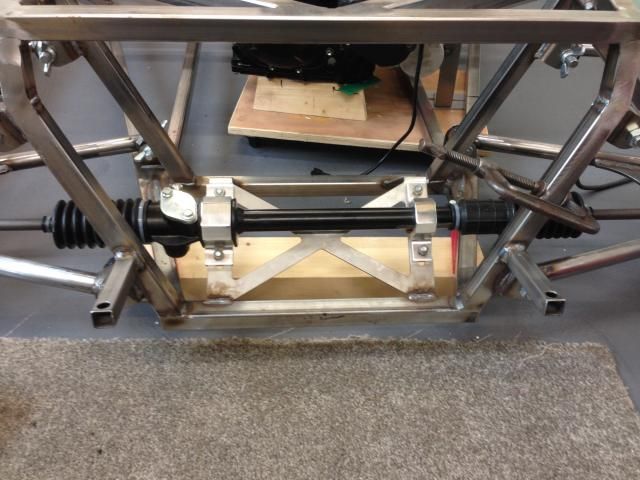
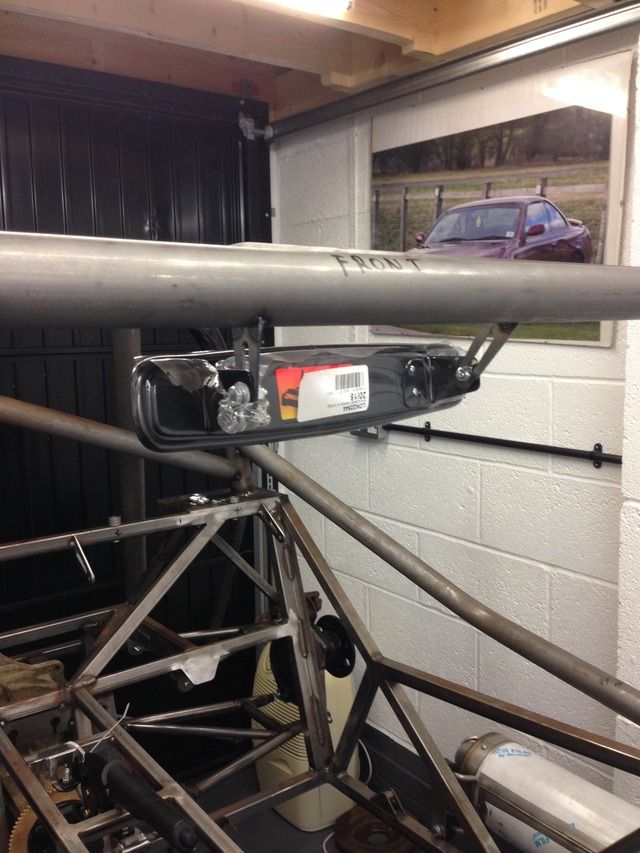
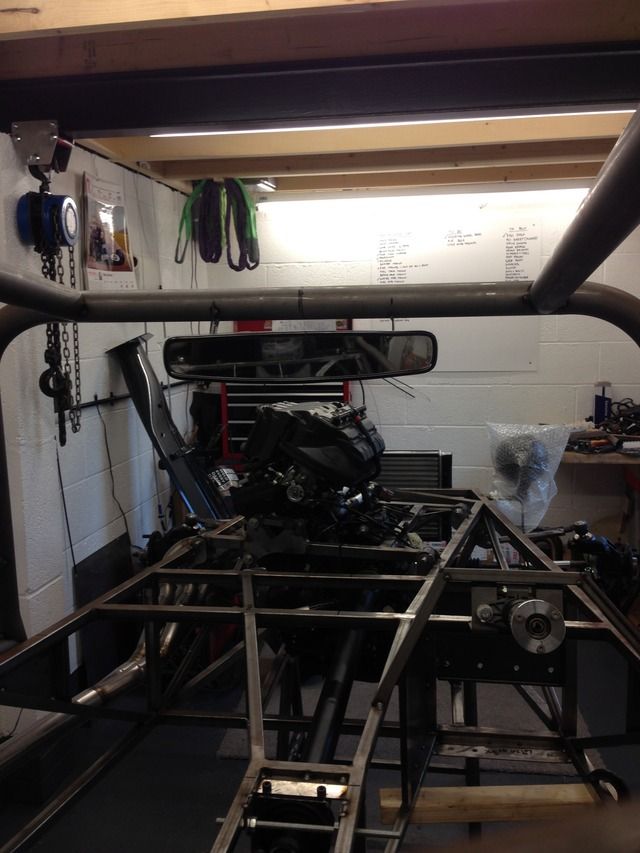
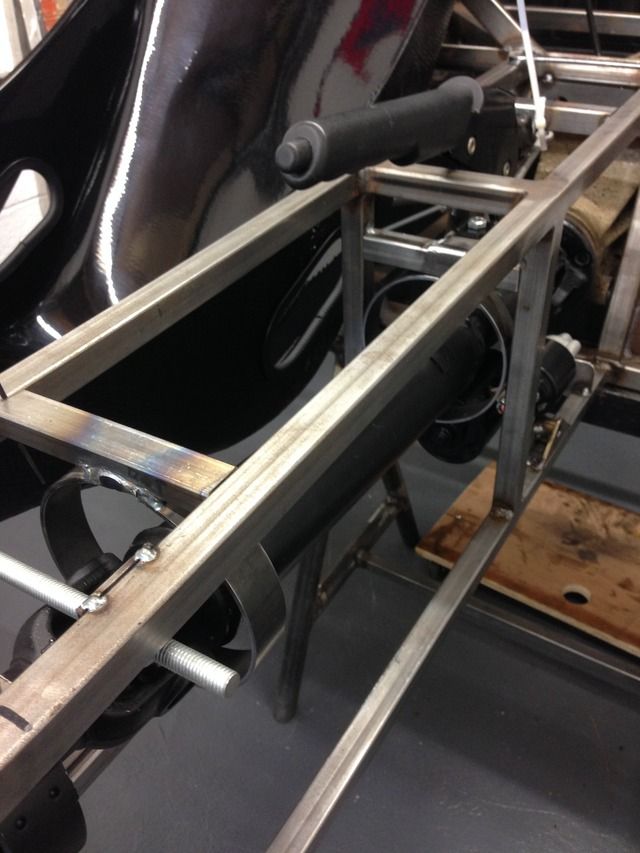
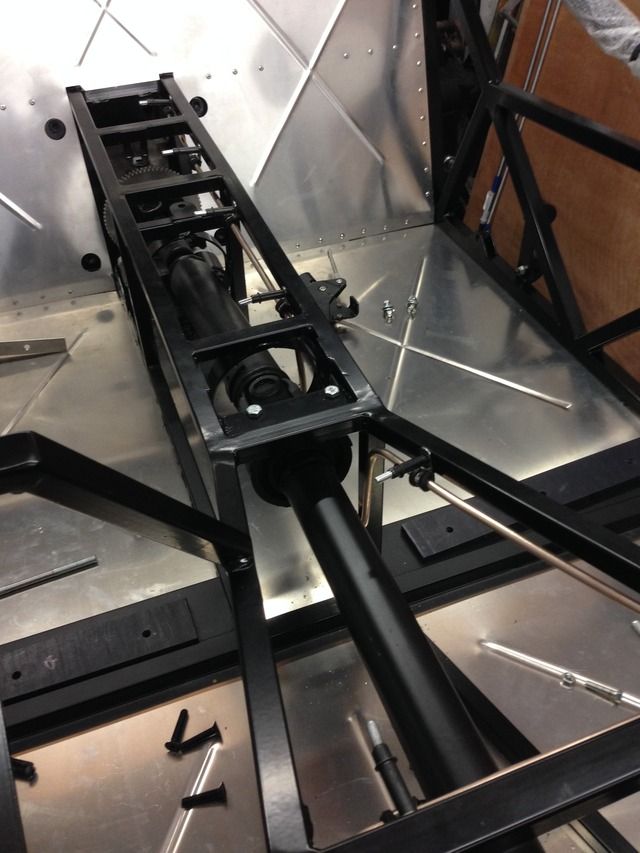
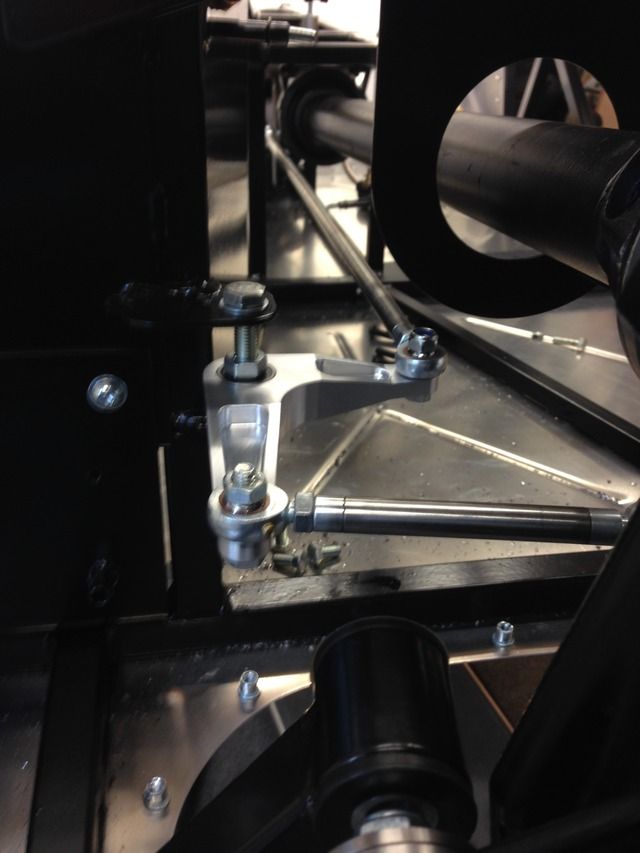
Prop shaft turned up from dunning and fairbank on Friday so lots of jobs to be done
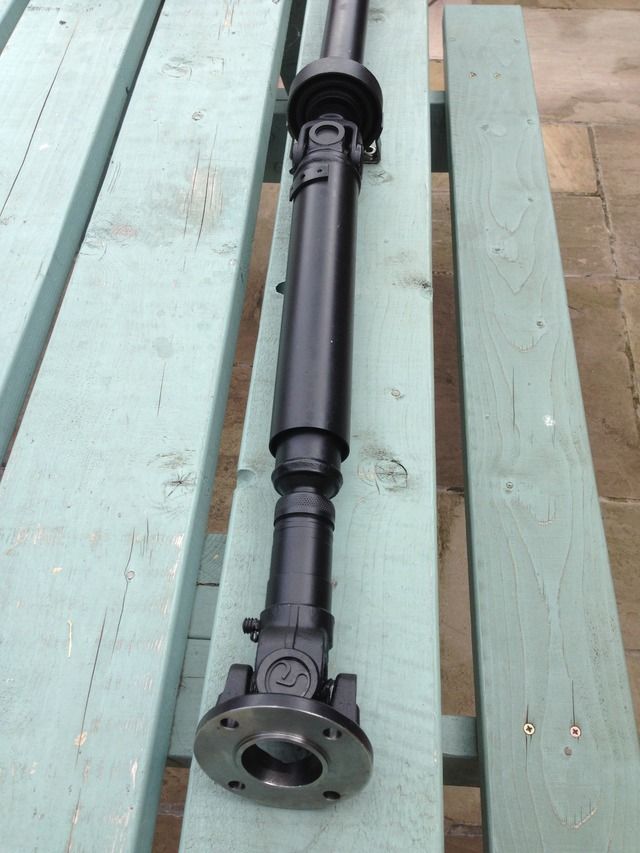
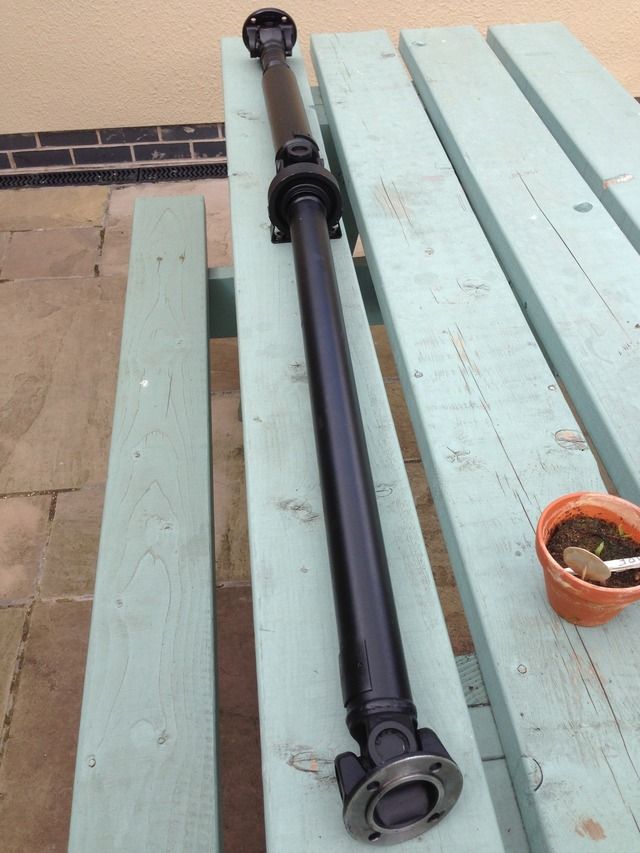
So got the prop bolted in and mounted my rear view mirror
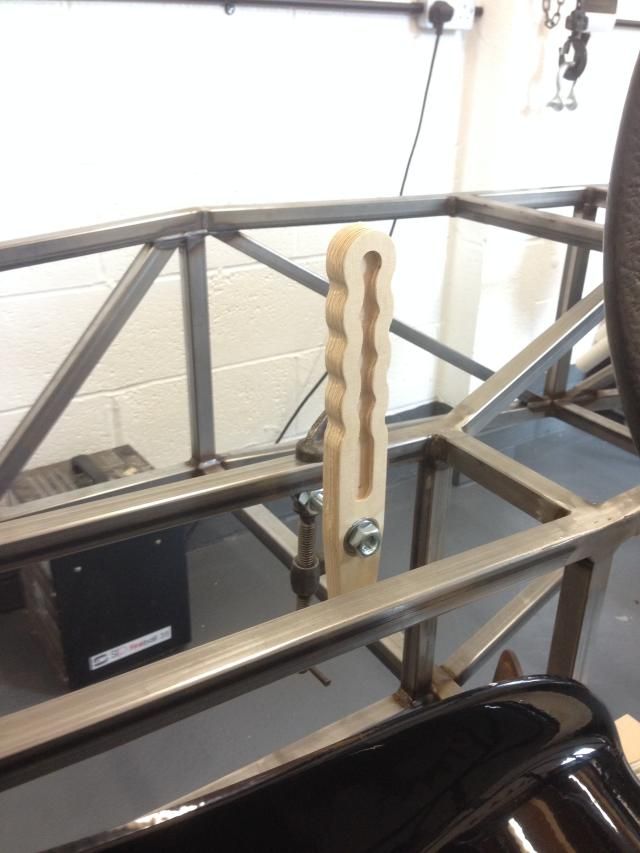
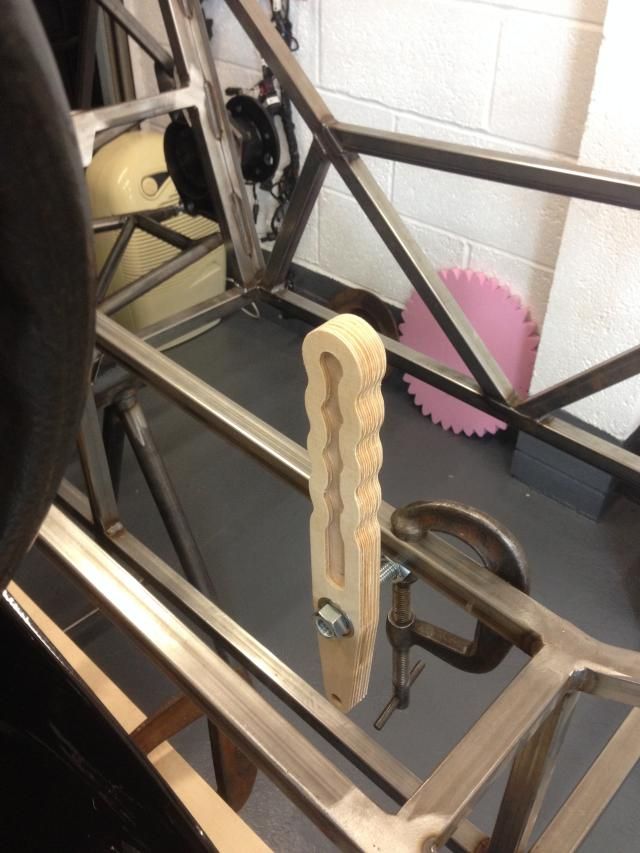
Gear linkage mocked up
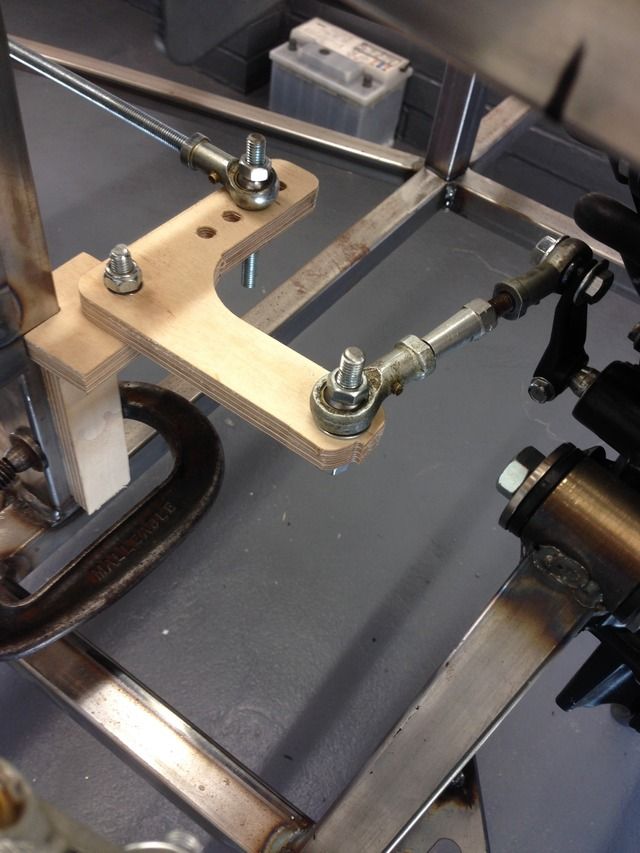

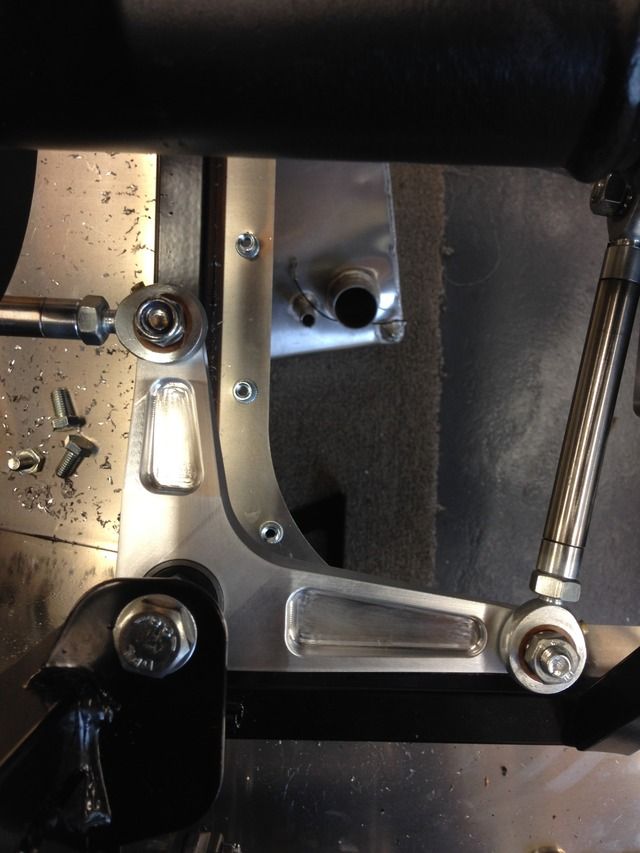
Mounts for bel crank
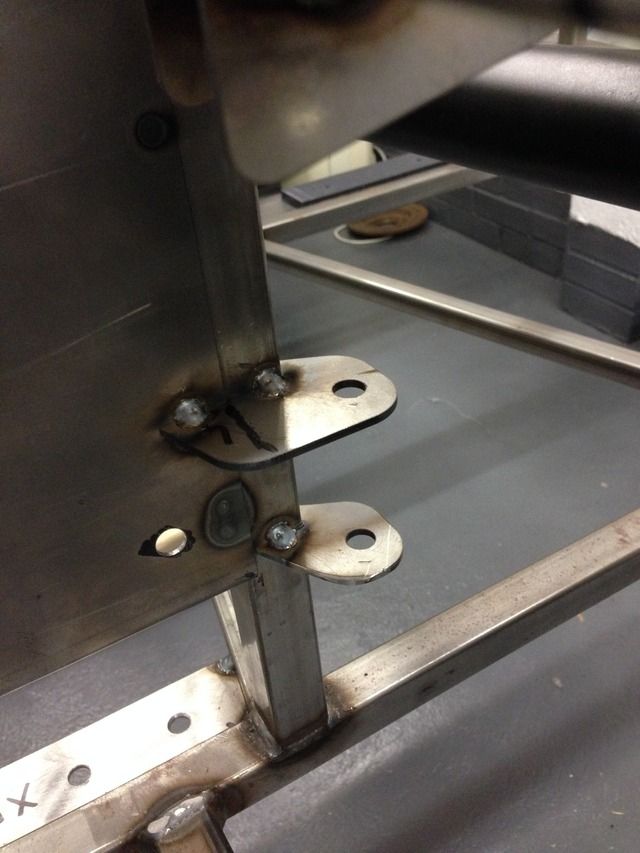
Plate for centre bearing sorted and mounts for gear lever done
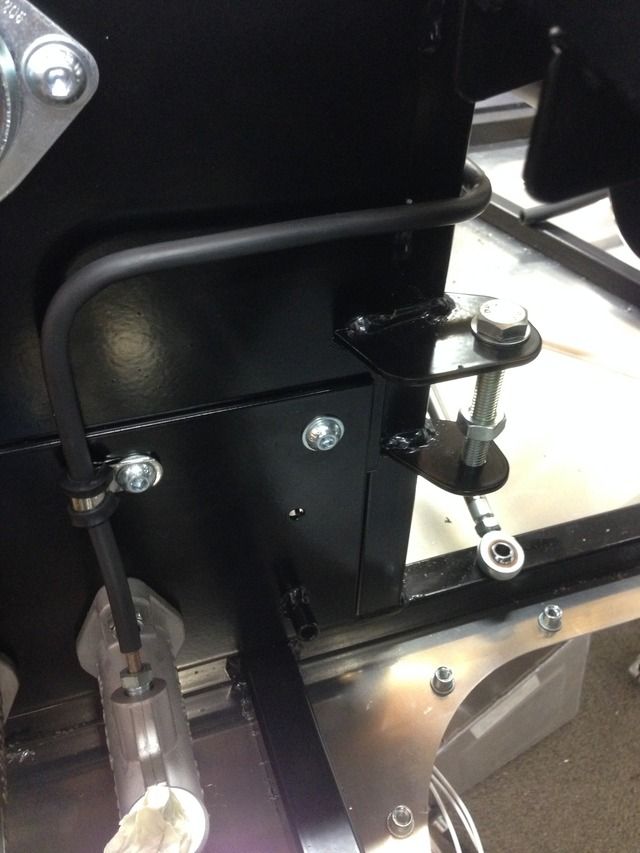
Not overly happy about the handbrake lever position but it's not in the way when sat in the seat and it's the best position for the cable

Front cross brace done
Water pipe mounts, will have rubber grommets in
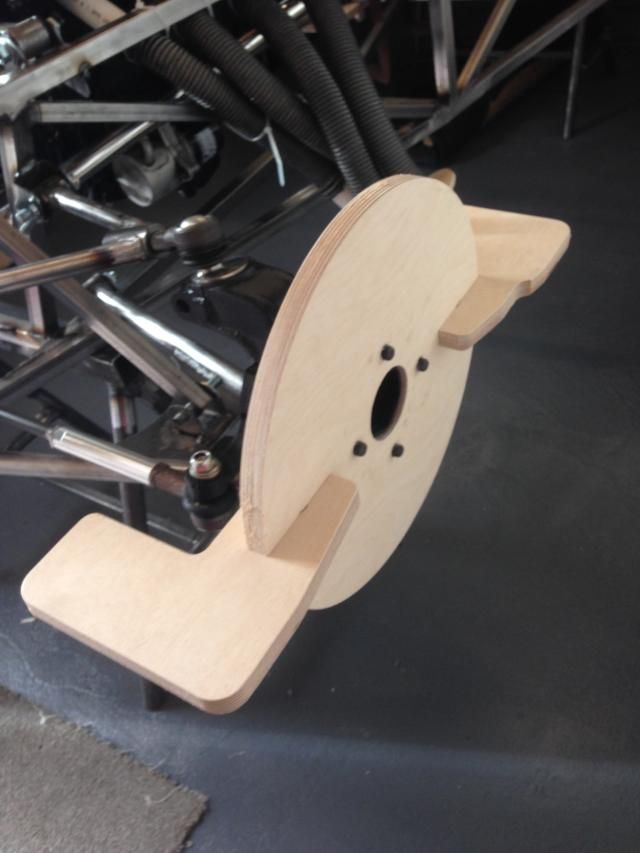
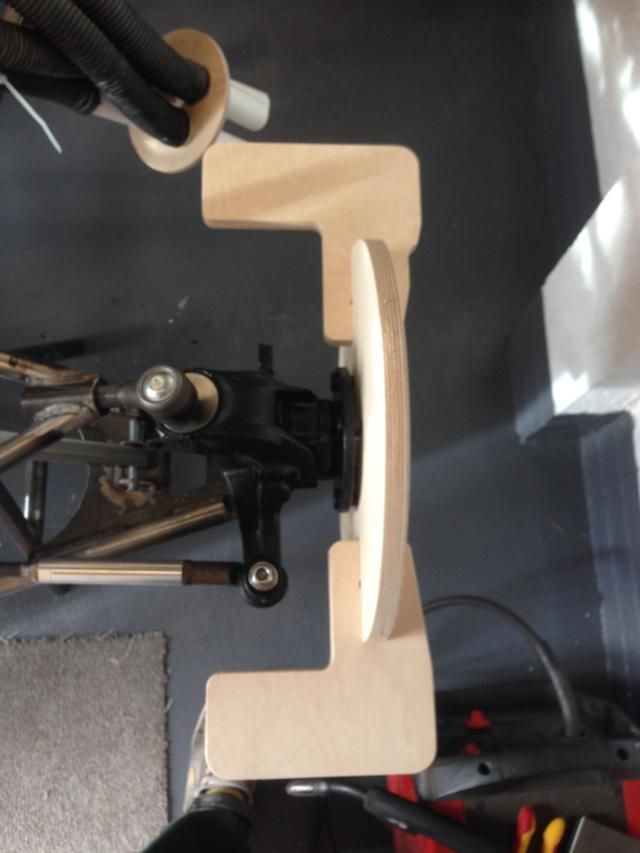
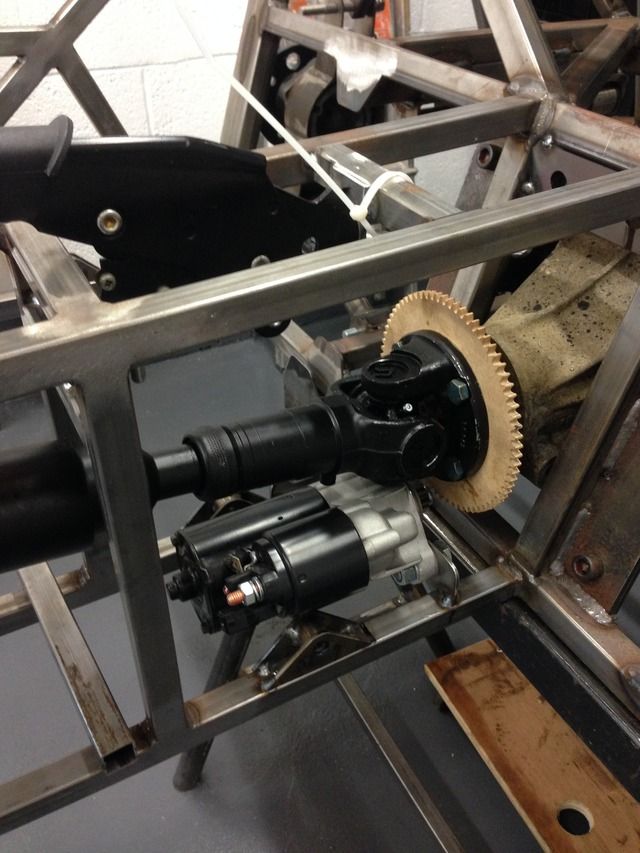
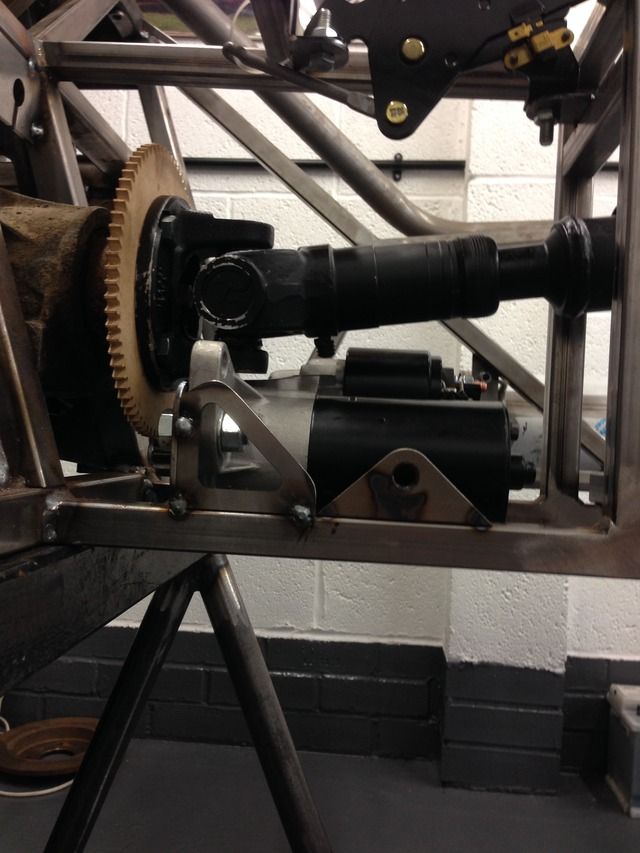
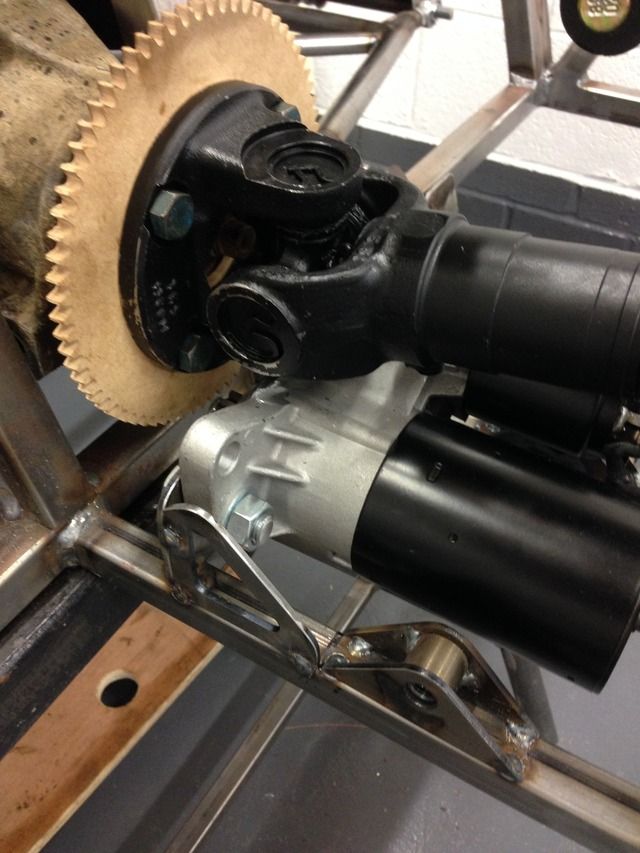
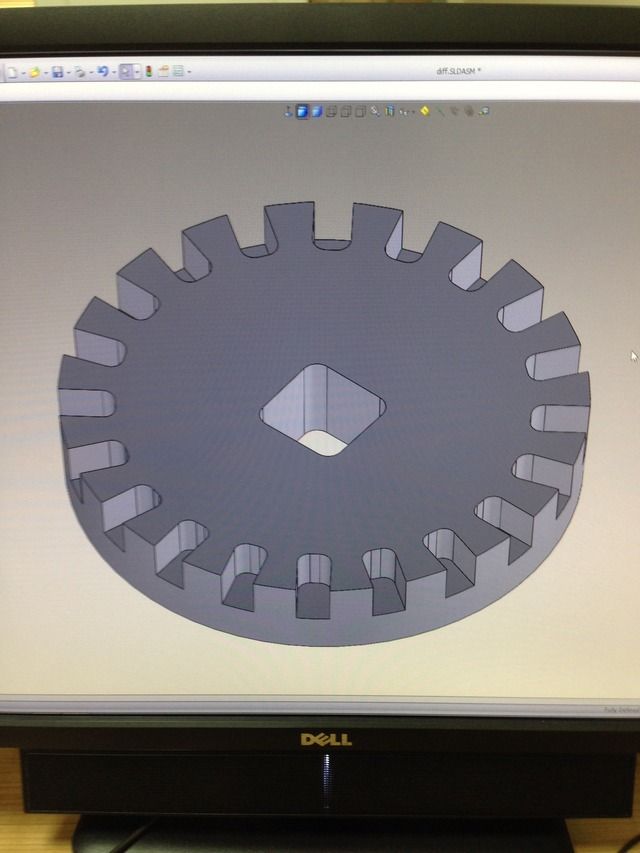
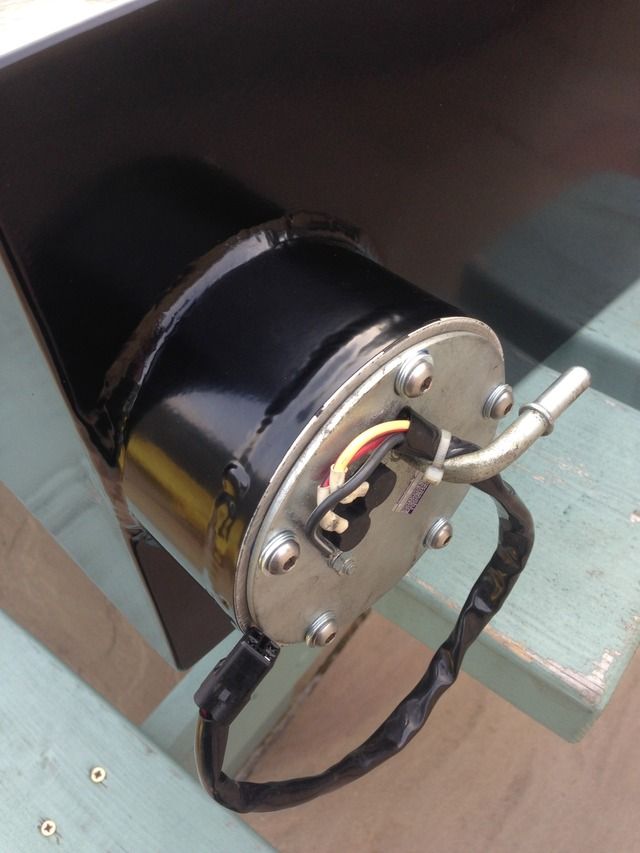
My dad cut me a bigger gear out of mdf on his cnc as a test, as the normal 140mm that people use was way to small, the motor needed to much grinding
out
We went for 160mm and the motor only needed a little bit out in a few places, I'm really happy as the motor doesn't sit through the bottom
of the car
I will get a steel gear laser cut out now, we powered it up on the mdf and it worked a treat
Also got the handbrake mounted
bart - 7/6/15 at 08:48 PM
once again looking terrific
top quality work
you need to make your own body panels so we can compete fairly !!!
Rosco86 - 7/6/15 at 09:30 PM
quote:
Originally posted by bart
once again looking terrific
top quality work
you need to make your own body panels so we can compete fairly !!!
Haha sounds like a chalenge, maybe one day but not on this build i dont think, im aiming to be on the road ready for next summer!
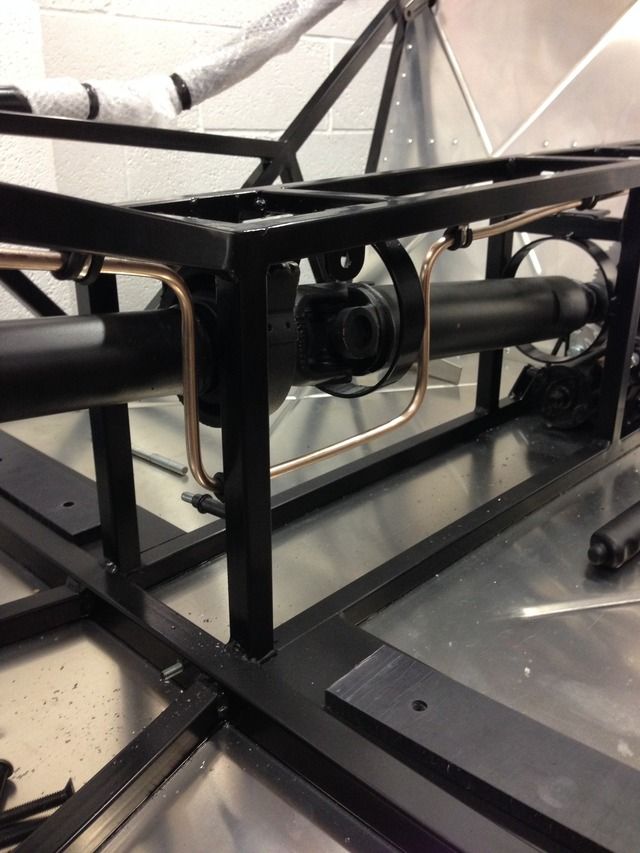
Rosco86 - 9/6/15 at 08:43 PM
Got a couple of prop catchers done tonight, these two will be welded on, I'm going to make a front one that bolts on else I will never get the
prop in and out
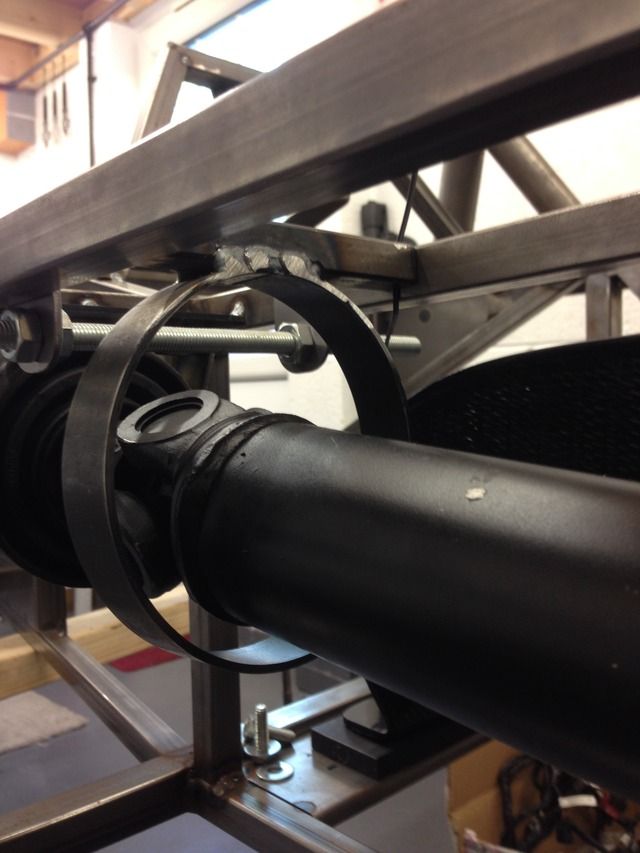
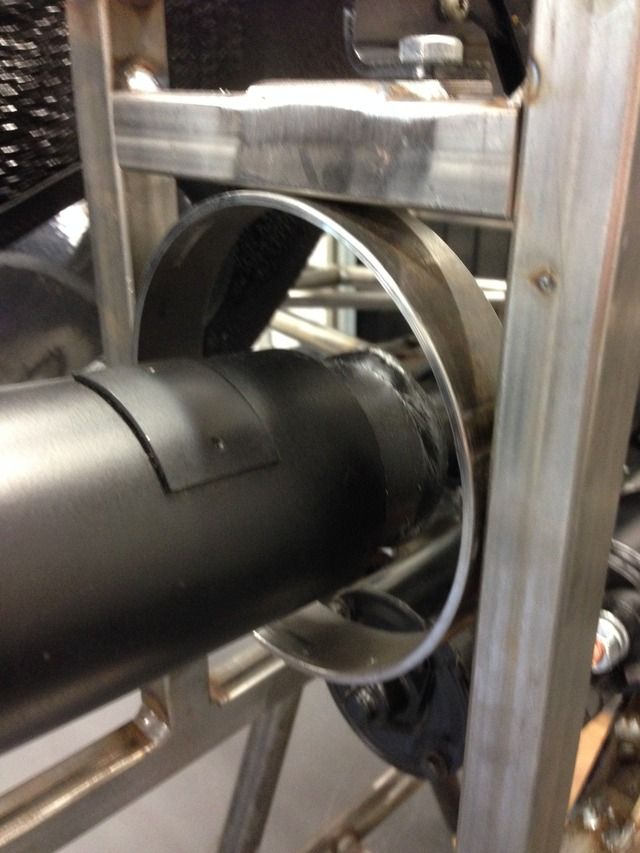
The tube was a bit of rear hub tube I had left over and it's a perfect fit in between the tunnel
Rossmcleod - 9/6/15 at 09:24 PM
Epic build mate stunning
Badger_McLetcher - 9/6/15 at 09:53 PM
I can't get over how CLEAN your build is! My build just gets covered with shite, no matter how much I try to keep it clean.
Cunning handbrake mount as well
Rosco86 - 10/6/15 at 02:50 PM
quote:
Originally posted by Rossmcleod
Epic build mate stunning
thanks pal
Rosco86 - 10/6/15 at 02:50 PM
quote:
Originally posted by Badger_McLetcher
I can't get over how CLEAN your build is! My build just gets covered with shite, no matter how much I try to keep it clean.
Cunning handbrake mount as well
haha cheers, that's helped by having the car in my garage and my tools in my workshop!
Rosco86 - 22/6/15 at 07:55 PM
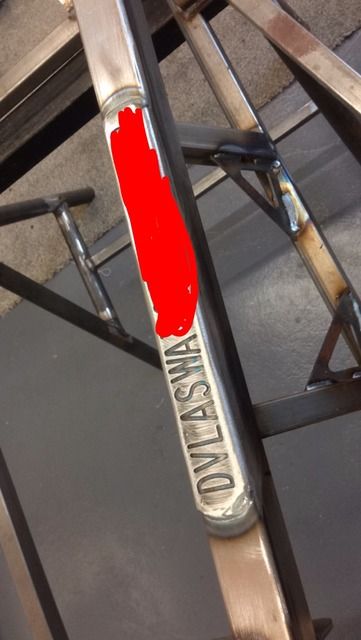
Quick update, just tacking the last few bits onto the chassis, my vin number came today, just need to make a plate and sort some earth points then
ready for powder coat
Passenger bulkhead bead rolled and fitted
Gear lever taking shape
The black smudge is where I'm going to weld my vin number
Vmax1974 - 23/6/15 at 09:30 PM
Seriously impressive build following with interest
Rosco86 - 27/6/15 at 07:22 PM
Well stripped my car down this week and my mate has finished welded it, just a bit of weld splatter to get off then everything's off for
sandblasting and powdercoat
The vin number my dad milled for me
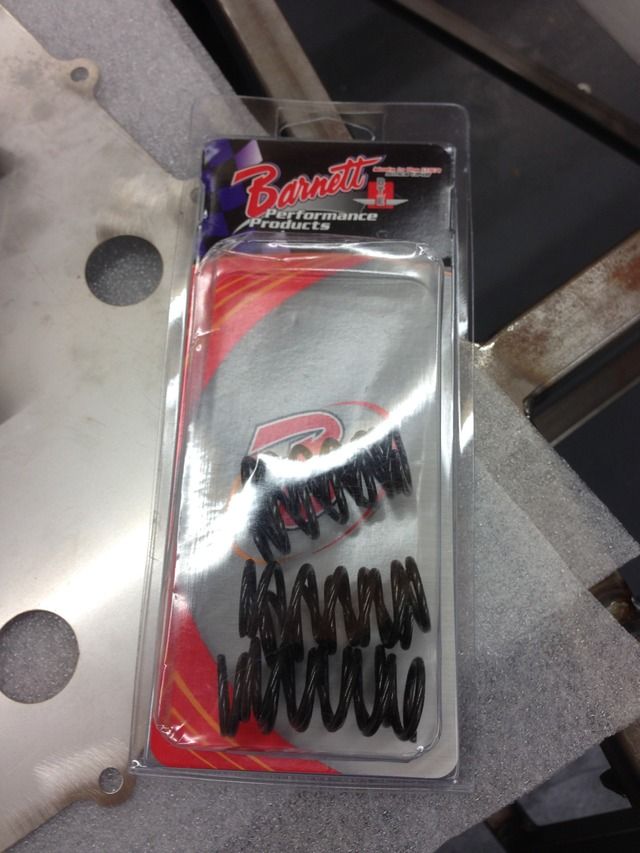
Ordered a billet sump and HD clutch springs from AB Performance
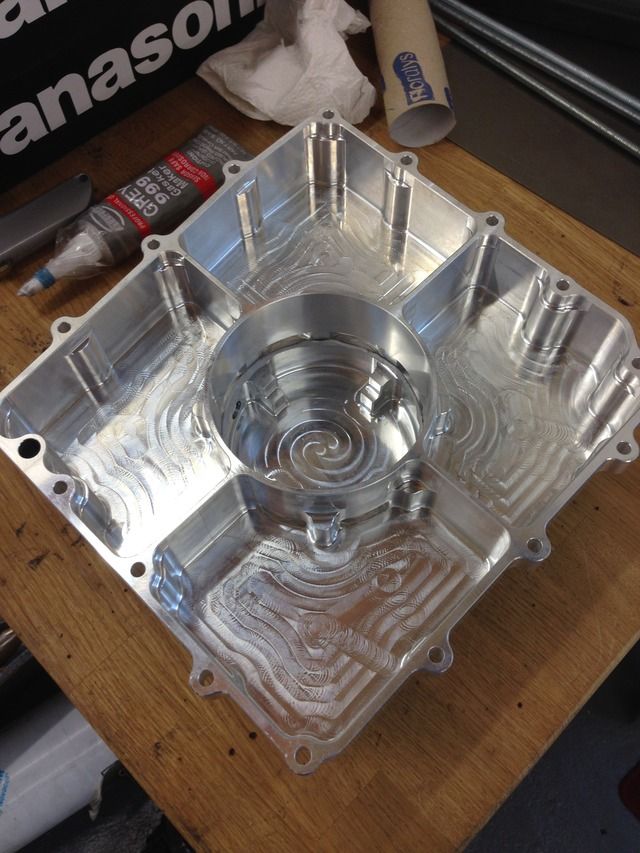
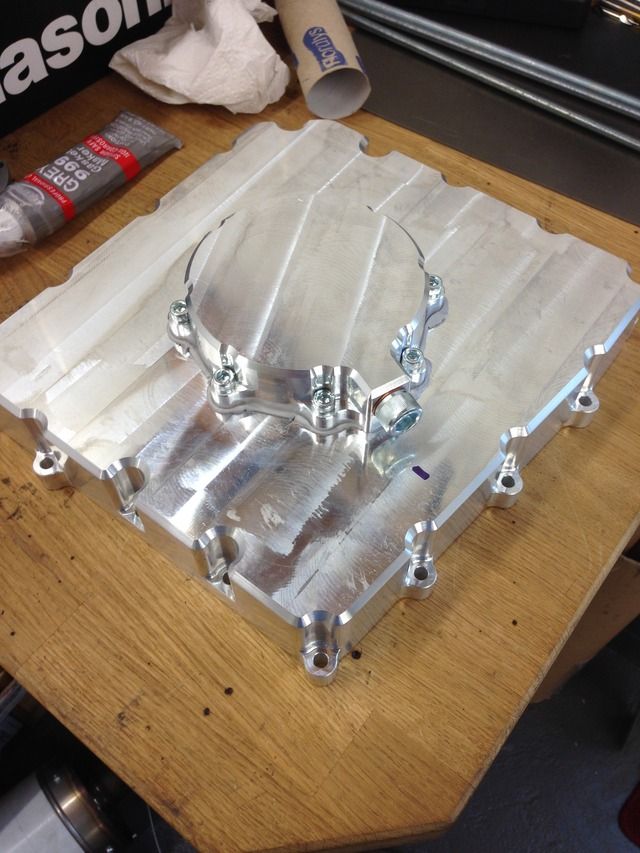
Baffle plate and new oil pickup
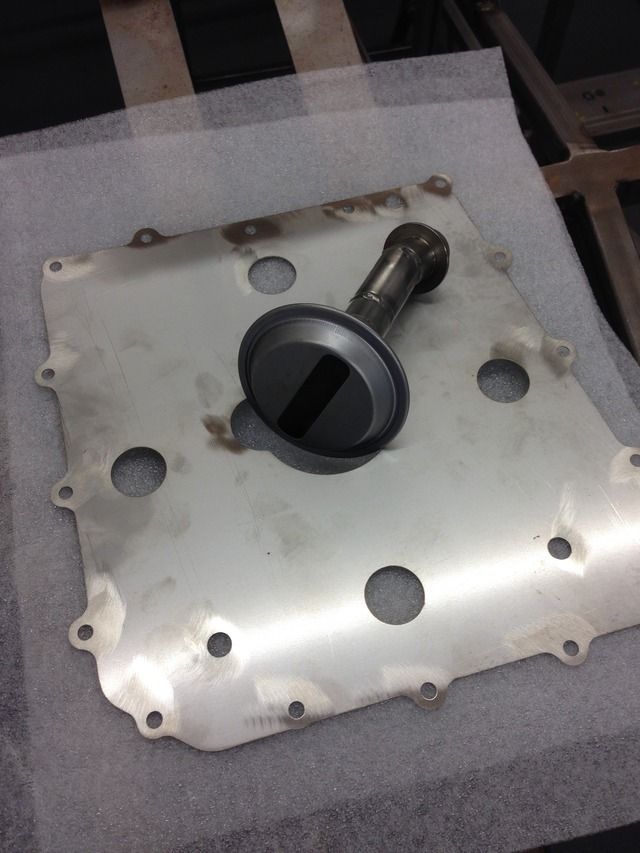
Clutch springs
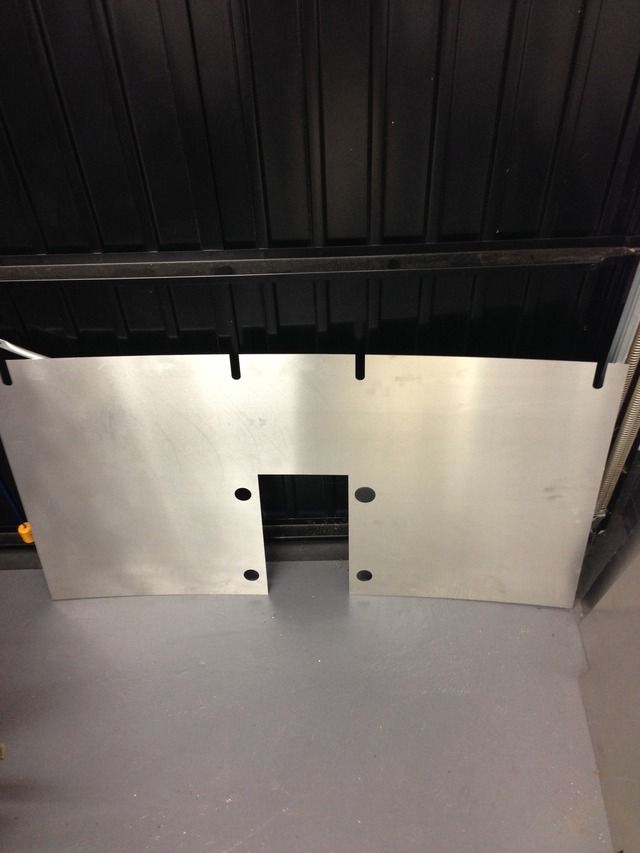
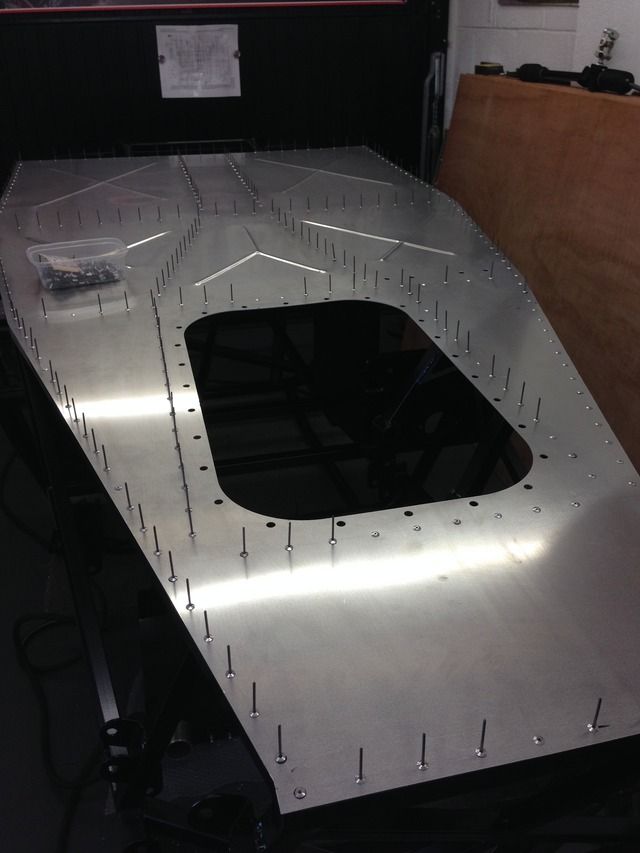
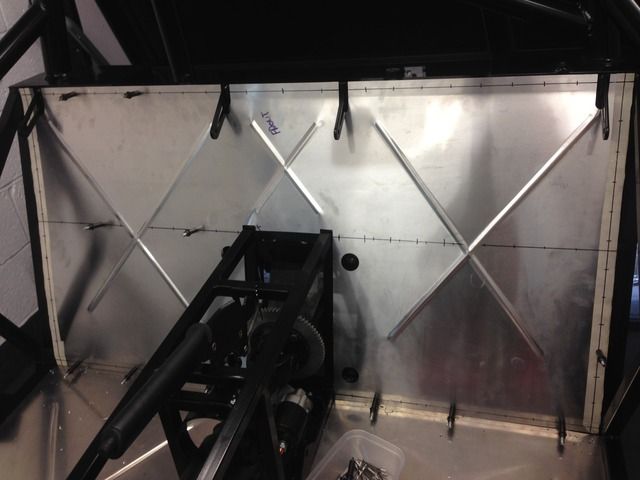
Also got my aluminium panels lazer cut instead of getting the jigsaw out, the floors 1.5mm and the rest 1.2mm, all 5251 sheet
The big hole will sit under the engine, this will have rivnuts fitted and a removable section bolted on
Rosco86 - 28/6/15 at 07:35 PM
Got my sump fitted today, engine looks like brand new inside, the new pickup was a little tricky to locate, but got it on in the end
Rosco86 - 7/7/15 at 08:25 PM
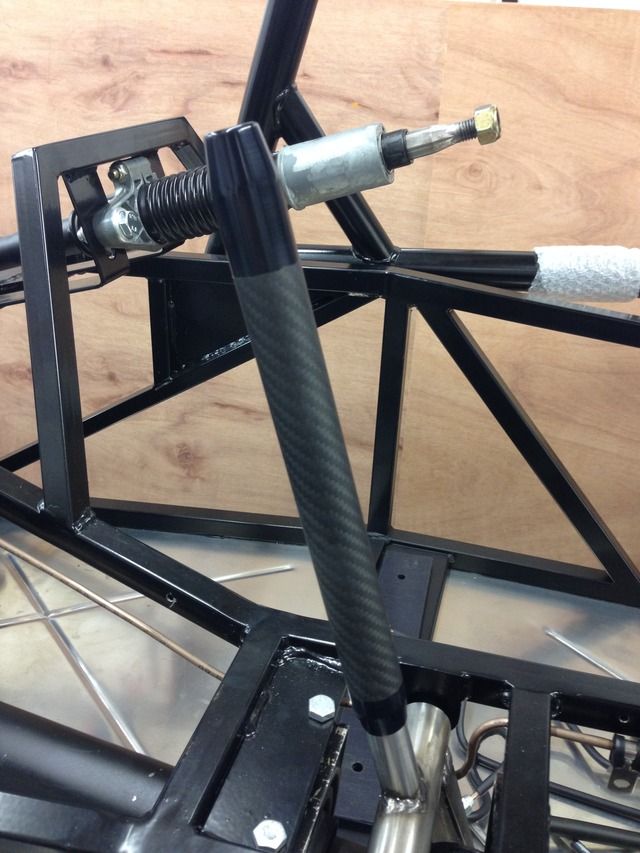
Got my carbon fibre tube that I've been waiting for today so did a bit more on my gear lever
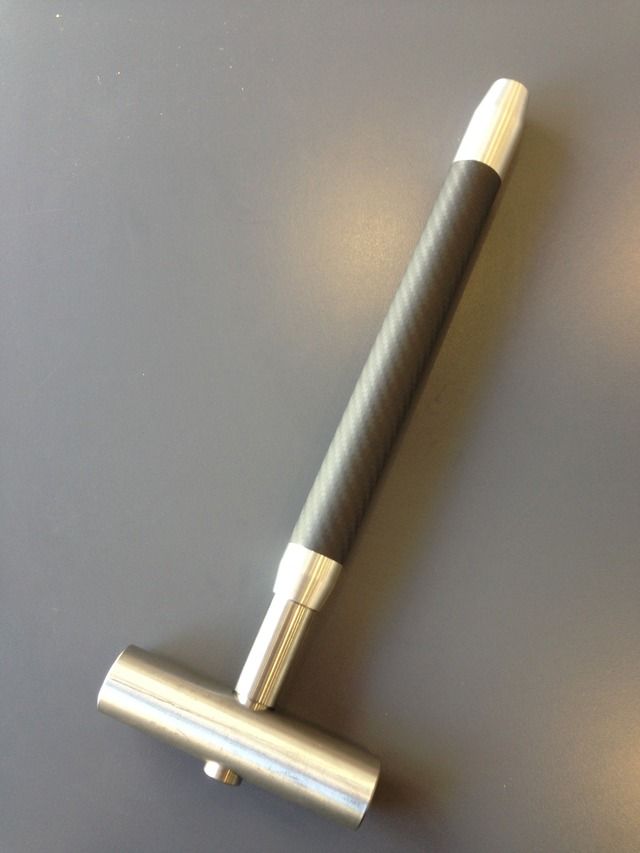
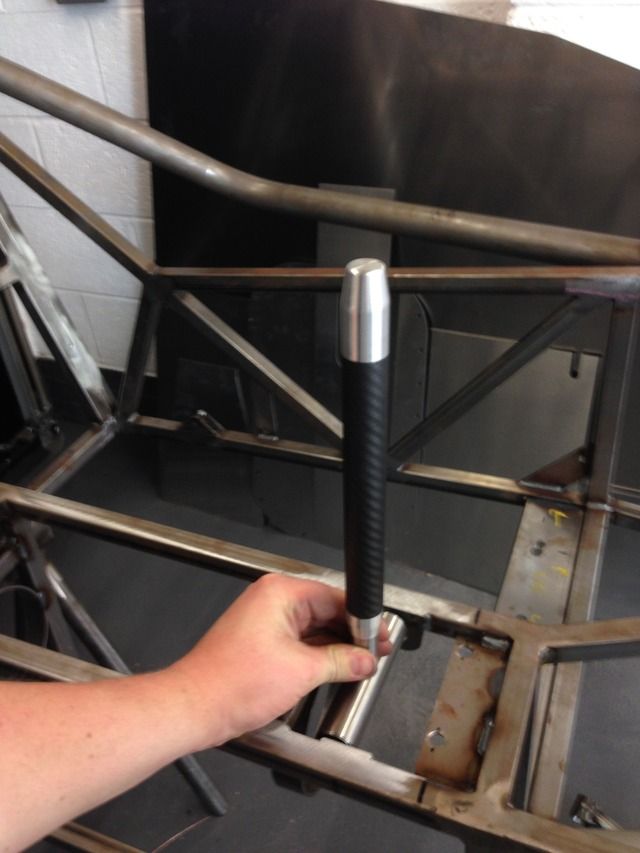
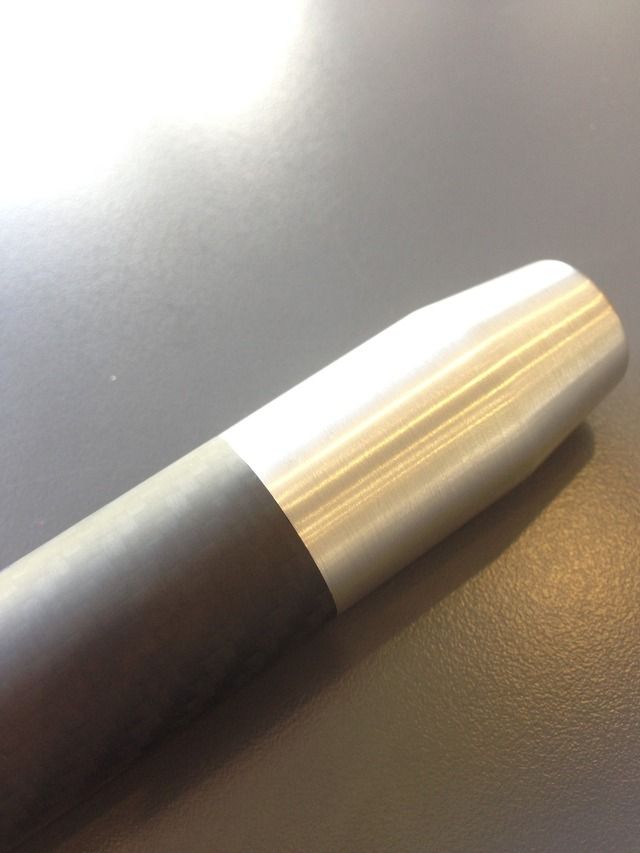
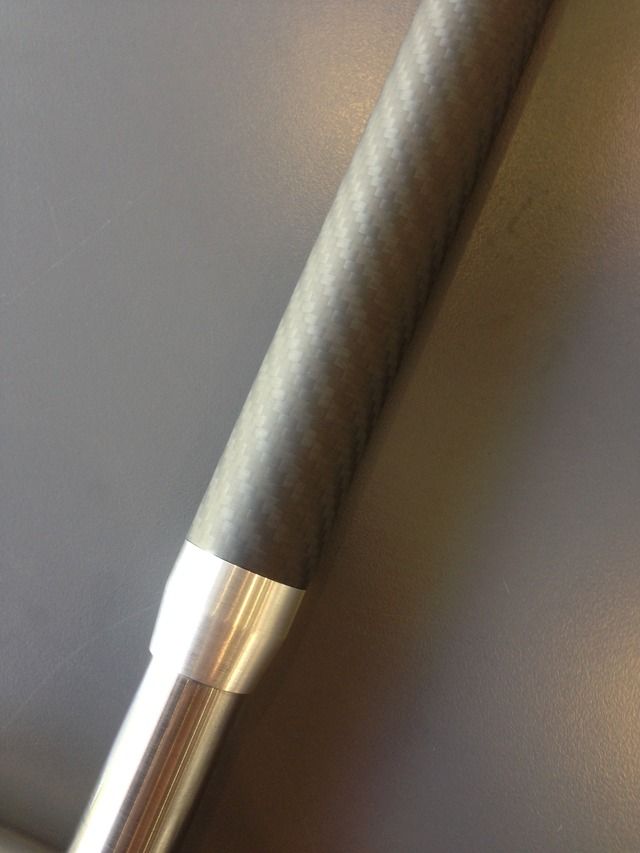
To say I'm happy with how it looks is an understatement, well happy with it! I'm going to get all the aluminium bits anodised to
Digimon - 9/7/15 at 01:35 PM
Your build is on speedhunters.com
http://www.speedhunters.com/2015/03/iamthespeedhunter-your-bike-p
owered-builds/
Rosco86 - 9/7/15 at 03:16 PM
quote:
Originally posted by Digimon
Your build is on speedhunters.com
http://www.speedhunters.com/2015/03/iamthespeedhunter-your-bike-p
owered-builds/
haha yeah i no, i sent some pics in a while back when they were doing bike engine week, then one day i was reading through and there was my build,
hopefully i will get a full right up on there when its finished!
Rosco86 - 12/7/15 at 07:08 PM
Needed a tool to strip my diffs down so drew one up and made it at work quick, 30mins total

Fitted perfect, I had to use the air good and heat to get them out though, was a hot sweaty oily job so no pics I'm afraid
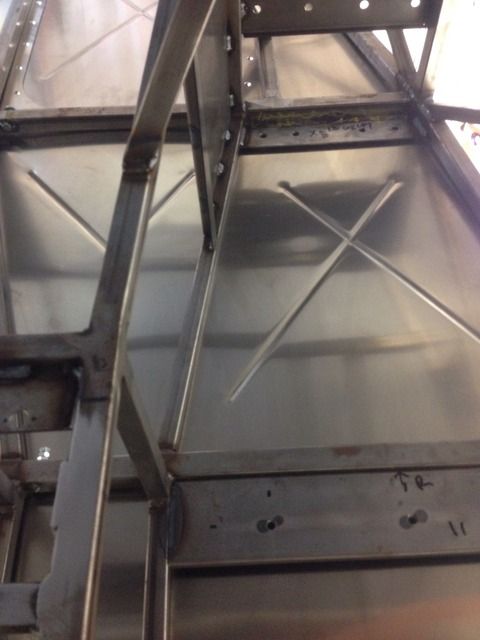
Offered my floor up to see how well it fit, perfect, was well happy, as my chassis that I built with a tape measure matches a laser cut panel
All my small parts blasted ready for powder coat next weekend
Got my fuel tank
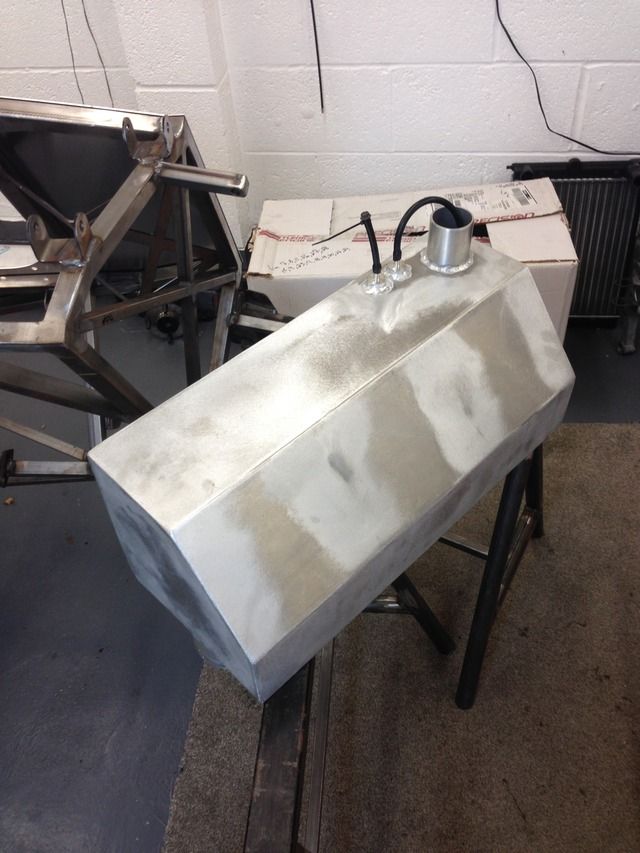
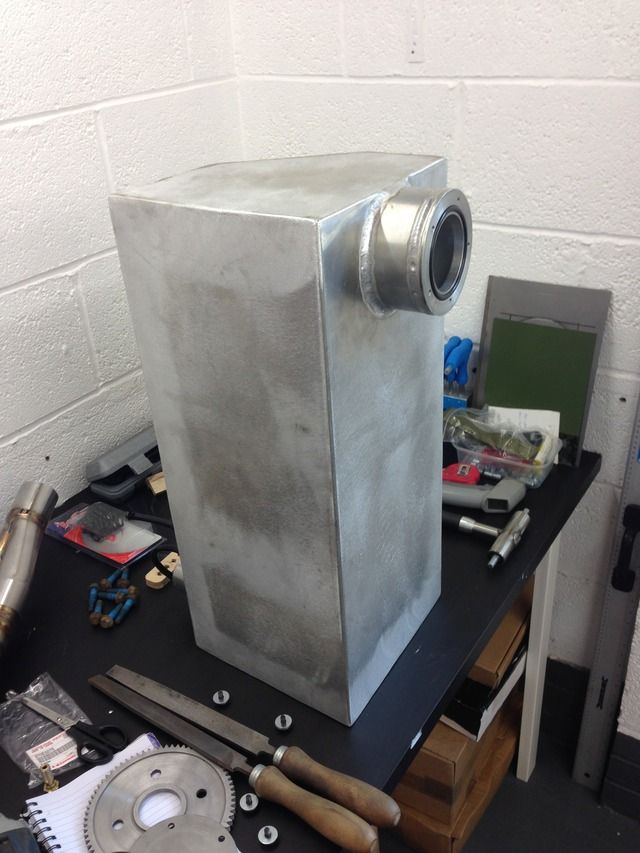
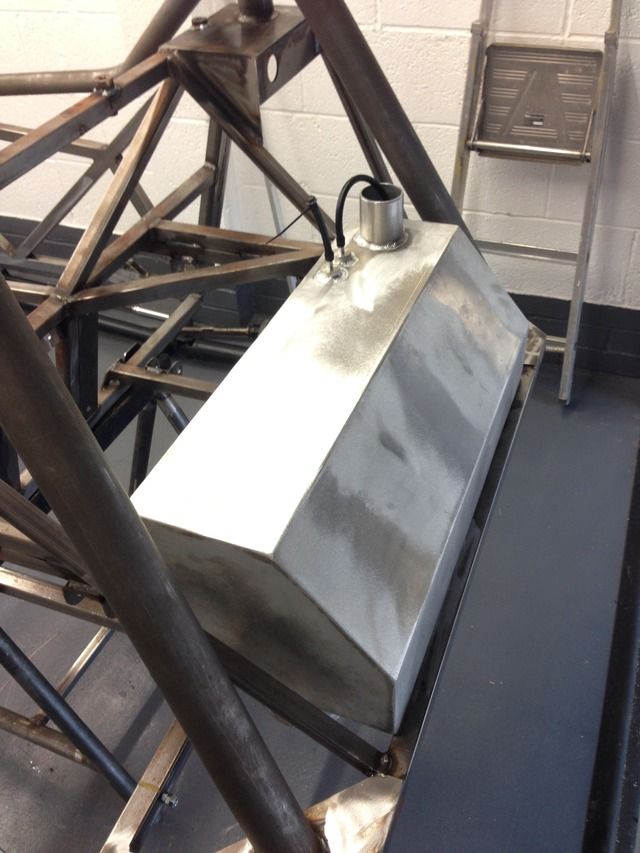
Testing for leaks
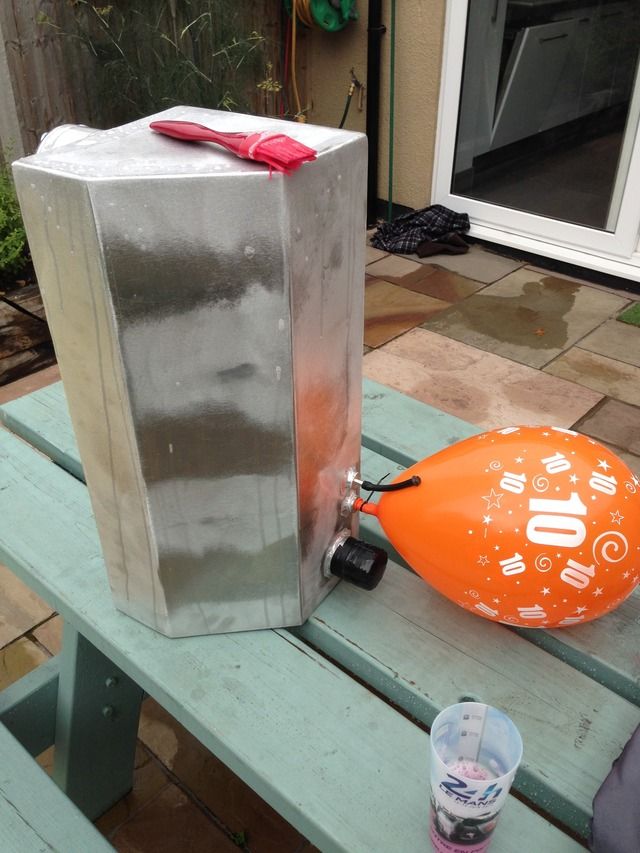
Only thing is my mate who made the tank has dressed the welds and sanded the tank so I think I'm going to get it powder coated
Rear seat panel
Tunnel sides
DRM Black7 - 12/7/15 at 09:48 PM
Absolutely stunning build, just spent the evening reading the thread. Amazing detail and some really lovely touches. Superb!!!
Rosco86 - 13/7/15 at 06:19 PM
quote:
Originally posted by DRM Black7
Absolutely stunning build, just spent the evening reading the thread. Amazing detail and some really lovely touches. Superb!!!
Cheers, just trying to keep on top on my updates, will be good to read it all back when it's finished
Rosco86 - 13/7/15 at 06:24 PM
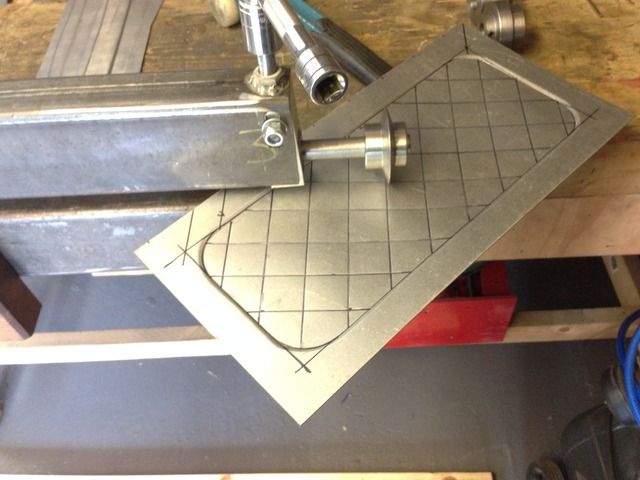
Made a few modifications to my bead roller, welded a handle on to apply the roller pressure and swapped the bottom wheel for a plastic one as the
metal one was a bit heavy on the aluminium
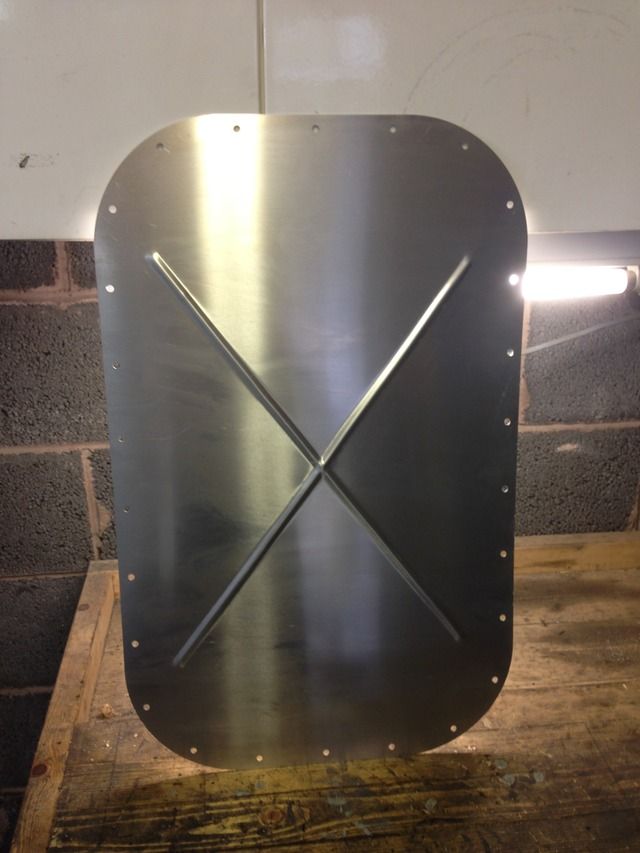
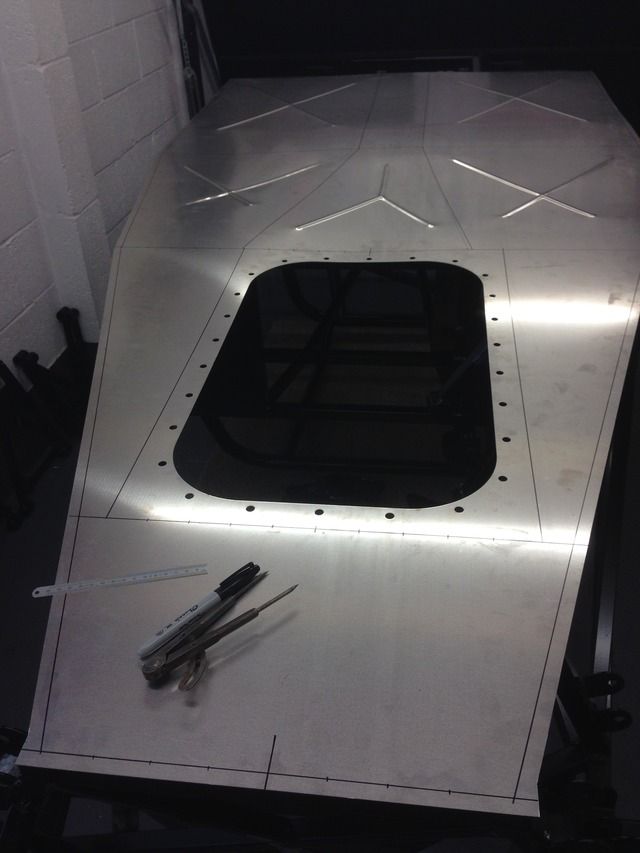
Engine hatch marked out
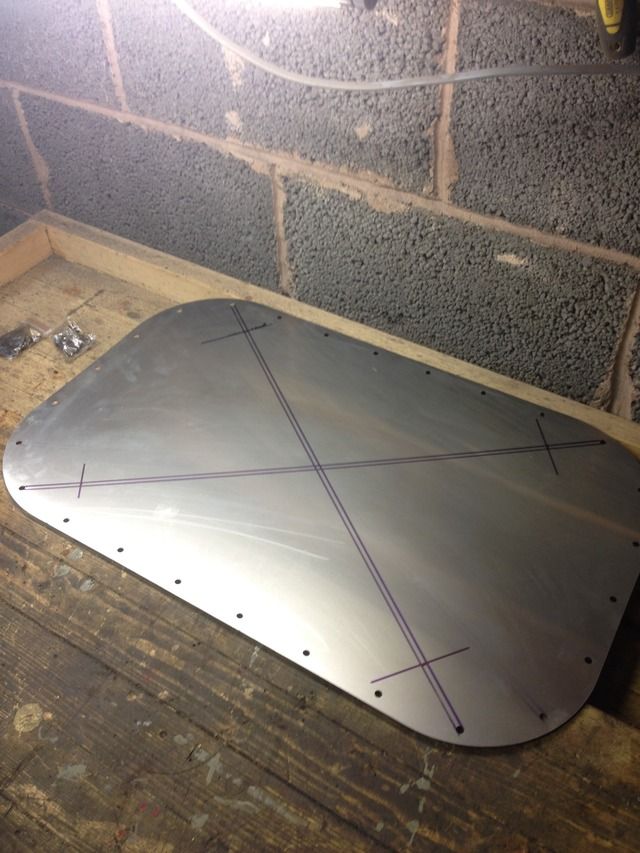
Finished panel, I was a bit worried about ruining it, but it's turned out perfect, tomorrow night I'm doing the big floor panel
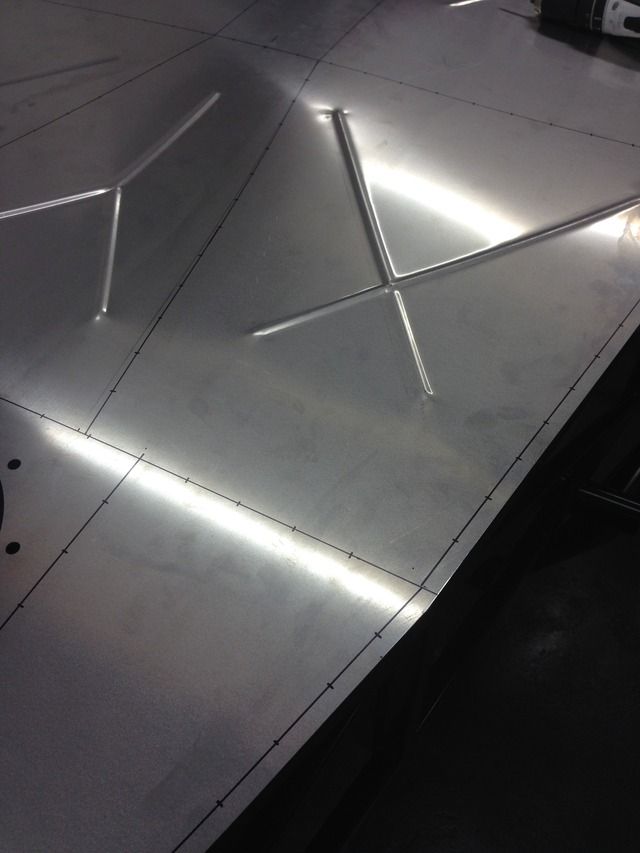
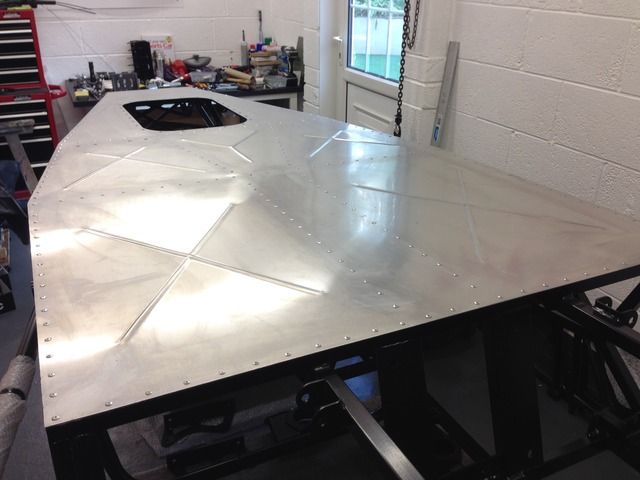
Rosco86 - 14/7/15 at 06:57 PM
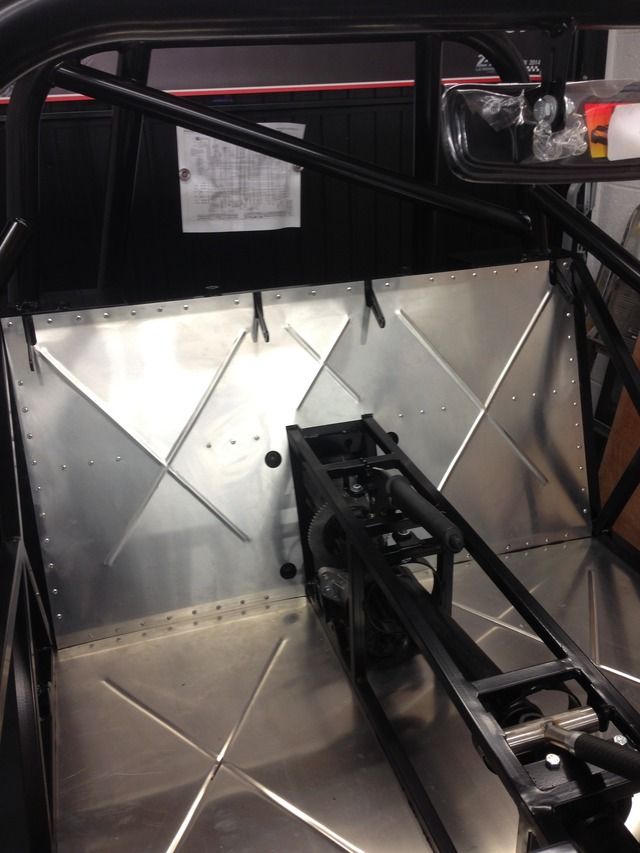
Got my floor beaded tonight with the help of my dad, could of done with another set of hands really as it's quite a big sheet
Turned out quite well, one bits a little dodgy but I will give it a little tap before I rivet it on
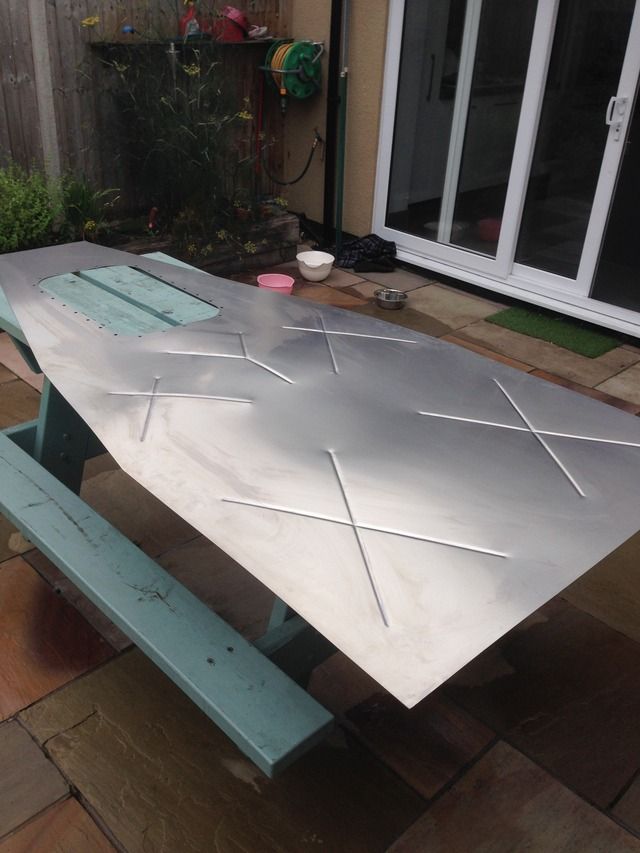
What it looks like from the inside
Rosco86 - 19/7/15 at 04:29 PM
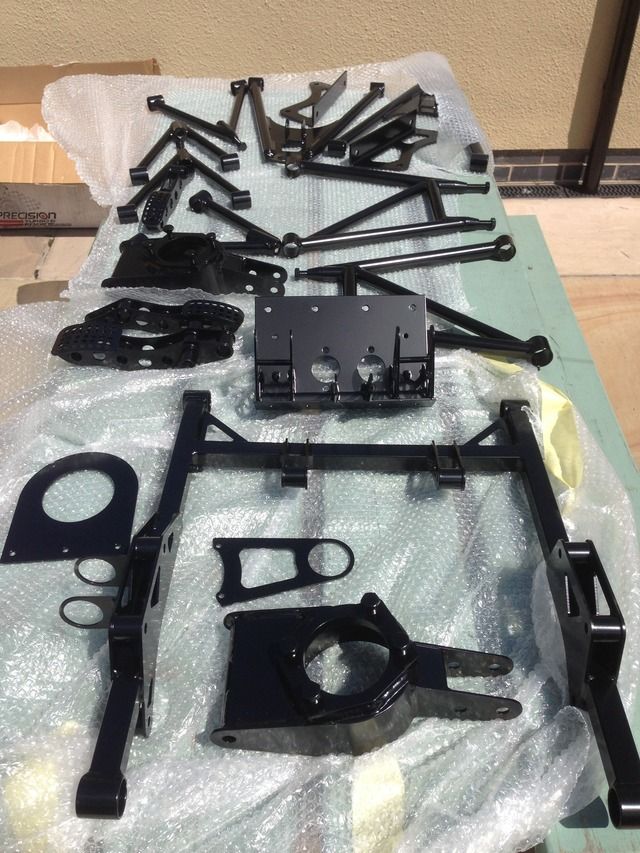
Dropped my chassis and everything off at the powder coaters yesterday morning and collected it this morning, well happy with it! I feel like the ends
now in site!


Rosco86 - 20/7/15 at 09:21 PM
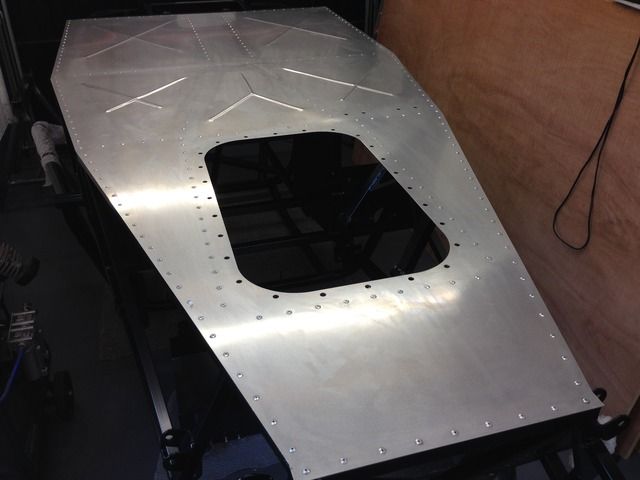
Got the car spun over tonight and got on with marking the rivet holes out, I've gone for 4mm rivets at 45mm spacing, I'm bonding it on
to!
I marked the rail centres on first then used a set of dividers to mark the spacing, wasn't as bad as I thought it was going to be and 45mm worked
out nicely everywhere which was good for my OCD!
I started drilling a few holes at the back and worked up to the next cross rail, I had brought some cleco pins and glad I did there perfect for the
job
Because I had bead rolled the panel it wasn't as flat as a plain sheet, but it pulled flat as I worked my way along
20 cleco pins fitted
Then I drilled all the holes In between, I will get on the next section tomorrow hopefully
[Edited on 20/7/15 by Rosco86]
Rosco86 - 22/7/15 at 07:35 PM
Well got the rest of the holes drilled last night and debured
I used Wurth Bond and Seal to bond it on, just put a small bead down the middle of all the rails covering all the holes, it was just enough as I was
still covered in it!
My mate let me use his air rivet gun! It's a good job as there's no way I would of done it by hand
Digimon - 22/7/15 at 08:41 PM
looking good mate
Rosco86 - 23/7/15 at 06:55 PM
Made myself a rivnut tool tonight
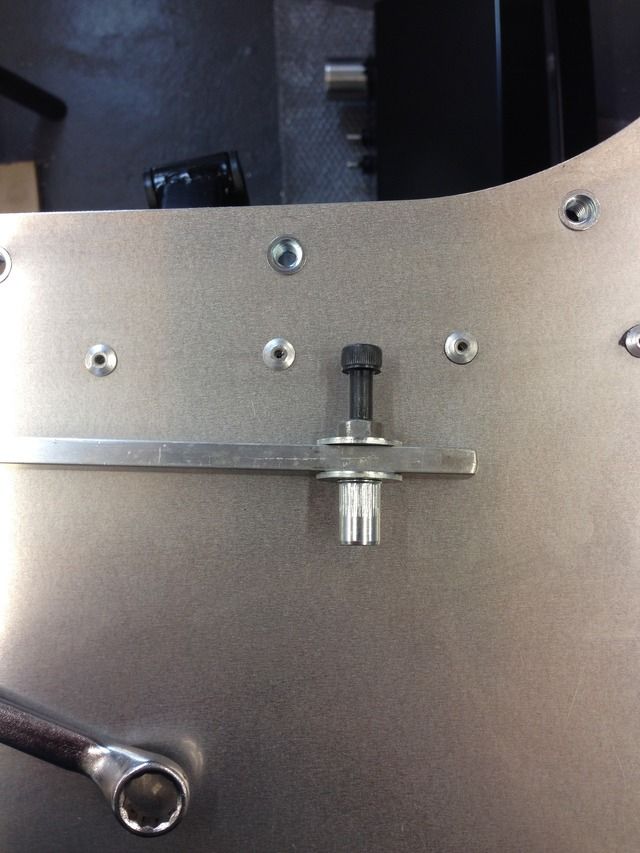
Then fitted the rivnuts round the hatch opening
Then spun her over
I love how the bead rolling has turned out
Just the right amount of sealant, this is down to my dad as I wanted to put more on but I resisted
Rosco86 - 26/7/15 at 08:35 PM
Two full days of updates tonight
Made some stainless spacers from some tube for my pedal box
Then went down my local bolt shop
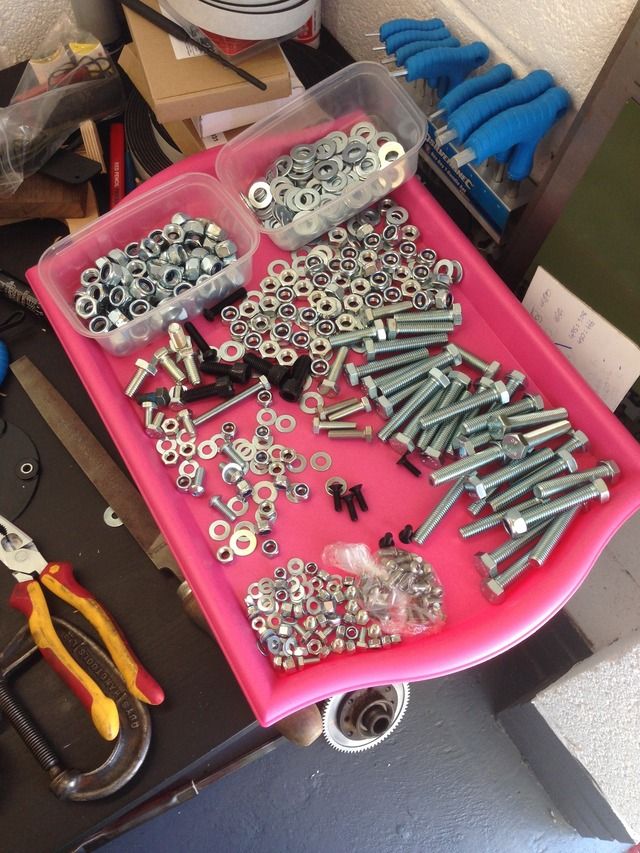
Pedal box assembled and fitted
Then painted a few little bits that couldn't be powder coated

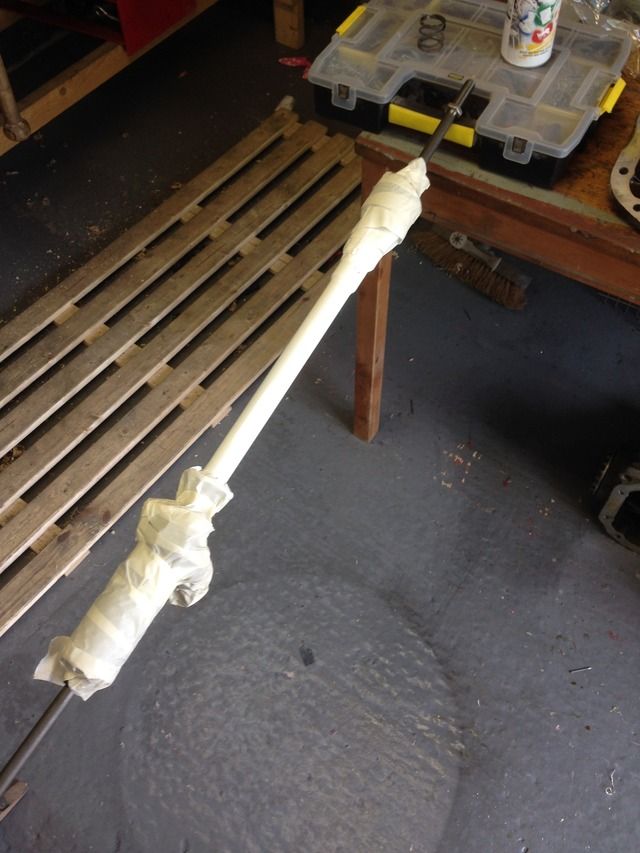
Steering rack because I had to cut a bit off
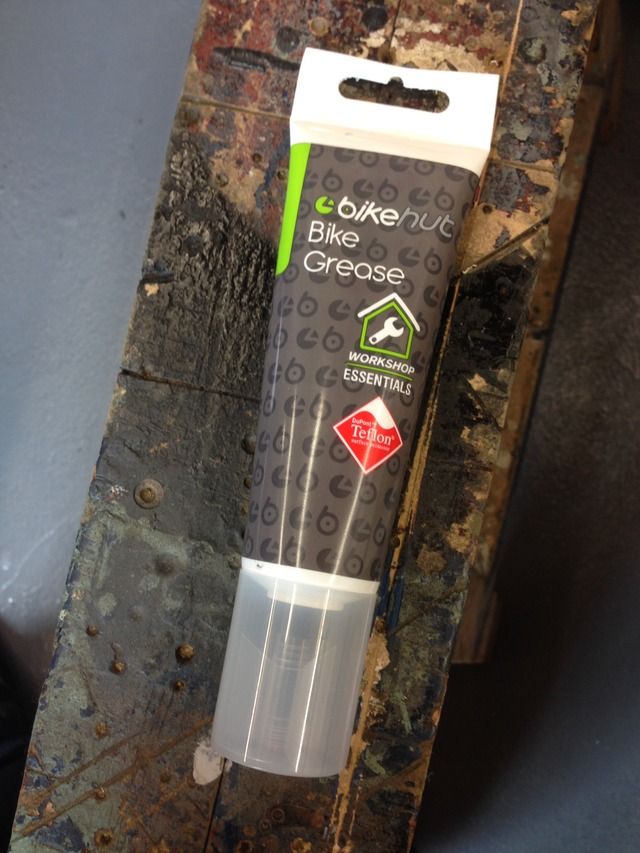
Got some Teflon grease for my poly bushes
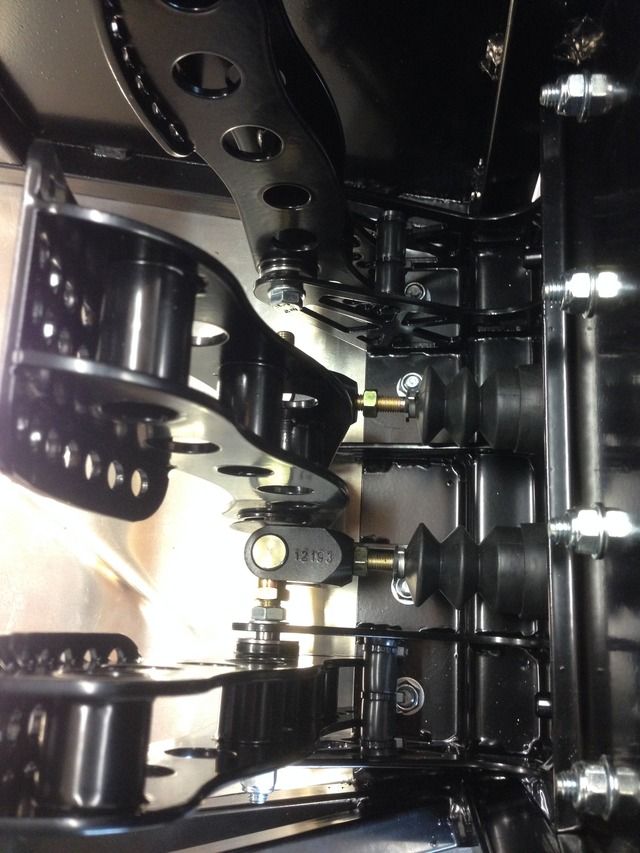
Wishbones fitted
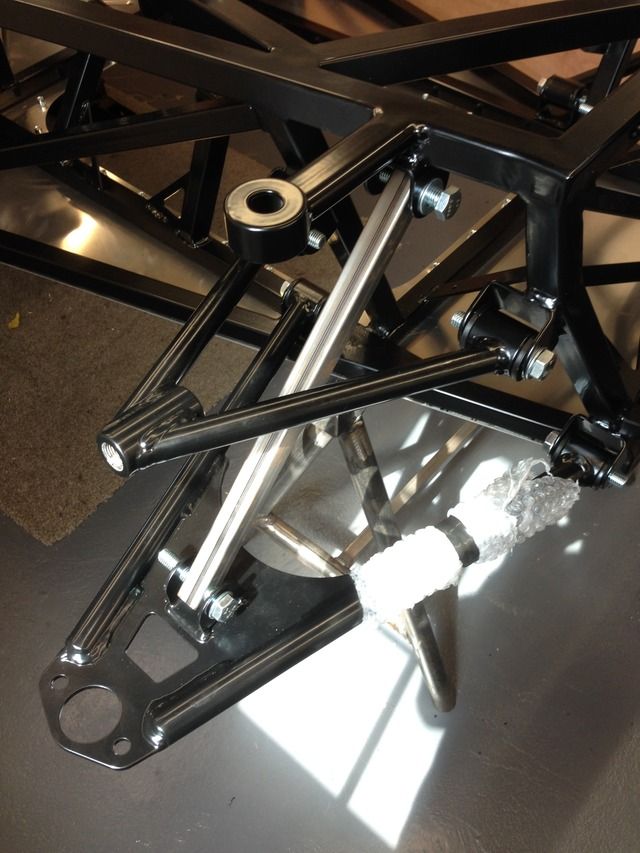
Few other bits fitted
Today's job was to get the seat panel fitted, my dad gave me a hand as it was quite tight and didn't want to scratch everything
The panel fit really well from the laser cutters and only needed a little trim on the tunnel top, then the top and bottom needed bending
We clamped the bottom Inbetween two bits of box section and the top between timber with a bevel on the back
It folded real nice
We both decided it needed bead rolling to match the rest
All sealed and riveted
I decided to gob the backside with the sealer to stop any water or dirt getting trapped anywhere, not the neatest but does the job
Rosco86 - 18/8/15 at 09:18 PM
Right I'm back on the updates now, I've not got much done really, I've brought a Bridgeport mill so I've been sorting that out
over the last few weeks
Back to the car, my dad made me some radiater brackets and a brake fluid bracket
These will all be powder coated then riveted on
Engines back in to with stronger clutch springs
Gear linkage next, just working out the size of the bell crank to be made
Down arm added to gear lever, this will be shortened once I've decided the holes in the right place
Lastly put some skateboard grip tape on my pedals, also a clue as to what sort of colour scheme I'm going with
CosKev3 - 19/8/15 at 06:57 AM
Spot on job!
Best build quality and pics I've seen on any thread for a kit car build.
One question, and a suggestion
Why have you gone with the propshaft the opposite way around to manufacturers/any other build?
Grip tape is not required for IVA on throttle pedal, and will make driving the car smoothly a pain in the arse!
Rosco86 - 19/8/15 at 07:11 AM
quote:
Originally posted by CosKev3
Spot on job!
Best build quality and pics I've seen on any thread for a kit car build.
One question, and a suggestion
Why have you gone with the propshaft the opposite way around to manufacturers/any other build?
Grip tape is not required for IVA on throttle pedal, and will make driving the car smoothly a pain in the arse!
cheers! im doing the thread as a record of the build really, im hoping to print it all off when im done as a bit of a keep sake
re the prop shaft i discussed it with d&f at length who made my prop, and they didn't have an issue with it, it just made the two sections
similar in length instead of having one quite a bit longer that the other, also it worked out that the angles of the prop were smaller
also this form suggestions both ways round, mine is the same as option 1
http://baileymorris.co.uk/pdf/KIT_CAR_2_PIECE_SHAFT.pdf
as for the throttle pedal, now you mention it all pictures i have seen have a smooth throttle pedals (that would explain why), i best peal it off
before i cant get my arm down there!
Cheers for the input!
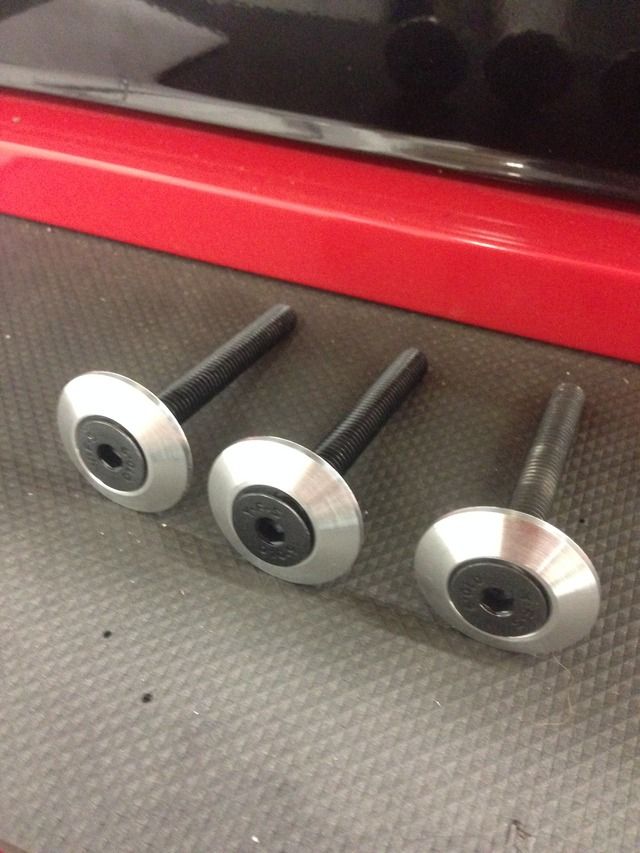
Rosco86 - 19/8/15 at 06:52 PM
On the lathe tonight, I made some countersunk washers for my seats to spread the load a little
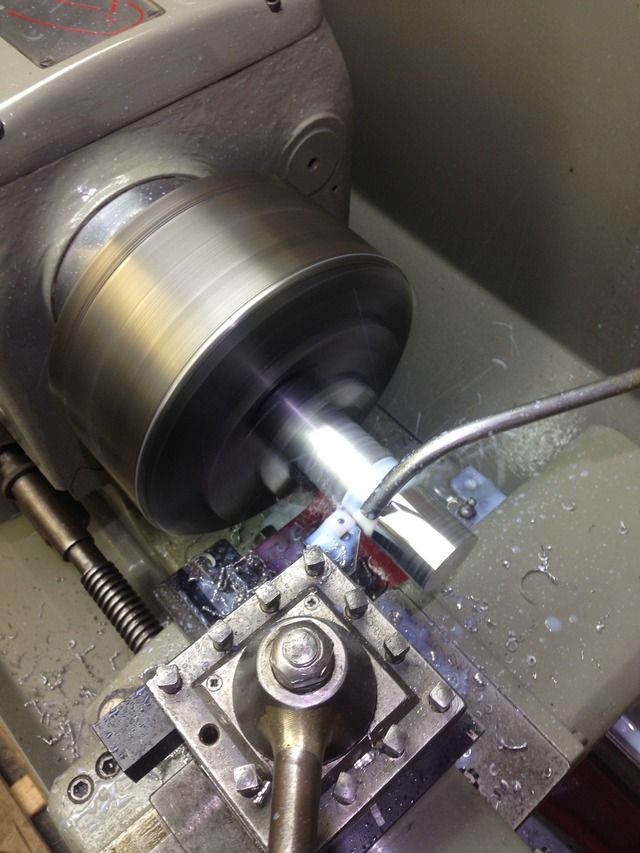
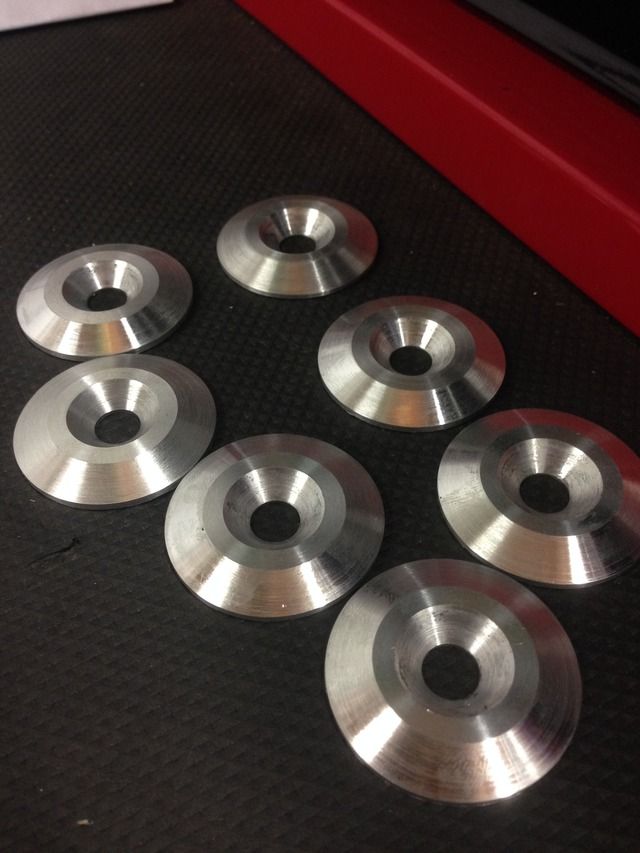
Everything aluminium will be going for anodising at some point
Rosco86 - 20/8/15 at 09:05 PM
Bit more done tonight, I made three more washers, a bit smaller this time for my pedal box
Washed my fuel tank out and mounted the fuel pump
Foam padding stuck to chassis
Tank in place
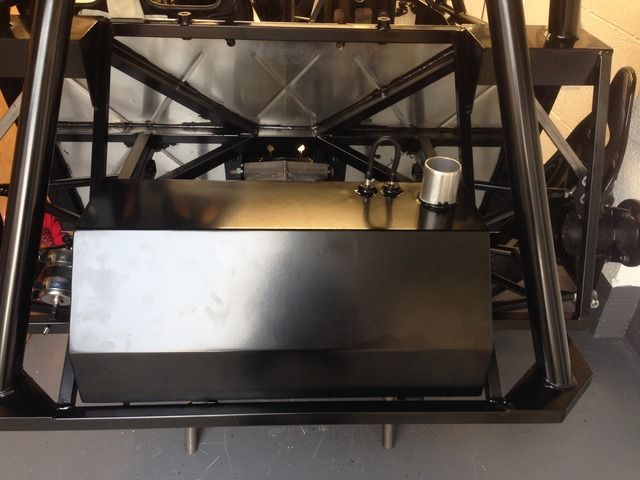
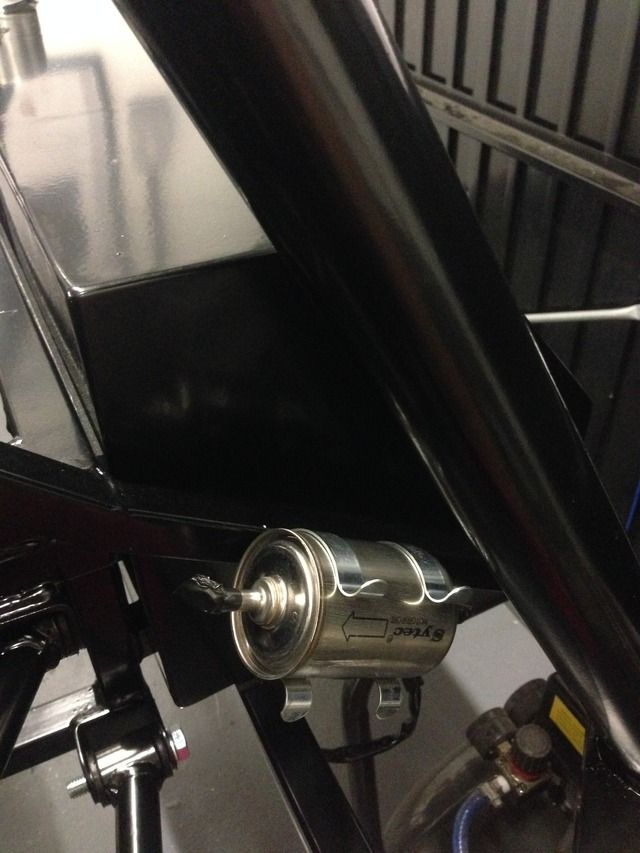
Fuel filter mounted
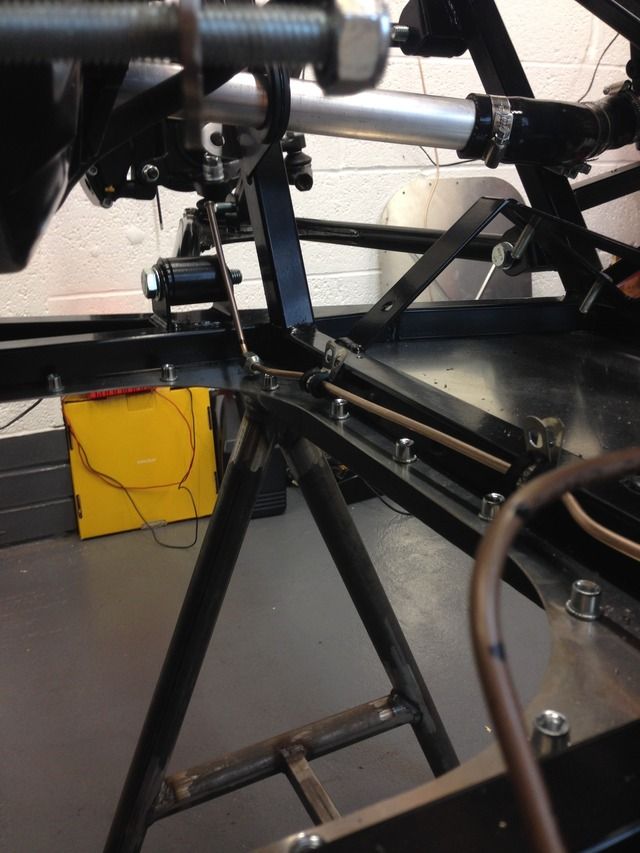
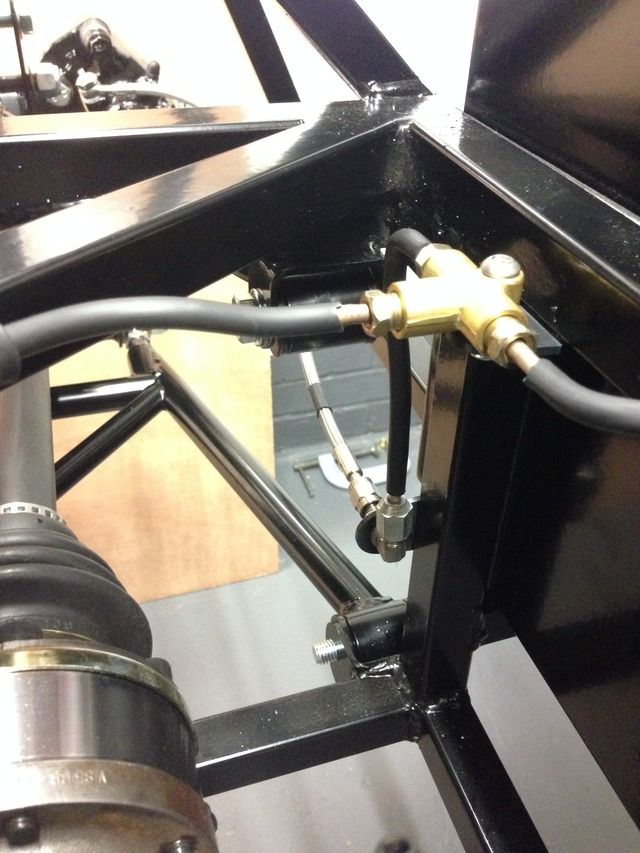
Rosco86 - 23/8/15 at 08:29 PM
Update for the weekend, my gear link bars were 10mm Ali tube with a 6mm bore, drilled and taped m8 in the ends but I didn't feel they were strong
enough so made some with 12x1mm stainless tube with threaded slugs in the end, these just need tigging in
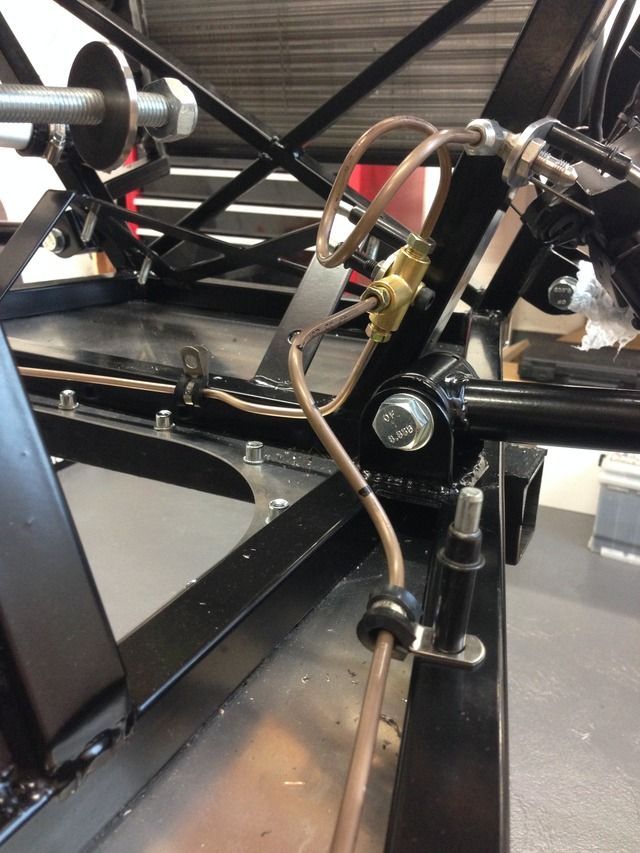
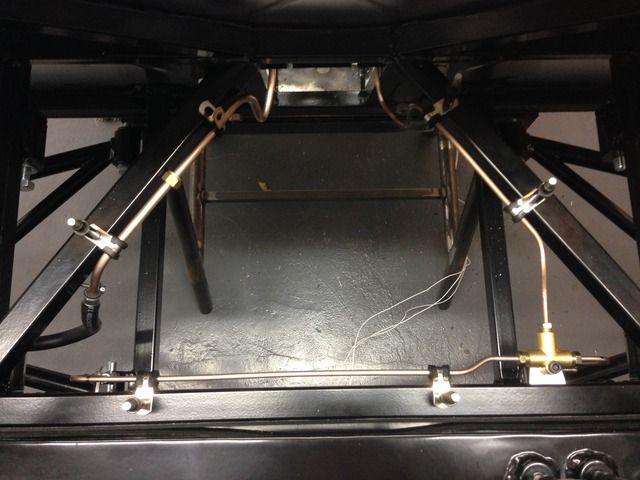
Then onto my fuel pipe, 8mm cupro, drilled a bit of plastic to straighten the tube with, worked great
The routing was a bit rubbish due to the electric reverse but it turned out a lot better than I thought in the end
Rear
Front
also once bent it was a bit tricky to get in position, but I just managed it, I had a go at the main brake pipe but wasn't happy so will have
another attempt one night in the week
40inches - 23/8/15 at 08:37 PM
Far too neat! Obviously CGI.
Rosco86 - 25/8/15 at 08:08 PM
Haha thanks, it's mirrors
Rosco86 - 25/8/15 at 08:12 PM
Well ordered some brake pipe brackets off my dad last night, he had done them before I got home from work today!
I've polished all my aluminium parts up ready for anodizing
And my rear calipers turned up today to!
Next job is to get all my brake pipes sorted!
Rosco86 - 28/8/15 at 05:50 PM
Made my bellcrank for my gear change after work tonight
CosKev3 - 28/8/15 at 07:02 PM
Awesome
You should sell those on E-Bay.
What's ratio like?
Adamirish - 28/8/15 at 07:13 PM
Epic, just epic! I wish I had the time, knowledge and skill to even think about a build like that. Well done mate, a real credit to you!
Rosco86 - 28/8/15 at 08:16 PM
quote:
Originally posted by CosKev3
Awesome
You should sell those on E-Bay.
What's ratio like?
Haha if I had my own cnc I would!
Ratio wise, I'm not totally sure, I've just blagged it really
Rosco86 - 28/8/15 at 08:17 PM
quote:
Originally posted by Adamirish
Epic, just epic! I wish I had the time, knowledge and skill to even think about a build like that. Well done mate, a real credit to you!
Wow thanks for that, but I'm just working my way through bit by bit
Rosco86 - 29/8/15 at 06:36 PM
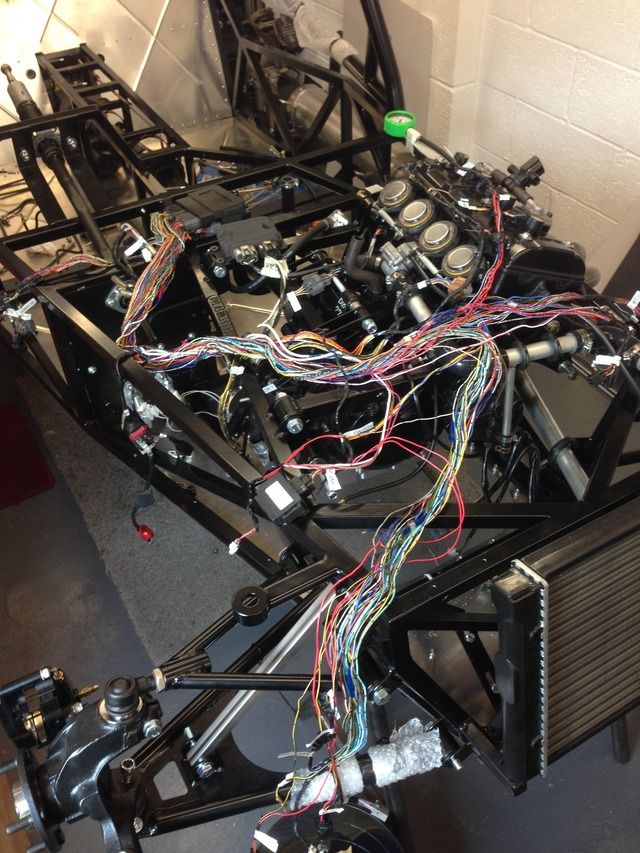
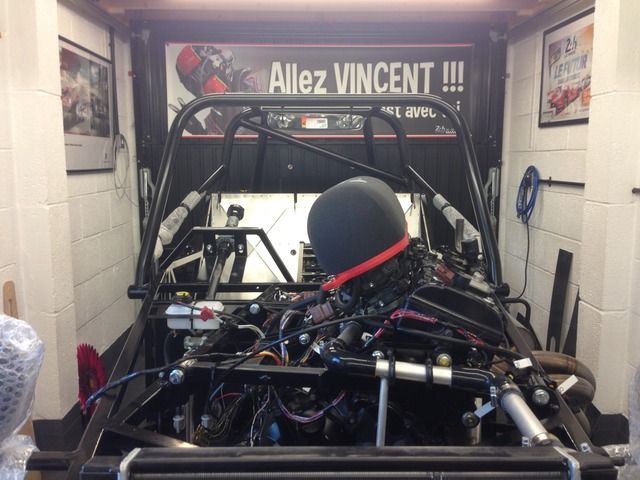
What a day! Got the engine running today! cranked the engine with the plugs out to get some oil pressure, it took a min but cracked the oil filter off
and that sorted it, primed the fuel through and she started up! I was well chuffed! Sounds so good!
The rats nest that needs sorting!
scutter - 29/8/15 at 08:57 PM
Outstanding, Well done.
ATB Dan.
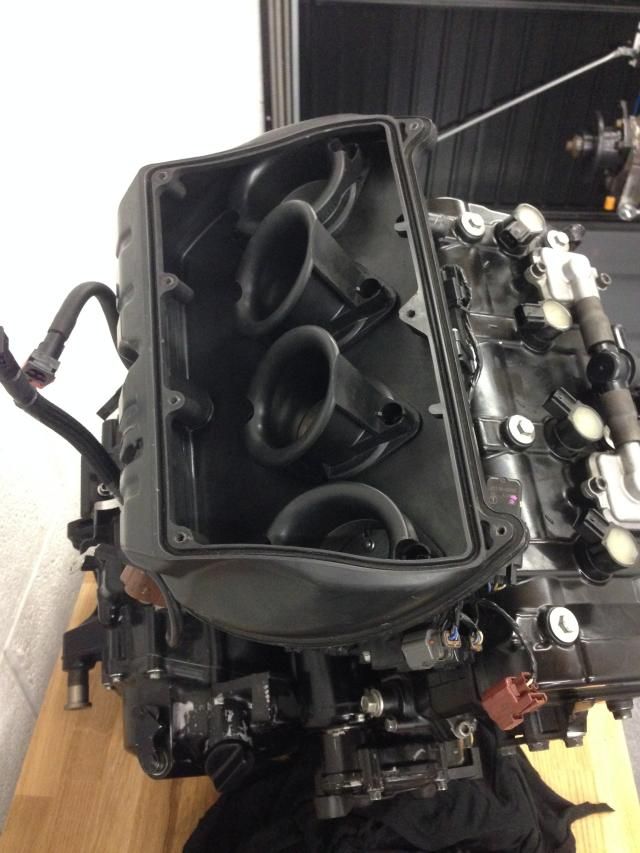
CosKev3 - 29/8/15 at 10:55 PM
Are those injectors on the top of air box a secondary set,or are they the only injectors?
Do you need to keep air box with this engine,if not how do you go about getting those injectors mounted with a foam filter etc?
Rosco86 - 31/8/15 at 05:25 PM
quote:
Originally posted by CosKev3
Are those injectors on the top of air box a secondary set,or are they the only injectors?
Do you need to keep air box with this engine,if not how do you go about getting those injectors mounted with a foam filter etc?
Yeah there secondary's, yeah I'm going to make a new air box and remount the injector rail, easier said then done haha
Rosco86 - 31/8/15 at 05:25 PM
quote:
Originally posted by CosKev3
Are those injectors on the top of air box a secondary set,or are they the only injectors?
Do you need to keep air box with this engine,if not how do you go about getting those injectors mounted with a foam filter etc?
Thanks
Rosco86 - 31/8/15 at 06:19 PM
Today's job was brake pipes, had to go my motor spares shop 3 times as the fittings I had ordered weren't going to work out right, this
meant I didn't get going till about 11:30

I'm happy how they have all turned out but I did find it a bit of a faf about, the fittings I brought from various places are all different, also
you read about sae and din flares etc, in the end I did test flares in all my fitting types to check they seated properly and the back edge
wasn't damaged by the fitting, also when I tighten them up I'm going to undo them and check the flares have seated correctly, I'm going
to get my brake flex's made up tomorrow to all being well!
CosKev3 - 31/8/15 at 09:00 PM
Nice and neat.
Your not making up your own flexies?
Rosco86 - 1/9/15 at 08:36 PM
quote:
Originally posted by CosKev3
Nice and neat.
Your not making up your own flexies?
No mate, having them properly crimped, next post!
Rosco86 - 1/9/15 at 08:41 PM
Right, got my brake lines done today, I no you can make them up your self but these are properly crimped and look a bit more factory I felt,
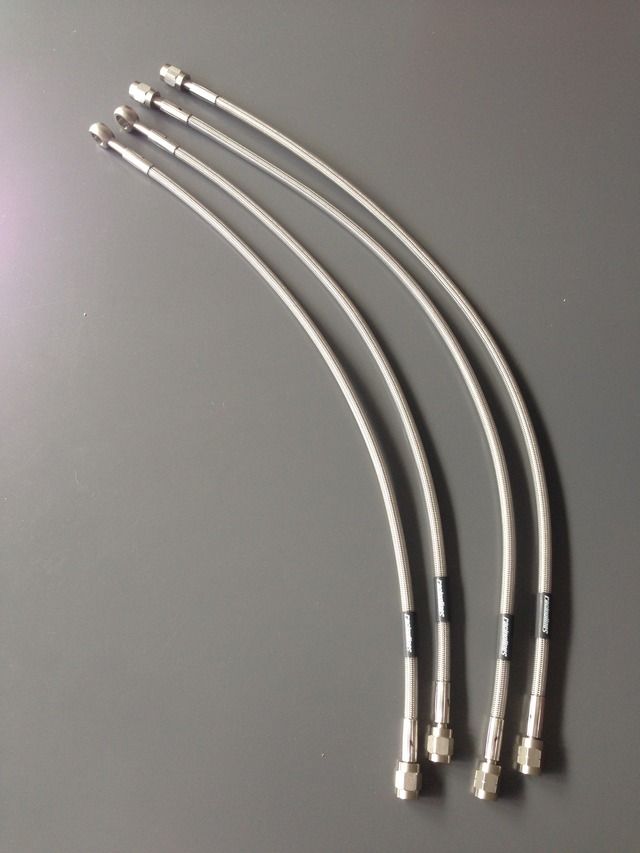
Also got a coat of black on the rear calipers so they match the fronts
prawnabie - 1/9/15 at 08:55 PM
Hoses made with compression fittings will fail an MOT anyway now - not sure about IVA
Rosco86 - 2/9/15 at 06:54 PM
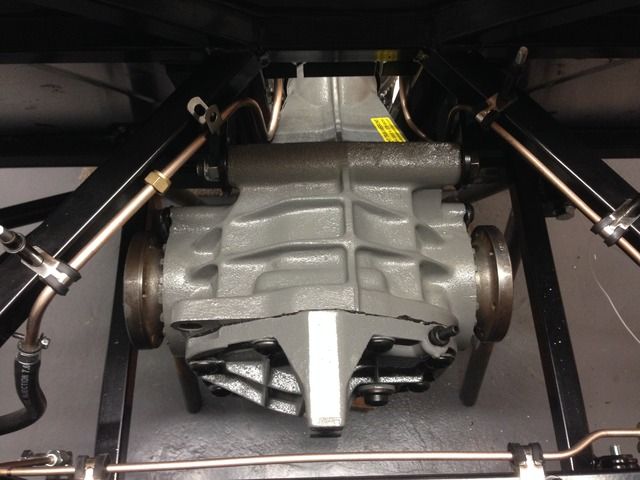
Well i sent David Rae my diff last thursday and i got it back today, well happy, so got it fitted tonight
CosKev3 - 2/9/15 at 07:00 PM
quote:
Originally posted by Rosco86
quote:
Originally posted by CosKev3
Nice and neat.
Your not making up your own flexies?
No mate, having them properly crimped, next post!
look good, as above pretty sure making your own will fail iva,hence why I asked
What ratio is your diff?
Only ask as I've had mine converted to a 3.38 for my R1, as 3.62 was too low for road use imo.
Topped out at 120mph on the limiter in sixth on rolling road, and was circa 7000rpm cruising at 70mph so was too busy!
Rosco86 - 2/9/15 at 07:47 PM
quote:
Originally posted by CosKev3
quote:
Originally posted by Rosco86
quote:
Originally posted by CosKev3
Nice and neat.
Your not making up your own flexies?
No mate, having them properly crimped, next post!
look good, as above pretty sure making your own will fail iva,hence why I asked
What ratio is your diff?
Only ask as I've had mine converted to a 3.38 for my R1, as 3.62 was too low for road use imo.
Topped out at 120mph on the limiter in sixth on rolling road, and was circa 7000rpm cruising at 70mph so was too busy!
Ah ok, to be honist i didnt no you could make your own flexies
Yeah ive gone for 3.38 i strugled to get it but its turned out ok in the end, ive got a viscus lsd in there to, i think the zx10 gear boxes are a
little worse In top gear but i think it will be ok
Rosco86 - 3/9/15 at 08:02 PM
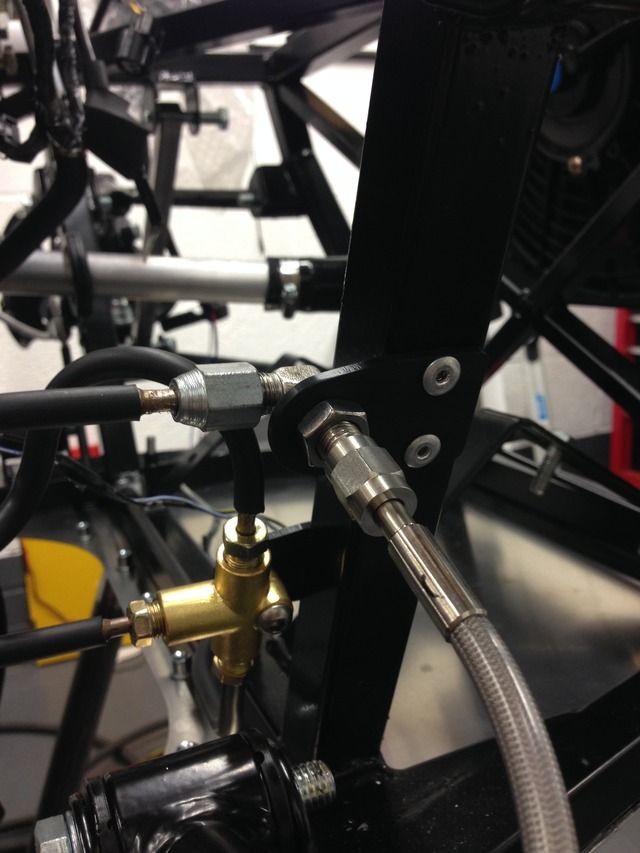
Good bit done tonight, I decided my brake pipes looked a bit bodge in copper colour so put some heat shrink over them, was a right pain in the butt,
would of been loads easier before I flared the fittings on the end but turned out ok in the end

Also my dad had cut my fuel tank strap out for me today, just needed to bend it up! It came out sweet, I will get it powder coated I think

Just need to trim the ends to length and sort the holes out
sdh2903 - 3/9/15 at 08:08 PM
That tank strap is a work of art. I love the attention to detail with your build, very impressive. Neat idea with the brake pipes too.
Rosco86 - 6/9/15 at 04:56 PM
quote:
Originally posted by sdh2903
That tank strap is a work of art. I love the attention to detail with your build, very impressive. Neat idea with the brake pipes too.
Cheers, yeah it does look cool but it's still simply two straps like everyone else, as for heat shrink, it's great, makes stuff look so
neat!
Rosco86 - 6/9/15 at 05:14 PM
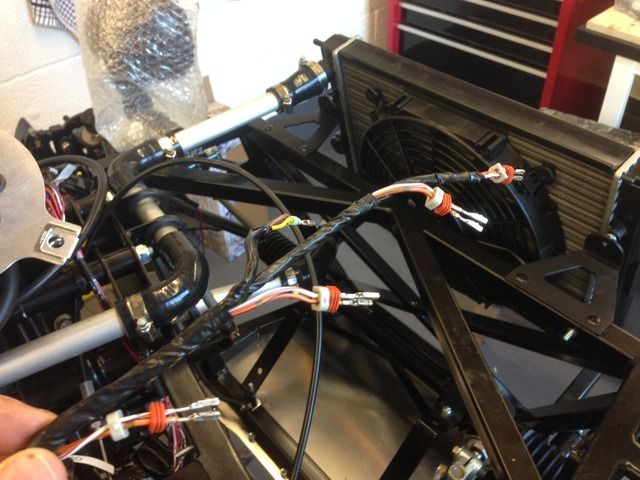
A full day of sticky wiring on Saturday, me and my dad unwrapped the entire loom and relocated everything into position and everything into the
cockpit etc, to be fair it wasn't anywhere near as bad as I thought it would be, also we removed things not required like stop watch buttons,
sidestand etc, we stripped the lighting back so we just have the feeds coming out of the fuse box, next job is get the lights and dash bits roughly in
place and get wiried up
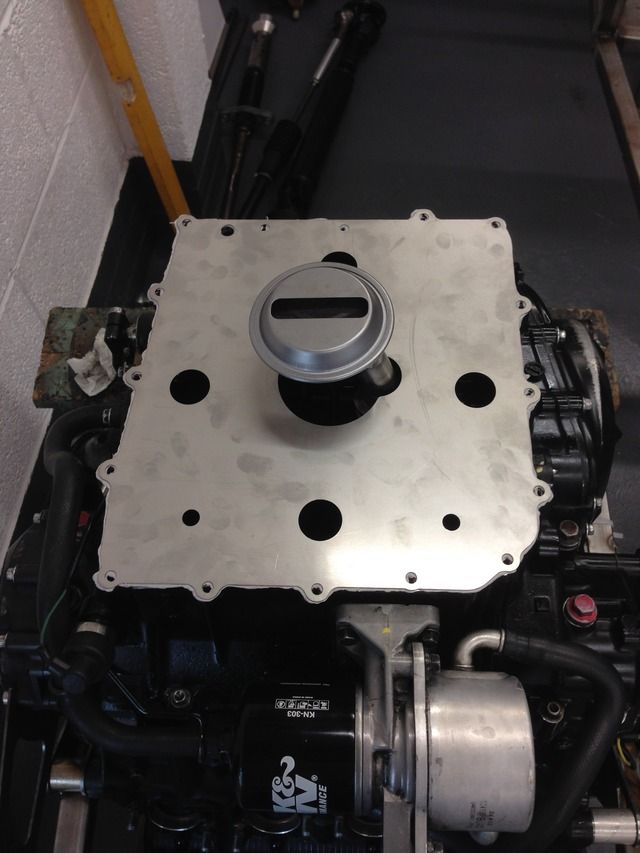
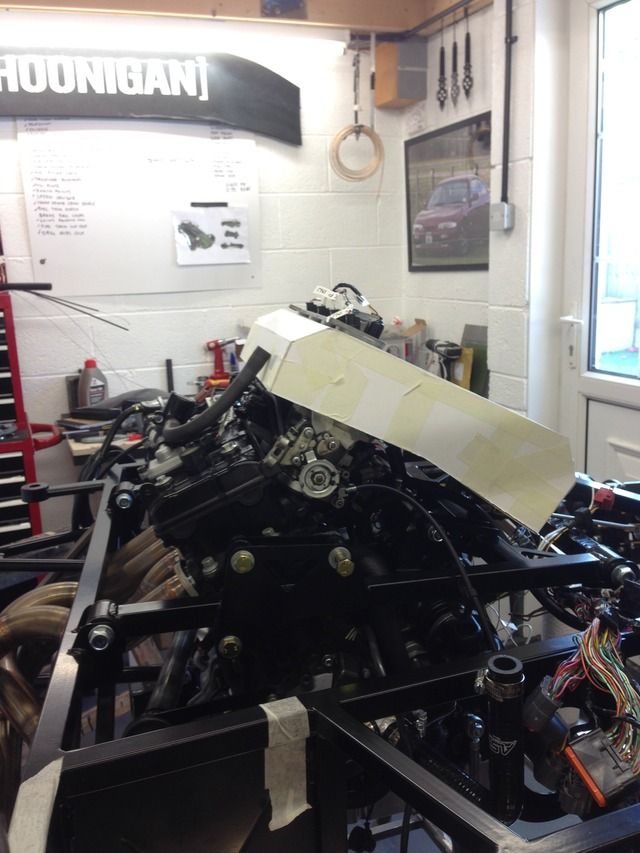
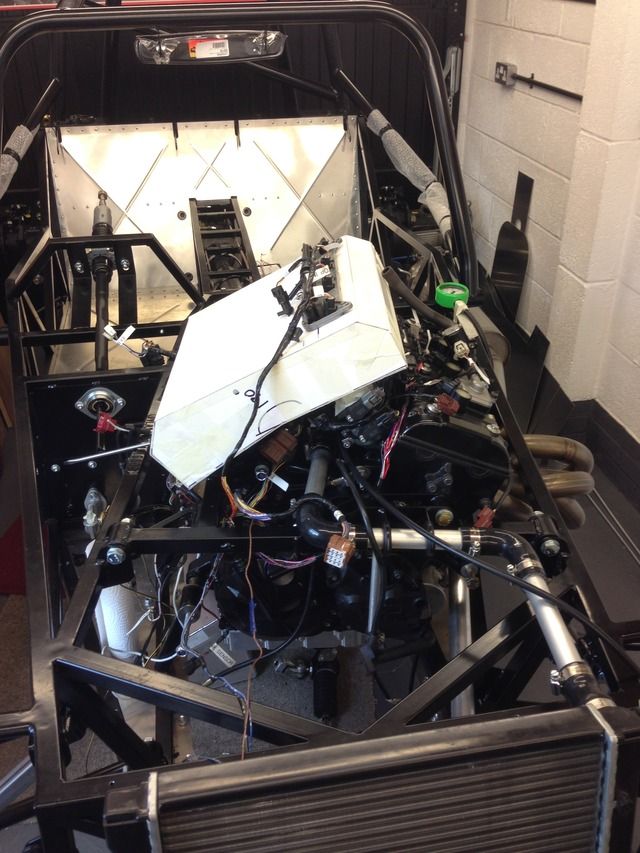
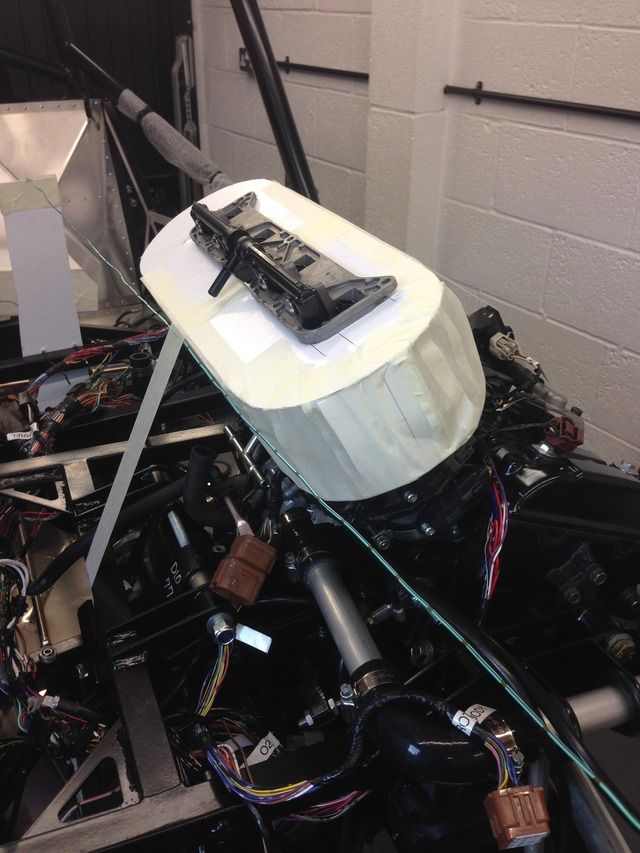
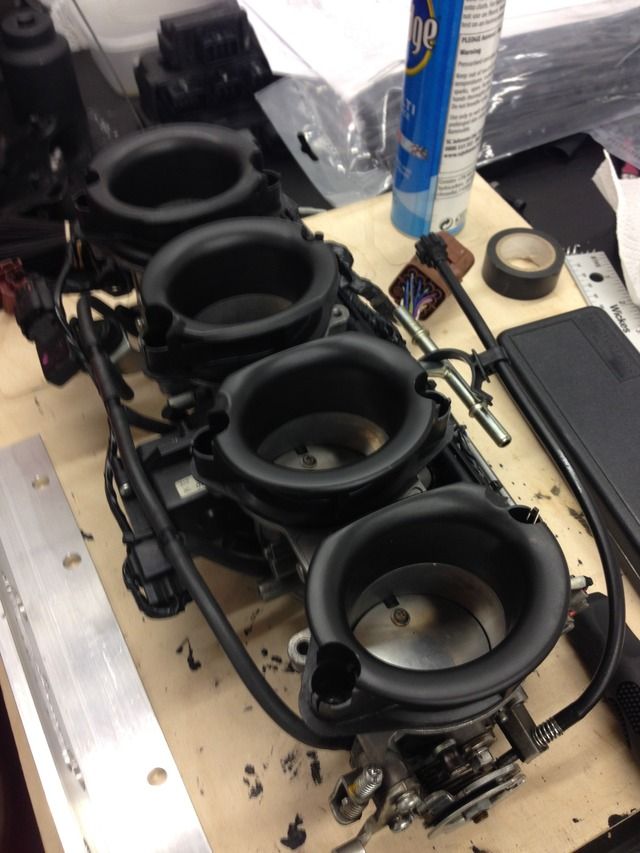
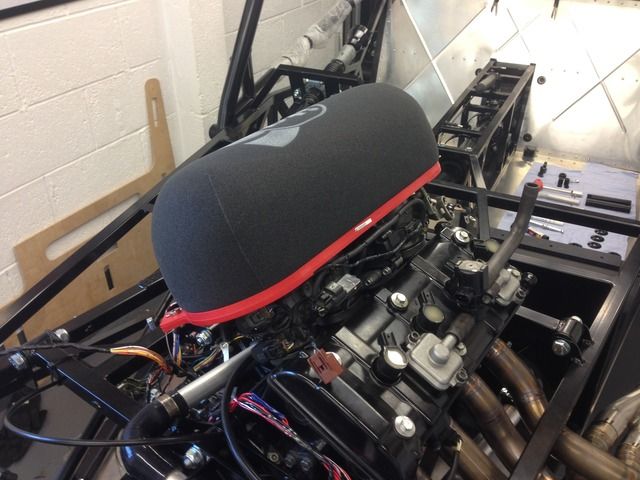
This morning we mocked up a new air box in card, I'm aiming to fab it up in aluminium, the problem is the top injectors, the std box is to high
and out to the side, the new idea is a bit lower but not out to the side, I think if I did it as is I would need a bulge/scoop around 100mm high on
the bonnet, I'm open to any ideas if anyone has any,
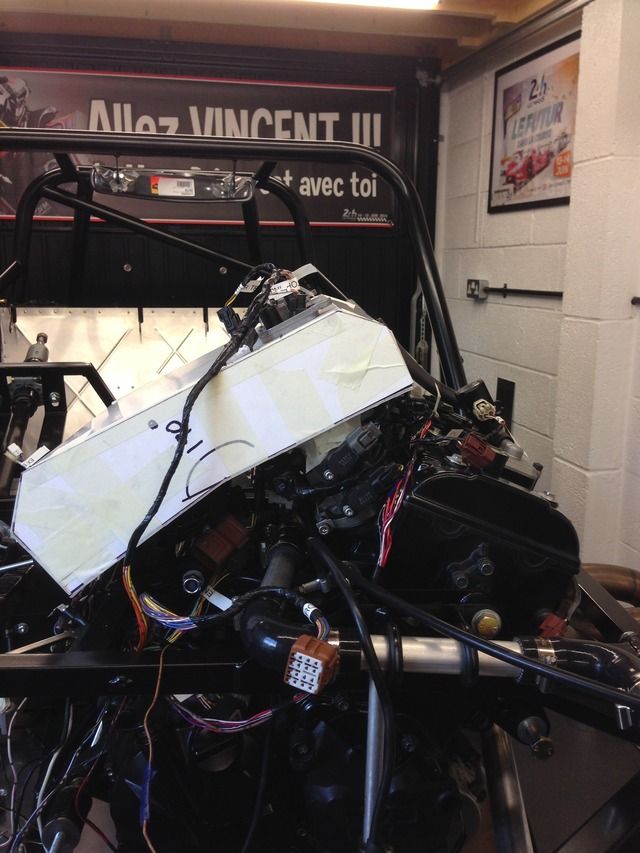

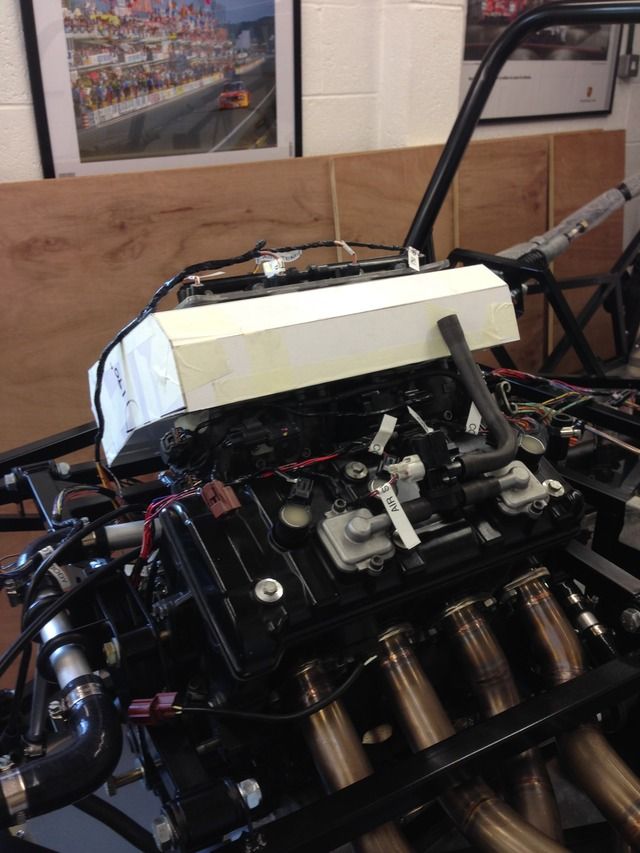
Also I'm thinking of using a cone filter with a cold feed, mounted on the front like others have done
OliilO - 6/9/15 at 06:39 PM
Still looking great.
I know Mac1 made an airbox for zx10 engines, so may be worth searching for some pictures of them; not sure if they were for engines with secondary
injectors or not though.
What thickness steel did you used for the panel your lower steering column bearing is bolted to? That's something I want to change in my car over
winter, so it's got a bearing rather than just a bush.
Rosco86 - 6/9/15 at 06:53 PM
quote:
Originally posted by OliilO
Still looking great.
I know Mac1 made an airbox for zx10 engines, so may be worth searching for some pictures of them; not sure if they were for engines with secondary
injectors or not though.
What thickness steel did you used for the panel your lower steering column bearing is bolted to? That's something I want to change in my car over
winter, so it's got a bearing rather than just a bush.
Yeah that's what I've sort of copied, this is Big Macs

I used 2mm but I did also put a short fold in it right on the lower edge to stiffen it up for the pedal box
Rosco86 - 6/9/15 at 07:29 PM
Change of plan haha I've just seen this idea, it clamps a foam/k&n filter between the two plates
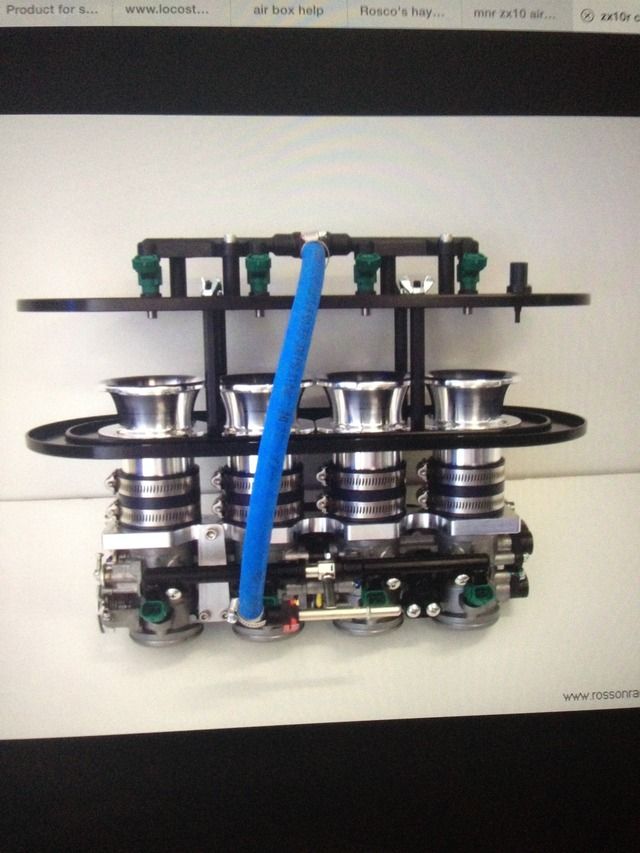
Also the injector height could easily altered to keep it as low as possible and altered if it causes a bhp drop,
perksy - 6/9/15 at 10:25 PM
Excellent build, well done
Some great photos and info being shared, thanks
Rosco86 - 7/9/15 at 06:12 PM
Cheers
Rosco86 - 7/9/15 at 06:20 PM
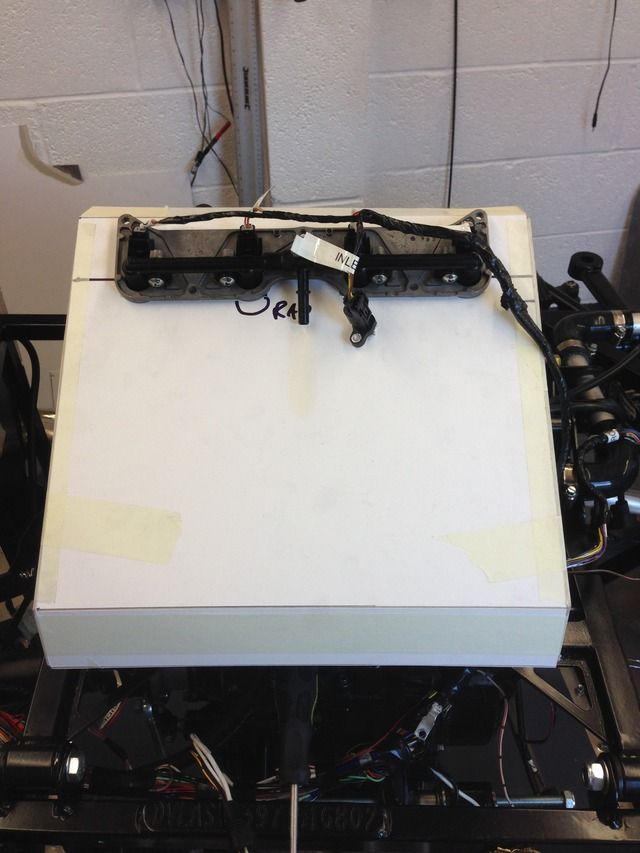
Right well I've mocked up air box idea number two just to get an idea of size, looks ok, I've mocked up a bit of wire to represent the
bonnet line roughly, also I'm a bit worried about induction noise with this method as it's got to be less than 99db at 3/4 throttle!!! Is
there anyway of getting this rpm dropped, maybe a new power graph showing peak power at 8000 rpm say??

Rosco86 - 14/9/15 at 07:02 PM
Not many photos tonight but it doesn't mean I've not been busy, got my driveshafts from j&r on eBay greased, built up and fitted
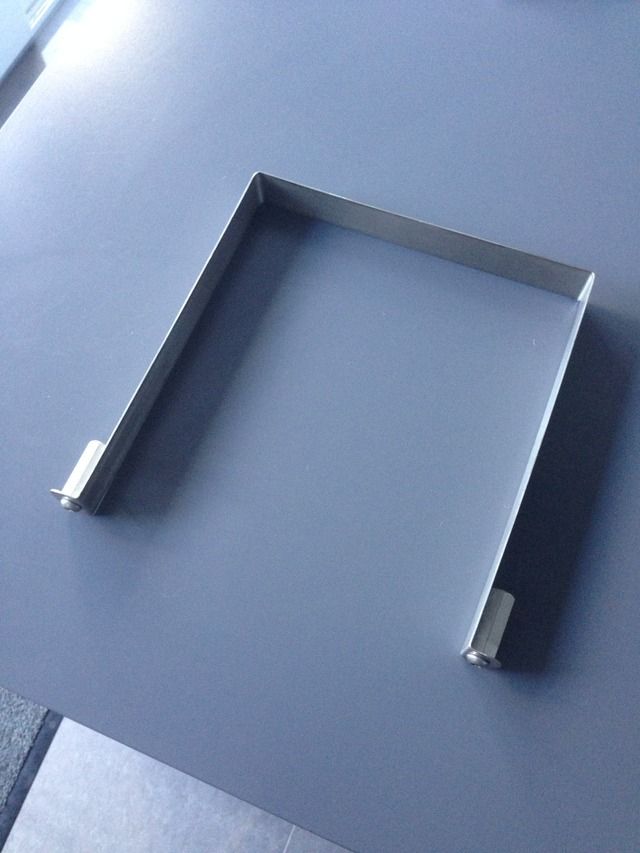
Got a type 054 battery, think it's going in the passenger footwell behind a foot rest, so made the foot rest fit and made a strap out of
stainless
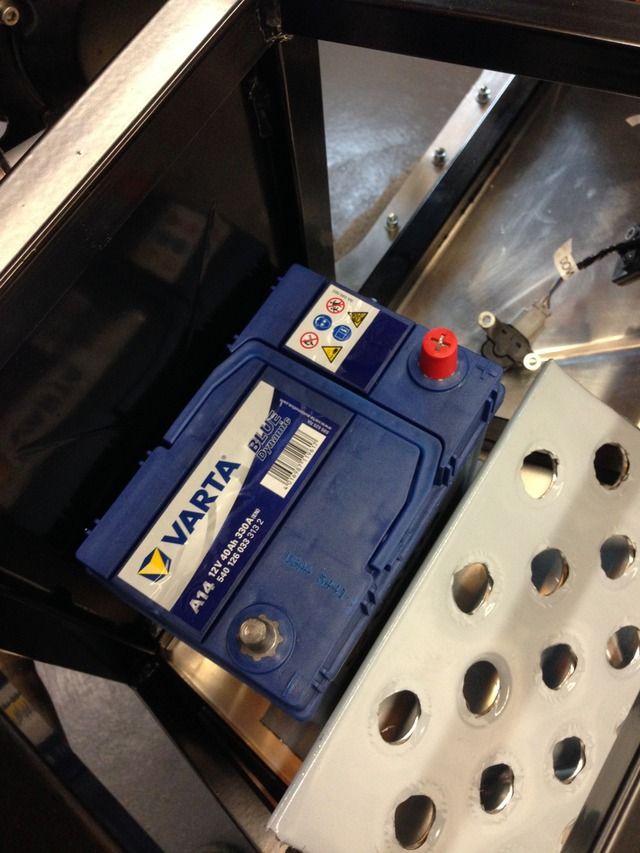

This will bolt through the floor from underneath, all bits need a bit of padding here and there
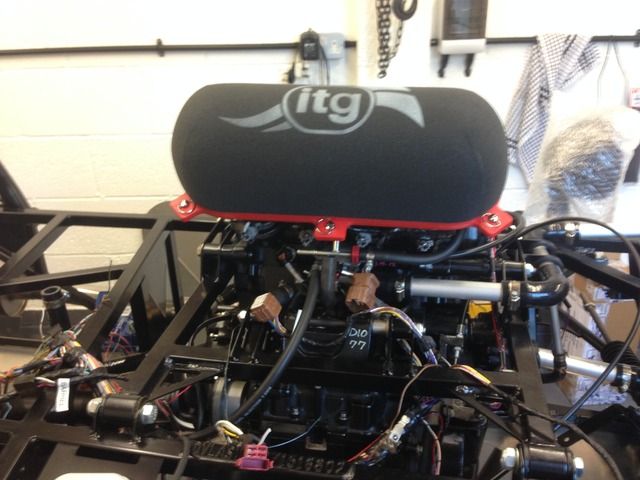
Then spent most of Sunday drawing and deciding how to do my air filter
First try was with a k&n filter but looks to big,
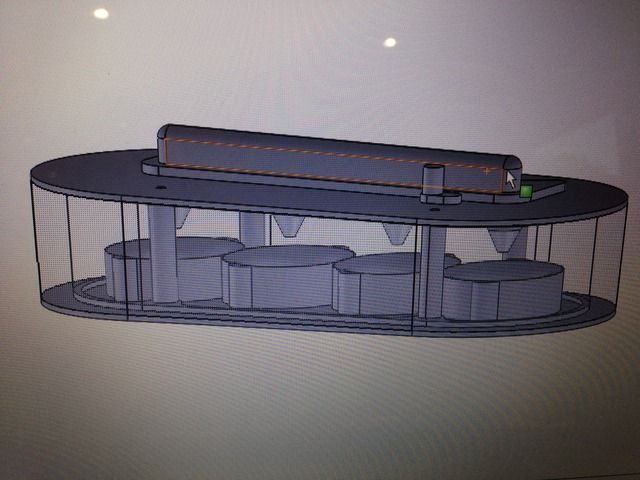
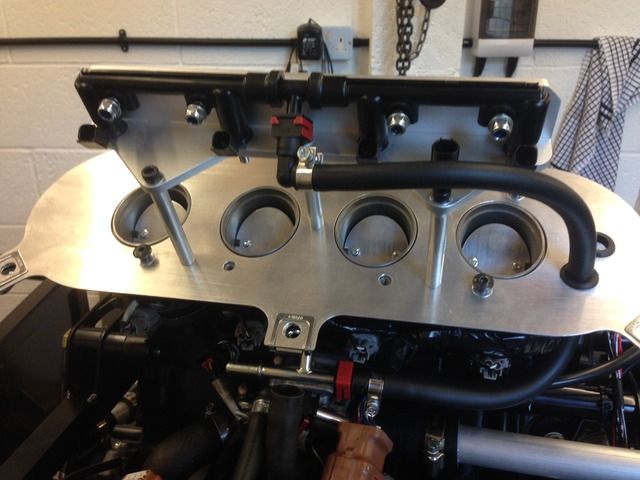
Next is to suit an itg sausage filter over the top, this is what I'm going to do, I've got to make a new fuel rail and a base plate
Std injectors which will fit in the new rail/bracket
This method seems the simplest, easy to make, most compact and uses an off the shelf air filter
Rosco86 - 16/9/15 at 07:51 PM
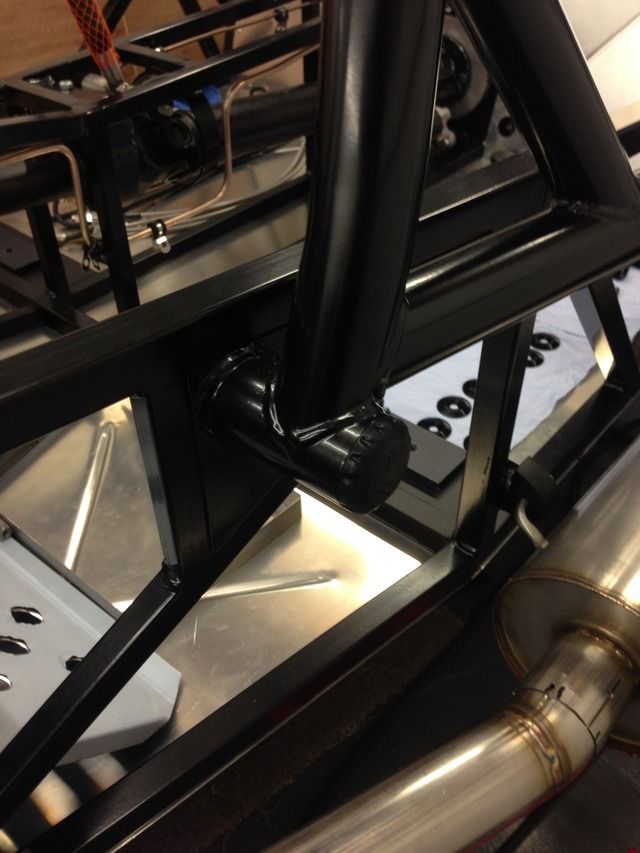
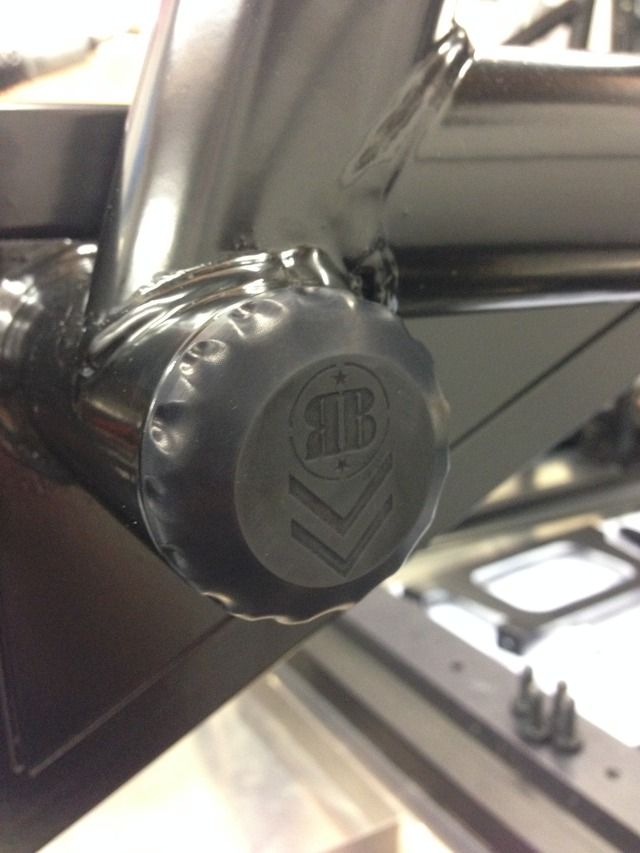
Well got all my anodizing back today, looks sweet
Gear shifter
Roll cage bungs, I admit I got carried away with these, but I do love it! Made a bit of a logo with my initials
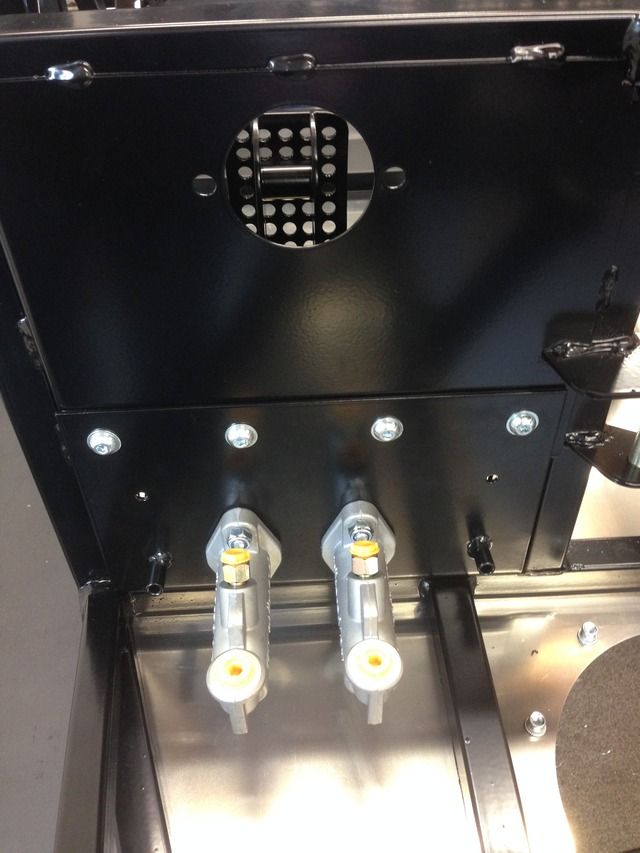
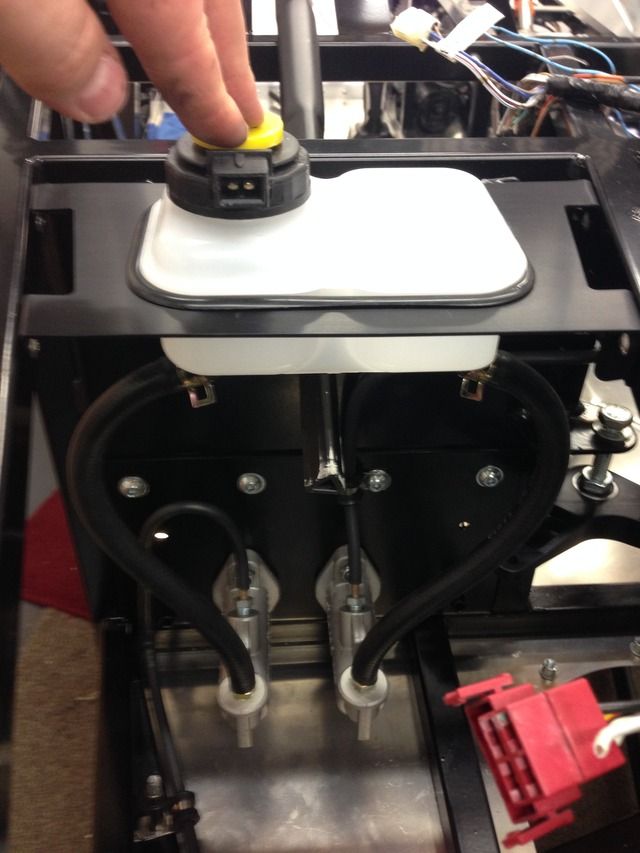
Brake tags bonded and riveted on (I spoke to the tech iva man at the dvla about this and he said it's fine as long as there secure) also got all
my brake pipes back on tonight, I just need to rivet the p clips on
Rad brackets fixed on and fan fitted
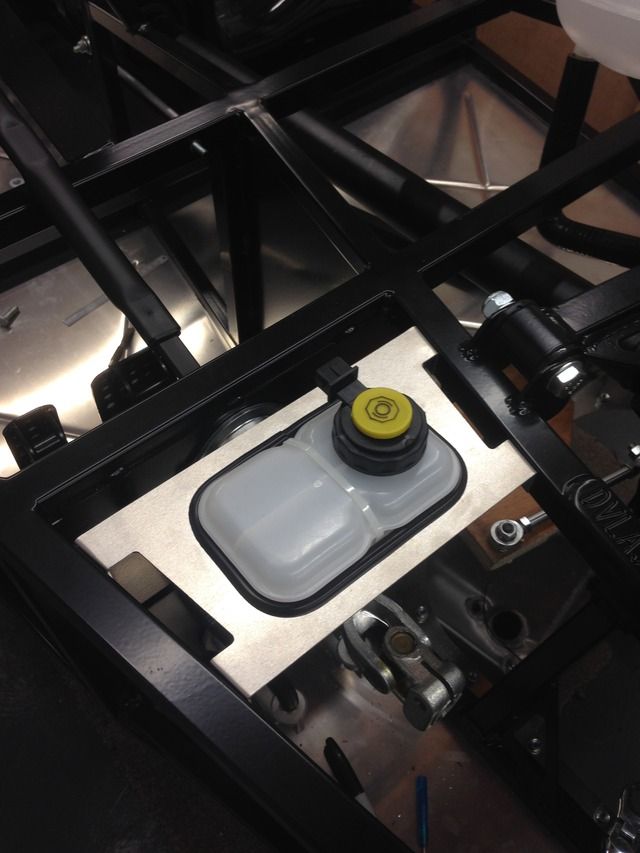
Brake res fitted
My air trumpets turned up yesterday so now I have 4 short ones
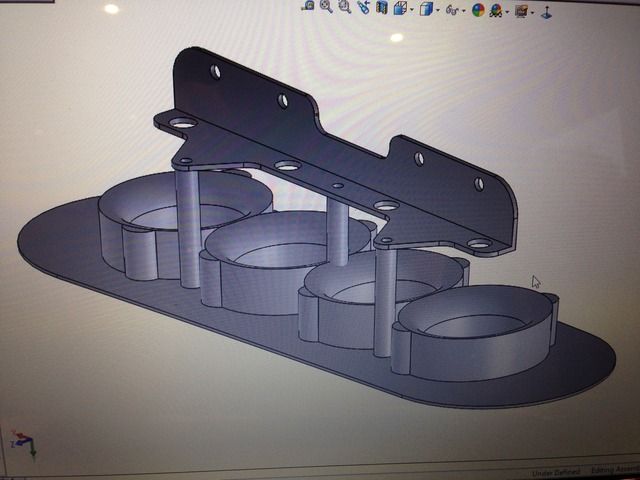
Started the fuel rail bracket
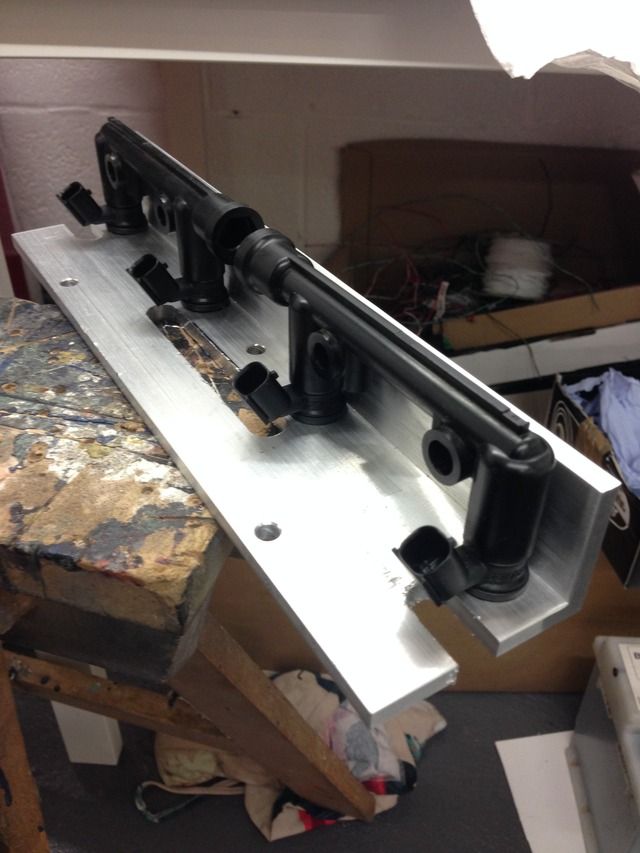
Back plate drawn up
Just need to order one of these filters
Neilwilson - 16/9/15 at 08:06 PM
The effort that you have/are putting in is outstanding, definitely reflected in the quality of your build.
Really like the personal emblem, I can imagine at some point you will have a badge on the bonnet much the same
Rosco86 - 16/9/15 at 08:11 PM
quote:
Originally posted by Neilwilson
The effort that you have/are putting in is outstanding, definitely reflected in the quality of your build.
Really like the personal emblem, I can imagine at some point you will have a badge on the bonnet much the same
Thanks mate, it means a lot, it's hard to keep it up week in week out but if I don't I won't be happy
As for the badge, I may already have made it
Digimon - 17/9/15 at 08:11 AM
I take my hat off to you sir the attention to detail in each part is amazing!
Adamirish - 17/9/15 at 03:55 PM
As everyone else has said, the attention to detail is incredible in your build, I can't wait to it finished and used in anger. When do you hope
it will be on the road? Are you not worried when you finish?
Rosco86 - 17/9/15 at 07:45 PM
Wow thanks guys,
As for finish date it's done when's it done but I am spending all my spare time on it as I want it finished, I would like to be somewhere
near in the start of next year
Rosco86 - 17/9/15 at 07:54 PM
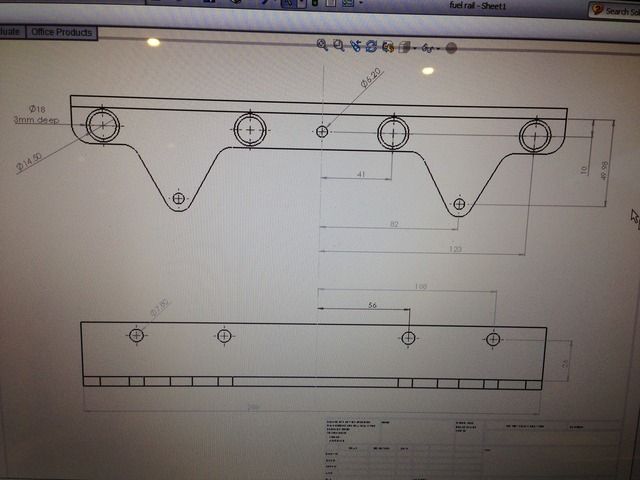
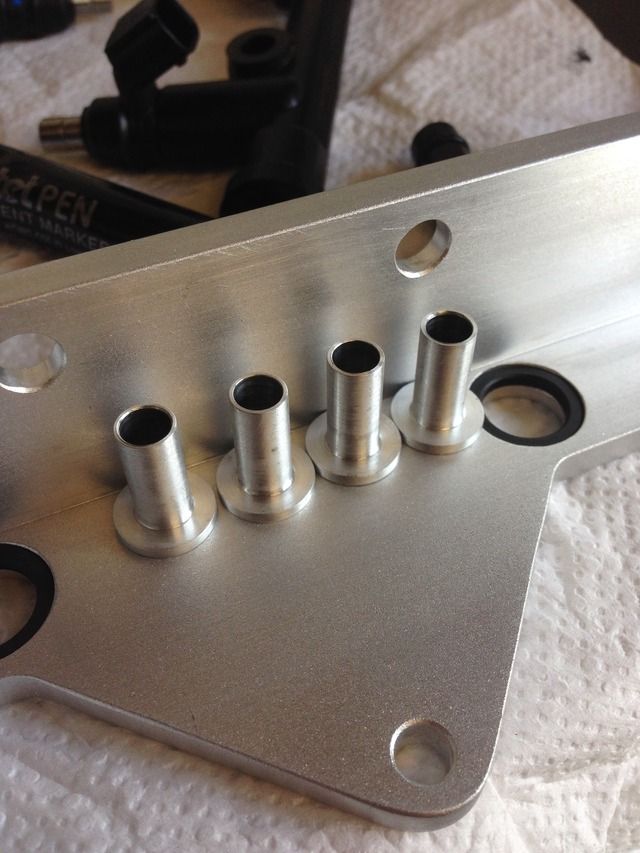
Well finished my fuel rail bracket off tonight, just got to make a few bosses for it
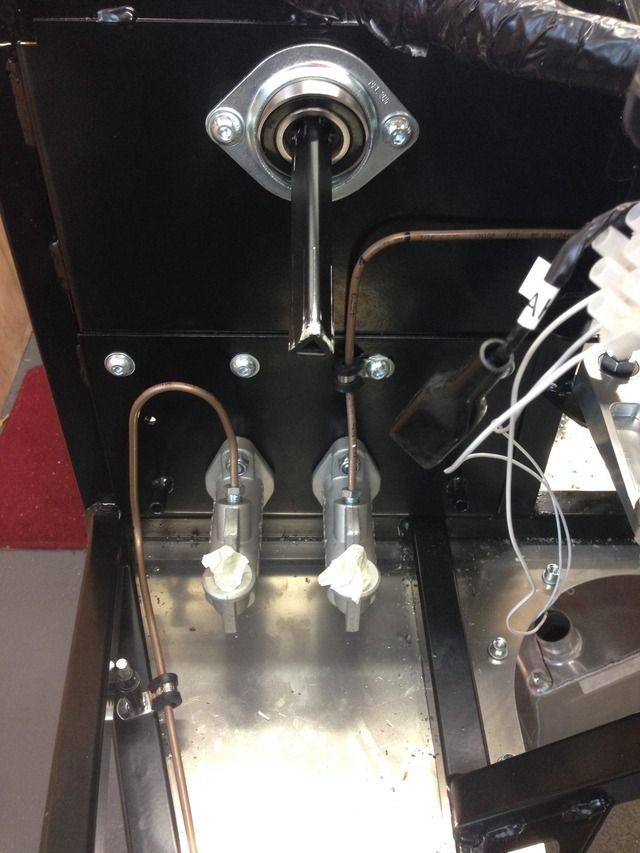
Then onto the handbrake cables, I thought this would be an easy job but it wasn't, the cables weren't really long enough and not sitting
nicely, I was ready to leave it for tonight then I thought about making some exstention tubes
The cables are a snug fit in the tubes and locate on 50mm also it stops them from rubbing on the diff
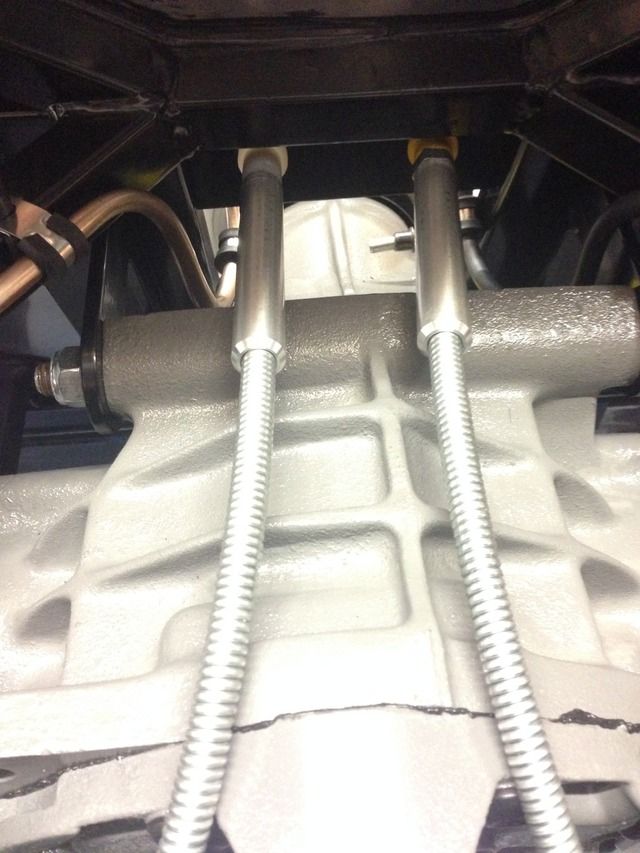
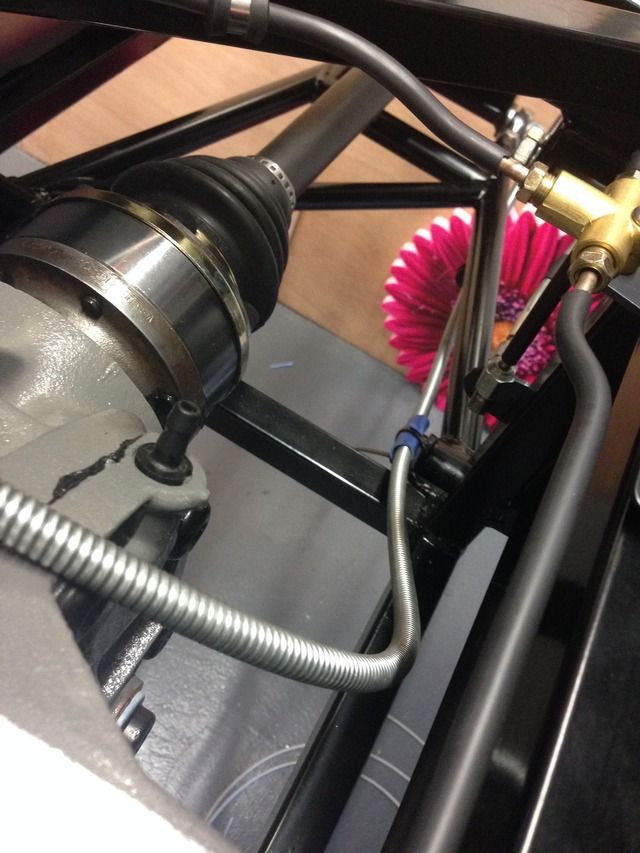

I just need to make a couple of brackets to hold the cables in place off the wishbone bolts
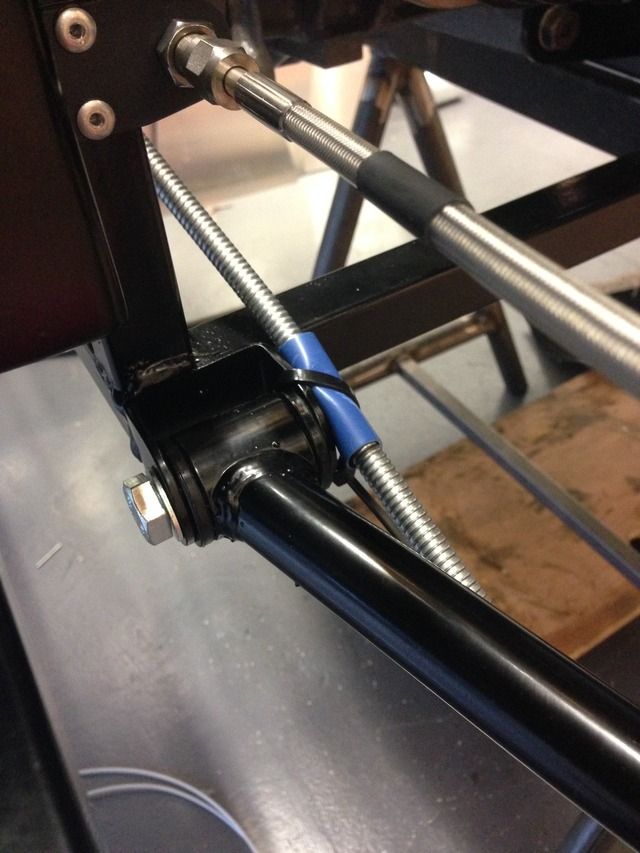
I've removed the adjuster from the cable but I will still have adjustment on the cable end fitting as it has grub screws in
Rosco86 - 19/9/15 at 05:08 PM
Well more done today, made some little crush tubes for the fuel rail, also I've vapour blasted the bracket to make it look at bit more factory
Also I've started making a new gear lever, just the lower bit with the bearings in as its a bit of a bodge lol
Rosco86 - 20/9/15 at 04:56 PM
More done today, loads of bits and bobs to do, got my clutch cable sorted, had to make a bit at the pedal end and solder a bit on the other end, it
wouldn't solder to start with, to hot I think, but got it done in the end.
Also got all my aluminium engine cradle spacers back on and tightened up.
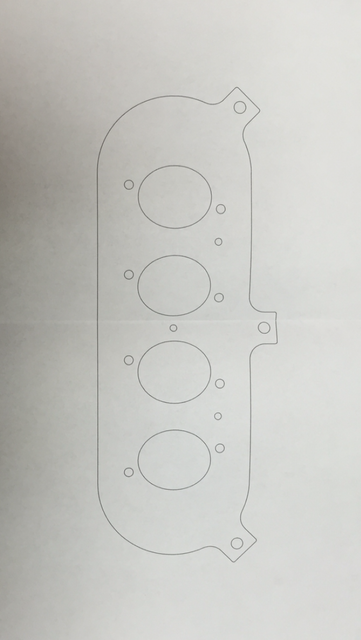
Then went down my dads and made my air filter backplate ready for the itg filter, I got a drawing from ITG for the outside
Came out mint
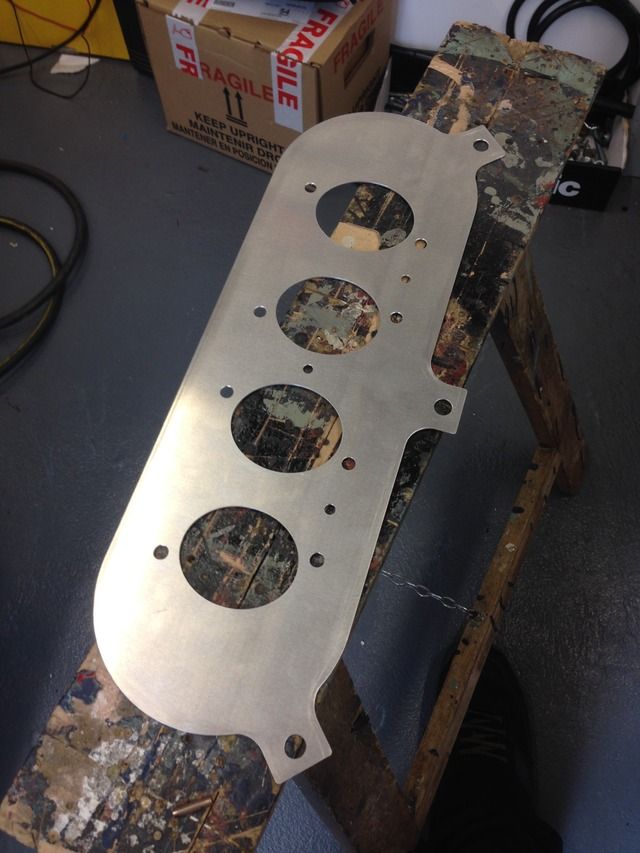

Pretty much there now, just need a few holes in it for wiring, air temp and the fuel feed, also need some 3mm spacers under the trumpets to replicate
what was there before as it's got orings that seal everything
theduck - 20/9/15 at 07:26 PM
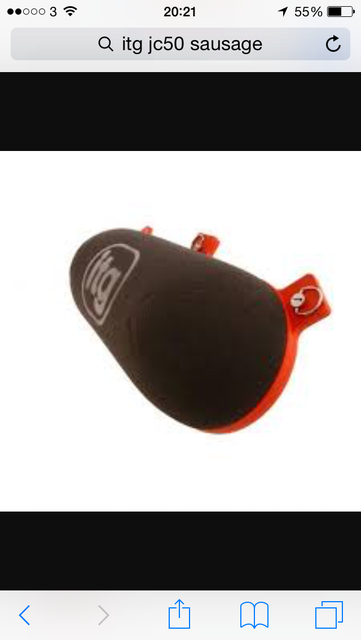
I'm sure it is me missing something, but if you use a JC50 filter won't you end up with the secondary injectors soaking it in petrol?
wylliezx9r - 20/9/15 at 07:53 PM
quote:
Originally posted by theduck
I'm sure it is me missing something, but if you use a JC50 filter won't you end up with the secondary injectors soaking it in petrol?
Don't think so. The secondary injectors and trumpets will sit within the dome of the filter.
theduck - 20/9/15 at 08:14 PM
See. Knew I was missing something!
Rosco86 - 20/9/15 at 08:19 PM
Yeah thats it, the filters going to cover the lot, it seemed like the best way, simple and easiest to make, also hopefully i wont have to cut to much
out of the bonnet, and it will be sucking cool air, im just a bit worried about the induction noise, but i will have just have to see
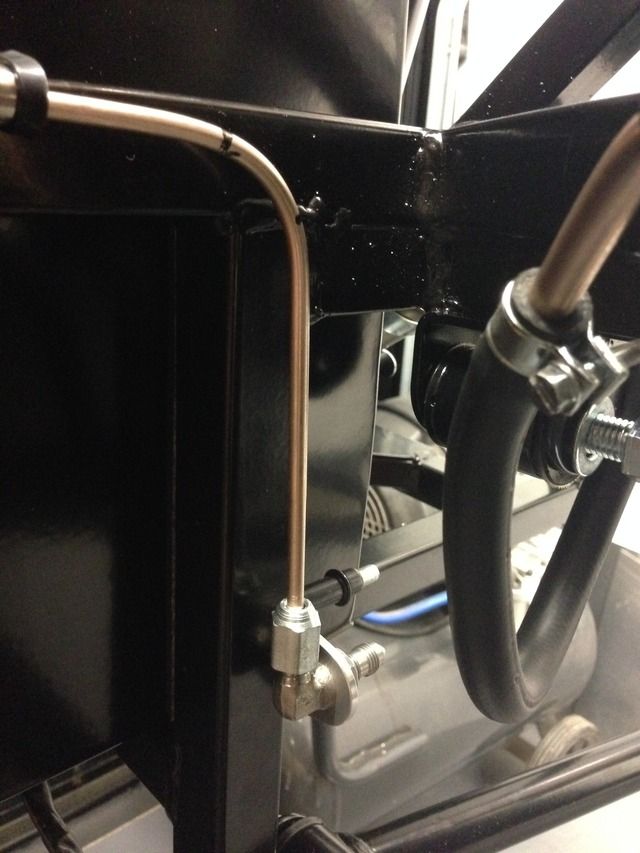
Rosco86 - 26/9/15 at 06:11 PM
Steering rack and track rods re fitted
When I re fitted the steering shaft my break pipe was in the way so I had to make a new one
Rear discs and pads fitted

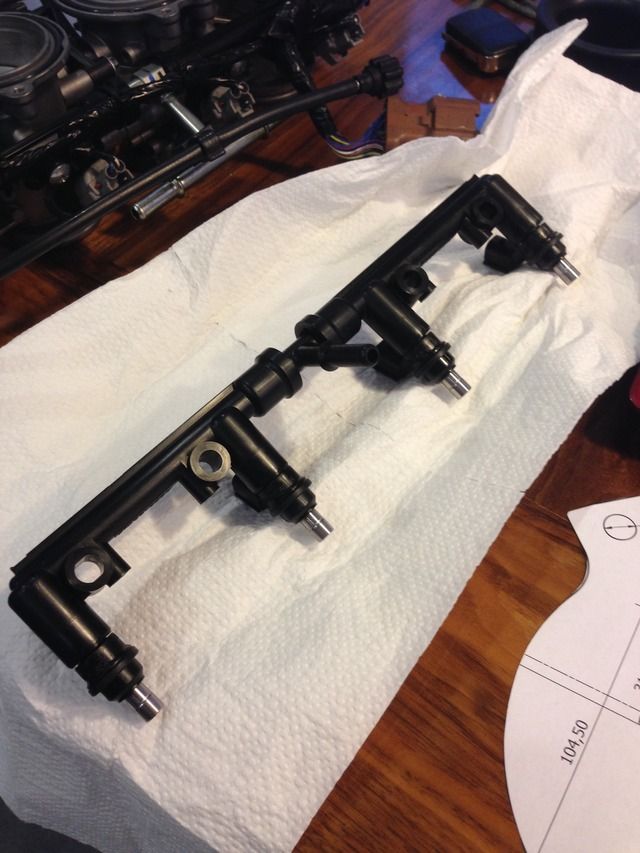
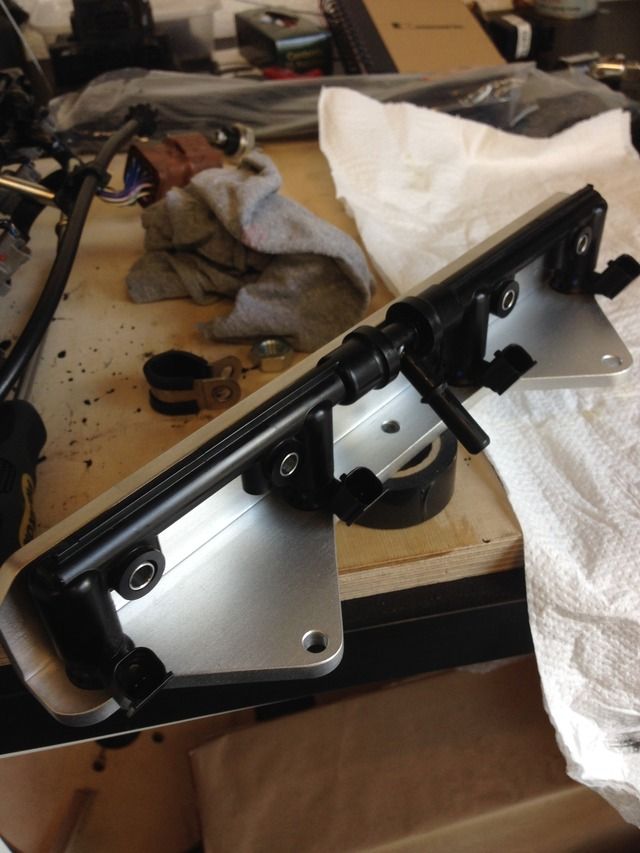
Done a bit more on my inlet, fuel rail all fitted and fuel piped up
I removed the pins from the injector plugs ready to pass through a grommet but then decided I'm going to cut the lot and put a connector inline
so it's easily removed
Also my air filter came last week and fits sweet!
[Edited on 26/9/15 by Rosco86]
Adamirish - 26/9/15 at 06:27 PM
I know its hard to tell without the scuttle etc fitted but wont the filter stick out too far to see over the top?
Rosco86 - 26/9/15 at 06:47 PM
Yeah it's hard to tell, I think it will stick out by about 100mm so not to bad I don't think, as some scoops are 50-60mm I will just have to
see when it comes to it
What's everyone else think?
CosKev3 - 26/9/15 at 07:36 PM
I can't see you finding a good enough looking scoop to cover that.
Would just need to have it poking out through a nice neat cut out in bonnet I think looking at it.
Not sure on IVA and filter sticking out though,would pass radius tests ok but not sure about noise test.
Rosco86 - 26/9/15 at 07:41 PM
quote:
Originally posted by CosKev3
I can't see you finding a good enough looking scoop to cover that.
Would just need to have it poking out through a nice neat cut out in bonnet I think looking at it.
Not sure on IVA and filter sticking out though,would pass radius tests ok but not sure about noise test.
Yeah that's what I was going to do, I might have to make a fibreglass bulge to keep it under the bonnet for iva, I will just have to see I guess,
I just hope it doesn't block my view lol
It's the most compact solution I could think of without laying the throttle bodies on there side
Rosco86 - 27/9/15 at 07:43 PM
Had a morning on my dads cnc today
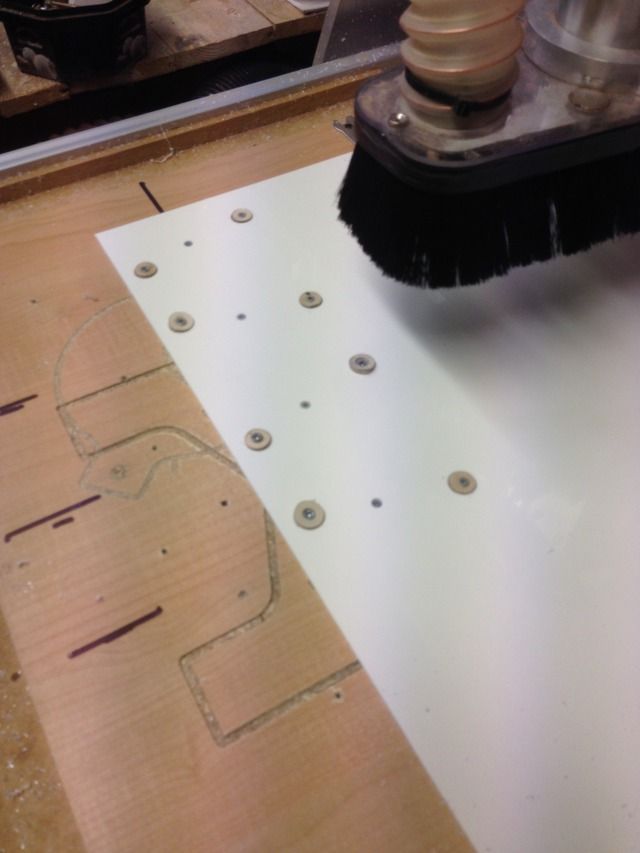
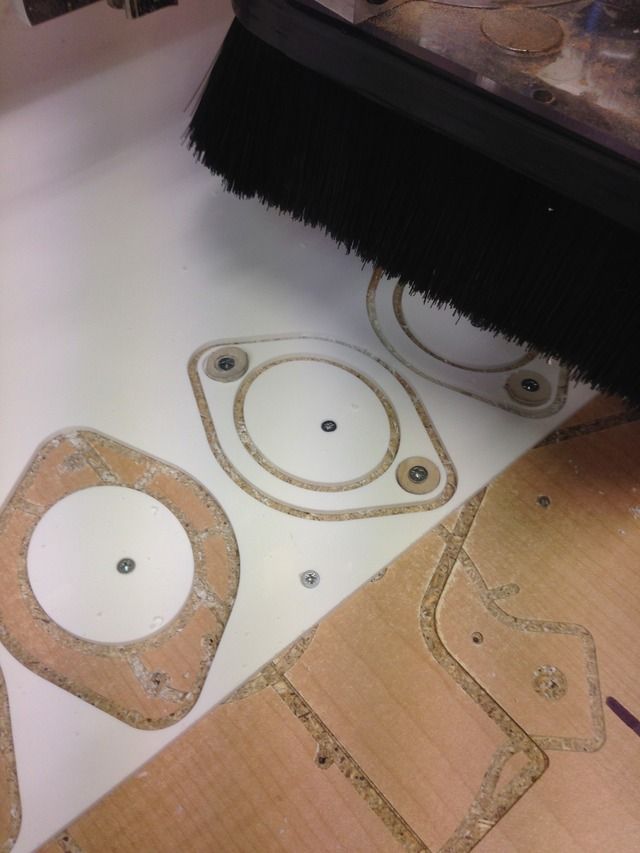
These are to go under my trumpets on the inlet to replicate the thickness that was there before
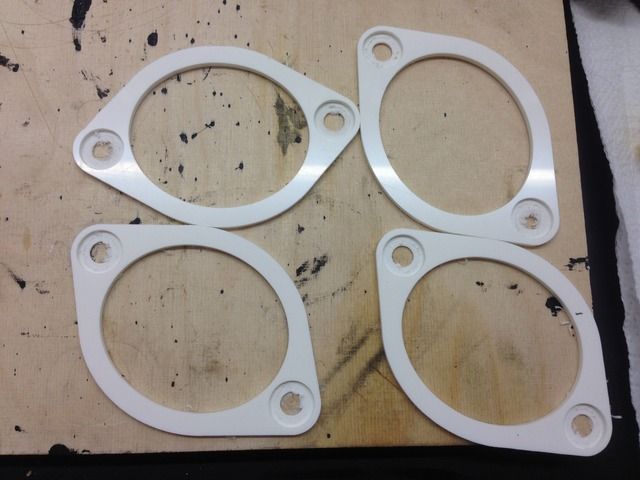
Handbrake cable tags
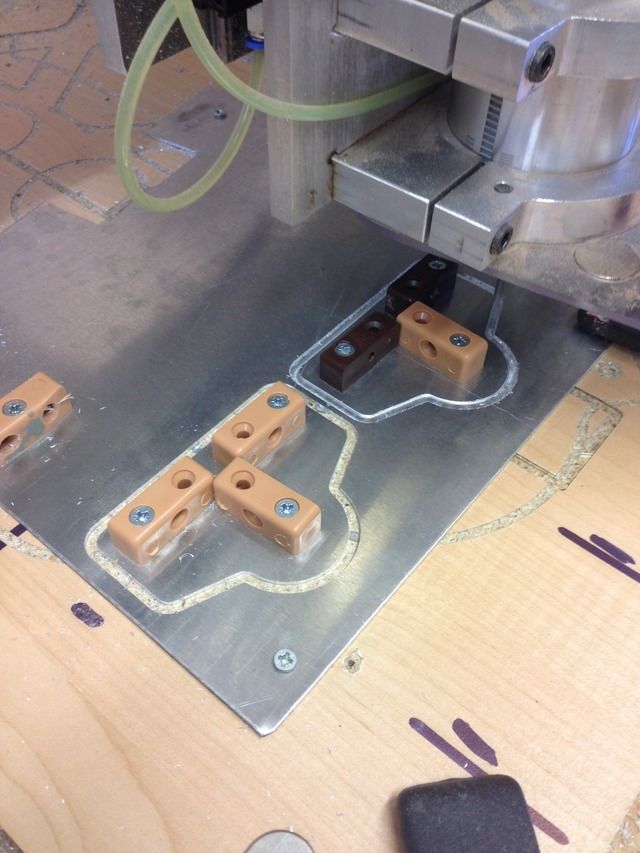
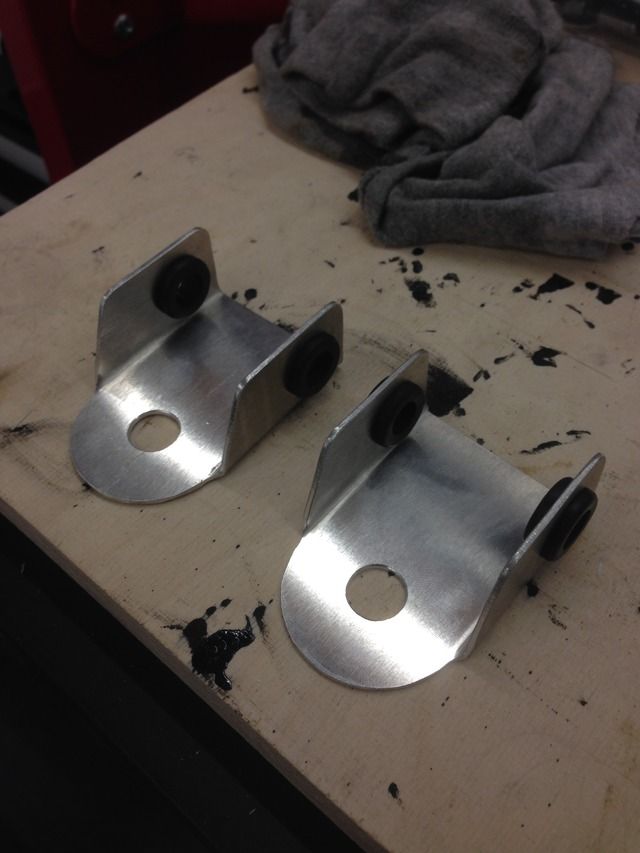
Works like a dream to!
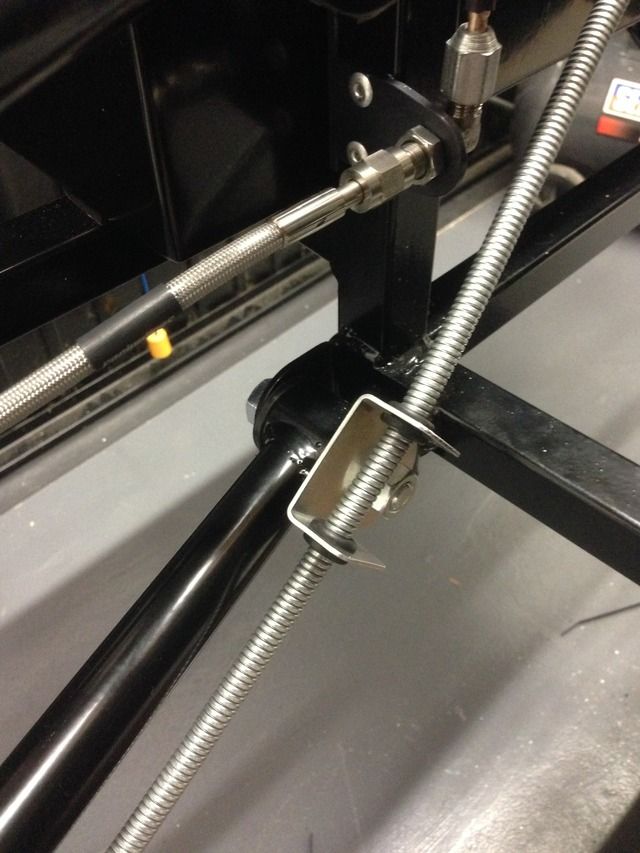
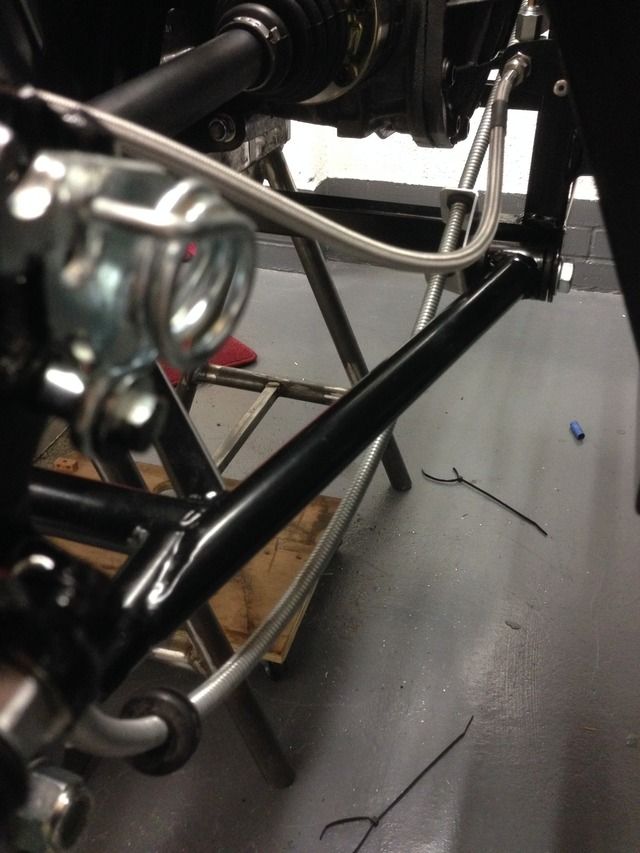
This is a bracket for over the diff, just need some more grommets
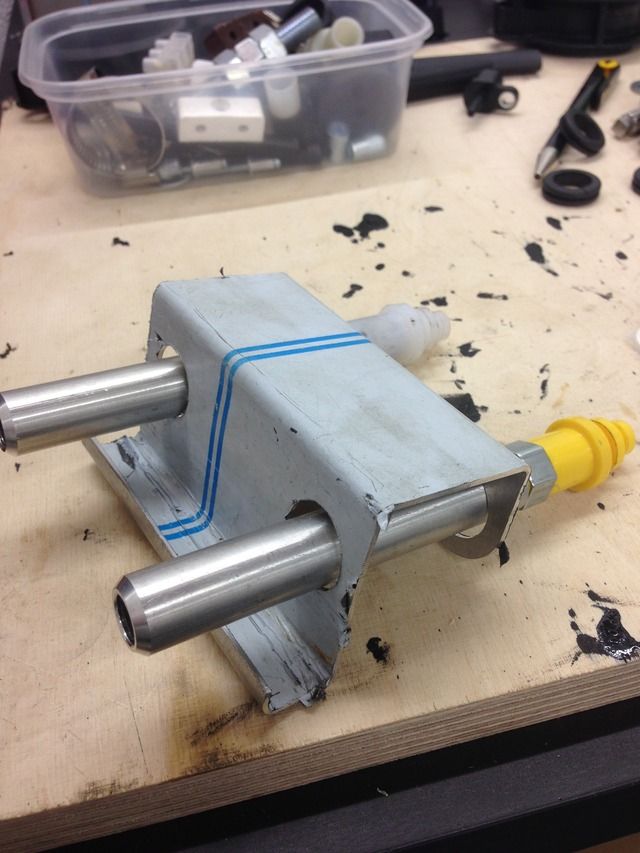
Rosco86 - 1/10/15 at 08:16 PM
Well got a few jobs done this week, got my handbrake bracket fitted, really pleased with this as its held the cables dead in the right place
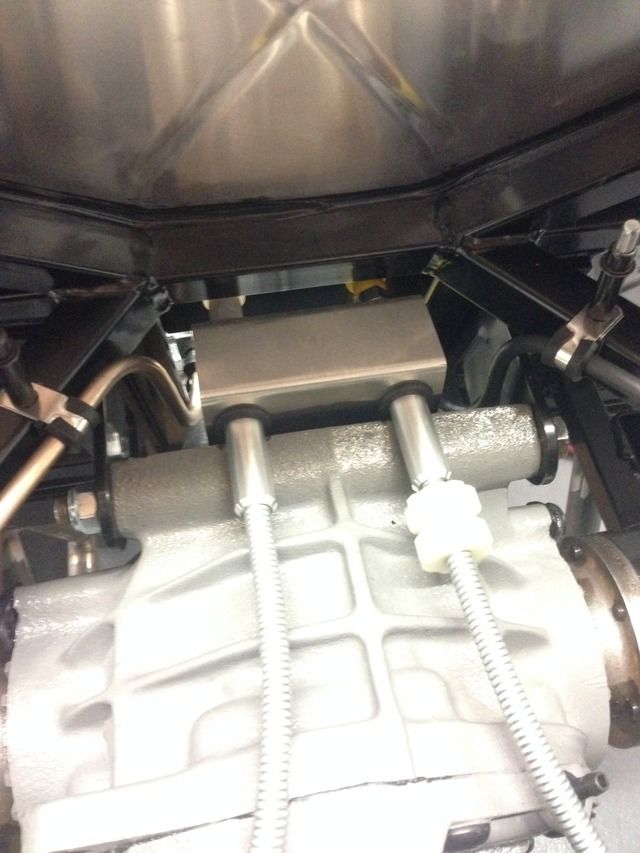
Decided on what switches I'm going to use for my dash, and got some switch guards, only thing there 4mm not 5mm so I think they will fail iva so
I'm going to have to push some rubber tube over them I think
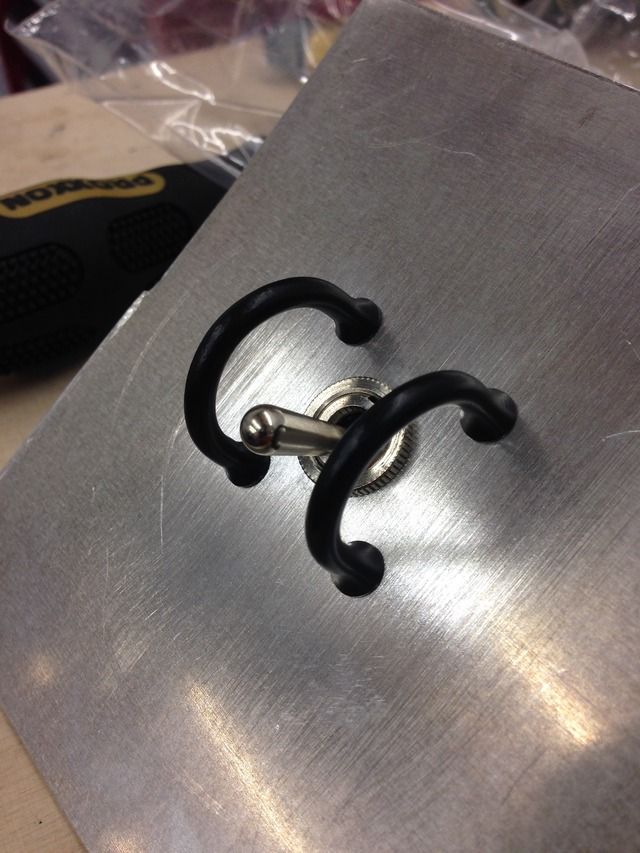
Also made a mount for my wheel speed sensor, there was a spare hole on the engine so I used this, it's going to pick up off a long bolt on the
prop adapter
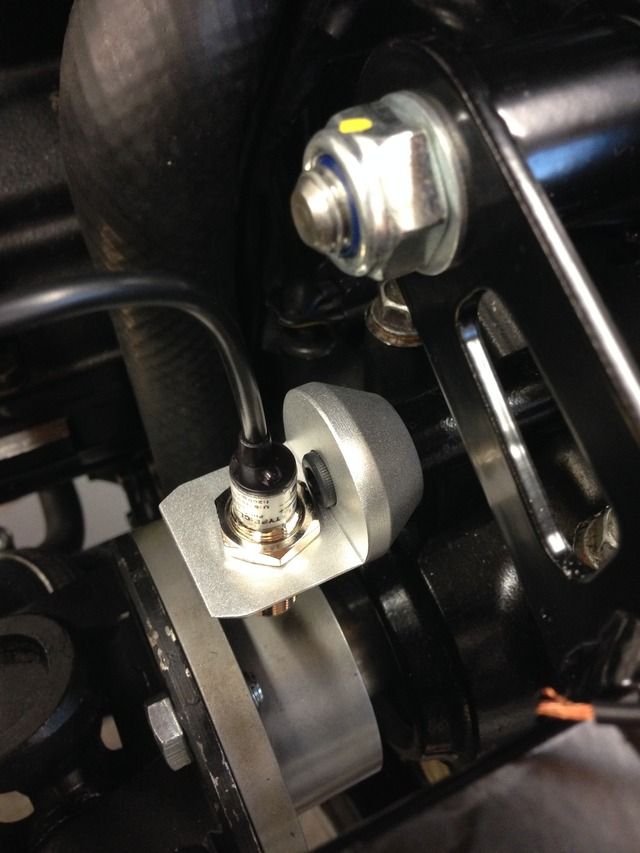
It sits closer than it looks, it's just the angle of the pic
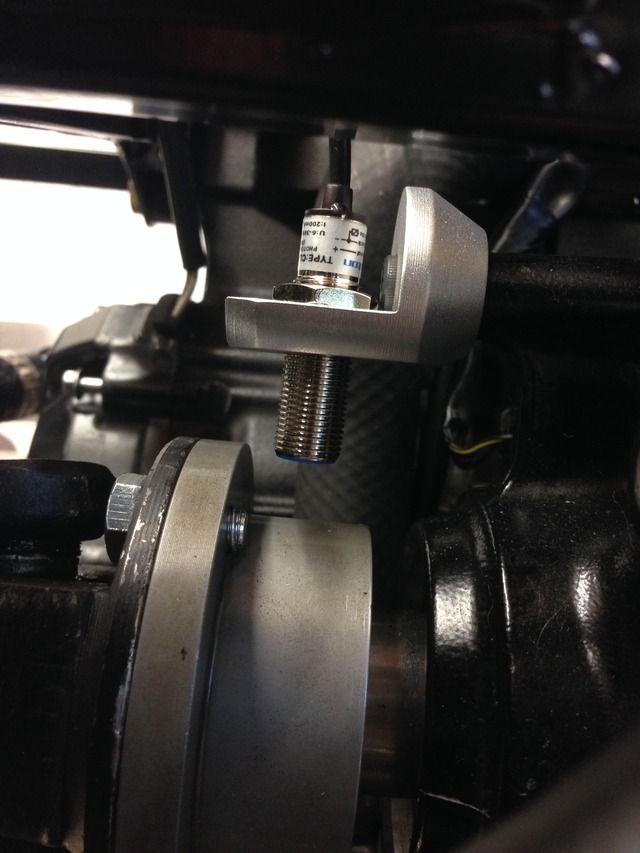
rdodger - 1/10/15 at 08:27 PM
CBS 5mm Switch guard
http://www.carbuildersolutions.com/uk/toggle-switch-guard
theduck - 1/10/15 at 08:33 PM
I used this on mine
BMW MINI ONE COOPER S R50 R52 R53 TOGGLE SWITCH PANEL NO ASC/DSC 6917985
Johneturbo - 7/10/15 at 03:32 PM
Amazing build, top quality fabrication
I only got to page 7, as from page 8 none of your photos are coming up
CosKev3 - 7/10/15 at 03:49 PM
quote:
Originally posted by Johneturbo
Amazing build, top quality fabrication
I only got to page 7, as from page 8 none of your photos are coming up
Must be your laptop/Internet connection etc,all pics showing fine on mine
Johneturbo - 7/10/15 at 03:51 PM
quote:
Originally posted by CosKev3
quote:
Originally posted by Johneturbo
Amazing build, top quality fabrication
I only got to page 7, as from page 8 none of your photos are coming up
Must be your laptop/Internet connection etc,all pics showing fine on mine
Very odd, as the photos on the last page are showing up. but not from 8 onwards!
ETA ok seems to be ok now! laptop throwing a tantrum!
[Edited on 7/10/15 by Johneturbo]
Rosco86 - 9/10/15 at 08:13 PM
quote:
Originally posted by Johneturbo
Amazing build, top quality fabrication
I only got to page 7, as from page 8 none of your photos are coming up
Thanks,
I'm sticking with these switch guards as they weren't the cheapest!
Rosco86 - 9/10/15 at 08:23 PM
Right update time, been bitting and bobbing all week really
Rear lights temporarly mounted and wired to the front
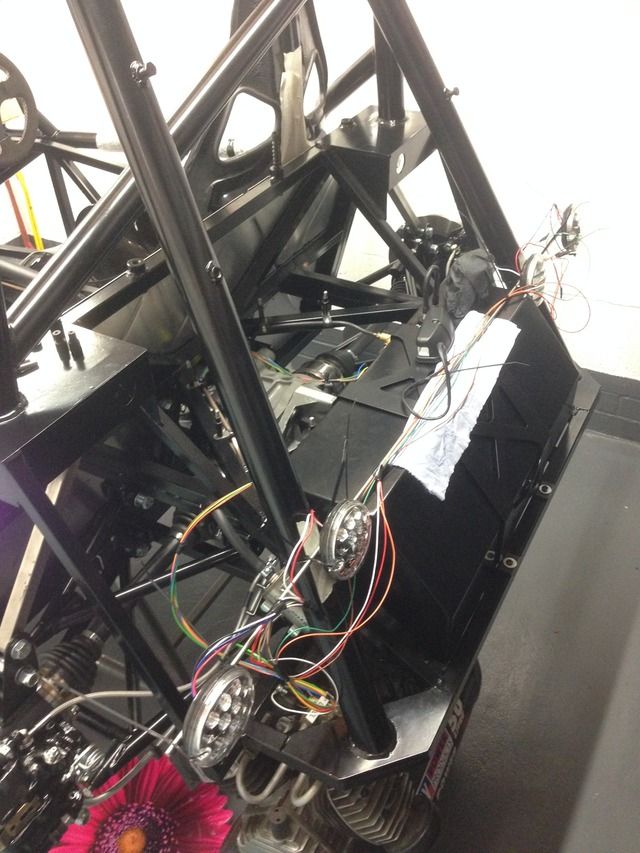
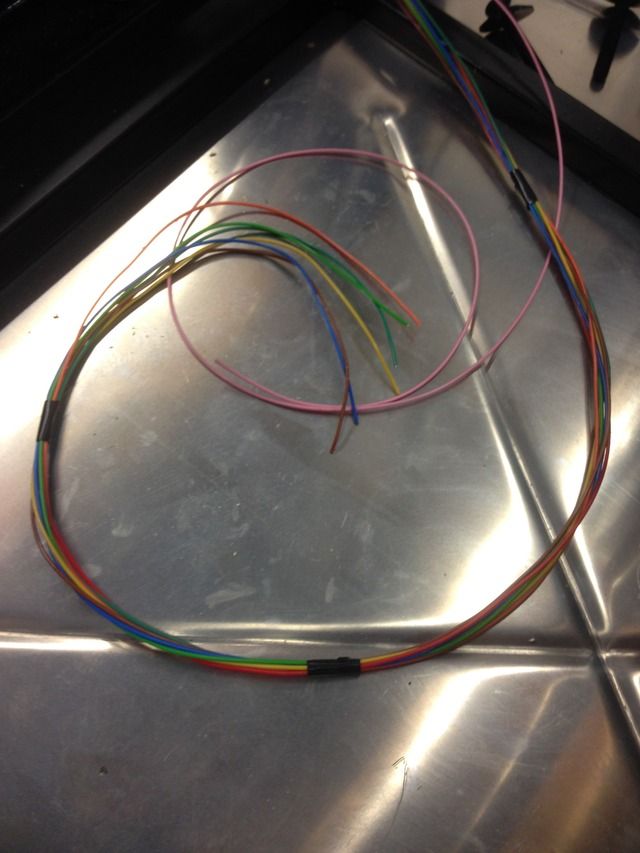
Makeshift dash sorted so I can start to get things wiried
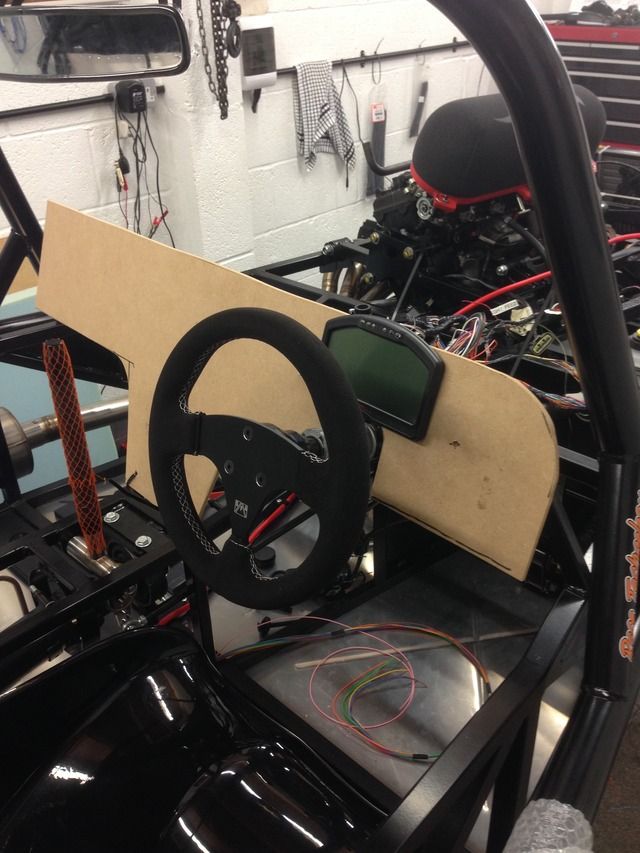
Battery cables done
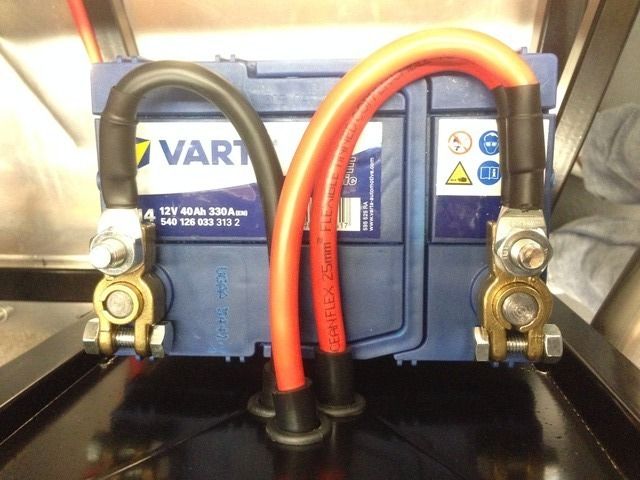
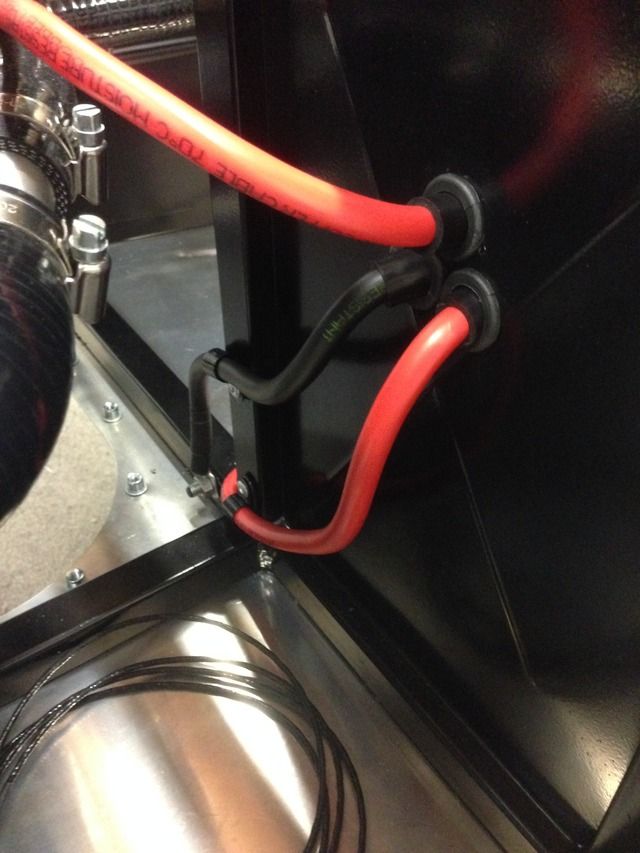
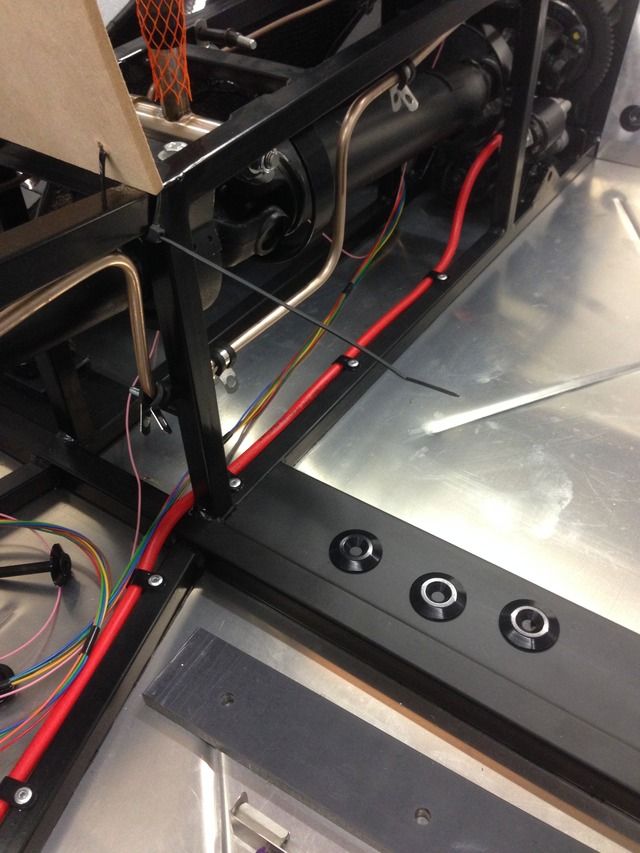
I'm using these terminal bars for my wiring

Toggle switches for my dash
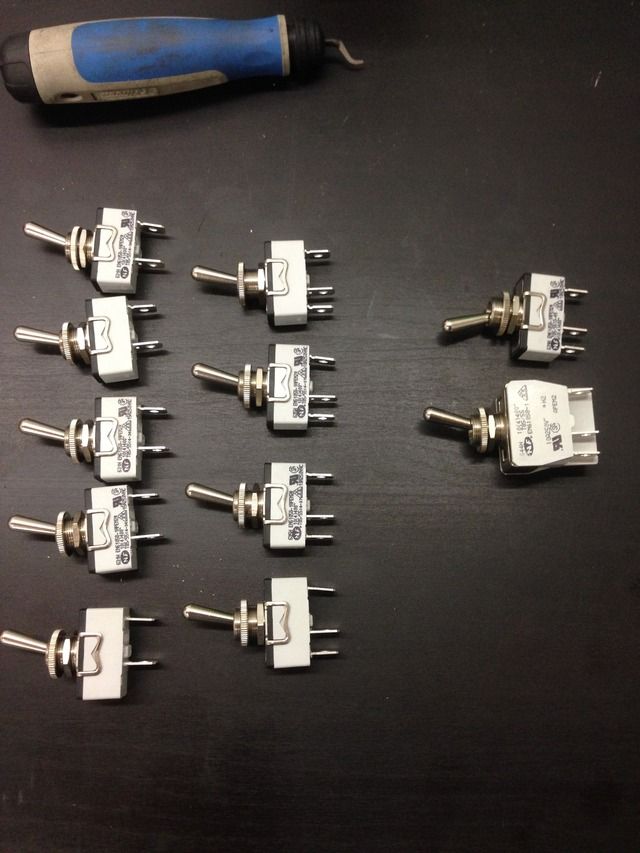
New gear lever made
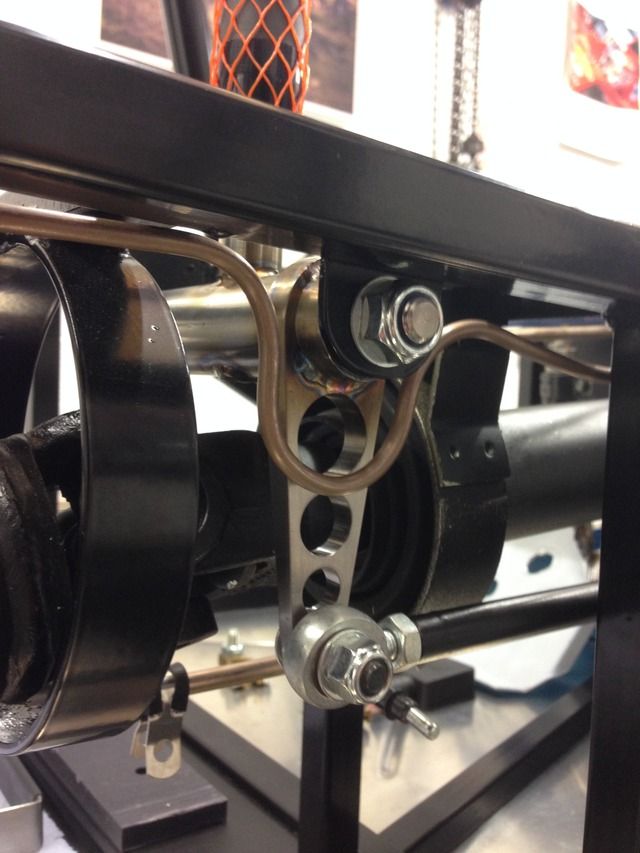
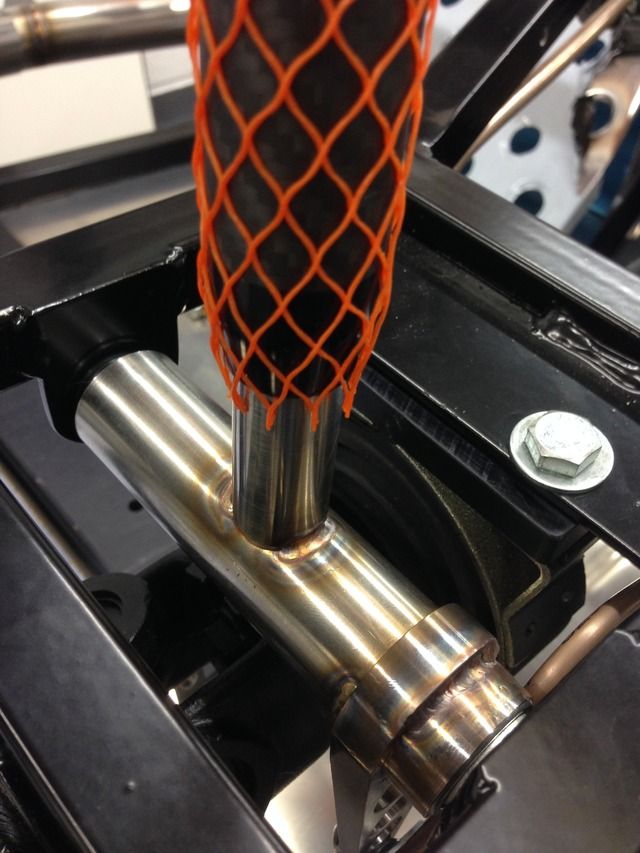
Also made a bracket for the starter relay
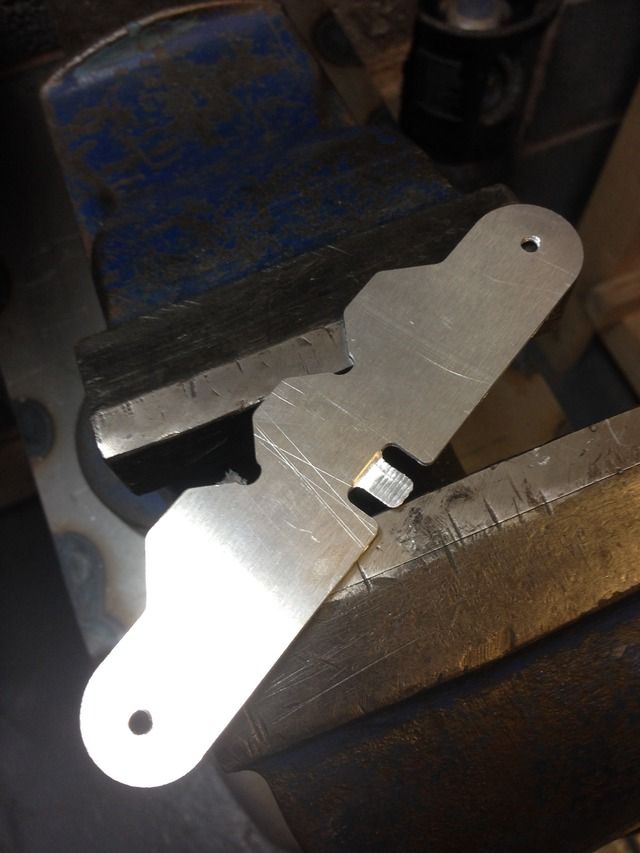
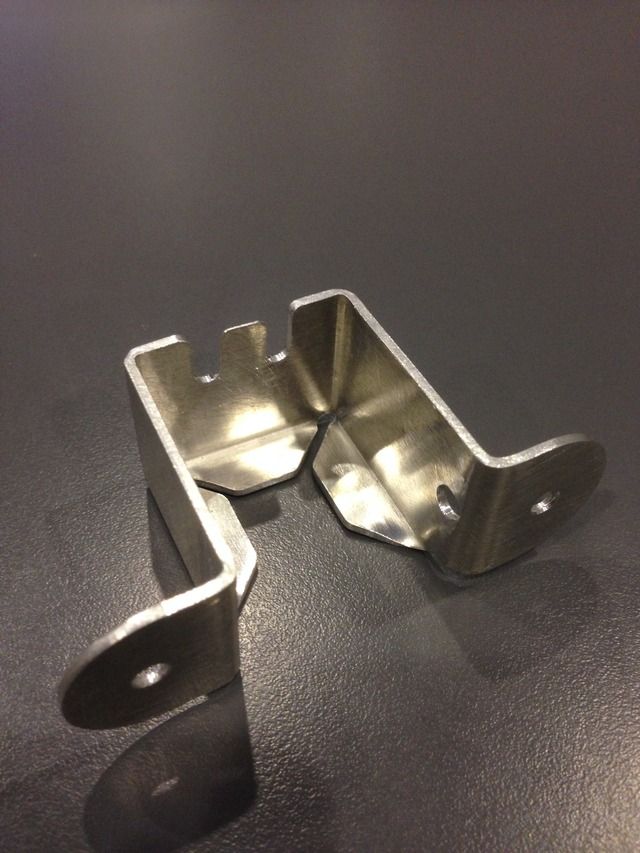
theduck - 9/10/15 at 08:48 PM
I love this build. Would love to see it one day.
Rosco86 - 11/10/15 at 08:25 PM
quote:
Originally posted by theduck
I love this build. Would love to see it one day.
Cheers pal, everything will be covered when it's finished lol
Rosco86 - 11/10/15 at 08:32 PM
Almost two full days of wiring!
All dash wires into terminal rails
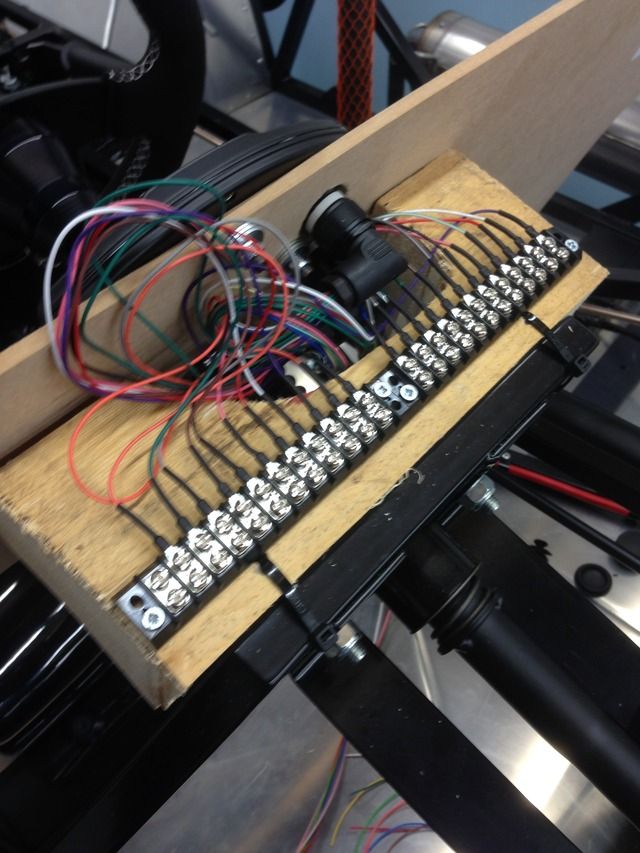
These are the ends, crimp forks soldered on
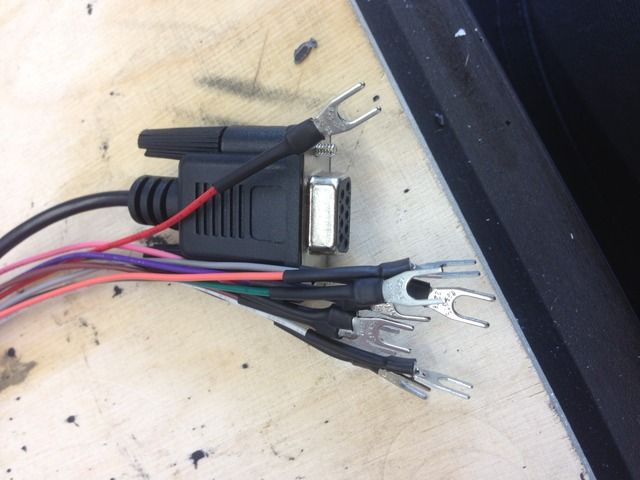
Two 13 way plugs fitted on the end of the bike loom and fly leads out the other side to the rails
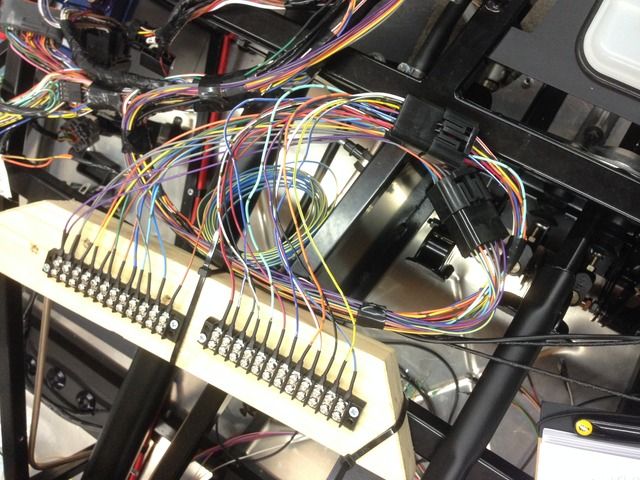
Engine loom in position and getting neater
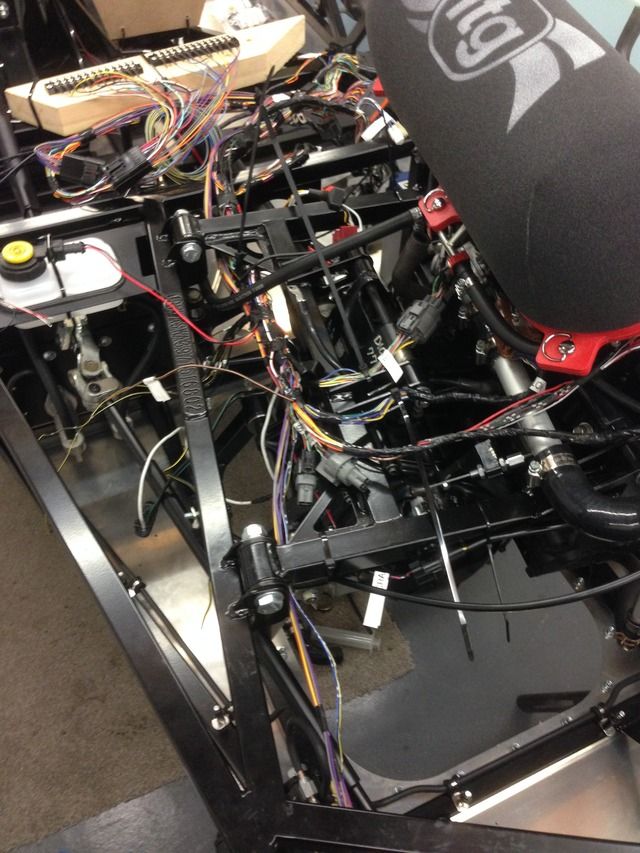
Water pump removed, need to block the hole in the block, I'm going to run an electric water pump
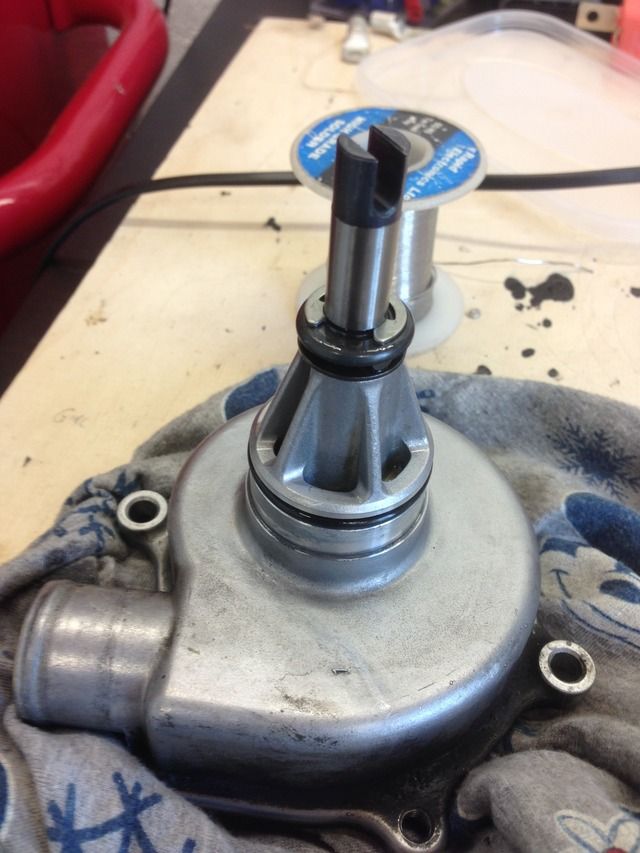
And that's it, doesn't look a lot, got a few more plugs to fit and get my switches mounted then I will be linking the rails together, I
might get rid of the rails when it's all wiried but I will see, I did it this way as its all laid out and I'm hoping it will be easy to keep
track of
Adamirish - 11/10/15 at 08:38 PM
Wiring is the part of any build that scares me! You seen to have it under control though. Love it!
CosKev3 - 12/10/15 at 07:17 AM
Awesome as usaul!
I can't remember seeing your brake light switch?
Only reason I mention it whilst your sorting wiring I would look into fitting a switch on the pedal rather than a pressure one in line.
One of my winter jobs,as I've found you can be braking without the lights coming on,you need to press pedal pretty hard to get lights on.
Last thing you want in one of these is some dippy driver in a Chelsea tractor rear ending you!
Rosco86 - 12/10/15 at 11:20 AM
cheers,
yeah ive ordered a little limit switch, ive just got to work out how to mount it, i should of done it when i drew the pedal box up but didn't
think, yet another job to do!
Rosco86 - 22/10/15 at 08:58 PM
Right small update, had to work on the house all weekend!!!
Water pump blank bung made
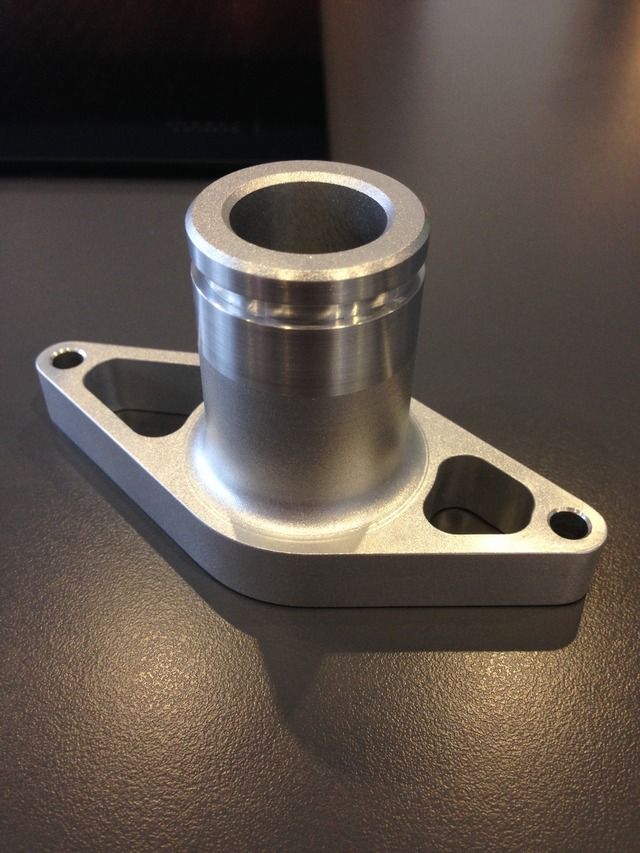
Bolted up
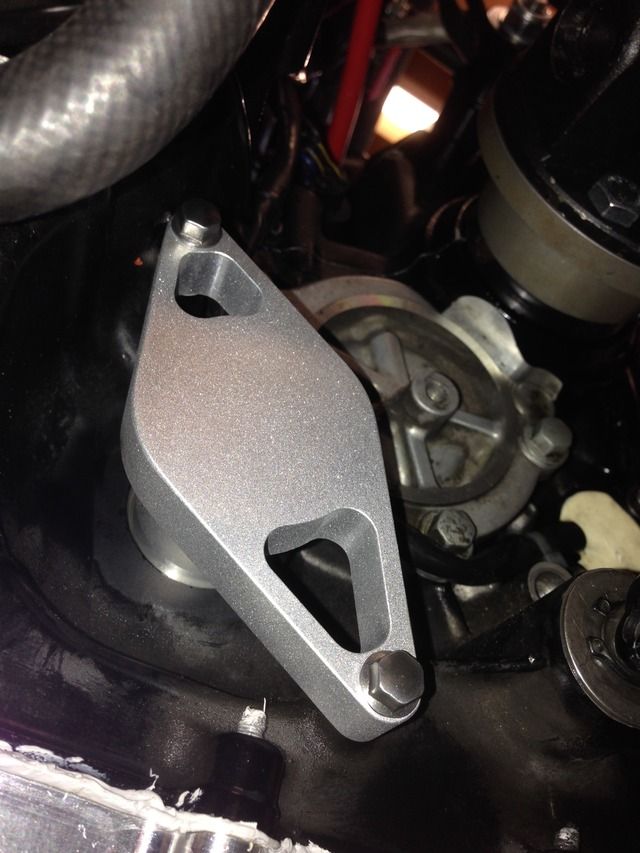
Also made a reducer to join these two pipes
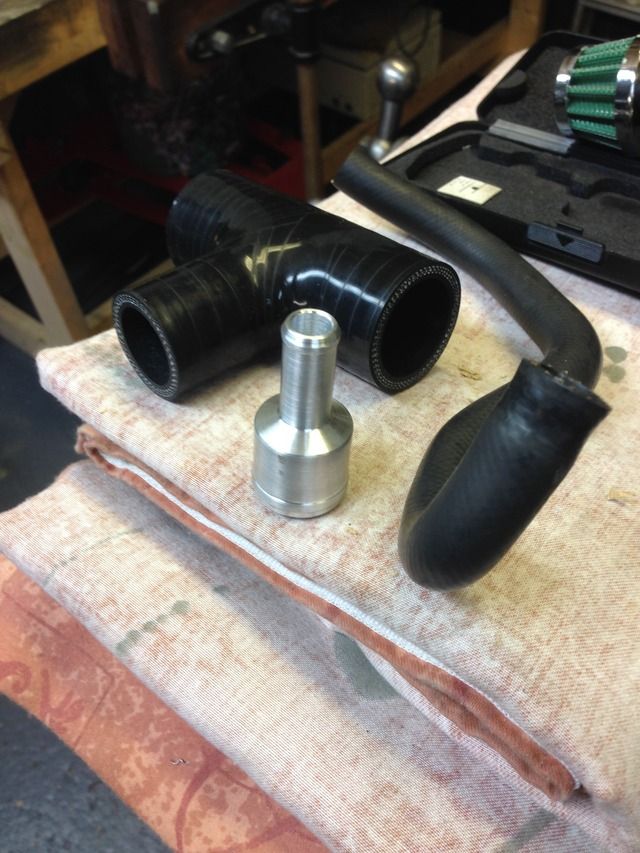
Switches fitted in temporary dash, position not final
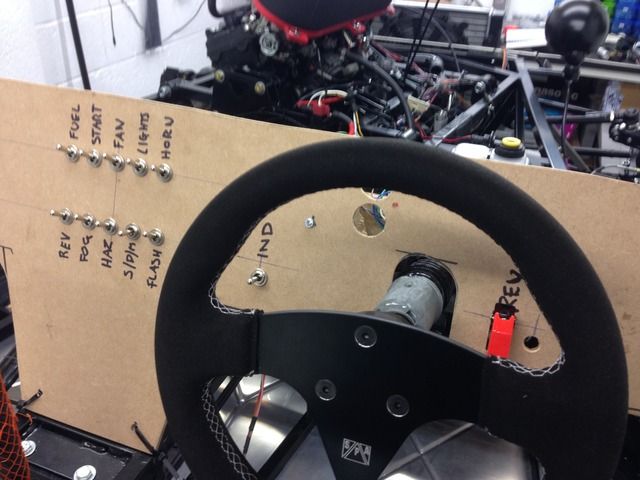
Relay bracket fitted and leads finished
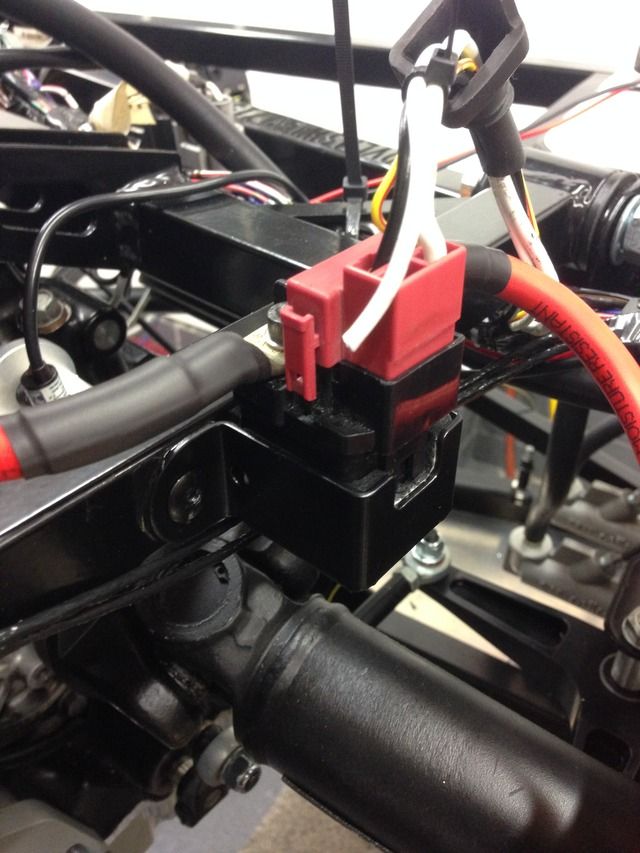
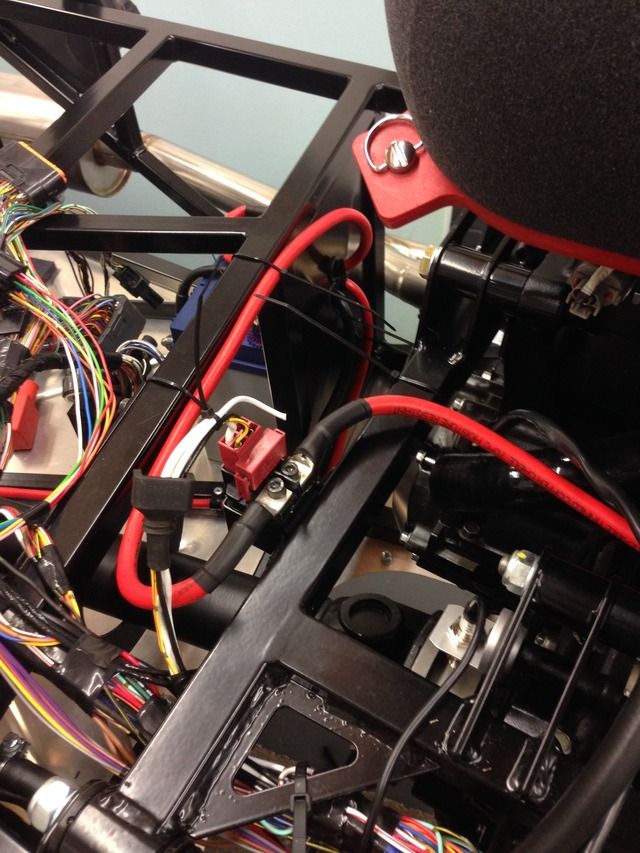
Rosco86 - 24/10/15 at 09:30 PM
Got my electric water pump fitted and my painted pipes back on
Oh and I had to bore out some rubber grommets so the pipe fitted snug
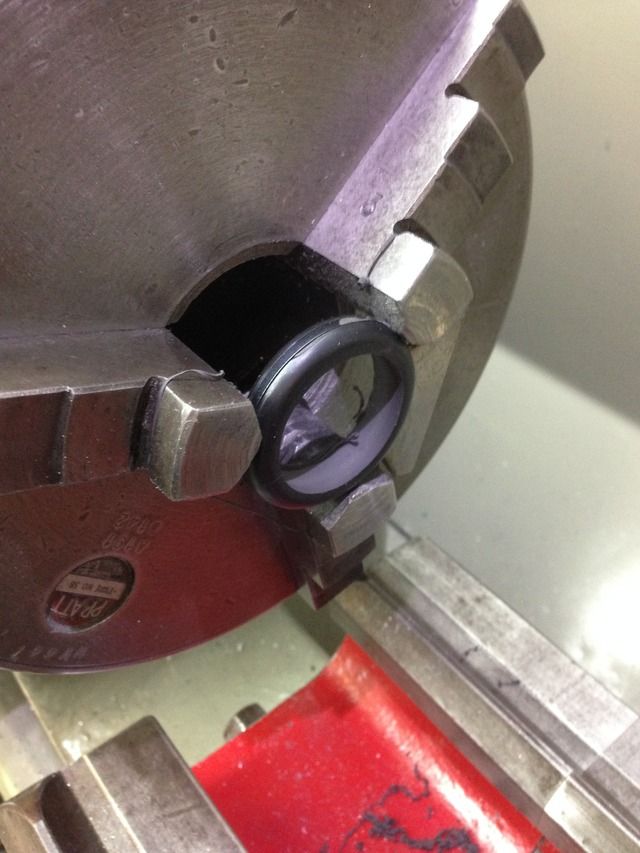
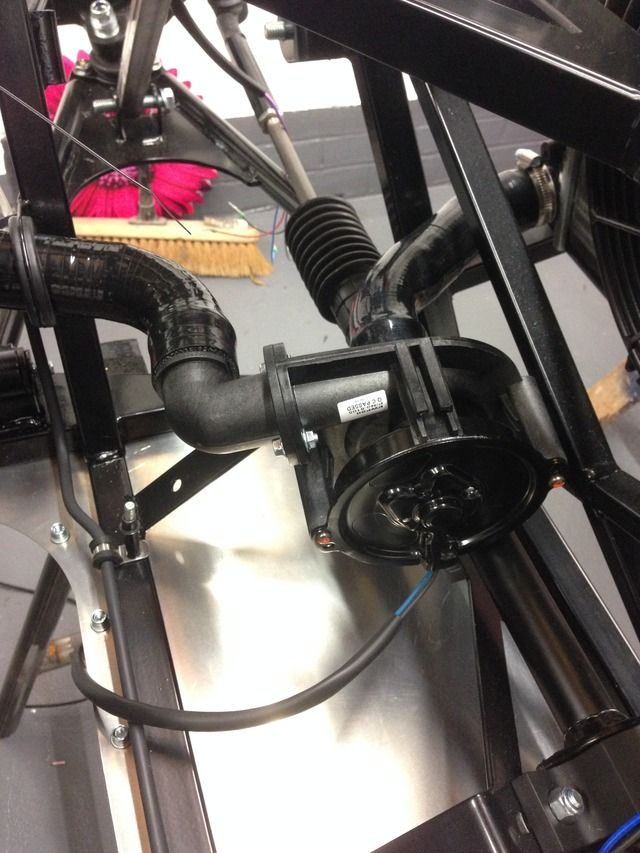
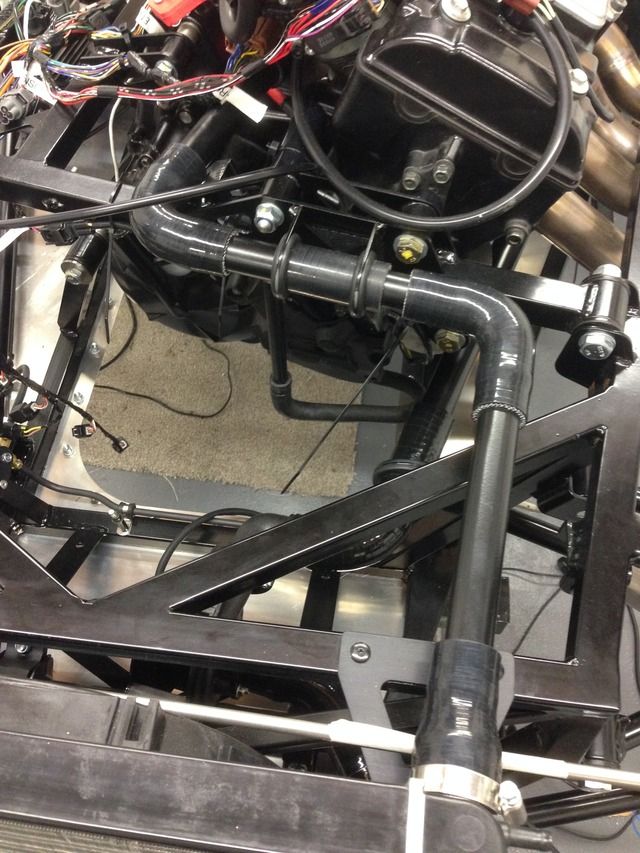
Me and my Dad spent all day wiring, we got the indicators working and the tail lights, and got the digi dash powered up, hopefully another few
weekends and the bulk of the wiring should be done! We might try and get the engine started again next week to make sure it still runs!!!
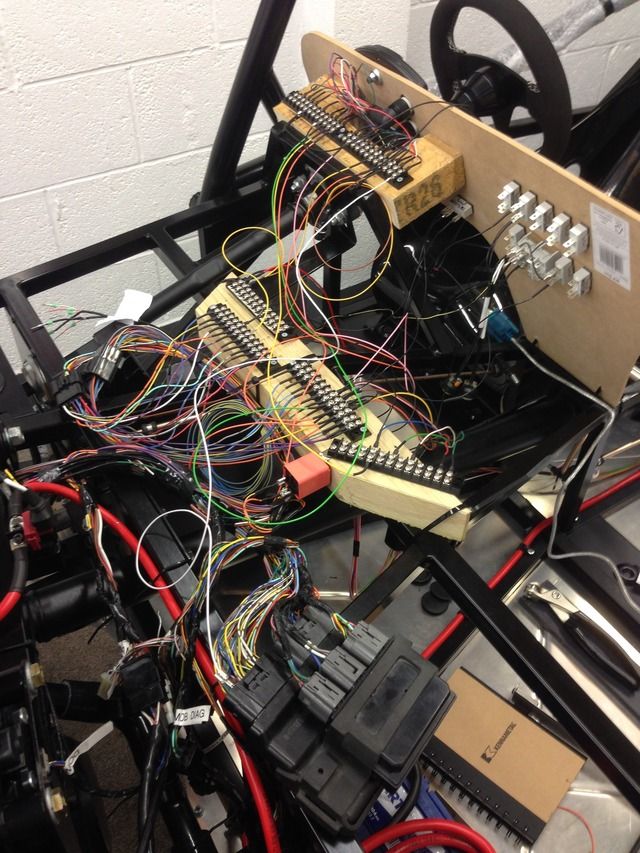
[Edited on 24/10/15 by Rosco86]
Rosco86 - 10/11/15 at 09:04 PM
Right, I've been busy on the wiring for the last few weeks, it's all done but needs tidying when I get my dash etc

I've taken it all off now as it was in the way a bit
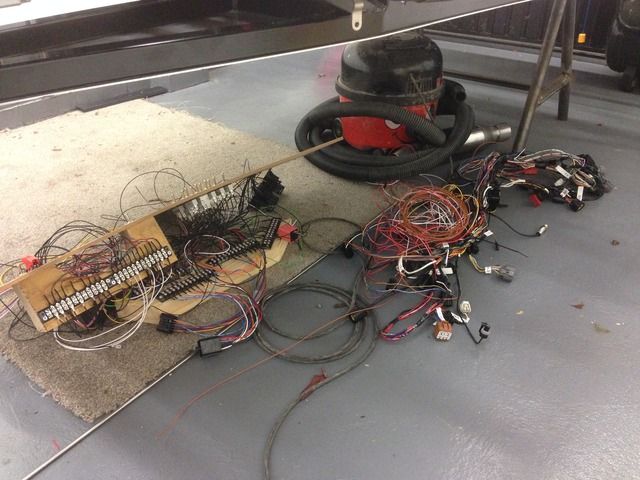
Also stared on my tunnel panels

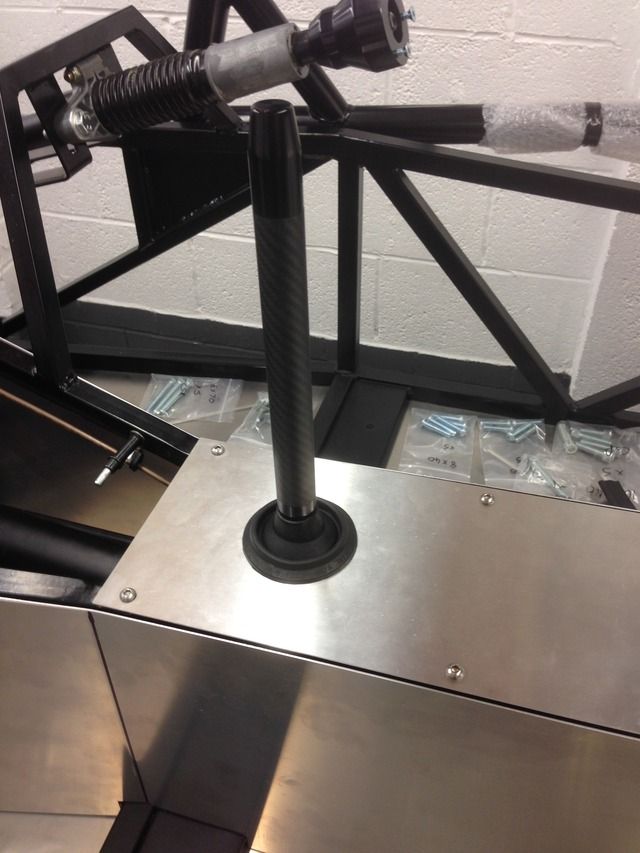

I'm using wing beading to brake the edges
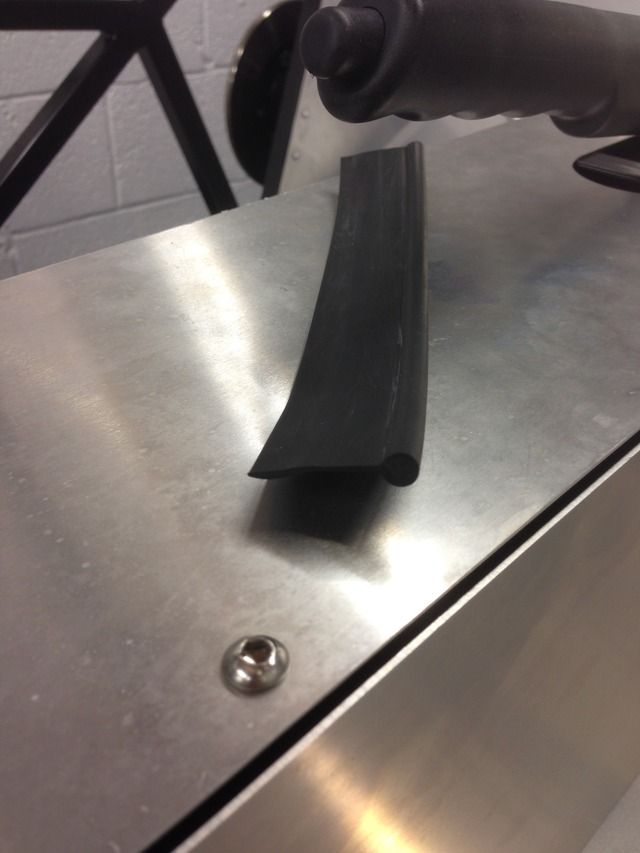
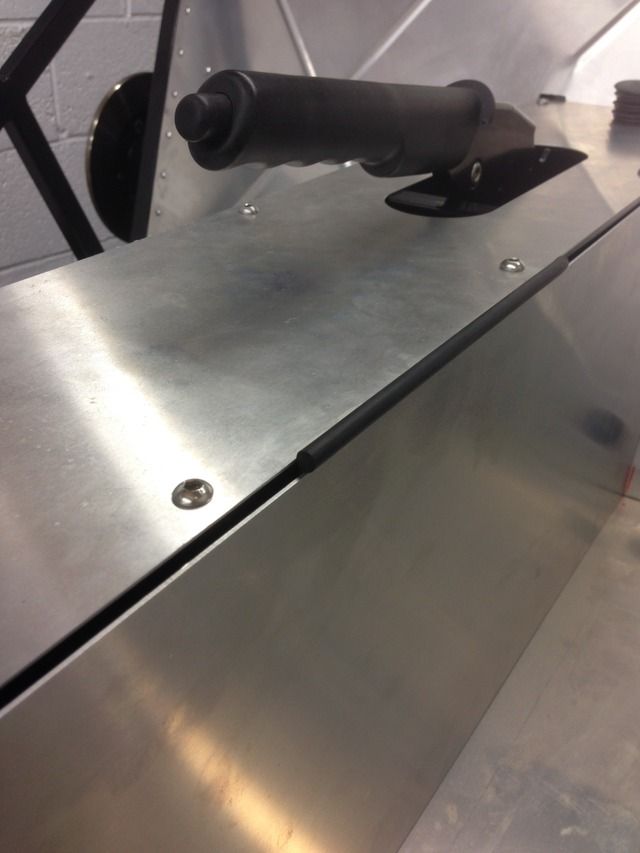
Also got my hard pipes rivited in place
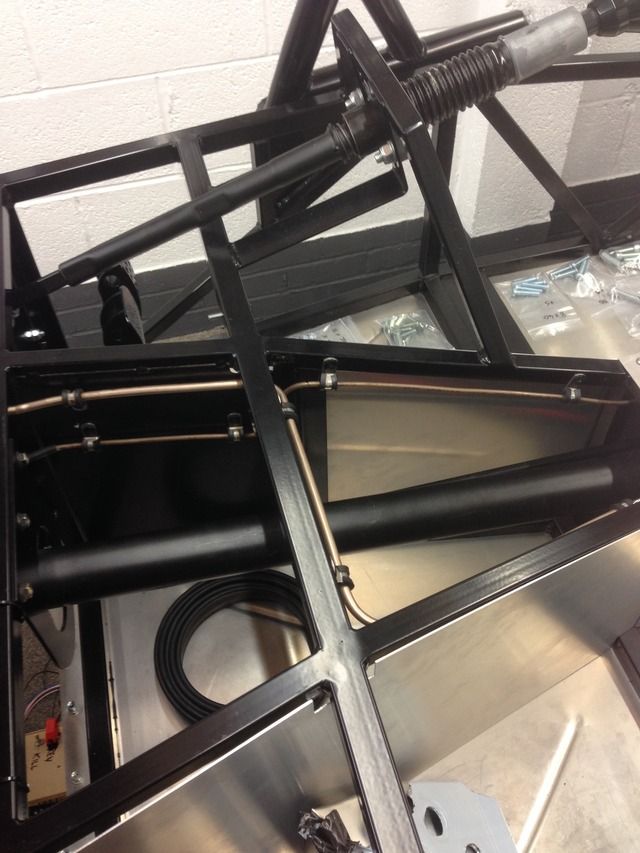
Oh and one last thing.............
My body work has been ordered!!!!! Yay
rdodger - 10/11/15 at 10:05 PM
Neater than a neat thing being neat!
Tidy too!
Adamirish - 10/11/15 at 10:09 PM
After seeing your pictures one thing puzzles me. Where exactly are you going to mount the Henry? And what are the performance benefits?
Still looking ace mate. Keep it up!
Rosco86 - 11/11/15 at 08:45 AM
haha cheers guys!
Rosco86 - 14/11/15 at 05:56 PM
Right full day again today, first job, I wanted to add a throttle return spring so the pedal felt a bit harder
And it turned out like a dream
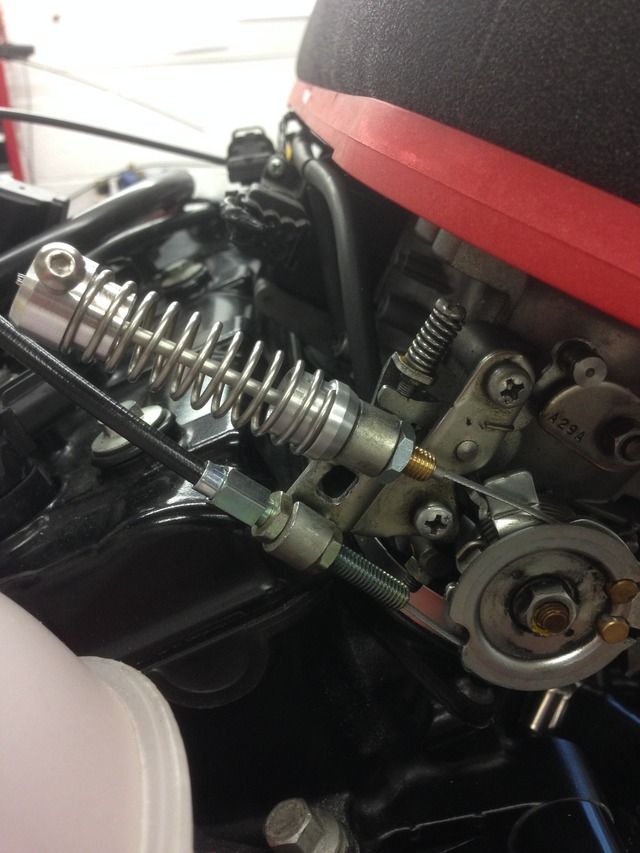
Then made a sump plug to fit my oil temp sensor, fitted it with thermal cpu compound to try and help heat transfer
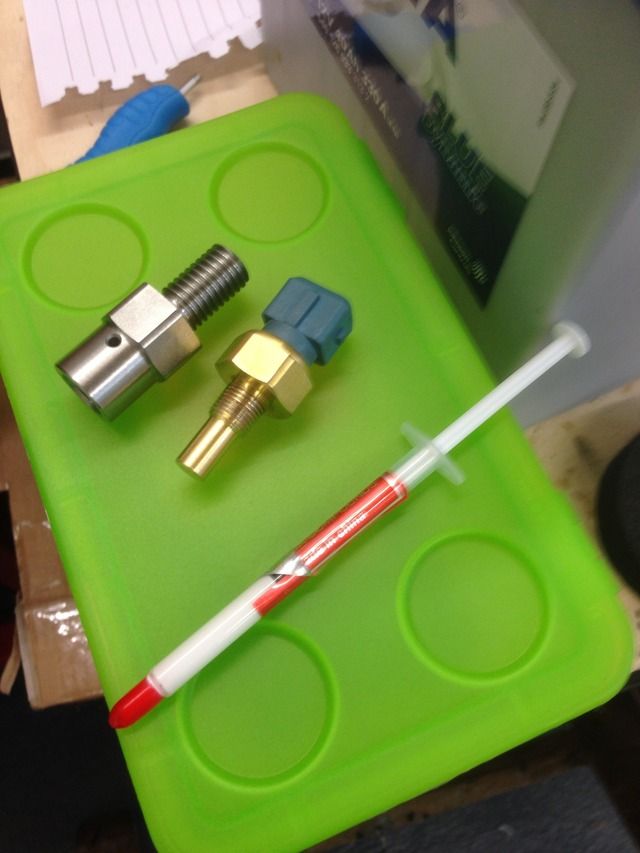
Bleed hole
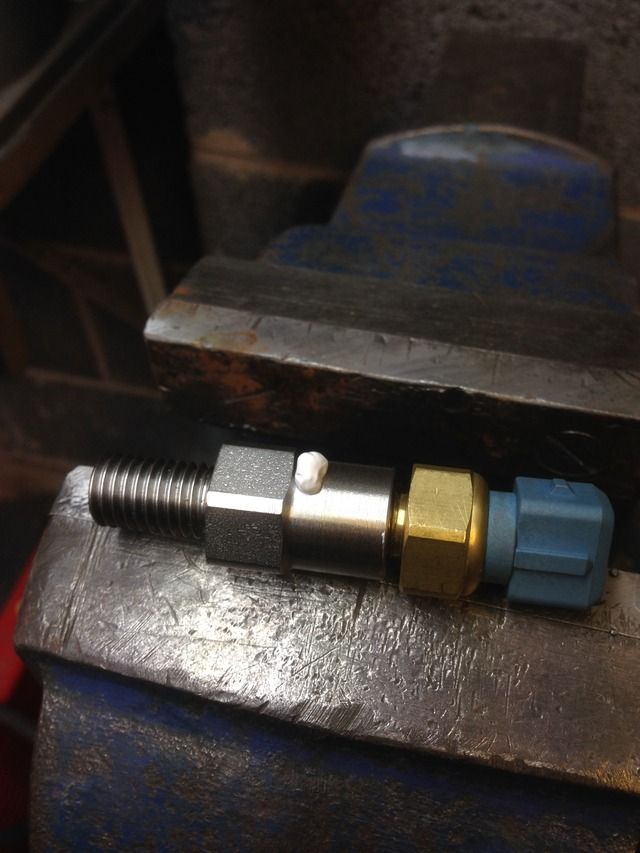
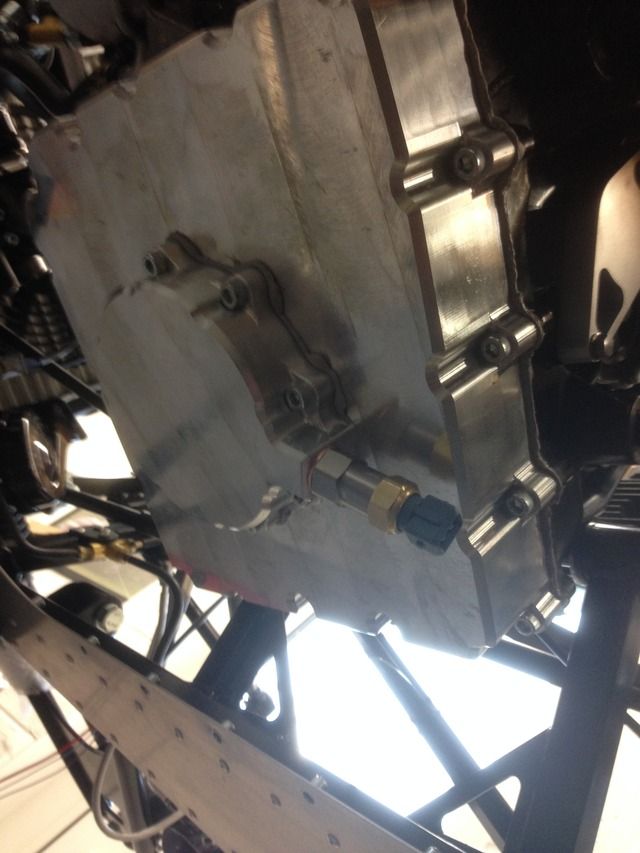
Then got the engine bay loom wrapped back up with pvc loom tape
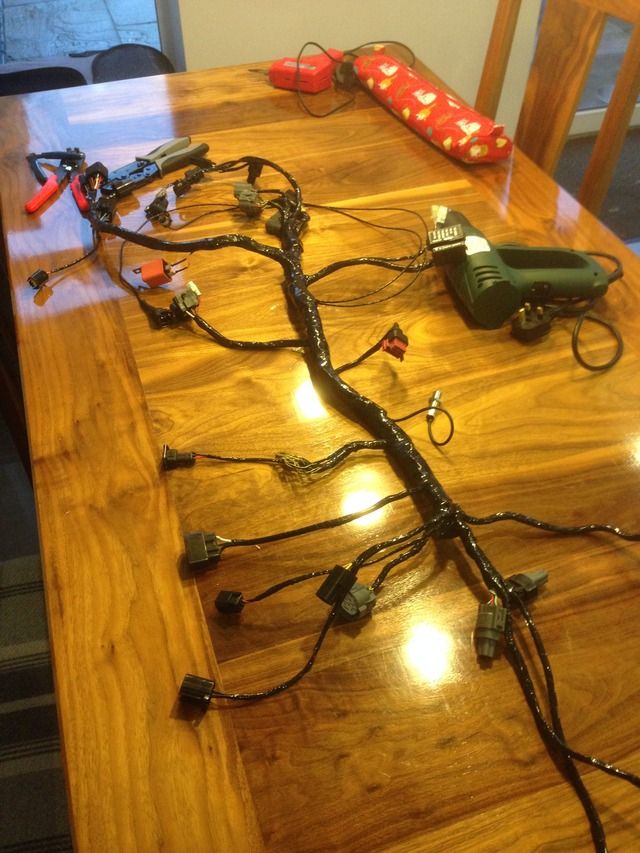
Then finished fitting my tunnel panels, I decided to use rivnuts and bolt them, I've not used a lot as I'm going to use dots of sealer to
stop them rattling
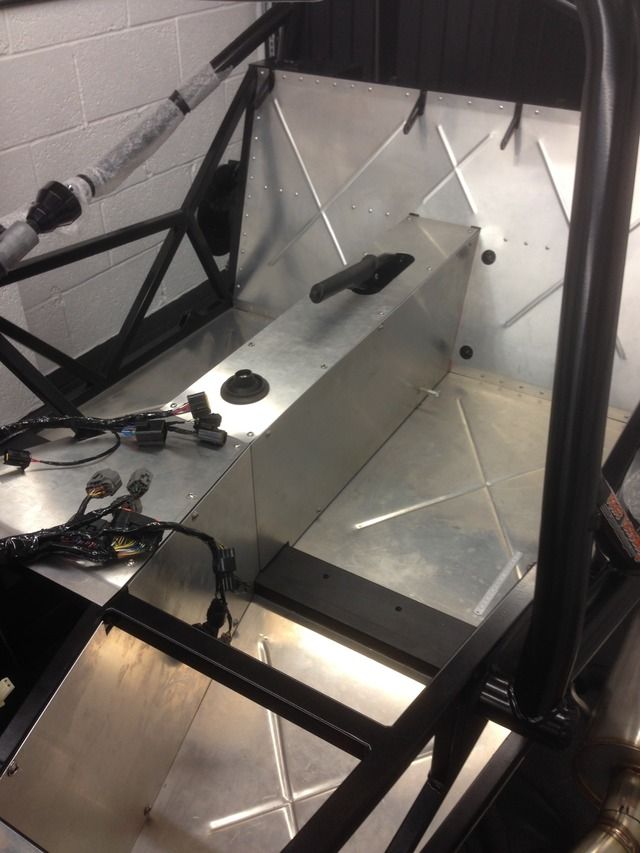

Loom dropped back somewhere near
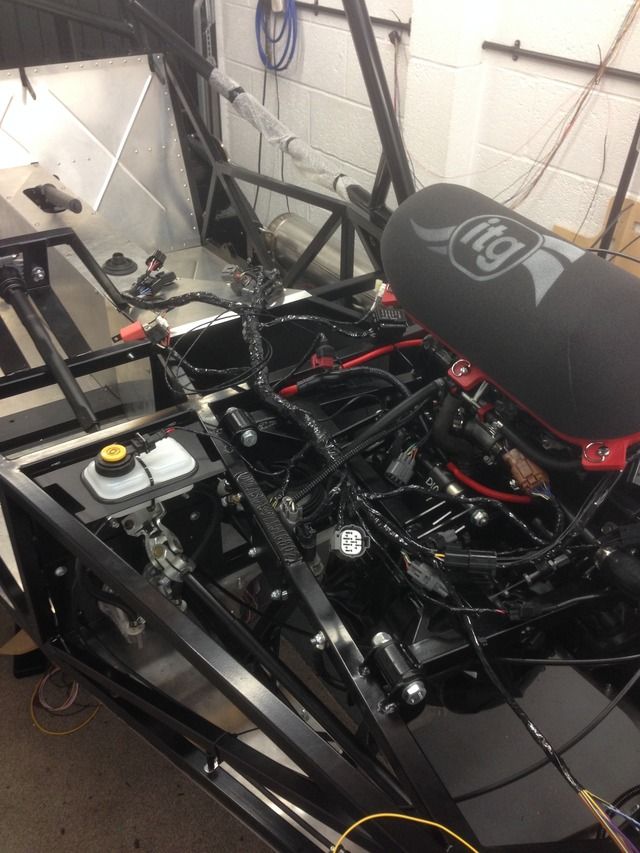
Adamirish - 14/11/15 at 10:40 PM
The most over engineered throttle return Spring I have ever seen! Love it! I guess it's somewhat adjustable too which would be useful. Great work
mate, keep it up!
Rosco86 - 16/11/15 at 08:12 PM
Cheers pal, but in all honesty it only took about 30mins start to finish
Rosco86 - 16/11/15 at 08:18 PM
Pedal back stops done
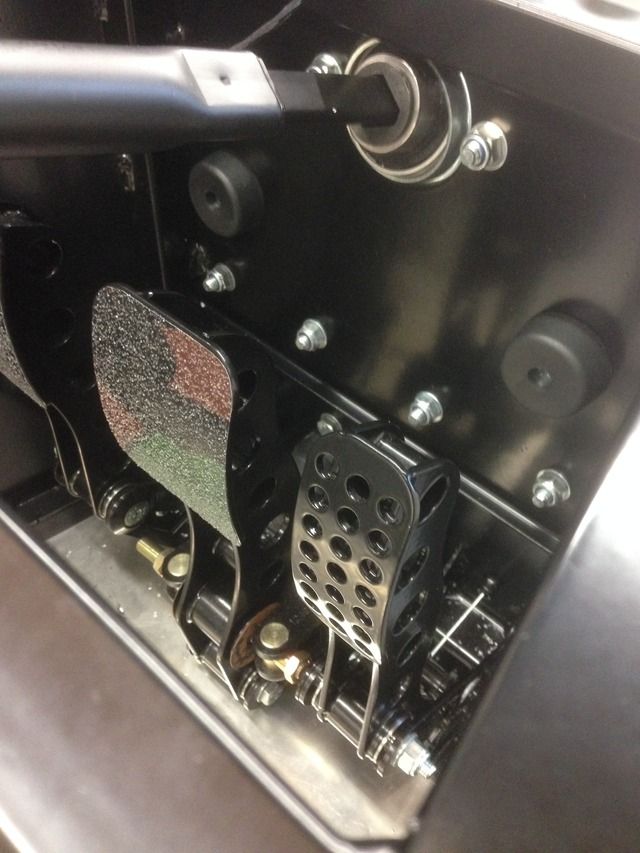
Then sorted my brake light switch, took me a while to hatch a plan but I think it will work ok
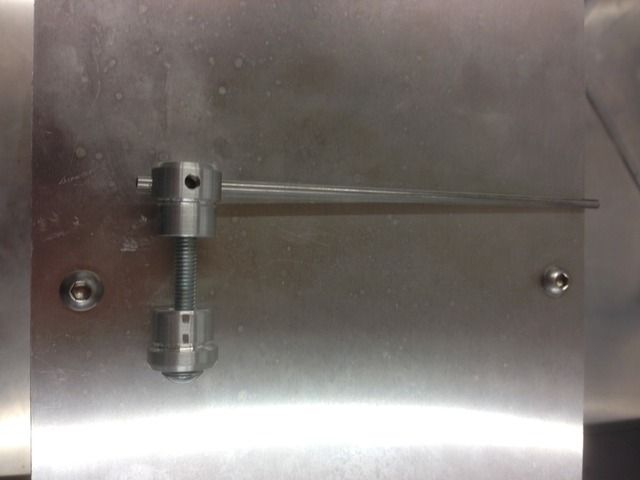
Nice and adjustable
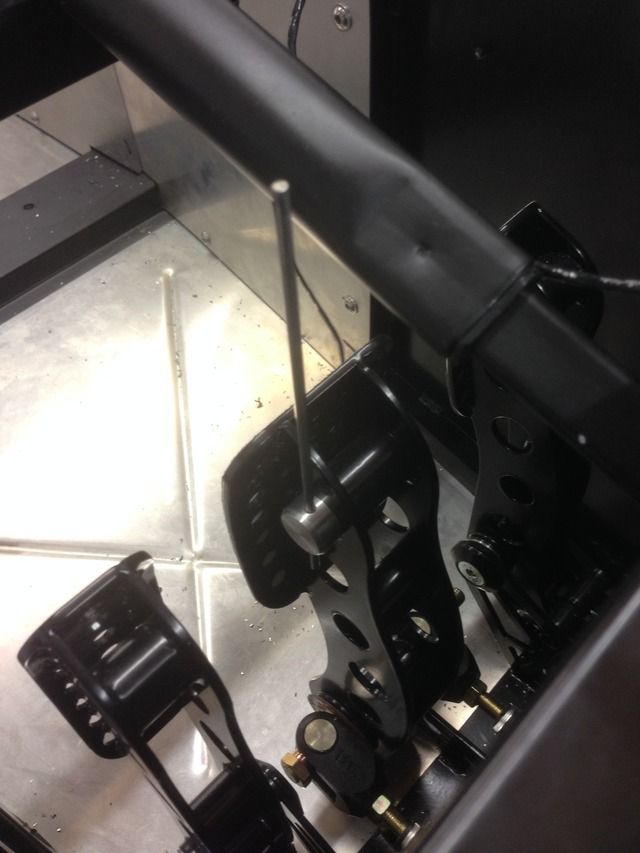
Then a switch will be mounted above so as soon as the pedal is touched it releases the switch
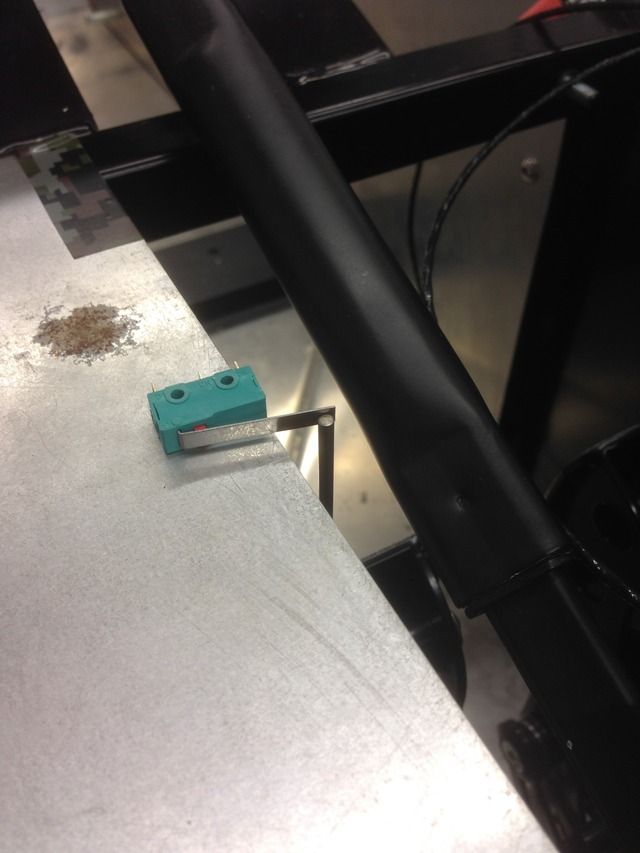
That was yesterday, then tonight I've made a little battery tray on my dads cnc
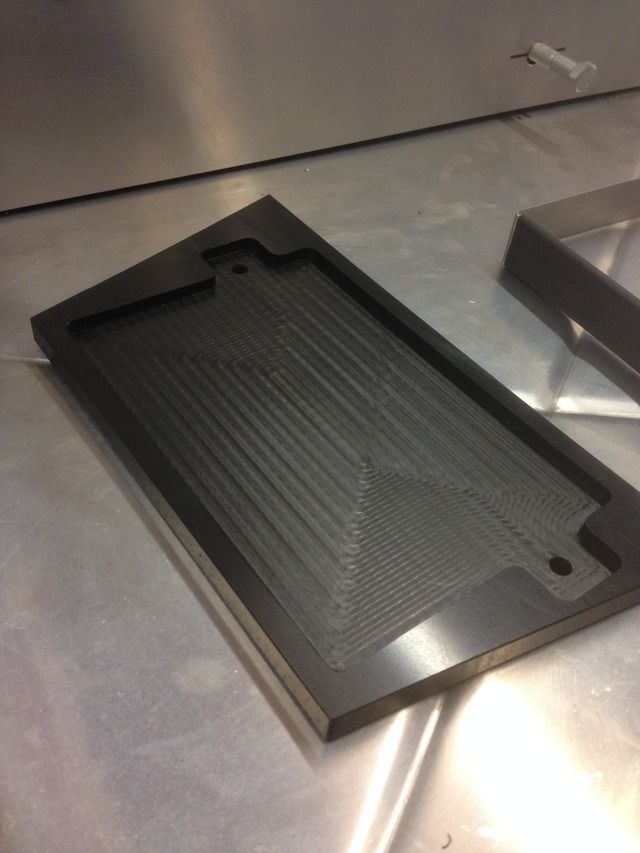
In place, just needs a little fitting
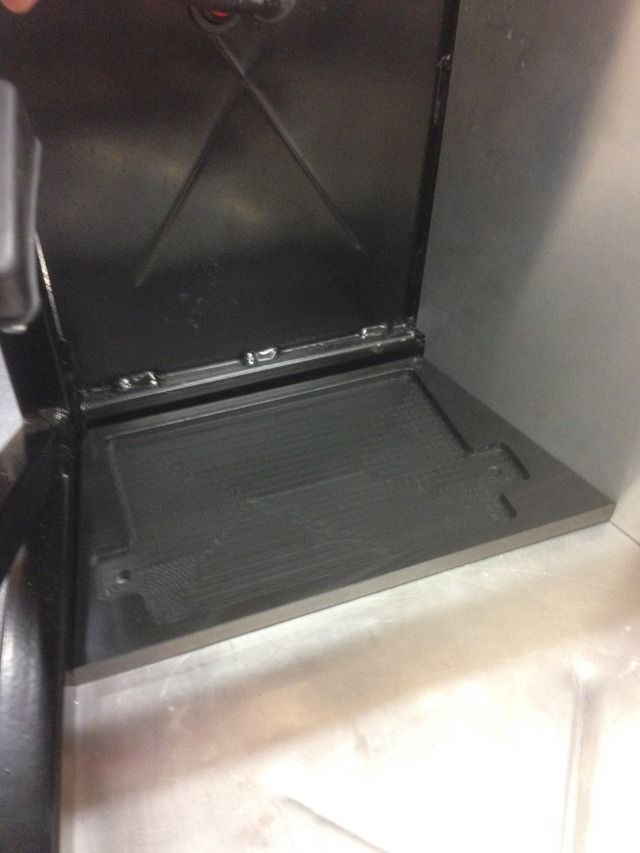
The clamp will be bolted from underneath the floor and hold everything in
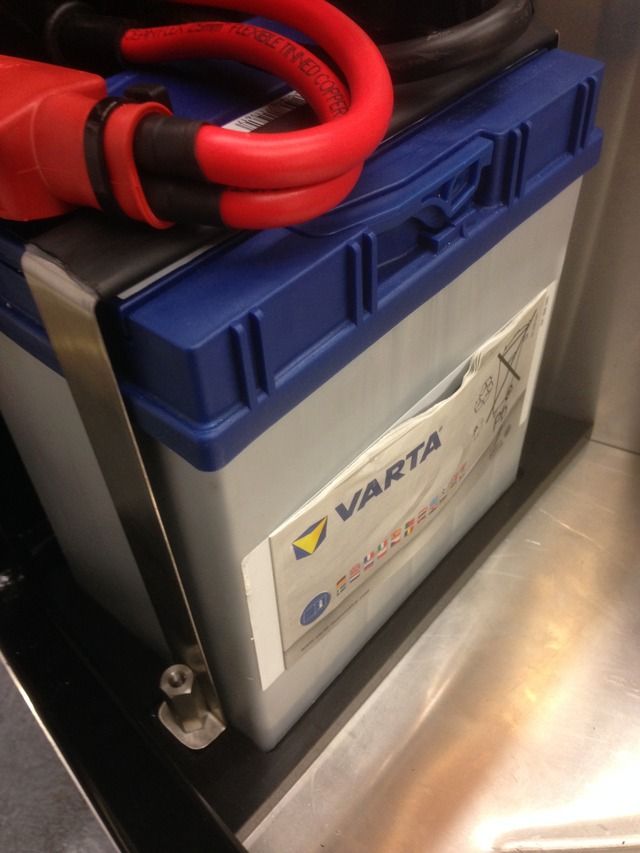
christim - 16/11/15 at 09:09 PM
Almost a shame it'll all soon be covered up in bodywork...every piece really top quality
CosKev3 - 16/11/15 at 09:31 PM
As above,spot on
One thing though,have you sat in the passenger seat with the battery where it is?
If anyone that's going to be a passenger is 6 foot+ they won't thank you for fitting the battery there!
[Edited on 16/11/15 by CosKev3]
Rosco86 - 2/12/15 at 07:51 PM
quote:
Originally posted by CosKev3
As above,spot on
One thing though,have you sat in the passenger seat with the battery where it is?
If anyone that's going to be a passenger is 6 foot+ they won't thank you for fitting the battery there!
[Edited on 16/11/15 by CosKev3]
Cheers chaps!
No I've not to be fair, I will chuck a seat in and try!
Rosco86 - 2/12/15 at 07:54 PM
Right well ordered my shocks from protech shocks, what can I say! A perfect service! Even did them all black for me! Well happy

ste - 11/12/15 at 11:04 PM
Rosco, this is a lovely build, one of the best I've seen by far.
One little thing for you though, you need to have the horns pointing down or level so they don't fill with water. Just fitted mine this week and
the pack had that warning on.
Do you take orders on the engraved chassis numbers?
ste
Rosco86 - 17/12/15 at 08:00 PM
quote:
Originally posted by ste
Rosco, this is a lovely build, one of the best I've seen by far.
One little thing for you though, you need to have the horns pointing down or level so they don't fill with water. Just fitted mine this week and
the pack had that warning on.
Do you take orders on the engraved chassis numbers?
ste
Cheers mate! Yeah I will spin them round cheers!
Not on the numbers I'm afraid but I did see someone on eBay offering some stamped ones that look good and only about �7 or so
Rosco86 - 17/12/15 at 08:34 PM
Right, update time! It's been a while as I've had some issues with my bodywork from Equinox, it's took the shine of the whole project
really.
To cut a long story short, hired a van, drove 3hrs, collected the panels, got home and unwrapped everything, almost every pannel had scratches on some
worse than others, a few had light streaks in the gel coat, the nose cone had some good blobs of resin on the seam edge where it meets the bonnet
Rang and spoke to Dave and he explained if I wet and dried then polished, I would get the scratches out and I could work on the seam line like this
to
He offered to replace any panels I wasn't happy with if I returned them but it cost me the best part of �150 to collect them the first time, in
my opinion i should of never been told they were ready to collect
In the end I posted the wheel arches back as these were the worst bits and he refunded me for these, I'm going to get some carbon ones now I
think
As for the light streaks and scratches I'm just going to have to try and wet and dry them out, ide rather not have to do this, but hey ho
Overall I was just disappointed as they weren't cheap and he's regarded as the best place to get the panels,
Right anyway, my colour scheme might start to become a bit clearer
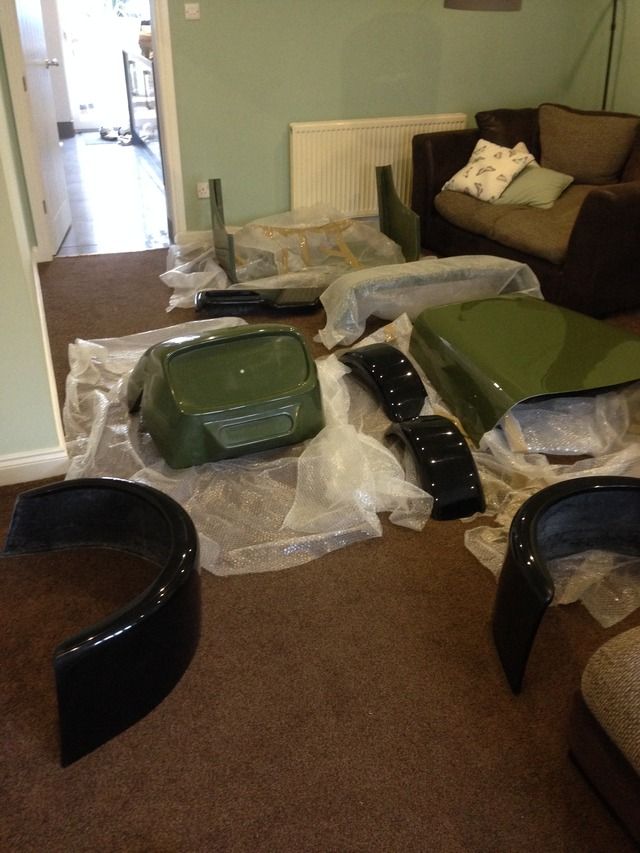
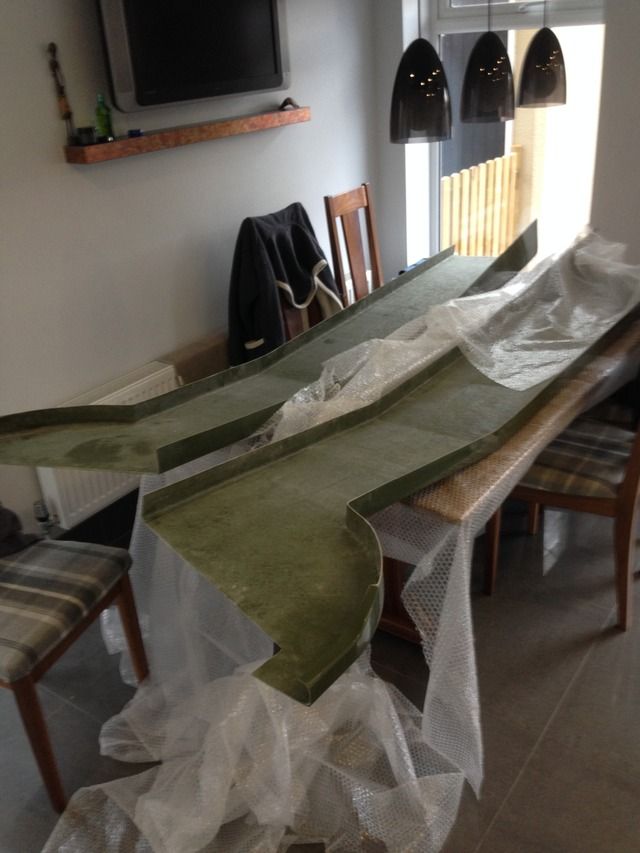
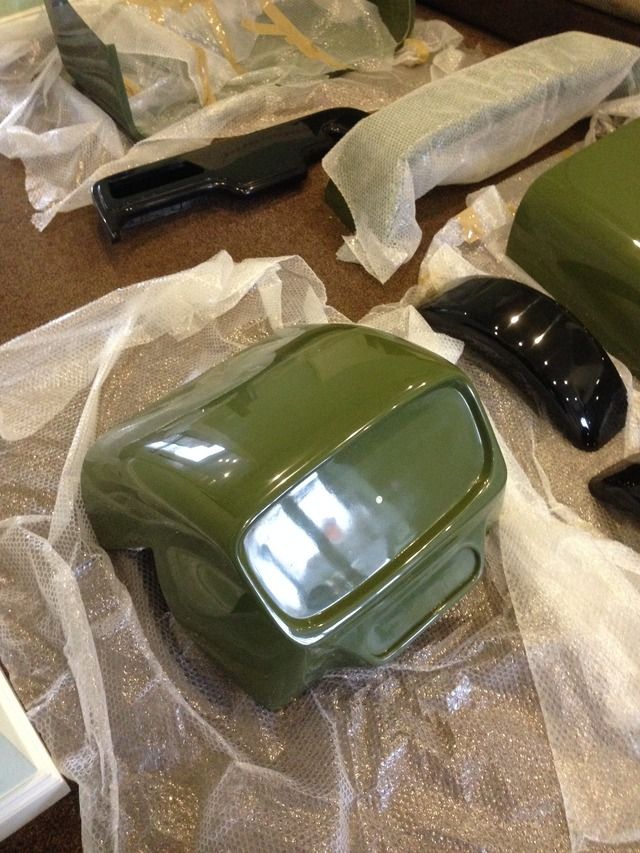
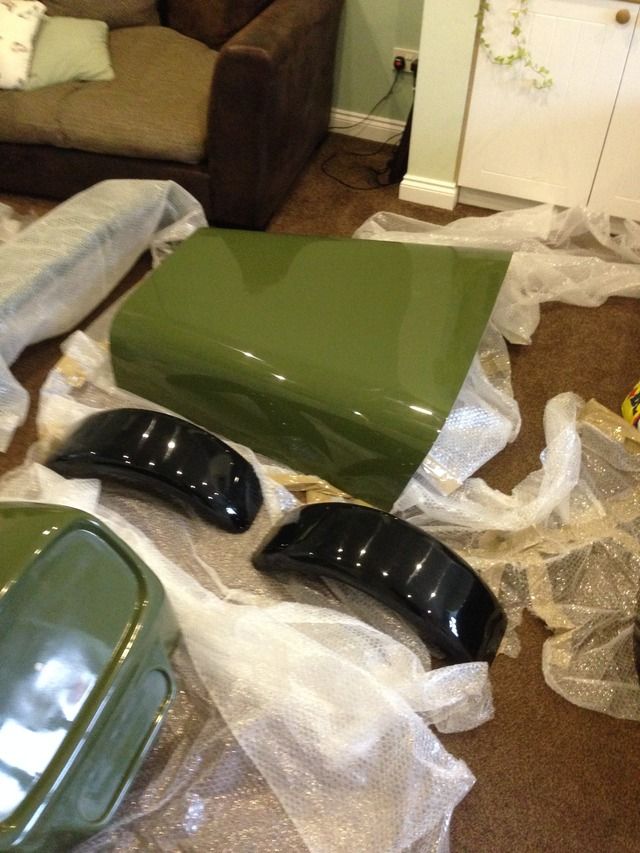
Marking out for the first cut, eek!

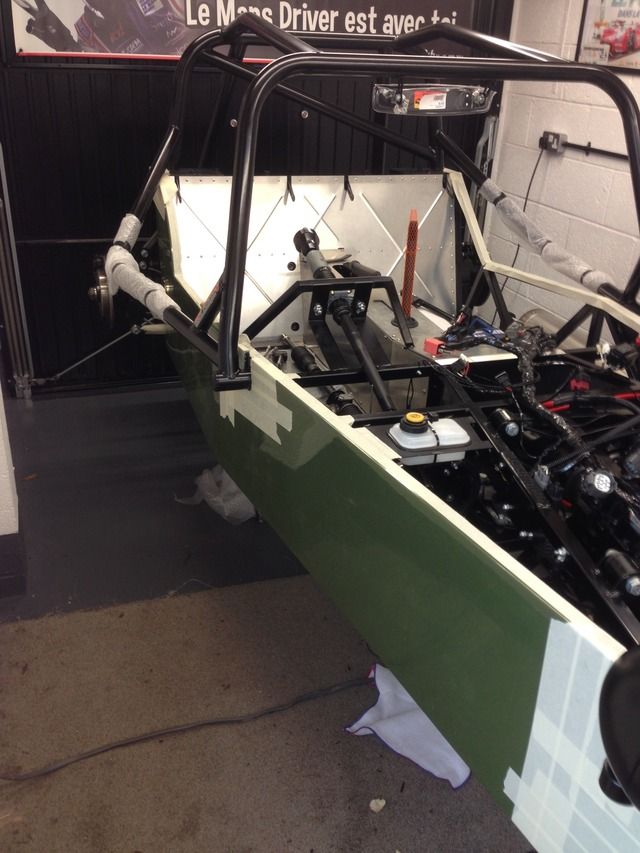
Marking for wishbones
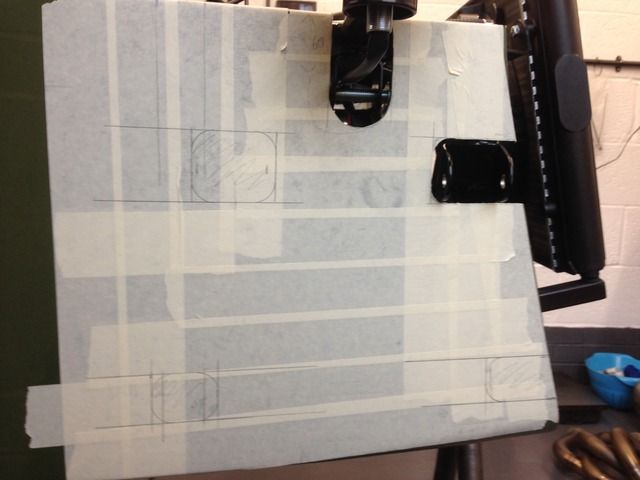
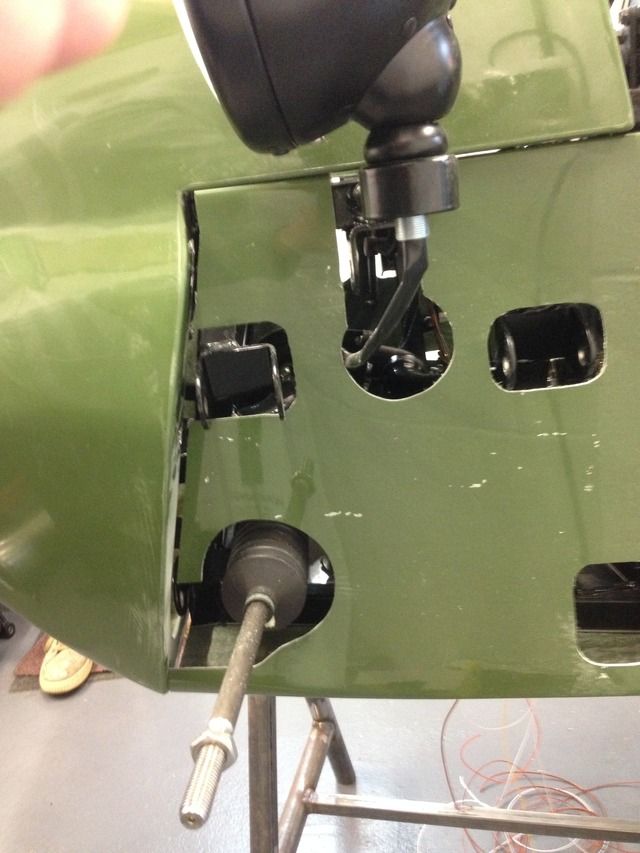
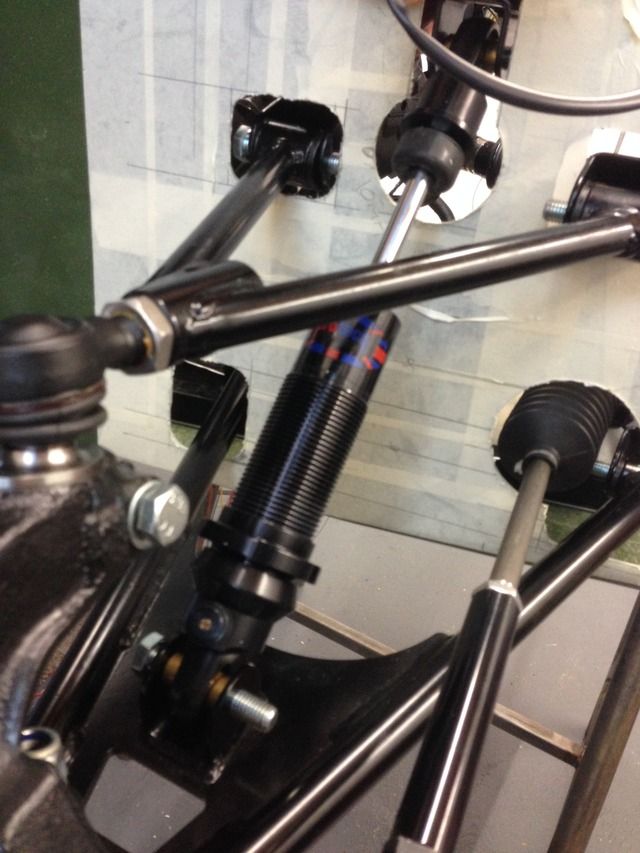
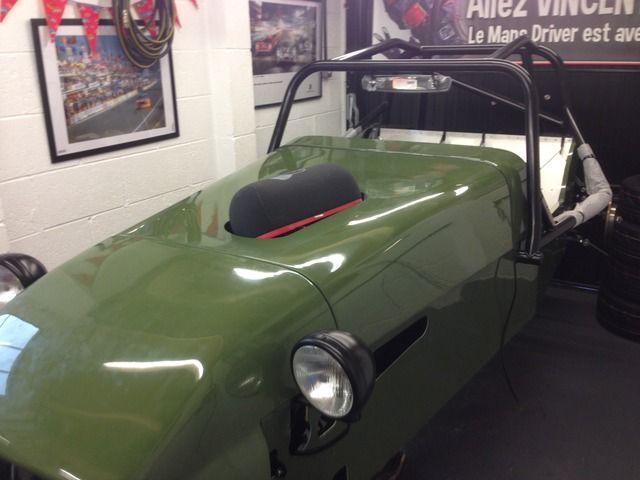
Air filter hole was a bit tricky but turned out sweet, might make a scoop to cover it at some point

Ordered some tyres and wing stays from Mk, in stock and turned up next day, I wish all suppliers could manage this
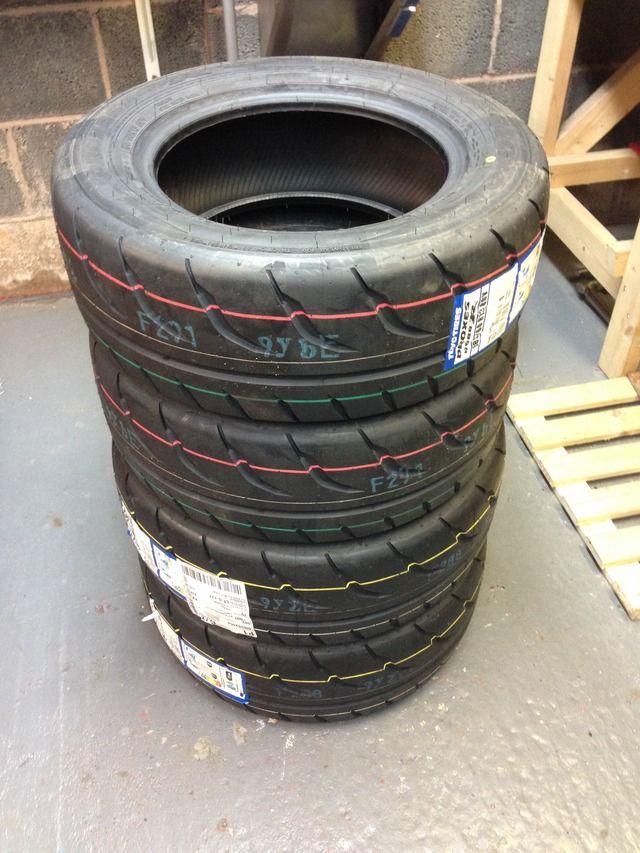
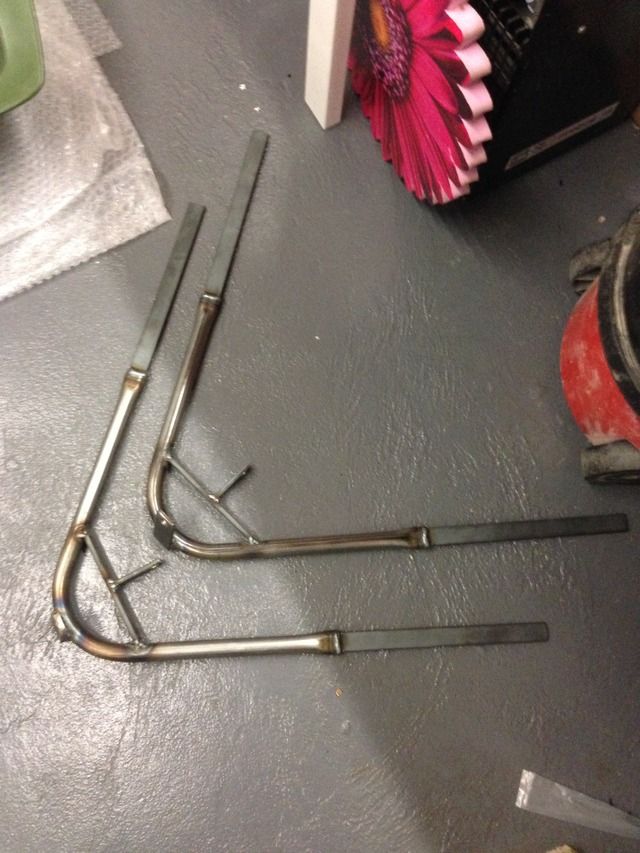
Also got my rims
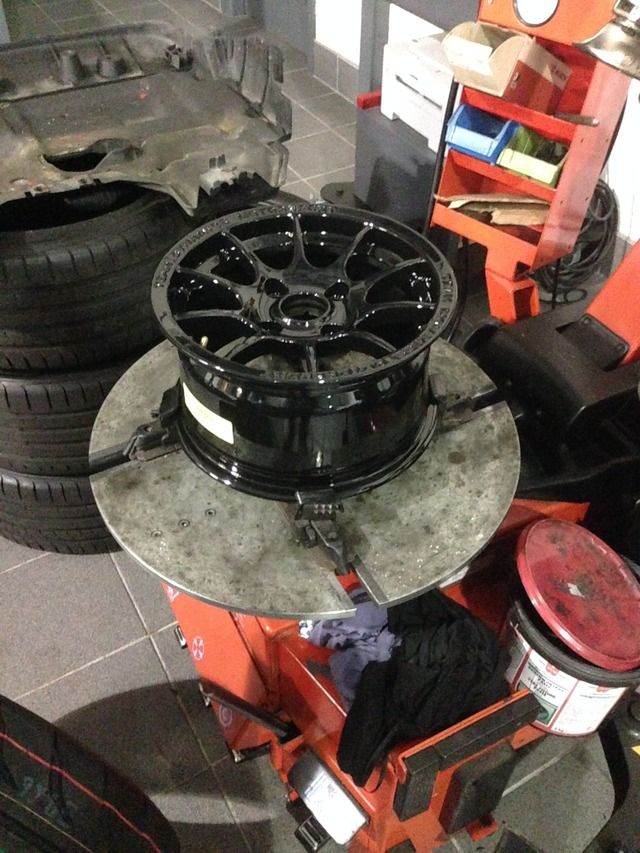
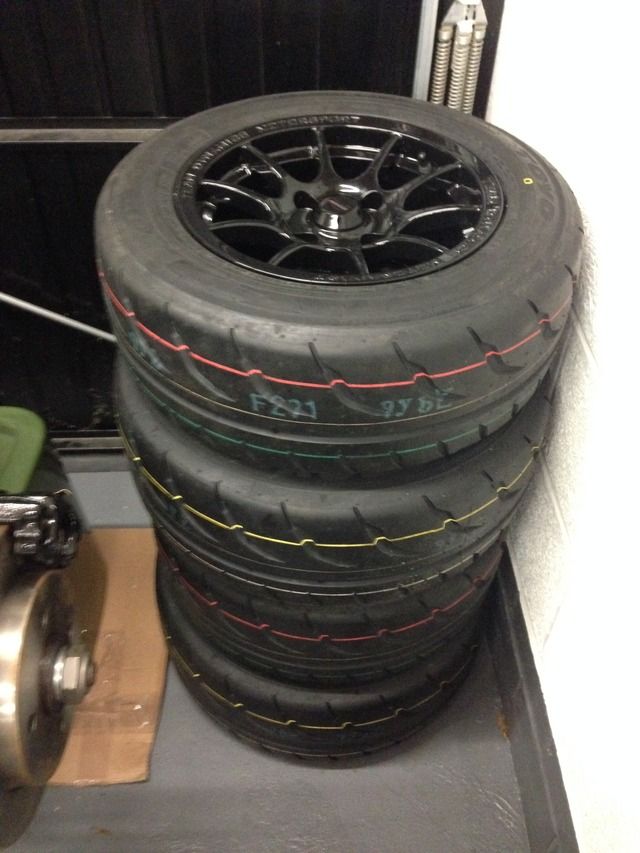
Longer wheel studs and new nuts

First fit of rear wheels, all clears nice etc
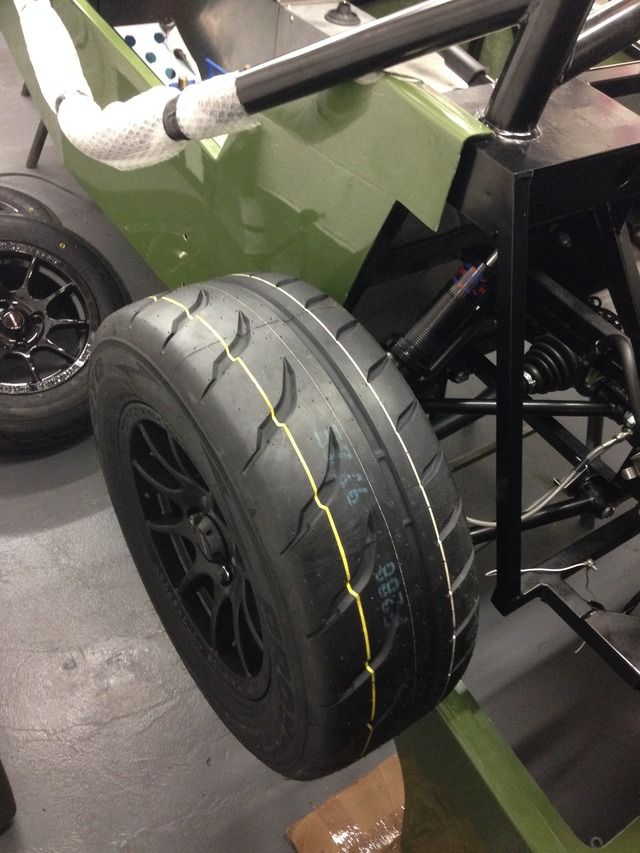
I made a handbrake surround, just got to make the cloth bit
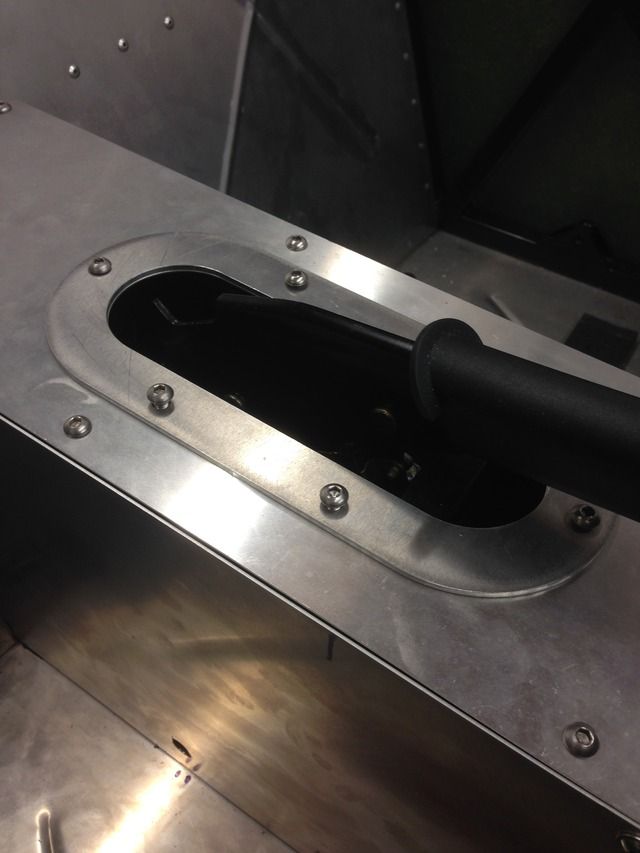

That's about it, I've been on with other little bits but that's about it, it's been a bit slow going this last month but I'm
trying to get cracking but the body works a two man job really so can't do much in the week
As for the body panels some might think I'm being fussy but I just expected them to be better
rdodger - 17/12/15 at 09:07 PM
Inspired choice of colour.
Not something I would have considered but looks to work really well!
Rosco86 - 17/12/15 at 09:35 PM
quote:
Originally posted by rdodger
Inspired choice of colour.
Not something I would have considered but looks to work really well!
cheers, yeah took me a while to decide to go for it!
Adamirish - 18/12/15 at 12:04 AM
Great update and for the record, I wouldn't have been happy about the bodywork either. IMO it's just not acceptable. Surely they should be
supplied ready to just cut and fit. The scratches could ruin one of the best builds I have seen so I do hope you can flat them out mate.
Good to see that the air filter isn't as obtrusive as I first thought it may be. Great work!
CosKev3 - 18/12/15 at 08:22 AM
Gutted for you about the bodywork,as above its sold as a finished product it should not need any prep or repairs.
Colour scheme looks good,only downside imo to dark coloured/camouflaged seven type cars is you will blend into the background/scenery pretty easily
and will need to be extra vigilant to people pulling out in front of you etc at junctions.
Bright coloured seven type cars ftw!
Rosco86 - 18/12/15 at 10:50 AM
cheers guys, yeah its propper pissed me off, but not really got any other options apart from a 6hr round trip etc
yeah thats my only worry with a dark colour but im not a bright colour kind of guy
Rosco86 - 20/12/15 at 08:17 PM
Well me and my dad have had two full days on the car again this weekend, got the side panels finish trimmed, painted the inside black and bonded on
with tiger seal
Also got the bonnet trimmed to match the scuttle and the scuttle fixed on with Rivnuts
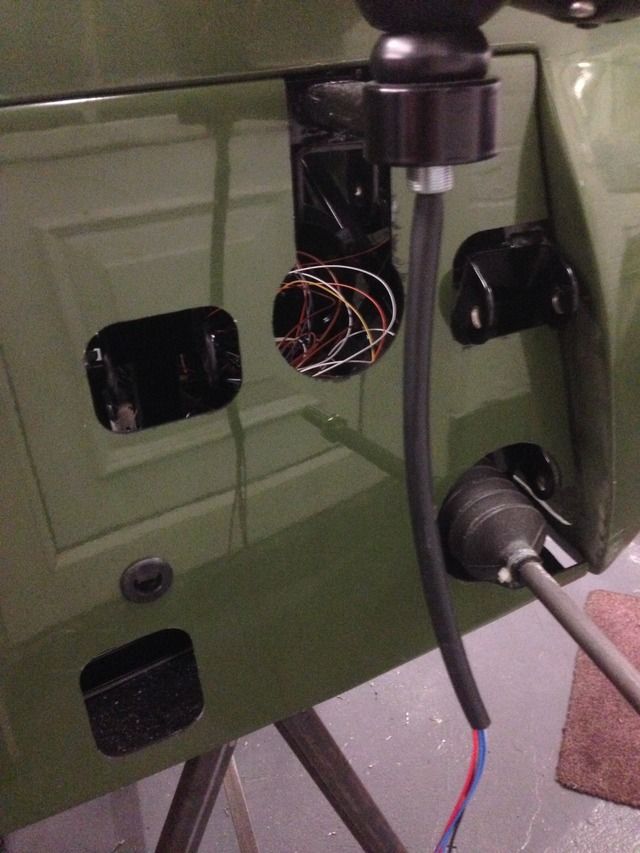
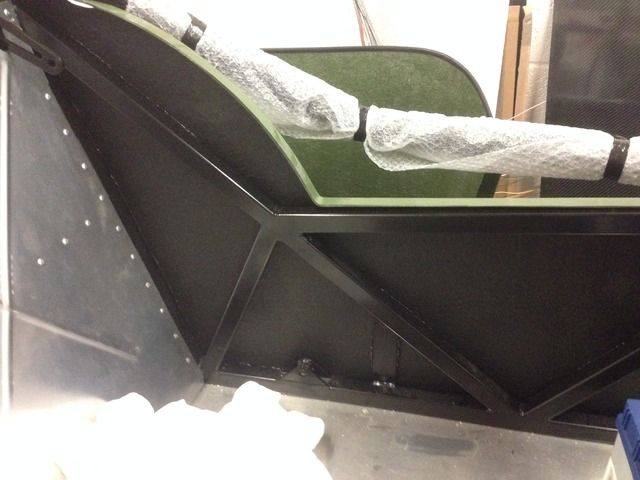
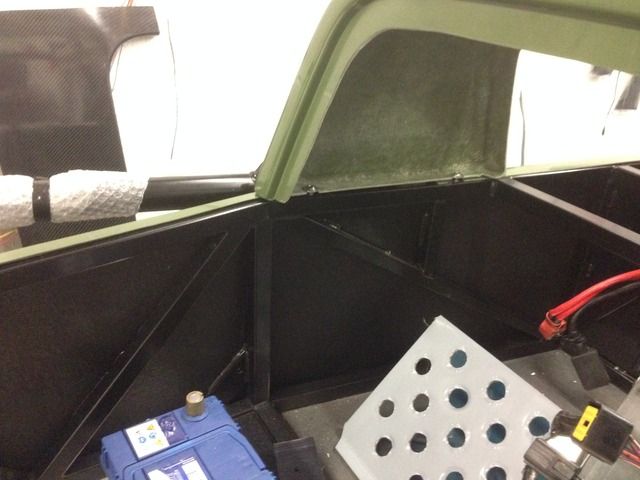
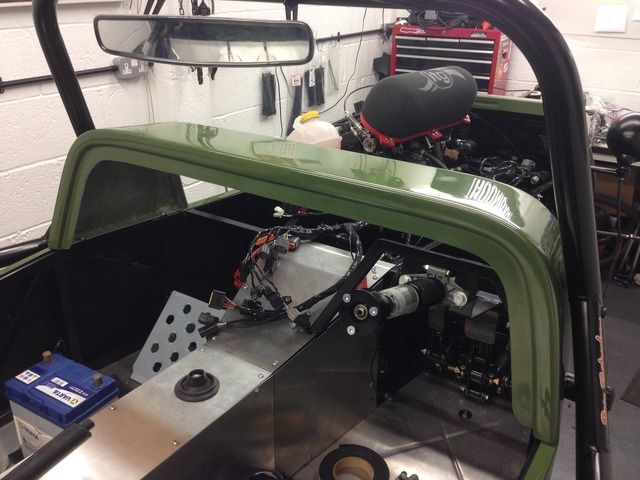
Rear tub fitted

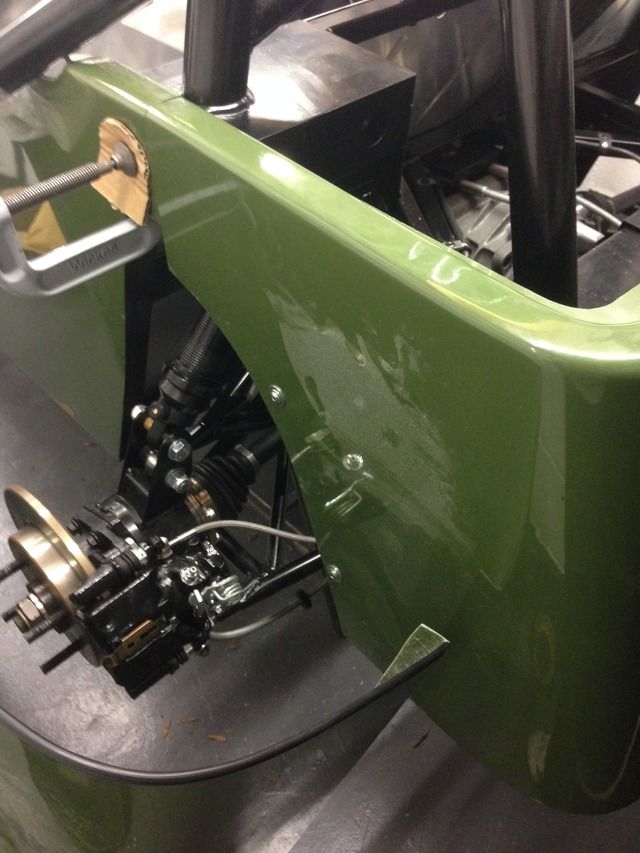
Then made a card template for a exhaust heat shield
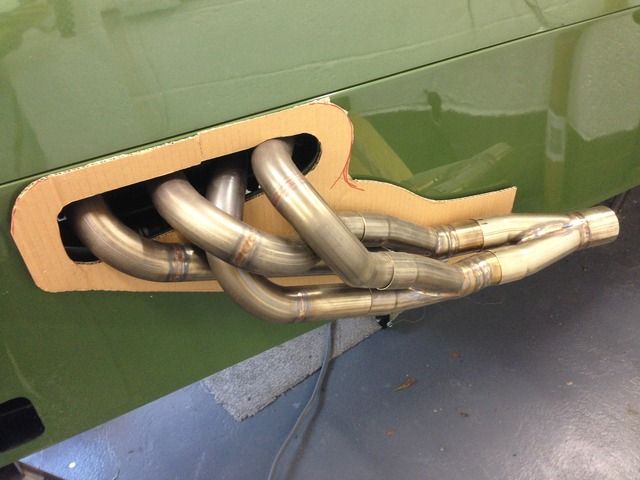
Then drawn up on the pic, we had to rotate so it would fit on my dads cnc
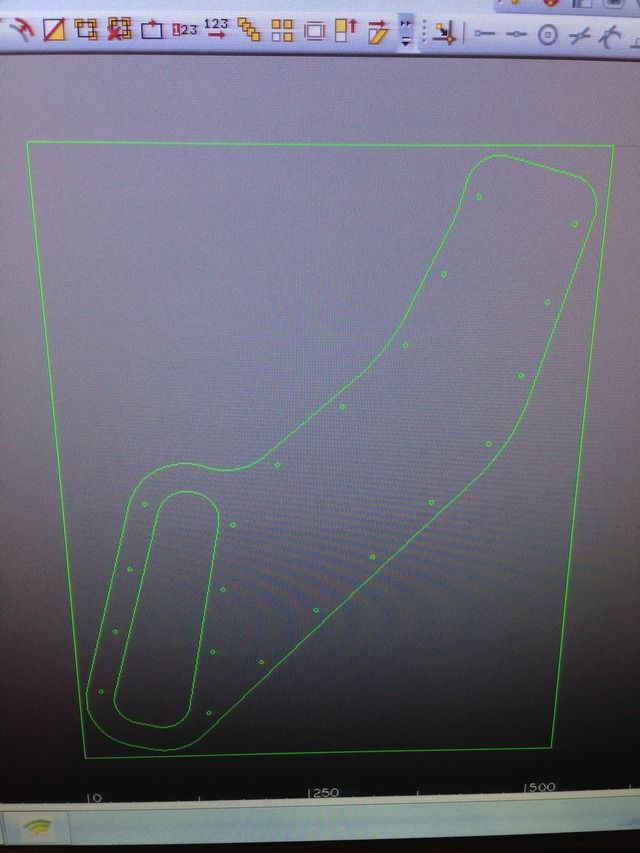
Finished product in aluminium, I might still cover this in heat reflective foil, then it will be rivited on I think
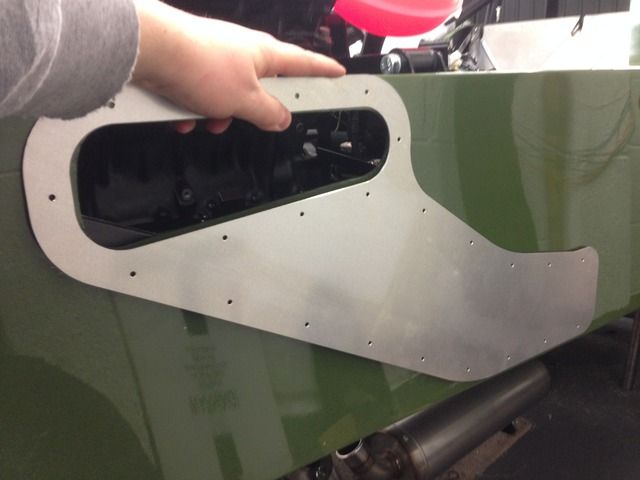
40inches - 21/12/15 at 08:57 AM
This is a nice build
Regarding the wing stays, you might want to replace the flat section with tubing, it isn't rare for them to shear at the flat/tube joint.
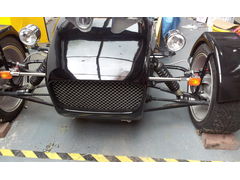
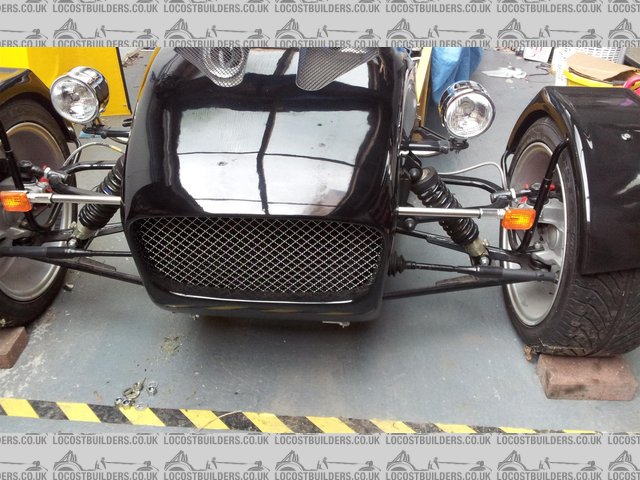
Description
Rosco86 - 1/1/16 at 06:42 PM
Cheers, I will have a look when I get my arches
Rosco86 - 1/1/16 at 07:05 PM
Right I've had three full days on the car this Christmas, and hopefully two more still to go,
Santa brought me a gopro
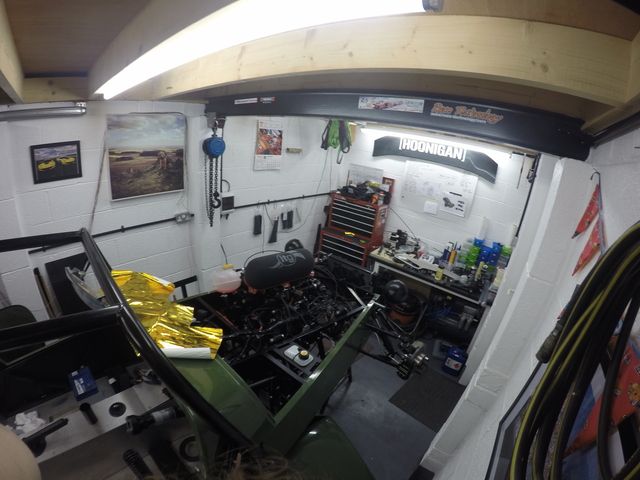
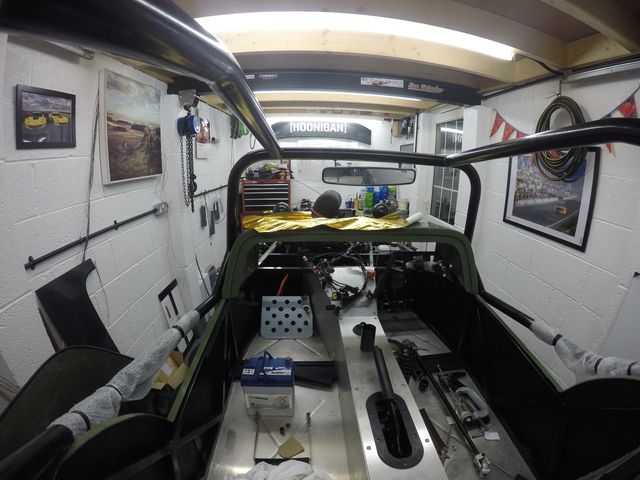
Space heat foil stuck on the aluminium heat shield and bolted on
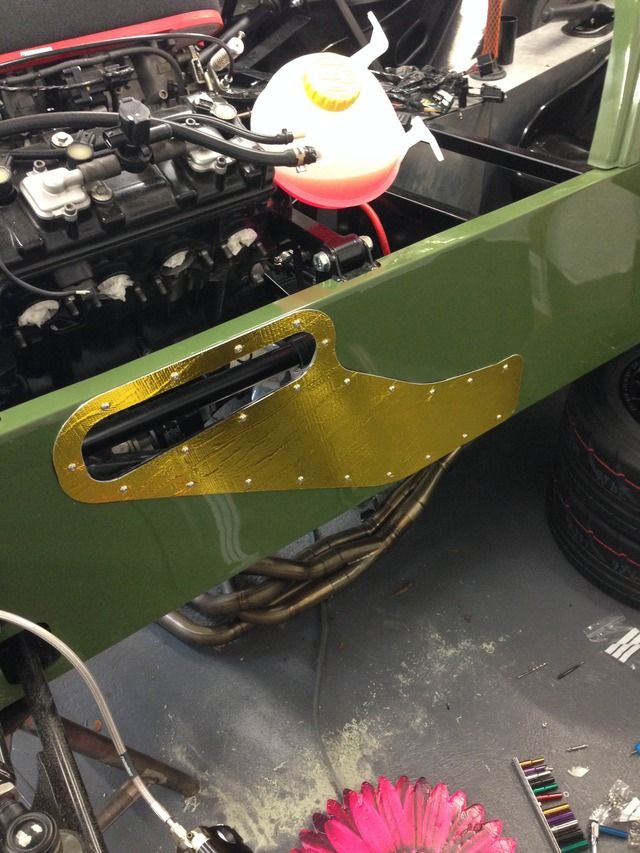
Exhaust manifold fitted, and even if I say so myself I couldn't stop smiling after getting this all fitted up
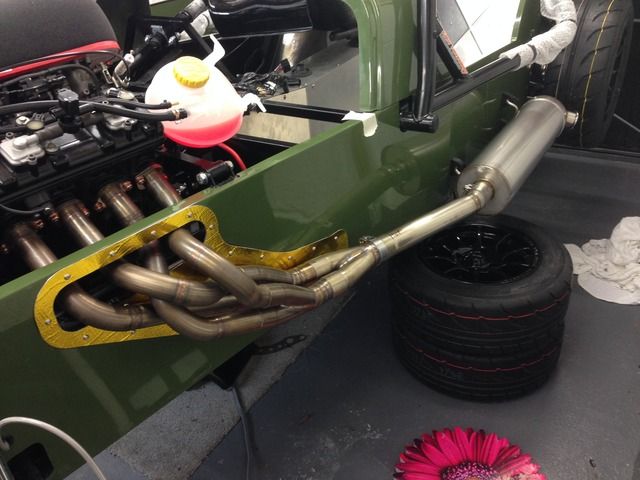
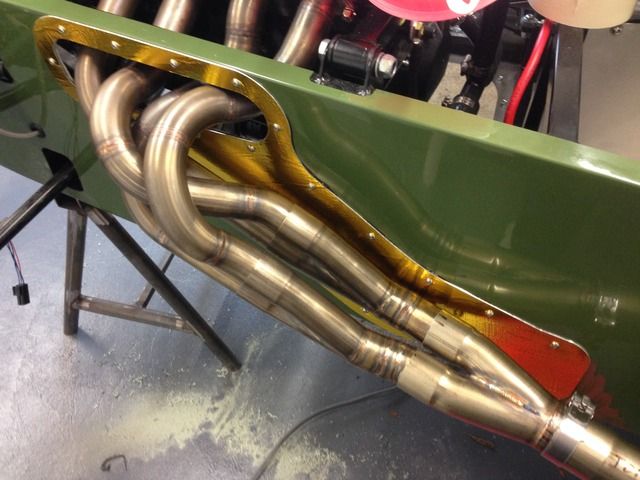
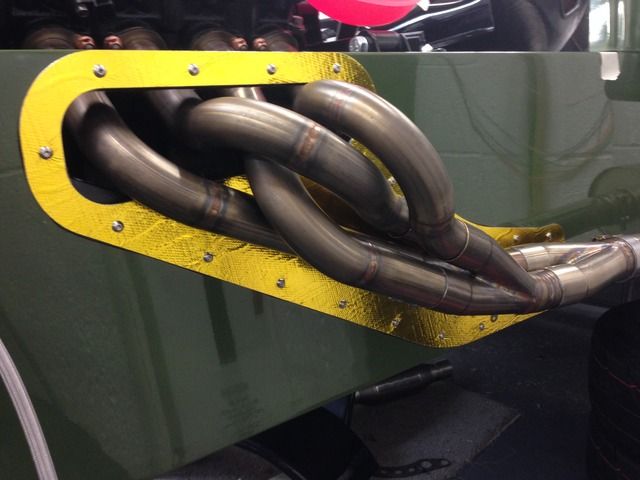
Next job Dashboard, I've been struggling with this, deciding which way to go, I didn't like the look of the equinox one, I wanted a carbon
one but there's not one with an iva edge,
In the end I decided to make one with deboned sheet, easy to work with etc, as for the lower edge I'm using black pvc waste pipe, sounds crude
but it's turned out sweet
Template first, I used 2mm coriguated plastic from wickes, was only �4 for an 8x4 sheet and can be easily cut
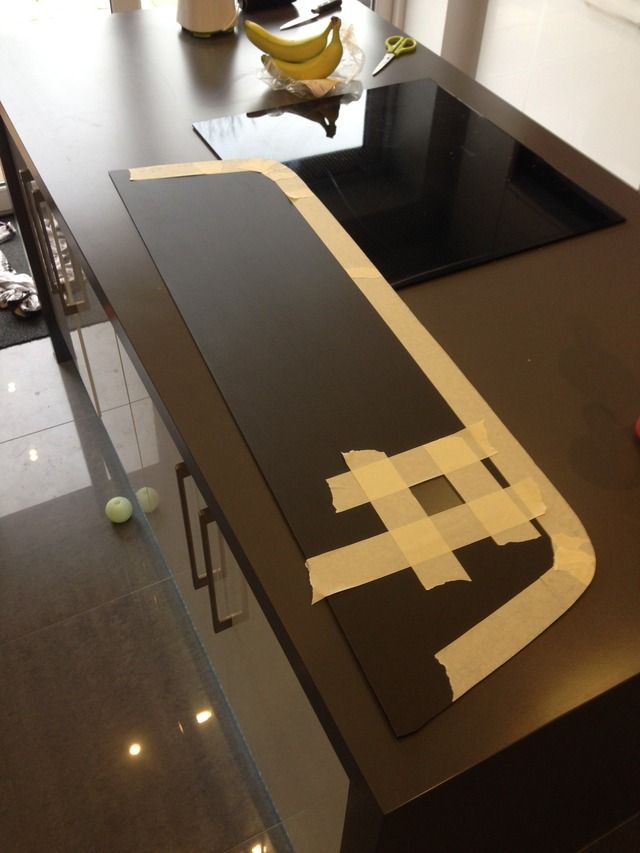

Fixing holes drilled and rivnuts fitted in scuttle
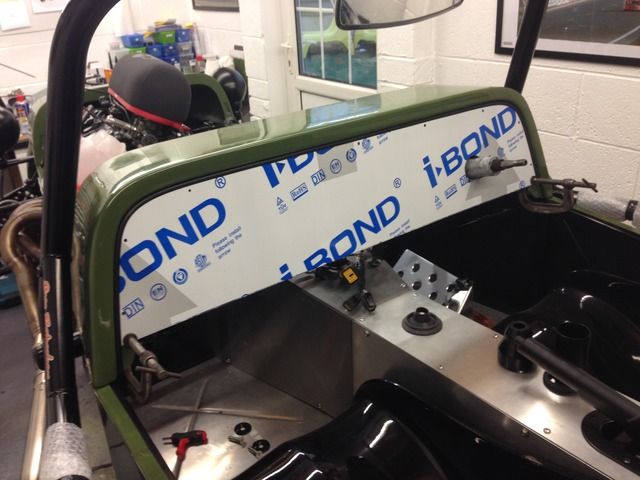
Rubber grommet and sleeve for steering column
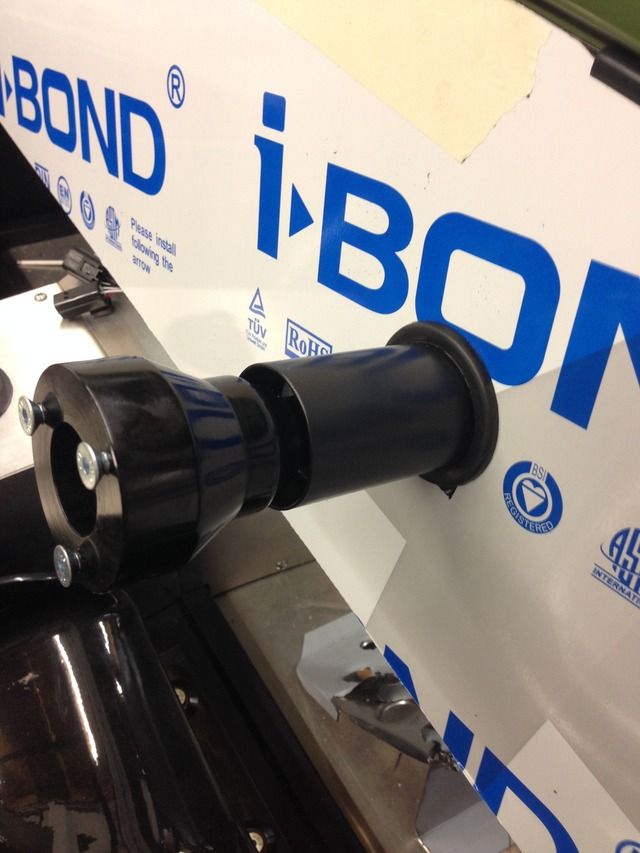
I was in the zone and forgot to take any pictures, I cut all the switch and dash holes out on my dads cnc
Back of the dash
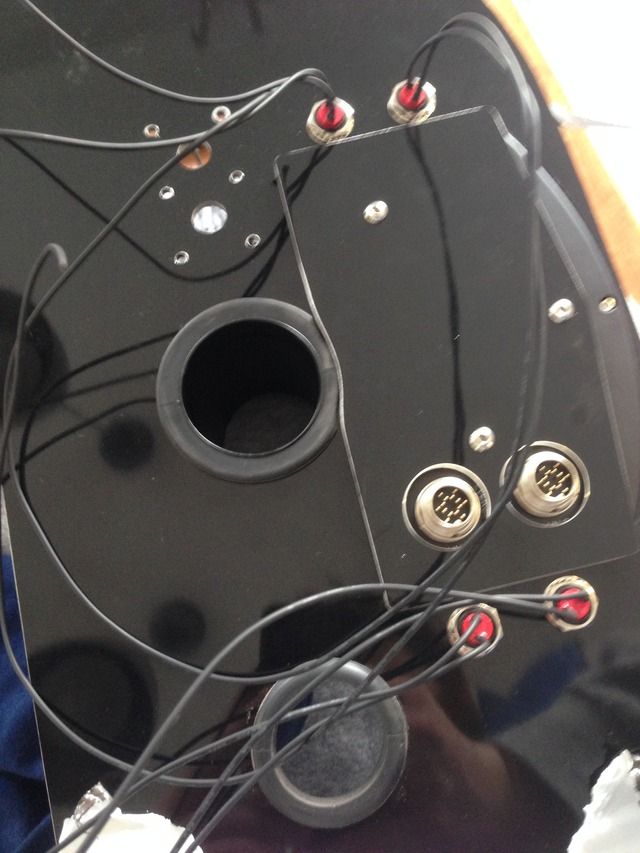
All fitted up for good hopefully, lower edge pipe trim fitted
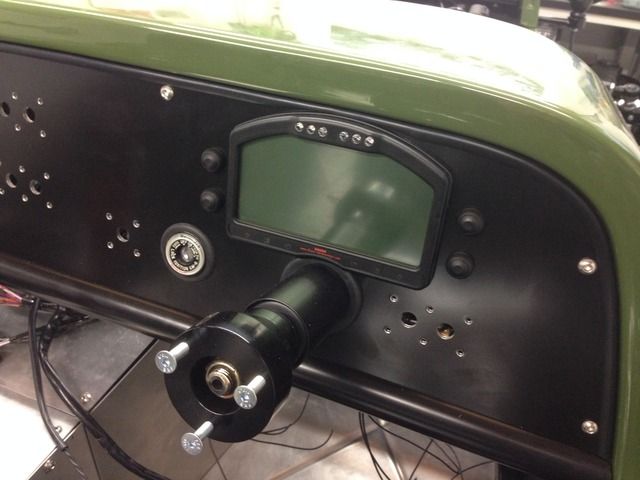
Full photo
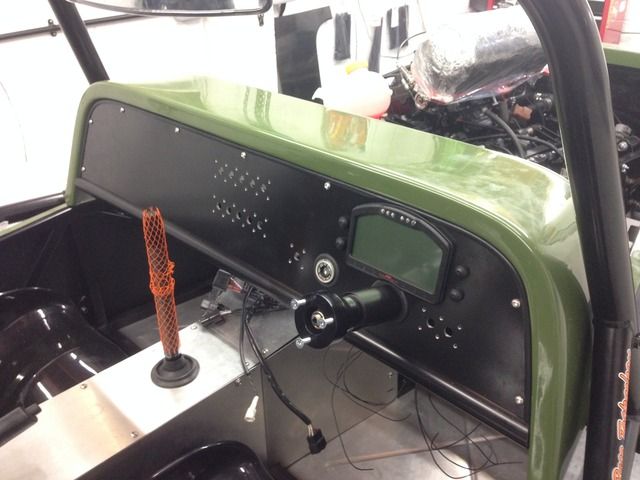
Battery fitted and passenger footrest, I might block the battery off from the footwell with a bit of dibond
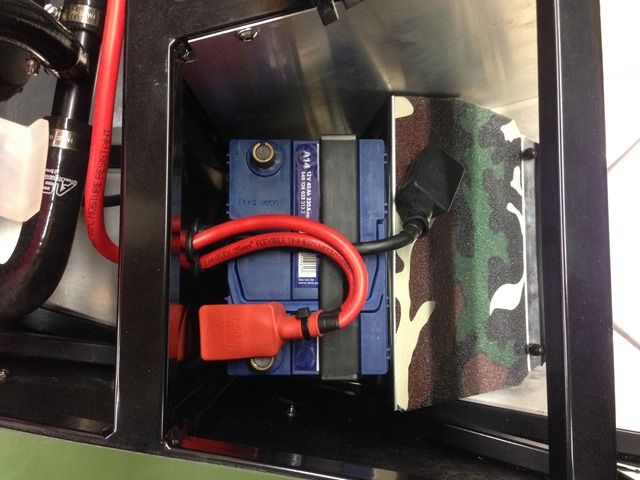
And a full shot for a change, starting to look like a car
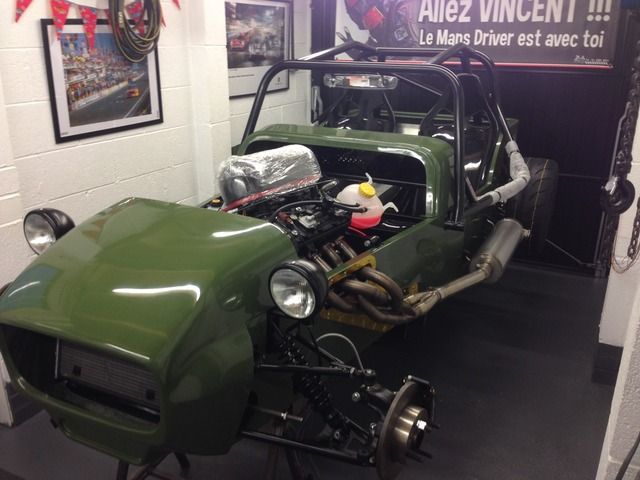
Rosco86 - 2/1/16 at 03:11 PM
Got a bit more done today,
Boot lid temple made up
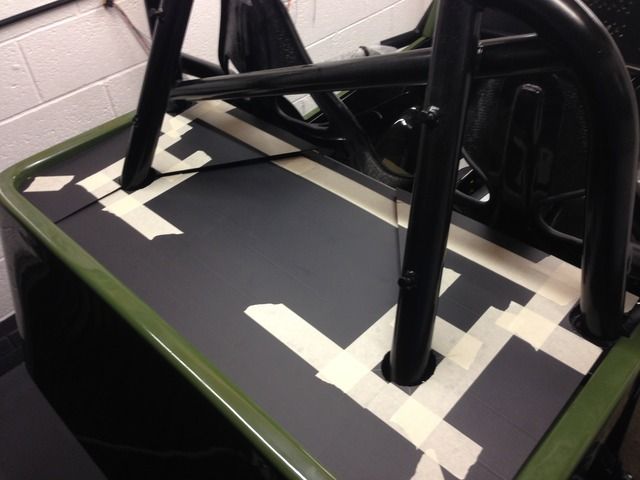
And then as if like magic
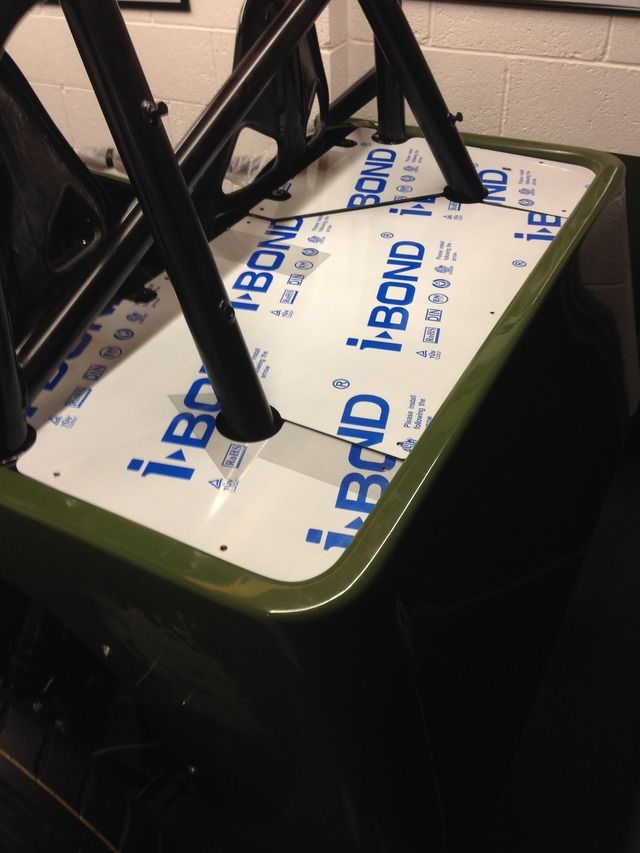
Sorry forgot to take any pics, but yes I did it on my dads cnc, still needs a bit of fitting but waiting on some rubber bobbins now
Each of the three pieces will be bolted in place with the centre easy to unbolt and remove
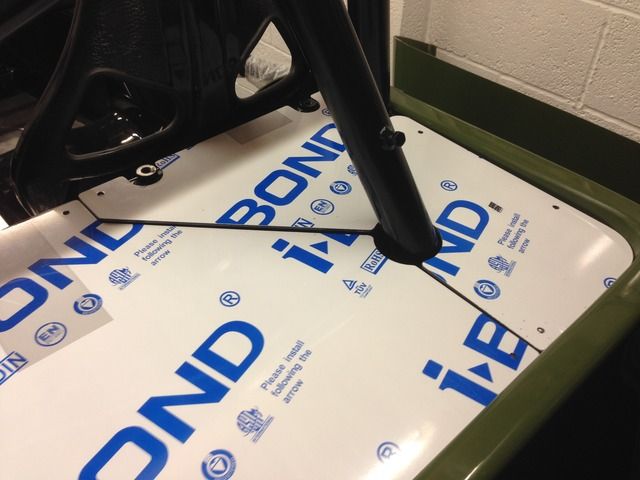
[Edited on 2/1/16 by Rosco86]
Rosco86 - 3/1/16 at 08:41 PM
Quick update from today, me and my dad fitted the bonnet aerocatches, went rather smoothly, I thought it was going to be tricky but turned out
sweet
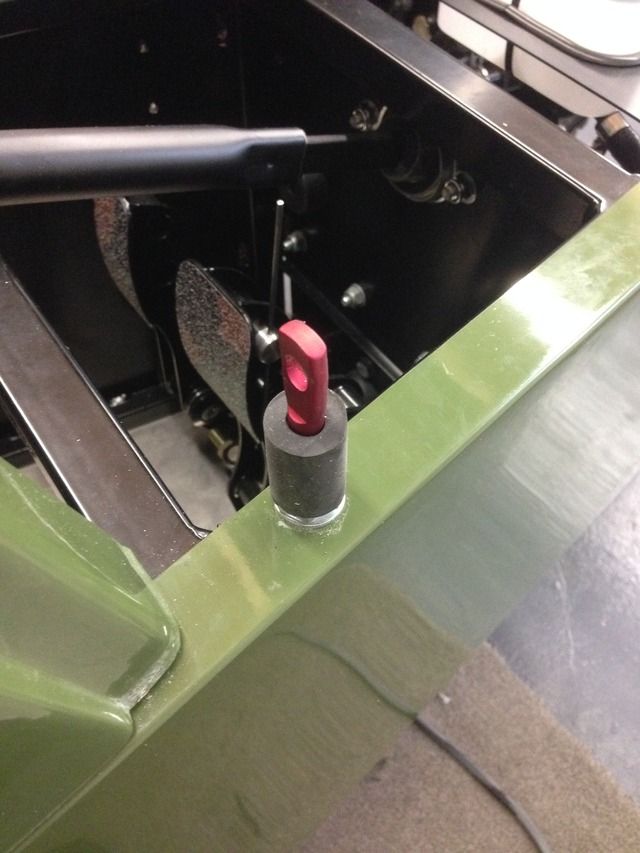
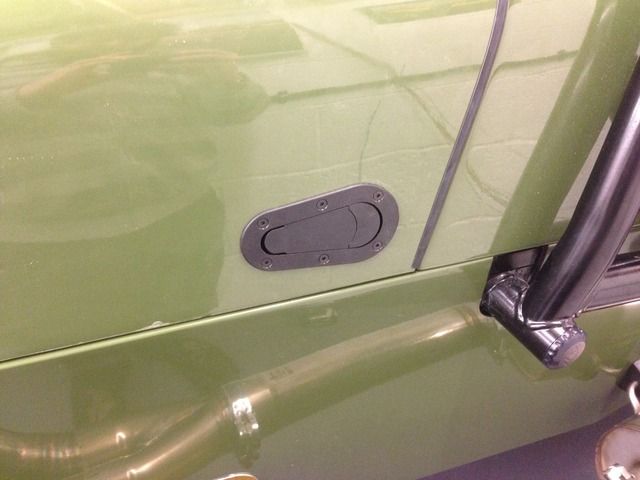
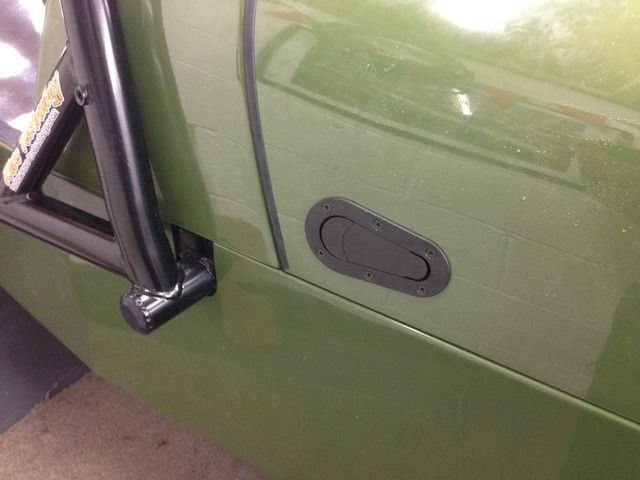
Next weeks job is to try and remember what's going on here

Rosco86 - 23/1/16 at 08:09 PM
Bit of an update, I've been flat out with every bit of spare time trying to get this thing somewhere near finished
I drew this up and made one, it's so I can use the bike fuel filler cap so the keys the same for the ignition and the tank
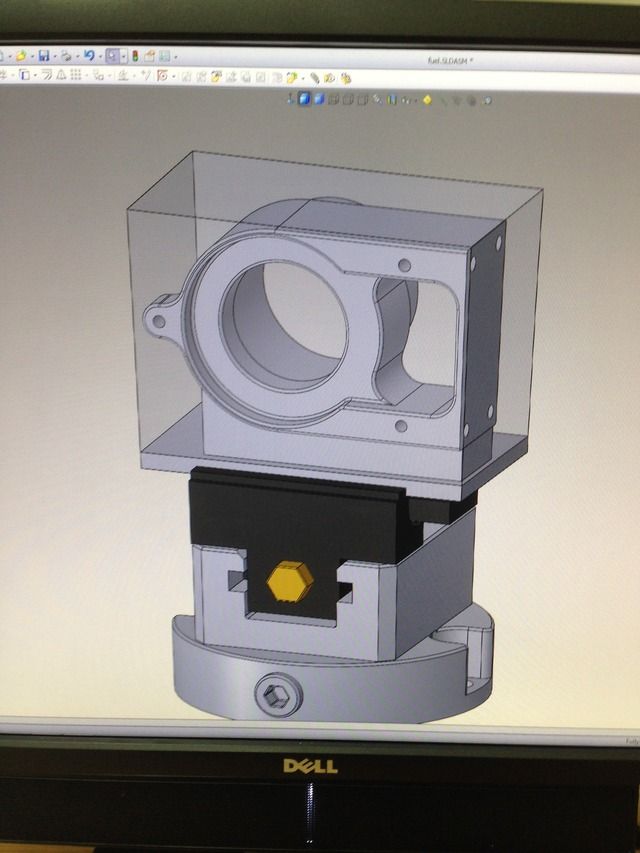
It was quite tricky to draw it up but turned out great
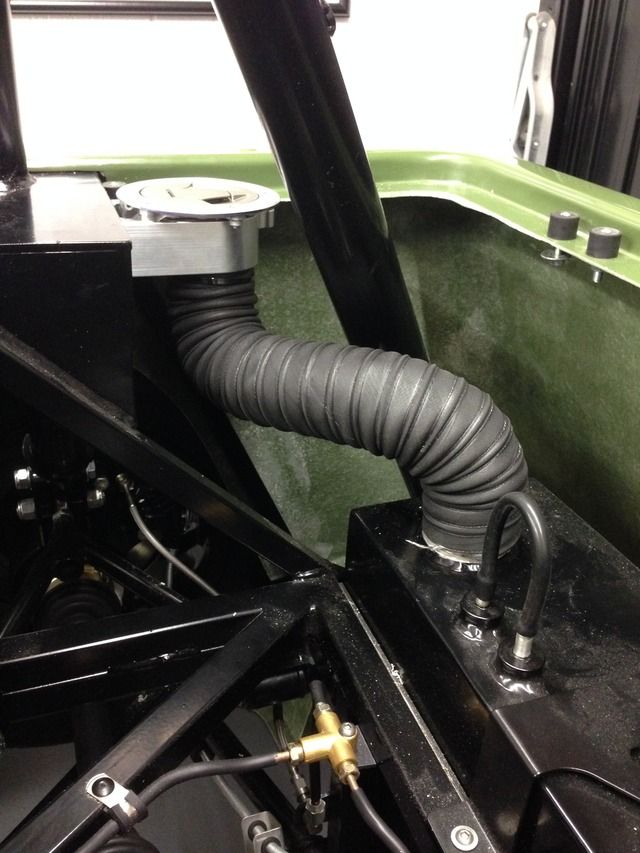
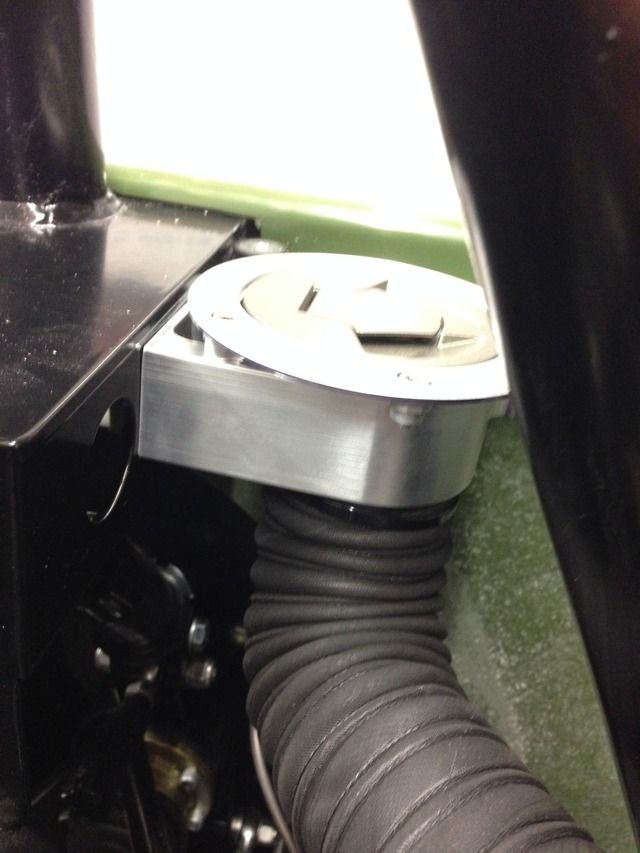
Started on an oil catch tank from an alu water bottle
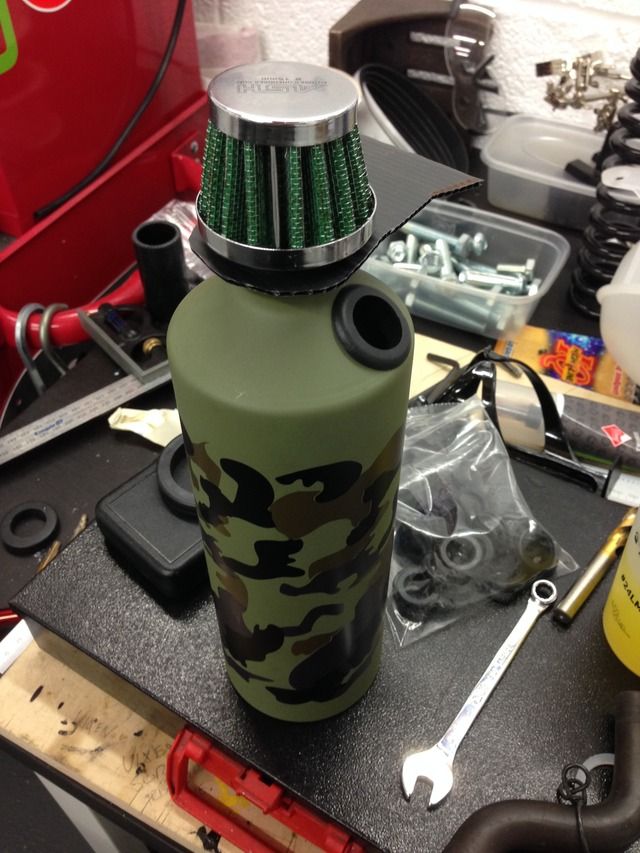
Got some logos made up for my centre caps
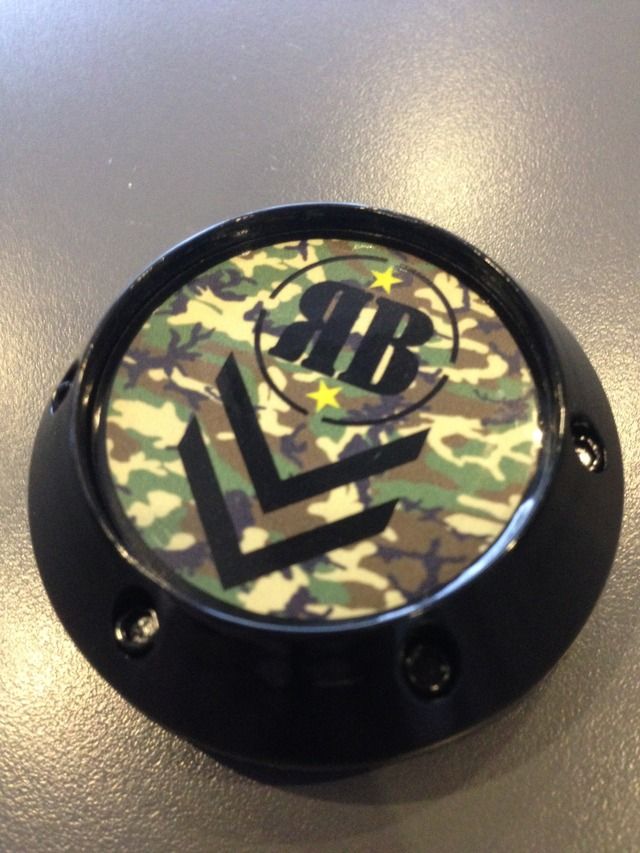
Couple of bonnet location pins made
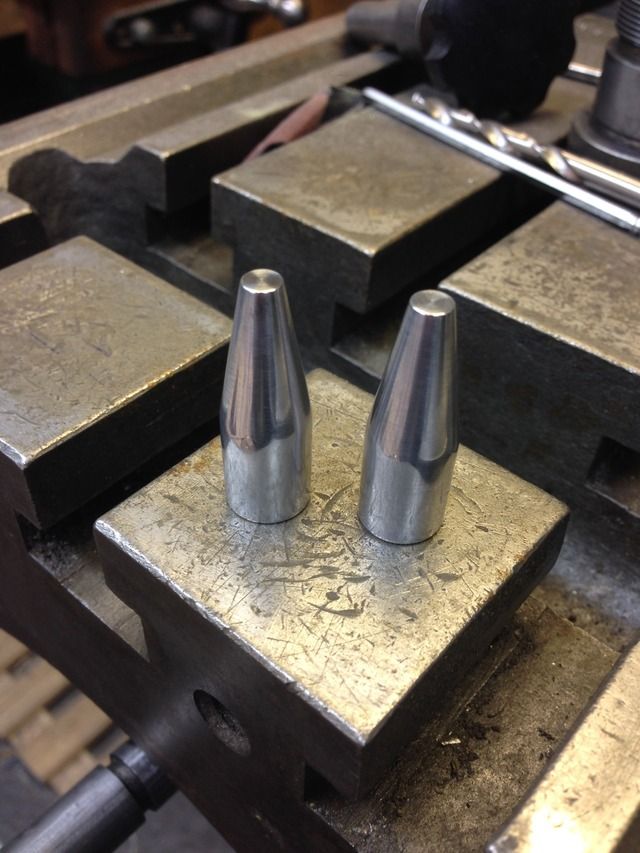
Got some front arches from MK, there proper smart, well happy with the quality of them
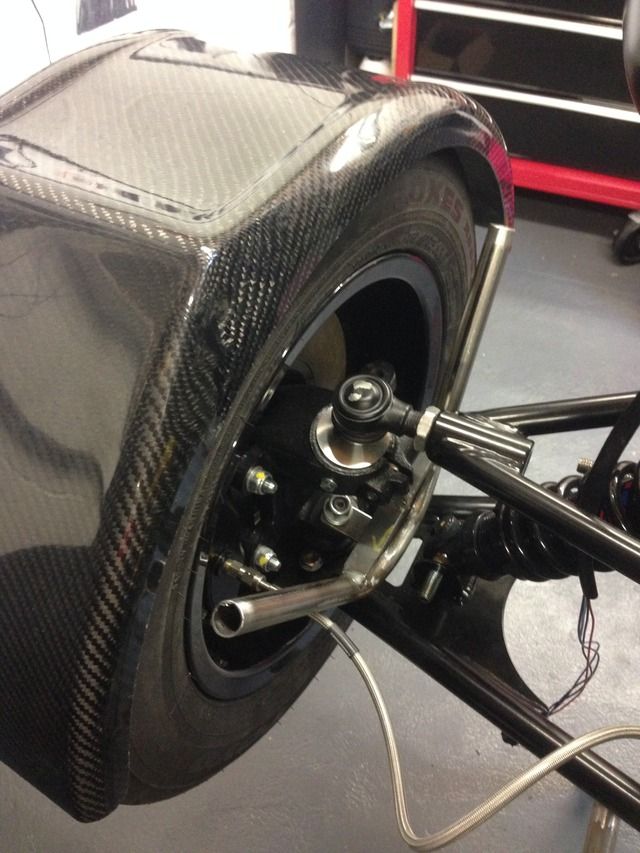
Decided to get some tube bent as the flat bar looked a bit naff
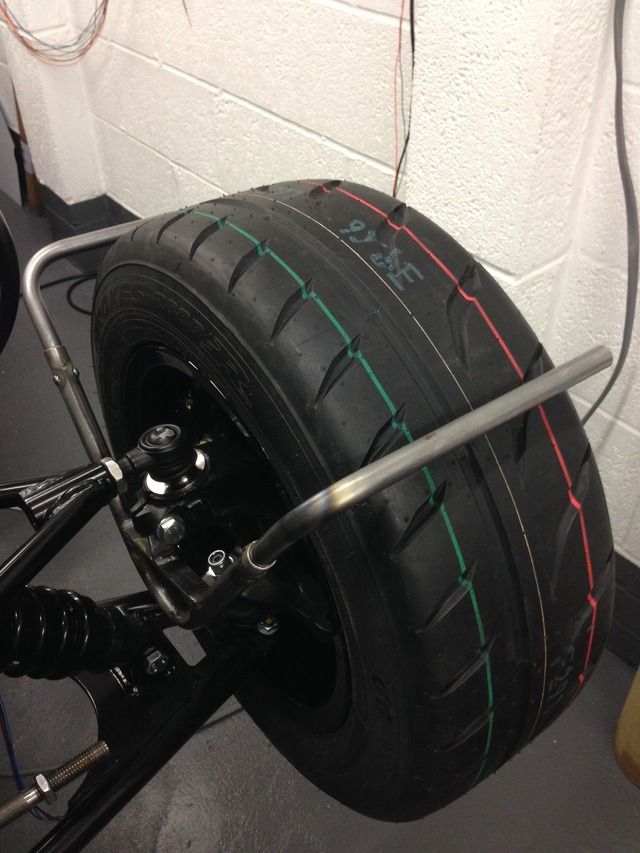
I used m5 rubber well nuts in the tubes to bolt them on, took me all day and stressed me out trying to get them right! Turned out ok in the end
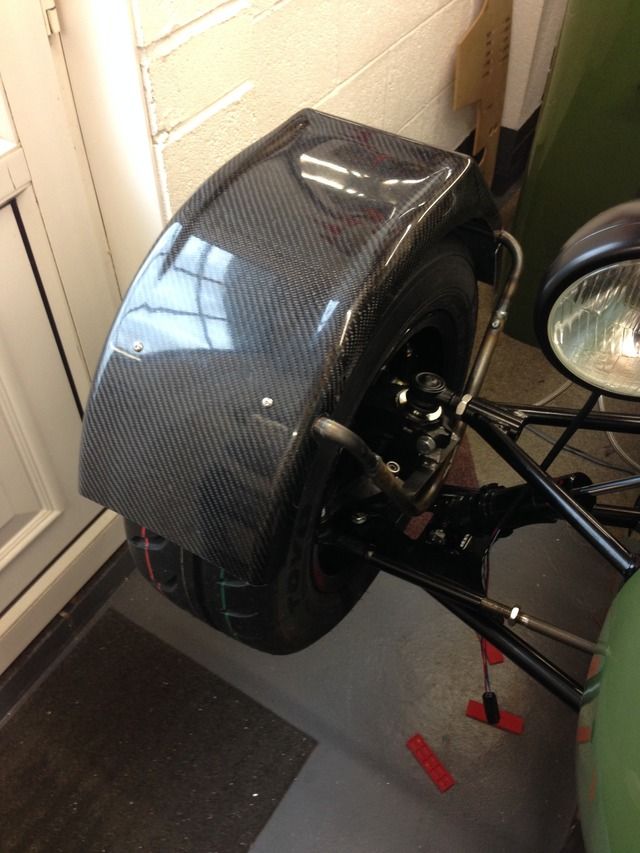
I've not mounted them to close to the tyre as I want to be able to swap wheels early
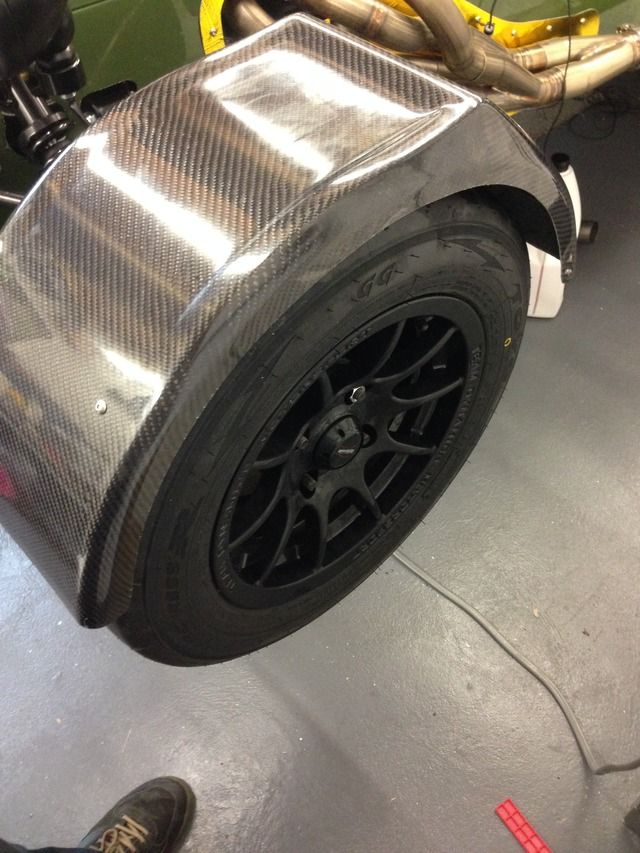
Made some name plates for under my switches etc, there getting anodised then I will engrave them up
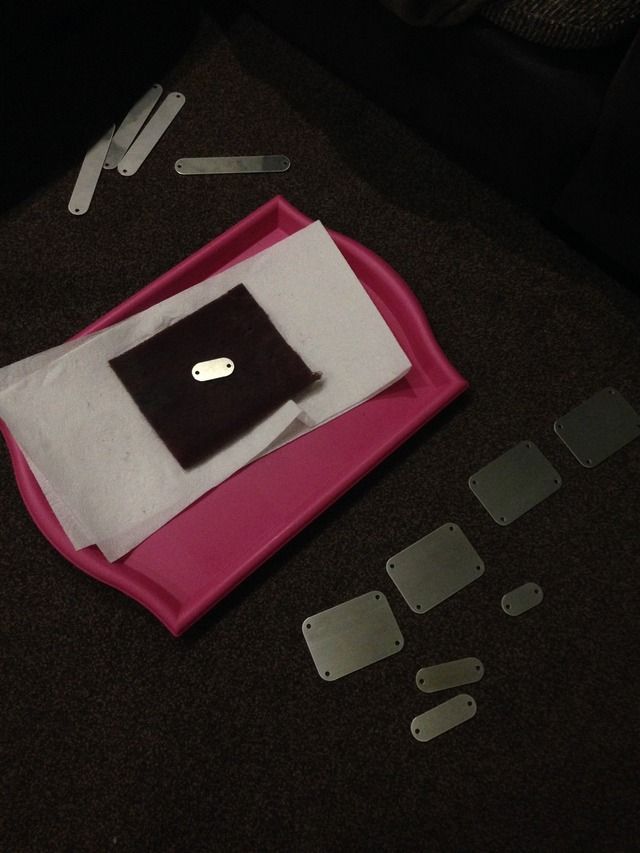
The next job took me almost two full days! The bulkhead, took a shot to prove I don't use cnc for everything
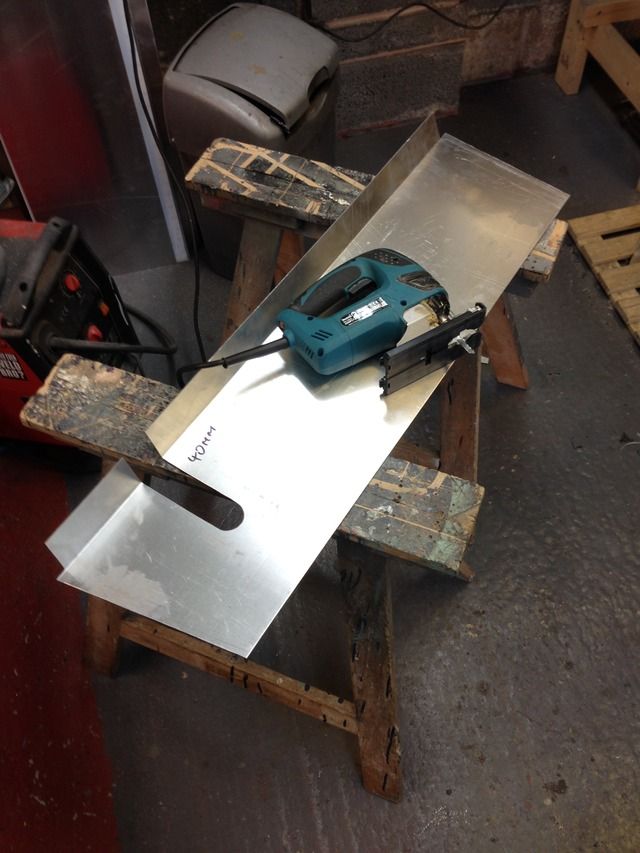
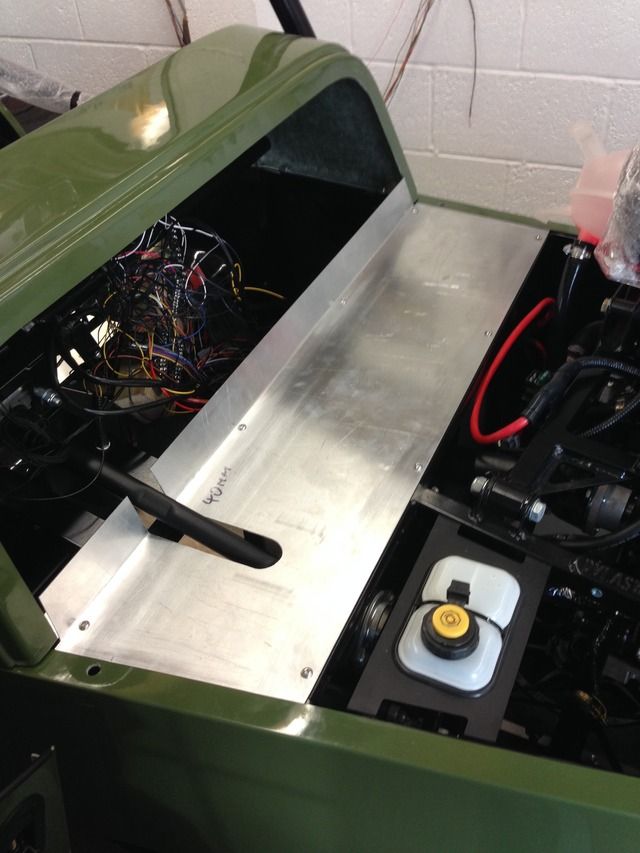
I've done it in two parts so I can get behind the dash easily
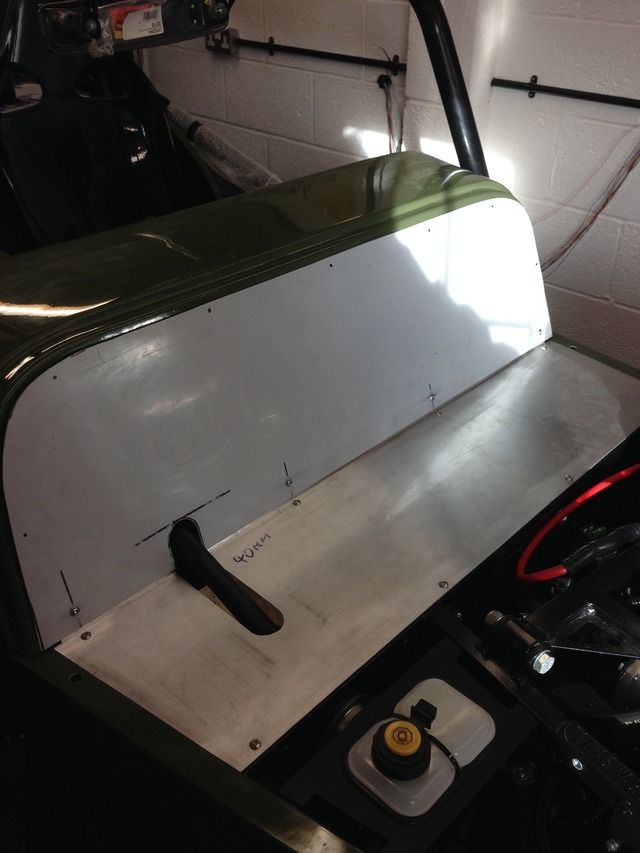
Inspection holes cut out
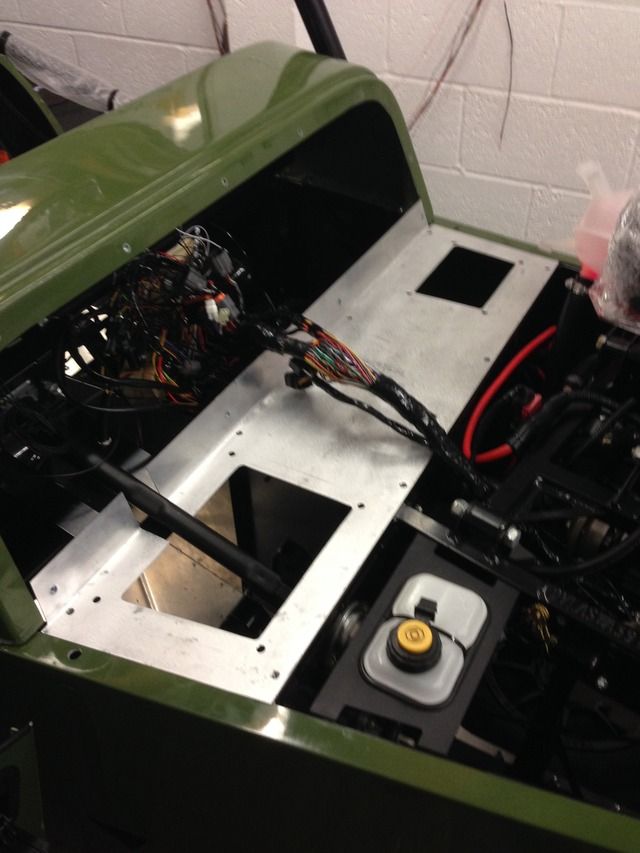
Left cover
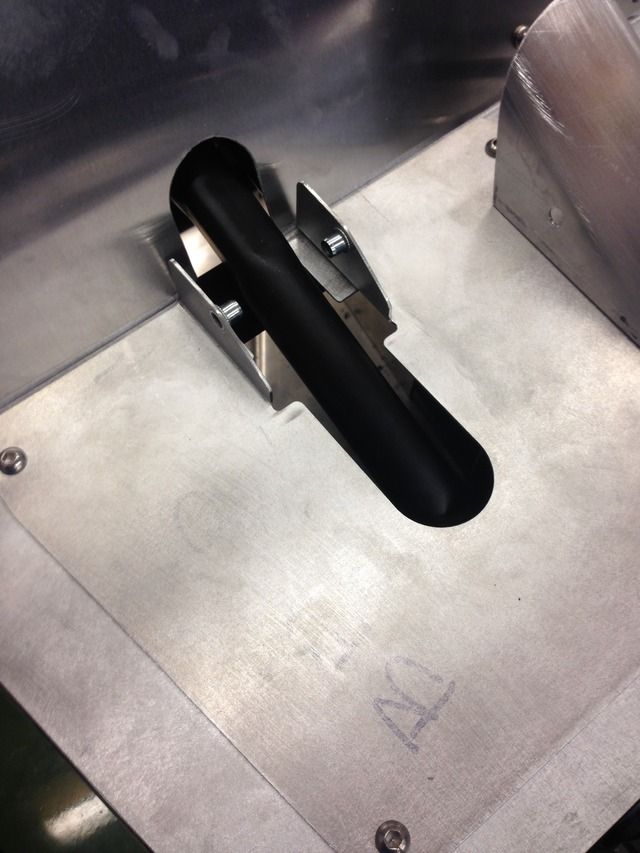
Both covers in place
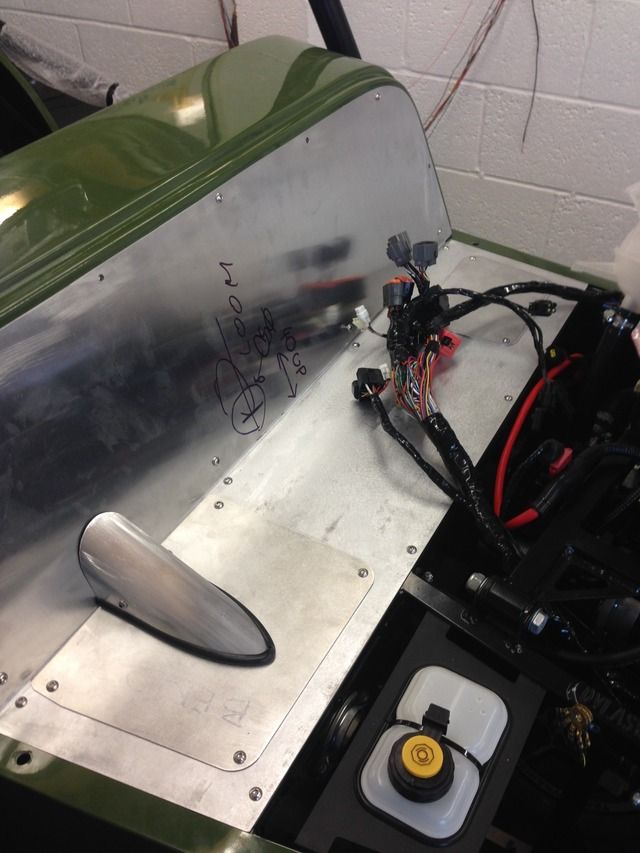
Bit of bead rolling
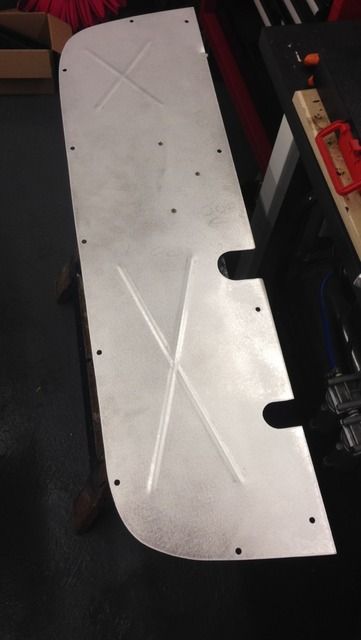
Everything's going to get powder coated black
Also got my brakes all bled! Pedal feels great and no leaks so I'm well happy with that
Next job is to get that wiring sorted that I've been putting off
MsD - 23/1/16 at 09:33 PM
Brilliant, thanks for keeping the thread updated!
Work looks top quality. Have you started IVA applications yet?
Do you have any pictures of the harness mounts you were talking about in the other thread?
Thanks, Mark.
Rosco86 - 23/1/16 at 10:14 PM
quote:
Originally posted by MsD
Brilliant, thanks for keeping the thread updated!
Work looks top quality. Have you started IVA applications yet?
Do you have any pictures of the harness mounts you were talking about in the other thread?
Thanks, Mark.
Cheers pal, not started my iva yet, want to get it all finished and mapped etc I think
Hers some pics mate
quote:
Originally posted by Rosco86
This weeks progress
I started working out where my lower harness mounts were going according to the msa blue book
I've changed the book design a little, tacked in
Centre two
Upper seat brackets done, I no the top edge doesn't need a radius behind the seat, but it looks neater I think
[Edited on 12/4/15 by Rosco86]
Rosco86 - 24/1/16 at 07:06 PM
Was on my lathe at 6am today
Turned this up to fit the drinks bottle, bit of screw cutting to
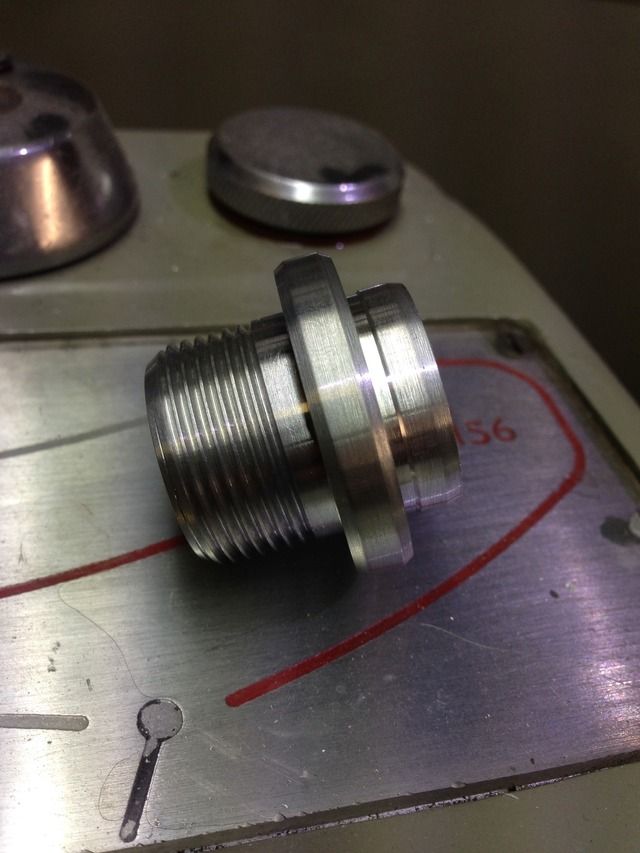
Filter pressed on top
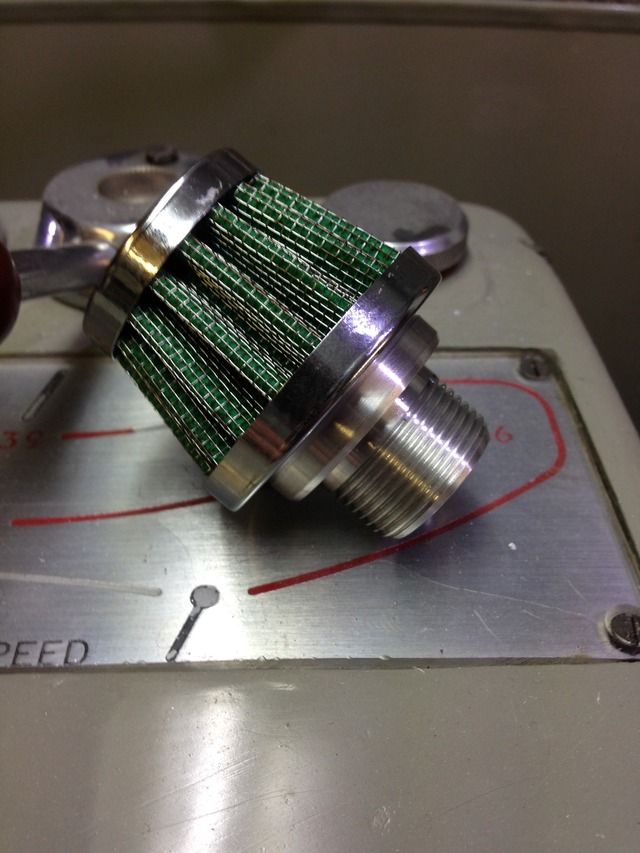
Then on my dads cnc for a few brackets
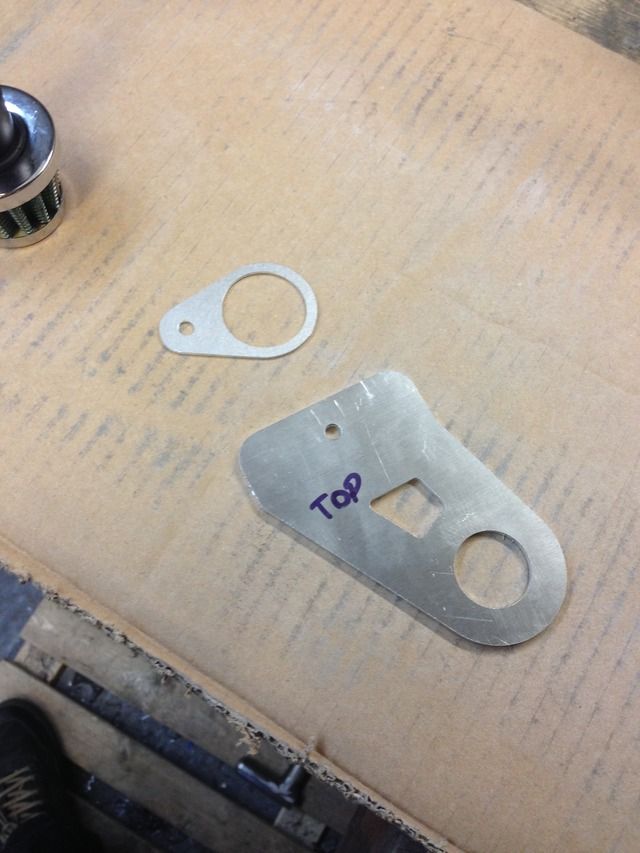
Bracket bent and tank in place
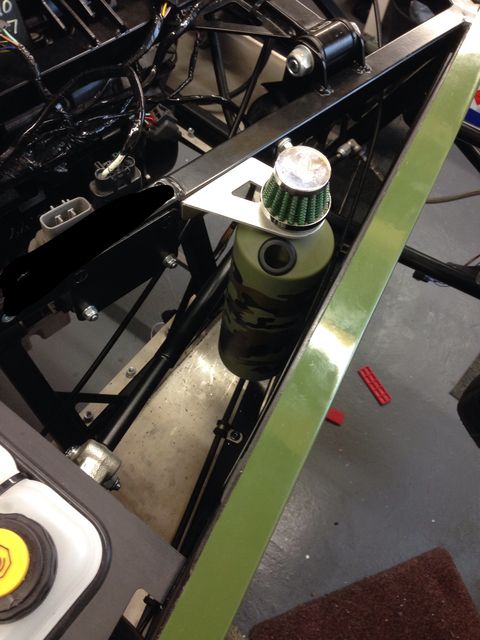
Bracket two
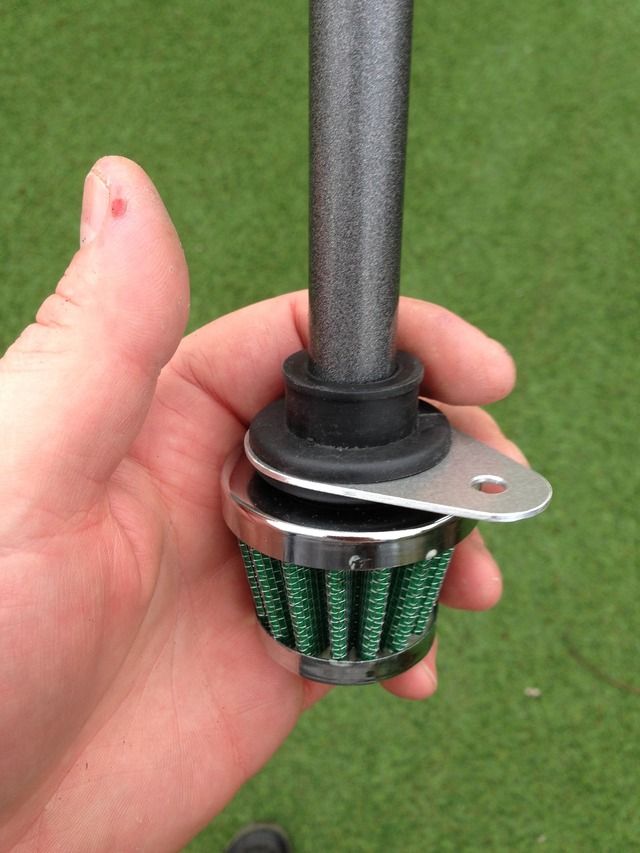

There was a threaded boss on the cam cover that I've bolted to
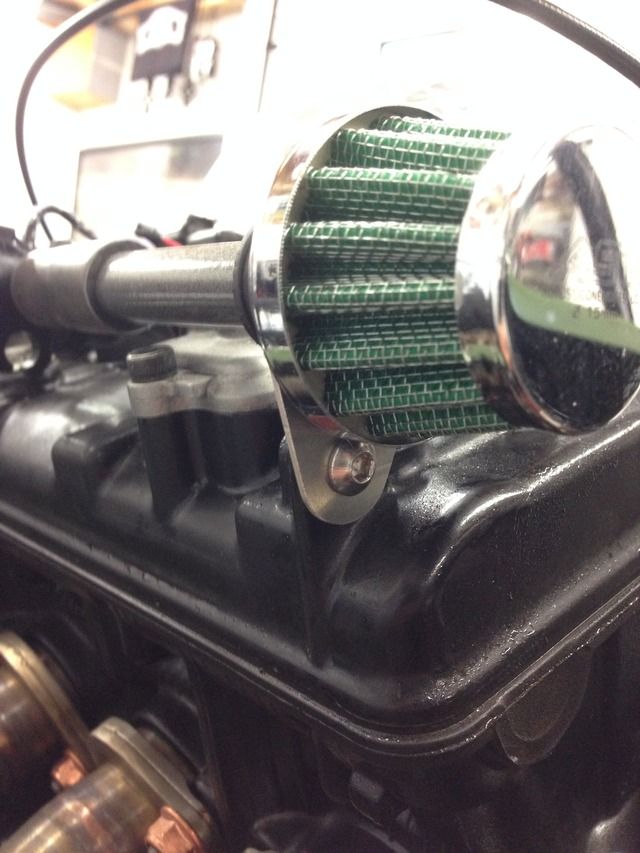
Then started to get the wiring tidied up and fastened in place
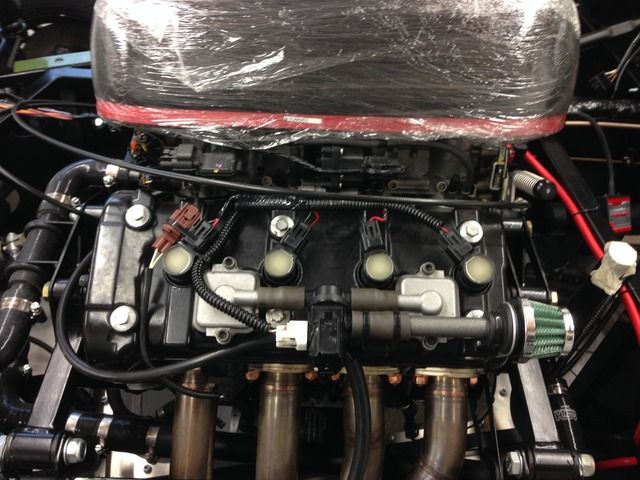
Rosco86 - 24/1/16 at 07:08 PM
Was on my lathe at 6am today
Turned this up to fit the drinks bottle, bit of screw cutting to
Filter pressed on top
Then on my dads cnc for a few brackets
Bracket bent and tank in place
Bracket two
There was a threaded boss on the cam cover that I've bolted to
Then started to get the wiring tidied up and fastened in place
That's the engine bay about finished I think
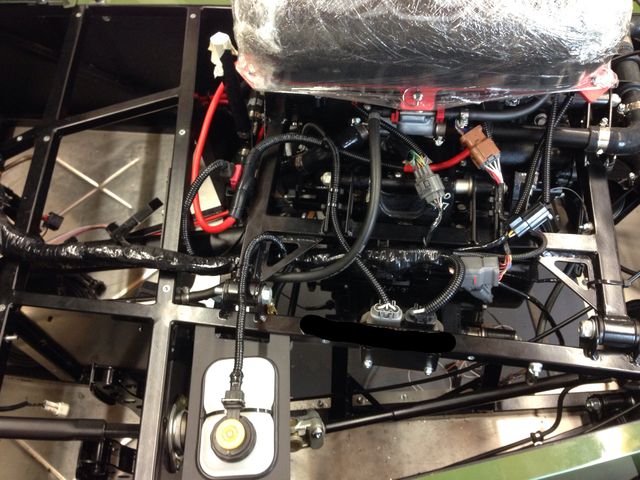
JSG89 - 24/1/16 at 07:28 PM
Purely Amazing.
From someone who has just started this is my inspiration!!
Great work as always!
Would love to see this in the flesh one day.
Keep up the great work.
Josh
DRM Black7 - 24/1/16 at 08:27 PM
Just mind blowing the little details!!! Superb mate superb
Rosco86 - 27/1/16 at 09:05 PM
Cheers guys, can't wait to get it finished!
Rosco86 - 30/1/16 at 08:12 PM
Got all my tunnel panels back from powder coating and got them fitted
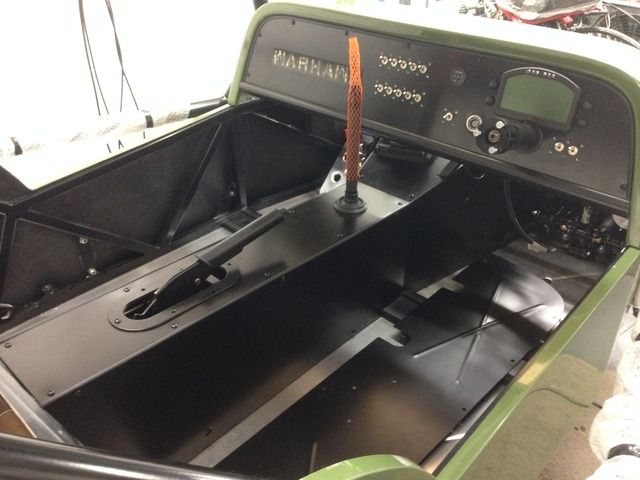
Edge beading worked out perfect
Also got a load of bolts powder coated black
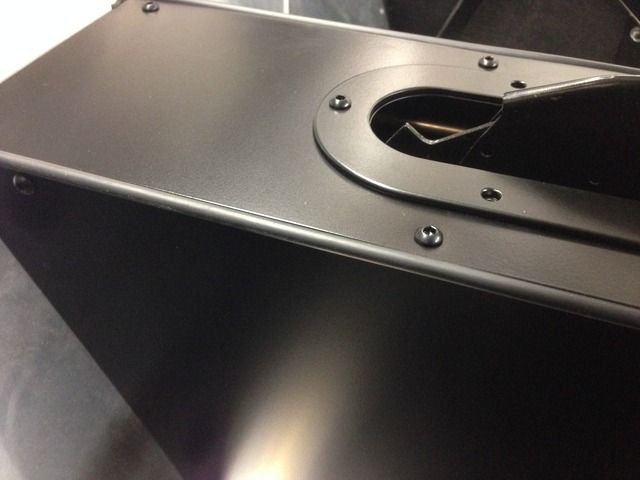
Oh and I've had some stickers made up saying "Warhawk" which is what I've decided to name the beast
Digimon - 22/2/16 at 04:50 PM
How you getting on with the car Ross?
Rosco86 - 7/3/16 at 07:00 PM
Hi guys, been a while since my last update, we've had a baby girl a couple of weeks ago, hence the month off the car! I did get a few bits and
bobs done before and just started getting a few bits done this week, but I think the days are long gone of spending 20-30 hours a week in the
garage!
My dad made me a shelf to take my IKEA tubs
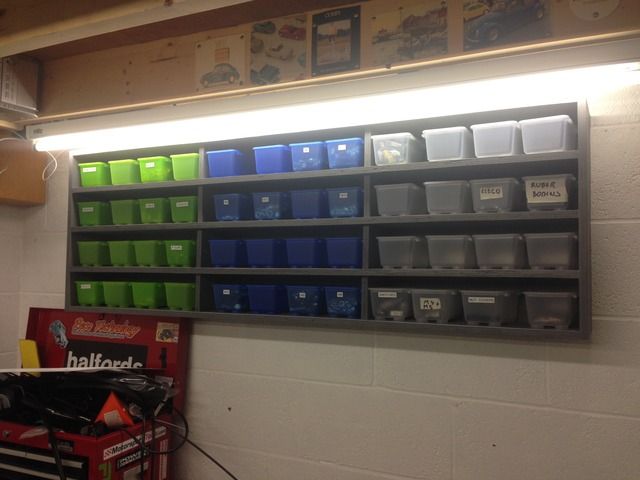
Dash label plates anodised and ready to engrave
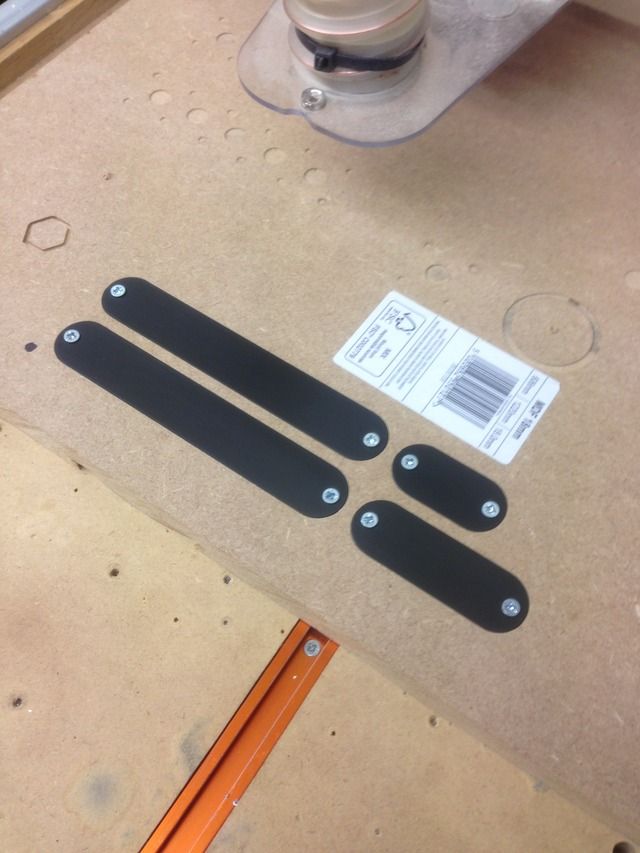
Engraved
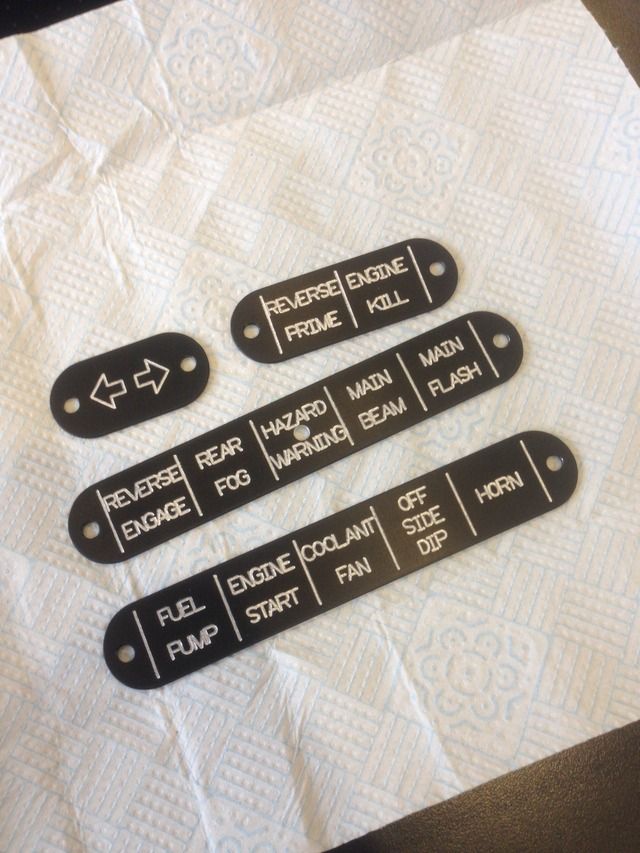
Headlights wired
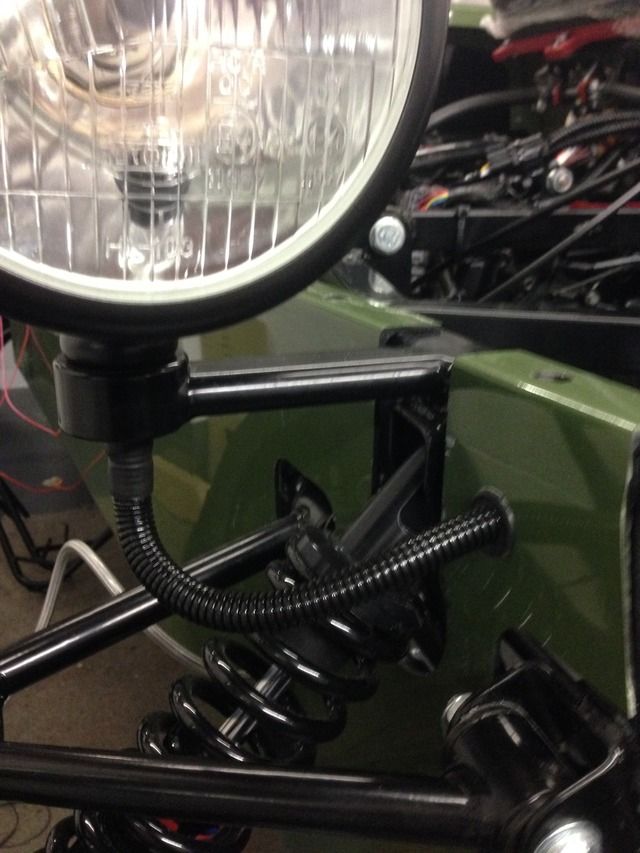
Tapered sleeves made for track rods
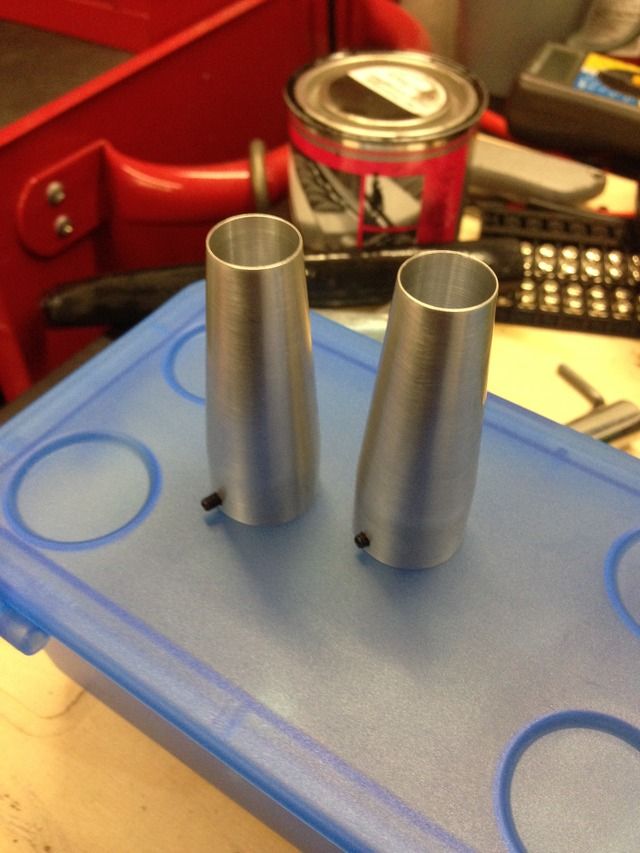
Just need anodizing
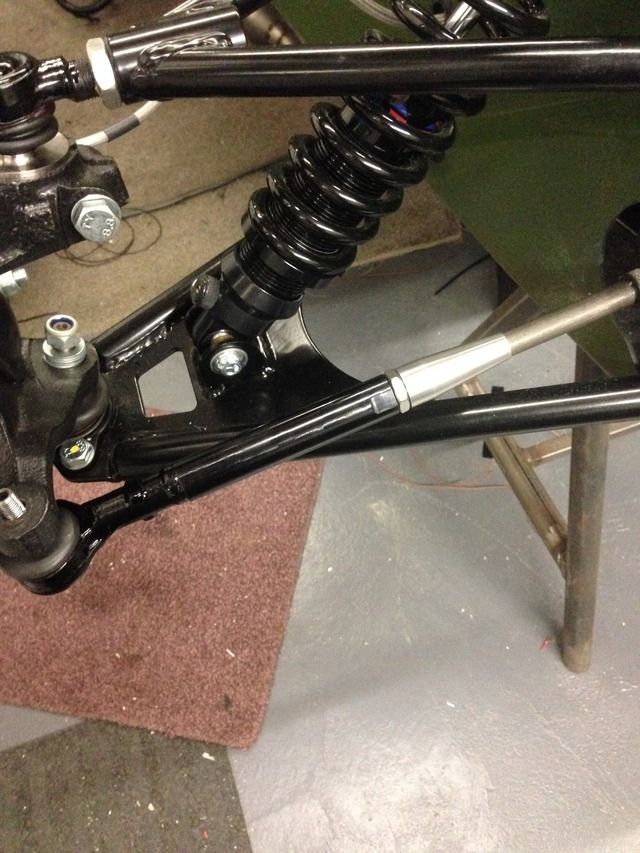
Fuel filler adapter anodised
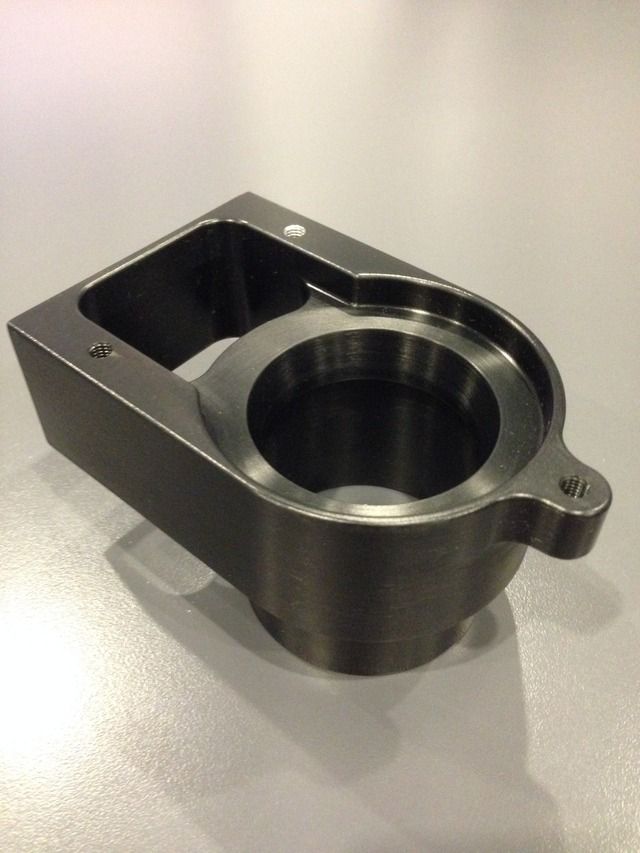
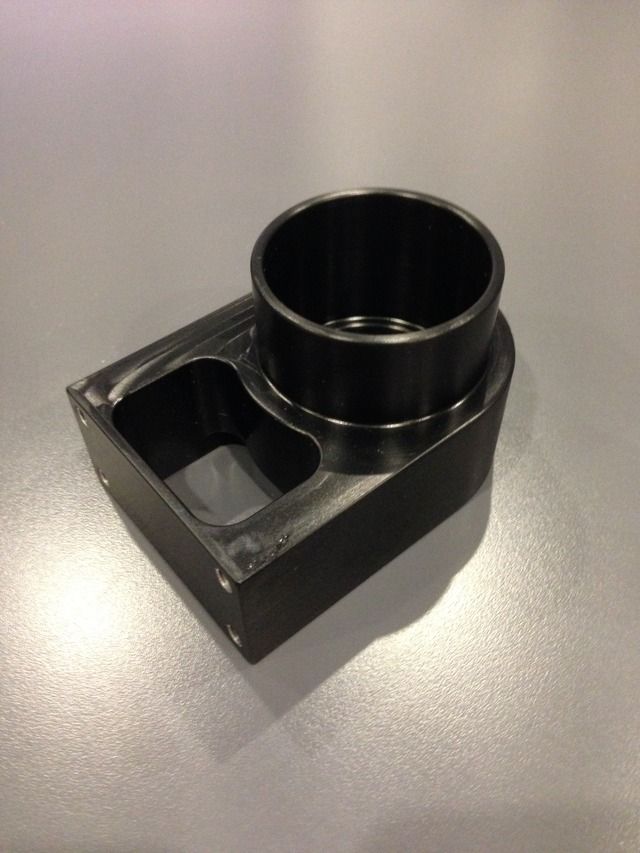
Fog and reverse light plinths made
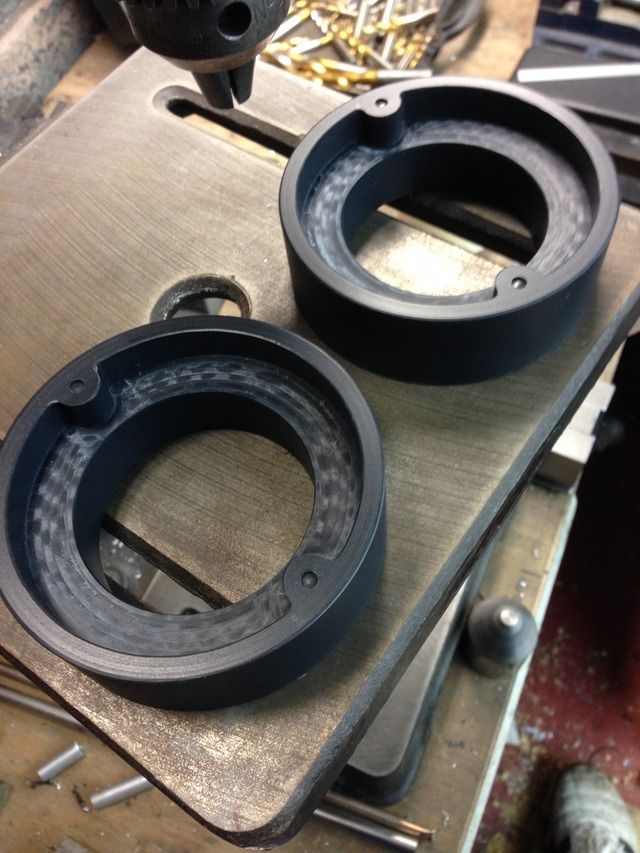
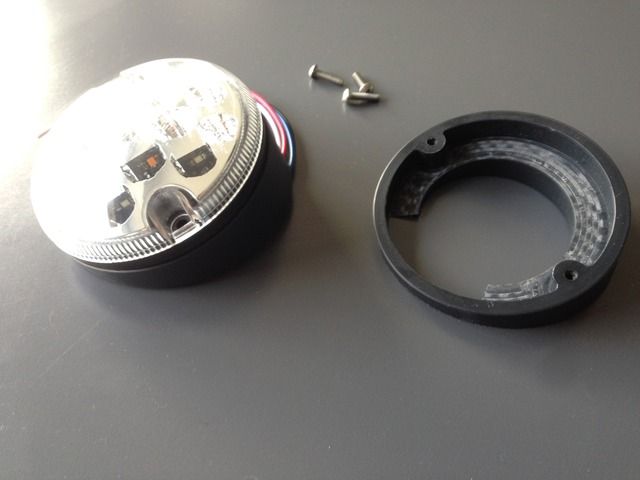
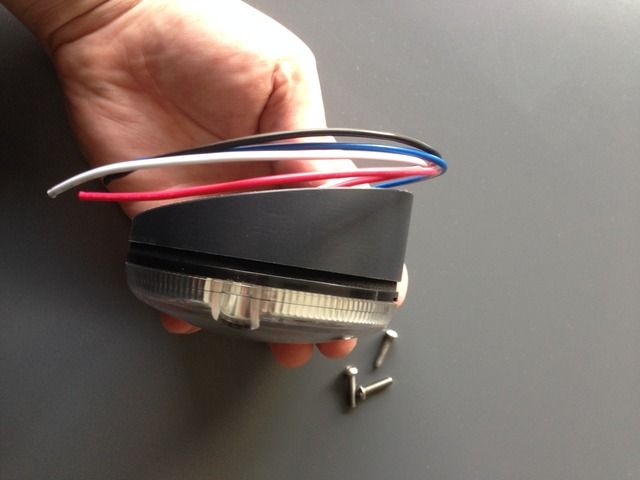
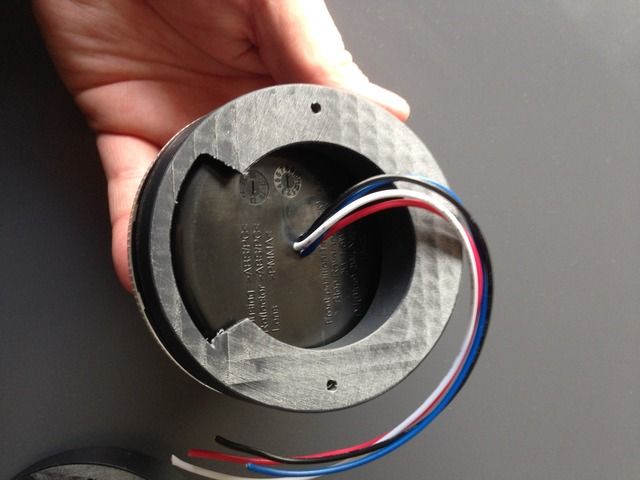
Adamirish - 7/3/16 at 07:16 PM
Congratulations on the new arrival!
AlanH - 7/3/16 at 09:58 PM
Just read you thread Ross. Cracking work, an impressive example of what can be achieved.
A
Digimon - 8/3/16 at 10:18 AM
Congratulations Ross
JSArmstrong - 10/3/16 at 08:09 PM
What a fantastic and inspirational build Rosco! And congratulations!
Rosco86 - 12/3/16 at 08:09 PM
Cheers guys!!!
I've got a few hours here and there and got a bit more done, also reached a bit of a milestone
Made a bit of a bracket to mount my horns in a better position
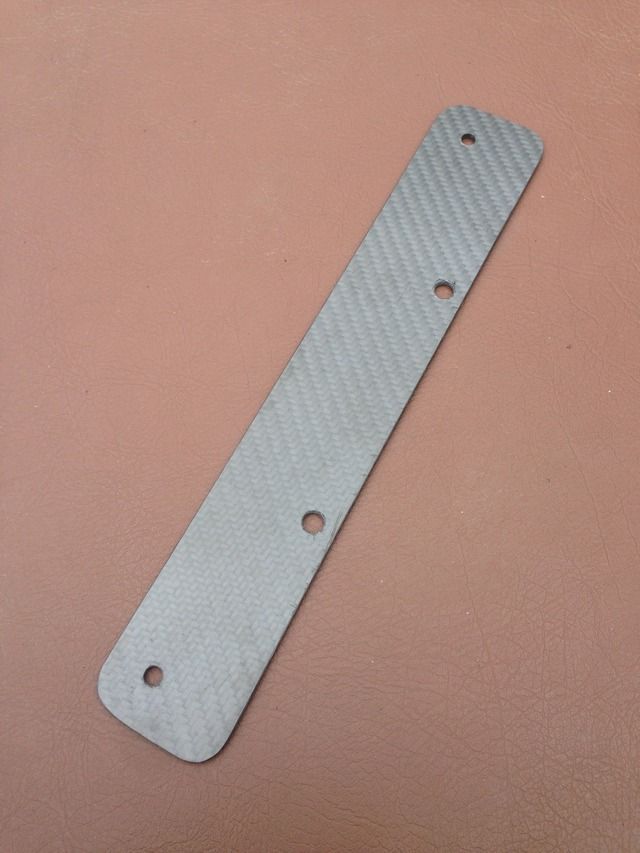
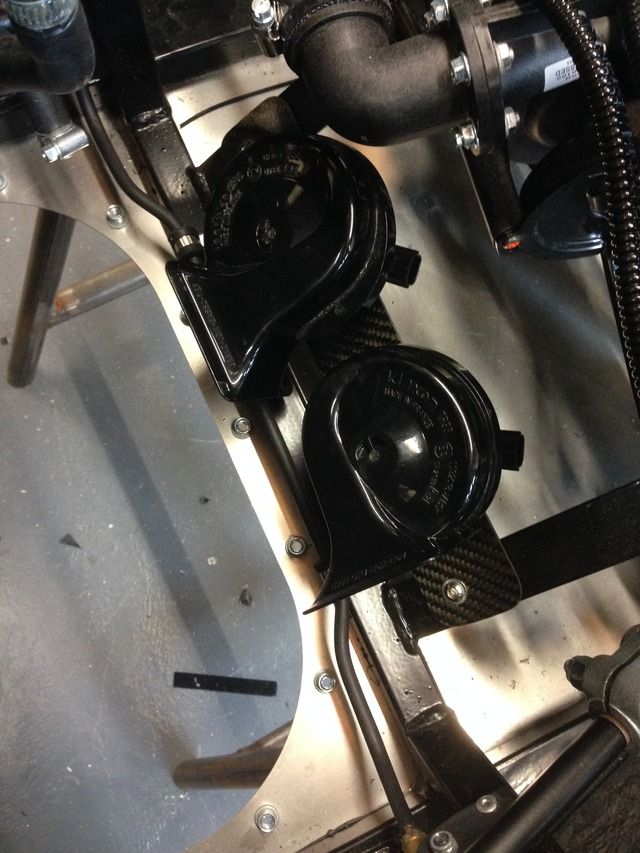
A bracket to support the middle of the rear tub
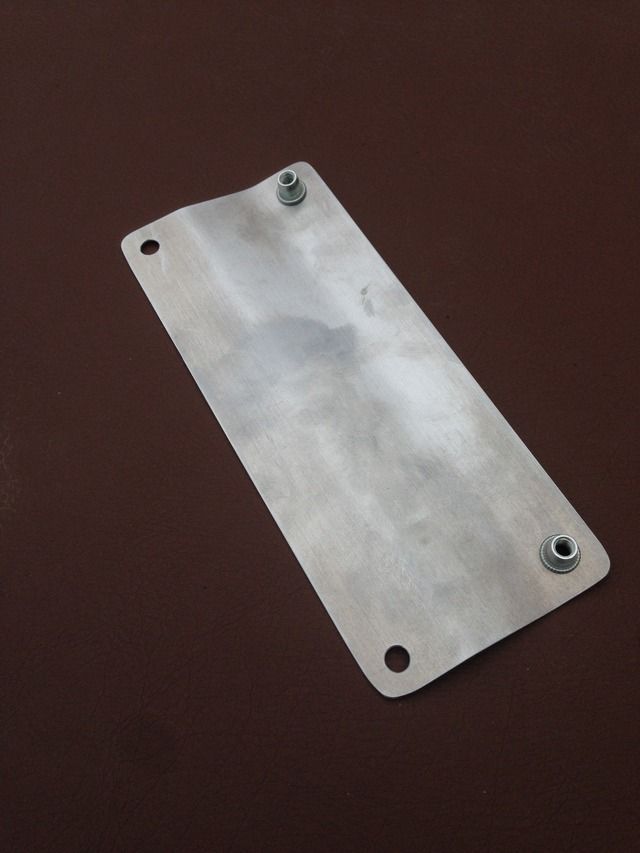
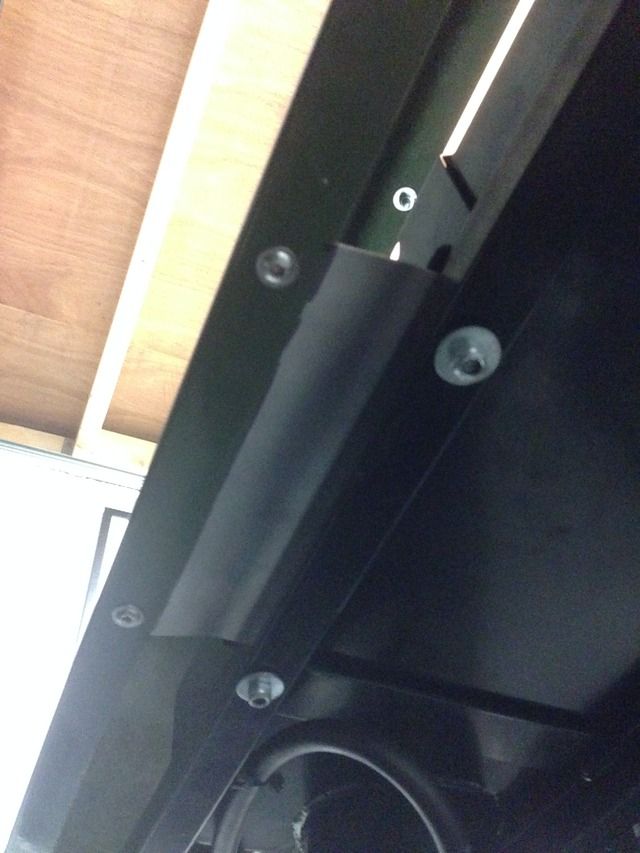
Then today got the wheels on ready for the floor!
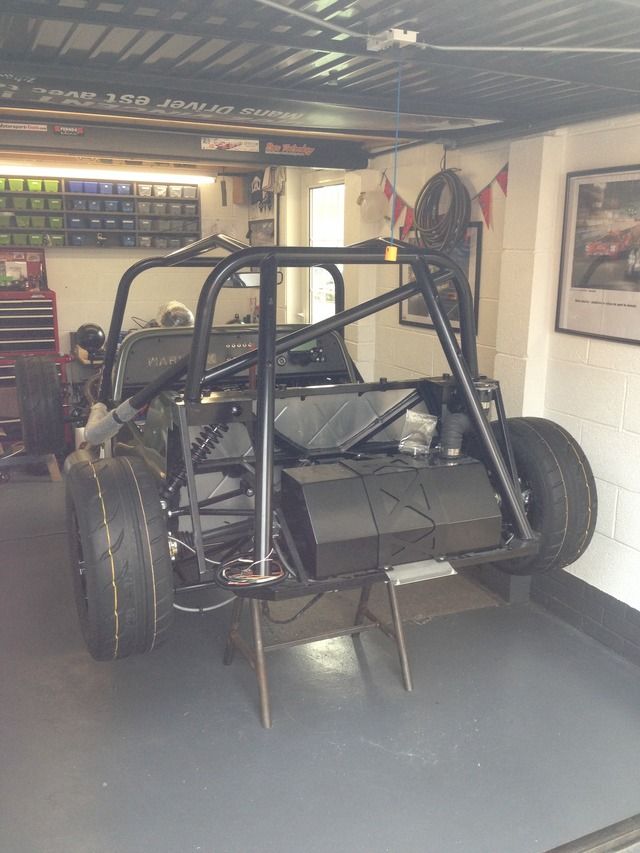
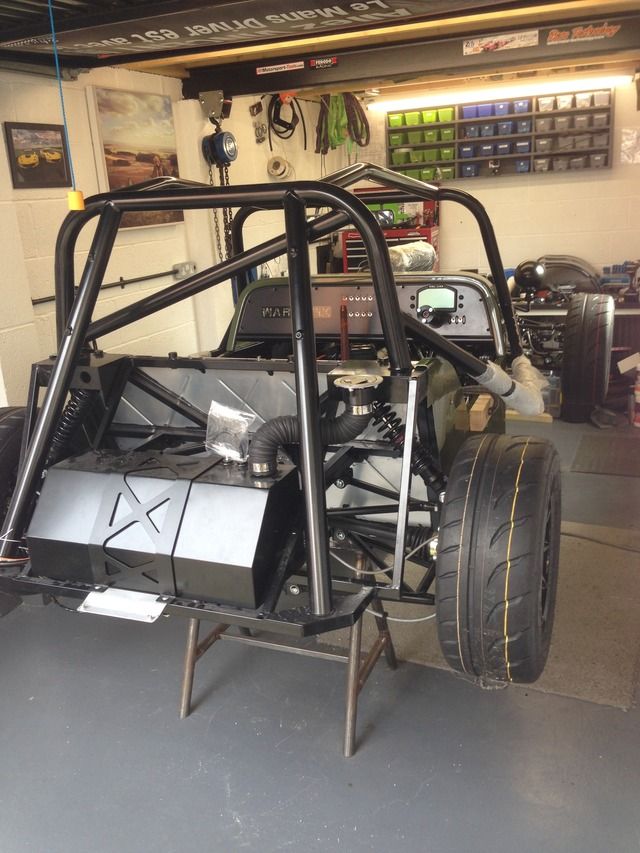
There was 8 of us and lifted it down a doddle, looks so much better on the floor!
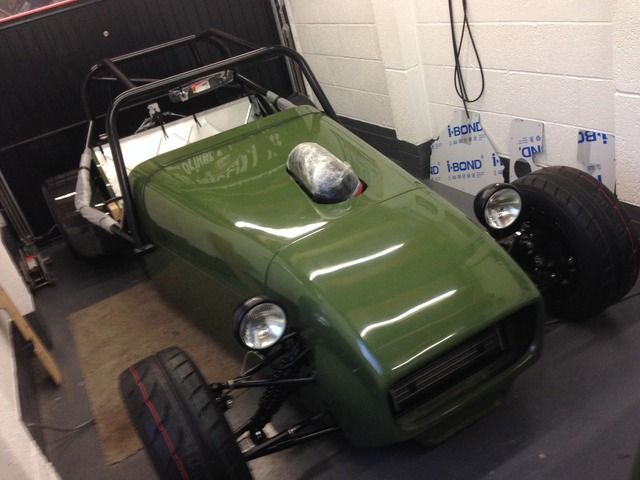
Then my mate called by with his corner weight scales
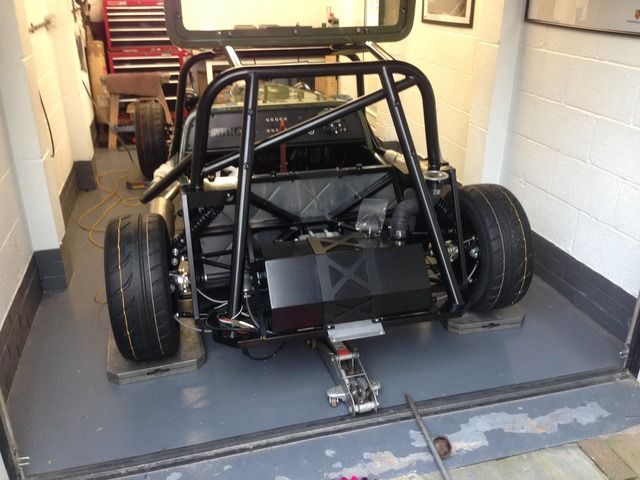
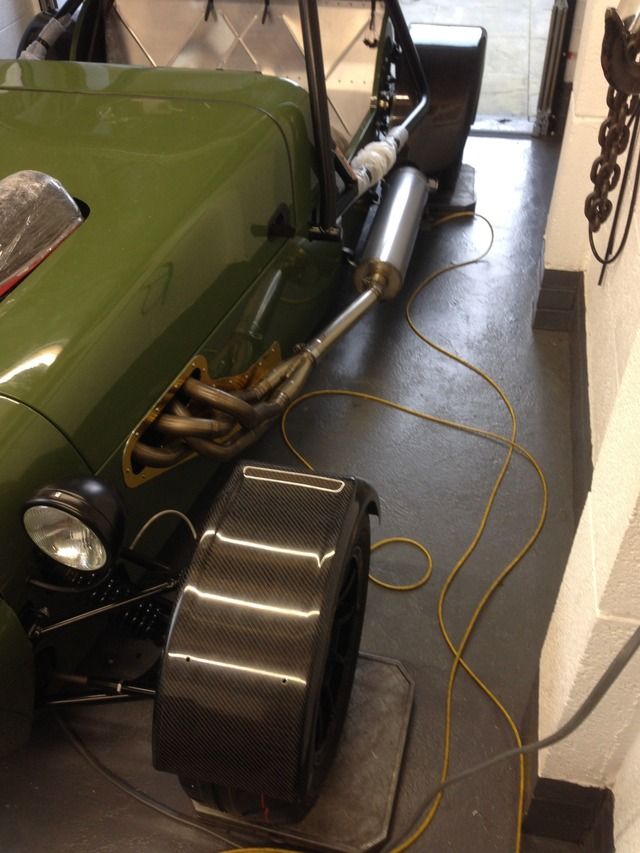
And I'm so happy with the weight! I put everything in the car that's left to fit, only things missing is seats and harnesses, oh and a tank
of fuel
Weight was 507kg so real happy with that, it's full of oil and coolant, so looking like 550kg max wet with the key in, no rubbish dry weights
here!
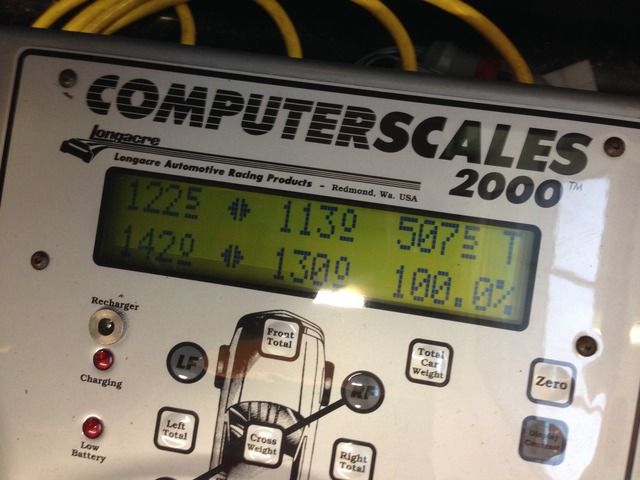
Oh also the car was heavy on the left so should be nice when I get in, or heavy on the right!
CosKev3 - 12/3/16 at 10:12 PM
Mint
Word of warning when you first go to fill it with fuel,my hose is exactly the same as yours from filler to tank and its puss to put fuel in!
You gets loads of splash back and can't have the fuel going in more than half speed
[Edited on 12/3/16 by CosKev3]
Rosco86 - 18/3/16 at 09:49 AM
quote:
Originally posted by CosKev3
Mint
Word of warning when you first go to fill it with fuel,my hose is exactly the same as yours from filler to tank and its puss to put fuel in!
You gets loads of splash back and can't have the fuel going in more than half speed
[Edited on 12/3/16 by CosKev3]
ah ok mate, might get a cool jerry can then, just so i look cooler
Rosco86 - 21/3/16 at 11:27 PM
Bit of a late one tonight but I need to press on and get it finished!
Finally fitted my dash switch guards and label plates, well happy with it!
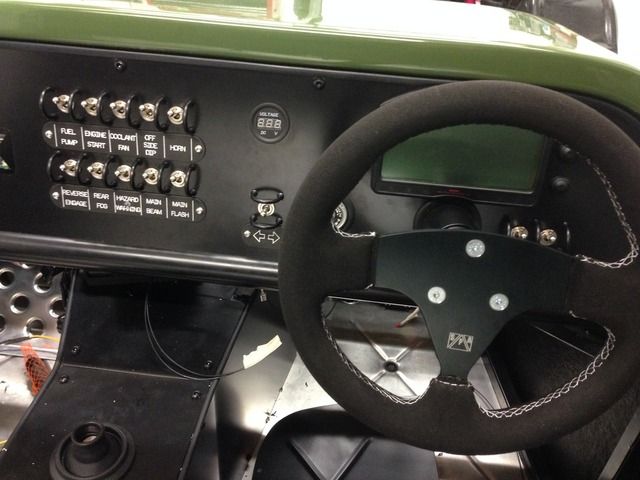
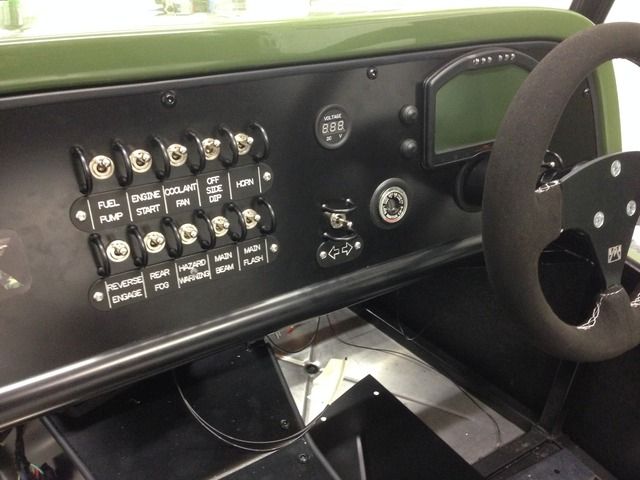
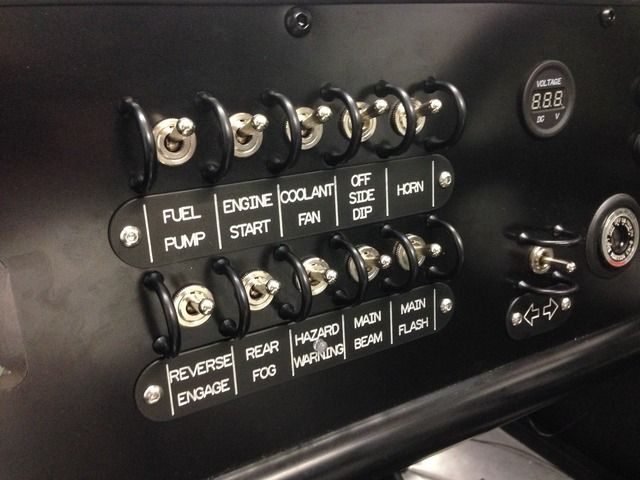
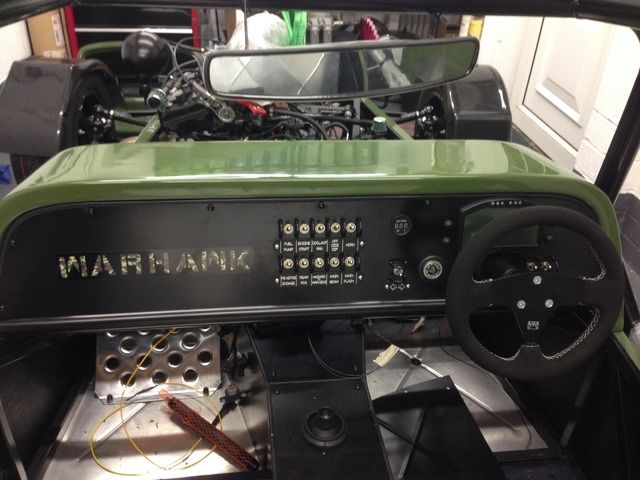
CosKev3 - 22/3/16 at 08:07 AM
Nice
Not sure if it's been mentioned already,but seeing as you have no steering lock fitted you will need a second security device for IVA.
Rosco86 - 27/3/16 at 03:16 PM
quote:
Originally posted by CosKev3
Nice
Not sure if it's been mentioned already,but seeing as you have no steering lock fitted you will need a second security device for IVA.
Cheers pal, yeah Ive read the iva manual and I think the ignition key counts as one and the factory engine imobilizer will count as the second, not
100% tho
Rosco86 - 27/3/16 at 03:57 PM
Got a few more jobs done
The front of the car was on the floor on the bump stops so had to make some plastic spacers
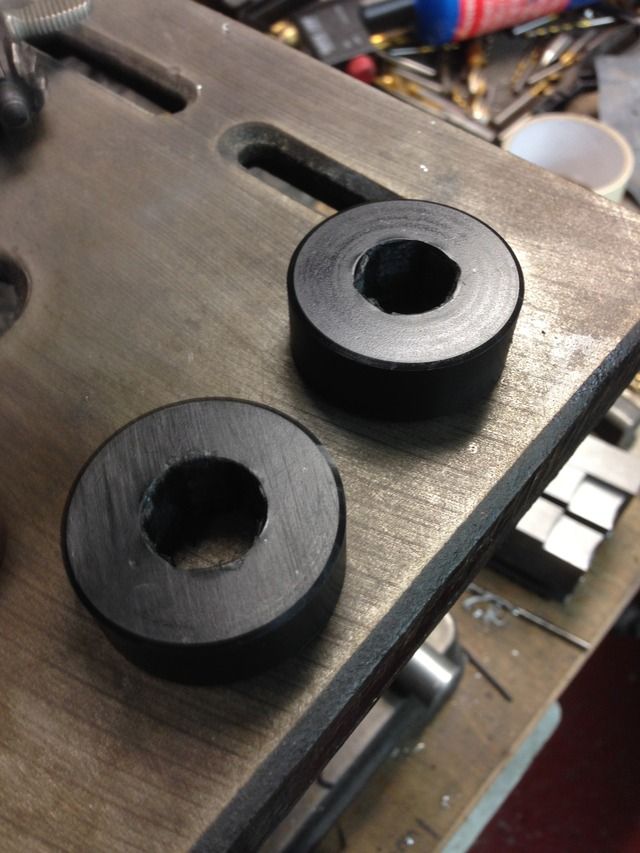
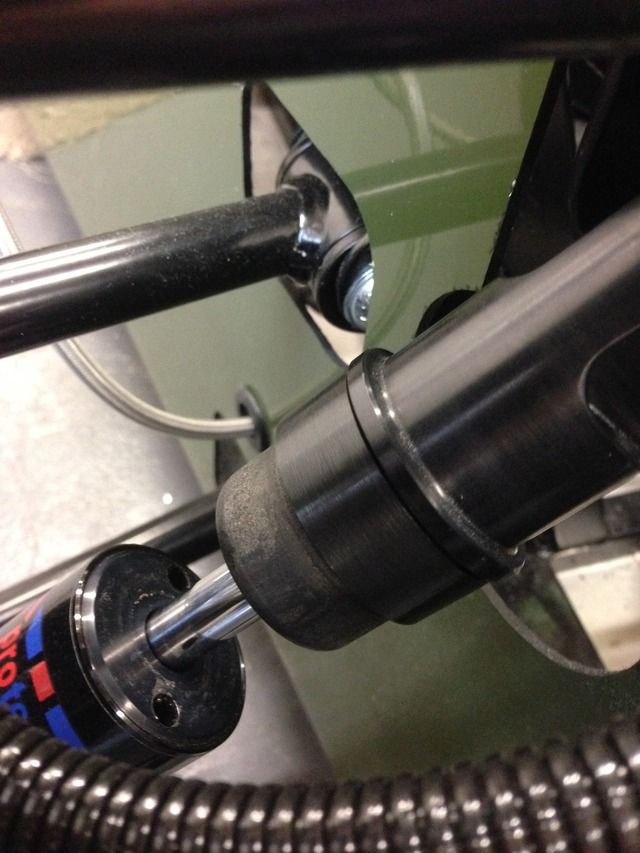
Sorted a brake light switch out
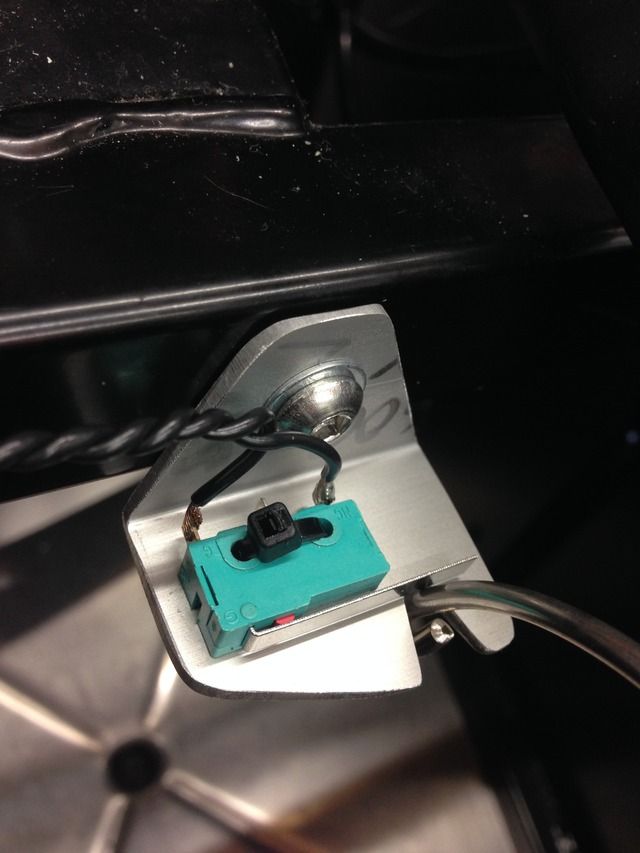
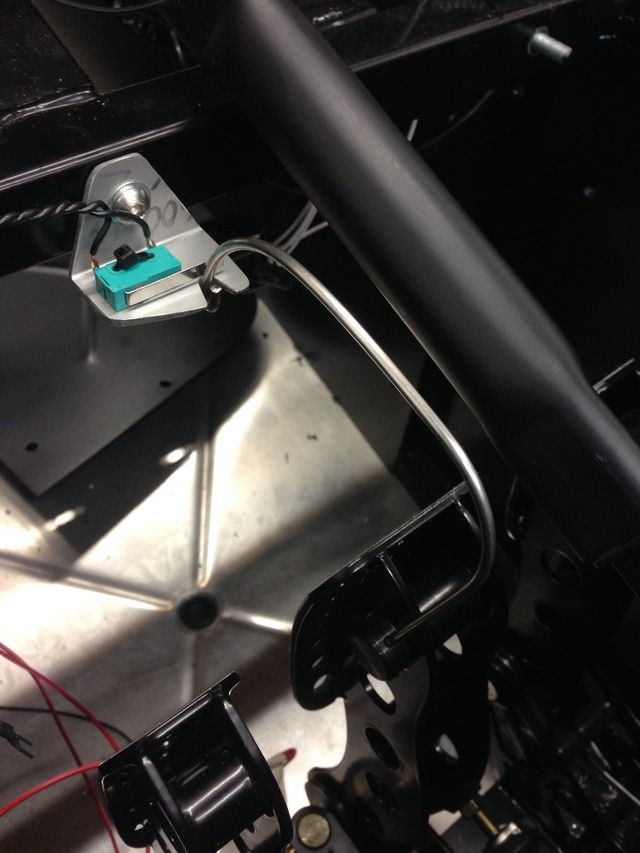
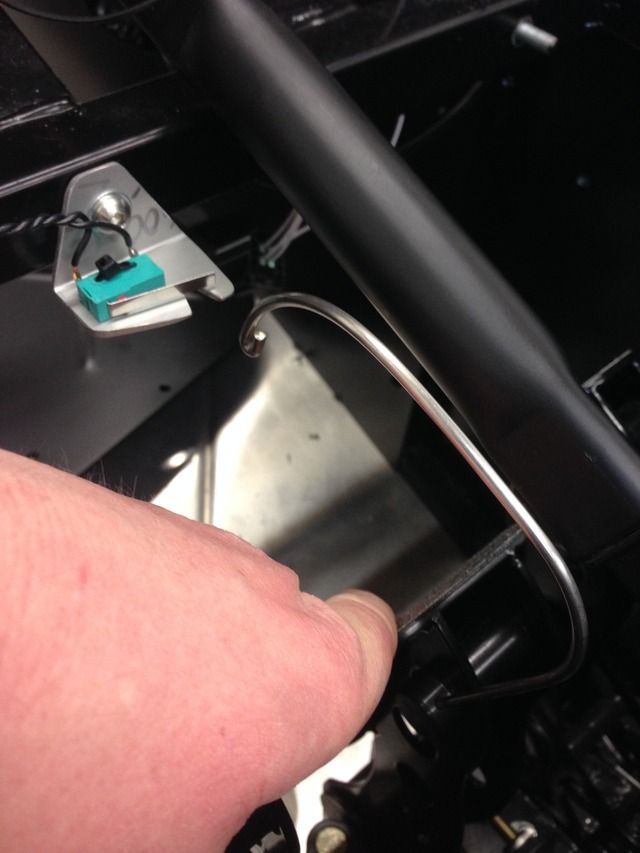
Next up a job I've been putting off for some reason, front indicators,
First up drilled a small hole to check it looked about right
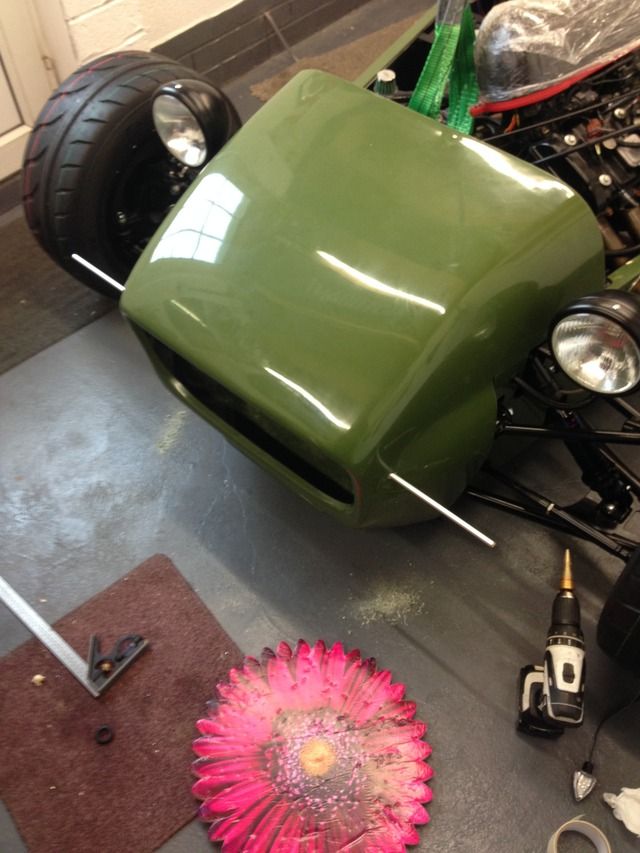
I had to open some grommets up as the fiberglass is quite thick
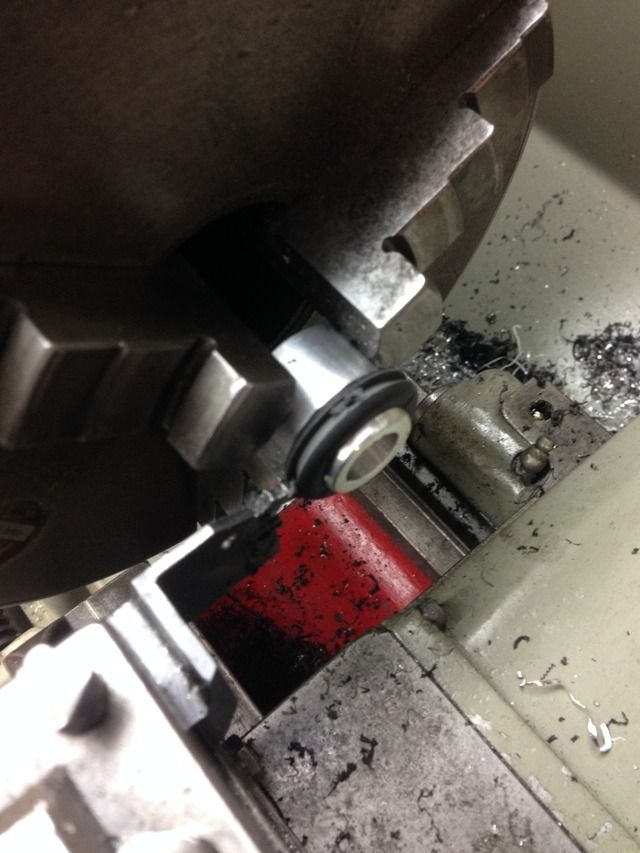

Glued some indicators into some carbon tube
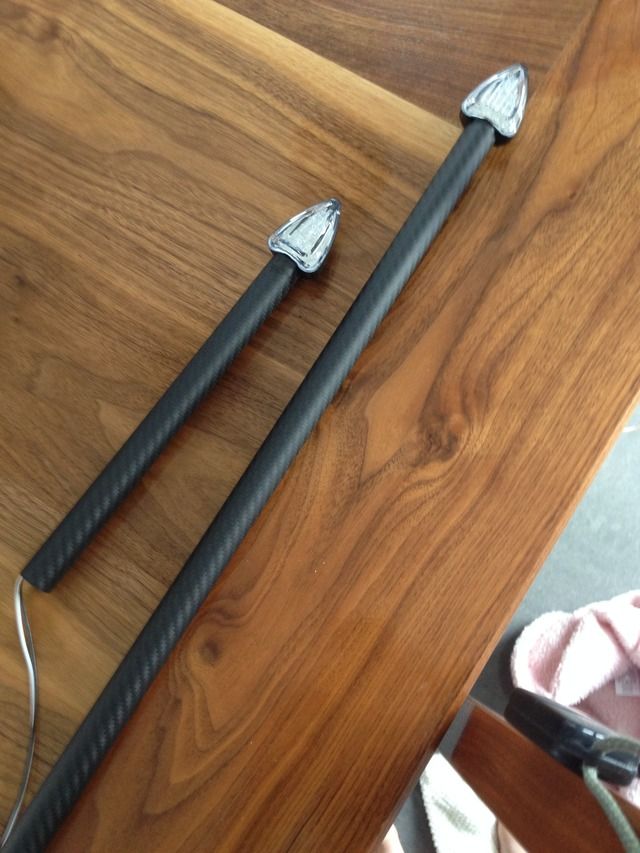

These will push in either side and join with this and the wires will come out the sleeving
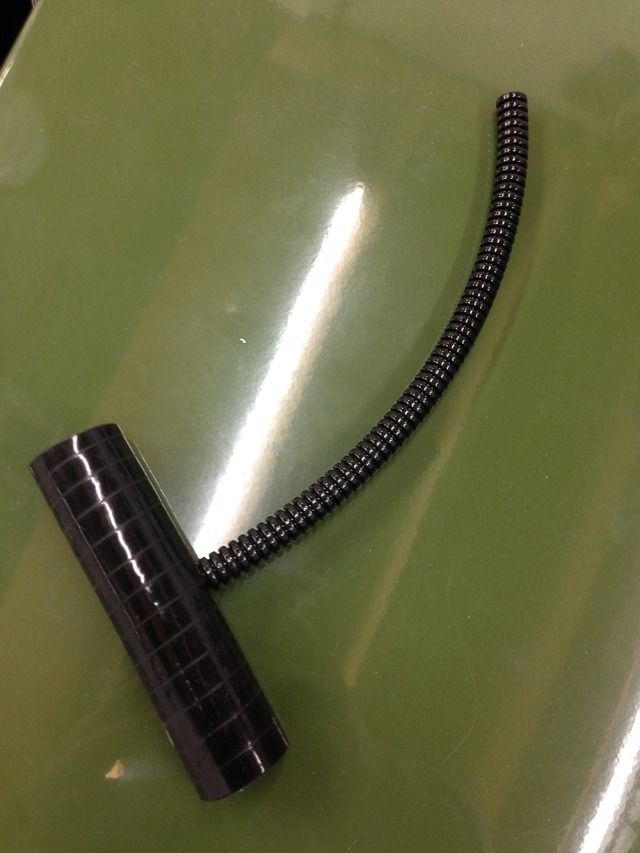
My mate lent me his laser alignment gear, and left me to it!
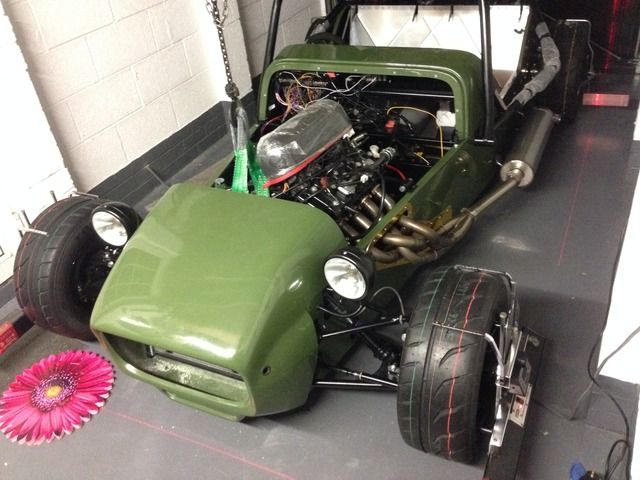
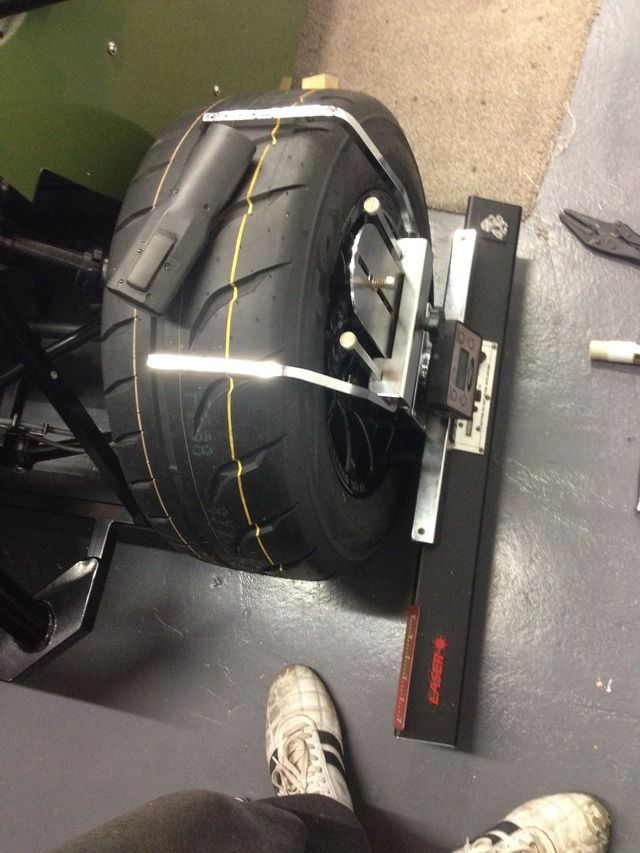
Suspension all tight and cycle wing brackets fitted
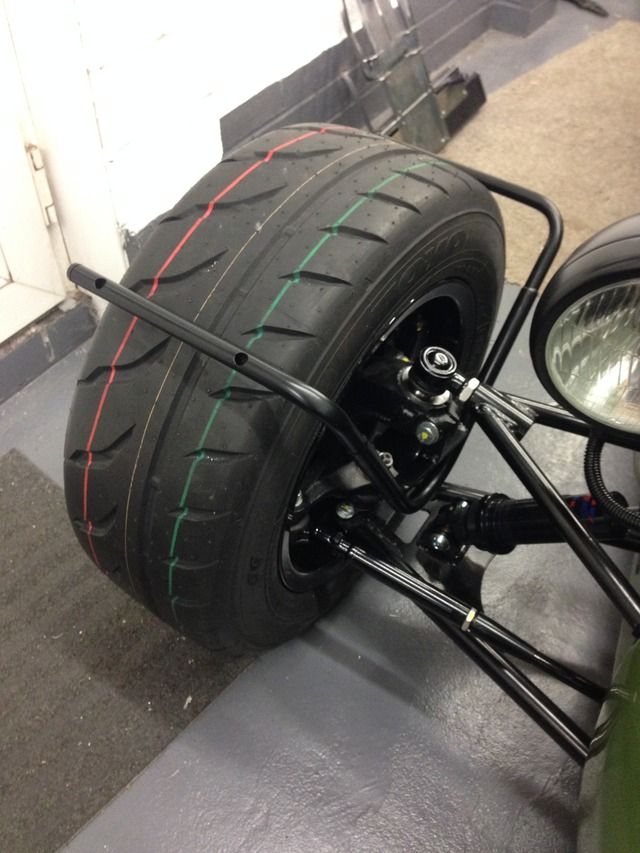
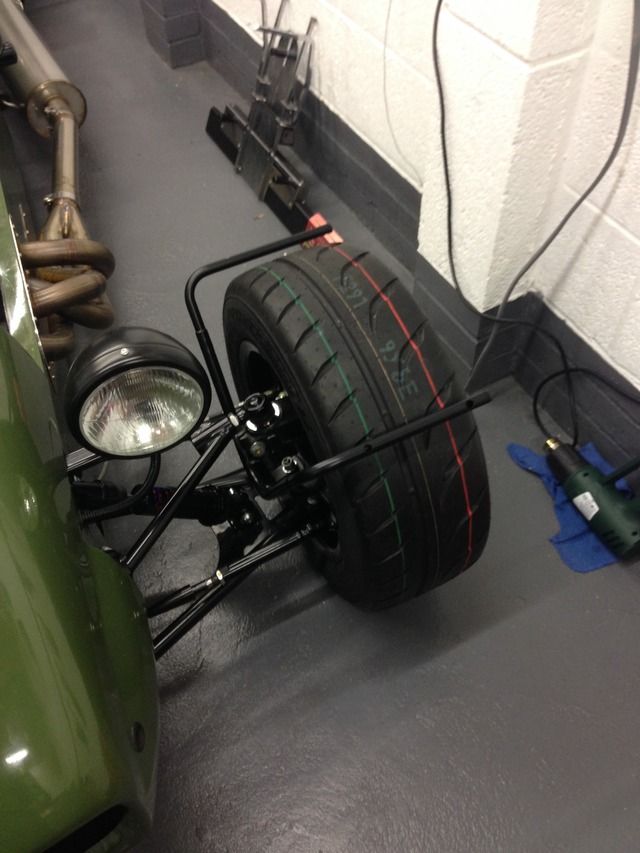
CosKev3 - 28/3/16 at 09:33 AM
Getting a bit repetitive now saying 'awesome work' 'looks spot on' etc!!!!!
Really looking forward to seeing this in the flesh hopefully this year
What's the score with aligning it with no springs on the dampers?
Surely the alignment will be out again once the springs go on and you set up the ride height?
Also if that's the height your going to be running the car it doesn't look like you will have enough travel on your dampers,it will surely
be bottoming out the damper under compression?
Rosco86 - 5/4/16 at 08:36 PM
quote:
Originally posted by CosKev3
Getting a bit repetitive now saying 'awesome work' 'looks spot on' etc!!!!!
Really looking forward to seeing this in the flesh hopefully this year
What's the score with aligning it with no springs on the dampers?
Surely the alignment will be out again once the springs go on and you set up the ride height?
Also if that's the height your going to be running the car it doesn't look like you will have enough travel on your dampers,it will surely
be bottoming out the damper under compression?
Cheers mate, yeah hoping to get it finished soon!
No springs on as I've got the chassis sat on blocks at the ride height I'm going to run, 4" front 5" rear, I can't really
corner weight and set ride height till it's all finished and wanted to get the alignment somewhere near,
No springs so I can check the bump steer,
After thinking about it your proberly right about the front travel, think I'm going to lift it up a bit, say 5" front, 6" rear
That will mean 4" front travel and 4" rear travel when it's on the bump stops, sound ok?
Rosco86 - 5/4/16 at 08:46 PM
Bit of an update
Front grill glued in
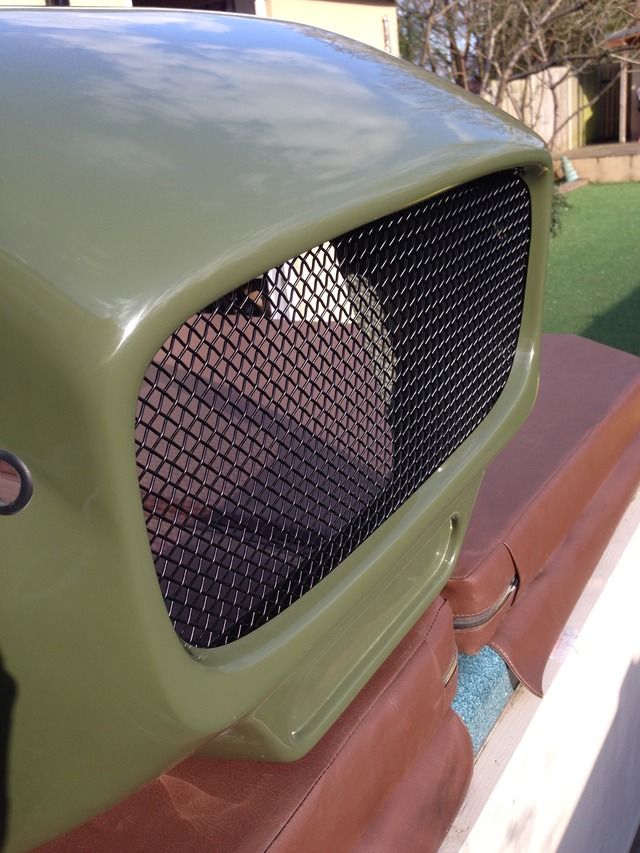
Got some wiring tidied up, still more to do but getting there, refitted the bulkhead to see how it fits
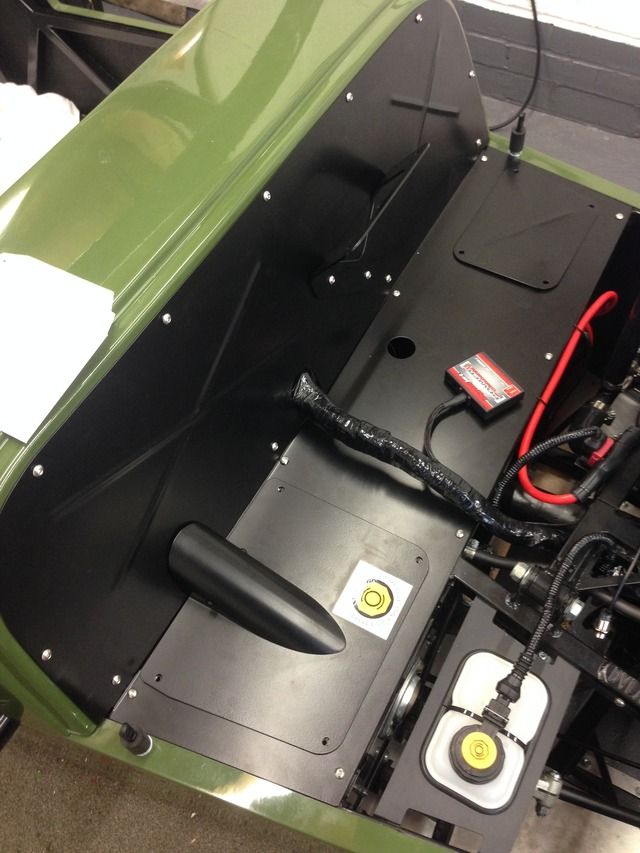
Fitted the fog and reverse lights

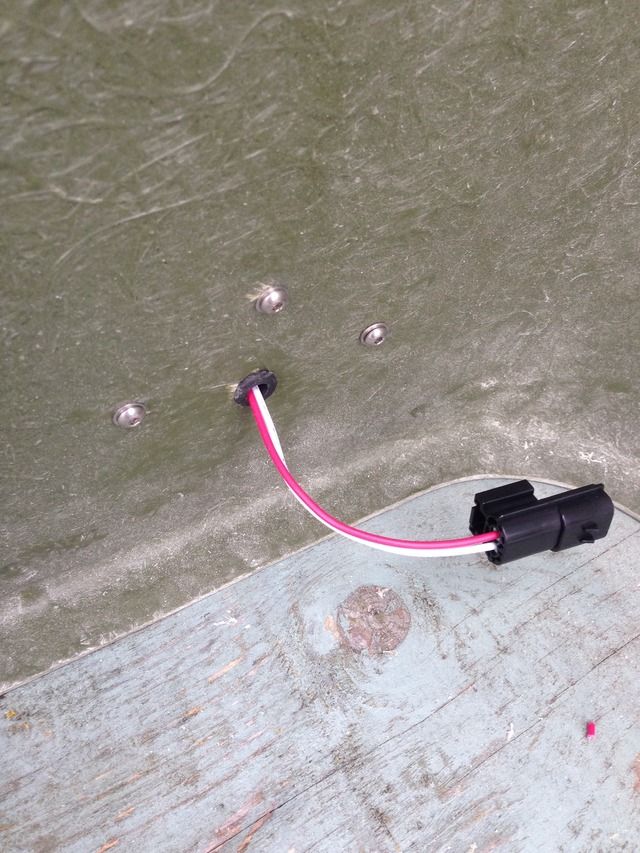
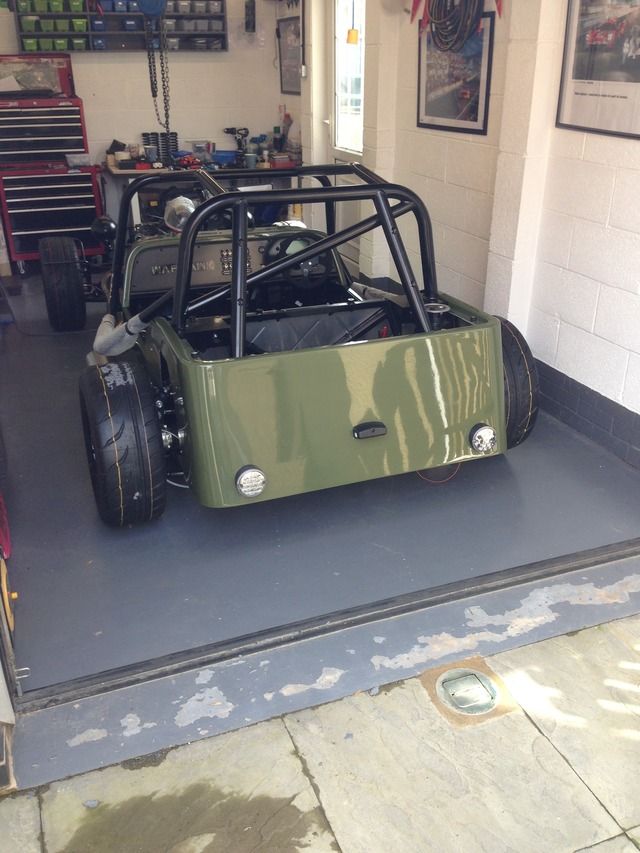
And yes that is my garage floor paint on my tyre grrrr
Got the rear lighting wiring almost finished, surprising how much kit you need!
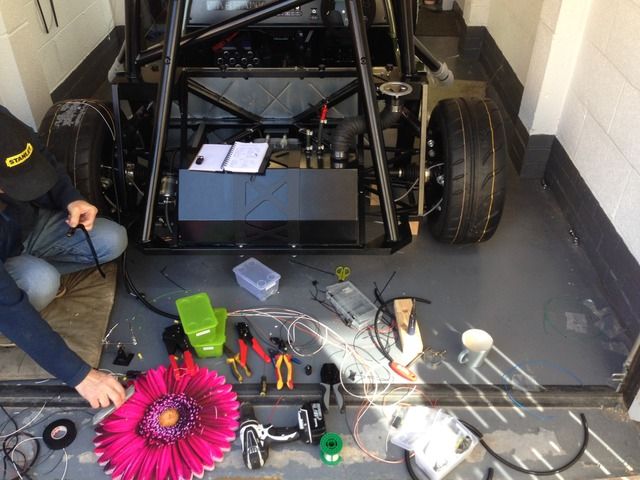
Fuel breather fitted
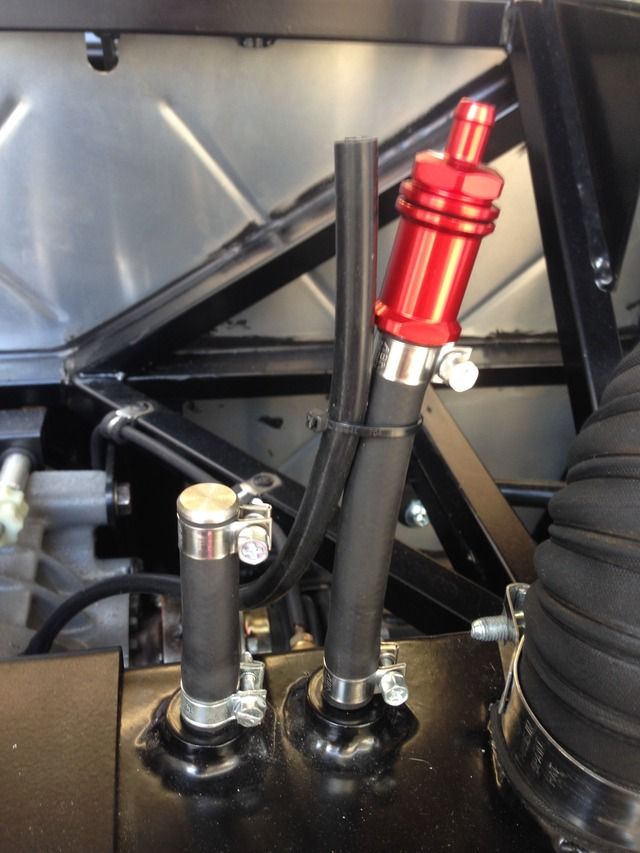
Made a dibond divider to separate the footwell from the battery
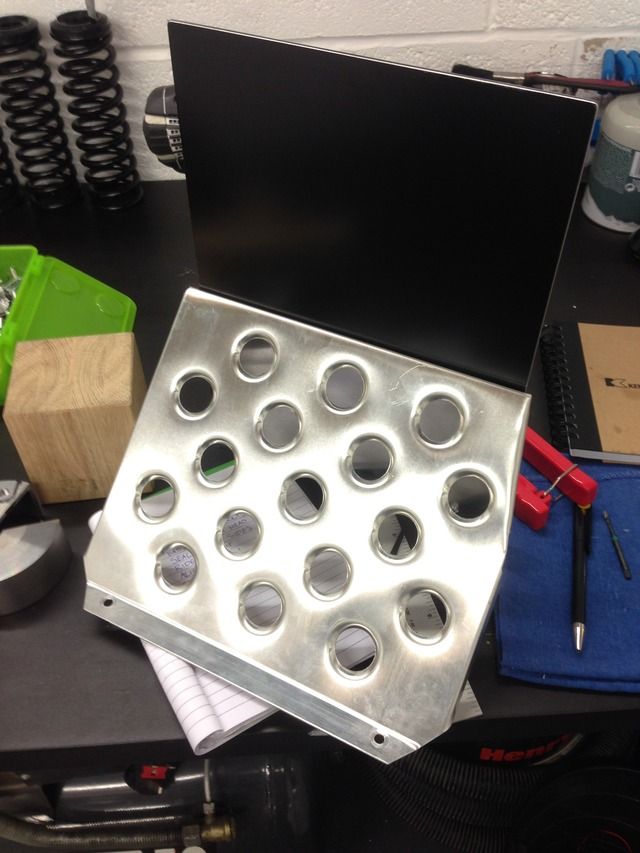
Rosco86 - 19/4/16 at 08:21 PM
Bit more of an update,
Lifted my ride height up a bit, 5" front 6" rear, got all my camber and toe adjusted
Then checked the bump steer, to start with from ride height it full bump it was toeing in 4mm a side
After sliding the rack up a bit on the slots I've now got
0mm total toe at full droop
2mm total toe at ride height
2mm total toes at full bump
Which according to my mate who lent me the lasers should be ok
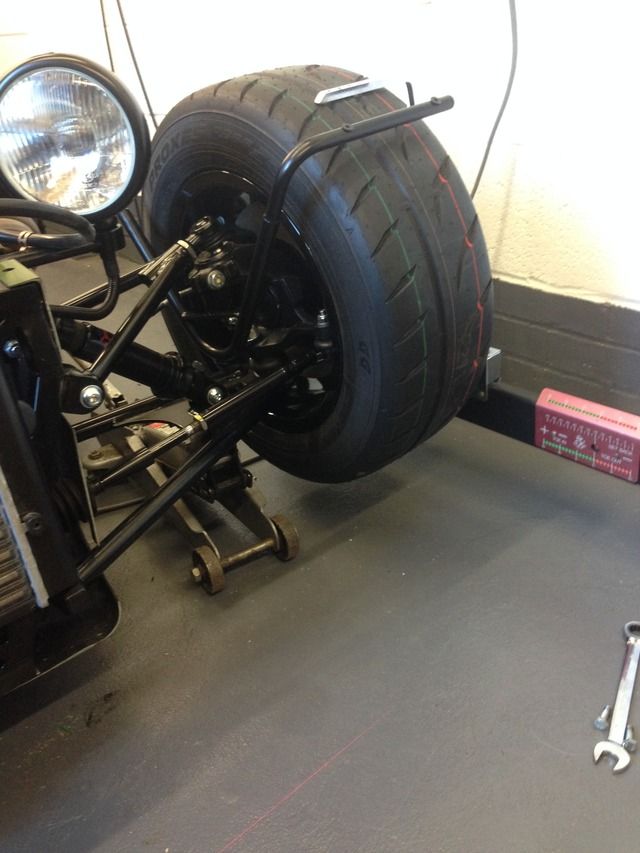
Just need to put the springs back on the shocks, and get the ride height correct and then corner weight it when it's finished and double check
the alignment
Next up, I've filled my iva forms out and sent them off! Woo hoo
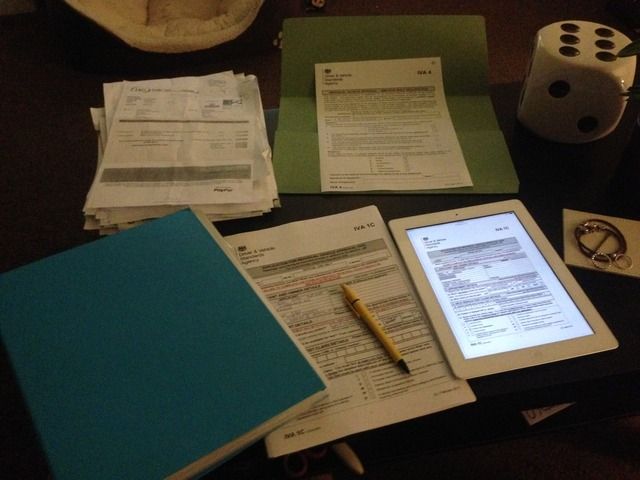
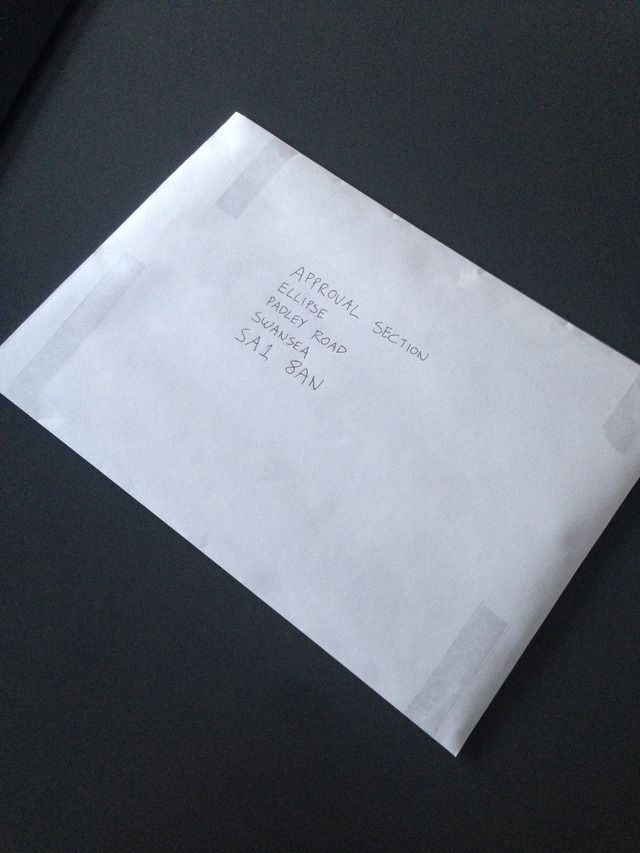
I have been on with other bits and bobs but still got a bit to do, I need to get cracking!
hkp57 - 20/4/16 at 09:50 AM
Its a great looking car and its a credit to you.
one question, does it annoy you as it does me that the Toyo R888 r tread patterns are not handed?
I just got a set and bugs the life out of me when you look at the car from the front and it looks like a tyre is on backwards knowing its not.
How hard would it have been for Toyo to tool up two molds
Rosco86 - 24/4/16 at 07:05 PM
quote:
Originally posted by hkp57
Its a great looking car and its a credit to you.
one question, does it annoy you as it does me that the Toyo R888 r tread patterns are not handed?
I just got a set and bugs the life out of me when you look at the car from the front and it looks like a tyre is on backwards knowing its not.
How hard would it have been for Toyo to tool up two molds
Cheers pal, yeah how did you guess? Drives me nuts,
Rosco86 - 24/4/16 at 07:13 PM
Got a bit more done this weekend, not as much as I would of liked but it's slowly getting there
My mum sowed me a hand brake gator up
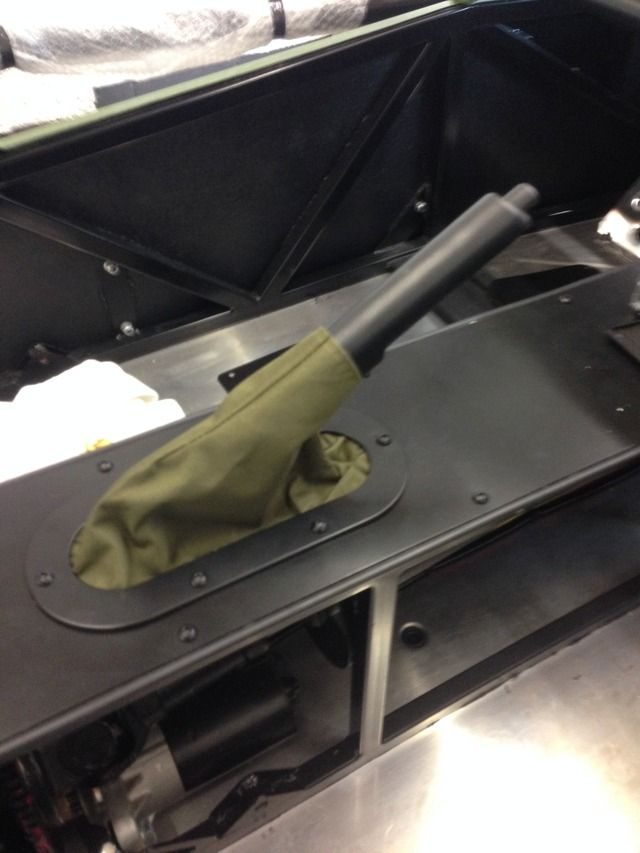
Which spured me on to make a padded centre for my wheel
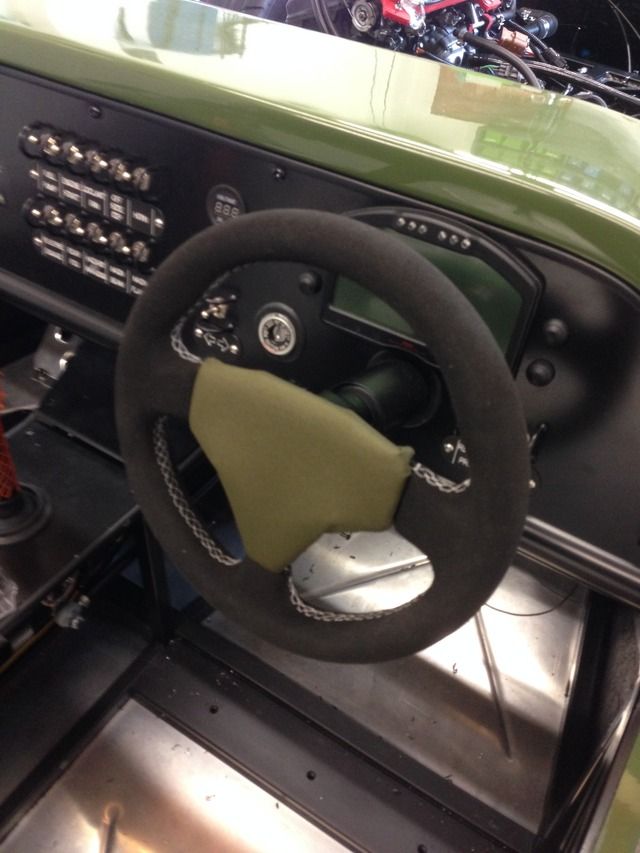
And for people who think I don't bodge things
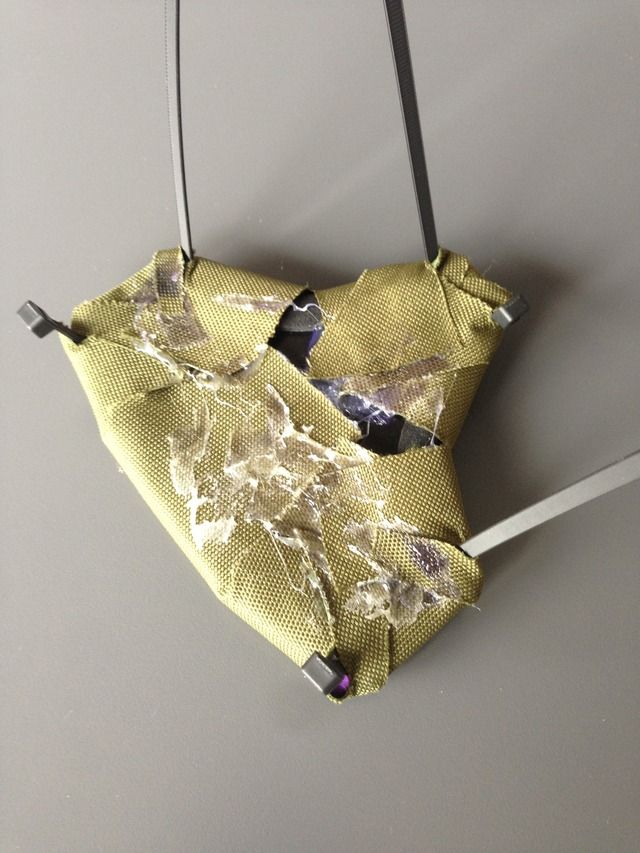
Made my vin plate

Finished the wheel arch light plinths, these took loads of work but they have turned out perfect,
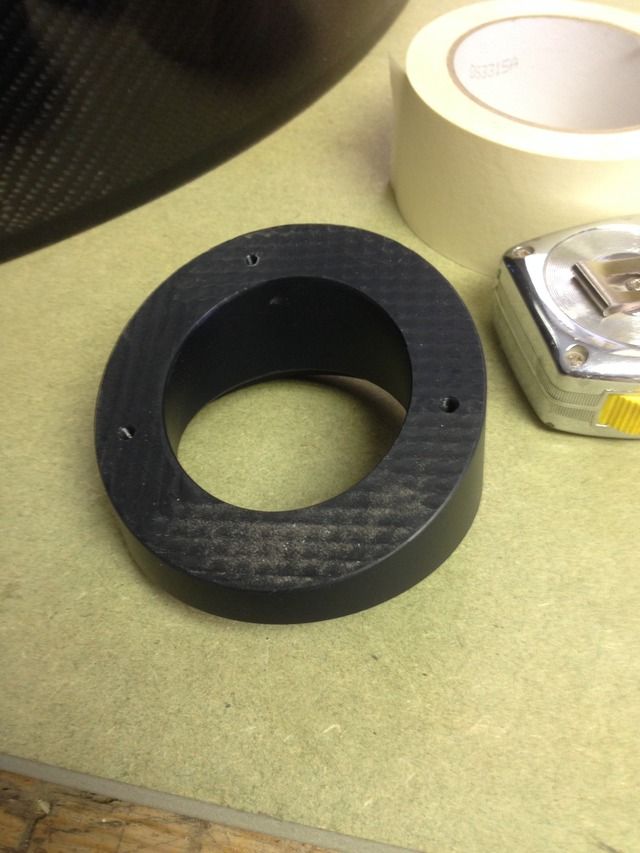
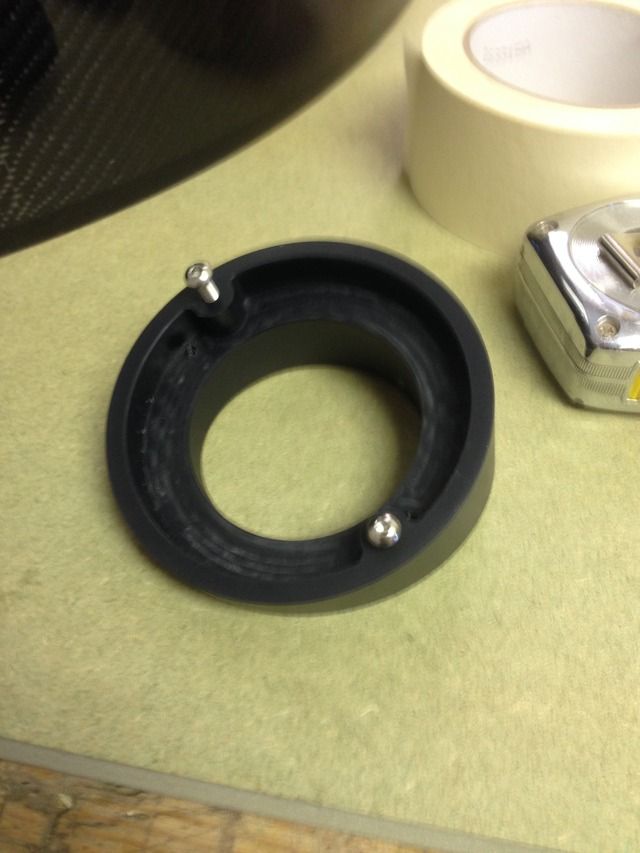
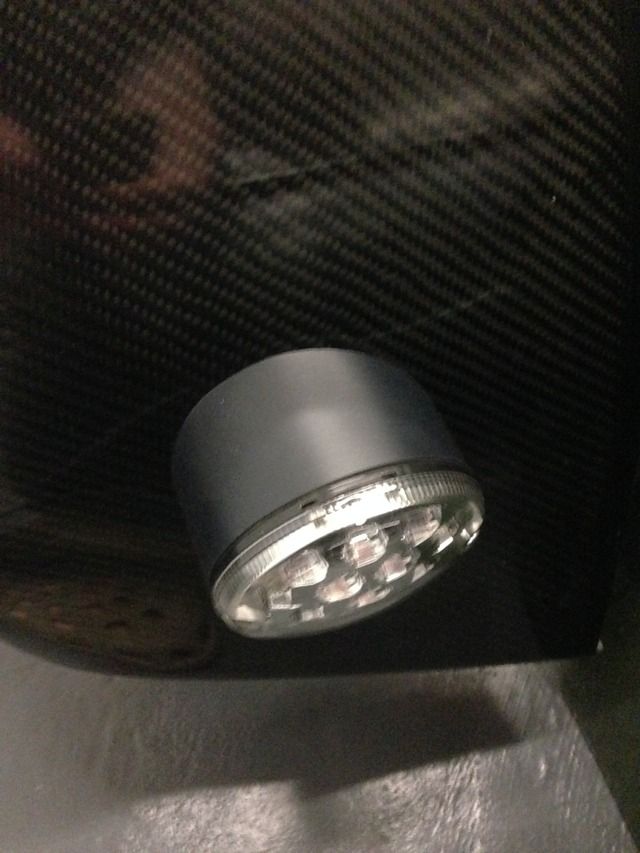
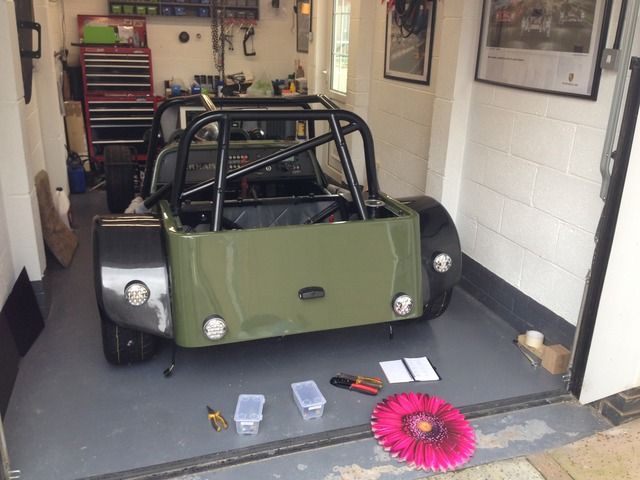
Rear wiring loom all finished now, just a bit left to sort behind the dash
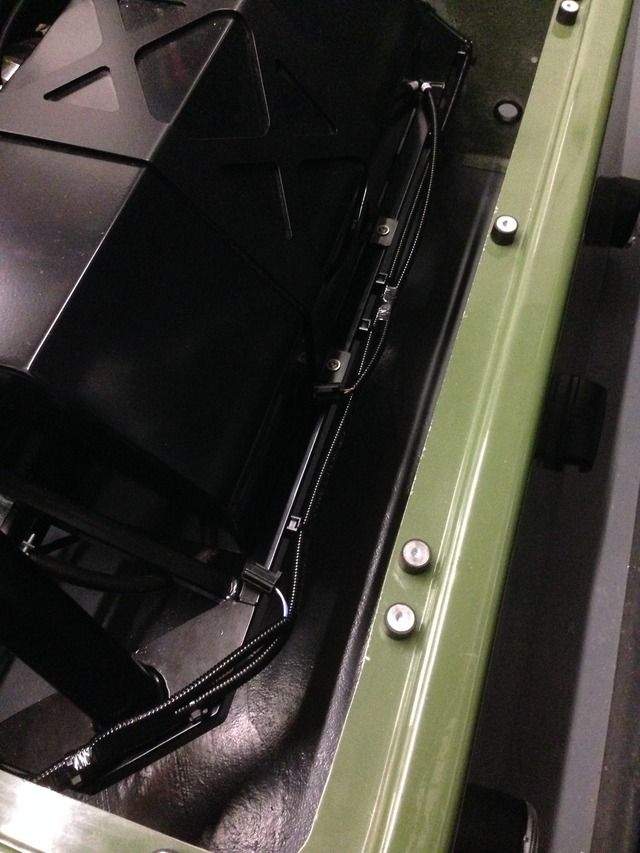
Rosco86 - 25/4/16 at 07:45 PM
Got a little job that was nagging me sorted tonight
The joint of the front indicator carbon tubes
Mk1 that I wasn't really happy with, wasn't really solid enough
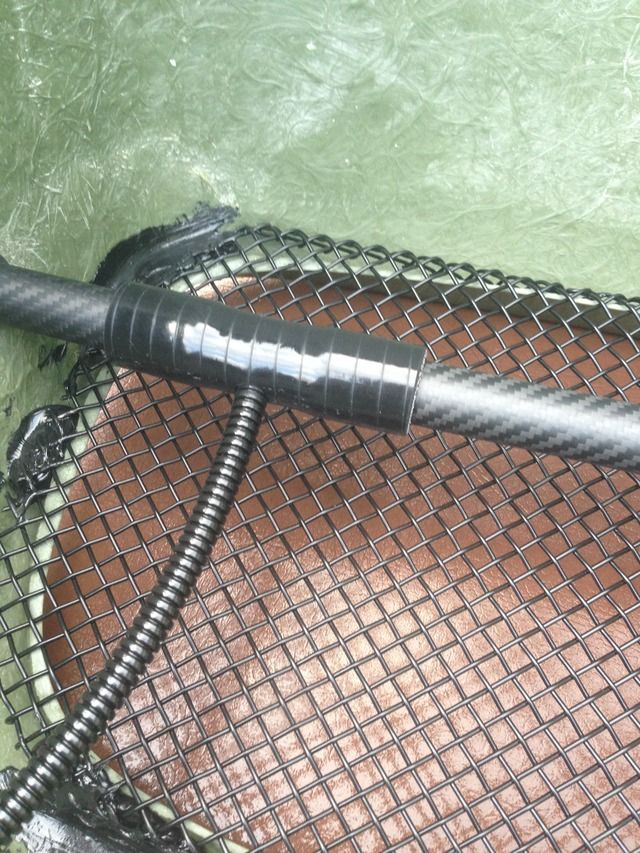
Mk2 bit of nylon turned up and two bolts through the plastic into the tube, looks less of a bodge to
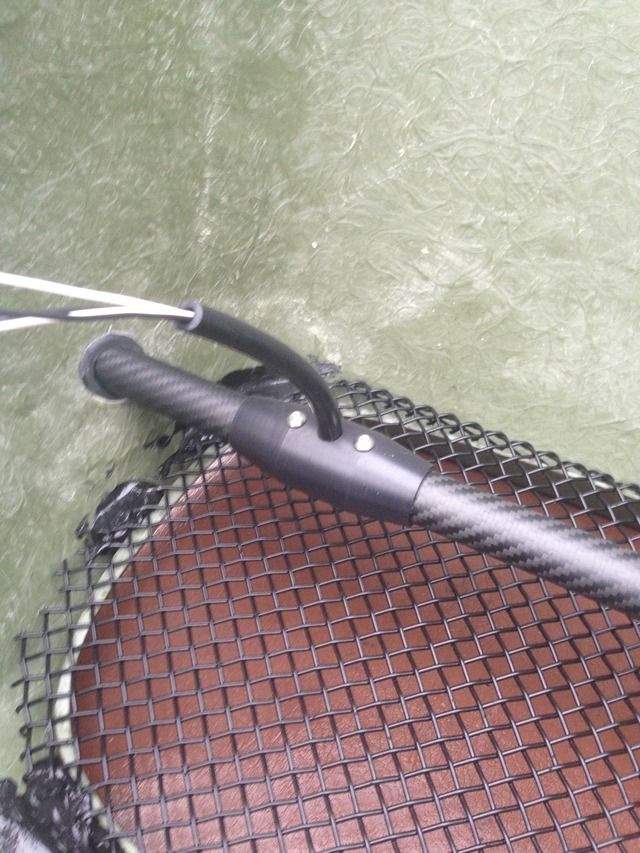
Well happy, as I've had the tube ready for the job for ages!
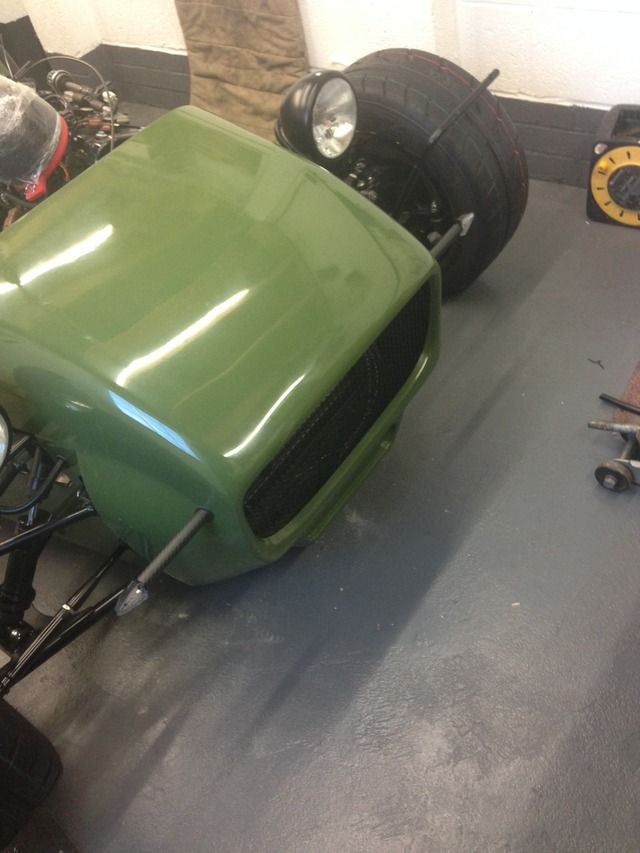
Rosco86 - 30/4/16 at 04:31 PM
Good half a day today trying to soft the wiring mess out, it's getting there but just needs a little bit more sorting then I will be able to live
with it I think
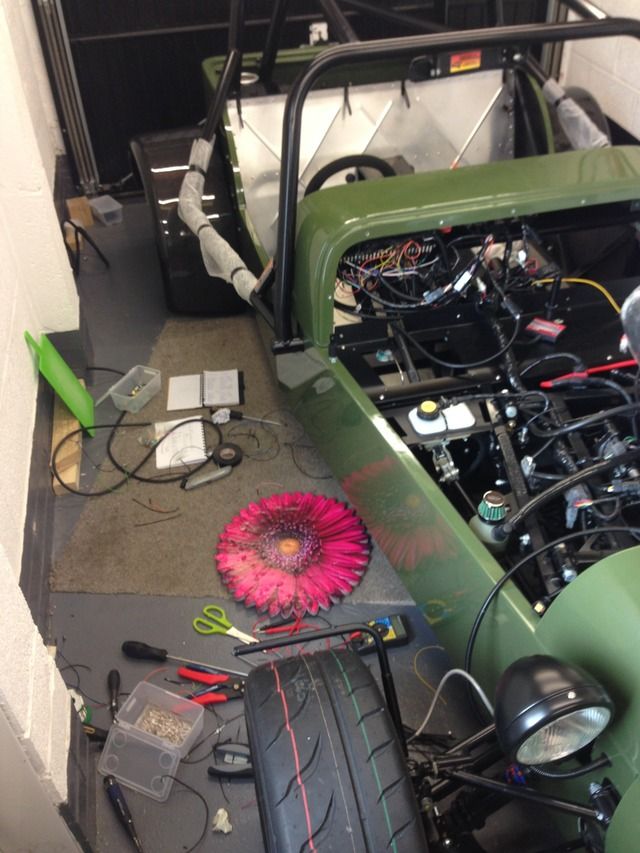
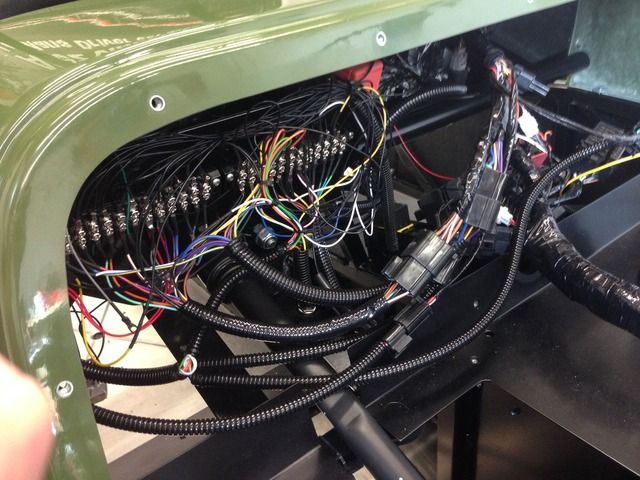

CosKev3 - 30/4/16 at 05:25 PM
quote:
Originally posted by Rosco86
quote:
Originally posted by CosKev3
Getting a bit repetitive now saying 'awesome work' 'looks spot on' etc!!!!!
Really looking forward to seeing this in the flesh hopefully this year
What's the score with aligning it with no springs on the dampers?
Surely the alignment will be out again once the springs go on and you set up the ride height?
Also if that's the height your going to be running the car it doesn't look like you will have enough travel on your dampers,it will surely
be bottoming out the damper under compression?
Cheers mate, yeah hoping to get it finished soon!
No springs on as I've got the chassis sat on blocks at the ride height I'm going to run, 4" front 5" rear, I can't really
corner weight and set ride height till it's all finished and wanted to get the alignment somewhere near,
No springs so I can check the bump steer,
After thinking about it your proberly right about the front travel, think I'm going to lift it up a bit, say 5" front, 6" rear
That will mean 4" front travel and 4" rear travel when it's on the bump stops, sound ok?
I'm no expert! But yeah that sounds better
You've done something controversial with the rear arches
I know they fit both ways,but IMO yours are on back to front
Rosco86 - 30/4/16 at 05:51 PM
quote:
Originally posted by CosKev3
quote:
Originally posted by Rosco86
quote:
Originally posted by CosKev3
Getting a bit repetitive now saying 'awesome work' 'looks spot on' etc!!!!!
Really looking forward to seeing this in the flesh hopefully this year
What's the score with aligning it with no springs on the dampers?
Surely the alignment will be out again once the springs go on and you set up the ride height?
Also if that's the height your going to be running the car it doesn't look like you will have enough travel on your dampers,it will surely
be bottoming out the damper under compression?
Cheers mate, yeah hoping to get it finished soon!
No springs on as I've got the chassis sat on blocks at the ride height I'm going to run, 4" front 5" rear, I can't really
corner weight and set ride height till it's all finished and wanted to get the alignment somewhere near,
No springs so I can check the bump steer,
After thinking about it your proberly right about the front travel, think I'm going to lift it up a bit, say 5" front, 6" rear
That will mean 4" front travel and 4" rear travel when it's on the bump stops, sound ok?
I'm no expert! But yeah that sounds better
You've done something controversial with the rear arches
I know they fit both ways,but IMO yours are on back to front
Oh god, I just thought they went that way round, bit to late now, do you think it looks rubbish? Stressing now
CosKev3 - 30/4/16 at 05:59 PM
quote:
Originally posted by Rosco86
quote:
Originally posted by CosKev3
quote:
Originally posted by Rosco86
quote:
Originally posted by CosKev3
Getting a bit repetitive now saying 'awesome work' 'looks spot on' etc!!!!!
Really looking forward to seeing this in the flesh hopefully this year
What's the score with aligning it with no springs on the dampers?
Surely the alignment will be out again once the springs go on and you set up the ride height?
Also if that's the height your going to be running the car it doesn't look like you will have enough travel on your dampers,it will surely
be bottoming out the damper under compression?
Cheers mate, yeah hoping to get it finished soon!
No springs on as I've got the chassis sat on blocks at the ride height I'm going to run, 4" front 5" rear, I can't really
corner weight and set ride height till it's all finished and wanted to get the alignment somewhere near,
No springs so I can check the bump steer,
After thinking about it your proberly right about the front travel, think I'm going to lift it up a bit, say 5" front, 6" rear
That will mean 4" front travel and 4" rear travel when it's on the bump stops, sound ok?
I'm no expert! But yeah that sounds better
You've done something controversial with the rear arches
I know they fit both ways,but IMO yours are on back to front
Oh god, I just thought they went that way round, bit to late now, do you think it looks rubbish? Stressing now
Nothing on your car looks rubbish m8!!!!
I've just got it in my head the way they go,but they fit both ways so it's up to the builder tbh which they prefer
CosKev3 - 30/4/16 at 06:04 PM

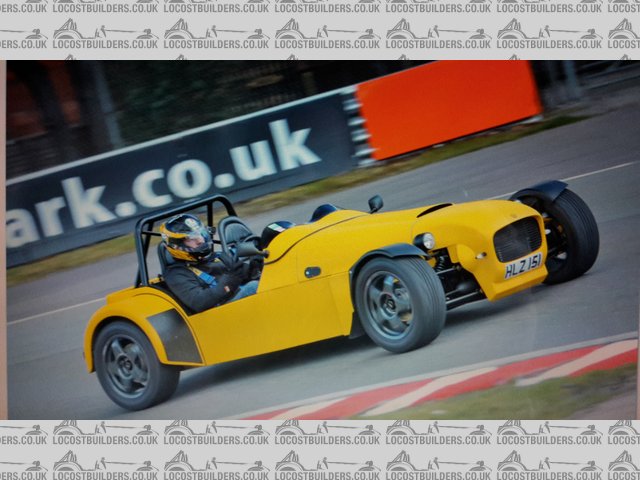
Description
CosKev3 - 30/4/16 at 06:06 PM

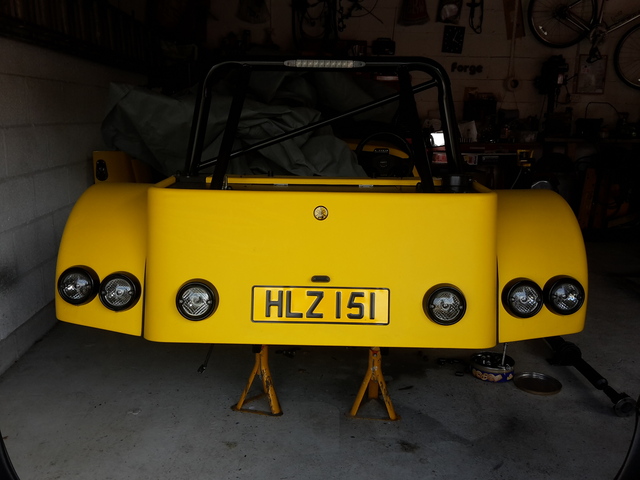
Description
I just think the angled part looks better at the front,and flatter part on rear
Rosco86 - 30/4/16 at 06:26 PM
Yeah your right I think they do look better that way round, too late now though
CosKev3 - 30/4/16 at 06:40 PM
Oops sorry 
CosKev3 - 30/4/16 at 06:45 PM
Could you make up a blanking plug for the hole where lights are fitted,then fit some stone guards over them?
Rosco86 - 30/4/16 at 07:00 PM
No worries mate lol, I think it looks ok, I will leave it as it is and see how I looks, it's hard to tell in the garage really, I've just
had a look and I'm going to make a rear defused after iva so I might take it right across the back of the arches or something,
I don't mind you saying though pal, appreciate the honesty
Rosco86 - 4/5/16 at 08:26 PM
Well had a phone call today, my IVA tests booked for friday the 17th of June!!!
Now just need to get it finished
CosKev3 - 4/5/16 at 09:03 PM
quote:
Originally posted by Rosco86
Well had a phone call today, my IVA tests booked for friday the 17th of June!!!
Now just need to get it finished
Tidy
And don't worry,having the rear arches on the wrong way around is not a IVA fail!!!
Rosco86 - 6/5/16 at 09:47 AM
haha thank god for that!
Rosco86 - 21/5/16 at 06:55 PM
Right, had a few weeks off the car due to one thing and the other but had a good day today
Got the springs back on the shocks and the ride height set roughly, it's getting corner weighted when it's finished
Everything on the rear tightened up, then got the rear tub fitted, the arches and the boot lid fitted
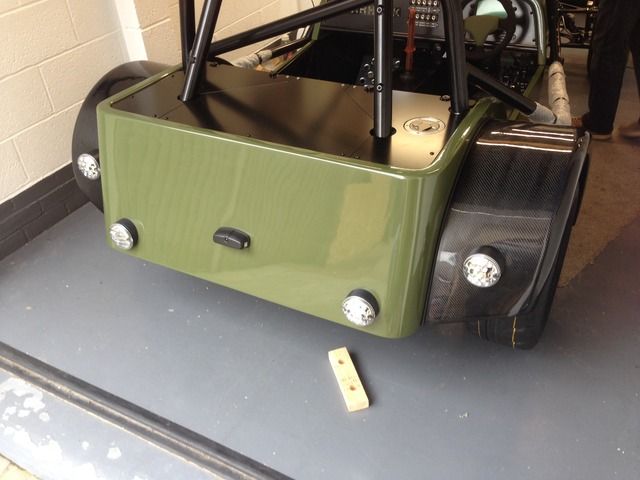
Well happy with it all to be honist, just need a few more black bolts
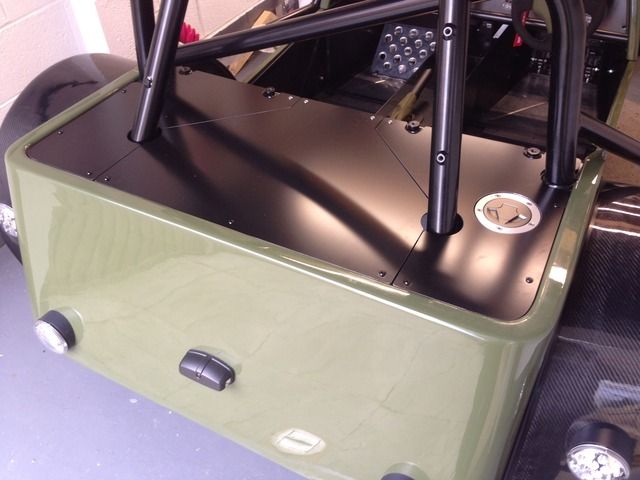
Pretty much all the wiring is finished and working now, just got to sort the front side repeaters, hopefully tomorrow's job
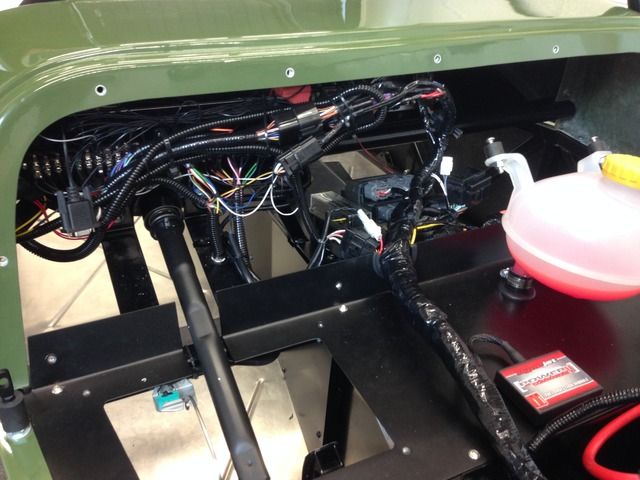
Rosco86 - 23/5/16 at 06:42 PM
Sunday's progress
Locating pins finally fitted in the nose cone, I will get another shot when the bonnets next on
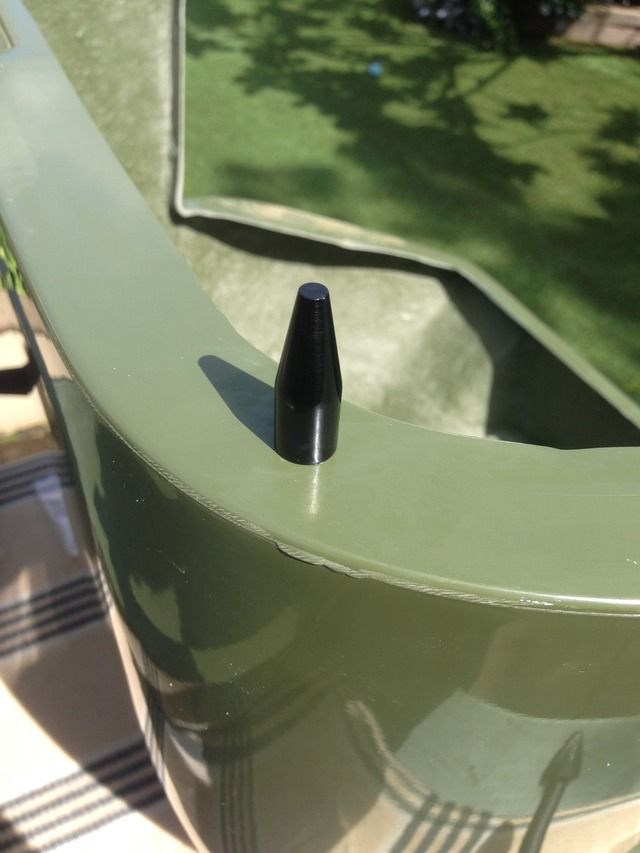
Side repeater wire extended, and hole drilled in arches, I just used a drill to twist two wires together, turned out quite neat

Wire tiger sealed to the underside of the arch, it will become clearer once the arches are back on the car I hope!

Rosco86 - 26/5/16 at 07:04 PM
Little mid week update
Made a spanner to tighten up my headlights

Front arches stone chipped and trim glued on
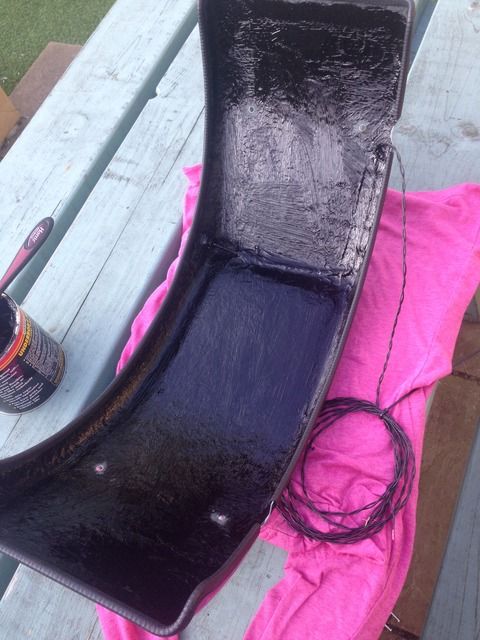
Side led repeaters
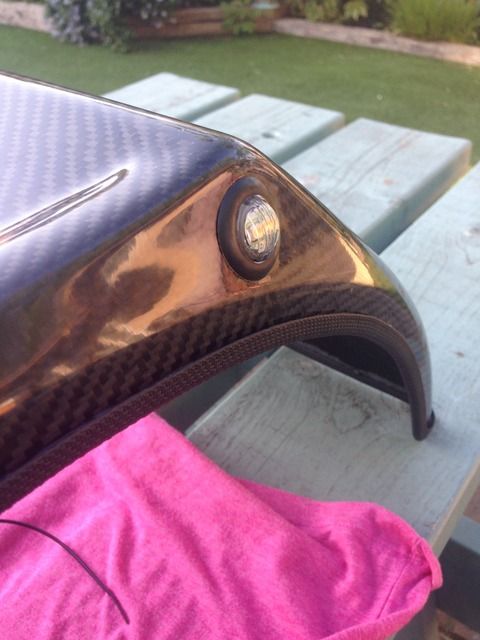
Shot of the engine bay as it's looking nice now
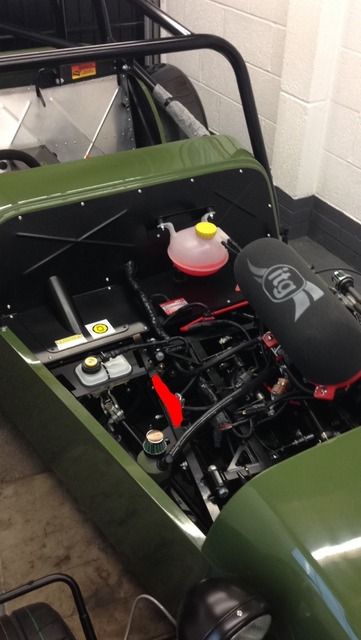
Rosco86 - 28/5/16 at 07:51 PM
Had a good day today, got loads of bits sorted,
I needed to calibrate my water temp sensor to my digi dash as I used the bike sensor, so I got the engine running and with every 10deg c of water temp
I noted down the output voltage of the sensor then, entered the figures into the dash and jobs a goodun!
Also plunged the laptop into the power commander, pretty cool, tells you rpm etc, but turned out the rpm on the digi dash was reading double, so
sorted that.
Then worked out how many pulses per mile the speed sensor will read and sorted that,
Next job, the front arches, I got them fitted and wired in,
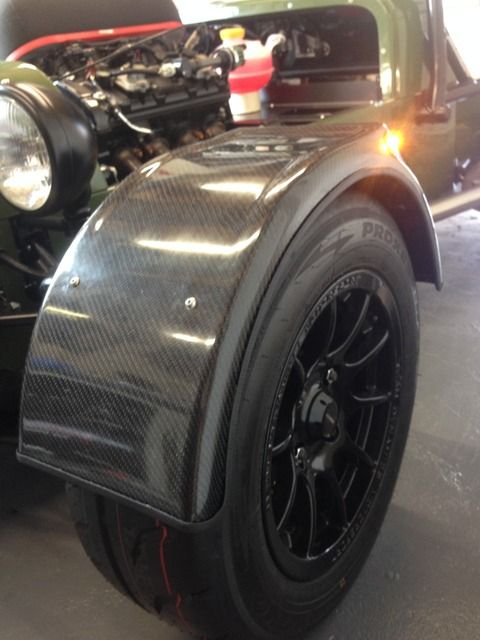
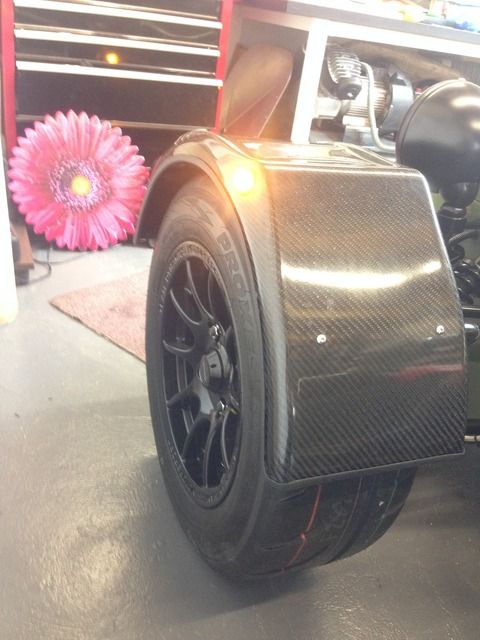
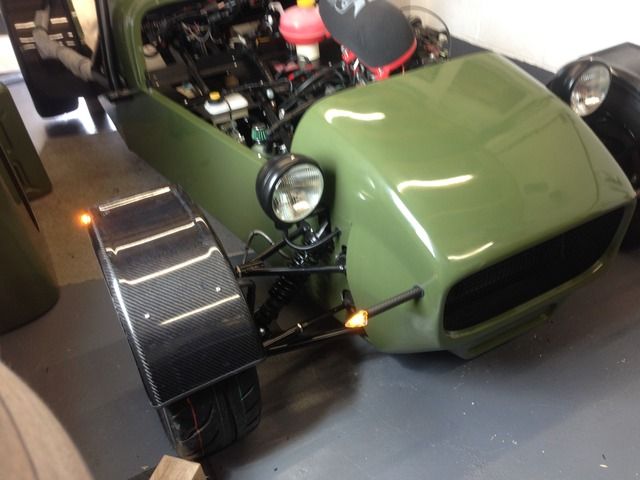
I ran the wires down the wing stay and up the brake pipe, it looks ok, not totally happy with it but it does the job,
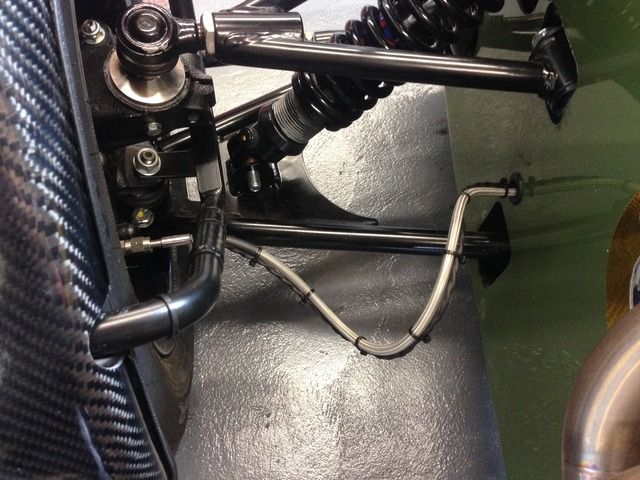
Also one of my rear copper brake pipes was leaking, took it off and it looked fine so nipped it up a bit tighter and seems ok now, I've had the
pedal wedged all day under pressure to!
Oh also I wanted an led to say the hazards are switched on, but a little harder than I thought as it also lit up when the indicators are switched on,
but bit of research and I've used a diode, which is like a one way valve, so that's now working to
Got a few more bits and bobs to do tomorrow and I think it will be about finished, hoping to take her for a spin next weekend
Rosco86 - 29/5/16 at 07:54 PM
Well didn't get much done today, but I did roll her out of the garage for the first time and gave the garage a good clean out
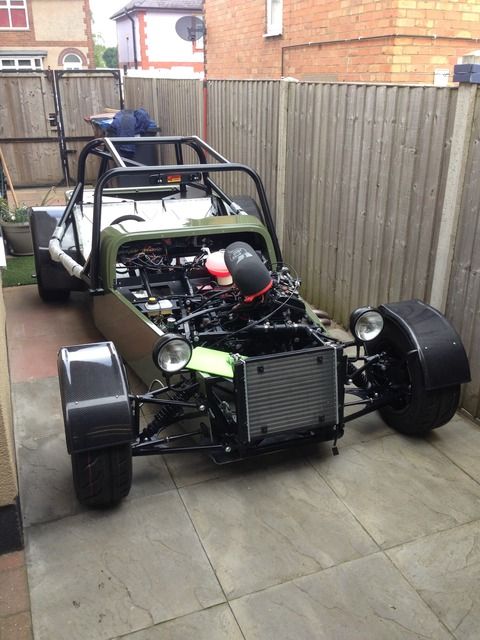
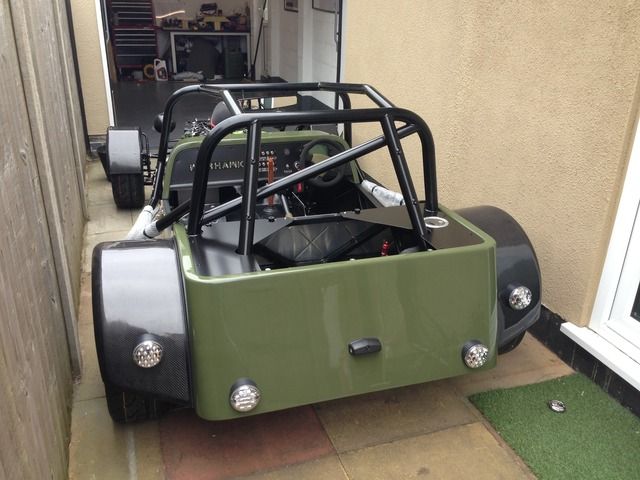
See how tomorrow goes!!
Rosco86 - 30/5/16 at 06:44 PM
Right all day again today, and I'm still not in the dog house!
Cat fitted
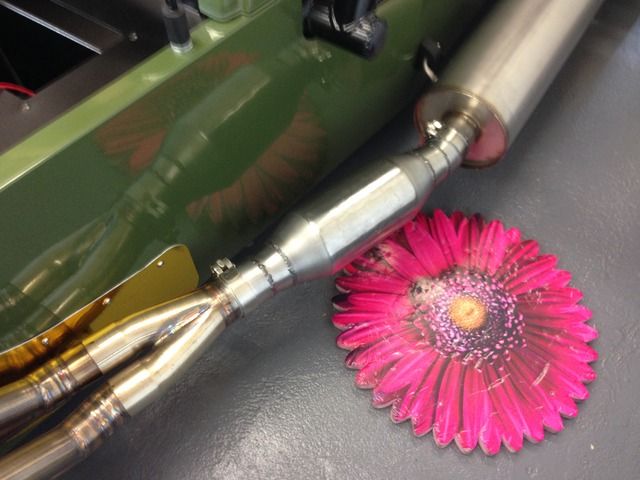
Heat wrapped to cover any sharp edges
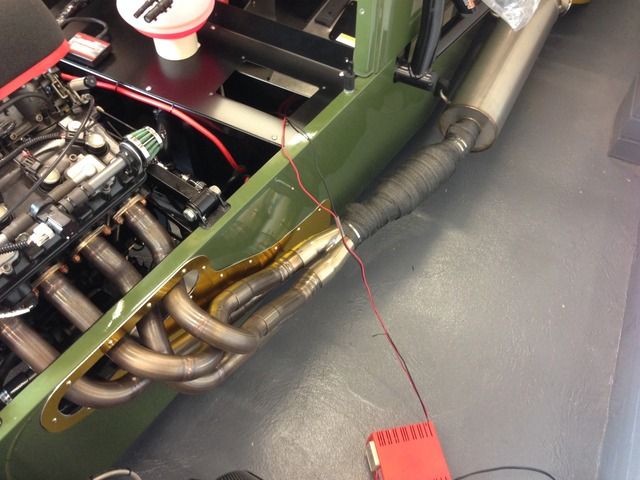
Rear view mirror trimmed up

Front sharp edges sorted
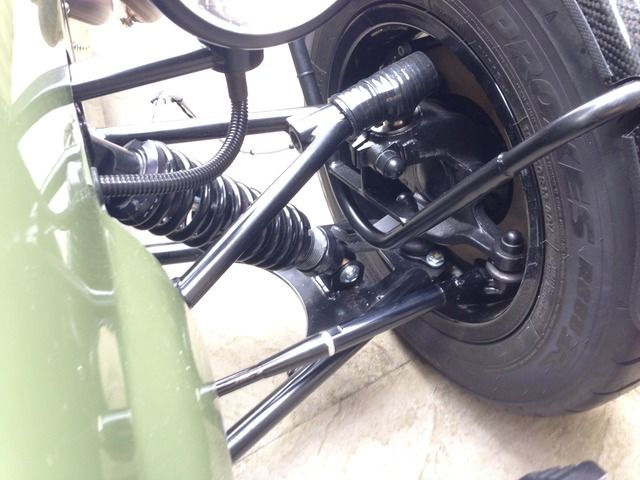
Bit of edge trim on the exhaust can
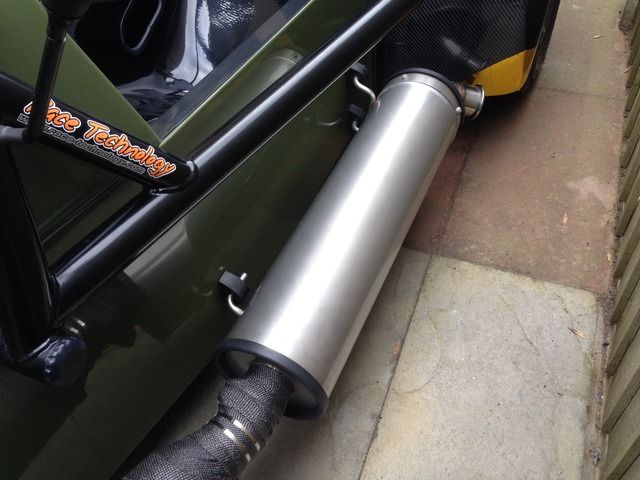
Then some pictures with the bonnet on
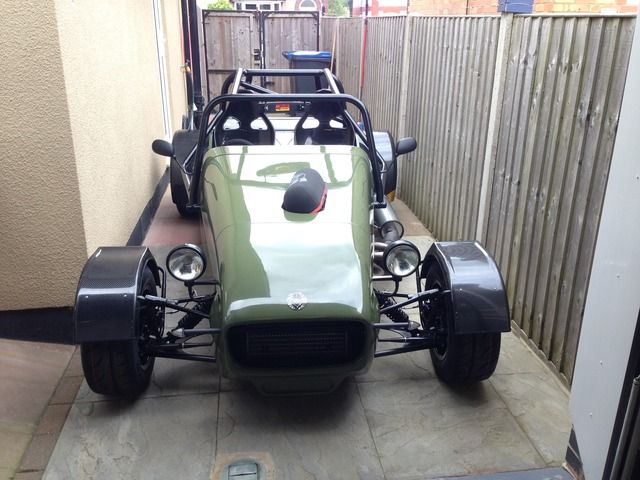
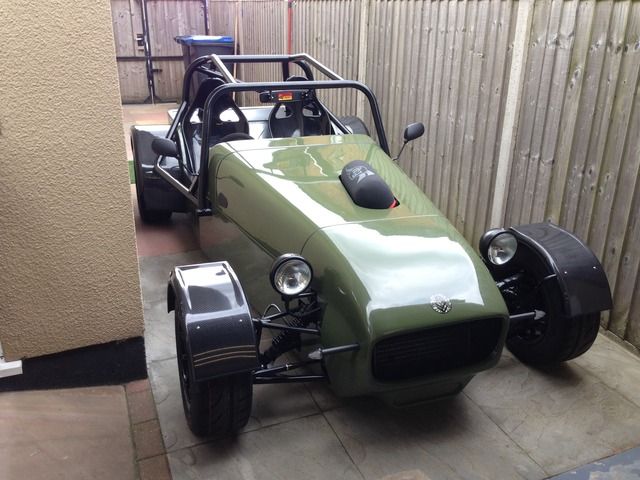
Just need to trim that filter hole

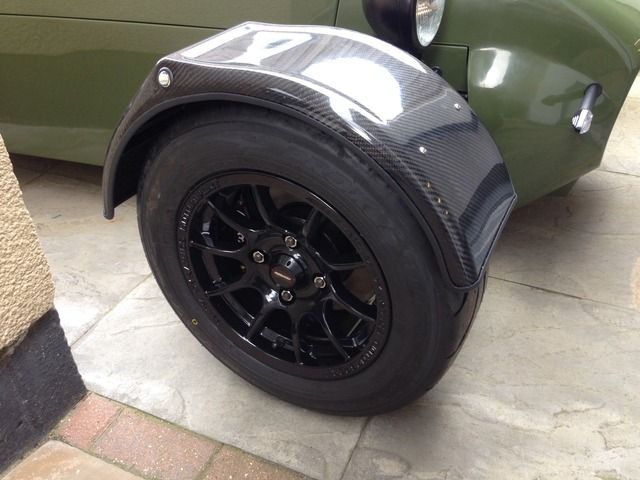
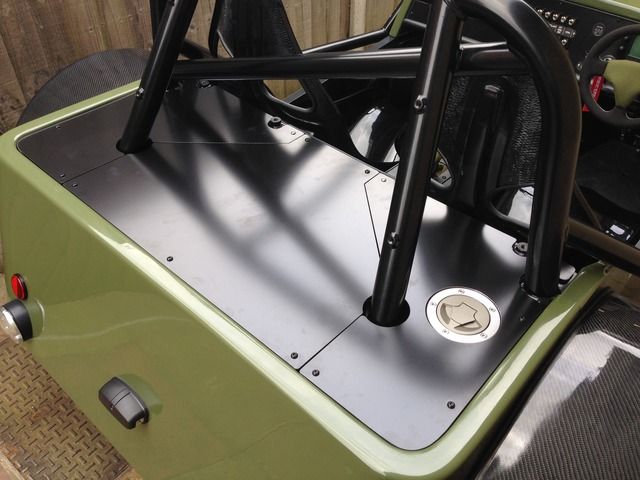
Seats dropped in but still waiting for my seat belts
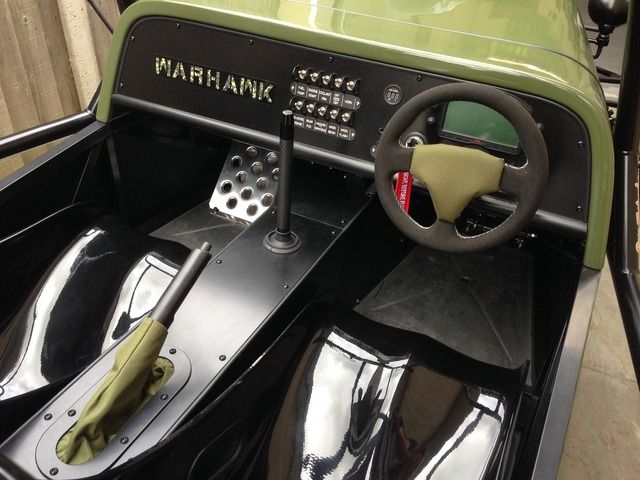
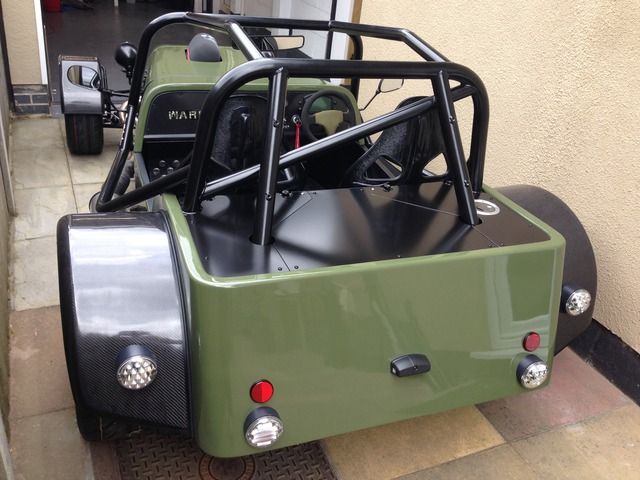
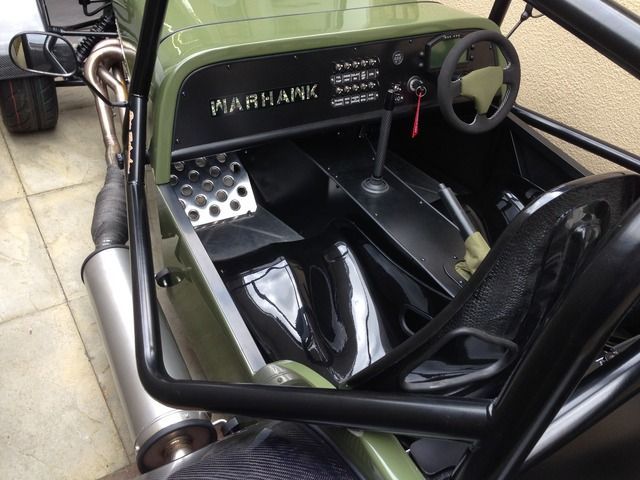
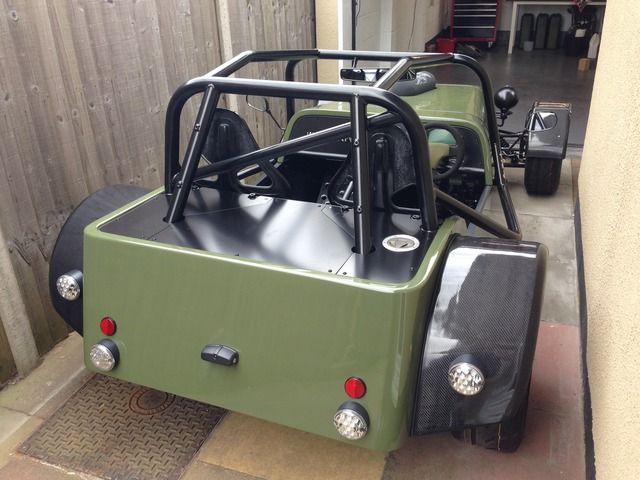
Almost ready for the track!
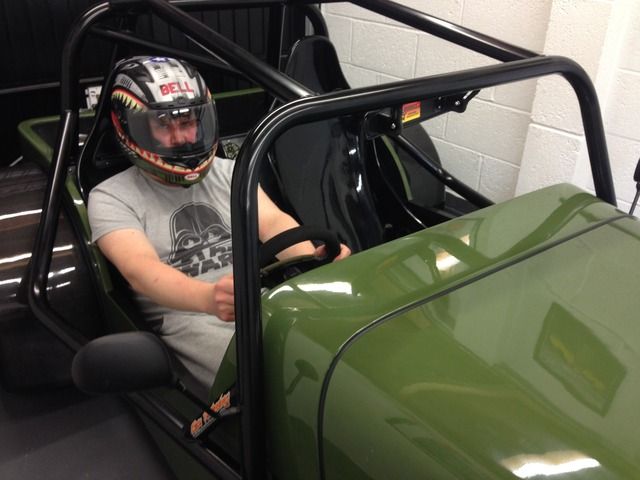
CosKev3 - 30/5/16 at 06:52 PM
Nearly there
I can't believe nobody has commented on your rather gay kneeling pad!!!
What mounts are you using for silencer?prob missed it somewhere,but never mind
joneh - 30/5/16 at 07:18 PM
I've got the yellow version!
quote:
Originally posted by CosKev3
I can't believe nobody has commented on your rather gay kneeling pad
CosKev3 - 30/5/16 at 07:34 PM
quote:
Originally posted by joneh
I've got the yellow version!
quote:
Originally posted by CosKev3
I can't believe nobody has commented on your rather gay kneeling pad
Is that your way of coming out of the closet?!?!?
Rosco86 - 31/5/16 at 08:19 PM
quote:
Originally posted by CosKev3
Nearly there
I can't believe nobody has commented on your rather gay kneeling pad!!!
What mounts are you using for silencer?prob missed it somewhere,but never mind
Do you want one?
Yeah the rubber mounts were off eBay, seem ok, see how long they last, just wanted it nice and iva friendly
Rosco86 - 31/5/16 at 08:21 PM
Little bit done tonight, the cable ties looked a bit naff on the brake lines so I tried swapping for some spiral wrap, I think it looks a bit
neater
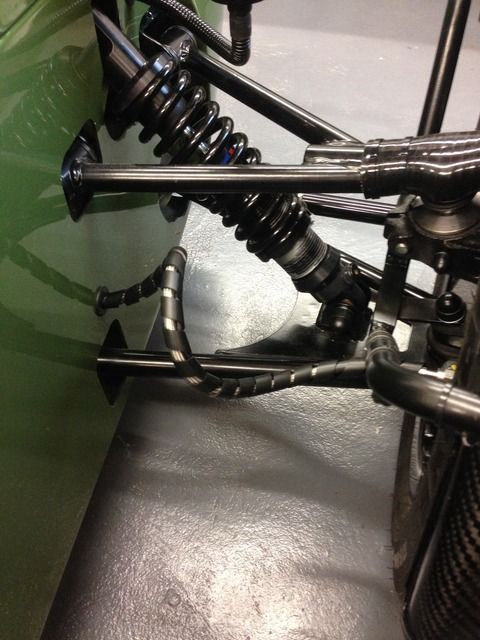
CosKev3 - 1/6/16 at 10:37 AM
quote:
Originally posted by Rosco86
quote:
Originally posted by CosKev3
Nearly there
I can't believe nobody has commented on your rather gay kneeling pad!!!
What mounts are you using for silencer?prob missed it somewhere,but never mind
Do you want one?
Yeah the rubber mounts were off eBay, seem ok, see how long they last, just wanted it nice and iva friendly
I think if my Mrs came in the garage and I was kneeling on one of those I would be looking for somewhere new to live!!!
So with the mounts you've cut your side panels around them,and got them bolted to the chassis inside out of sight?
[Edited on 1/6/16 by CosKev3]
Rosco86 - 1/6/16 at 09:33 PM
Haha! I nicked it off my mrs!!
Exhaust mounts are these
https://www.ebay.co.uk/itm/161623847697
M8 stud i think, so I've just got 3 holes through the body work, its mounted pretty solid with just a little give
Rosco86 - 3/6/16 at 07:45 PM
Well after waiting 3 months for my seat belts, they finally arrived today, so I turned up some top hats and spacers
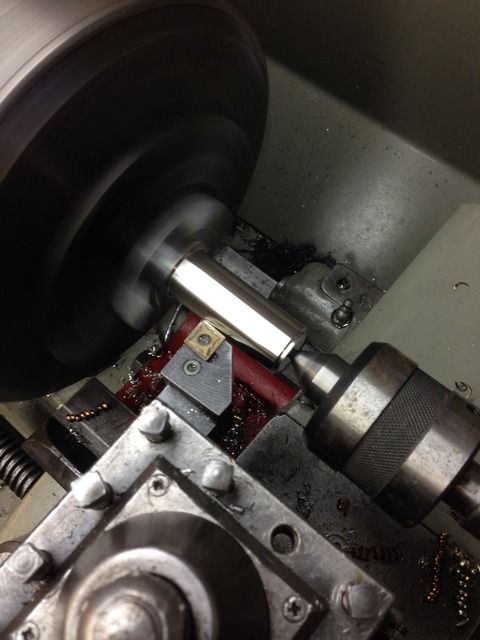
I've had to lift them up a bit so Mr IVA mans happy, just need to sort some covers out next
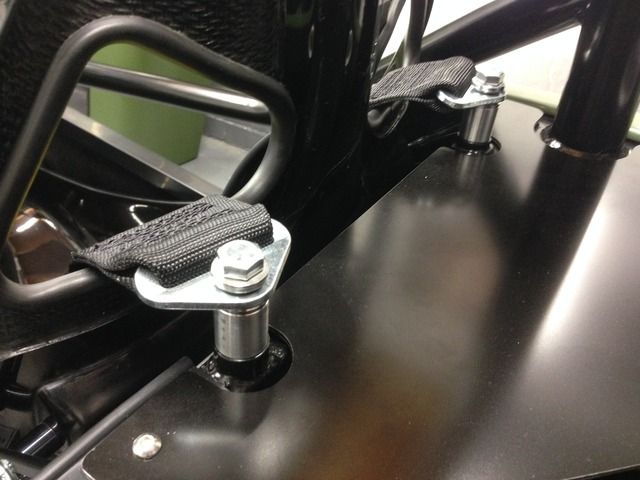
I've gone for 4 points, see how I get on, would of preferred 6 point but I dint think until the chassis was painted
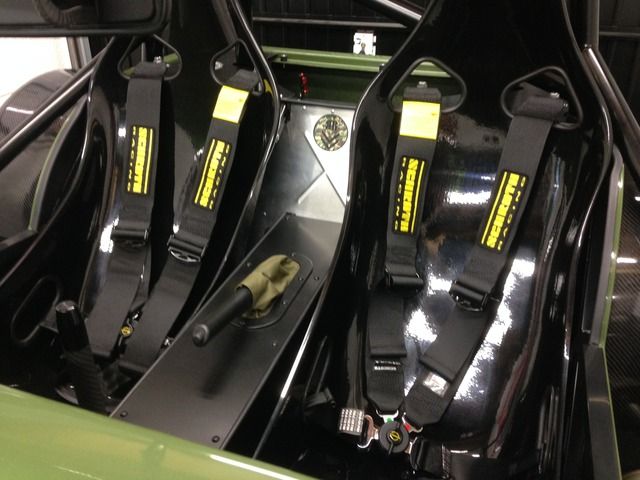
Also got the engine floor hatch fitted!
Adamirish - 3/6/16 at 07:50 PM
Still looking good mate. I'm excited for you getting it on the road.
As for 4 point vs 6 point harnesses I think 4 point is the right choice. I saw a pic once of somebody who had an accident wearing a 6 point harness.
The wedding veg didn't fair well! I'm sure that was probably one in a million chance but was enough to put me off.
Keep up the good work!
Rosco86 - 4/6/16 at 08:35 PM
Well after 18 months of spending every hour I had spare in the garage or in bed not able to sleep thinking about the next bracket to make, the day
finally came when she was to leave the garage for a test drive!
Me and my dad got it loaded on the trailer
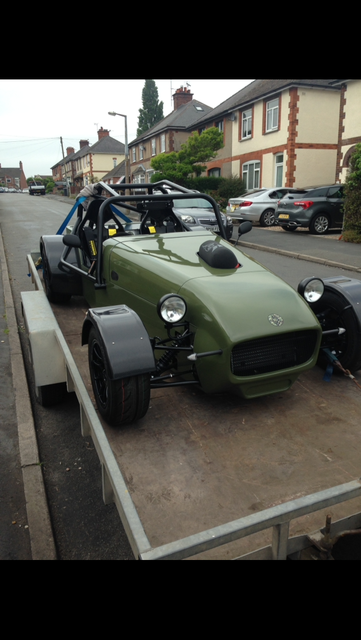
Then off down my mates at Roger Clarke Motorsport, there on the end of an industrial estate,
Started off with a few steady runs up and down to see how she went, everything was perfect, just kept going up and down to get the brakes bedded in
etc,
Kept pulling in and checking everything looked alright
Then set the brake bias up, just made sure it locked the fronts up first
The electric reverse worked sweet, but didn't last long as the motor pushed its self away, need to re mesh it then put a pin through I think
Also the big reverse gear on the prop was just rubbing on the aluminium side pannel, so need to swage that out a little
Next took it round the corner to my mates mot garage and he check the emissions, bit to high so just mapped it out with the power commander.
Next up, drop it on the rollers and check the speedo was working ok as it was a bit glitchy driving up and down
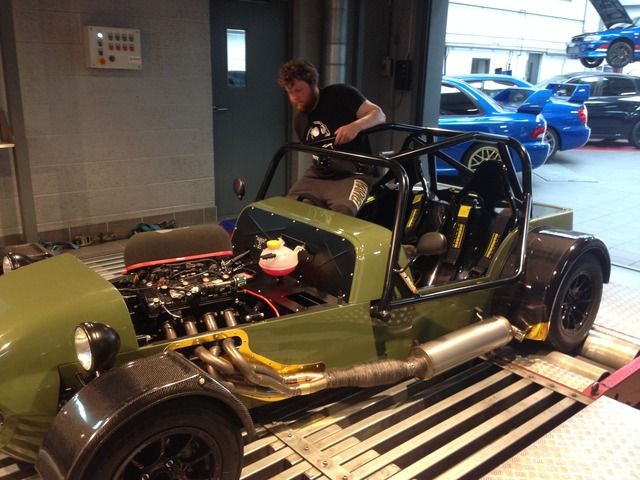
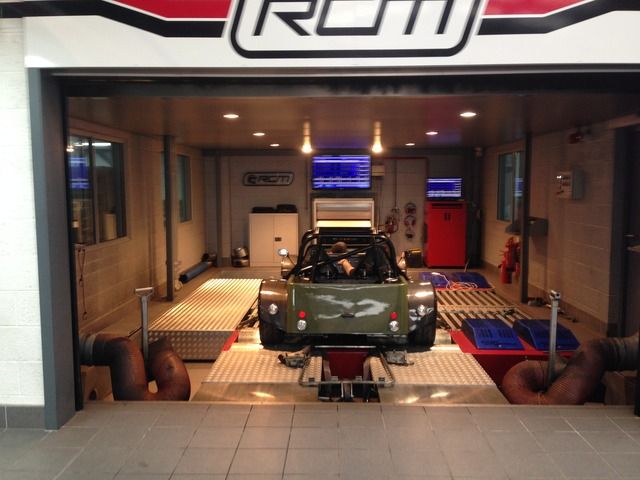
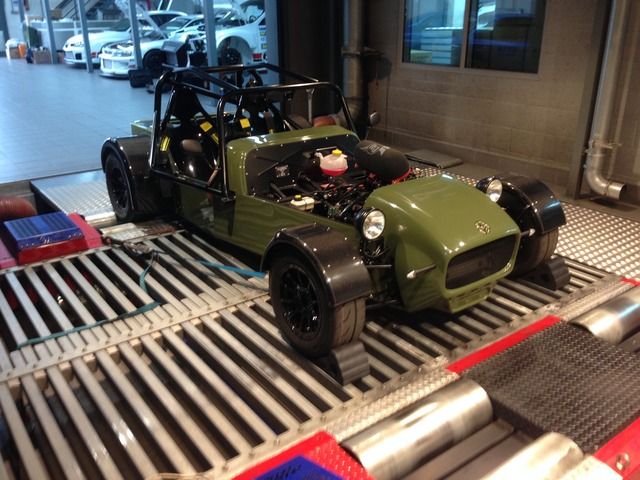
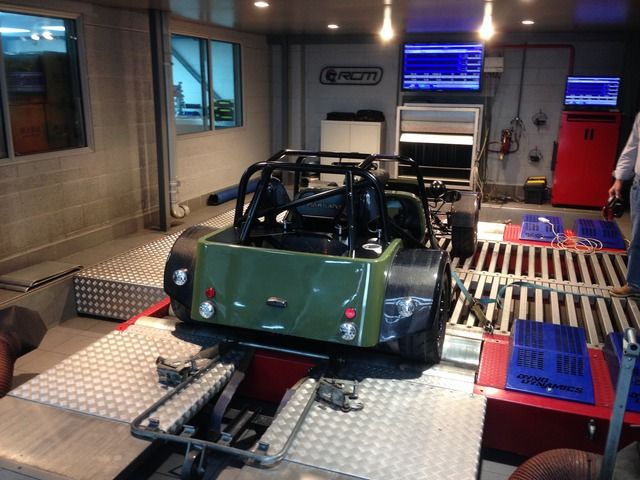
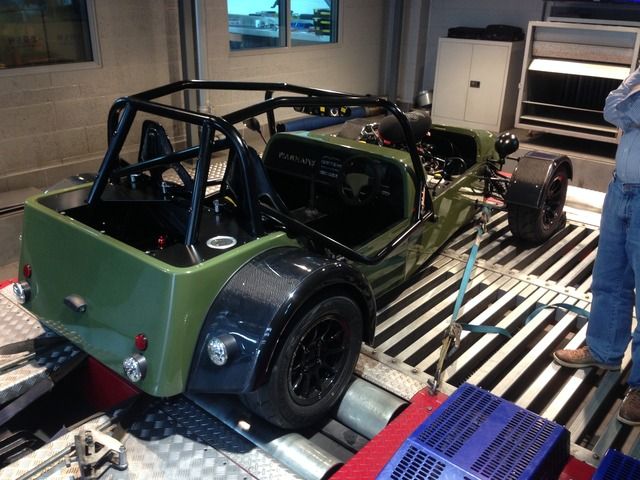
The speedo was dropping out at 50mph, so luckily I had already made a wider pickup, swapped it over and perfect! Ran it up to 100mph and all sweet,
well happy with that as it would of been a fail come IVA time,
Next was program the gear position on the digi dash, just a case of driving through the gears and telling it which gears which, but it's so much
easier to figure the gears out with the number on the dash
All in all a brilliant first run out, I couldn't of wished for better really, just got the sort the reverse out really and she will be ready for
the IVA test in two weeks time
matt5964 - 5/6/16 at 08:32 AM
Cracking build, so detailed.
Is that a 22B lurking in the background?
Adamirish - 5/6/16 at 09:49 AM
quote:
Originally posted by matt5964
Cracking build, so detailed.
Is that a 22B lurking in the background?
That would be the gobstopper. You should see the videos of that car. It is nuts! 800+bhp time attack car.
CosKev3 - 5/6/16 at 04:02 PM
How much power does the EWP take to run?
Out of interest next time you have your car running and cooling fan on put your headlights on and check your voltage if you don't mind?
Only wondering as the voltage on mine drops pretty low with headlights on if rad fan kicks in at idle.
Shows over 14 volts with nothing on,but seems to struggle once loaded.
it's not really surprising looking at the gauge of the wire from the rectifier though
quote:
Originally posted by Adamirish
quote:
Originally posted by matt5964
Cracking build, so detailed.
Is that a 22B lurking in the background?
That would be the gobstopper. You should see the videos of that car. It is nuts! 800+bhp time attack car.
The standard looking blue one in the pic above?
matt5964 - 5/6/16 at 04:27 PM
quote:
Originally posted by CosKev3
How much power does the EWP take to run?
Out of interest next time you have your car running and cooling fan on put your headlights on and check your voltage if you don't mind?
Only wondering as the voltage on mine drops pretty low with headlights on if rad fan kicks in at idle.
Shows over 14 volts with nothing on,but seems to struggle once loaded.
it's not really surprising looking at the gauge of the wire from the rectifier though
quote:
Originally posted by Adamirish
quote:
Originally posted by matt5964
Cracking build, so detailed.
Is that a 22B lurking in the background?
That would be the gobstopper. You should see the videos of that car. It is nuts! 800+bhp time attack car.
The standard looking blue one in the pic above?
The first blue one has 22b wheels and is a 2 door and as there weren't many 2 door old Skool about and the quality so of the other cars in the
photos thought it might be the real deal
Rosco86 - 14/6/16 at 07:20 PM
Yeah it's the Gobstopper 2, stunning car
Rosco86 - 14/6/16 at 07:30 PM
Well got the reverse motor re adjusted, then put a top hat washer in the hole above resting on the bracket, should stop it pushing its self away
again
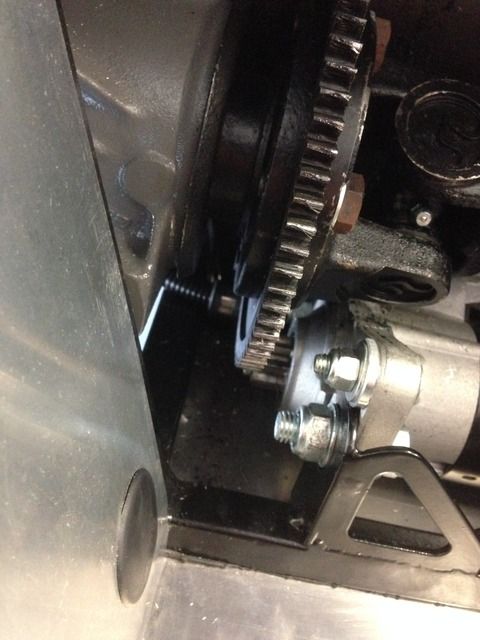

Also made some washer things to sort the sharp edges out on my seatbelt bolts
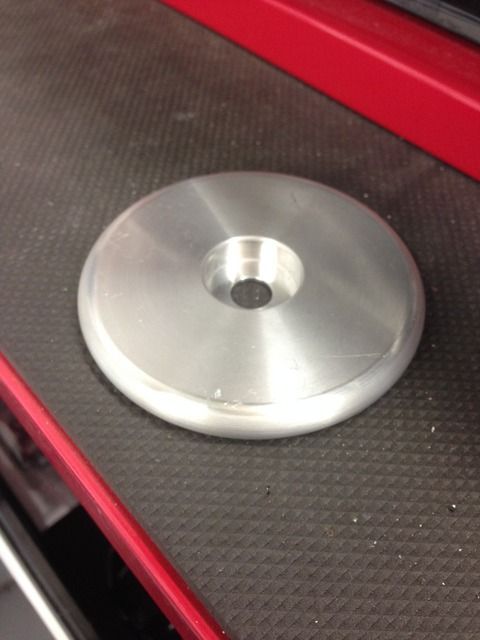
Painted and fitted
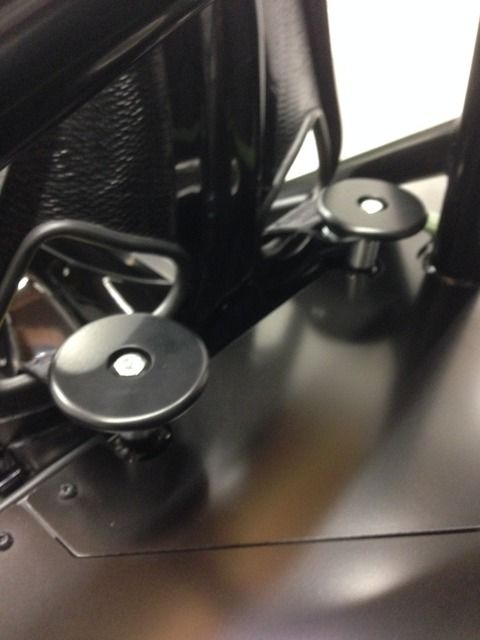
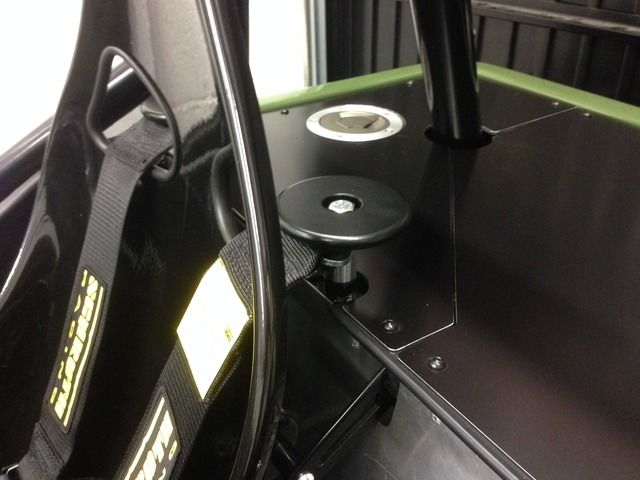
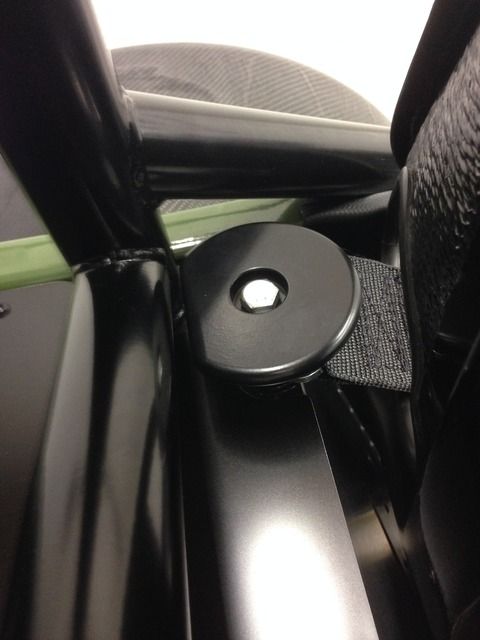
Bit of a stack but should keep the IVA man happy
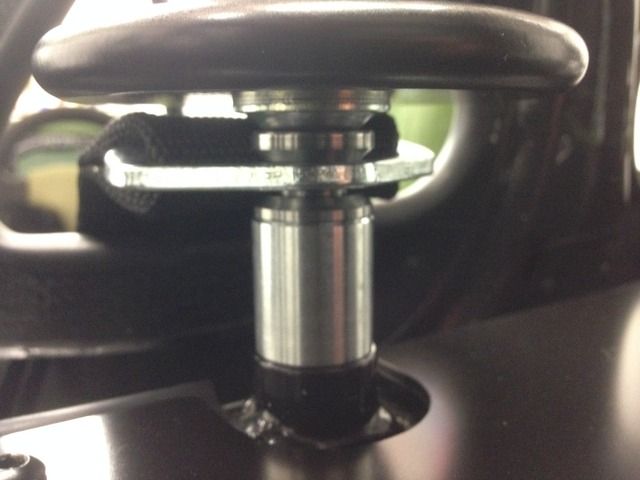
Also got some nut covers on my wheel nuts as the stud was poking through the nut
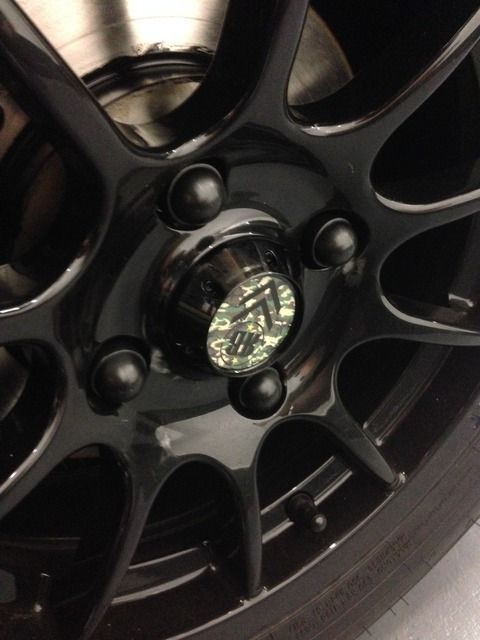
And that's about it, all ready for Friday morning I hope
Adamirish - 14/6/16 at 07:33 PM
quote:
Originally posted by Rosco86
Well got the reverse motor re adjusted, then put a top hat washer in the hole above resting on the bracket, should stop it pushing its self away
again
Also made some washer things to sort the sharp edges out on my seatbelt bolts
Painted and fitted
Bit of a stack but should keep the IVA man happy
Also got some nut covers on my wheel nuts as the stud was poking through the nut
And that's about it, all ready for Friday morning I hope
Best of luck mate!
Rosco86 - 14/6/16 at 08:31 PM
Cheers mate
matt5964 - 14/6/16 at 08:41 PM
If you don't get a pass then the assessor needs there eyes testing
christim - 16/6/16 at 08:00 AM
Good luck and fingers crossed for tomorrow! I'm sure you'll ace it
Rosco86 - 16/6/16 at 07:39 PM
Haha cheers guys!
Rosco86 - 17/6/16 at 01:56 PM
Well got up this morning about 4:45 as I couldn't sleep, walked the dog and got the bonnet on etc, 6am came and my Dad turned up with the
trailer, got it loaded up, I had a car cover so put this on as it was raining
Set off and the cover was blowing everywhere, so took it back off, it wasn't raining to hard
Got to the test station, unloaded the car and parked up, 8:30 the roller door went up and he got started, checked all the projections to start with,
said the bottom of the headlight bracket wasn't rounded enough
Then looked over the brakes, happy with the balance bar being lock wired, but not happy with the rubber tube from the brake fluid pot to the
cylinders, he asked if I had a recipt, but I couldn't find it,
Seat belts, all good, said they were fine but I could remove the spacers lifting them up, (the spacers were only for IVA anyway) he said the belts
would be ok resting on the seat as the hole was trimmed,
Had a good look around the car, then checked the reverse gear, but the way I had wiried it, the prime switch put the light on then the engage switch
reverses the car, but he said no good as you could leave the light on
Also the digi dash buttons needed locking as they hide the speedo when in a menu
Checked the speedo, all fine,
Emissions were spot on
Then he went and weighed it and try the brake balance I think
510kg and brakes good,
Onto the ramp, had a look underneath, checked lock to lock,
The headlights, said they were spot on
Just the brake test and noise left
Tested the brakes but said he has to work the figures out
Outside for the noise test, I was pooing it by this point, 97db so just under
Then he said if you want to go to your car and try n sort those 4 bits out
Well me and my dad, you would of thought we were going to miss the grid at the F1
Edge trim on the headlight brackets
I set about the wiring, re wired the reverse light so it was correct, and unwired the dash buttons
Just the brake pipe to sort, I rang rally design where it was from, them emailed me the spec sheet,
He came over and checked everything and said you've Passed
Went and did the paperwork and job done
So happy! I said I wouldn't have minded a fail but when I was there I didn't want to have to do a re test
So just need to fill my reg forms out now!
CosKev3 - 17/6/16 at 02:16 PM
Excellent well done!
Interesting about the reverse light,as I know of atleast one car that's passed like the original way you had it wired recently!
So you had to wire it so it's only lit when the car is moving?
Pretty sure he's wrong about the harnesses too,edging trim does not make the seat structual I'm sure!
BigGeoff - 17/6/16 at 02:26 PM
Congratulations - great build.
40inches - 17/6/16 at 02:45 PM
Well done, a good job
Did you go to Nottingham? Had my test there in 2013 with the reverse wired as you had it originally, and it passed!
rdodger - 17/6/16 at 04:11 PM
Brillinant!
Well done
gaz_gaz - 17/6/16 at 04:24 PM
Well done. Cracking built.
Hopefully have it registered for the end of Wimbledon when the sun comes out!!
Rosco86 - 17/6/16 at 09:27 PM
Cheers for all the interest and coments, yeah was at nottingham, the bloke was very thourough, as for the light, i thought it went out if put in gear
but i didnt, i may just add a warning light or something, i dont mind as it was an easy fix, would of been better than being ove 99db or something
Also got my forms all done and posted, what a nightmare, my dads printer was rubish so had to go down my mates, took me all night to sort it, so
fingers crossed,
Rosco86 - 17/6/16 at 09:31 PM
Few pics from today
6am
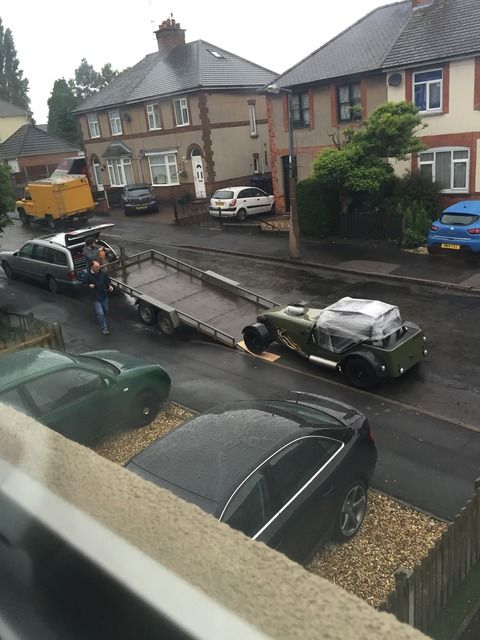
Waiting for 8:30
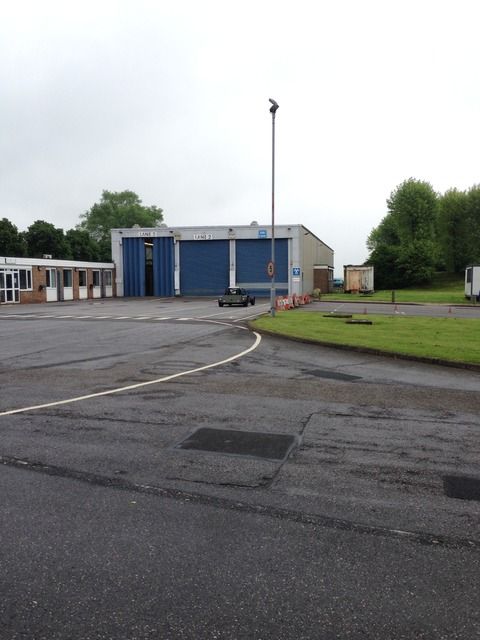

One proud Dad!
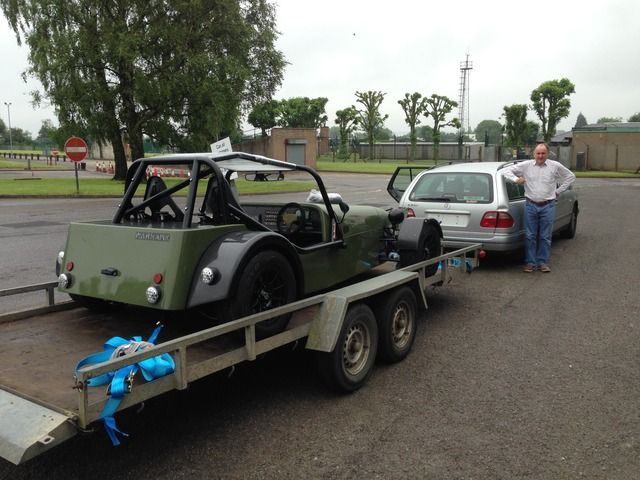
40inches - 17/6/16 at 11:22 PM
That brings back memory's

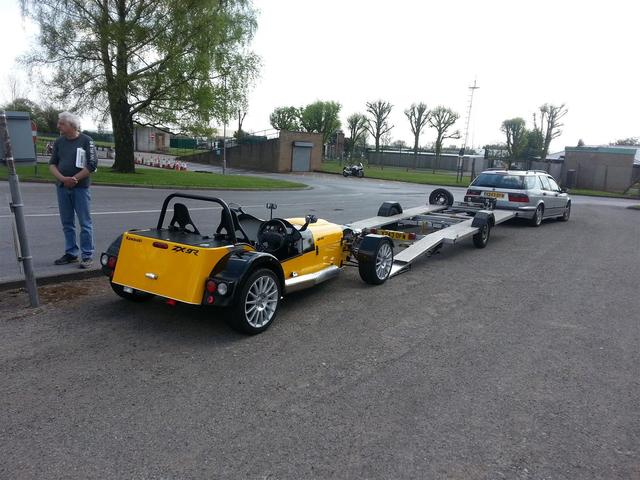
Description

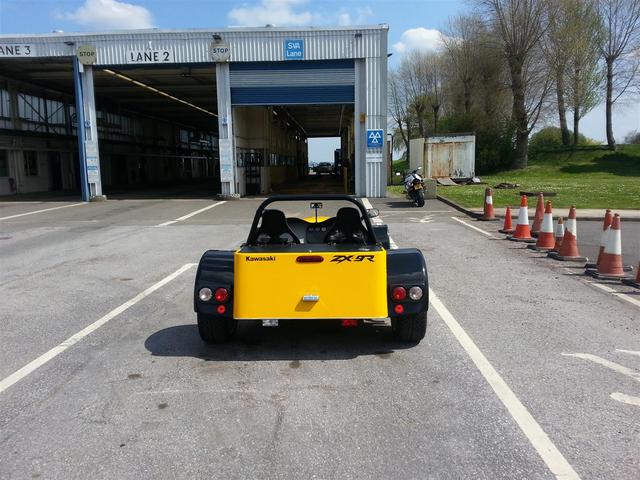
Description
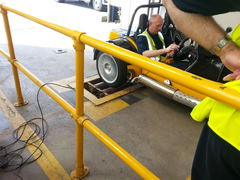
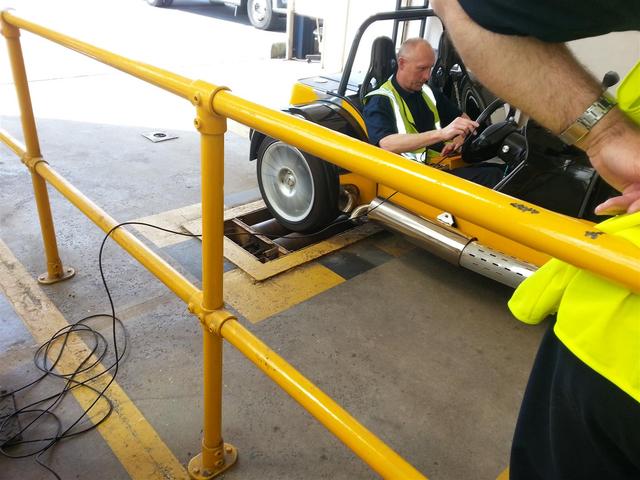
Description
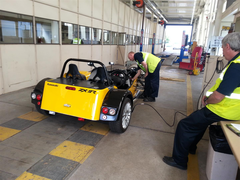

Description
Badger_McLetcher - 18/6/16 at 12:25 AM
Congrats mate, looks like all your hard work has paid off!
matt5964 - 18/6/16 at 08:03 AM
Awsome build, congrats.
I need a few bits doing, what's your rates .. Lol
Rosco86 - 18/6/16 at 08:56 PM
Haha, looks like the same chap doing the test,
Going rate, lol still got bits to do yet, never finished!
Rosco86 - 18/6/16 at 09:04 PM
Right, now to start the fun jobs,
Aero, got a few bits I want to get done before my reg turns up really
Nose cone canards
Made some templates
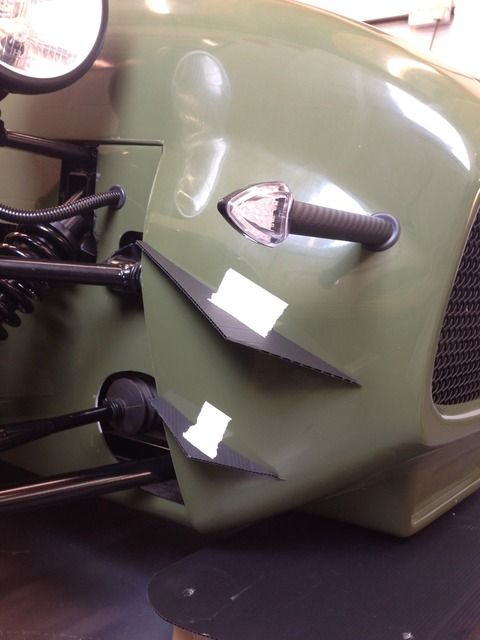
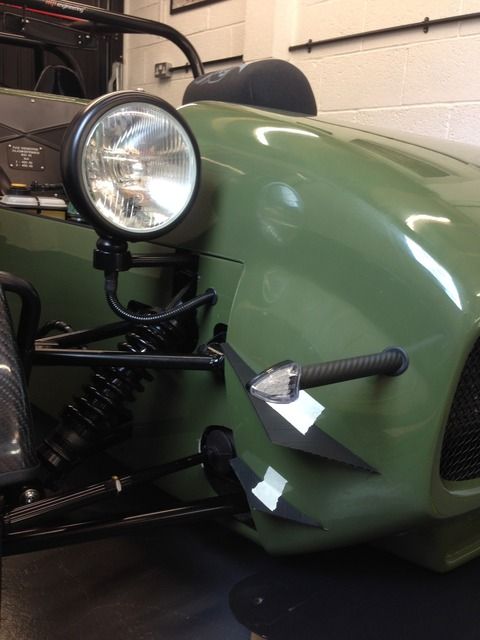
Then cut them out of some carbon sheet, used two jigsaw blades! It's such tough stuff!
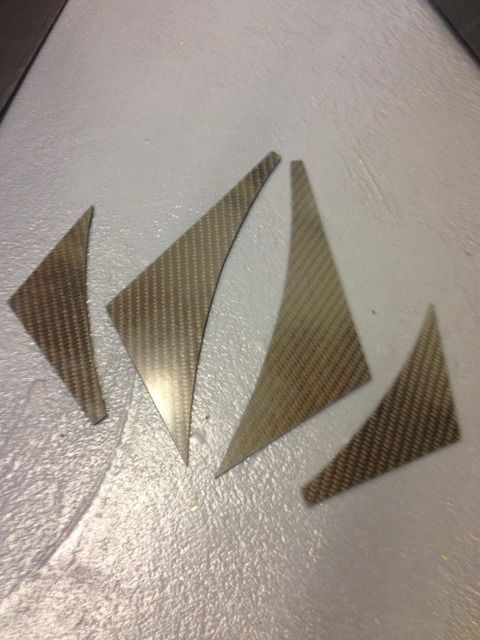
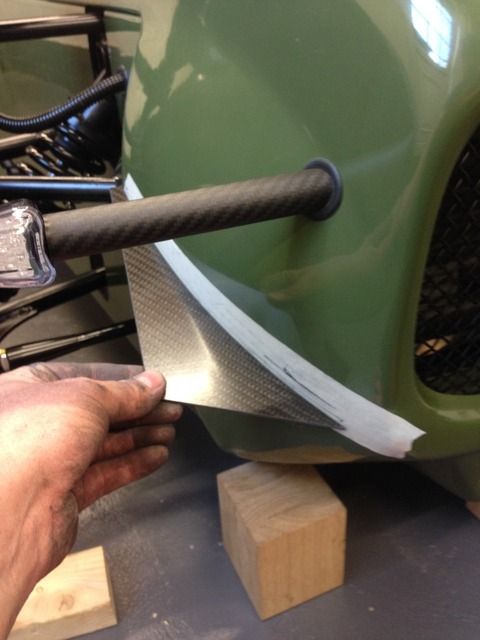
Then needed some little brackets, my dad had some 20x20 aluminium angle so had an idea

Then turned around for the 2nd side
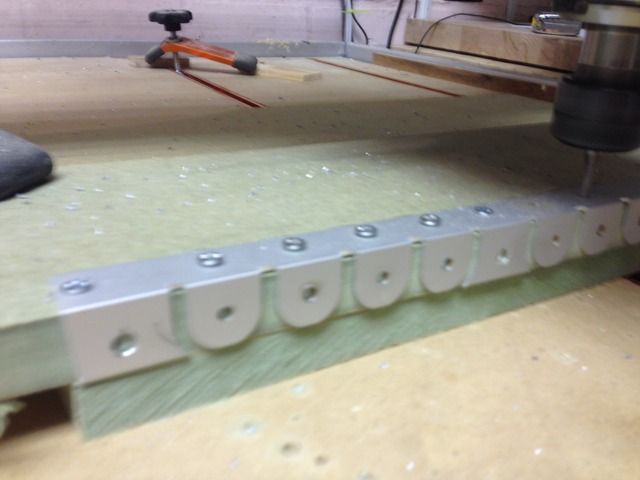
These will be bolted to the canards and the nose cone
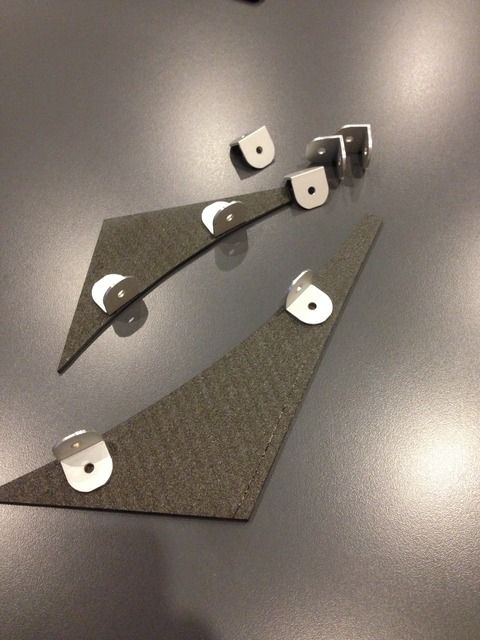
CosKev3 - 18/6/16 at 09:09 PM
As good as they look on competition cars I'm not a fan on a road car,especially when they are made of very hard and sharp carbon fibre.
I just have images in my head of someone's leg after being hit by a car with those fitted
Rosco86 - 19/6/16 at 06:10 AM
quote:
Originally posted by CosKev3
As good as they look on competition cars I'm not a fan on a road car,especially when they are made of very hard and sharp carbon fibre.
I just have images in my head of someone's leg after being hit by a car with those fitted
Yeah some of the fins I've seen are only real thin and razeor sharps on the edge, the carbon I've used is 5mm thick so I'm still able
to get a 2.5mm rad on the edges which would off passed IVA to
Rosco86 - 25/6/16 at 09:02 PM
Got a bit done this week, got the canards finished and fitted, bit tricky getting both sides the same but my dad eyed them up!
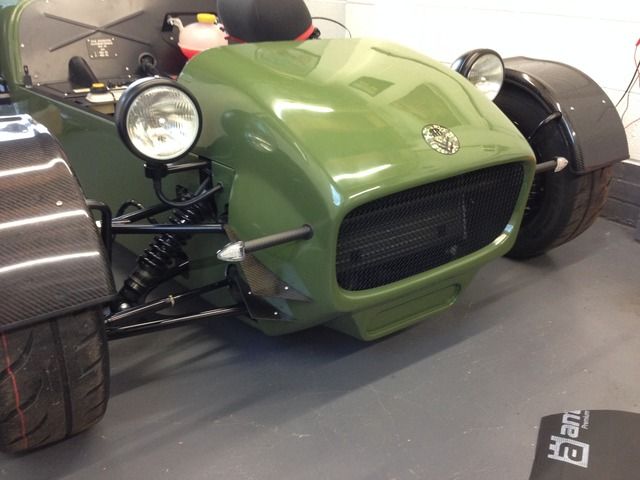
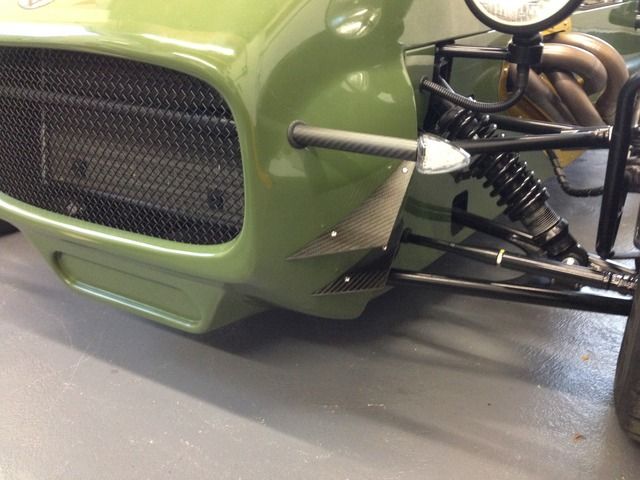
My dad made me some blacking plates so I could remove the air bypass bumf
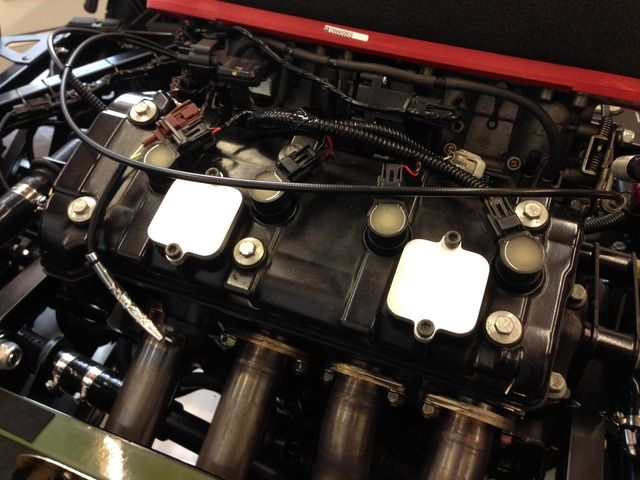
Next job, rear diffuser, more brackets made by my dad
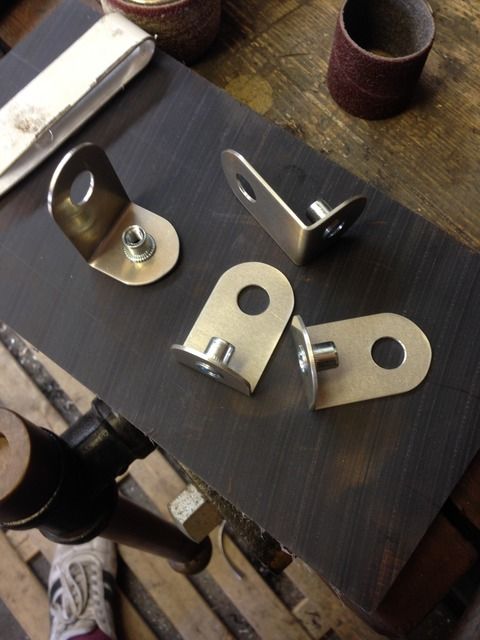
Brackets mounted on suspension bolts
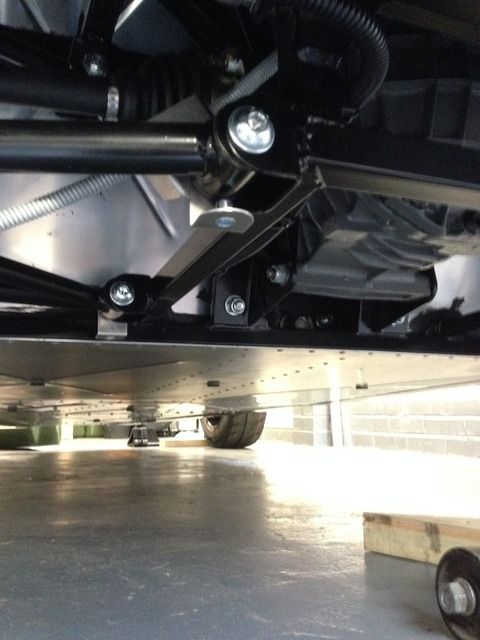
Rough card template
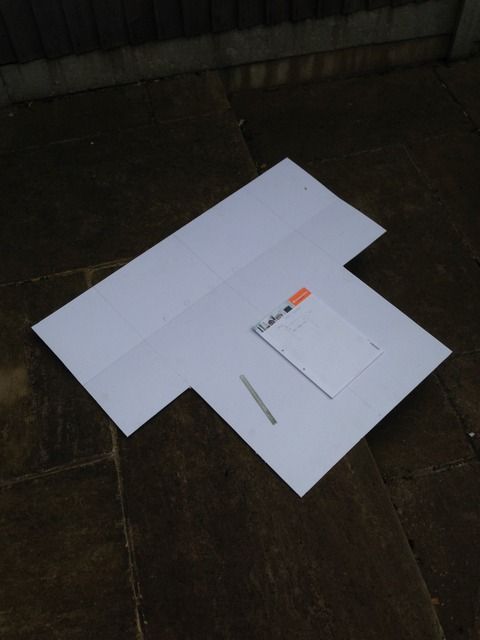
1.5mm aluminium, blank canvas!
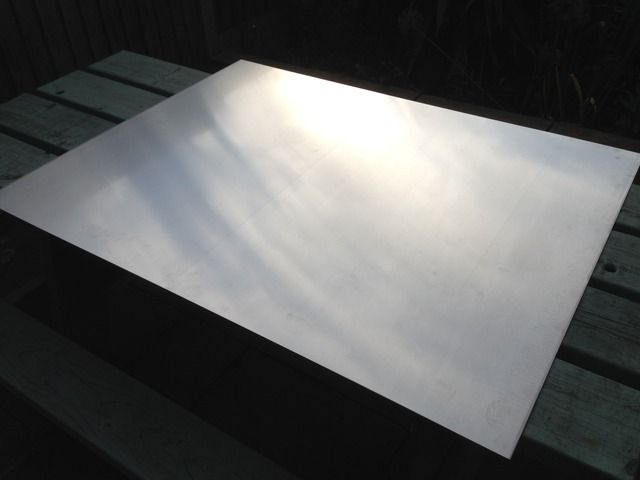
Folding back edge up
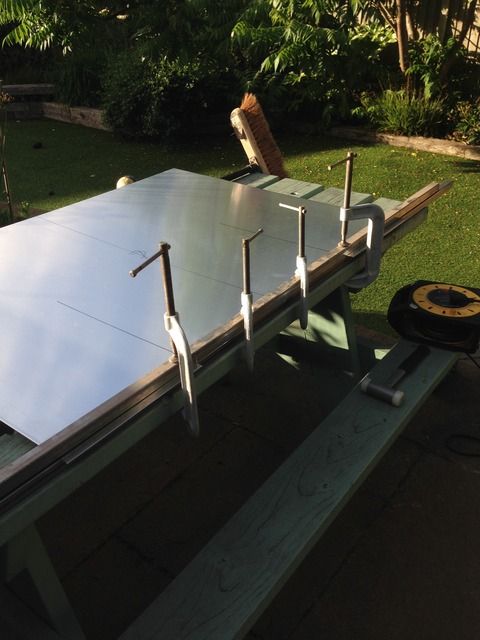
Getting there
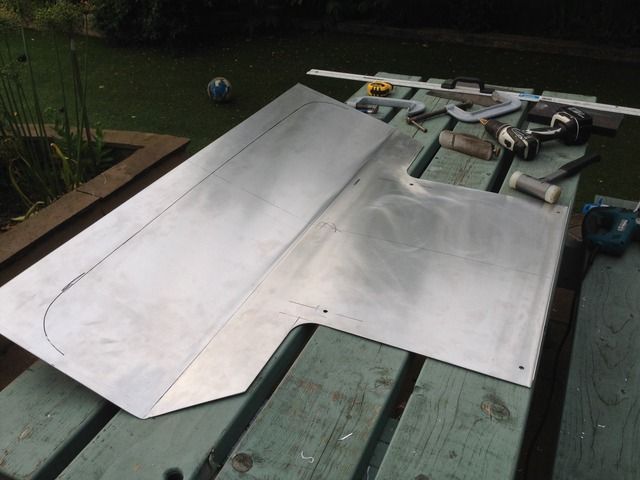
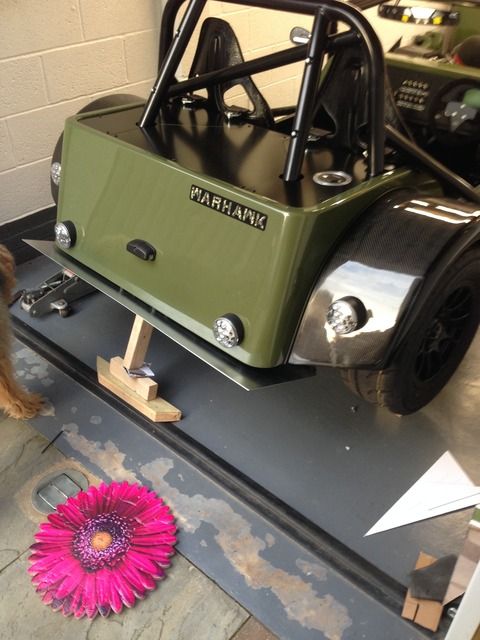
Got to have some bead rolling
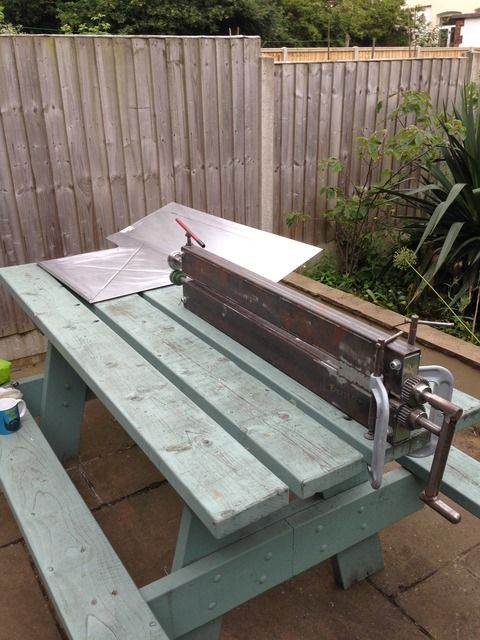
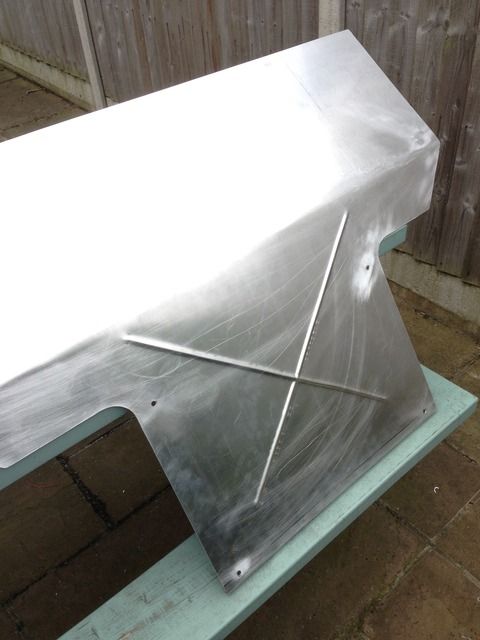
Fins added, going to nut and bolt these after paint I think, that way if one gets damaged i can just replace it
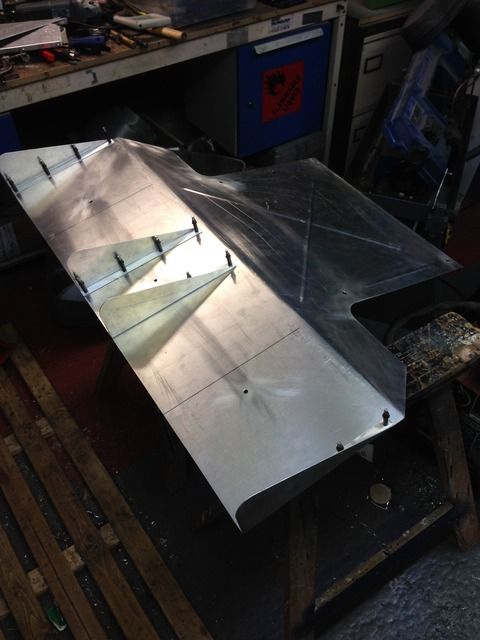
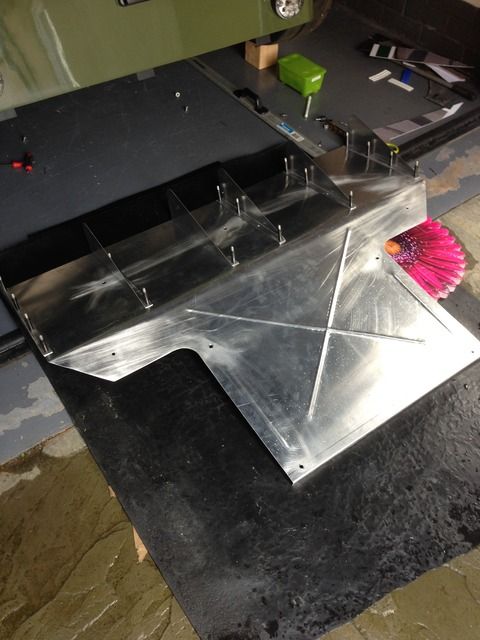
Looks a bit over the top but that's what I wanted, not bad for �15 for the aluminium sheet!
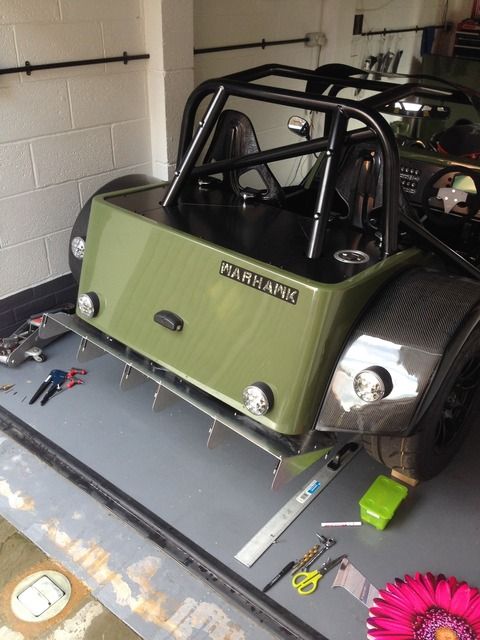
Digimon - 27/6/16 at 09:44 AM
Congratulations on passing the IVA. Now the fun bits can start, nice work on the diffuser
garyt - 28/6/16 at 07:51 AM
nice work and I really like the diffuser, what thickness ali did you use?
Rosco86 - 28/6/16 at 09:11 PM
Cheers guys, used 1.5mm bit of bead rolling soon stiffens it up
Rosco86 - 28/6/16 at 09:17 PM
Got some bonnet vents fitted, just to let some air out as there's only down the tunnel with the full floor etc
Holes cut
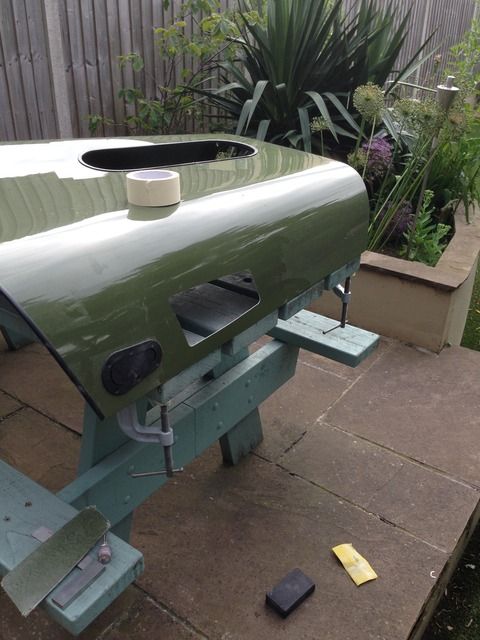
Stuck in
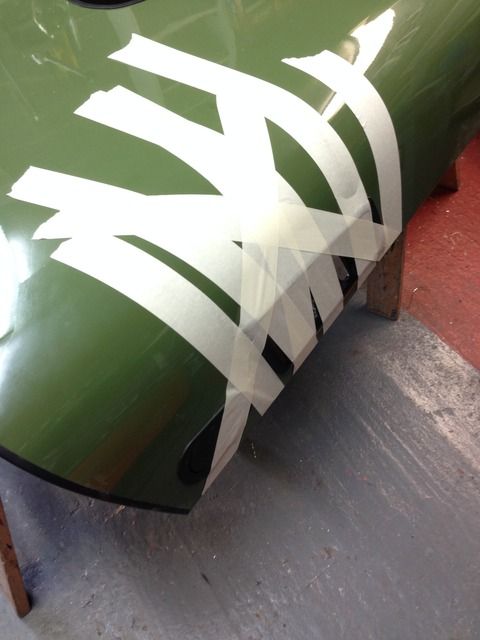
All done
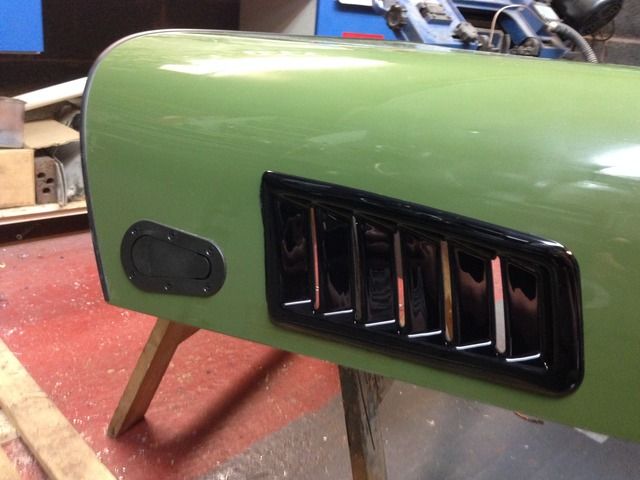
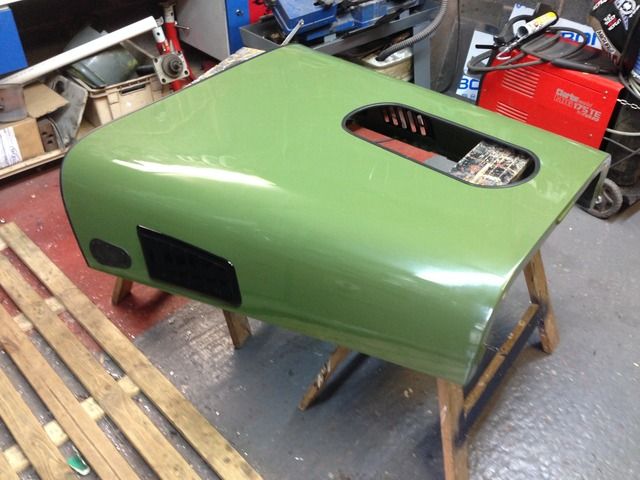
Also made a gopro mount
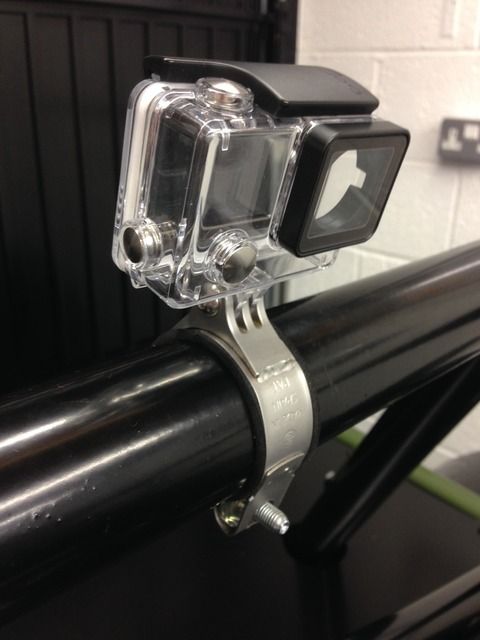
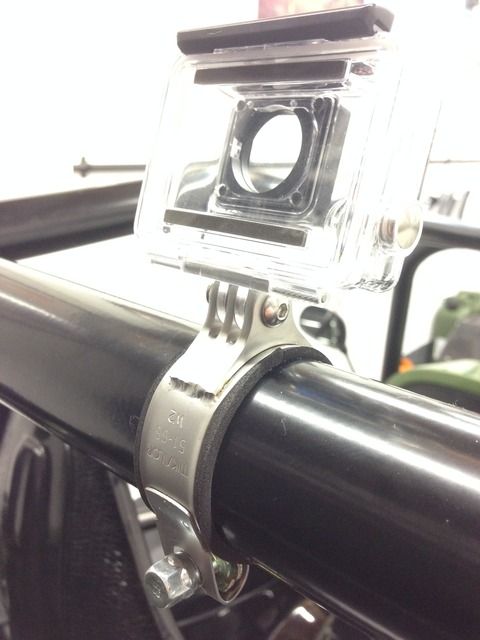
Might get the diffuser back from paint tomorrow too! Can't wait!
Rosco86 - 4/7/16 at 08:15 PM
Right well Friday just gone, I rang the dvla to chase my reg and they said they where just waiting on the payment to clear then they would call and
tell me my reg, about lunchtime they emailed it through, so straight to get some numberplates, got these fitted and also got my rear diffuser back
from paint and fitted
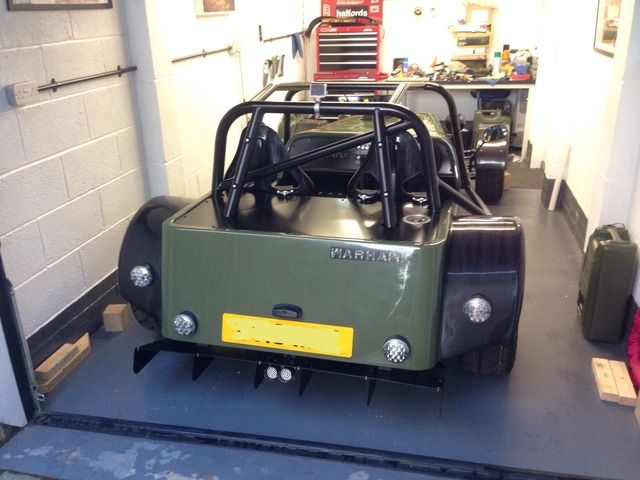

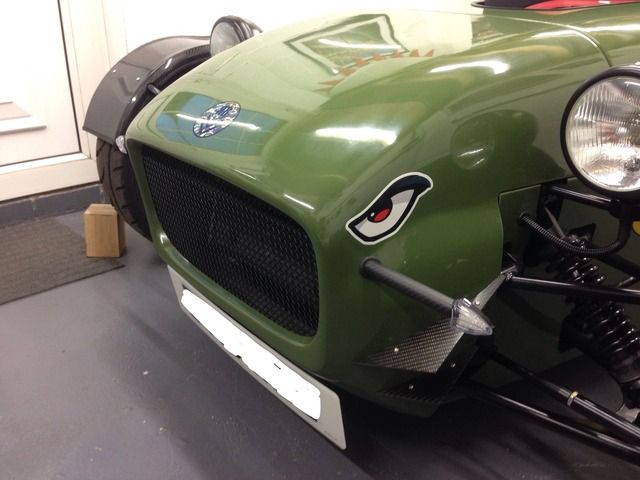
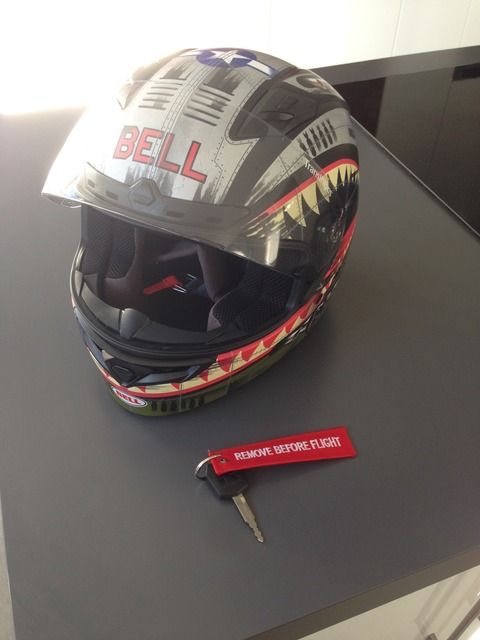
I was all ready for a spin but kept raining on Friday night,
Up early Saturday morning, and the sun was out, looking good
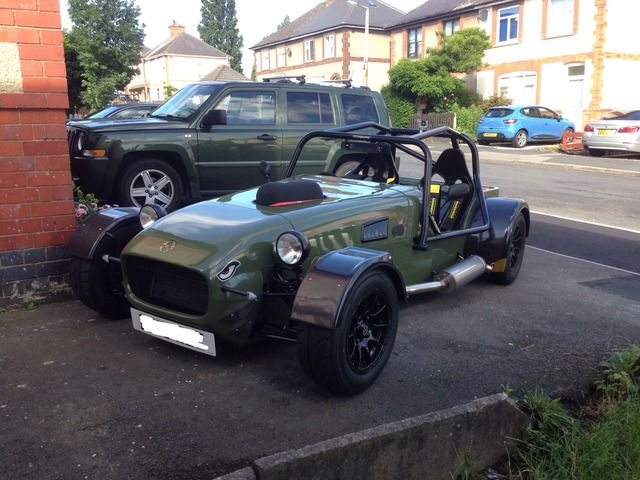

Had a good few runs out, just did short runs so I could keep checking everything looked alright, all sweet, drives lovely, well happy!
Digimon - 5/7/16 at 07:48 AM
The car looks fantastic, we just need some video now
Mash - 5/7/16 at 08:01 AM
quote:
Originally posted by Rosco86
Got some bonnet vents fitted, just to let some air out as there's only down the tunnel with the full floor etc
All done
Where did you get these from Mate?
Mash - 5/7/16 at 08:01 AM
Nice motor by the way
Rosco86 - 7/7/16 at 07:10 AM
cheers, will get some video up soon,
vent were these
Focus RS MK2 Style Bonnet Vents Universal Ford ST Vauxhall VW *SPECIAL OFFER*
real nice quality and very light weight
Digimon - 13/8/16 at 08:17 PM
How you getting on with the car Rosco?
Been out on track yet?
Rosco86 - 18/8/16 at 08:40 PM
Well guess a little update is needed,
Been real busy with real life to be fair, been on holiday and got a new daily so that's took a bit of my time,
As for the car, all perfect apart from a slight oil leak from the gear position sensor, fixed this last night
And a problem with the rear wheel bearings still being tight after 100 or so miles, turns out it looks like I had not pressed the inner seals in
enough, I had just fitted them flush with the hub face for some reason, so fitted a new set of bearings and seals to the hubs tonight so hopefully get
it back together and on the road over the weekend, then I can get a video and some good finished pictures up!
Rosco86 - 21/8/16 at 06:47 PM
Well got the wheel bearings all fitted and back together, not a bad job really, just sounds worse I think, once I built the hubs up I run them in the
lathe to see if they got warm, and they did, about 50 deg C, now I don't no if anyone else's run warm, but these seem to, I will just keep
an eye on it, as I have no other ideas,
Been out for a good drive today, and took a few pictures, drives so nice!
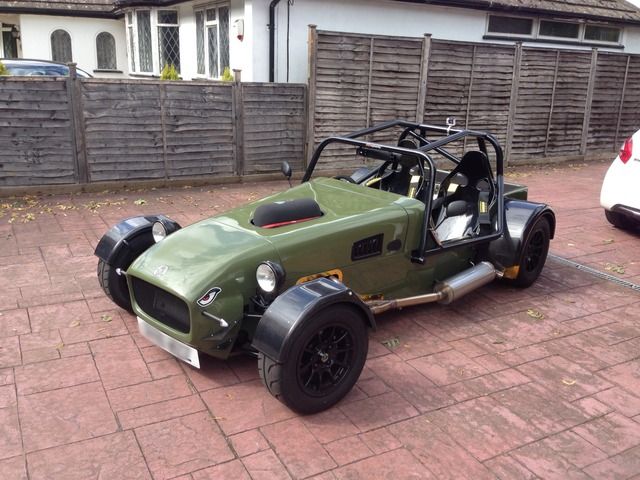
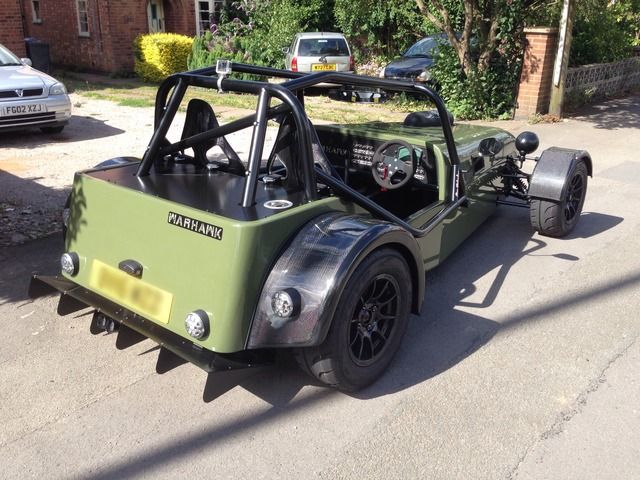
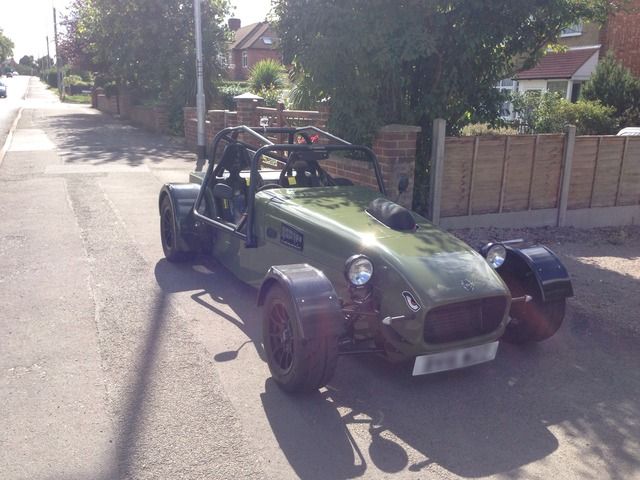
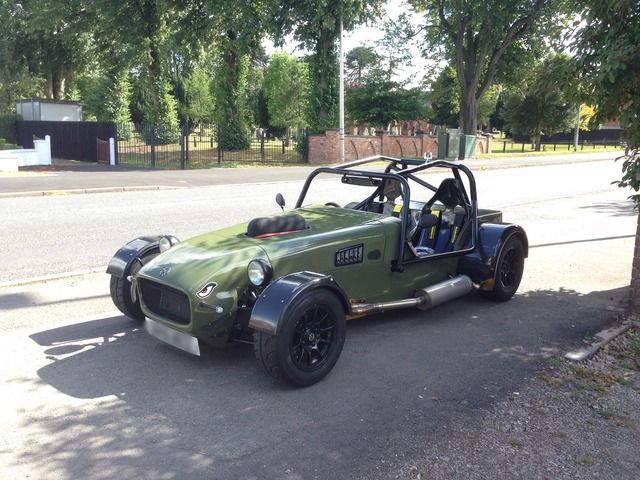
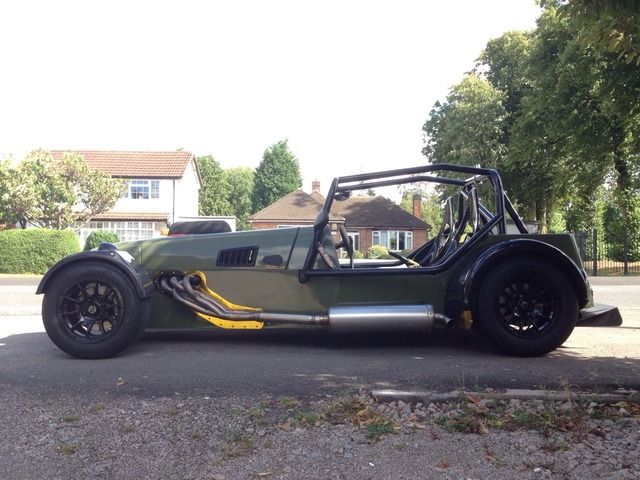
TheHighlander123 - 24/8/16 at 08:52 PM
Oustanding thread.
You have some skills mate
Love this.
Rosco86 - 24/8/16 at 09:04 PM
quote:
Originally posted by TheHighlander123
Oustanding thread.
You have some skills mate
Love this.
Cheers mate
BigMac - 25/8/16 at 07:15 AM
Everytime I read this thread, it both amazes and infuriates me... Amazes, as I'm astounded at your fabrication skills and the sheer quality of
the end product. It infuriates me, because any attempt I make at making things ends up like this...

Top job buddy, it really is a fantastic machine!
Samuele - 6/9/16 at 10:27 AM
I have to say congratulations for the work that I have seen in your building.
very professional.
Rosco86 - 10/9/16 at 06:34 PM
Thanks guys!
Well got my first track day next Friday, finally got it on the rollers to check the fueling, fueling needed a bit of a tweak but the main issue was at
9000 rpm the power dropped off, with a peak power of only 140bhp, great I thought, what's that going to be, but even so we took the air filter
off just to watch the top injectors working because we thought it was cool, and only three where working, so I got some 2nd hand injectors and
replaced the bad one, drives like a different car! 9000 rpm then hits the limiter at 13000! So back on the rollers for another power run and map the
fueling,
Here's a pic of the two power curves, the top green line is the bad injector run and the top red line is how it is now!
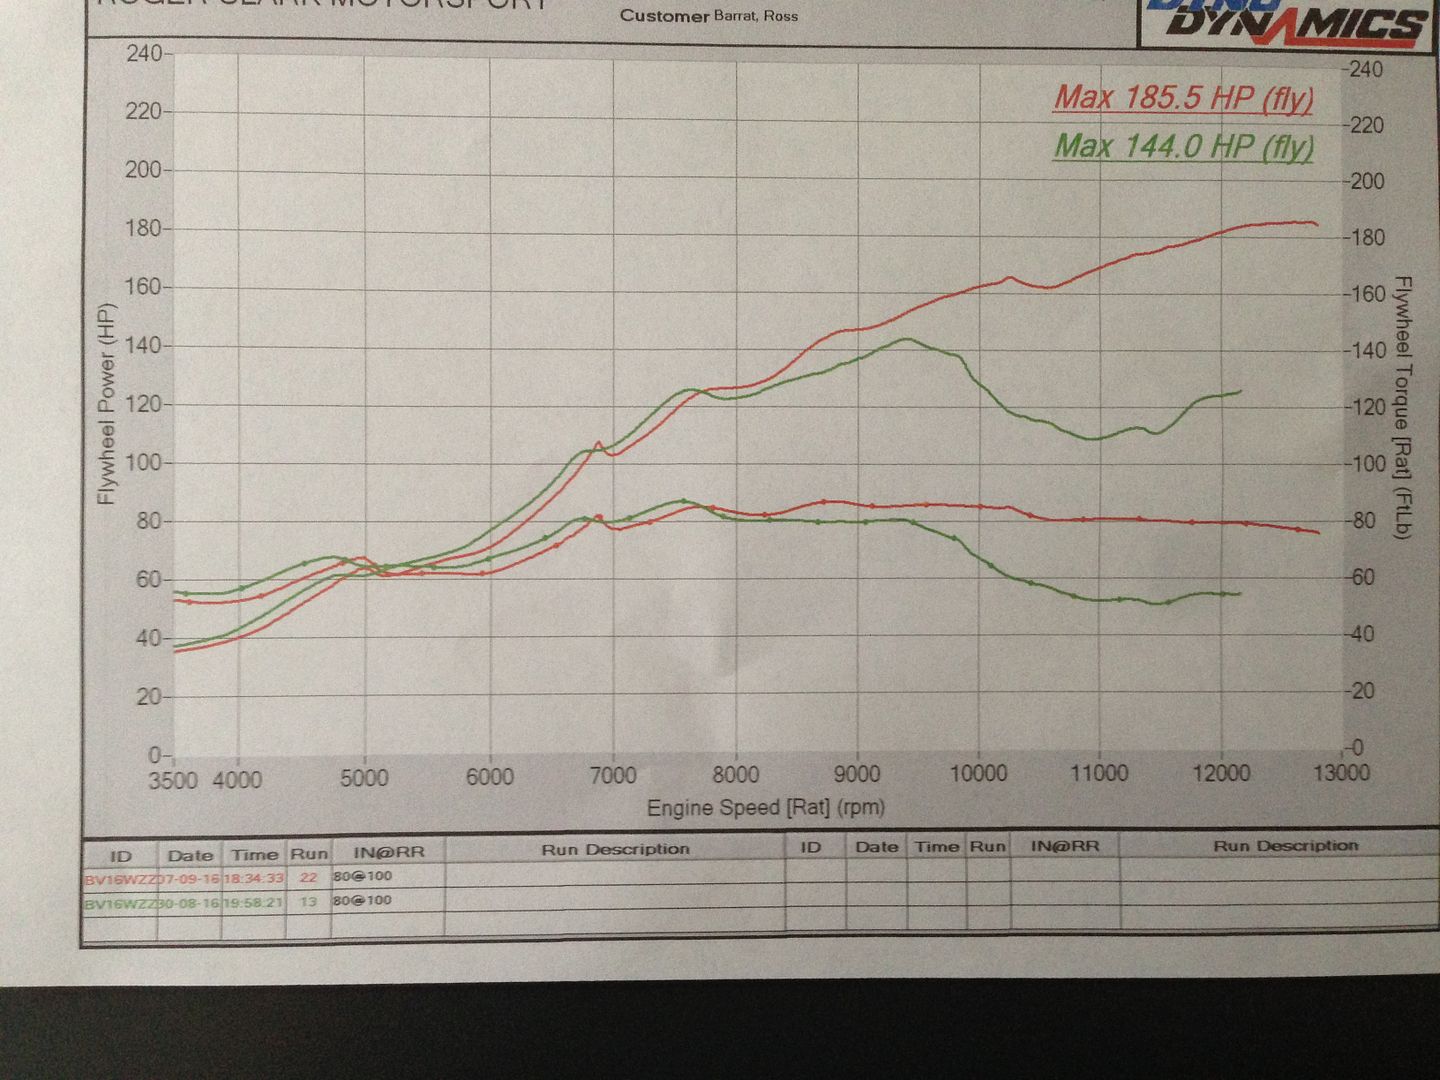
All in all an easy fix really, and feels so much faster!
Also the rear wheel bearings seem to be bedding in nicely,
I've checked the alignment again and set the ride height with me sat in it, oh and centred the steering wheel
Few little jobs left and a clean and I should be ready for a blast around blyton park
Banana - 28/10/16 at 06:56 PM
So....
How was Blyton?
Rosco86 - 10/11/16 at 10:15 PM
quote:
Originally posted by Banana
So....
How was Blyton?
Sorry only just read this, well, one of the worst days I've had in a while,
It rained all the way there, and all morning till midday, at which point we decided to head home, did one lap, car was filthy and drenched as where my
pants, I was gutted to be fair, I'm really surprised they let the day run as it was downright dangerous on track, but guess they wanted the
money!
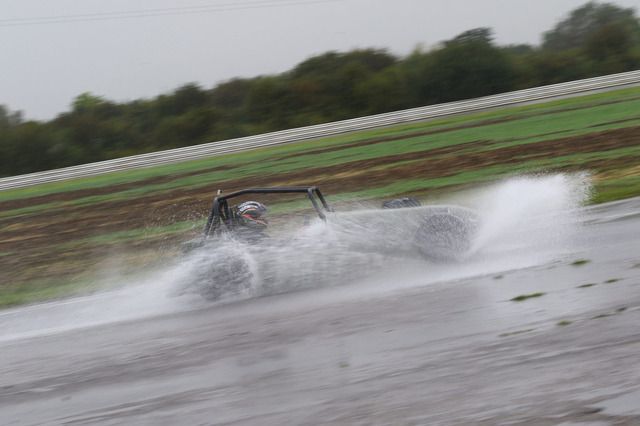
So got home and spent the whole weekend getting the car clean and dry again!
But I've been out for a few steady drives since, one issue I've had is with the colder weather my rubber pipes from my brake resviour have
been leaking a little fluid so I've swapped to these tonight
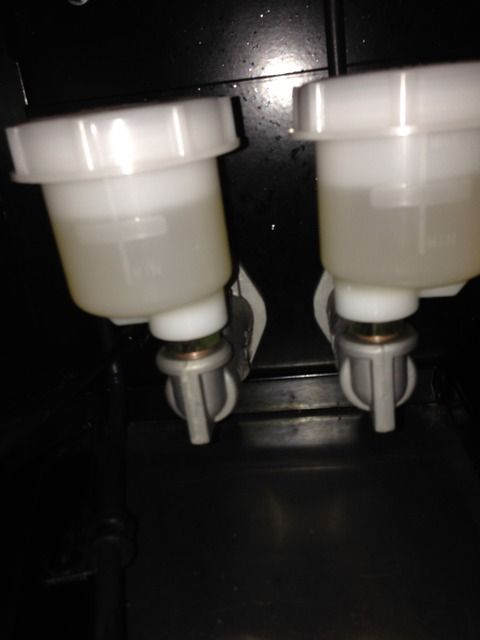
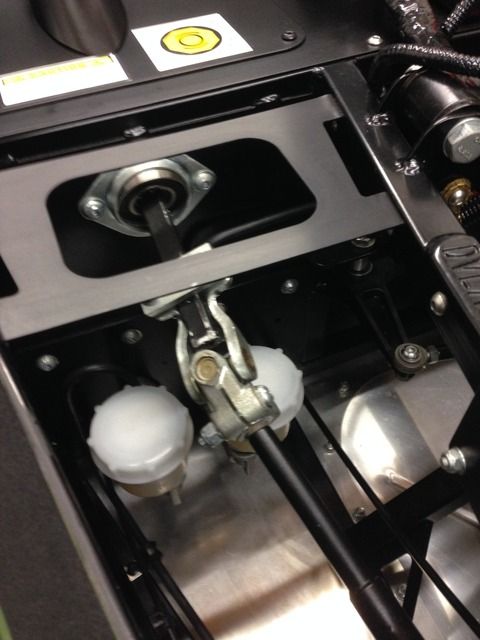
There remote ones but I didn't realise you can mount them straight in the master cylinders, so see how these go
Rosco86 - 19/1/17 at 10:02 PM
Well I'm still here, decided to get my finger out and start sorting my winter jobs out on the car,
The list is
Sort an aeroscreen out
Fit a fuel level sender and guage, as the one in the bike pump is to low and doesn't work
Fit a controller for the electric water pump as on a steady run it runs a bit cool as I've removed the thermostat
And a few other little jobs,
I will keep you posted
CosKev3 - 19/1/17 at 10:08 PM
Are you planning on taking it to Stoneleigh?
Rosco86 - 19/1/17 at 10:11 PM
quote:
Originally posted by CosKev3
Are you planning on taking it to Stoneleigh?
Yeah hoping to if the weathers ok, do they have indoor parking? Do the forum have a stand?
CosKev3 - 19/1/17 at 10:22 PM
Pretty sure in door is for traders and manufacturers.
Never seen a LCB stand/area
theduck - 20/1/17 at 12:01 PM
Club parking is outside, to park inside you'd have to get a supplier to have you on their stand.
This forum doesn't have a club stand but there are lots of clubs and I'm sure many would be happy to have you join them, certainly you would
be welcome on the rhocar stand
40inches - 20/1/17 at 07:20 PM
The bottom sheds are free for anyone selling a car
Rosco86 - 13/4/17 at 09:02 PM
Well got my winter jobs done, took me bloody ages lol, but I just did them now and again,
Not many pictures but got my fuel sender fitted in the tank and all working
Just finished my aeroscreen tonight
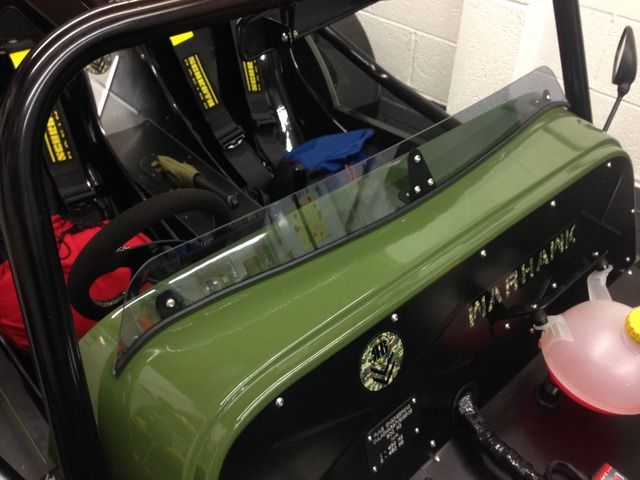
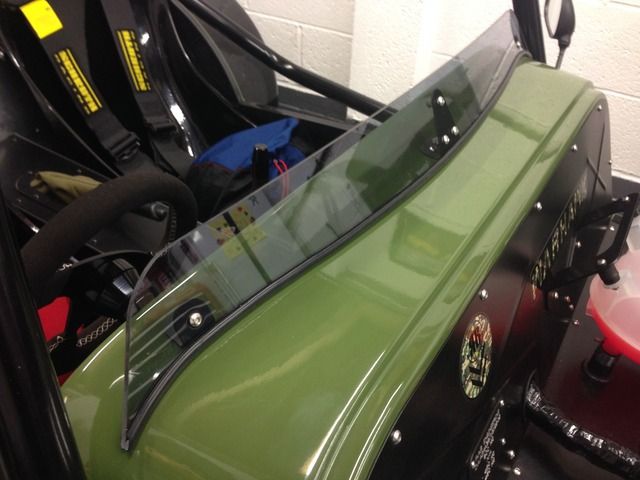
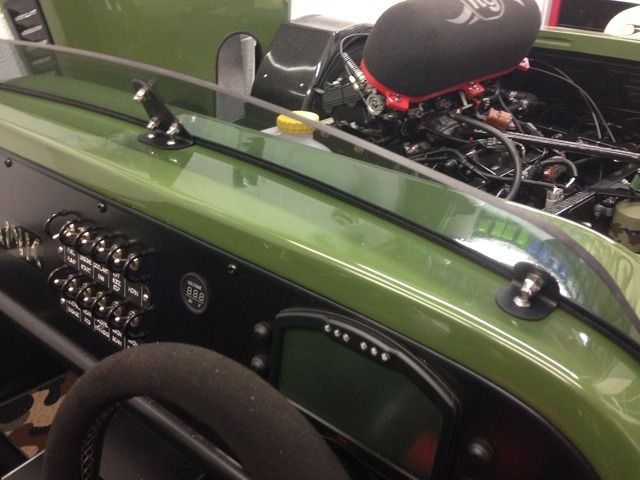
Quite happy with it to be fair
Also got my water pump controller all fitted and wired in, got out for the first time this year last weekend and all seemed to work well
Only other job might be to fit these vents behind the front wheels to let a bit of heat out from the engine bay, not sure yet tho
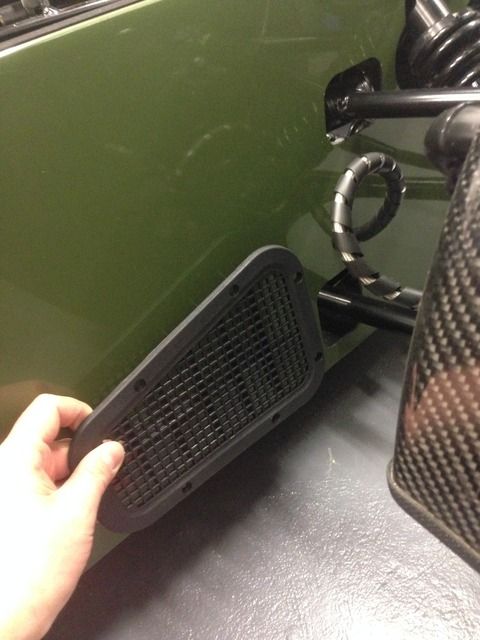
CosKev3 - 10/5/17 at 08:04 PM
Did you make it to stoneleigh?
Hoping you didn't,cause if you did I missed you
Rosco86 - 23/4/18 at 08:09 PM
well gave her a clean and went to work in it last week, its still sweet, just need to use it more
Rosco86 - 17/8/18 at 10:44 AM
Well after a lot of thought....
im thinking about maybe putting her up for sale
CosKev3 - 17/8/18 at 10:53 AM
Oh dear
How many miles have you done?
Just not for you a kit car?
Mr Whippy - 17/8/18 at 12:06 PM
Don't that's stupid and you'll regret it for ever more
I've had projects (not cars) which have been on hold for 12 years or more and I just put them aside till the time was right, working on two right
now a huge RC plane and a RC u-boat Robbe U47. Sometimes you have to have patience.
Rosco86 - 29/8/18 at 11:58 AM
quote:
Originally posted by CosKev3
Oh dear
How many miles have you done?
Just not for you a kit car?
about 500 total, so in two years, i just dont get time to get out in it thats all
CosKev3 - 29/8/18 at 01:22 PM
quote:
Originally posted by Rosco86
quote:
Originally posted by CosKev3
Oh dear
How many miles have you done?
Just not for you a kit car?
about 500 total, so in two years, i just dont get time to get out in it thats all
Wow what a shame
Done more than that in two drives out this year!
11.5k miles in the four summer's I've had it on road.
tom225 - 23/3/20 at 07:56 PM
Hey Rosco.
Epic build I know it was a good while ago, but currently building a similar project myself.
Just wondered if you happen to have the dimensions for the tubes used for the roll cage as I'd like to use the same design.
Rosco86 - 23/3/20 at 08:29 PM
I will have a look, drop me your email on a pm
Rosco86 - 19/4/21 at 08:00 PM
Pictures are working again some how, might be time to put her up for sale.......
Rosco86 - 24/2/24 at 10:51 PM
Now on ebay, new project on the horizon 😀
christim - 26/2/24 at 10:33 AM
Good luck hope it sells quickly. If any car out there deserves it's price tag it's this one!


