roadrunner
|
| posted on 28/9/21 at 08:51 AM |

|
|
Come along nicely. 
|
|
|
|
|
big_wasa
|
| posted on 28/9/21 at 09:43 AM |
|
|
Very nice
|
|
|
John Bonnett
|
| posted on 28/9/21 at 05:27 PM |
|
|
quote:
Originally posted by big_wasa
Very nice
Thank you, everyone.
I'd appreciate any help and advice you could give me on a power distribution unit for my car that won't cost an arm and a leg. I know very
little about them but from what I understand they offer a significant advantage over conventional fuses and relays.
|
|
|
John Bonnett
|
| posted on 14/10/22 at 10:46 AM |
|
|
It's been a while since the last offering so here is a pictorial record of the intervening progress and to where we are at present.
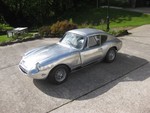
We'll start of with an artist's impression which is a computer generated render onto the body frame. This was done by a chap in Germany and
it blew me away when I first saw it.


[Edited on 14/10/22 by John Bonnett]
|
|
|
John Bonnett
|
| posted on 14/10/22 at 11:08 AM |
|
|
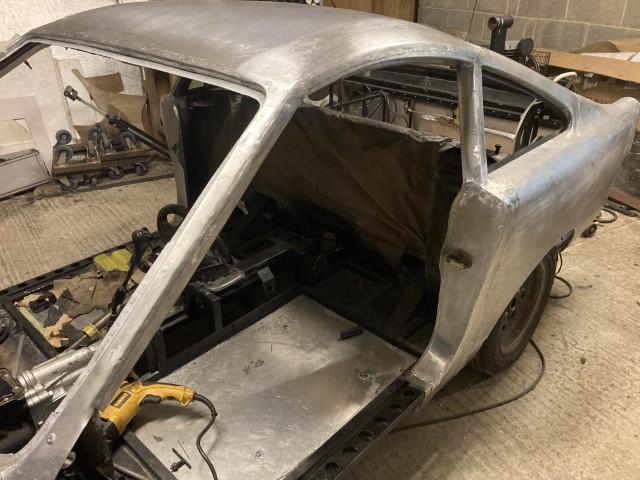
Every little section of bodywork is like a mini project in itself and each gives a lot of pleasure in the execution. The rear of the car is inspired
by the DB5 and specifically the line of the rear quarter panels and the light configuration. For the first time, I have used a wire frame buck made
from 6mm steel bar and it worked out nicely having some advantages over a plywood station buck.
The shape of the area around the rear lights is complex and needed a bit of head scratching to work out how to form it.


The plate to accommodate the lamps was made separately


And then edge welded in position


[Edited on 14/10/22 by John Bonnett]
|
|
|
John Bonnett
|
| posted on 14/10/22 at 11:36 AM |
|
|
This car is going to have modern refinements which I hope will improve the driving experience without detracting from the outward classic body style.
If the car was designed, and it really wasn't, it's more of a case of make it up as you go along, you could say that it all revolves around
the windscreen from a MK4 Fiesta. This was the smallest, most easily available and cheap electrically heated screen that I could find. This together
with the Fiesta heated rear screen are the first of the upgrades. You need to be able to see and although the car will have a conventional demister it
won't be anything like as effective as an electrically heated screen.
I like air conditioning and decided on a unit from VintageAir in the States. I then discovered that Dakota Digital make an automatic climate control
system, fully integrated and wired for direct connection to the VintageAir unit. VintageAir also offer and ABS plastic box which is what they call a
mockup of the actual unit so that the mountings can be fitted without any risk of damaging the actual unit. It is also considerably lighter which is
an advantage.

I went for their smallest system but it is still pretty big and so a bit of thought was needed to work out how to fit it and cover it in with the
dashboard/console. In the event, the dashboard took three months of work.


Dashboard removed for covering

[Edited on 14/10/22 by John Bonnett]
|
|
|
John Bonnett
|
| posted on 14/10/22 at 11:49 AM |
|
|
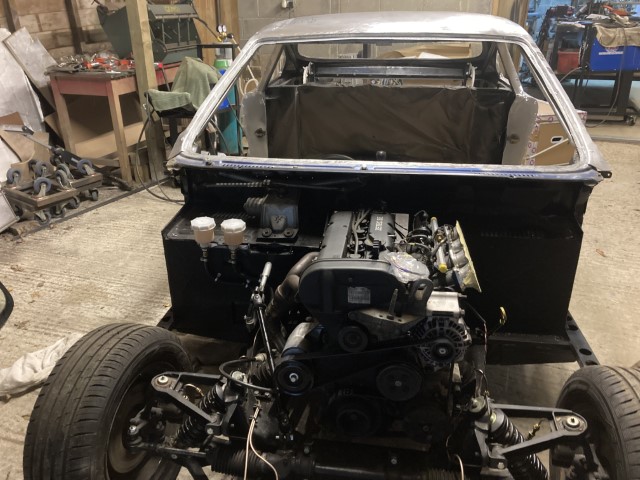
The main bodywork as far as the B post and the roof is now complete with just the metal finishing left to do so a bit of a milestone.


|
|
|
Mr Whippy
|
| posted on 14/10/22 at 11:53 AM |
|
|
Amazing. I'm sure you could run a business making custom dashboards for people and seems a shame to cover that tbh. Would look quite nice painted
body colour imo and more in line with the retro look of the car. Chrome plate all the plastic parts, would look very fancy
|
|
|
John Bonnett
|
| posted on 14/10/22 at 12:00 PM |
|
|
quote:
Originally posted by Mr Whippy
Amazing. I'm sure you could run a business making custom dashboards for people and seems a shame to cover that tbh. Would look quite nice painted
body colour imo and more in line with the retro look of the car. Chrome plate all the plastic parts, would look very fancy
Ha ha, That dashboard really was very hard work and I'm not sure I'd want to do another one. I felt that it needed to be covered with a
layer of foam underneath to add a degree of softness to it. I've farmed the job out to a professional trimmer because I'm really not good at
upholstery and she is, very good.
|
|
|
swanny
|
| posted on 14/10/22 at 02:47 PM |
|
|
saw excited to see an update on this.
The rear end has a whiff of gilbern genie about it. very nice
|
|
|
John Bonnett
|
| posted on 14/10/22 at 03:10 PM |
|
|
quote:
Originally posted by swanny
saw excited to see an update on this.
The rear end has a whiff of gilbern genie about it. very nice
Thank you.
I think there are flavours of several different marques in there including the Harrington Alpine and once the front is on maybe a few more.

[Edited on 14/10/22 by John Bonnett]
|
|
|
John Bonnett
|
| posted on 16/10/22 at 05:01 PM |
|
|
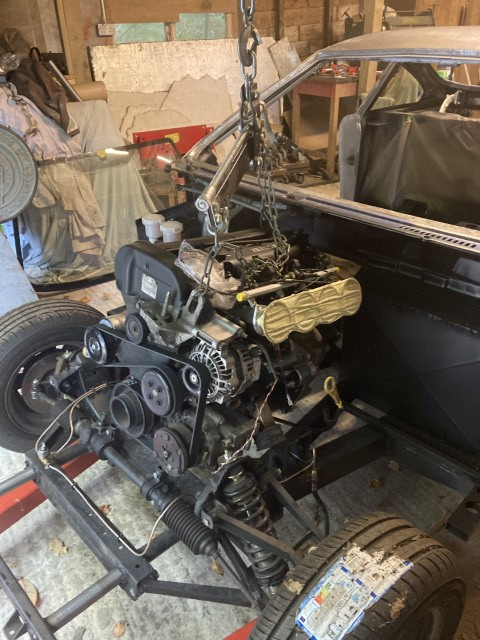
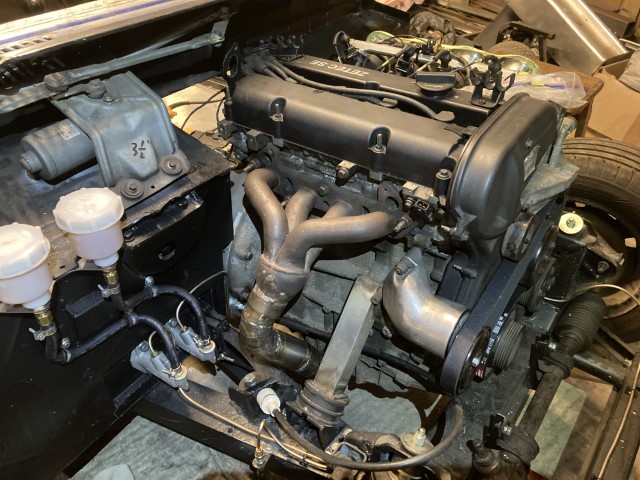
I've started metal finishing the weld between the roof and the door aperture and it's coming along quite nicely. As a break from the
laborious work with a body file, I decided to drop the engine and box in. It proved to be a really easy job which I manged on my own and without any
assistance. Next, throttle linkage went on followed by the bulkhead fitting for the heater/aircon pipes. On the other side, the clutch cable and
exhaust went on.
|
|
|
John Bonnett
|
| posted on 4/11/22 at 01:53 PM |
|
|
As with all these make it up as you go along projects there are set-backs as well as steps forward and since my last offering there's been a bit
of both.
I made a schoolboy error when welding the outside panels to the roof and have ended up with an asymmetric profile which will need to be dealt with at
some point but not now. Not a huge job to rectify but a bit of a pain because it could have been avoided.

I'm currently focussed on getting the engine running and in preparation, all the plumbing has to be done. I'm using PTFE lined stainless
steel braided hose and AN fittings. Although not cheap and not essential, I bought the assembly tools which are proving an absolute boon. For the
engine bay line I've used a nylon sheathed pipe which is less obtrusive that the stark braided stainless steel. The tube is still stainless steel
braided but it is covered by the nylon outer which involves one extra process when fitting the unions but in my view, aesthetically quite pleasing and
worth doing.


[Edited on 4/11/22 by John Bonnett]
|
|
|
John Bonnett
|
| posted on 8/11/22 at 06:56 PM |
|
|
I've been working out the runs for the coolant pipes which has caused a bit of head scratching but we're getting there. It is quite a costly
exercise but thanks to the extraordinary generosity of one of our forum members, not as expensive as it could have been. This really is a fantastic
forum like no other when it comes to the depth of knowledge and help that everyone is pleased to give and this experience is no exception and is
hugely appreciated. Thank you. I'm not going to mention your name but you know who you are and if there is ever anything I can do in return,
please just ask.
So, here are a few photos showing the progress.
Oh, and the new radiator is fitted.


|
|
|
John Bonnett
|
| posted on 12/11/22 at 09:02 AM |
|
|
The fuel lines are finished apart from one fitting that I'm waiting for. Incredibly, they fit where I intended them to in the profile of the
transmission tunnel that I made a couple of years ago. It's very nice when a plan works out.


|
|
|
John Bonnett
|
| posted on 20/11/22 at 04:35 PM |
|
|
Being lazy, I lobbed out on an expensive fuel filler arrangement that incorporates tank breather and the larger bore pipe that's stops blow back
and the pump cutting out. Unfortunately the outlet angle was at too steep an angle for a decent lead in to the tank so that was a bit of a downer.


So while it grieved me to do it, I had to take the angle grinder with a cutting disc to it, modify the angle and weld it all up. It didn't look
too bad when painted and there are no leaks

I wanted the filler to sit in a joddled recess rather than flat on a piece of sheet so it was time to dust off the old Rolastep which I notice are now
hugely expensive. I don't remember paying much for it many years ago when I bought it so, my good fortune that I have now because I could never
afford to buy one now that's for sure. It does a great job and comes into its own with this application.


I then made a hammerform to match the profile of the aperture and all turned out reasonably well.
https://i.ibb.co/3sB7RBh/IMG-4049-Small.jpg
|
|
|
John Bonnett
|
| posted on 20/11/22 at 04:36 PM |
|
|
And two more photos that got left off


Quite and acceptable feed in now and will be even better when the filler pipe is shortened a tad.
[Edited on 20/11/22 by John Bonnett]
|
|
|
HowardB
|
| posted on 21/11/22 at 05:06 PM |
|
|
that is looking amazing - 
Howard
Fisher Fury was 2000 Zetec - now a 1600 (it Lives again and goes zoom)
|
|
|
John Bonnett
|
| posted on 21/11/22 at 05:38 PM |
|
|
quote:
Originally posted by HowardB
that is looking amazing -
That's really kind of you Howard, thank you.
It's been a bit of a struggle but the tank is now securely strapped down and the panel containing the fuel filler bonding in. I'll leave it
clamped up for a day or two to give it a good chance to cure.


|
|
|
Mr Whippy
|
| posted on 22/11/22 at 12:31 PM |
|
|
I like that, probably the safest location you could put the fuel tank and filler.
|
|
|
John Bonnett
|
| posted on 22/11/22 at 01:02 PM |
|
|
quote:
Originally posted by Mr Whippy
I like that, probably the safest location you could put the fuel tank and filler.
Safety was one of the reasons for siting it there and the other is that just forward of the axle should give a better weight distribution. There
should be just room for the spare in the space left.
|
|
|
John Bonnett
|
| posted on 13/3/23 at 02:54 PM |
|
|
A bit more progress since my last update.
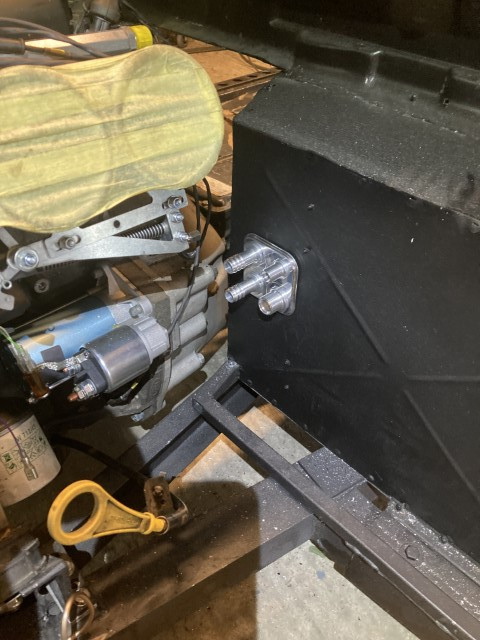
I managed to source from the States an adaptor to fit the aircon compressor with threaded union outlets which are in the ideal position for my
setup.

I'm using an Odyssey Extreme battery which is standing on its end and have fabricated a battery box in stainless steel to suit.

and mounted in the car

The engine bay fuse/relay box is installed and the loom fed into the cabin.


The accelerator cable now attached to the pedal.

|
|
|
John Bonnett
|
| posted on 19/3/23 at 03:31 PM |
|
|
I'd like to begin by a big thank you. I've been struggling to find the mating halves of the cooling fans and the aircon compressor and one
of our members out of the goodness of his heart gave me what I've been looking for and posted them to me refusing any payment. I'm
completely overwhelmed and very touched by such kindness and generosity which has warmed my heart.
Today has been a bit of a milestone in project terms because today the engine started and the first startup is always a special moment no matter how
many times it has happened before, something to which, I'm sure, we can all relate. But leading up to that, I discovered that I had made a faux
pas with wiring the ecu, in particular the two relays, fan and fuel pump. I hadn't realised that the ECU should be connected to the earth side of
the relay coil not the live side. My fear was that I might have fried the ECU by putting 12 volts where it shouldn't have been but fortunately I
got away with it.
Here's a short clip. The jingling sound is coming from the trumpets which aren't nipped up. I'd previously removed the backing plate
for better access to the earthing point on the block.
https://www.youtube.com/watch?v=SwyY-86p_QY
|
|
|
HowardB
|
| posted on 19/3/23 at 09:50 PM |
|
|
Sounds great! Great progress John... looking forward to seeing the 1st drive
Howard
Fisher Fury was 2000 Zetec - now a 1600 (it Lives again and goes zoom)
|
|
|
Schrodinger
|
| posted on 20/3/23 at 07:45 AM |
|
|
Well done John it's progressing nicely.
Keith
Aviemore
|
|
|