
Mac Worx RR build thread
Red16 - 21/2/10 at 03:16 PM
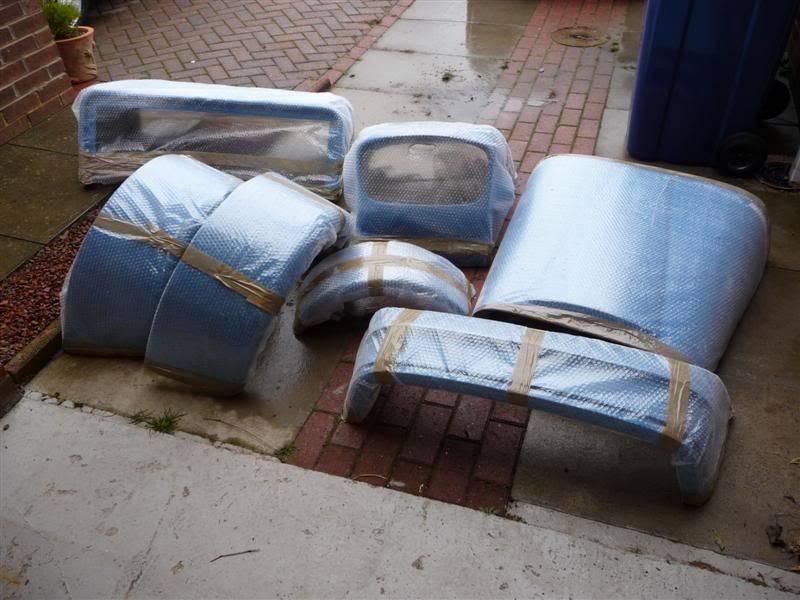
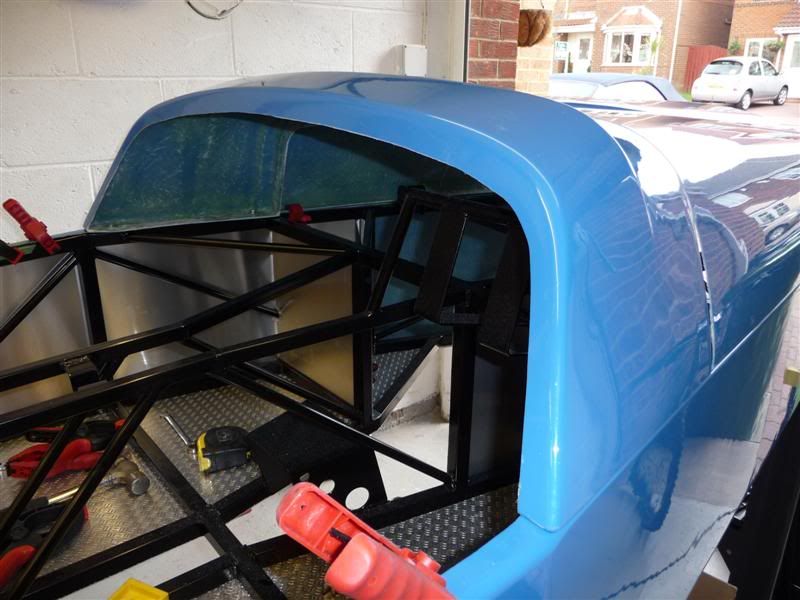
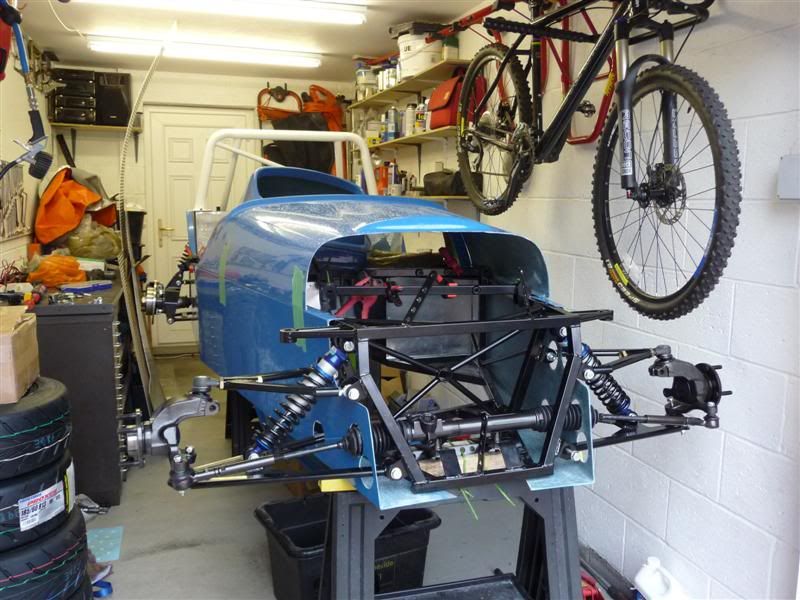
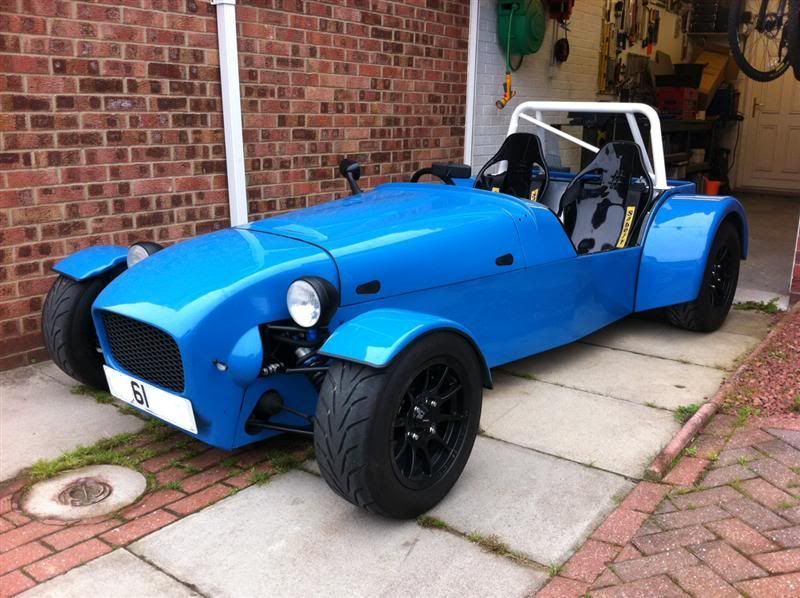
I've just collected the first stage of a my Mac Motorsports Worx RR kit. 
Heres a few photos...
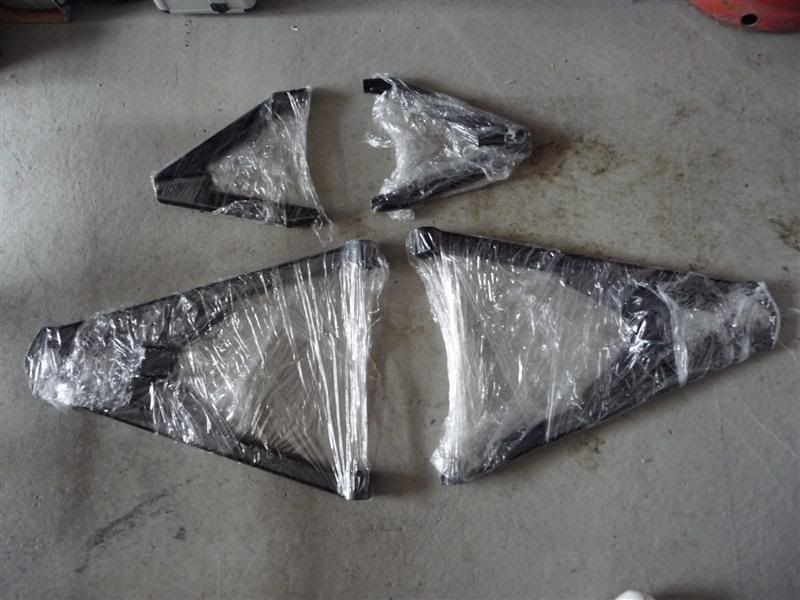
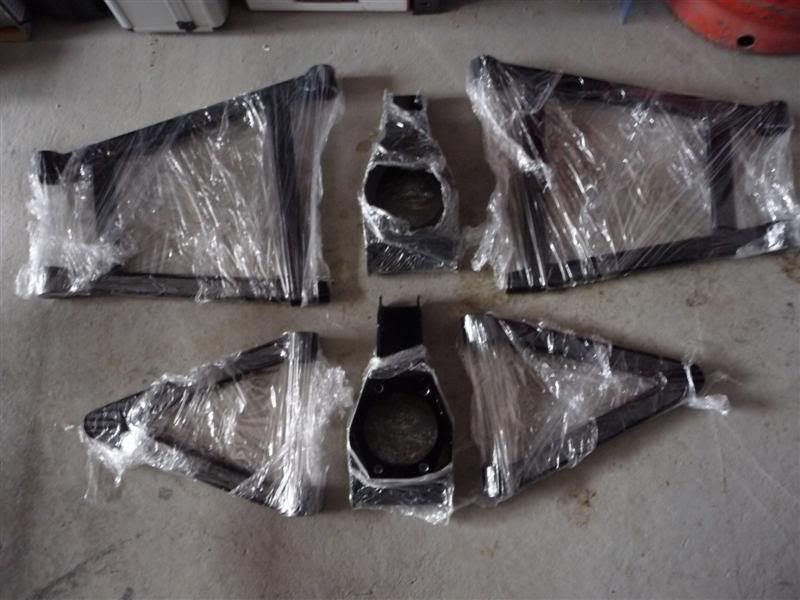
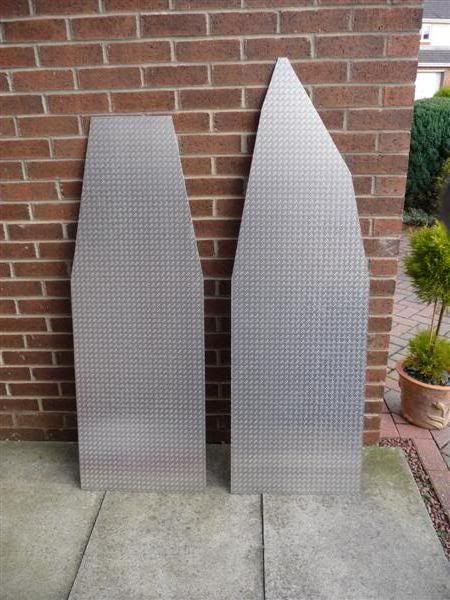
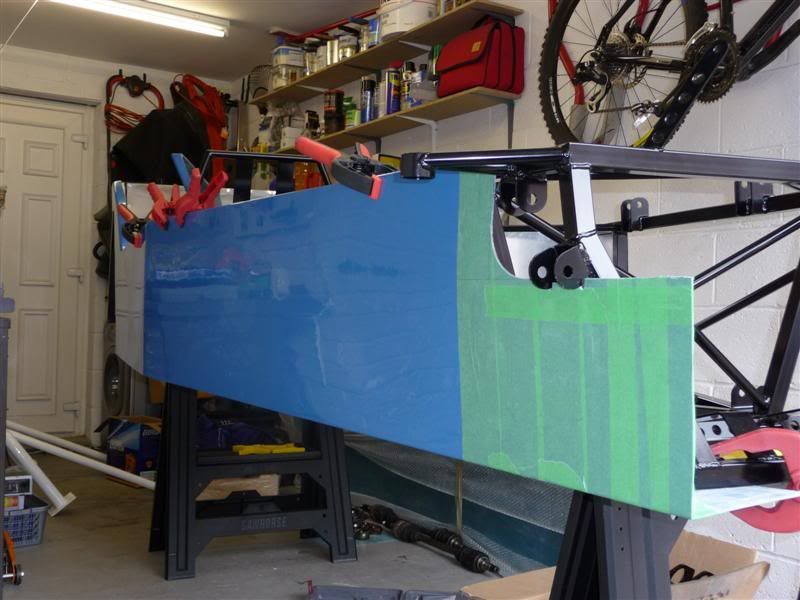
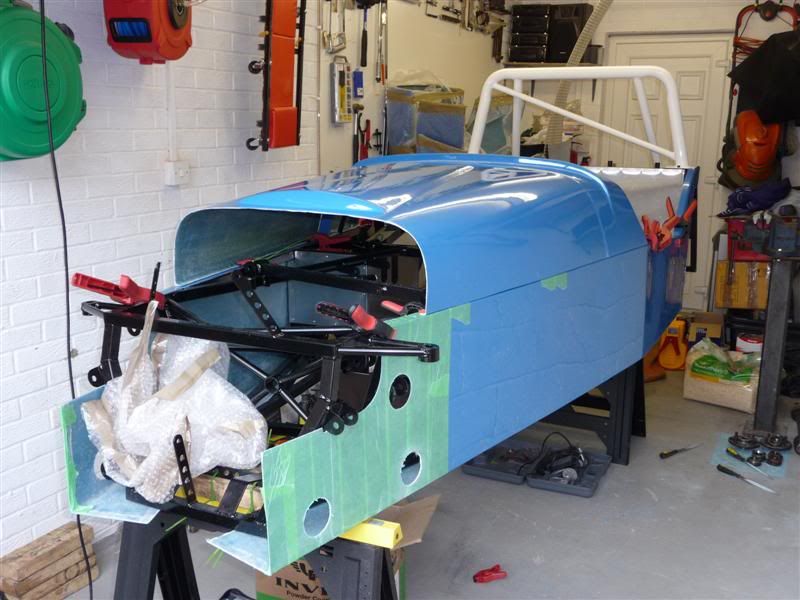
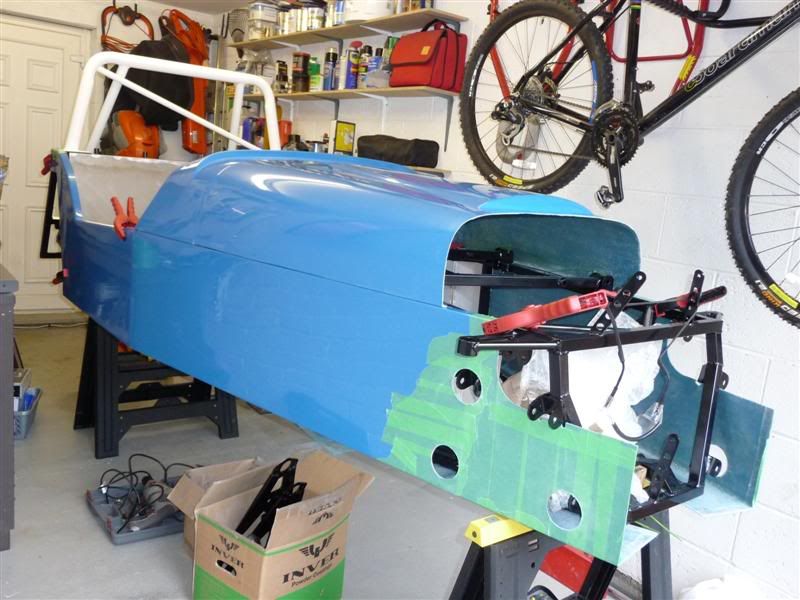
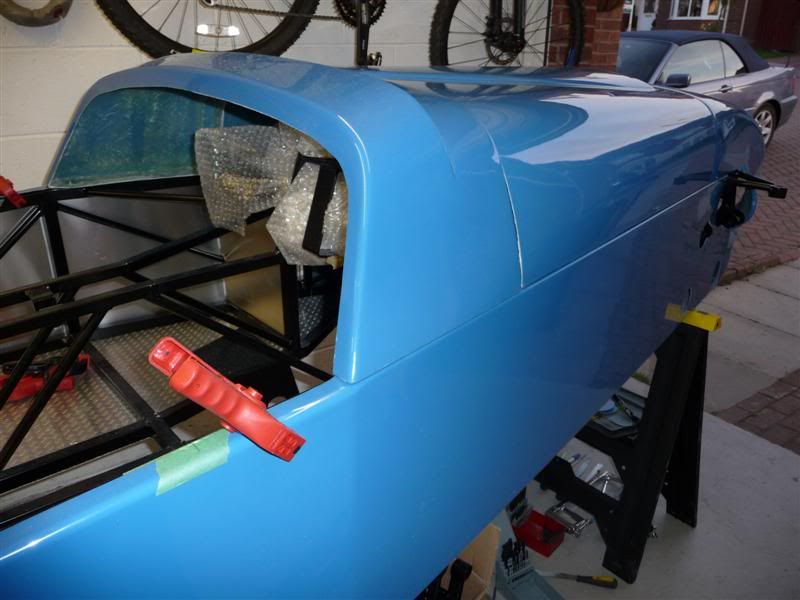
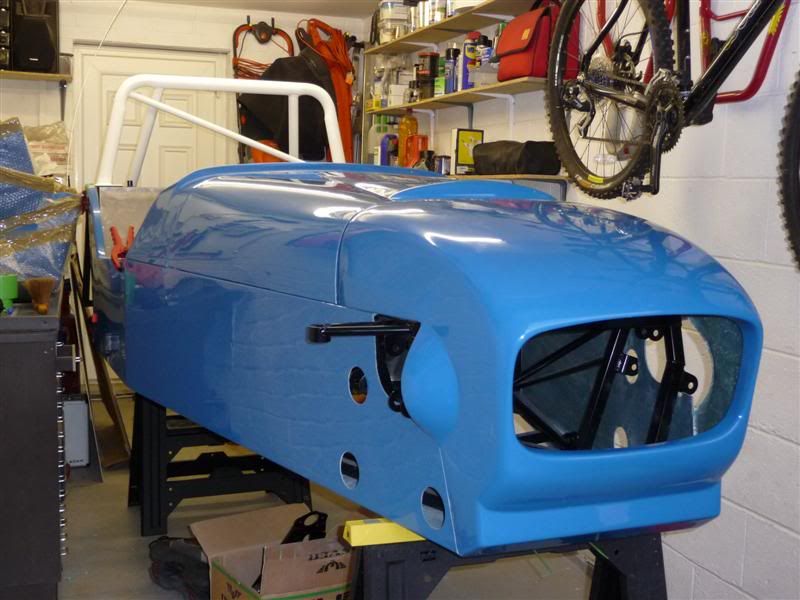
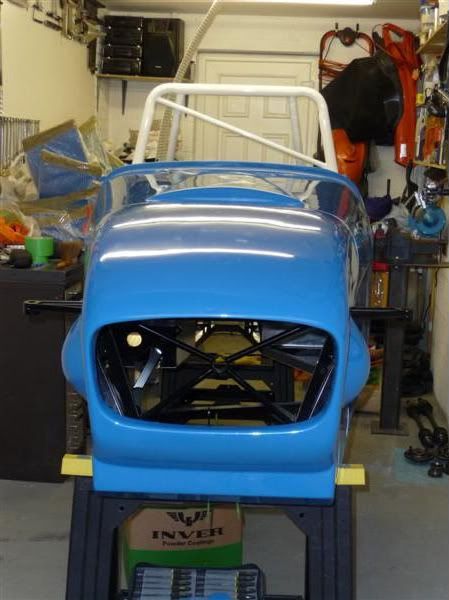
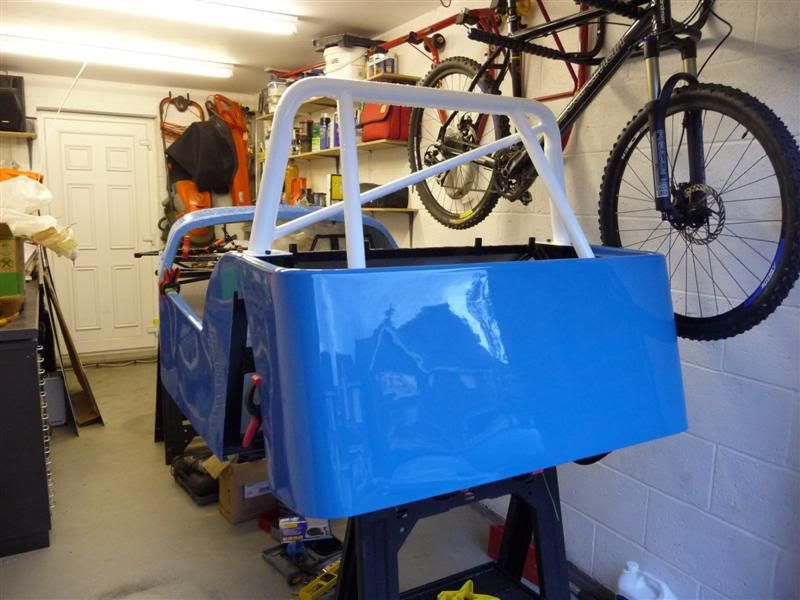
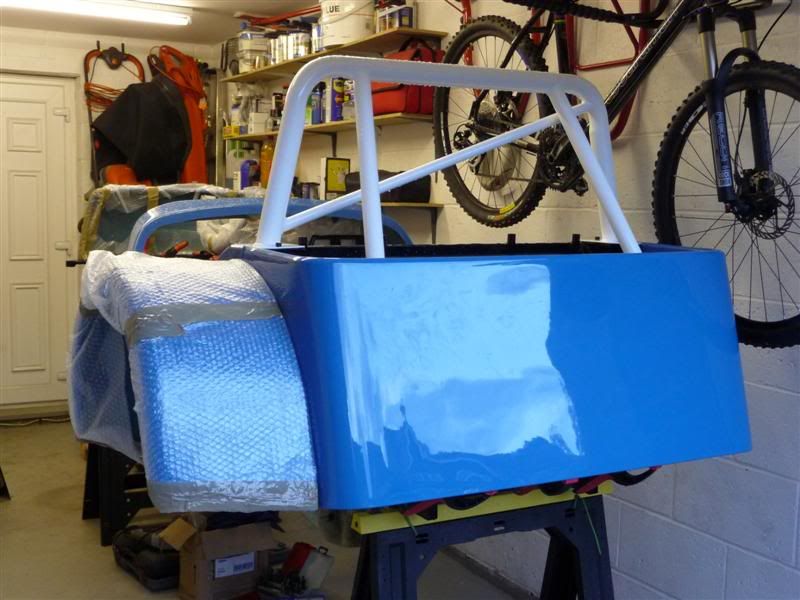
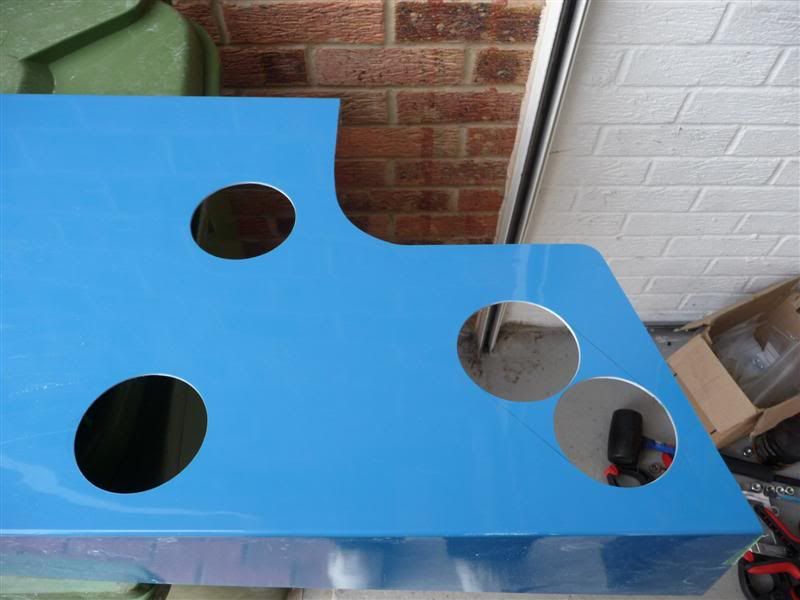
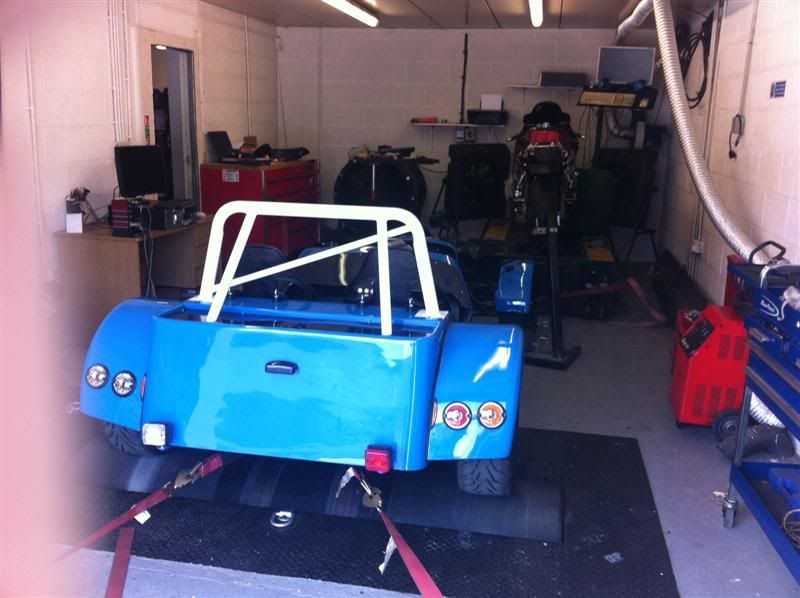
Body panels in light french blue gel coat
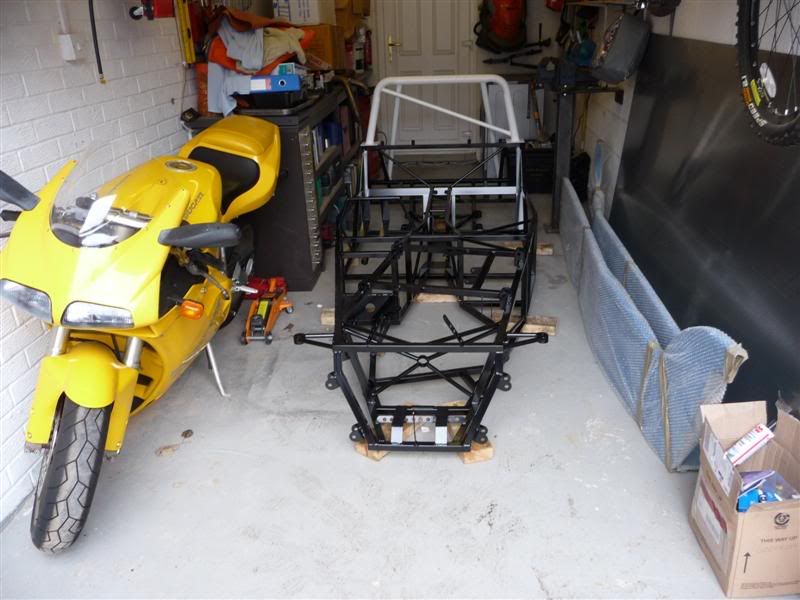
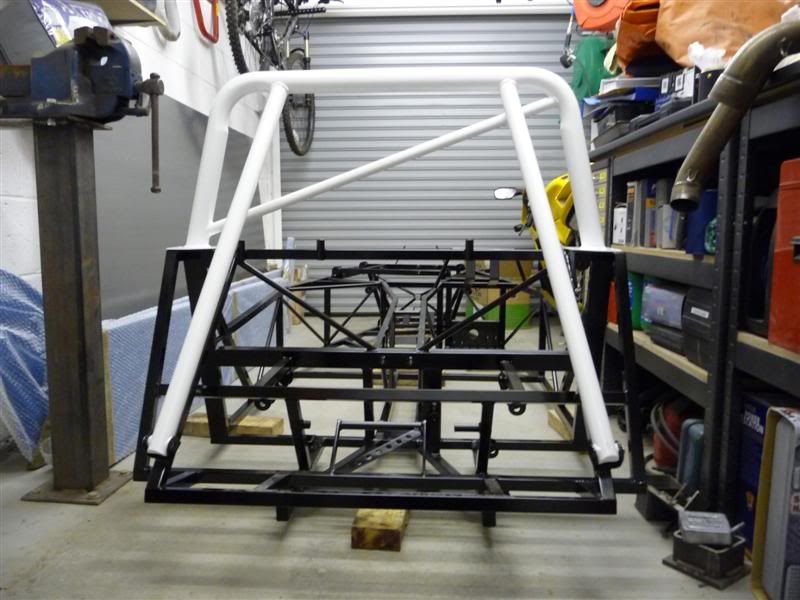
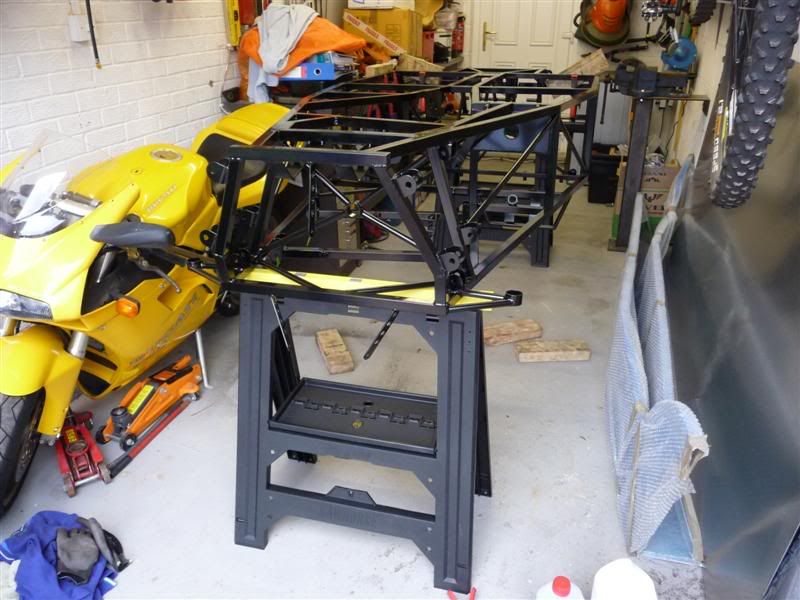
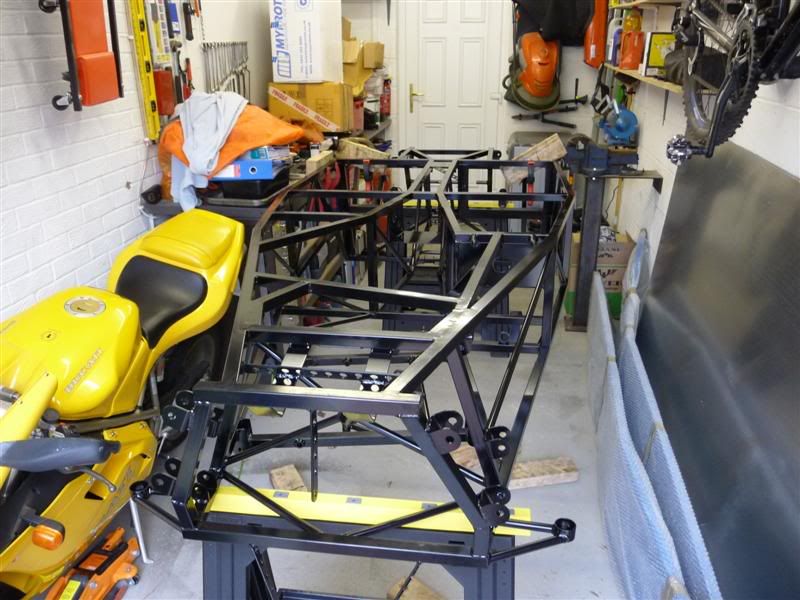
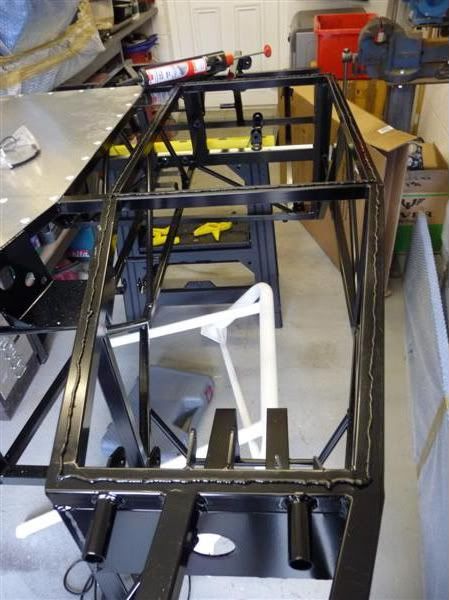
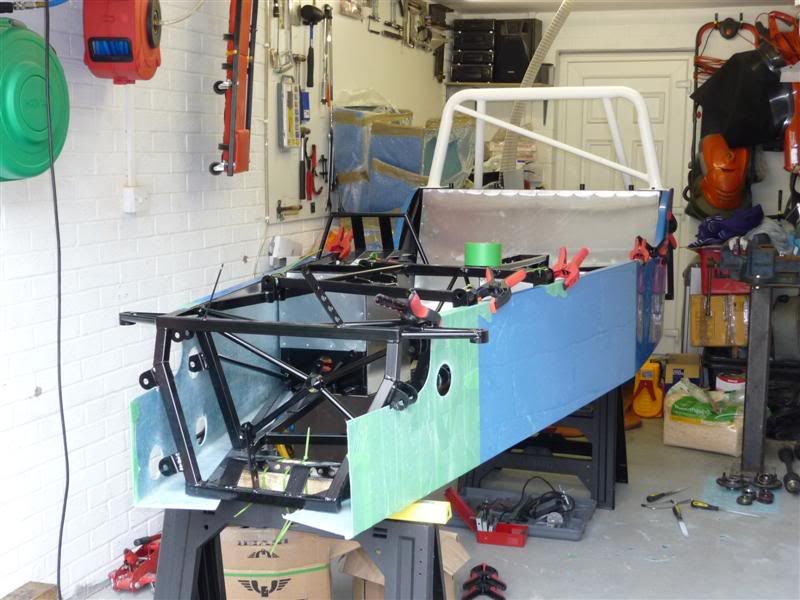
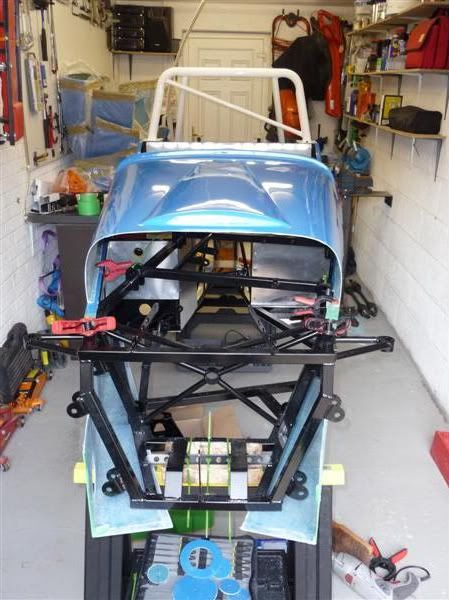
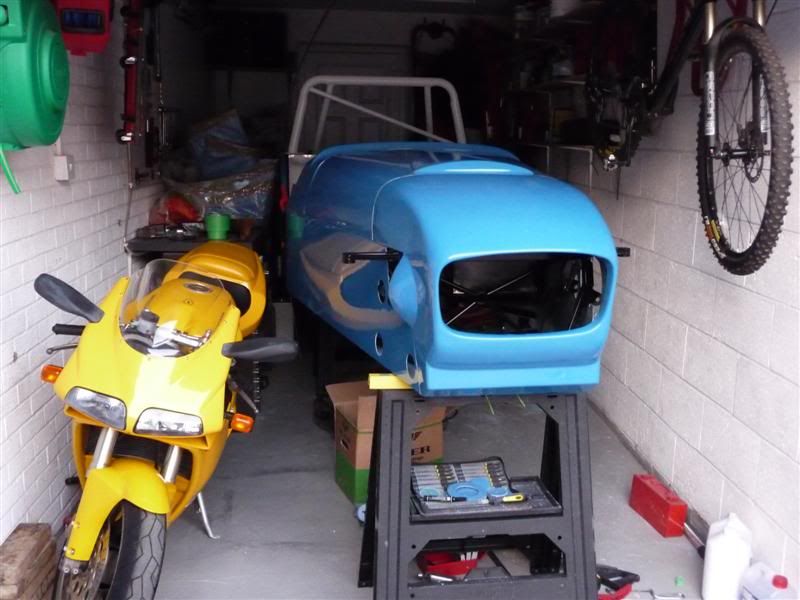
Chassis squashed into its new home... my huge garage
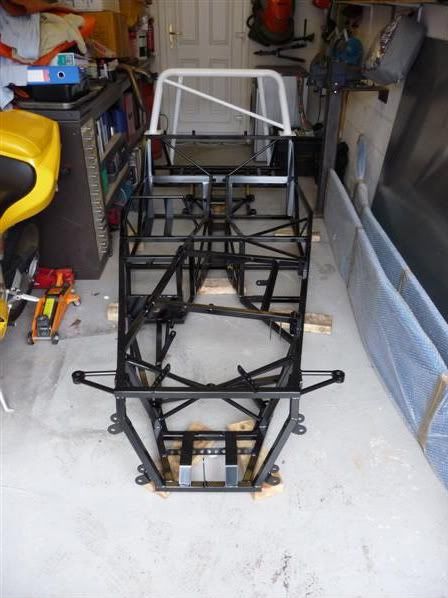
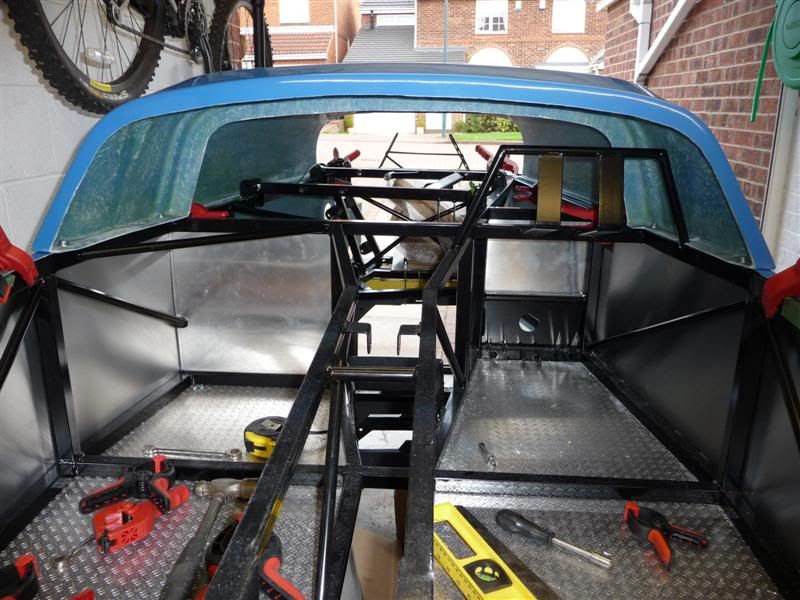
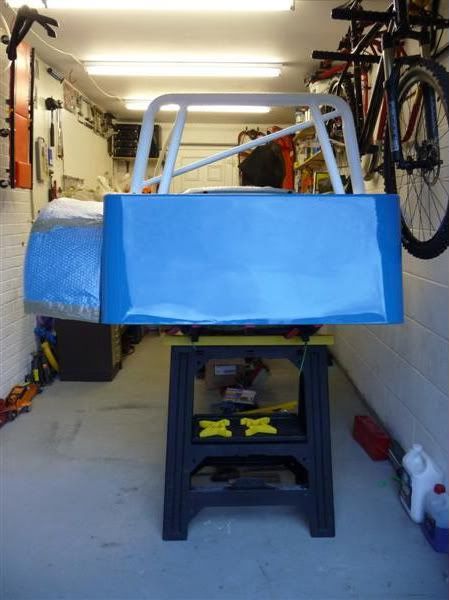
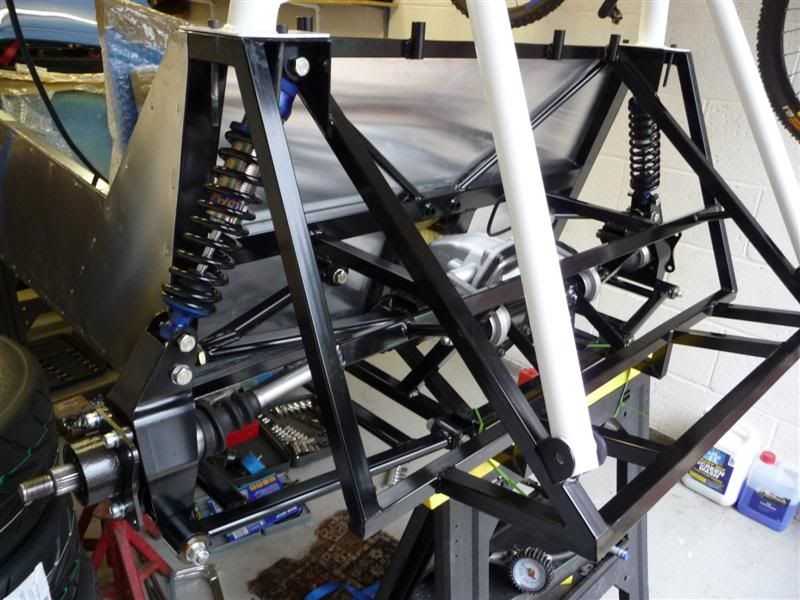
Chassis from the rear
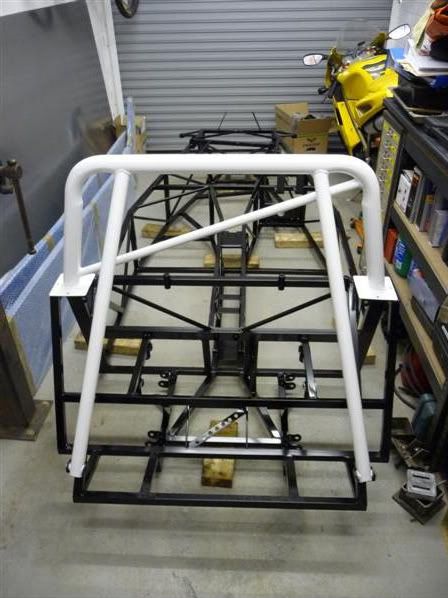
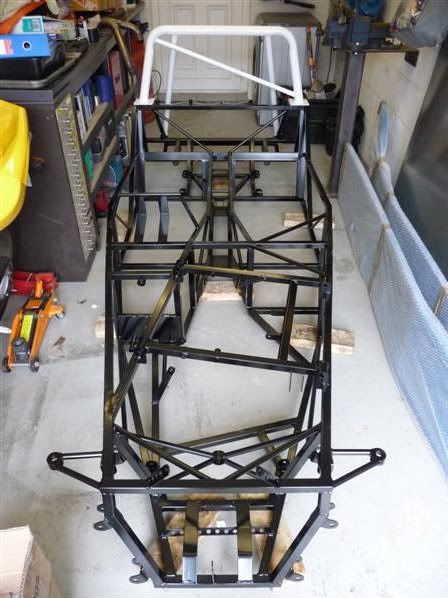
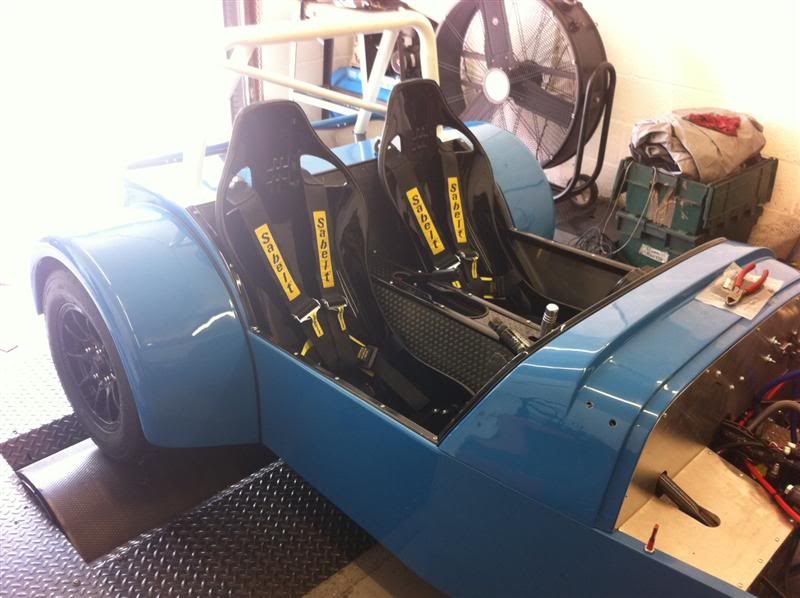
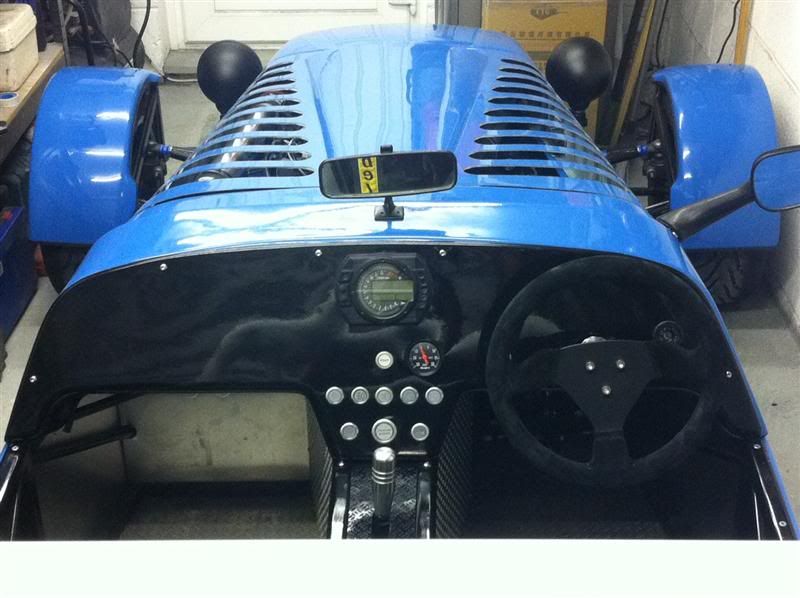
Cockpit
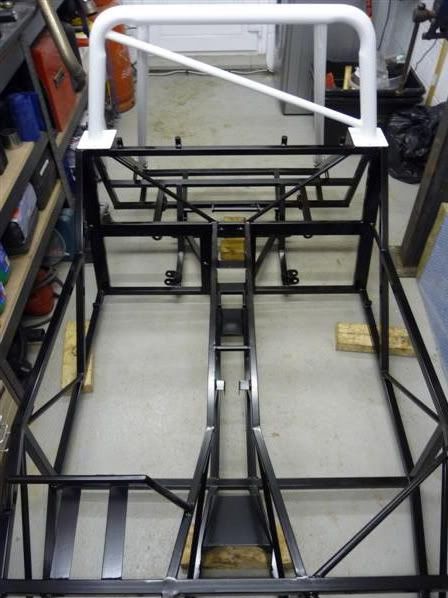
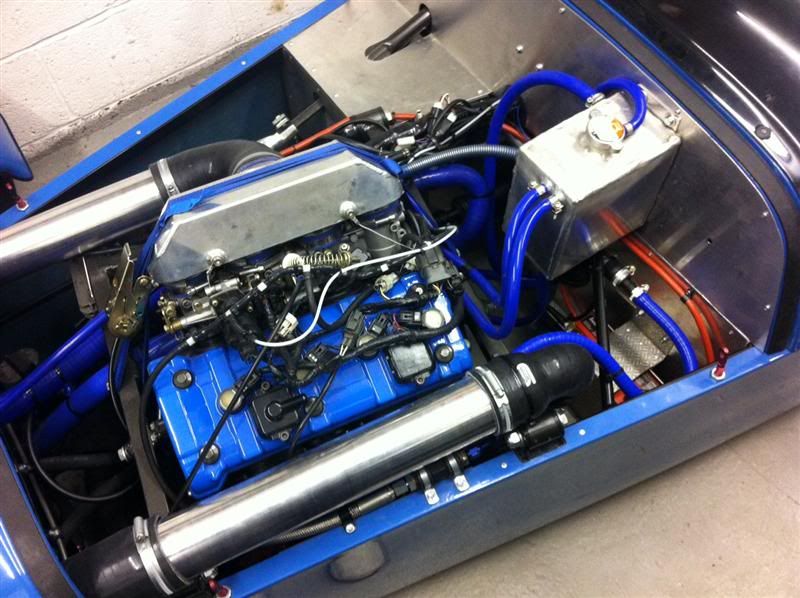
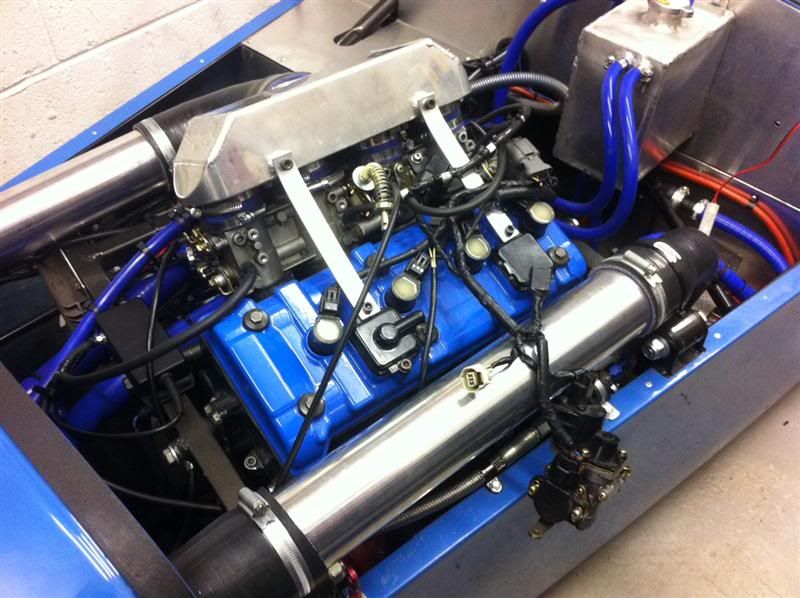
Engine bay

Front wishbones
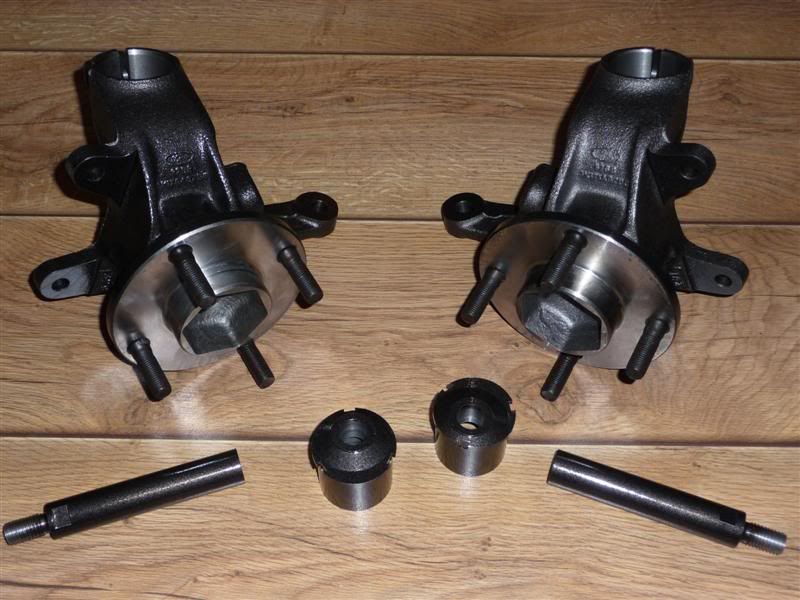
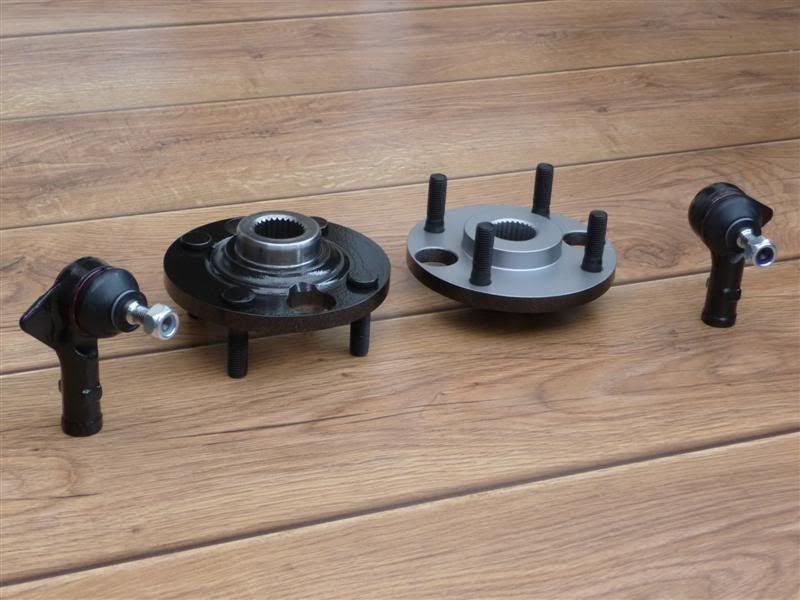
Rear wishbones and uprights
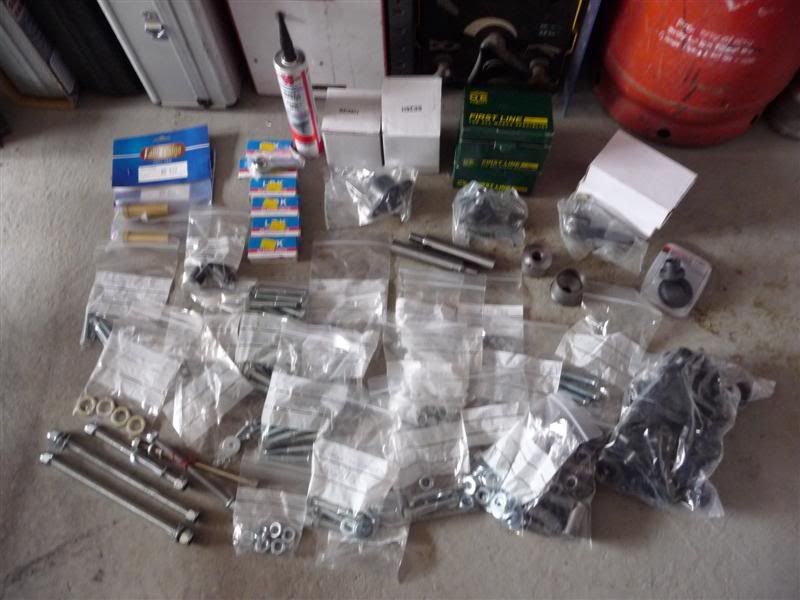
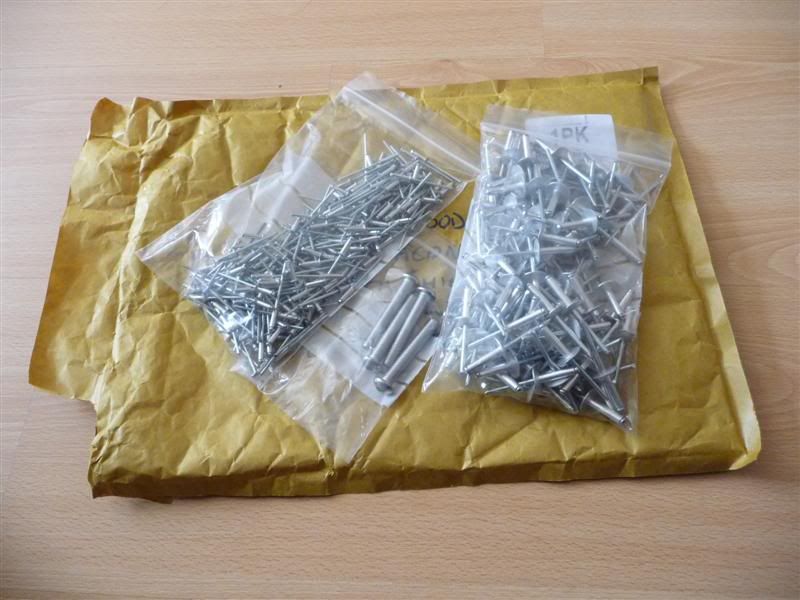
Nuts, bolts, bushes, tie rods, balljoints, rosejoints etc
eddie99 - 21/2/10 at 03:18 PM
Very good quality indeed. Good luck, Keep us updated on the progress.
Regards
Ed
bi22le - 21/2/10 at 04:28 PM
Very gleous. I loved my MAC (in the same colour but some bits in black) and would love to make one from scratch. These cars I think I very well made
and under rated as a se7en kit.
Enjoy.
I take it yours will be BEC? What engine you going for? Keep us all updated.
Dangle_kt - 21/2/10 at 05:05 PM
all the best with the build. I have a very narrow single garage and I gaurentee it will twist your mellon having such little room down the side. Might
be worth seeing if you can move some of that stuff out (bike etc.)
StevieB - 21/2/10 at 05:14 PM
I completed my build in a similar sized garage and didn't have too many problems, though it did get a little cramped towards the end.
If I was doing it again, I'd probbaly be tempted to leave the wishbones and suspension until as late as I could get away with to aid movement
around the car.
I'll happily provide a home for the Duke though...
Steve Hignett - 21/2/10 at 06:19 PM
Hi reds,
Where are you based?
I have at least one spare build table that I won't be using for a couple years, and I have some castors that you can bolt to the bottom, and move
to either side of you garage...
You're welcome to them, whether you're close to me or not! (my location is in my profile)
Steve
bigrich - 21/2/10 at 06:26 PM
Good luck with the build, If you need any help or advise just yell.
I have loads of pictures also if you need an idea of what goes where etc.
Rich
heres a little inspiration!!
.jpg)
designer - 21/2/10 at 07:00 PM
Looks good apart from the way the roll bar rear supports at fixed.
A single bolt in shear!!
Richard Quinn - 21/2/10 at 07:23 PM
Quite a few roll bars (not on 7's) use bolts in shear on stays. It's quite common to see rose joints on the end of some stays. I'm not
saying it's right or wrong but there are lots of examples out there.
Personally, I would be less happy about the amount the tube has been compressed on the bends on the main hoop.
ReMan - 21/2/10 at 07:49 PM
A reference to this
http://www.locostbuilders.co.uk/viewthread.php?tid=130451
perhaps?
daniel mason - 21/2/10 at 09:24 PM
who owns the BRG mac#1 ? very very nice!
grusks2 - 21/2/10 at 10:01 PM
Stop taking pictures and get building, yiou could of had the front suspension on by now lol
Only joking take photos the DVLA want them
And here is some more insparation for you[img]http://locostbuilders.co.uk/upload/a1099516-CIMG1040 [Desktop Resolution].JPG[/img]
grusks2 - 21/2/10 at 10:02 PM
Before you say Mark & Colin
I got any pics of the car with the new cage yet. Its keeping warm in the garage
welderman - 21/2/10 at 11:03 PM
Great photo BigRich!
The black one on the end looks awesome, is that the worx RR then?
quote:
Originally posted by bigrich
Good luck with the build, If you need any help or advise just yell.
I have loads of pictures also if you need an idea of what goes where etc.
Rich
heres a little inspiration!!
[Edited on 21/2/10 by welderman]
wescottishmatt - 22/2/10 at 04:21 PM
Picture of a 'Work in Progress'.
You'll soon be at this stage.
I'm also told we work for the same company.
[img] [/img]
Red16 - 22/2/10 at 06:13 PM
quote:
Originally posted by ReMan
A reference to this
http://www.locostbuilders.co.uk/viewthread.php?tid=130451
perhaps?
cool... i'll have a read of that when i get a spare minute.
quote:
Originally posted by designer
Looks good apart from the way the roll bar rear supports at fixed.
A single bolt in shear!!
As someone else has already said, rightly or wrongly lots of cars are made this way, but that setup is going to offer me far more protection than i
would have if i was on the Ducati.
quote:
Originally posted by bigrich
Good luck with the build, If you need any help or advise just yell.
I have loads of pictures also if you need an idea of what goes where etc.
Rich
heres a little inspiration!!
Thanks for the offer Rich... was nice to meet you on Saturday too.
quote:
Originally posted by Steve Hignett
Where are you based?
I have at least one spare build table that I won't be using for a couple years, and I have some castors that you can bolt to the bottom, and move
to either side of you garage...
What a great offer Steve, thanks but i've knocked up a couple of small A-Frames to stand the chassis on.
For the record im in South Shields.
quote:
Originally posted by StevieB
I'll happily provide a home for the Duke though...
A few people have offered me the exact same thing, lol.
quote:
Originally posted by bi22le
Very gleous. I loved my MAC (in the same colour but some bits in black) and would love to make one from scratch. These cars I think I very well made
and under rated as a se7en kit.
Enjoy.
I take it yours will be BEC? What engine you going for? Keep us all updated.
Cheers... It will be a ZX10R engine with Freelander rear diff, really looking forward to getting started.
quote:
Originally posted by wescottishmatt
Picture of a 'Work in Progress'.
You'll soon be at this stage.
I'm also told we work for the same company.
Cant wait to be at that stage Matt, probably be next year though i imagine, unless i get a good few trips away this year!
You're right, we do work for the same company, only thing is my base is Montrose. Are you up by Petrofac in Aberdeen or the Badentoy office?
FFTS - 23/2/10 at 01:38 PM
quote:
Originally posted by grusks2
Stop taking pictures and get building, yiou could of had the front suspension on by now lol
Only joking take photos the DVLA want them
And here is some more insparation for you
Is the double bubble screen on this photo supplied by Mac1? anyone know how much? Been on their site and its down for a few days so waiting for email
reply.
[img]http://www.locostbuilders.co.uk/viewthread.php?action=attachment&tid=130566&pid=1099516[/img] OK cant see to get the photo copied here so
the white and green Mac1 above.
[Edited on 23/2/10 by FFTS]
[Edited on 23/2/10 by FFTS]
Red16 - 23/2/10 at 03:00 PM
Originally posted by FFTS
quote:
Is the double bubble screen on this photo supplied by Mac1? anyone know how much? Been on their site and its down for a few days so waiting for email
reply.
[img]http://www.locostbuilders.co.uk/viewthread.php?action=attachment&tid=130566&pid=1099516[/img] OK cant see to get the photo copied here so
the white and green Mac1 above.
Yeah Mac Motorsport sell that windscreen setup, I'd give them a phone call and ask, they're usually busy in the workshop and not near
the computer, but they can hear the phone ring so will answer it.
Red16 - 24/3/10 at 10:00 PM
This afternoon i finally got a spare few hours to myself... so i began working on the car
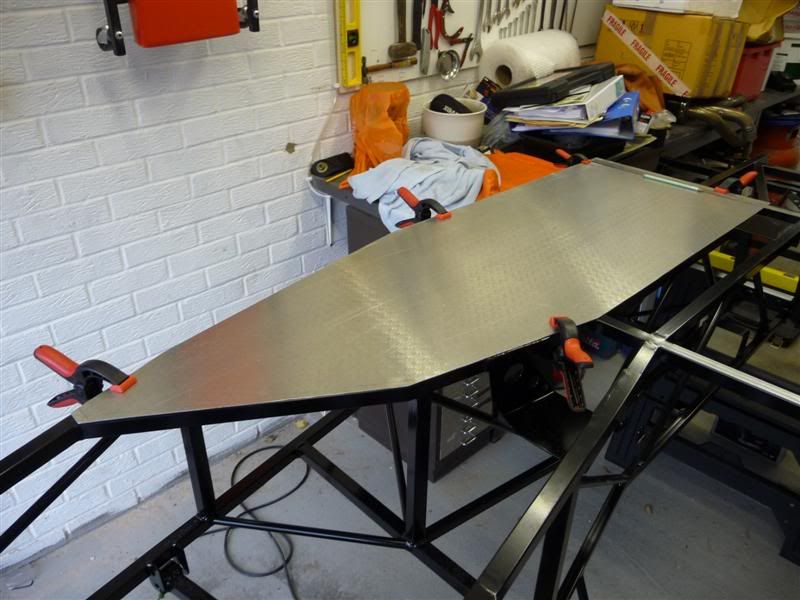
With the help of a neighbour, the upturned chassis was rested onto a pair of saw horses
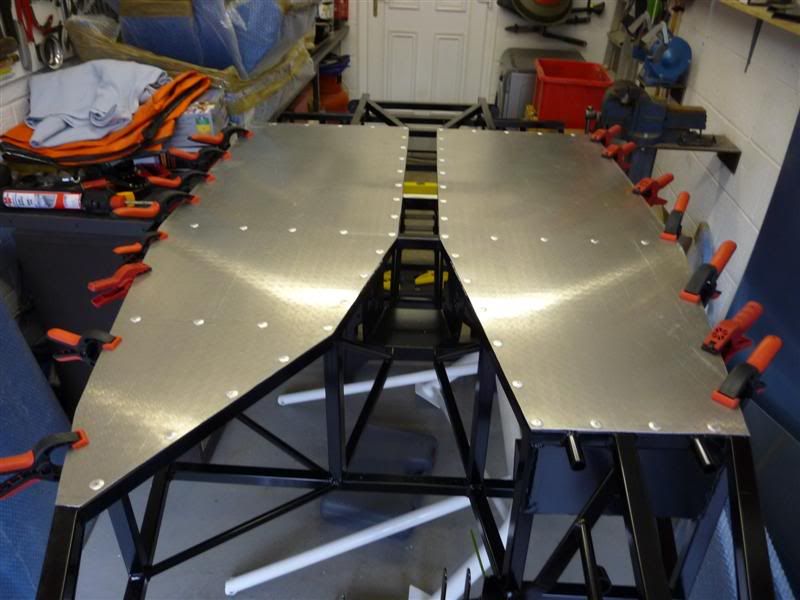
The cricket weave aluminium sheet was then rested on the chassis so i could mark the outline of the floorpan,
a few minutes of playing with the jigsaw and this was the result.
Passenger side floor clamped in position
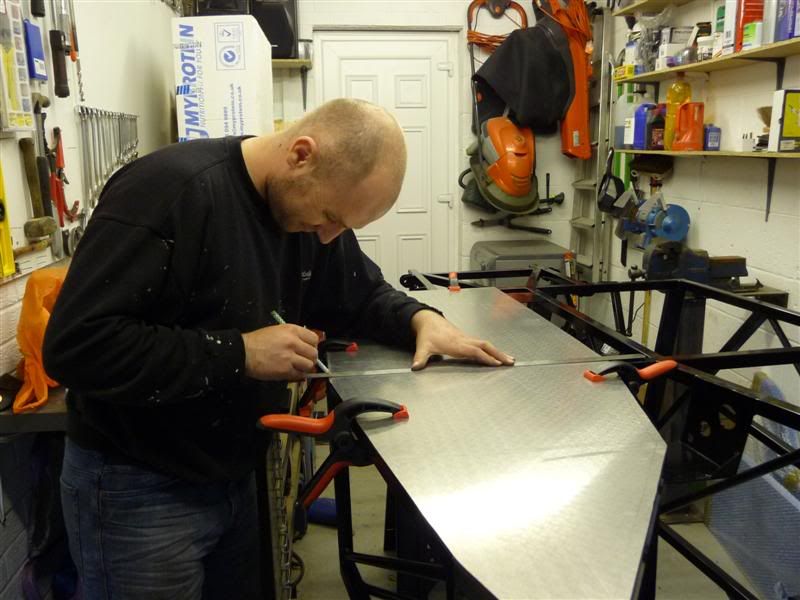
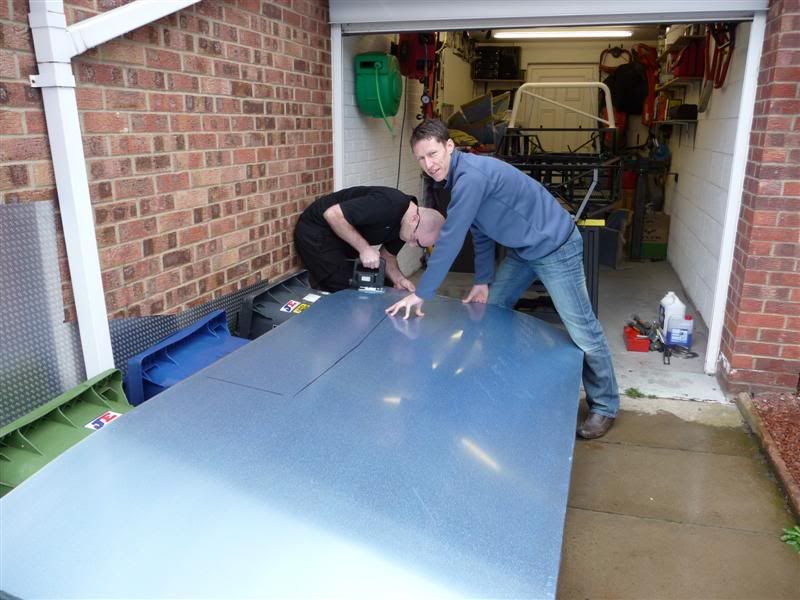
A mate popped round to make coffee and poke his nose in, while he was here he took a few photos of me in action
marking out rivet locations
centre punching the rivet locations ready to be drilled

My battery drill died midway through drilling the holes for the rivets, so this is how play ended today
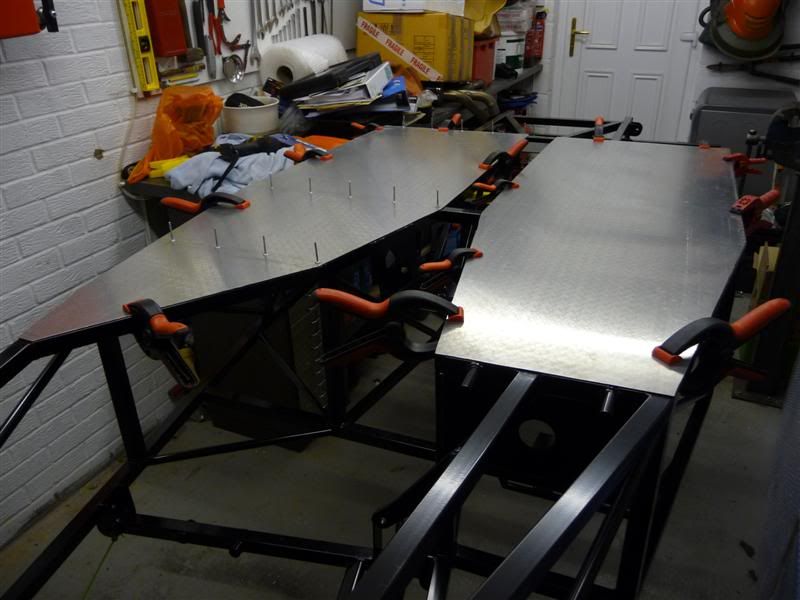
I've been to B&Q tonight and bought a new drill, so i'll be back in the garage tomorrow to continue this.
asn163 - 25/3/10 at 05:48 PM
Good luck with the build, good choice of kit, you won't. go far wrong with Mark and Colin's advice.
re. the "team photo" from Rich, anyone other than welderman spot the odd one out?
Simon
bigrich - 25/3/10 at 07:04 PM
Well i knew you were on the piccy
Just remember not to drill and rivit the outside edges of the floor pans. Do this once the side panels are fitted so you can drill the sides and floor
in one go. plus it makes fitting the sides easier..
Red16 - 25/3/10 at 10:23 PM
quote:
Originally posted by asn163
Good luck with the build, good choice of kit, you won't. go far wrong with Mark and Colin's advice.
re. the "team photo" from Rich, anyone other than welderman spot the odd one out?
Simon
I don't know who he is but i'm guessing one of the cars is car engined.
quote:
Originally posted by bigrich
Just remember not to drill and rivit the outside edges of the floor pans. Do this once the side panels are fitted so you can drill the sides and floor
in one go. plus it makes fitting the sides easier..
Cheers for the pointer... I was wondering about that after looking at Matt Shaw's photos, but it was confirmed this afternoon when i was on the
phone to Mark @ Mac#1.
If my rivets arrive in the post tomorrow i'll get the floor plates fastened down and the car back right side up.
bigrich - 25/3/10 at 10:37 PM
someone snook an MK indy into the picture, did'nt you Ed n Simon. It is a BEC though so we will let them off. and thers a pinto powered car on
the other end
and thers a pinto powered car on
the other end
[Edited on 25/3/10 by bigrich]
eddie99 - 25/3/10 at 10:53 PM
Looking very neat! Keep up the good work!!!!
Red16 - 27/3/10 at 09:46 PM
The rivets that had been holding the build up came in the post this afternoon, the ones i had used in the earlier photos were just for location while
i drilled the holes, the new ones have a much larger head on them.
Not done a great deal of work on the car today, been round my dads fitting new wheels to his Mini, but managed to get the floor panels finished
off.
An application of Wurth Bond + Seal stops water/dirt getting into the chassis and also into the cockpit
Finally all the rivets were fastened up and the edges of the panels clamped into position while the sealant cures, the extreme left/right sides of the
panels have been intentionally left without rivets as this is where the outer body panels are riveted to the chassis later in the build.
Red16 - 29/3/10 at 07:55 PM
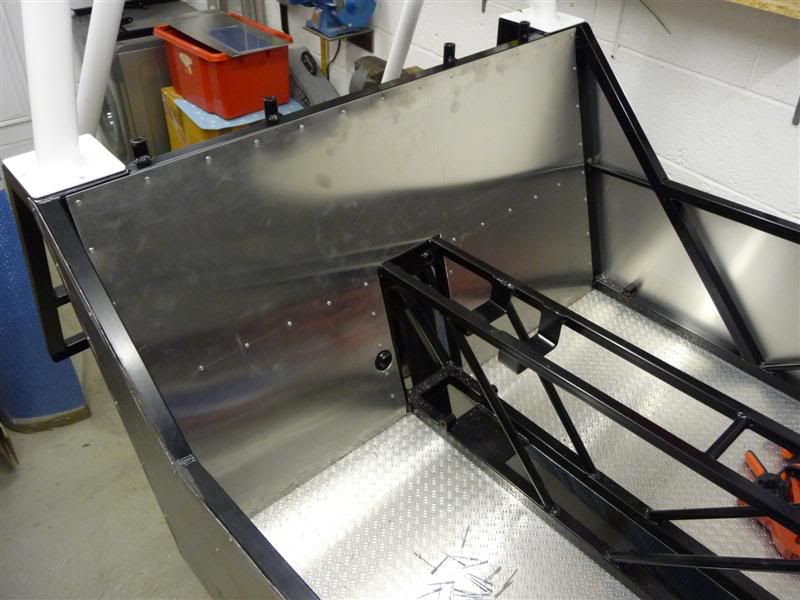
Marked out the interior side panel and cut it out using 3 wheelie bins in an unorthodox fashion .
Marked out, drilled and then bonded and riveted the panel to the chassis
From the inside of the car it now looks like this

Then cut out and mounted the other side panel in the same way but didn't bother to get any more photos as it looks exactly the same as the other
side.
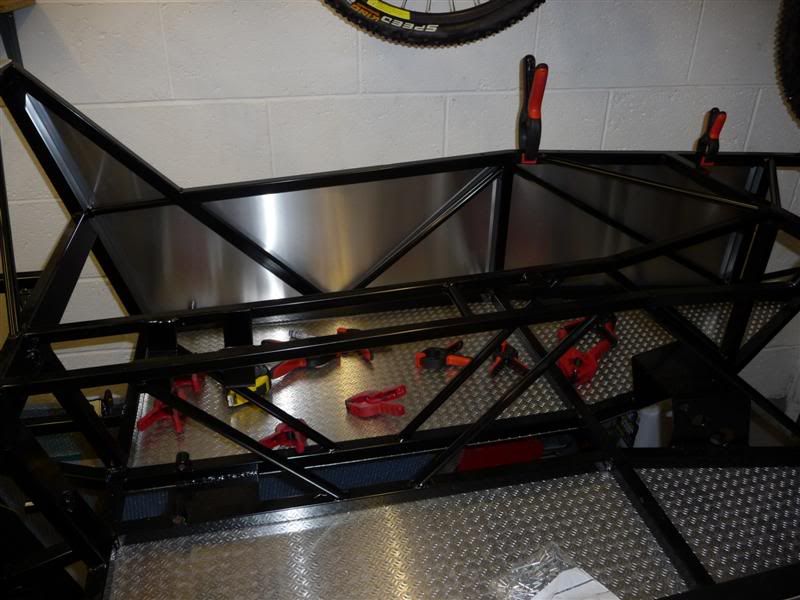
Red16 - 1/4/10 at 10:02 PM
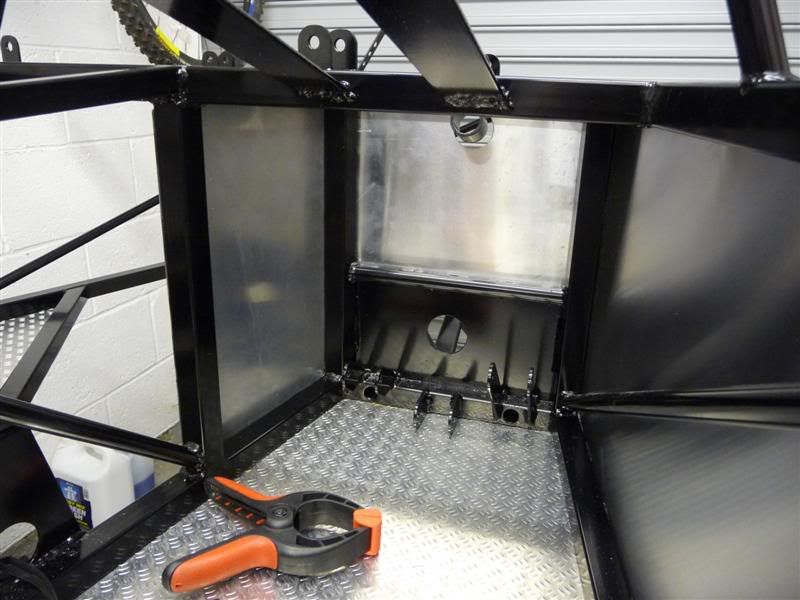
I've been in the garage tonight pottering about, knocked up a some panels for the drivers side of the cockpit.
Bulkhead panel
Bulkhead panel and start of the centre console/drive tunnel.
How it looks from the inside at the end of play today.
Red16 - 3/4/10 at 11:16 PM
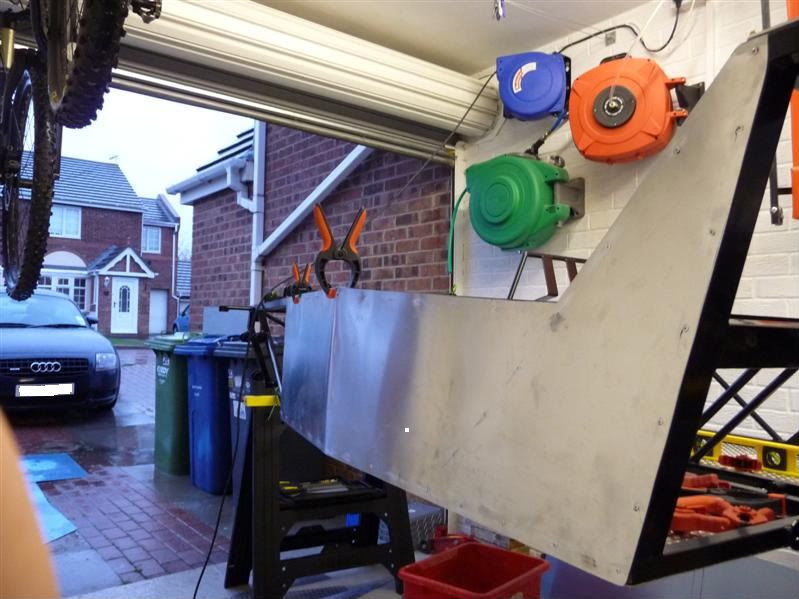
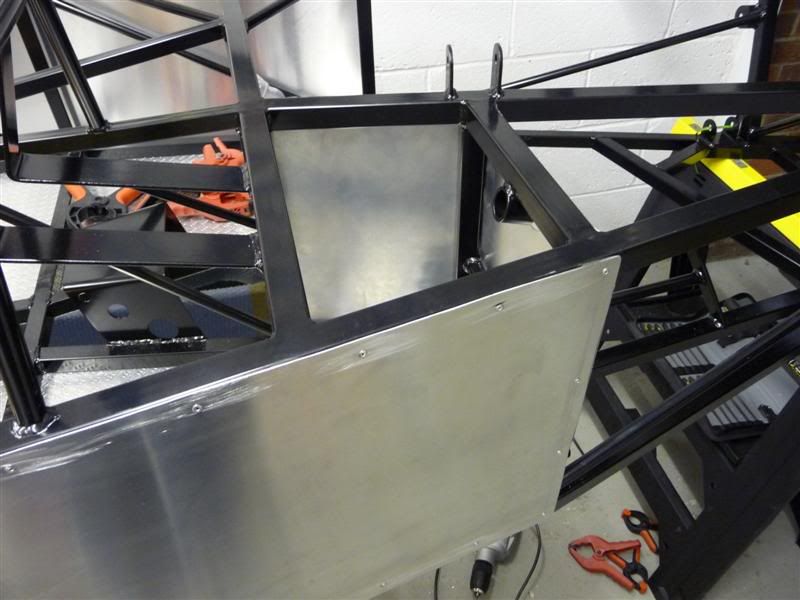
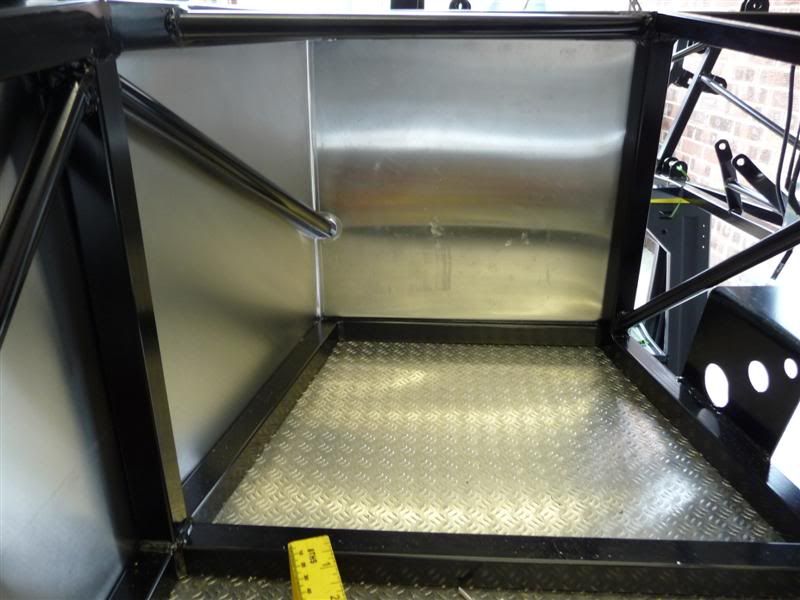
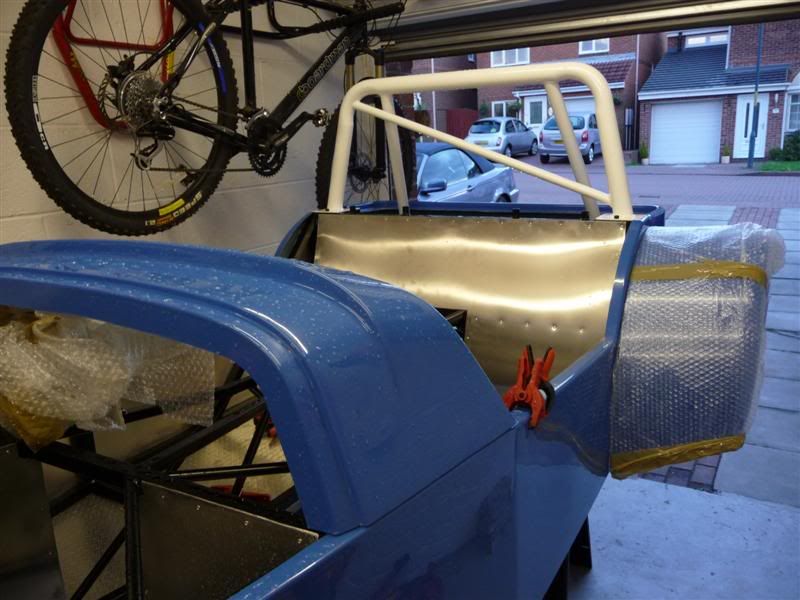
Finally got round to cutting out and mounting the large panel to the rear end of the cockpit area.
Here it is viewed from the back of the car
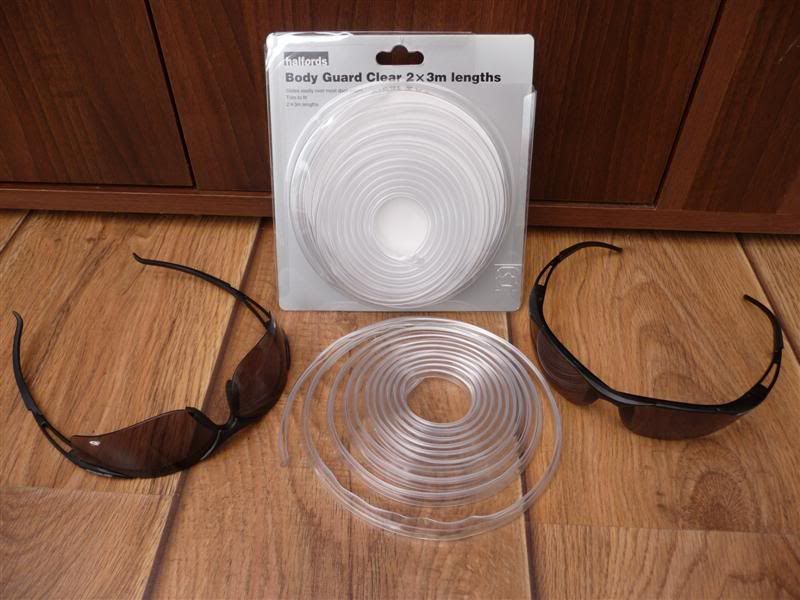
Kinda jumping the gun a bit here, but I seen the Bolle tinted safety glasses and couldn't resist buying them, lol.
Also bought a roll of clear edging from Halfords, i'm sure it'll come in handy at some point during the build.
[Edited on 3/4/10 by Red16]
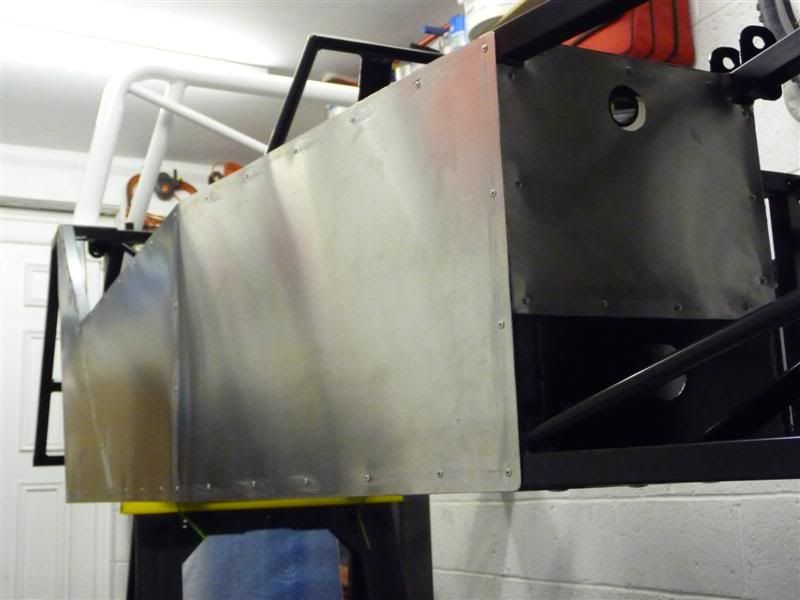
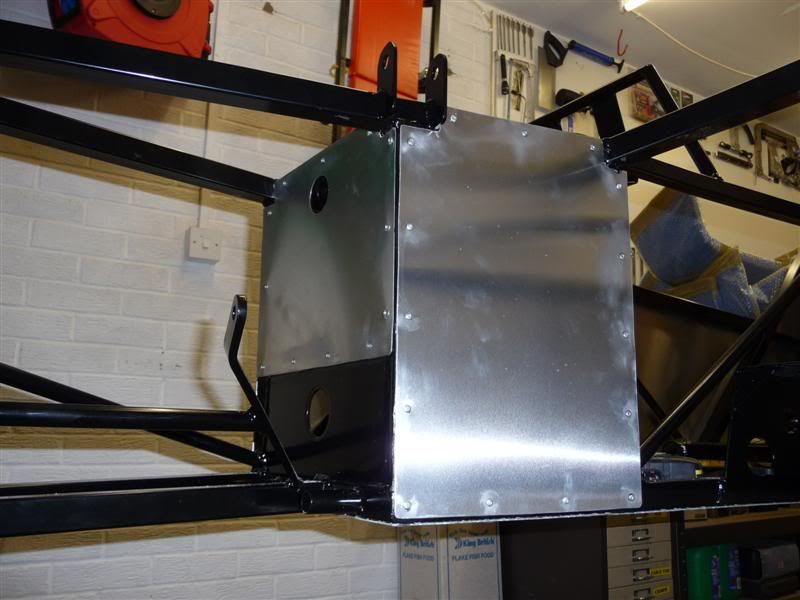
Red16 - 4/4/10 at 04:39 PM
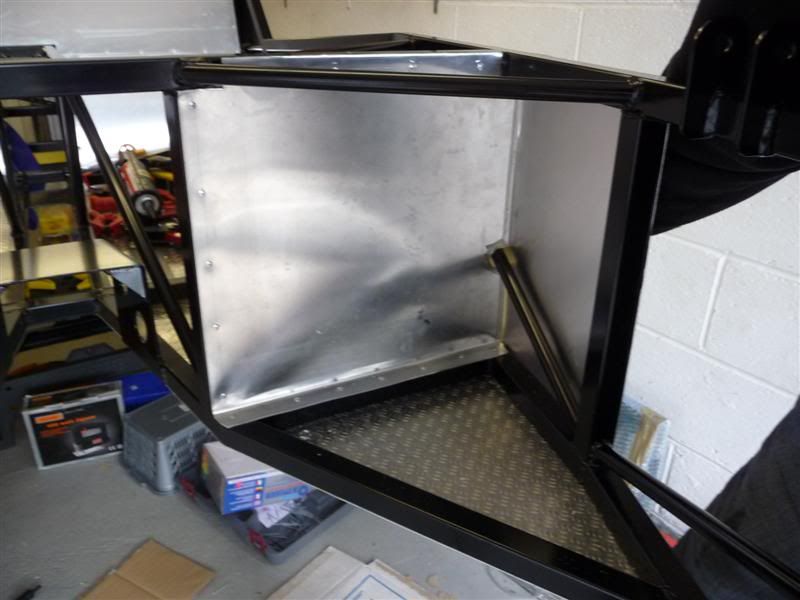
Passenger bulkhead now finished, this is how it looks from inside the car
and from the engine bay
grusks2 - 24/4/10 at 08:25 PM
Hi
I to riveted my floor pan the same distance apart underneath and after a while the rivets gave waye by the seat, i was shocked as these are large
rivets, ive since riveted them every 1.5inchs where the seats are.
Red16 - 25/4/10 at 11:49 AM
quote:
Originally posted by grusks2
I to riveted my floor pan the same distance apart underneath and after a while the rivets gave waye by the seat, i was shocked as these are large
rivets, ive since riveted them every 1.5inchs where the seats are.
Thanks for the heads up, good to find out things like this during the early stages of the build where they can be easily remedied.
Red16 - 26/4/10 at 10:17 PM
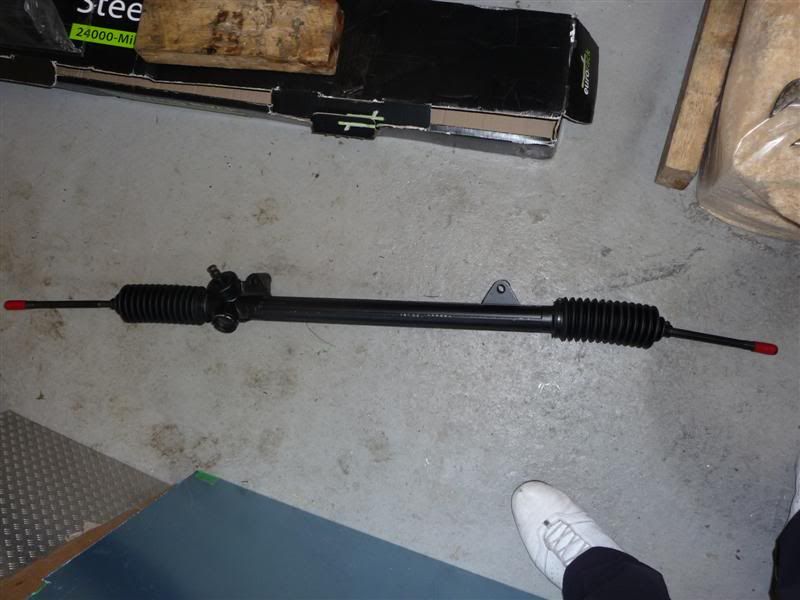
One brand new Sierra steering rack, which has since been packaged up and sent to Mac Motorsport to be shortened.
I've been in the garage today and made a bit of progress, the drivers side panel was notched to fit around the steering column support bracket
and then the front end had its first cut to accomodate the brackets for headlight, strut top and upper wishbone arm.
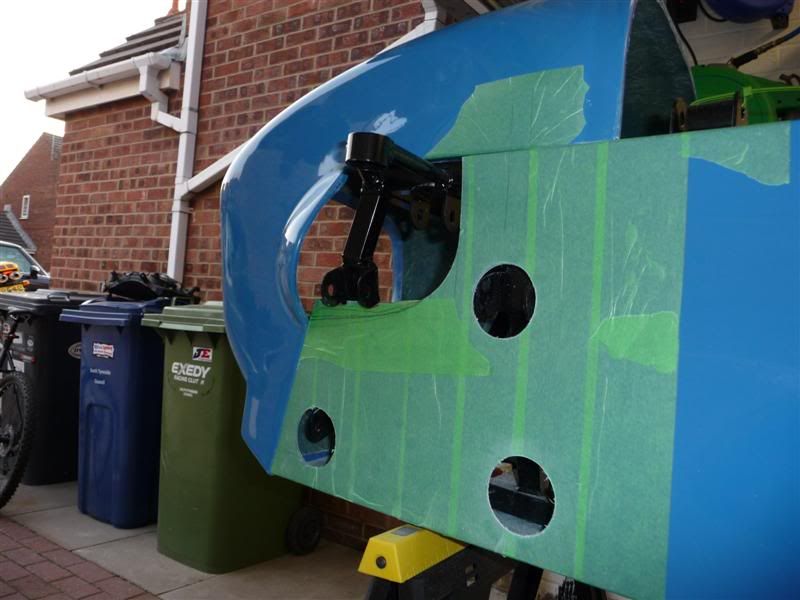
Holes were then cut into the side panel to allow access to the wishbone mounting brackets. The drivers side of the scuttle panel was notched to fit
around the steering column support bracket and then secured to the chassis using rivnuts.

Doesn't look much in the photo's but it took me ages in the garage to get to this stage!
Red16 - 27/4/10 at 07:43 PM
Well it's been another busy day in the garage for me...
Drivers side panel with notch and rivnuts as mentioned earlier

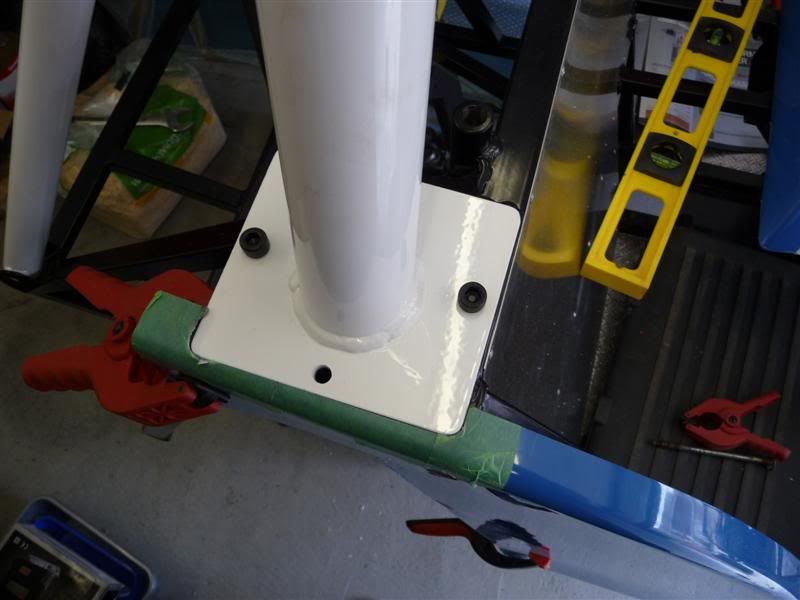
Rear of the drivers side panel modified to fit around the base of the roll bar
Began cutting and fitting the passenger side panel
Scuttle panel fastened into position at both sides
With the bonnet on it finally begins to resemble a car
Red16 - 28/4/10 at 08:01 PM
Todays plan of attack... get the side panels chopped down and have the nose cone mounted by the end of play.
Nose cone provisionally mounted to mark out where the side panels need to be cut

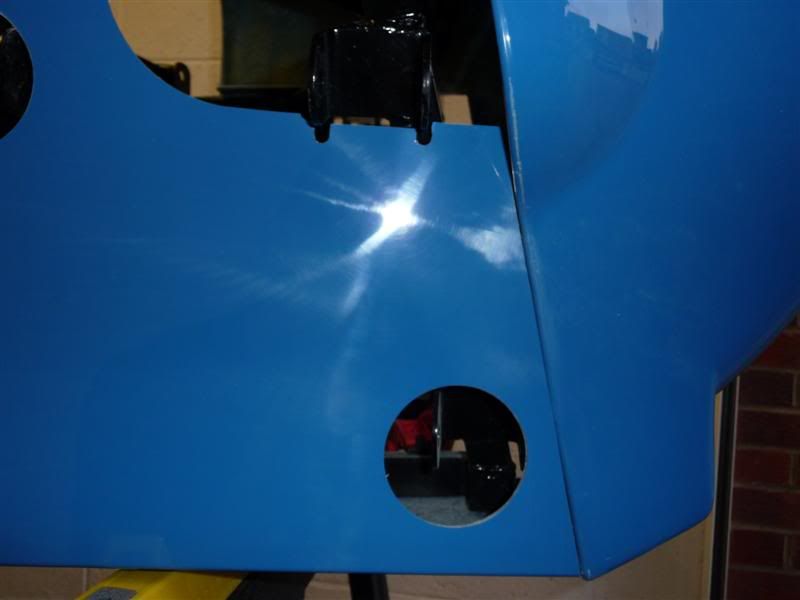
Passenger side cut, still masked off
Drivers side, cut and unmasked
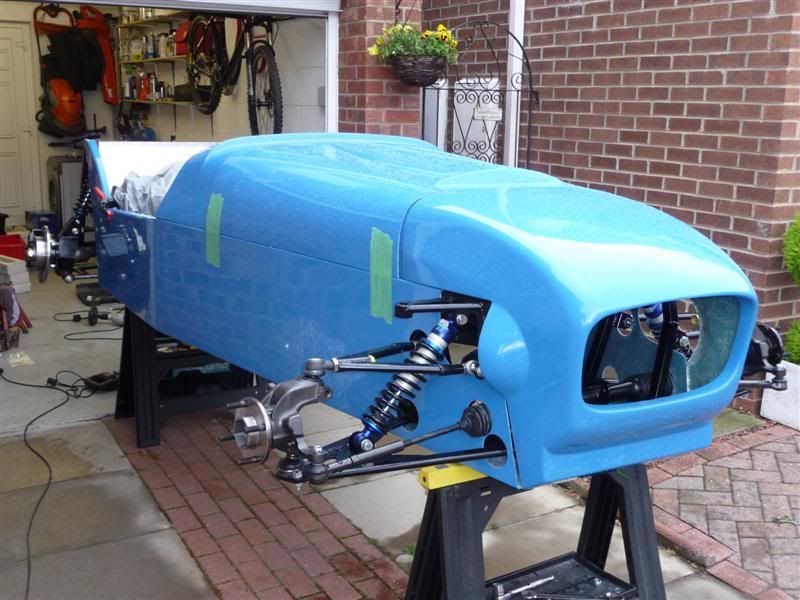
How it looks without the bonnet
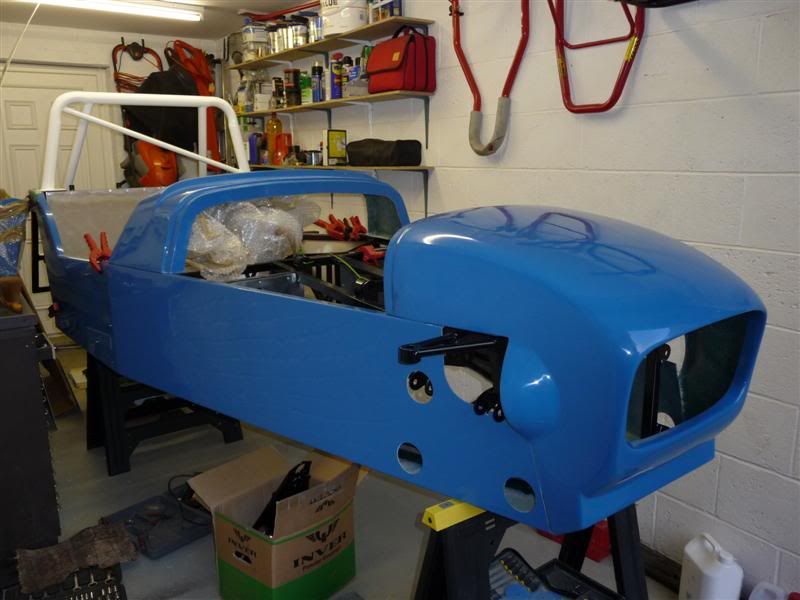
Bonnet rested in place, to pose for the camera
A full frontal shot
I couldn't help one last glance back to the garage before closing the door
Flamez - 29/4/10 at 06:54 PM
Looking good, your panel cutting looks spot on.
Red16 - 30/4/10 at 09:38 PM
quote:
Originally posted by Flamez
Looking good, your panel cutting looks spot on.
Thanks, it needs a bit more work to get the shape under the front upper wishbone bracket right, but thats a job for another day.
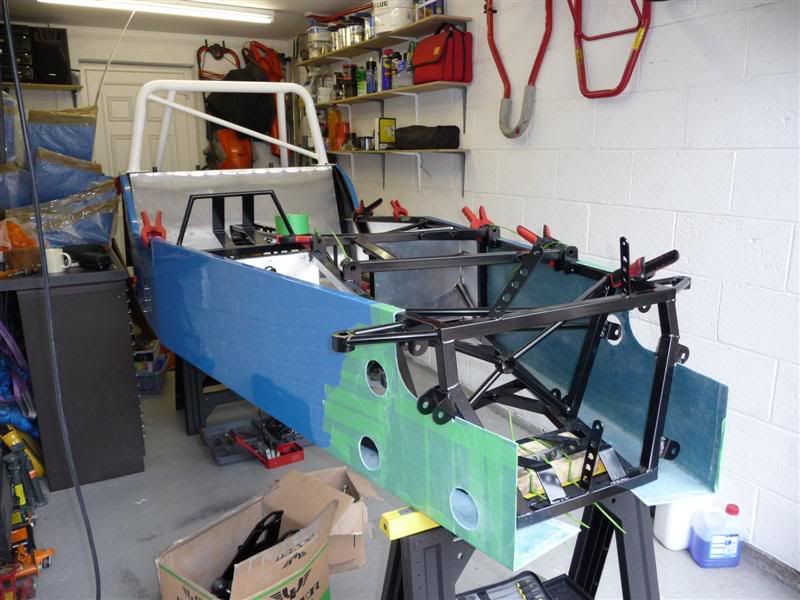
I've been in the garage again today and managed to get the rear end cut and clamped into position.
And while I was at it I couldn't resist clamping one of the rear arches on to see how it'd look
Looking a lot more car like now
GrahamC - 1/5/10 at 07:51 AM
Mega impressed with your panel cutting...what's your secret/technique? And what tools did you use?
Red16 - 1/5/10 at 12:07 PM
quote:
Originally posted by GrahamC
Mega impressed with your panel cutting...what's your secret/technique? And what tools did you use?
Cool, cheers for that.
I spend loads of time looking at the job, probably too much to be honest, before i mark and cut anything. I tend to cut just shy of the line i've
marked and then file away the remaining fibreglass until i reach the marked line.
Here's a photo of the tools i'm using.
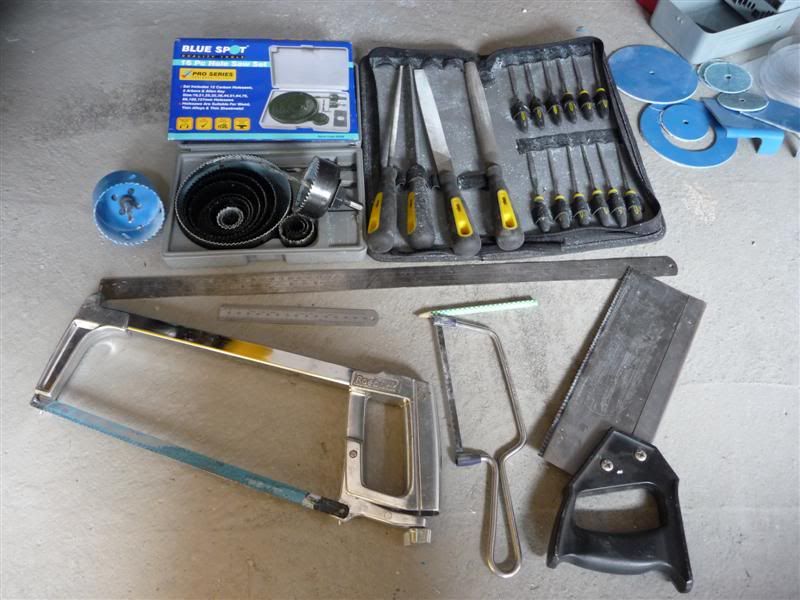
A wood saw, junior hacksaw, hacksaw, set of files, holecutters, large and small steel rule, not forgetting the trusty pencil.
Edited to say that I used a jigsaw to cut out the aluminium panels.
[Edited on 1/5/10 by Red16]
fesycresy - 1/5/10 at 12:41 PM
Nice job around the roll bar, always a difficult area to do.
Red16 - 6/5/10 at 02:16 PM
Not been doing a lot on the car lately, been too busy playing Modern Warfare 2 on the PS3, the big kid that I am, lol.
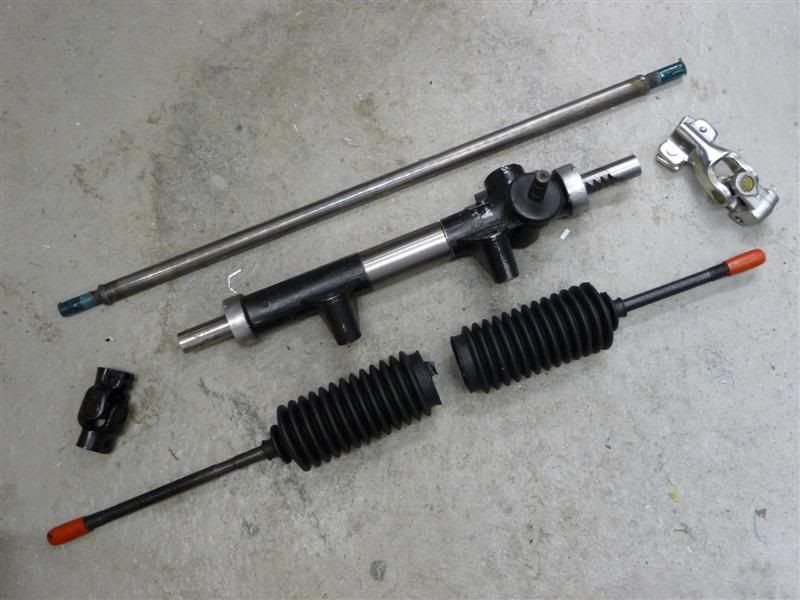
Anyway, I took delivery of a package from Mac#1 this morning
A new steering column and linkages, and a my Sierra rack which has been shortened
quote:
Originally posted by fesycresy
Nice job around the roll bar, always a difficult area to do.
thanks. 
[Edited on 6/5/10 by Red16]
Red16 - 11/5/10 at 10:56 PM
Here's possibly the poorest update ever
A coat of Hammerite Hammered spray paint and the steering rack and link arm look like this
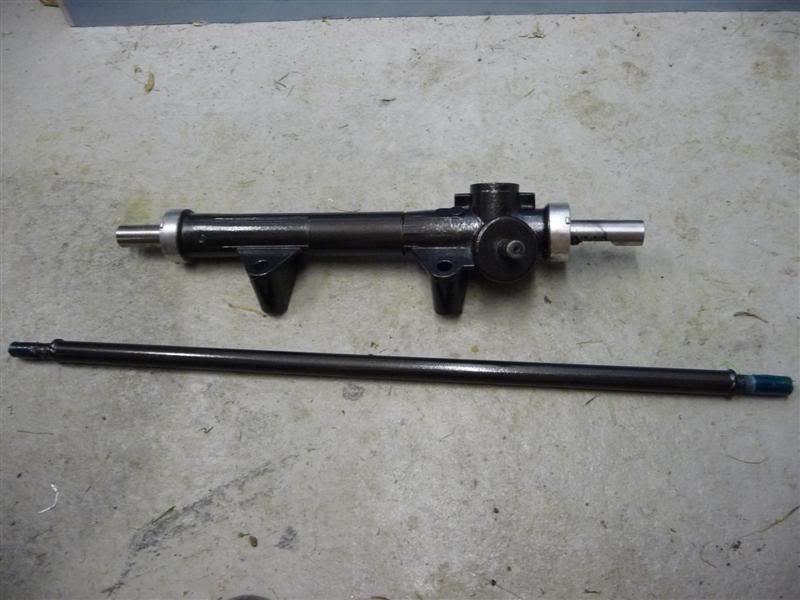
I might get round to fitting the rack and cutting the holes in the bodywork for the rack arms to come through tomorrow, then if i'm really lucky
fix the bodywork to the chassis permanently
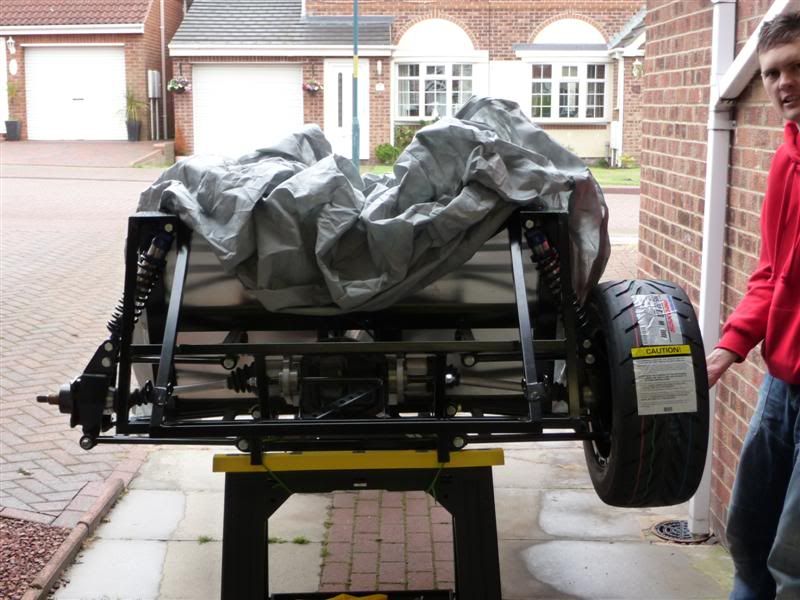
Red16 - 24/6/10 at 03:23 PM
Not much progress of late due to work, but I've managed to spend a bit of money and get some new parts
A set of Team Dynamics Pro 1.2 wheels with Toyo R888 tyres in 205/60/13 for the rear and 185/60/13 for the front.
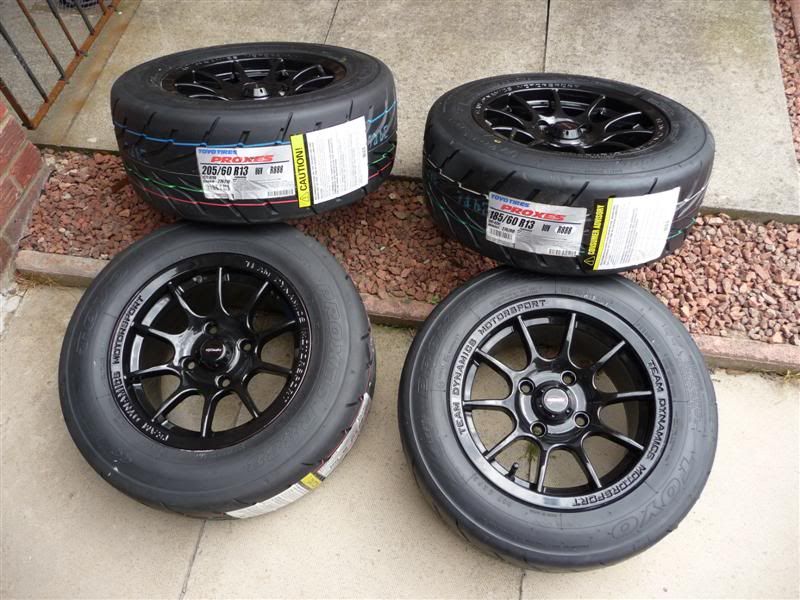
The fronts weigh in at 12.5kg per corner and the rears 13.6kg per corner.
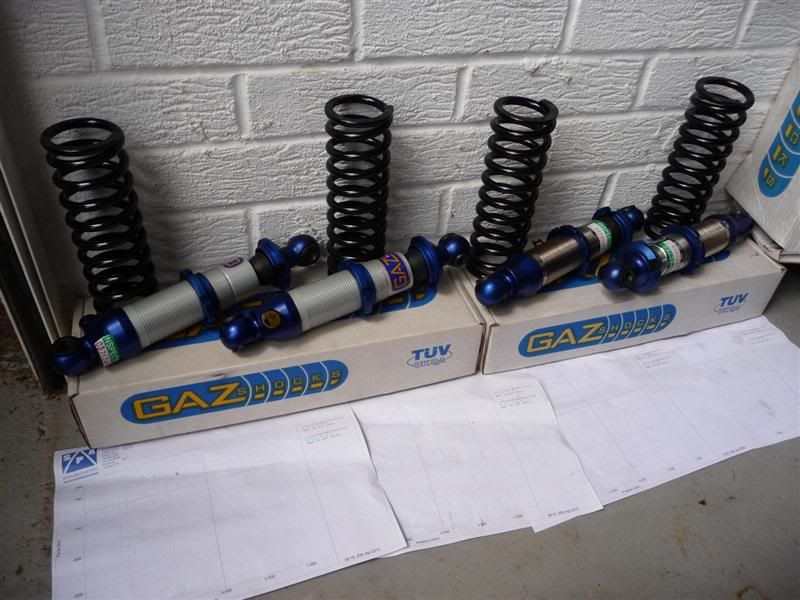
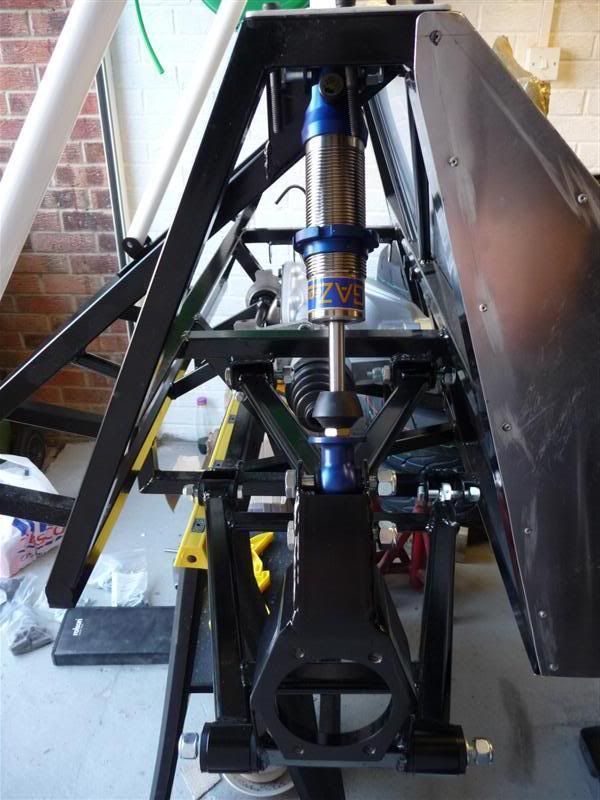
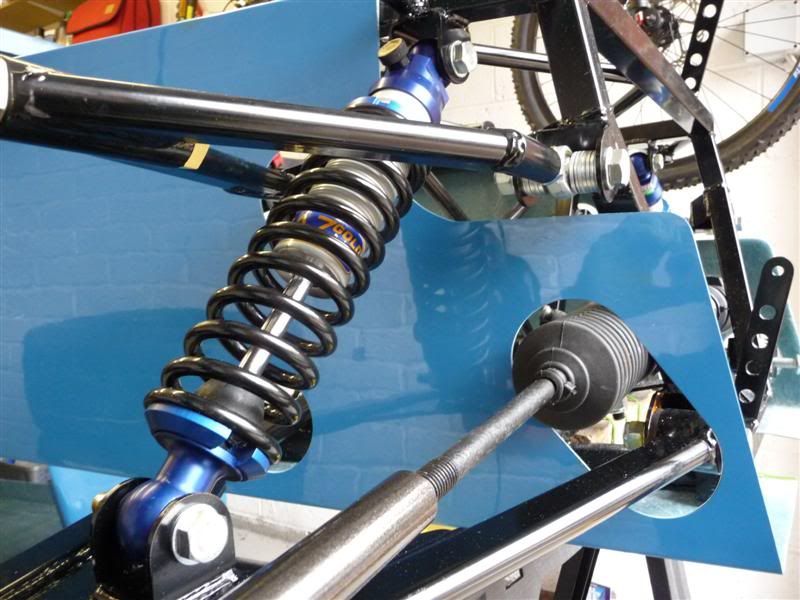
A set of Gaz Gold coilovers, revalved to work upside down.
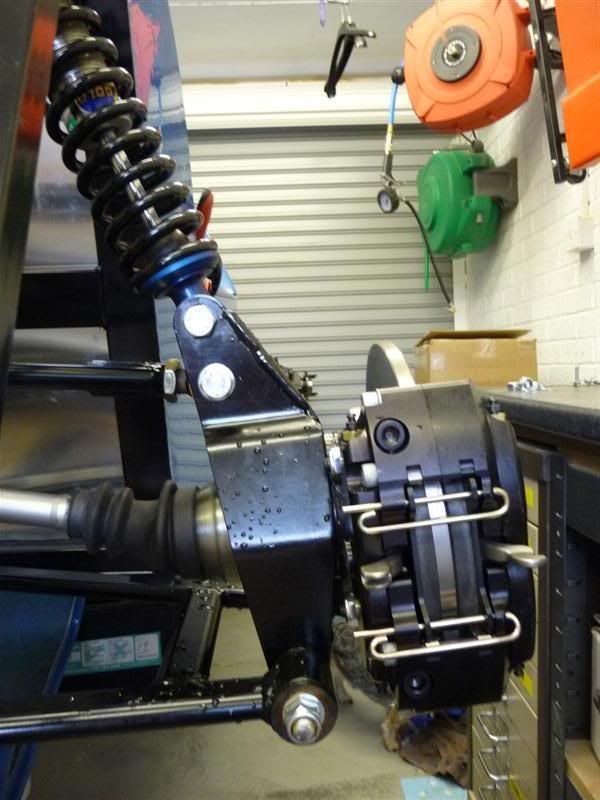
Wilwood 4 pot rear handbrake calipers.
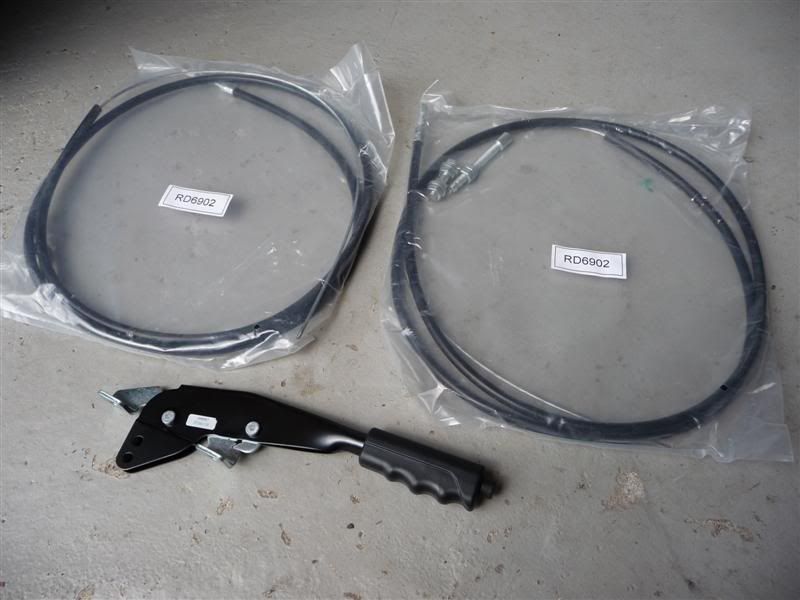
Handbrake lever and cables to suit the above calipers.
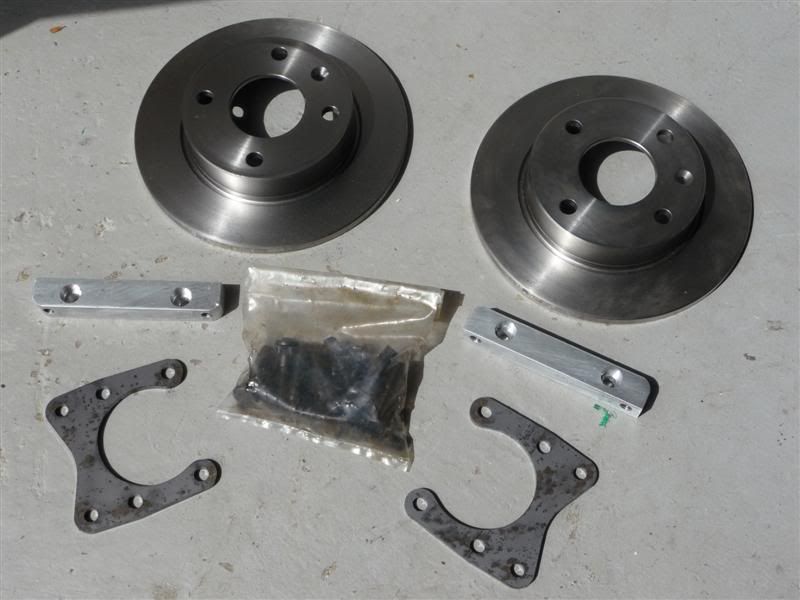
Solid rear discs, rear caliper mounting brackets and a bag of longer wheel studs to suit the Pro 1.2 wheels.
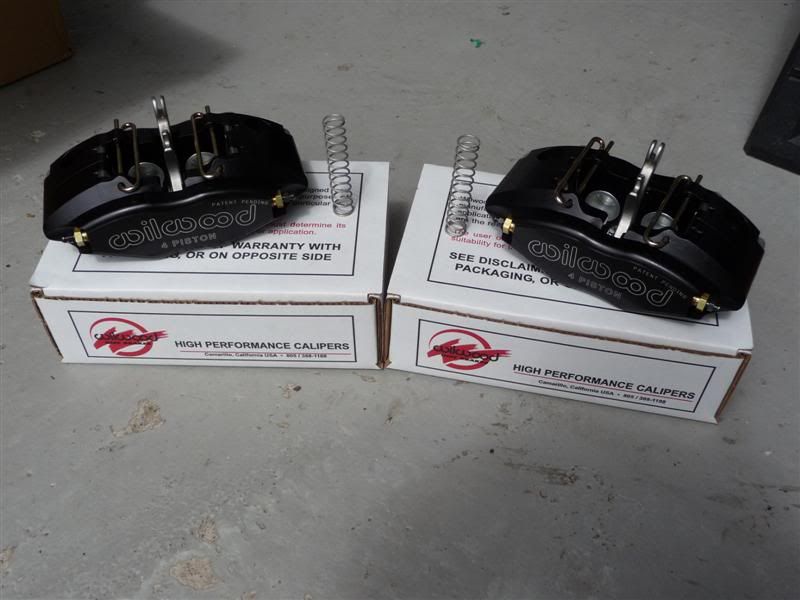
Solid front discs and Wilwood 4 pot calipers.
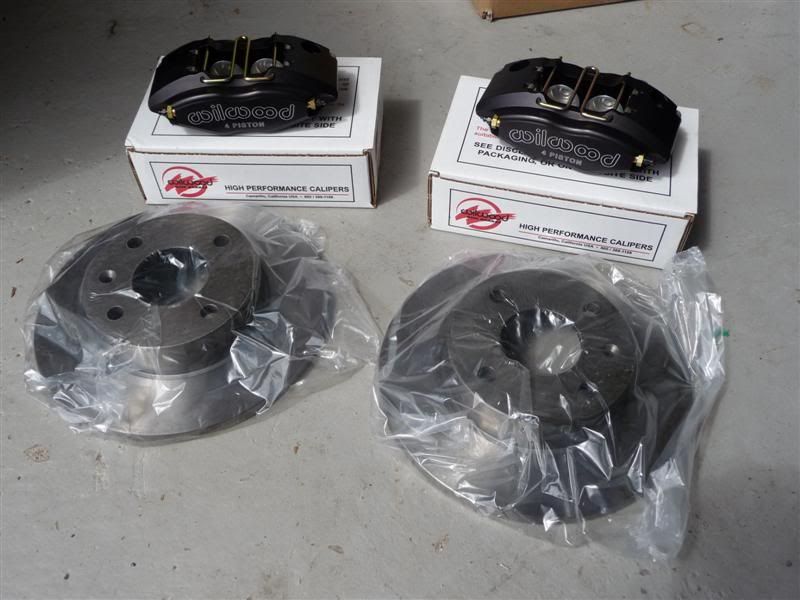
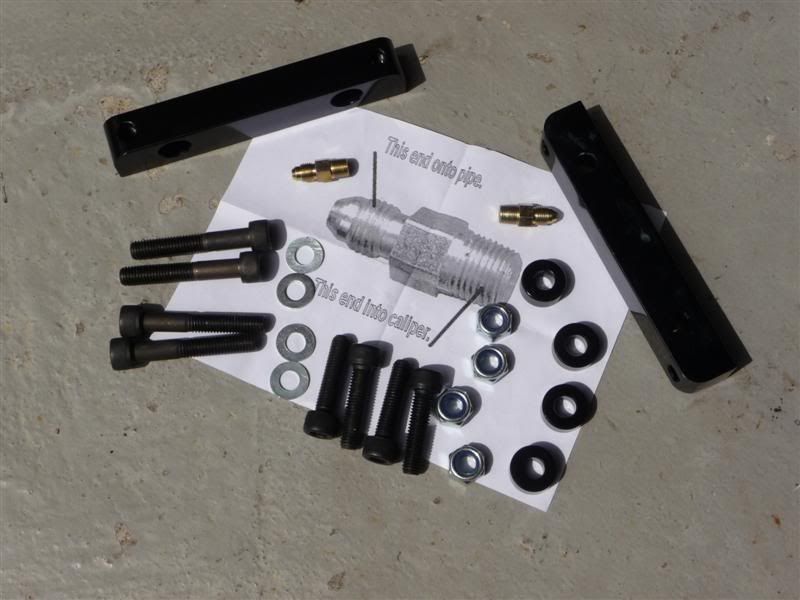
Front brake caliper mounting brackets, bolts and brake fittings.
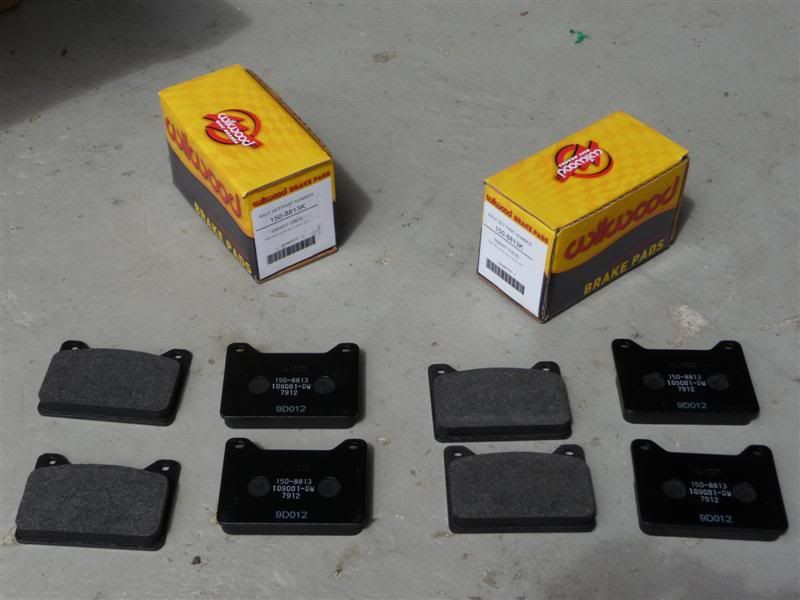
And a set of brake pads,
Thanks to the lad that sorted out the Rally Design brake kit group buy and to Mac#1 Motorsport for bringing the other parts down to the Newark show.
Red16 - 30/6/10 at 06:21 PM
Some more new parts arrived today
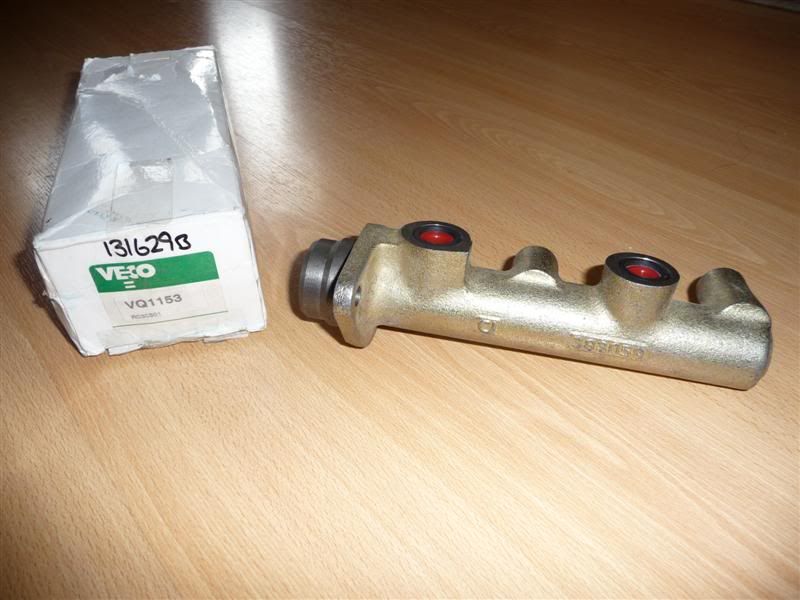
One Sierra master cylinder
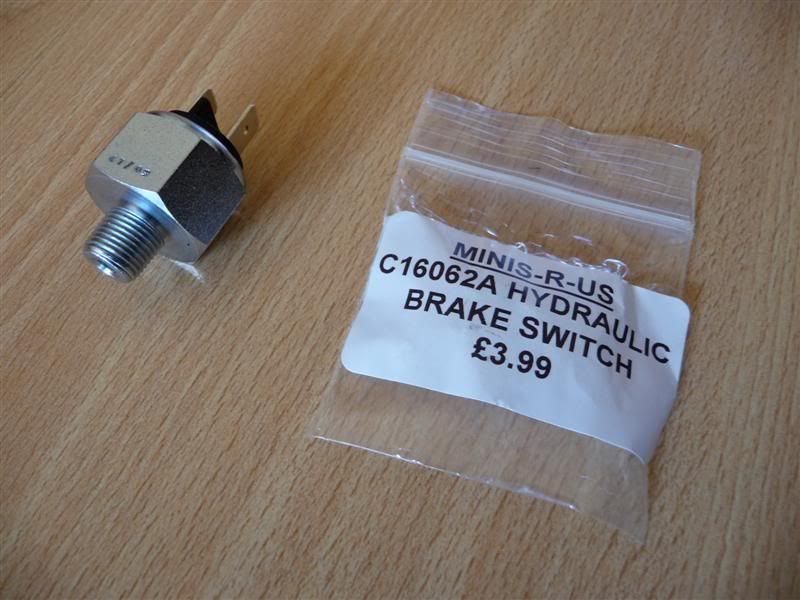
A hydraulic switch for the brake lights
A Freelander rear differential

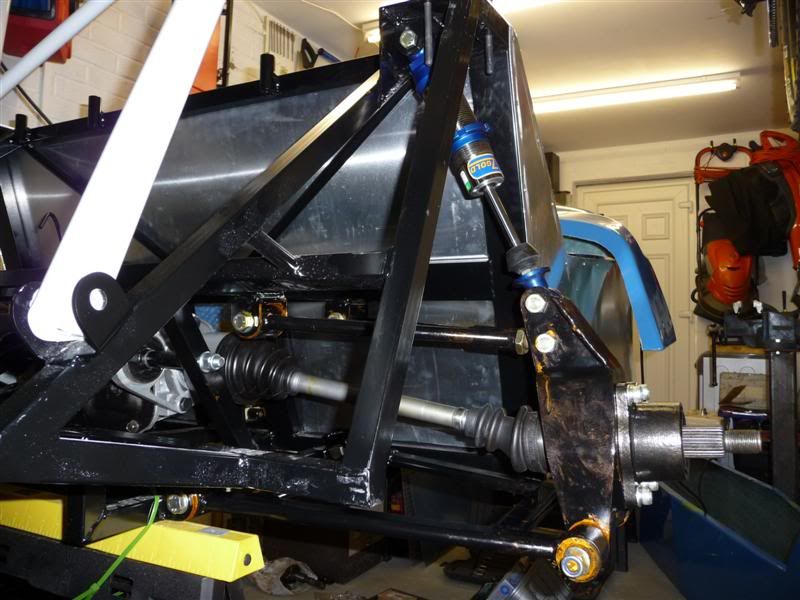
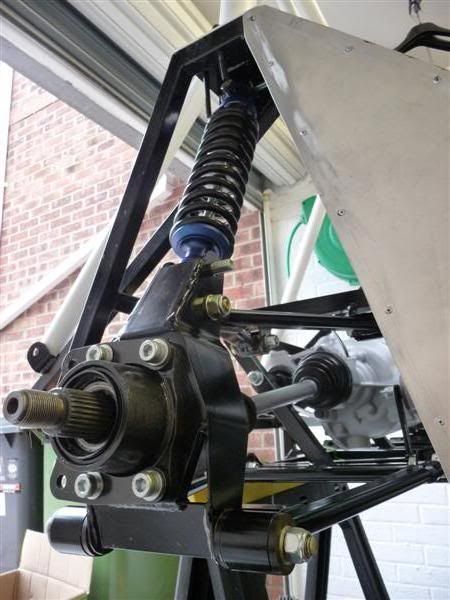
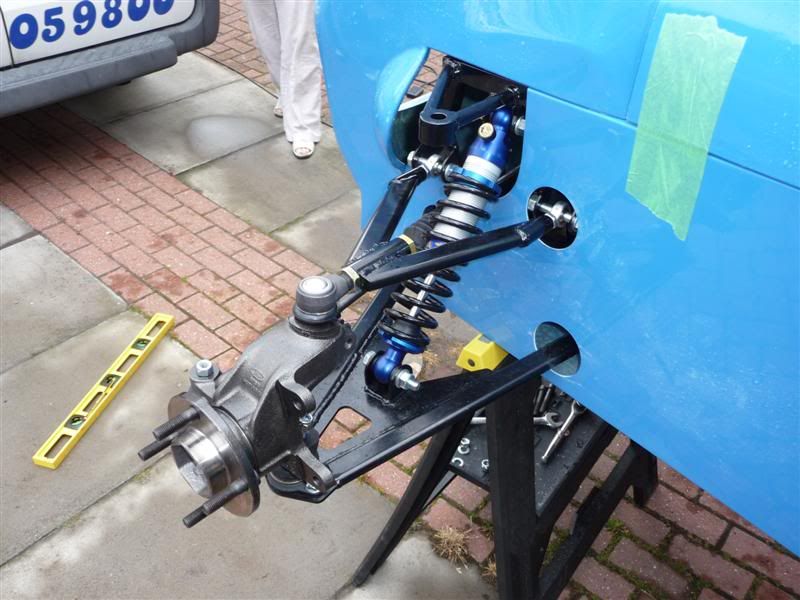
Finally got round to fitting the steering rack and quickly mocked up the suspension to see how it looks
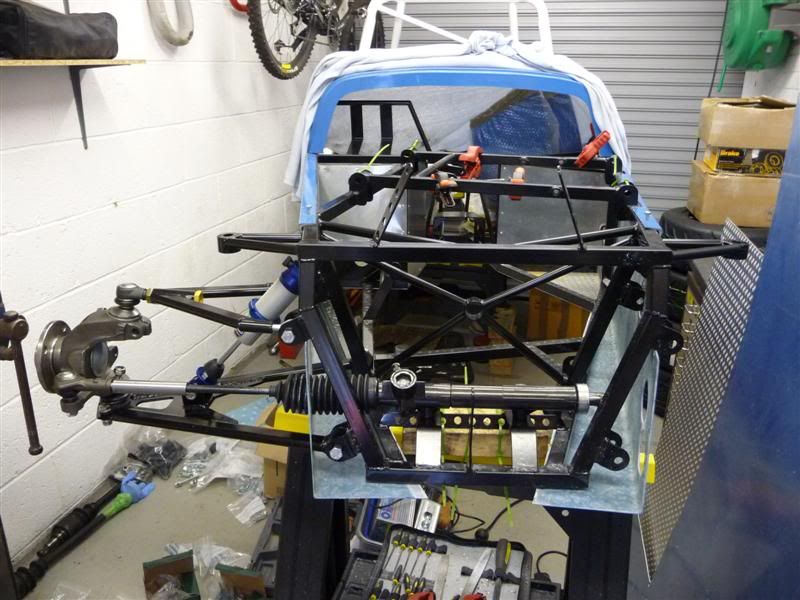

PS Yes I know the track rod end should mount underneath the upright not above like I had it, I only realised after I had taken the photos, doh!
No drama though as nothing is tightened up, and it all needs to come off so I can finish cutting the side panels.
Looking back through those photos really hits home how messy the garage has become, I'll be sorting that out tomorrow too!
Red16 - 1/7/10 at 10:31 AM
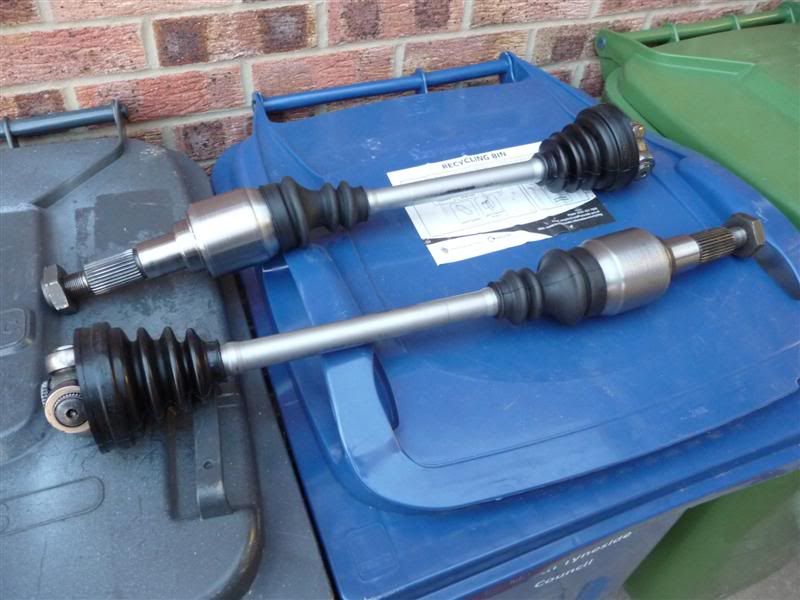
The doorbell went this morning and I was greeted by the posty with a parcel from Mac#1
Two new custom driveshafts and tri-lobe bearings
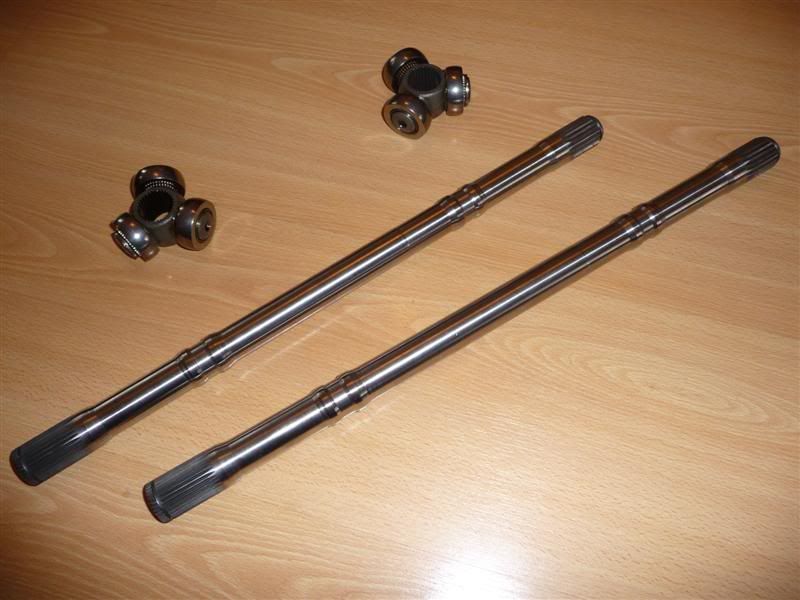
The stockpile of parts is getting really big, it's about time i pulled my finger out and got some of it on the car!
RK - 1/7/10 at 12:44 PM
Whatever you do, keep going. You are doing a great job so far! I wish my build had gone that well, but a lot of it is knowing what part is needed for
what job and you seem to have a good handle on that.
Red16 - 3/7/10 at 08:04 AM
Thanks RK
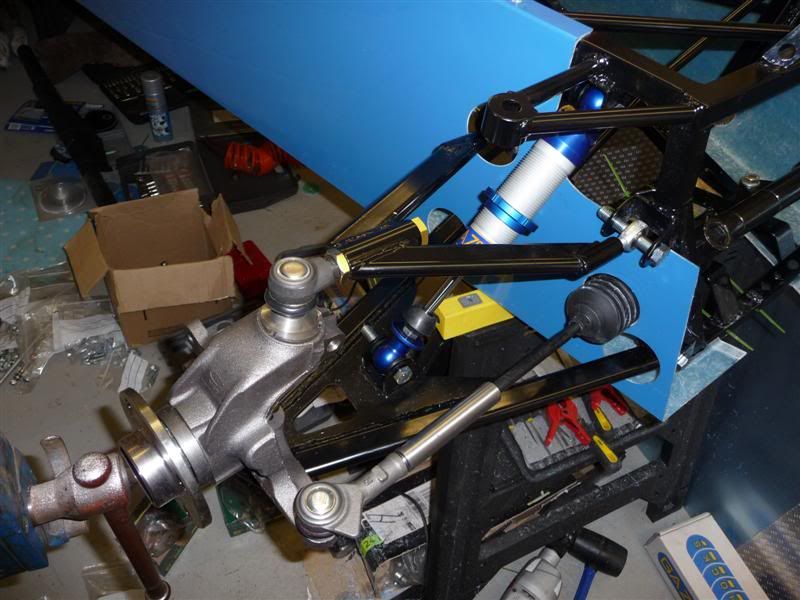
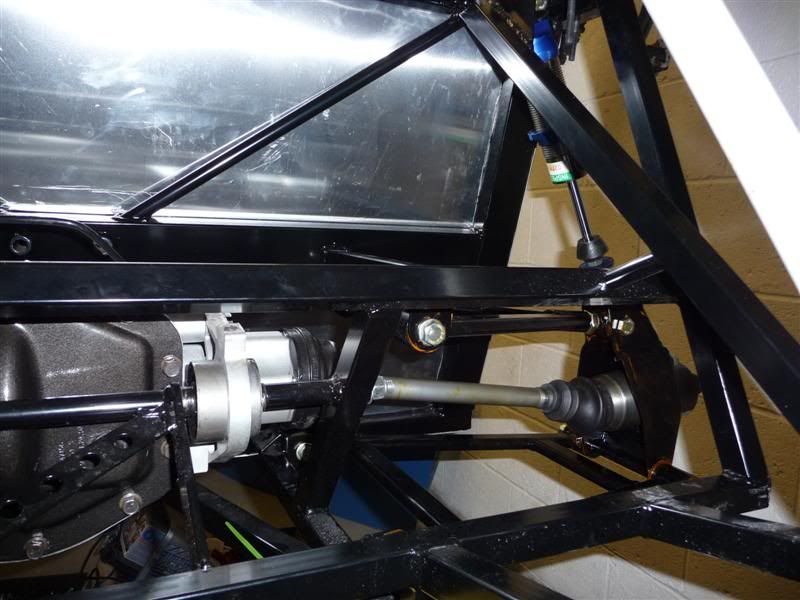
Tried to fit my Freelander rear diff yesterday but didnt realise until it was nearly in the car that the casing needed a little mod, doh!
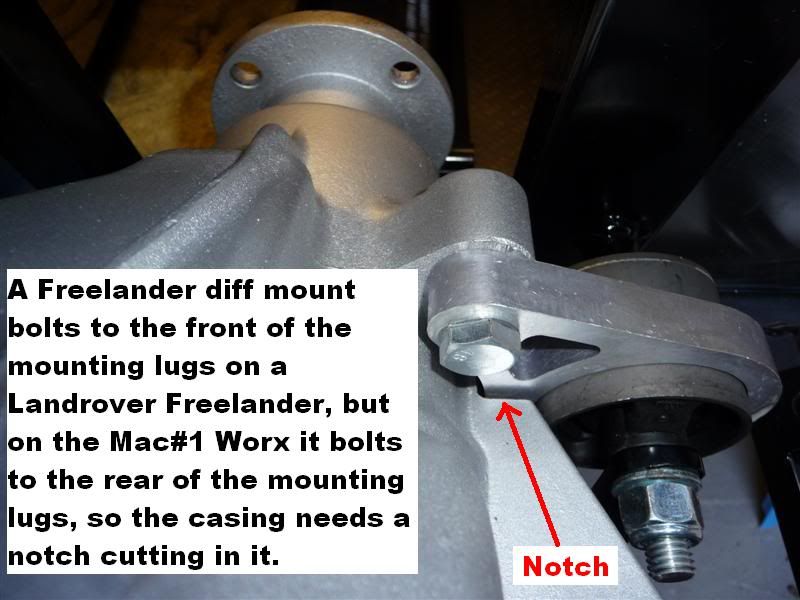
Once the notch was cut out of the casing, the diff bolted into the chassis easily.
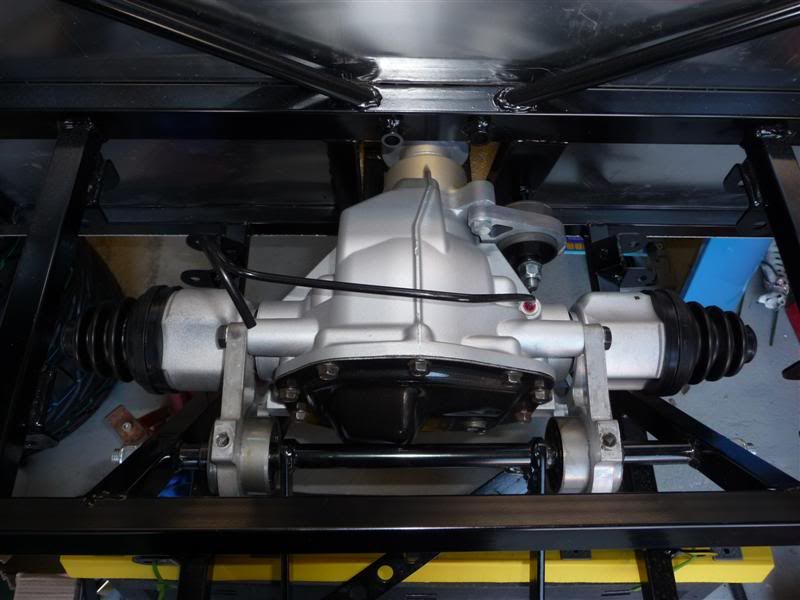
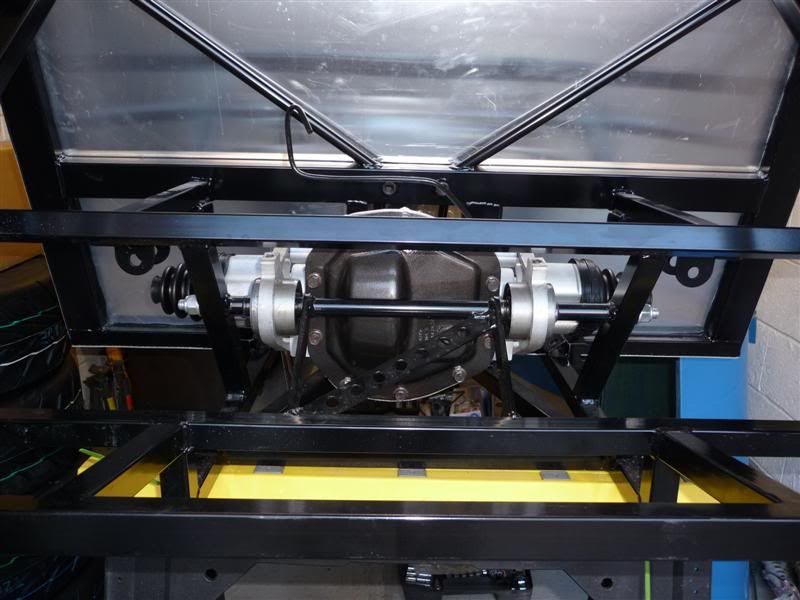
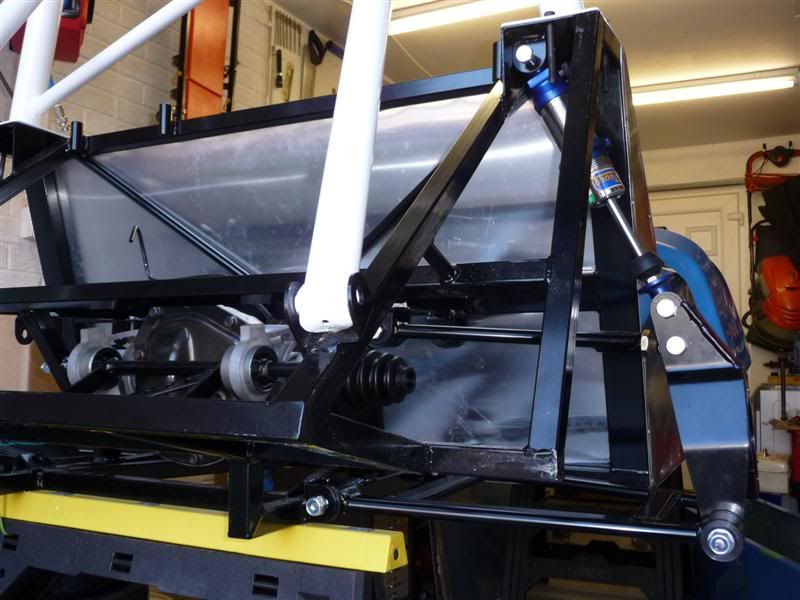
I then set about a quick mock up of the rear suspension, which looks something like this
20vturbogaz - 3/7/10 at 05:30 PM
Its coming along now mate. cant wait to start mine.
neo2 - 3/7/10 at 09:09 PM
There is no cross bracing in the chassis in the seating area, from this i assume the seats just bolt through the alloy floor panel is that correct
???
If thats the case i then assume the full driver weight is sitting on the pop rivets holding the floor in  seems a poor idea if what i see is right
??
seems a poor idea if what i see is right
??
Good work with the build though looking nice top job..
Red16 - 5/7/10 at 10:30 AM
quote:
Originally posted by 20vturbogaz
Its coming along now mate. cant wait to start mine.
Cheers Gaz I bet you cant, I was exactly the same when waiting for my kit to arrive! Glad you went car engined, be a great comparison with mine and
Brownys.
quote:
Originally posted by neo2
There is no cross bracing in the chassis in the seating area, from this i assume the seats just bolt through the alloy floor panel is that correct
???
If thats the case i then assume the full driver weight is sitting on the pop rivets holding the floor in seems a poor idea if what i see is right
??
Good work with the build though looking nice top job..
Thanks
You're right in what you say, I had similar thoughts but was assured that it's strong enough. The floor panels are rivoted to the chassis
using large headed rivots and also secured/sealed with Worth bond and seal.
Even without any rivots, the Worth bond and seal would hold the floor panel to the chassis with your body weight acting on the floor.
Red16 - 5/7/10 at 10:29 PM
Todays progress goes like this...
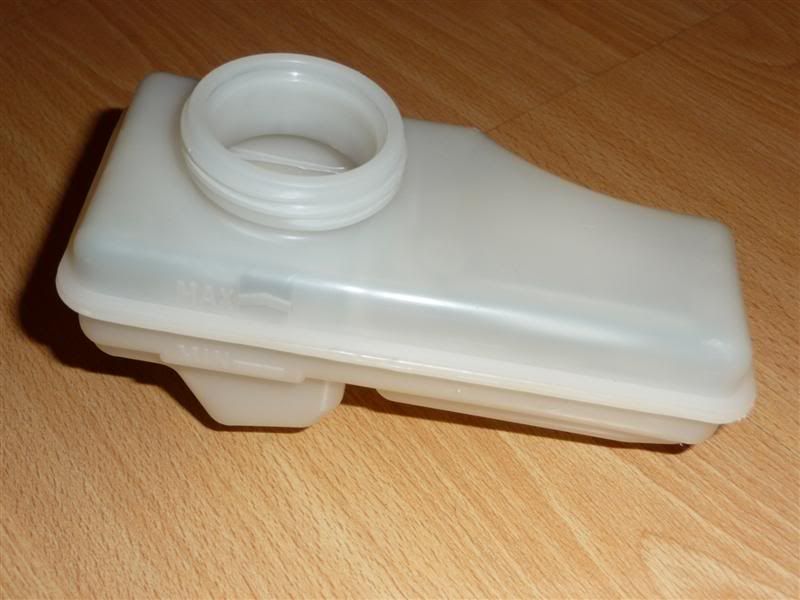
One new Sierra brake fluid reservoir
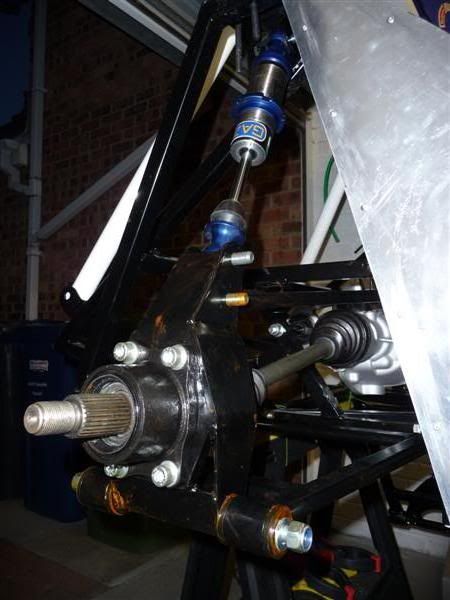
Driveshafts built up, but still requiring securing around each end of the cv boots
Drivers side driveshaft fitted, suspension assembled with upright, bushes fettled to rotate nice and easily, no squeeks
List of jobs for next time i venture out to the garage...
1. Brake caliper brackets to paint and fit.
2. Copper slip and other crap to wipe from the chassis, it looks filthy in the photos
3. Spring to fit to coilover strut.
4. Couple of nuts/bolts to torque up.
Then the other side can be assembled.
The rear hubs are away being machined to 134mm diameter to allow the rear brake discs to be fitted.
[Edited on 5/7/10 by Red16]
20vturbogaz - 5/7/10 at 10:48 PM
Looking good marra. Is browny on here yet.
Red16 - 9/7/10 at 08:26 PM
quote:
Originally posted by 20vturbogaz
Looking good marra. Is browny on here yet.
Aye Browny's on here, B120WNY is his username.
Red16 - 9/7/10 at 08:33 PM
Been assembling the rear end today
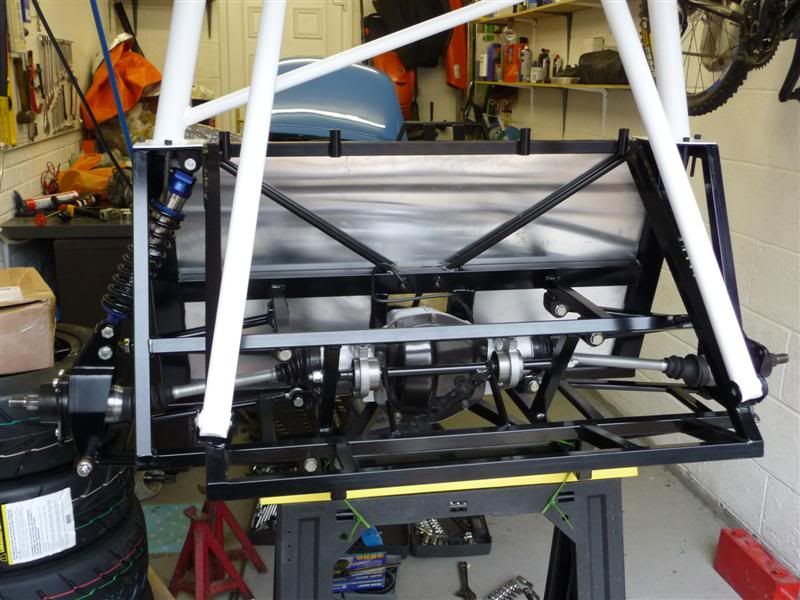
Fitted the brake caliper brackets to the uprights.
Drivers side
Passenger side
Then done a small amount of work to the front end, fitted the arms to the steering rod and secured the rubber boots.

Hoping to get my rear hubs back tomorrow, then the brakes can be fitted.
Red16 - 11/7/10 at 08:05 PM
Small update of the weekends work, nothing spectacular just a spot of painting, also fitted a set of longer wheel studs to suit the Pro Race 1.2
wheels.
The rear hubs are now back from being machined and are painted but not dry, hence the lack of photos.
Red16 - 12/7/10 at 09:10 AM
One pair of machined rear hubs with longer studs fitted and a pair of track rod ends, both been sprayed with black Hammerite Hammered paint.
Red16 - 12/7/10 at 07:22 PM
Rear hubs and brake caliper brackets fitted, driveshaft nuts need to be torqued up once the brakes are operational.
Rear brake discs and calipers fitted and it started to look like this
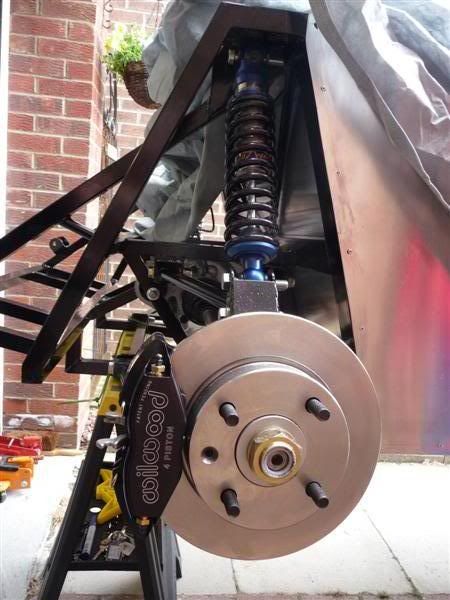
With my mate, Decka, acting as a temporary wheel nut a wheel was tried on the back, starting to look quite wide now
The side panels were trimmed for the final time, or so i thought, i now think i'll merge the steering rack hole with the front lower wishbone
hole, as most people do.
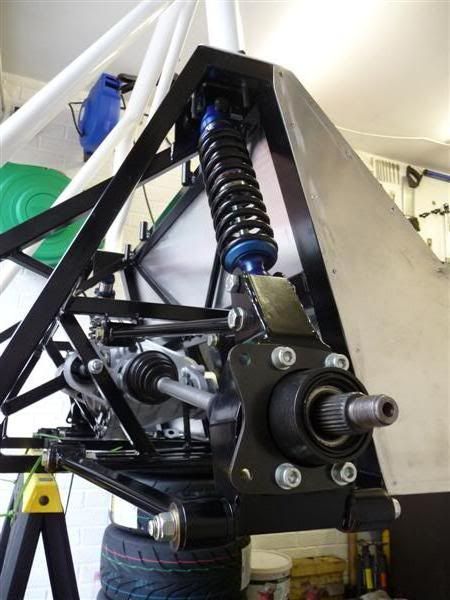
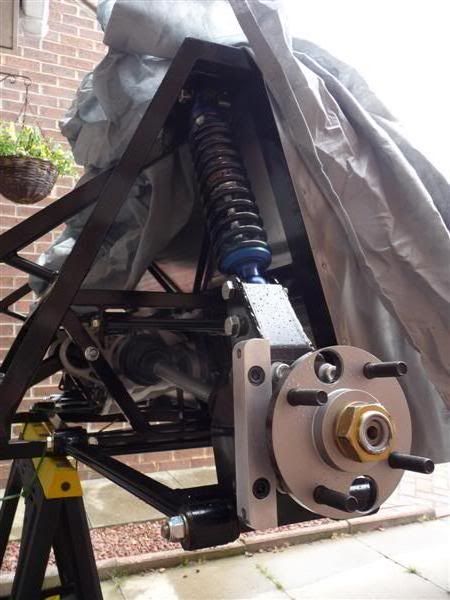
The passenger side front suspension was then built up

Drivers side
Took the nose cone off to fit it in the garage, need to move my vice stand to get the car further back... job for another day
Thanks to Decka for the assistance today, I'm dead happy with the kit, it's really starting to look like a car now
Red16 - 13/7/10 at 08:11 PM
This afternoon i took the suspension off the front of the car and decided to do the final trimming to the side panels
Before
After

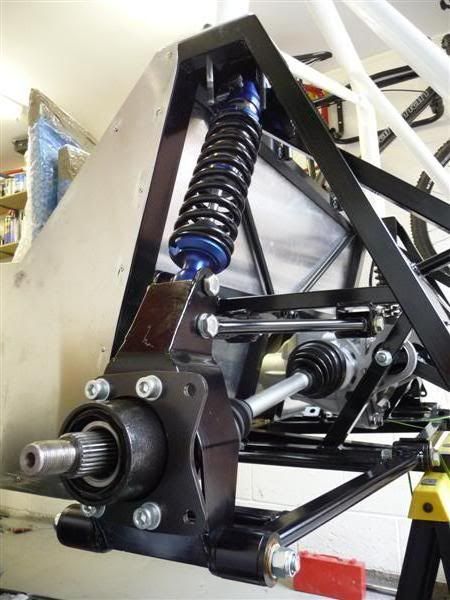
All the steering/suspension fitted back to the car again. The washers in the upper wishbone mounting brackets are temporary until i get some bushes
knocked up.
I done a quick little job while the side panel was off and fitted the master cylinder.

B120WNY - 26/1/11 at 08:47 PM
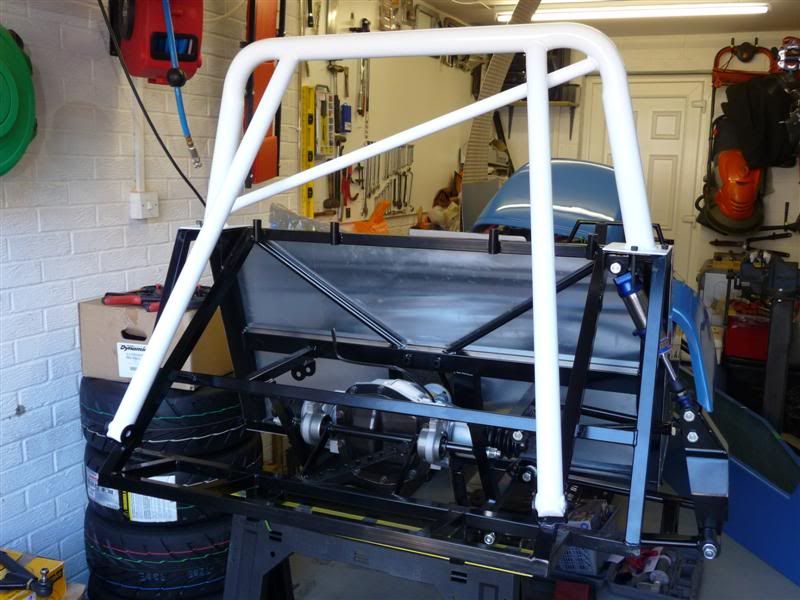
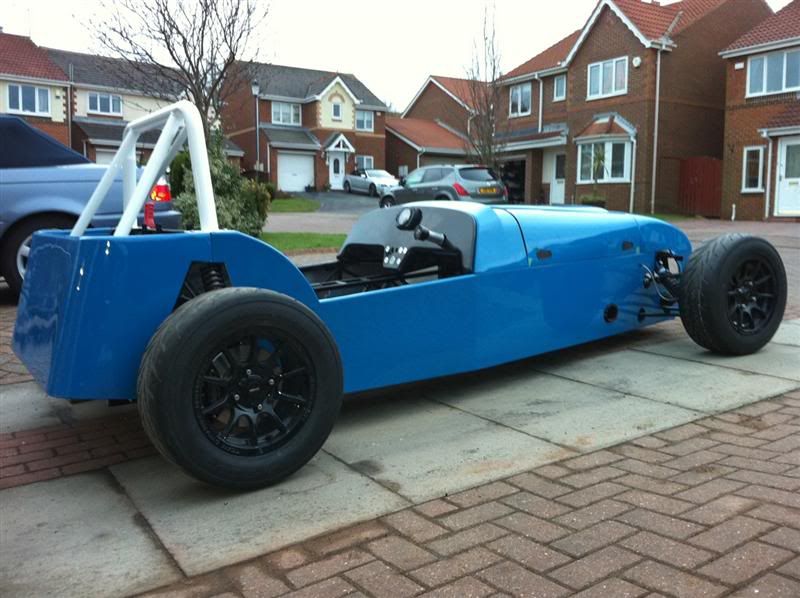
Couple of up to date photos

fimi7 - 27/1/11 at 01:36 AM
Nice clean build. What shocks are those?
B120WNY - 29/1/11 at 03:24 PM
quote:
Originally posted by fimi7What shocks are those?
They're alloy bodied Gaz coilovers.
eddie99 - 29/1/11 at 04:27 PM
Very nice build, tidy and all shiny! Its what i like to see
fimi7 - 30/1/11 at 12:42 AM
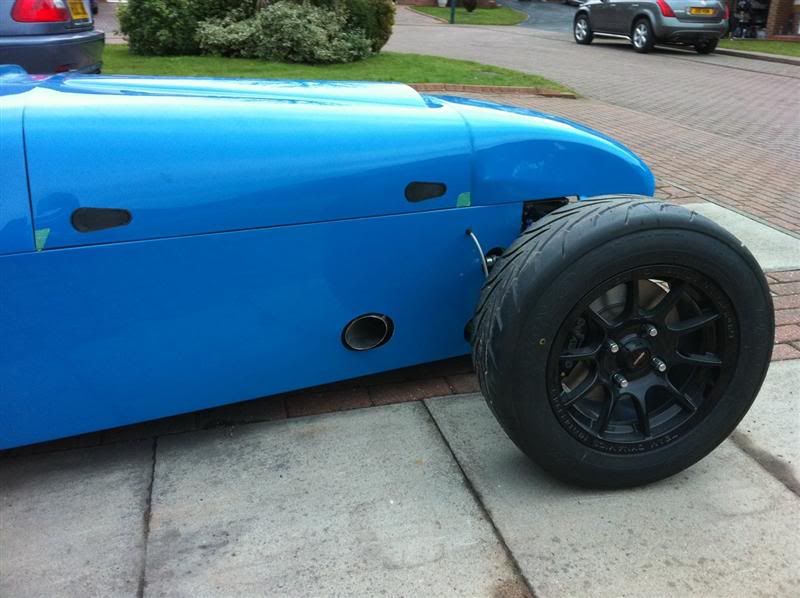
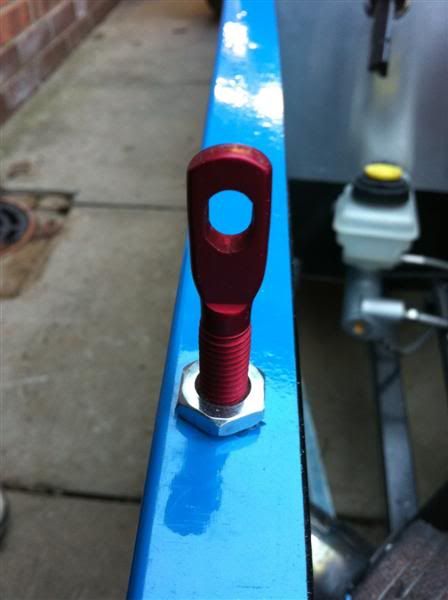
I was thinking of using the same bonnet locks. Can you put up a pic with how you mounted the bolts.
Thanks
Rocket_Rabbit - 14/3/11 at 12:43 AM
Just read through your build. Looks good, but you never said you were going with a Turbo!!
Shame about the ban - would have been nice to see the updates
[Edited on 14/3/11 by Rocket_Rabbit]
lewis - 14/3/11 at 09:02 AM
Great build blog lots of pics that i like,just one thing I have noticed the bolts holding the roll bar on are no way man enough IMO,car looks really
nice though,going to be a quality build.
SausageArm - 8/4/11 at 10:12 PM
quote:
Originally posted by fimi7
I was thinking of using the same bonnet locks. Can you put up a pic with how you mounted the bolts.
Thanks
They were mounted through the chassis like this, with a nut top and bottom to hold them secure.
SausageArm - 8/4/11 at 10:13 PM
quote:
Originally posted by lewis
Great build blog lots of pics that i like,just one thing I have noticed the bolts holding the roll bar on are no way man enough IMO,car looks really
nice though,going to be a quality build.
I think a full cage is on the cards once it's up and running
SausageArm - 8/4/11 at 10:15 PM
quote:
Originally posted by Rocket_Rabbit
Just read through your build. Looks good, but you never said you were going with a Turbo!!
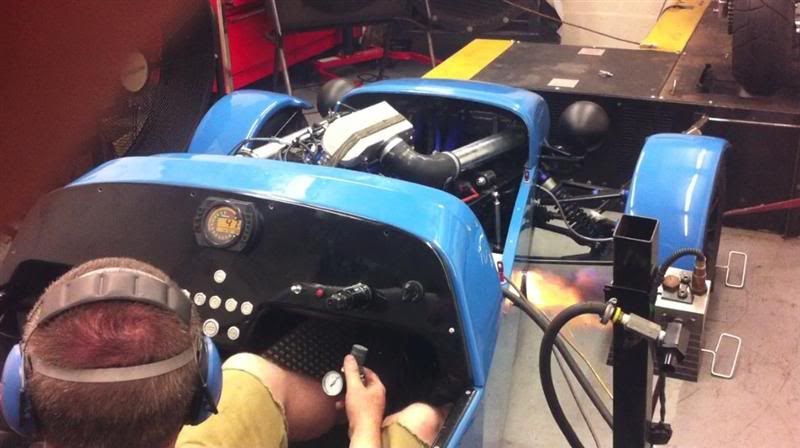
Well here she is after firing up for the first time at Mac#1 a couple of days ago
http://www.youtube.com/watch?v=Opp8ecvY7nU
SausageArm - 18/7/11 at 06:14 PM
Woohoo! IVA test passed first time!
SausageArm - 25/8/11 at 02:16 AM
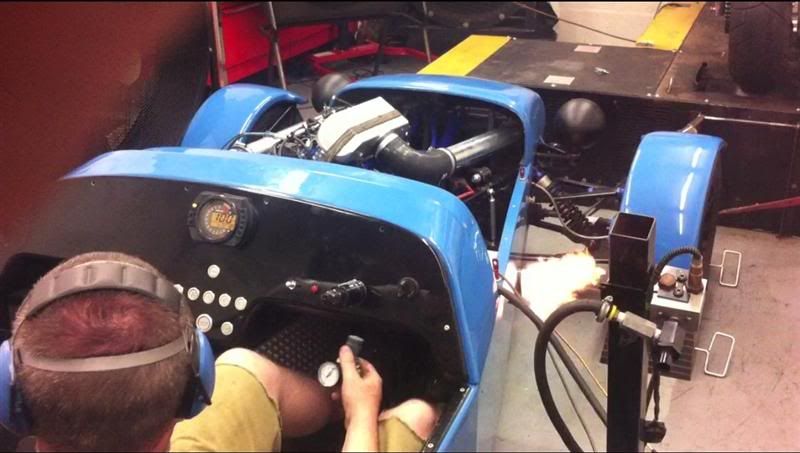
The car has been down to BigCC Racing to be mapped
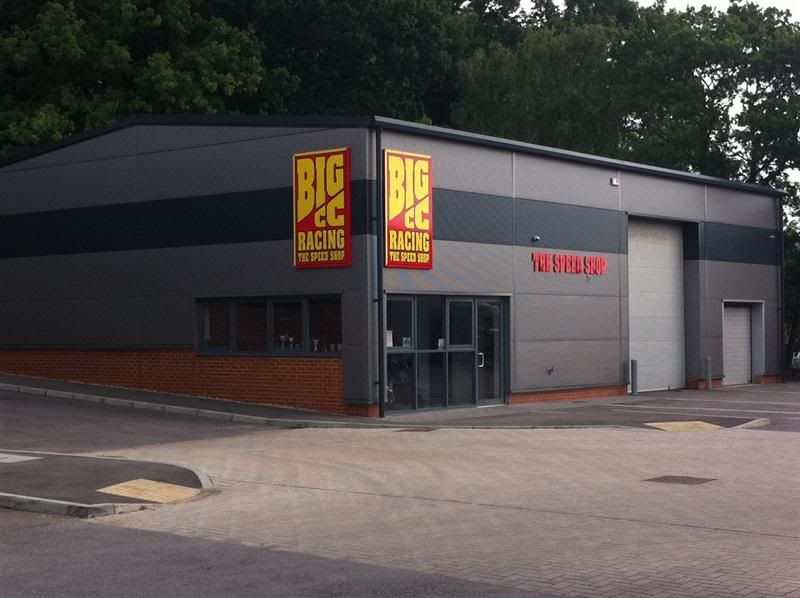
Car being strapped down onto the rollers
Coupe of flaming stills taken from video clips
Power and torque at the wheels, the blue line is at 12psi, the red line is at 8psi.
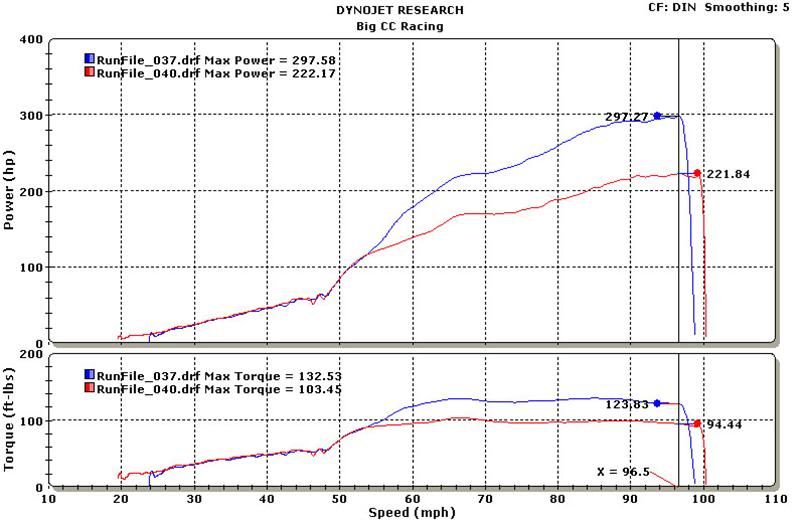
Just waiting on the DVLA to come out and inspect the car, then I can finally drive it
Eatpies99 - 2/9/11 at 10:28 PM
This car is amazing Just curious, what fuel is it been mapped on?
SausageArm - 3/9/11 at 03:53 PM
quote:
Originally posted by Eatpies99
This car is amazing Just curious, what fuel is it been mapped on?
Thanks a lot
It was mapped on Shell V-Power.
Eatpies99 - 3/9/11 at 04:43 PM
Thanks for the prompt reply
I look forward to seeing some videos once its on the road. Quite intrested in going the turbo route myself.
SausageArm - 3/9/11 at 04:58 PM
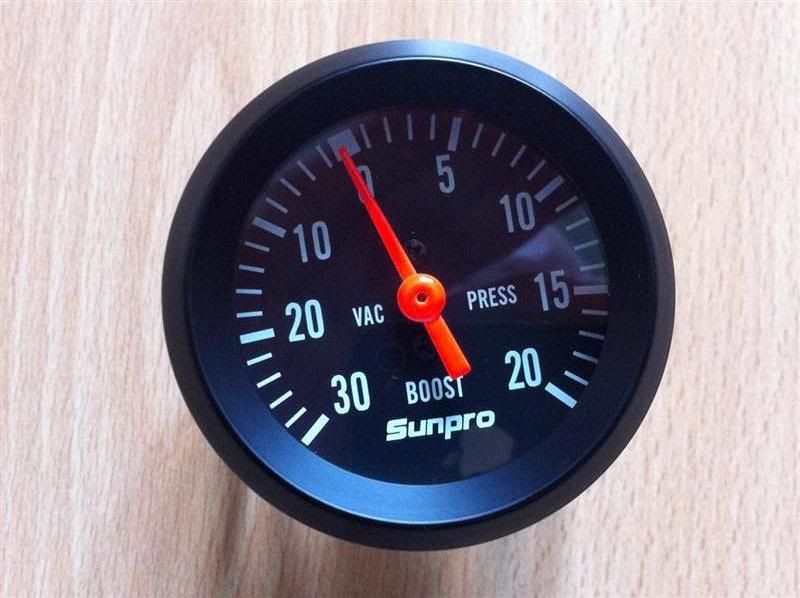
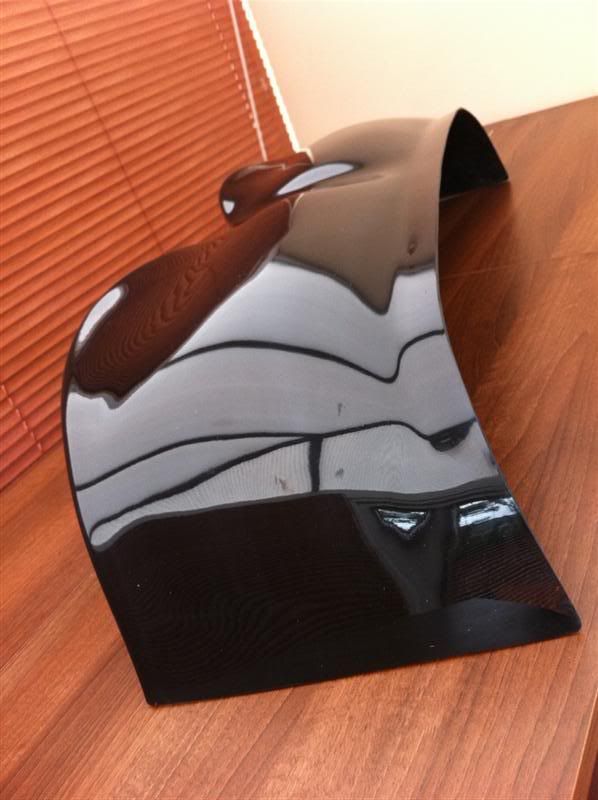
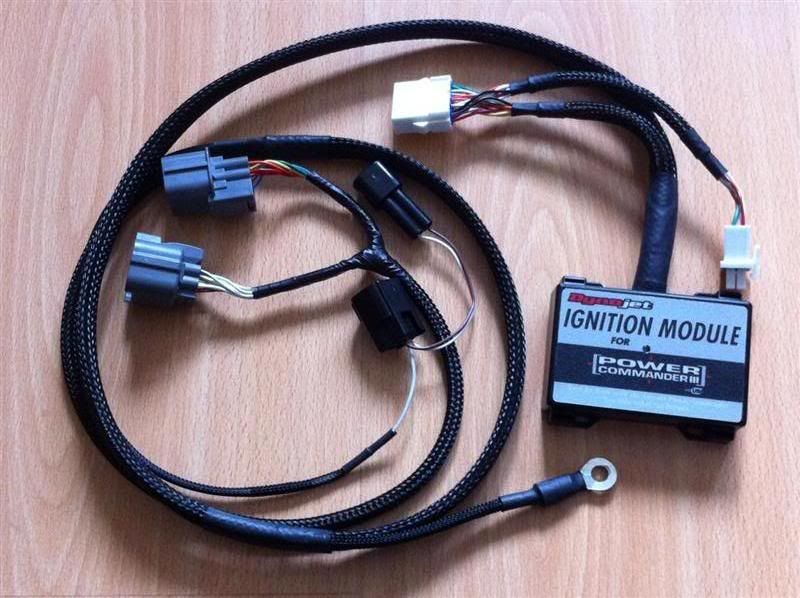
I'm still waiting for the DVLA to inspect the car so they can issue it with a registration number and V5, but in the mean time I've bought a
few odds and sods.
A 20psi boost gauge
A GRP aeroscreen
An ignition module add on for the Power Commander III, to allow the timing to be tweaked, that means another rolling road session to do some more
mapping.
beaver34 - 3/9/11 at 05:08 PM
awesome! been following it on passion ford
SausageArm - 12/9/11 at 03:26 PM
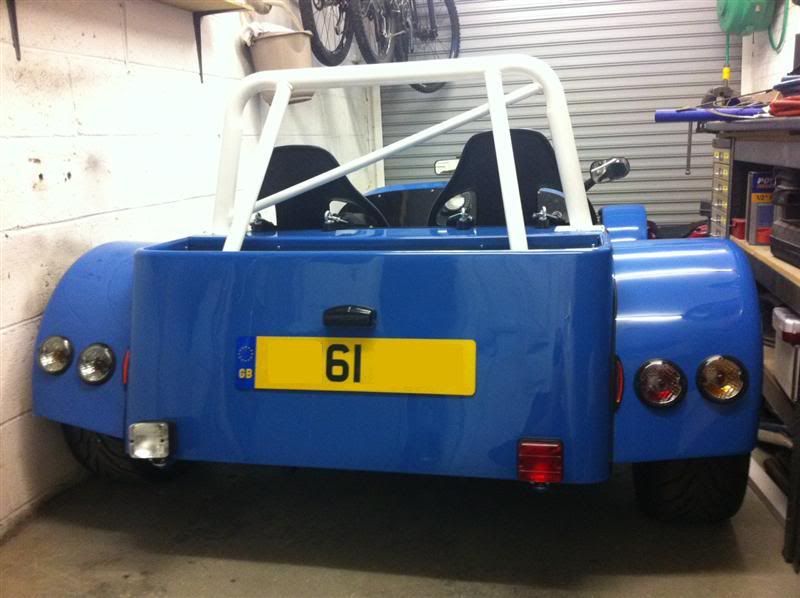
Well the DVLA finally pulled their finger out and sorted out my registration, a new 61 plate gratefully received, happy days!
A big thanks to Marc and Colin at Mac#1 for their hard work on the car over the last couple of months.
Here are a few photos of the car in it's latest form.
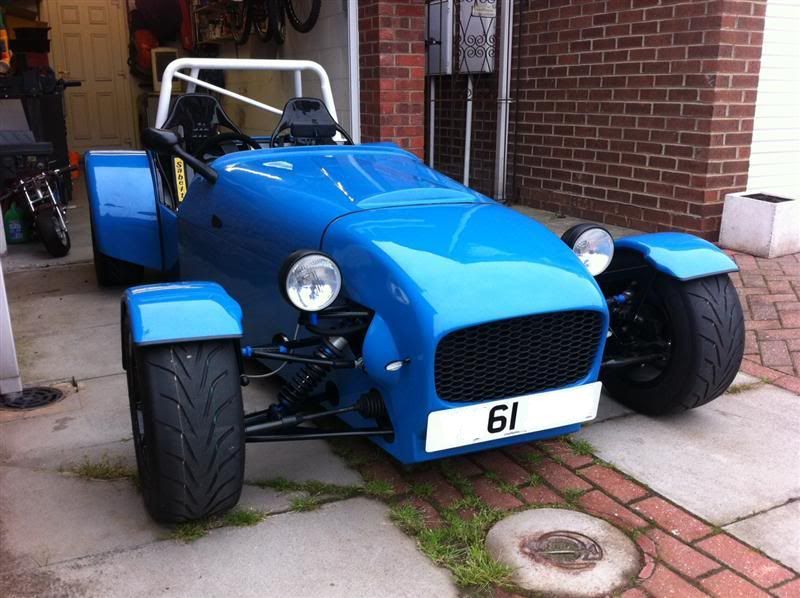
Tucked away in the garage
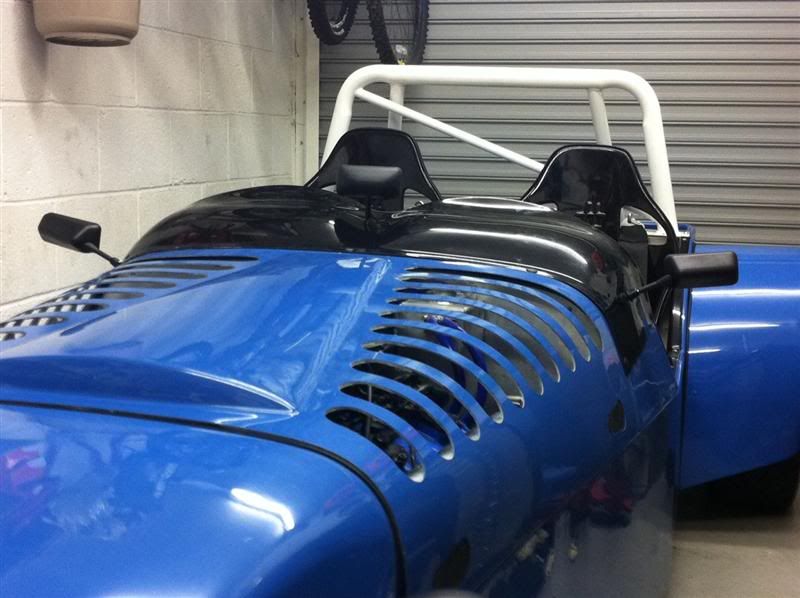
After a few test runs in the car, it was obvious I was struggling with engine cooling, so some bonnet vents were cut into the bonnet, here you can see
the work in progress, black mesh will be added to the underside of the holes.
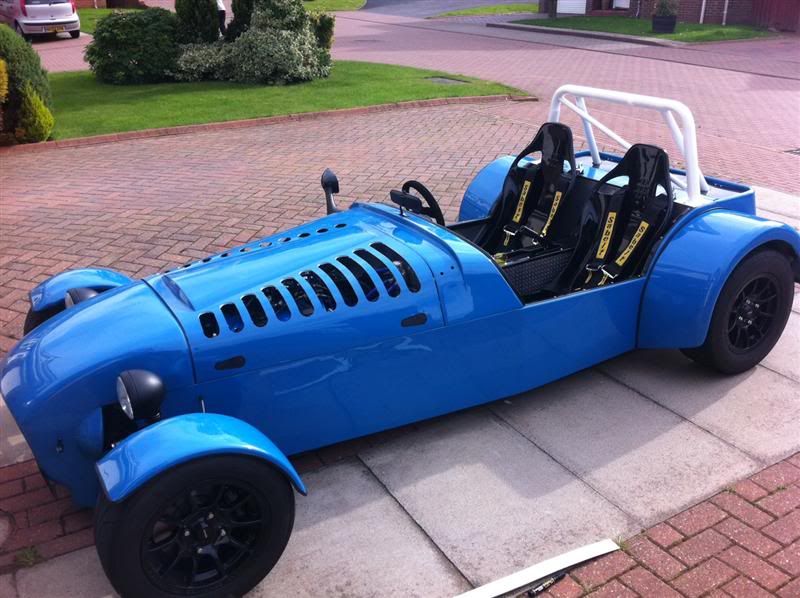
Boost gauge fitted
Cooling is now a lot better although i think it will need further work, especially in preparation for track days and summer ambient temps.
I've driven the car a good few times now and even on low boost it goes very very well, high boost it's like a missile! circa
770bhp/tonne kicks ass! :
kimbo1982 - 30/9/11 at 10:47 AM
That is a stunning build, just spent half hour reading your thread on pistonheads!
SausageArm - 22/1/12 at 08:28 PM
quote:
Originally posted by kimbo1982
That is a stunning build, just spent half hour reading your thread on pistonheads!
Thanks very much, glad you enjoyed reading it
SausageArm - 22/1/12 at 08:41 PM
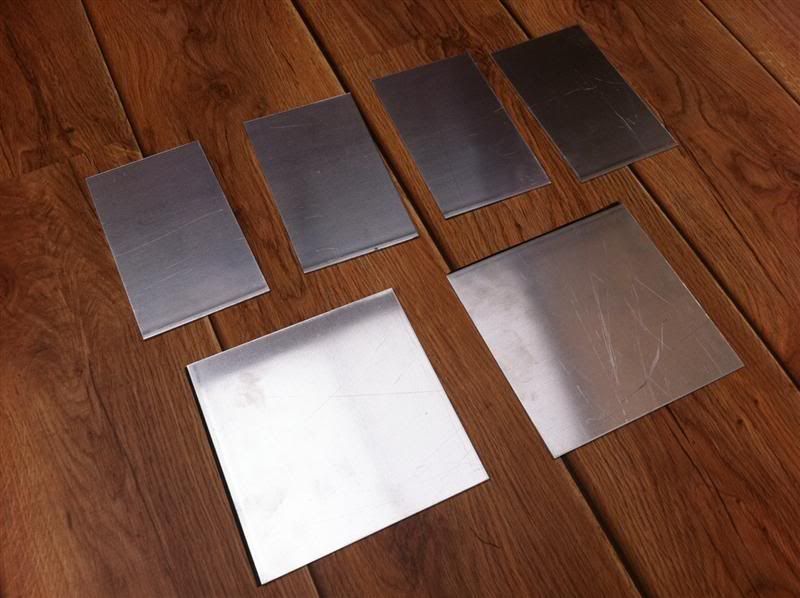
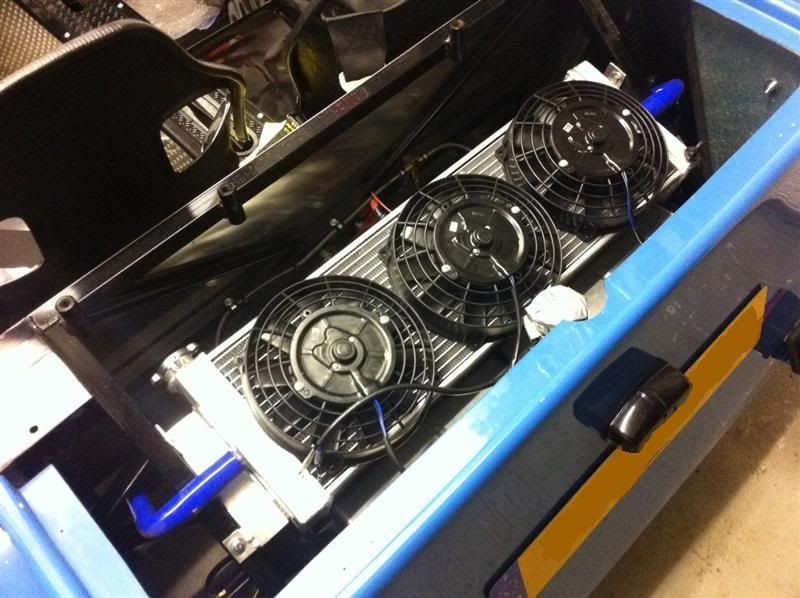
To further improve the cooling I decided to fit a second radiator in the boot area, I need a new header tank, with larger volume and more
inlet/outplet ports, so some aluminium sheet was bought and cut to size
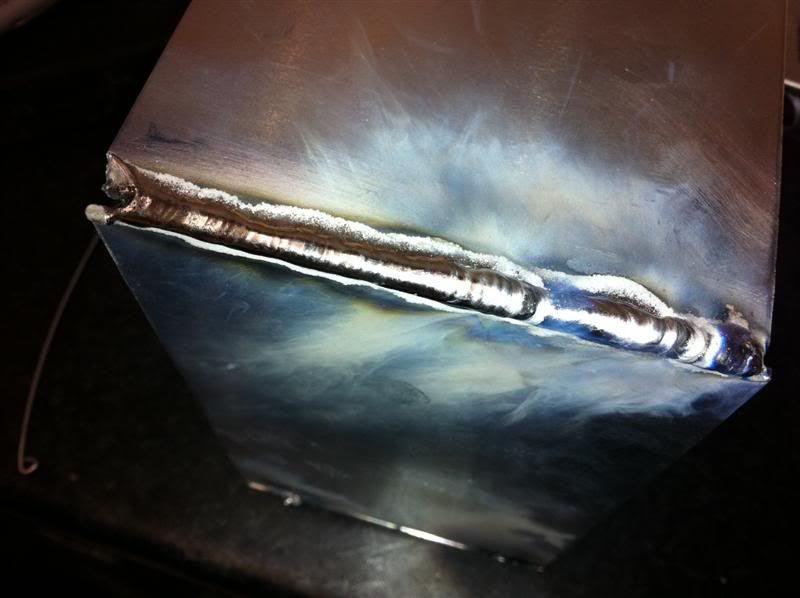
then the TIG set was fired up and i set about joining the bits together, my aluminium welding is far from perfect but it's improving
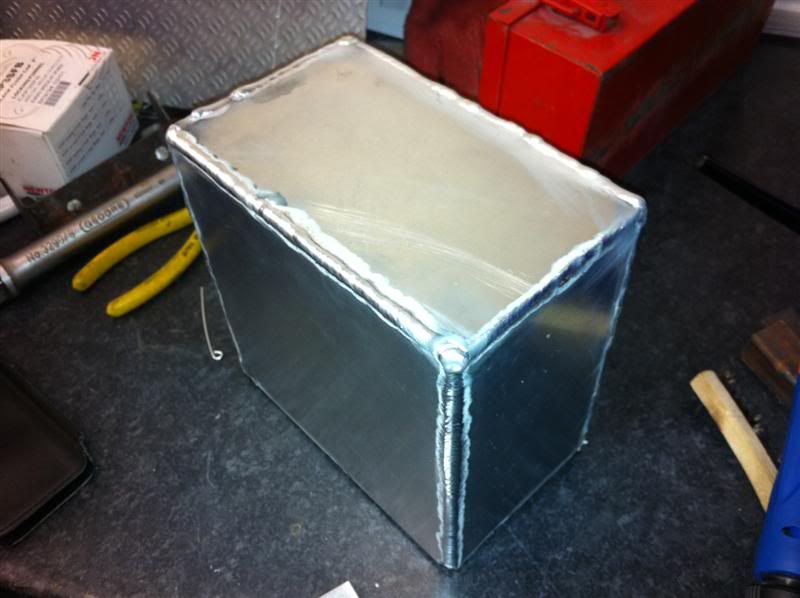
The header tank is progressing, still a long way to go but it's taking shape nicely
One radiator, Davies Craig water pump, hose elbows and hose adaptors/joiners.
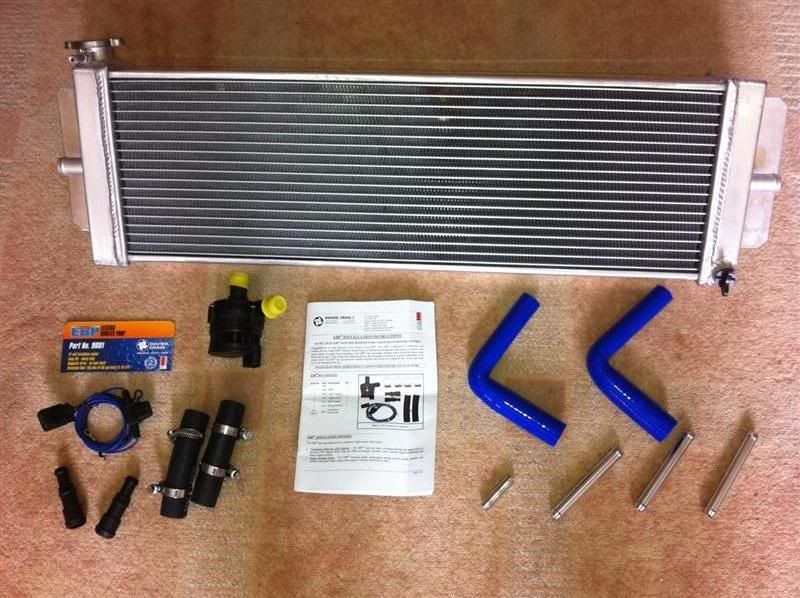
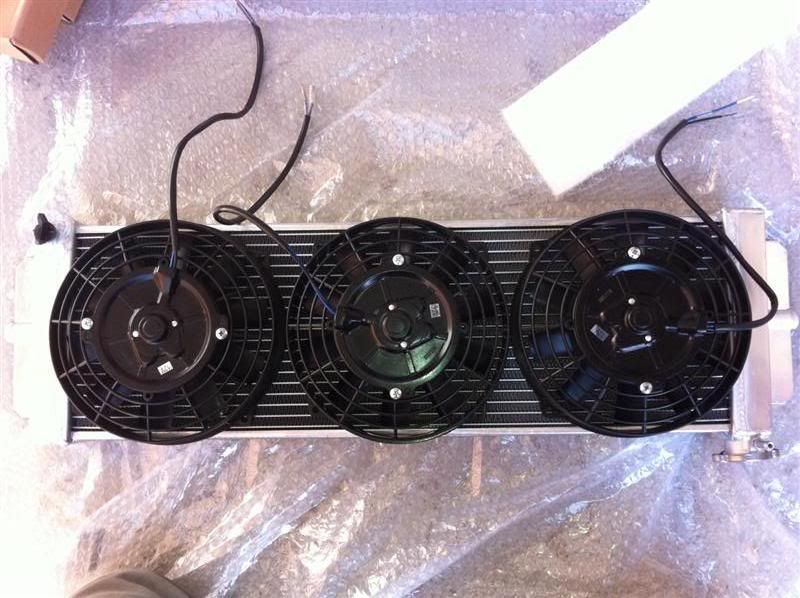
The radiator fans trial fitted them to the radiator, to double check they would actually fit as planned.
With the roll bar removed, it made access for fitting the radiator much better, some aluminium brackets were cut and welded to the radiator, rivnuts
fitted into the chassis, and the radiator mounted.
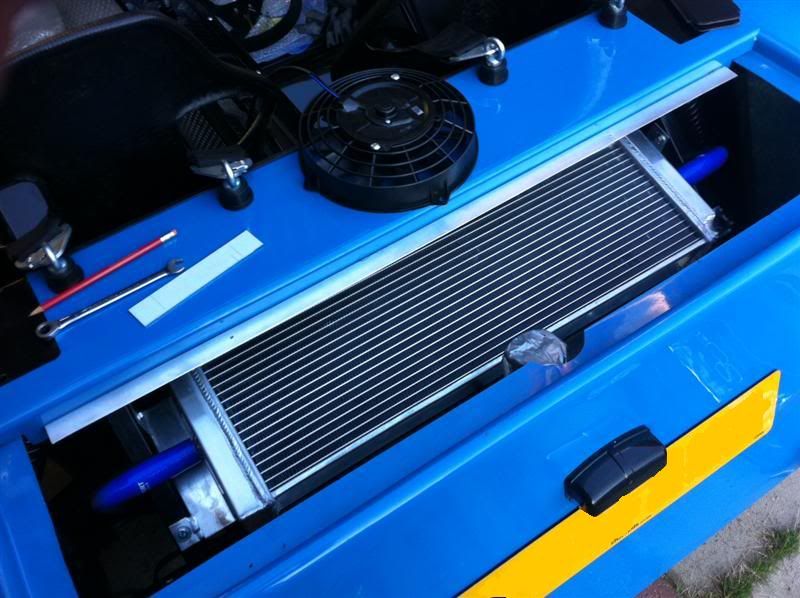
The radiator fits in the space rather nicely, happy days
Next up, the fans were trial mounted again, so the top panel could be fitted and see how much it needed to be cut to clear the three fans.
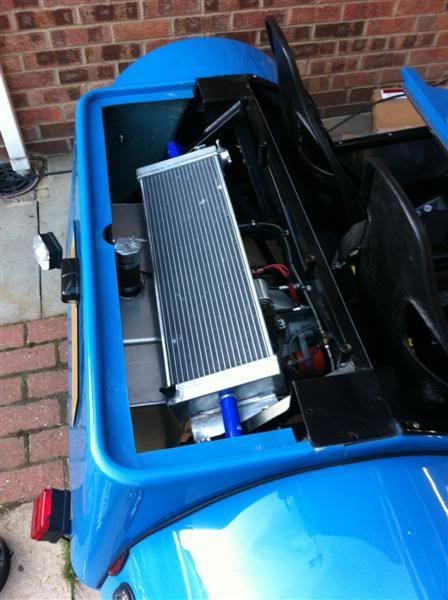
The angle grinder was fired up and a small amount was cut from the bottom area of the top panel, rested in position, clearance looks great.
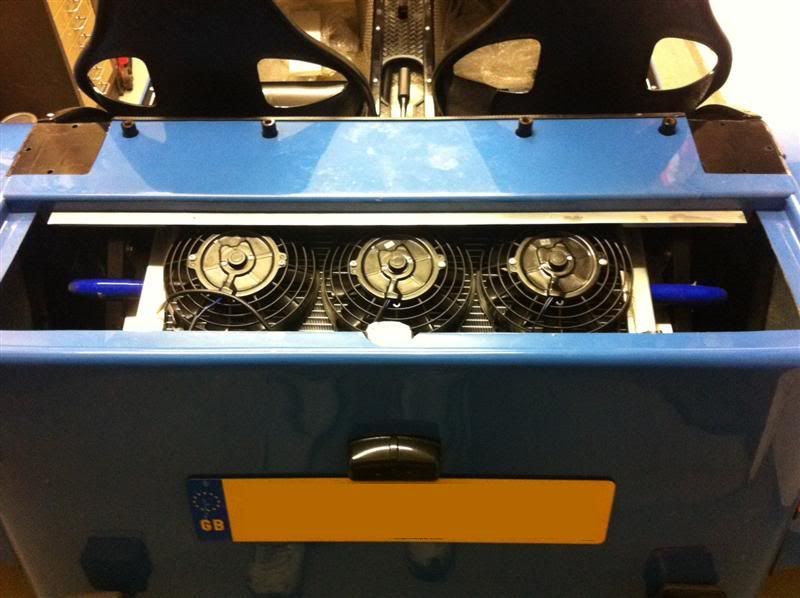
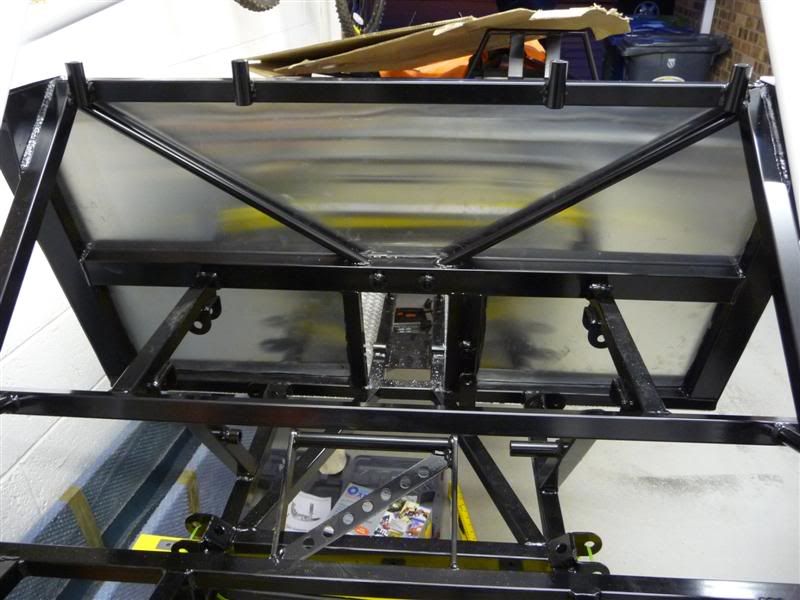
As I tidied the tools away for the night, I took the opportunity to rest the roll bar back in place, this is how it looks.
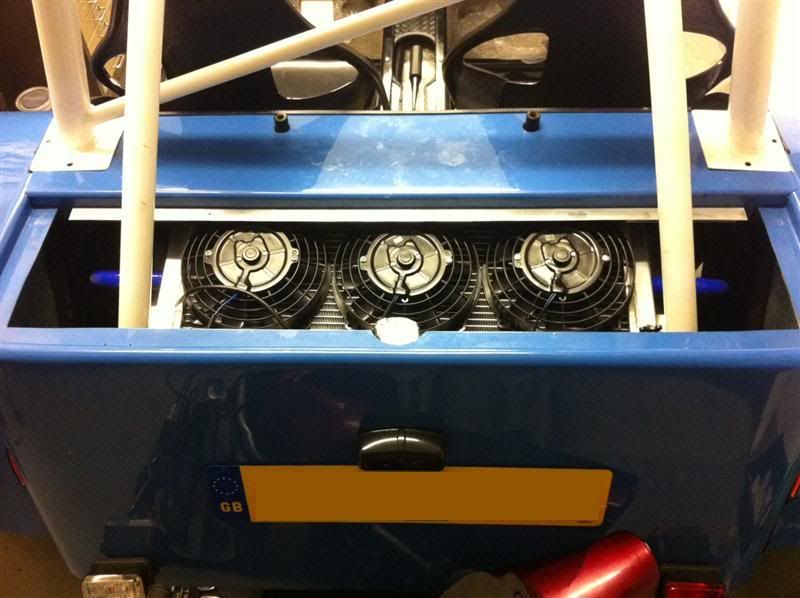
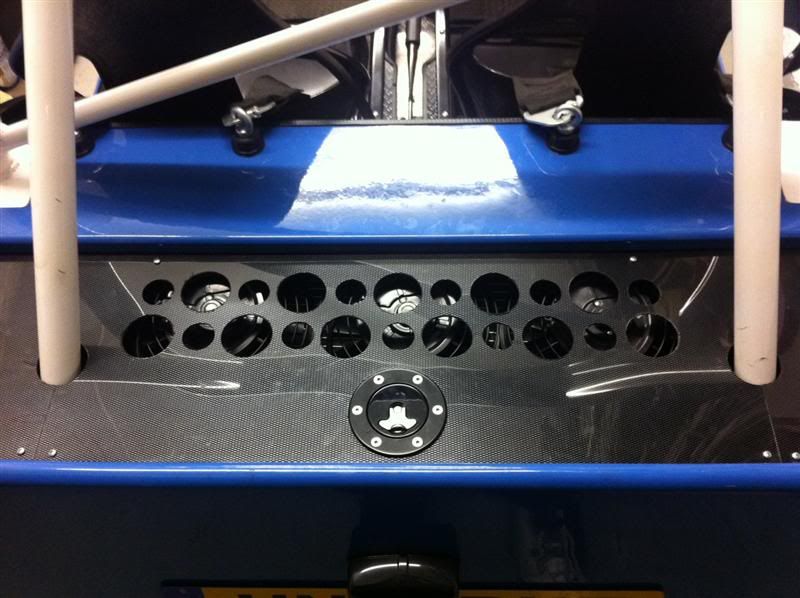
With the cover on the boot area of the car, this is all you can see of the radiator/fans inside. I'm planning on joining up the large and small
holes to make teardrop shaped vents, then meshing the holes from the underside, this will be done at the same time as the vents on the bonnet are
meshed up.
My DIY header tank has been pressure tested, found to be leak free and then installed
The cooling issues are now resolved , the new radiator in the boot has done the trick, on the move temps dont go above 90 deg C, through traffic temp
peaks at 95 deg C.
SausageArm - 22/1/12 at 08:43 PM
Racetech mirrors have now been fitted
SausageArm - 22/1/12 at 08:46 PM
To overcome the issue of not being able to press the clutch in with the lockup clutch while the engine is doing high rpm's, I have invested in
one of these

http://www.flatshifter.com/flat-shifter-expert/
The Flatshifter Expert quickshifter provides effortless full or part throttle clutchless upshifts and auto throttle blipped downshifts without using
the clutch, so the car should be a real pleasure to drive once I get this kit strapped on, it should make it a tad quicker on track too according to
Flatshifters claims.
The Flatshifter Expert kit is now fitted, tested it in the garage and the blipper worked a treat, with the engine at idle changing up and down the
gears without the clutch was easy, if a little jerky, but the fitting instructions did mention this.
I've been out in the car today, first drive with the Flatshifter on the car, going up through the gears is so quick it's fantastic! Changing
down the gears while carrying reasonable speed is silky smooth, at lower speeds it's not quite perfect but this can be fine tuned to your
personal preference.
All in all i'm a happy man
SausageArm - 22/1/12 at 08:48 PM
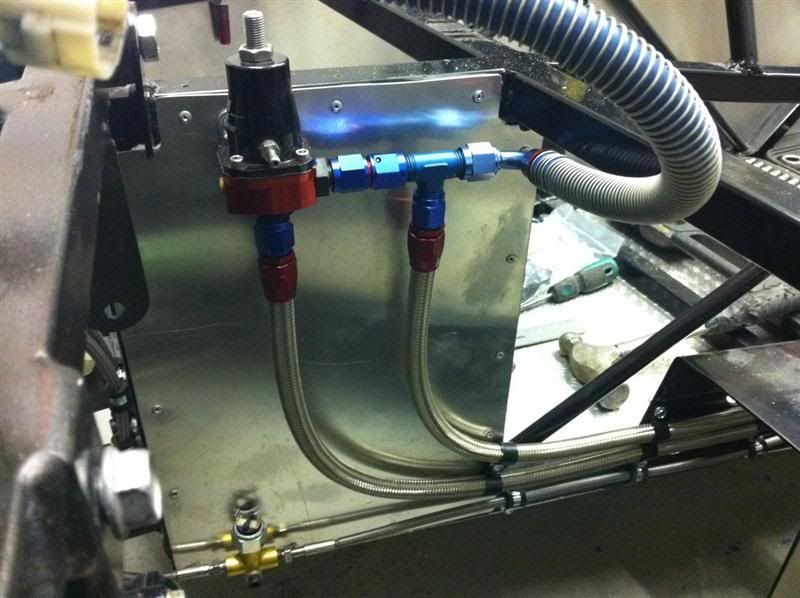
It was high time the horrid ratchet strap over the inlet manifold was removed, so without further ado it was taken off.
The motor/position sensor was also removed from the throttle bodies secondary butterflies, this made a nice space to allow some straps to be fitted to
secure the inlet manifold down.
Some aluminium strips were cut, bent and drilled, once fitted to the engine they look like this

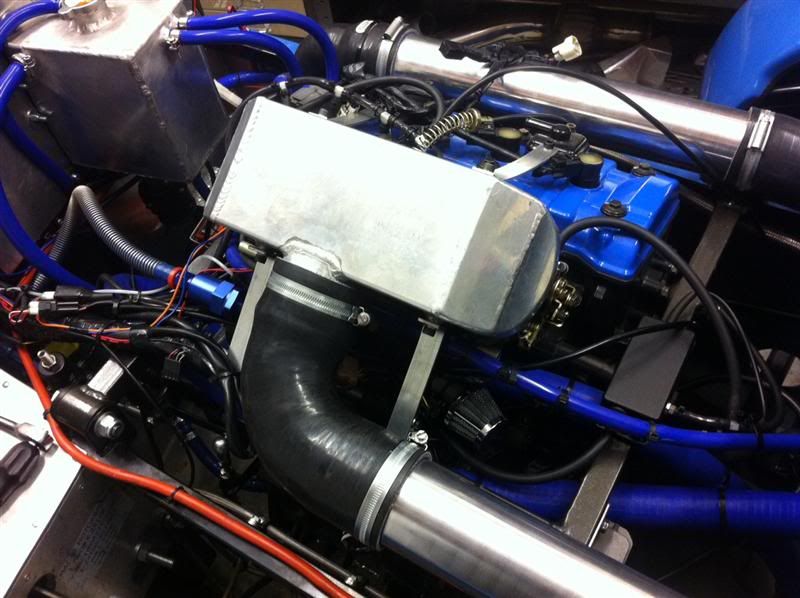
Looking at those last two photos, the wiring and vacuum hoses need some tidying because they look a right mess.
As agreed with Damien at Daytuner, the Power Commander has been fitted to the car but not connected up, that will be carried out when I get there.
Oil and water levels checked, tank filled up with V-Power, a set of NGK Laser Iridium spark plugs packed to be fitted prior to mapping, crash helmet
and warm clothing sorted, that's me set for the trip out to Daytuner in Harrogate tomorrow... fingers crossed the weathers good and the results
are even better!
SausageArm - 31/1/12 at 09:58 PM
A couple of videos from the mapping session, running 8psi (low boost)
Video 1 with a flame
Video 2 with more flames


