
Mx5 V6 project
clairetoo - 24/9/11 at 06:18 PM
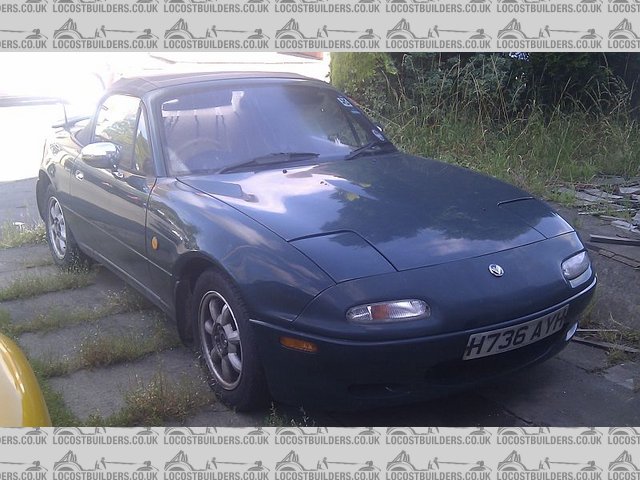
Not long ago I picked up a cheap Mx5 - so after a bit of a pause while I collected/made parts , I got stuck in !
I removed the whole front end - subframe , suspension and engine , and got busy in the shed......
As it arrived on my drive.......
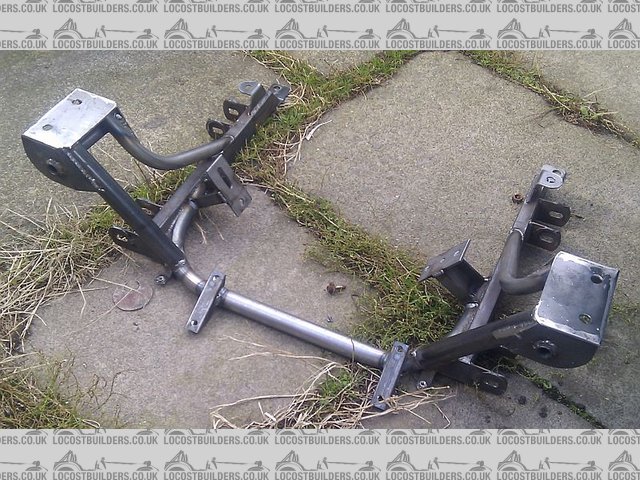
Shiny new subframe (what I made  )
)
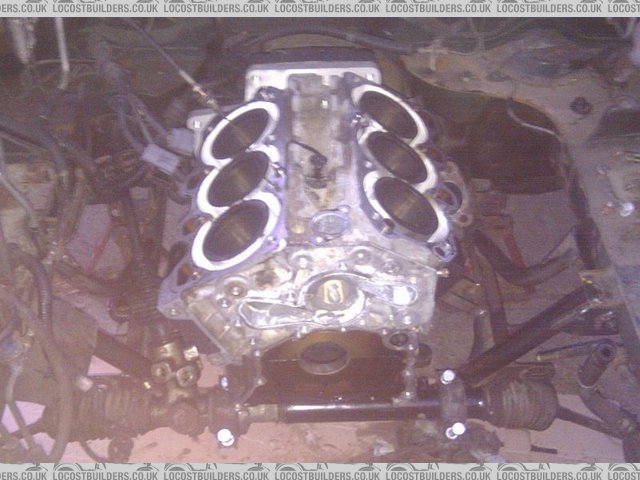
And with a bare block in place , so I could make some engine mounts
Engine mounts made today - to save time I cut down the stock NA mounts , then welded them to plates cut to fit the V6 block - and a shiny new steel
flywheel arrived from the states today .

In keeping with the low-cost approach to this project , today was indeed a good day - a guy just up the road from me with an Mx5 stopped by for advice
on how to change a stop-light bulb - and promptly donated a set of near-new 15 inch wheels and tyres he had in the shed after fitting 17"
ally's to his !
[Edited on 24/9/11 by clairetoo]
oldtimer - 24/9/11 at 06:31 PM
I am very envious of your ability to make stuff !............
Voodoo - 24/9/11 at 07:02 PM
That subframe is a nice looking piece!
M
Steve Hignett - 24/9/11 at 08:24 PM
Niiice....
jonno - 24/9/11 at 08:40 PM
I like the look of a V6 mx5, is going to be about the 200 bhp mark ? ... keep the updates coming 
Dangle_kt - 24/9/11 at 09:06 PM
shame you didnt buy that one that ended up going the scrappers! 
Beautifully made subframe. 
What v6 is it? Carbs or injection?
adithorp - 24/9/11 at 10:23 PM
I suspect it'll be on Claires usual 6 bike throttle body set-up.
clairetoo - 25/9/11 at 08:35 PM
quote:
Originally posted by adithorp
I suspect it'll be on Claires usual 6 bike throttle body set-up.
Yep - same old same old 
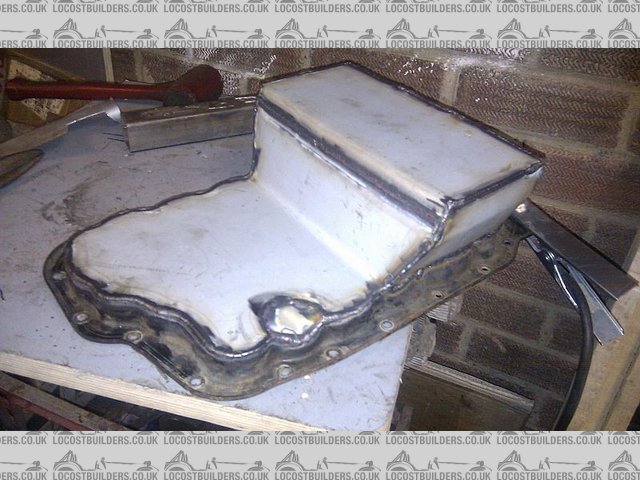
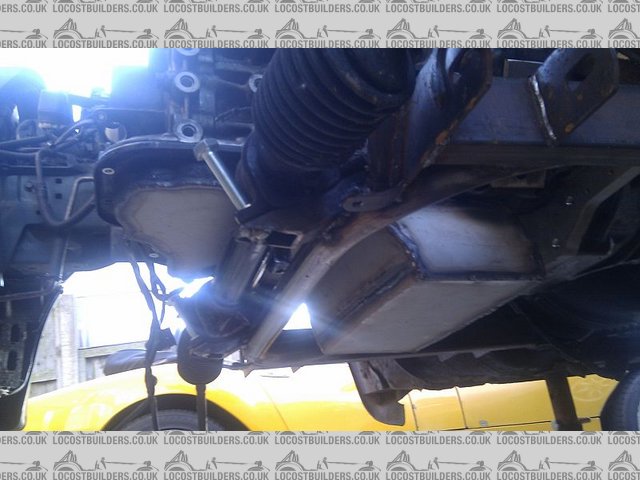
A bit more progress today - in between watching the F1 and falling asleep (while watching the F1......) I managed to get the sump chopped and re-made
to suit its new home - just a sump plug and re-positioned dipstick to add and I will be able to get on with the exhaust manifolds
Steve Hignett - 26/9/11 at 12:14 PM
Are you feelin alright???
(Cos looks like you've used NEW steel!!!)

Proby - 26/9/11 at 12:45 PM
Super duper, nice looking sub frame!
MikeRJ - 26/9/11 at 12:47 PM
quote:
Originally posted by Steve Hignett
Are you feelin alright???
(Cos looks like you've used NEW steel!!!)
The sump steel looks like it might have been donated by some kind of domestic appliance
Superb work though.
SeaBass - 26/9/11 at 01:19 PM
Ooh - nice work. MX5s are cropping up all over the place on this forum!
Does the MX5 box stay with that conversion?
clairetoo - 26/9/11 at 04:41 PM
quote:
Originally posted by Steve Hignett
Are you feelin alright???
(Cos looks like you've used NEW steel!!!)
Yep - all new steel , which I actually bought !
And the sump is made from some zintec that was left over from a job at work..........
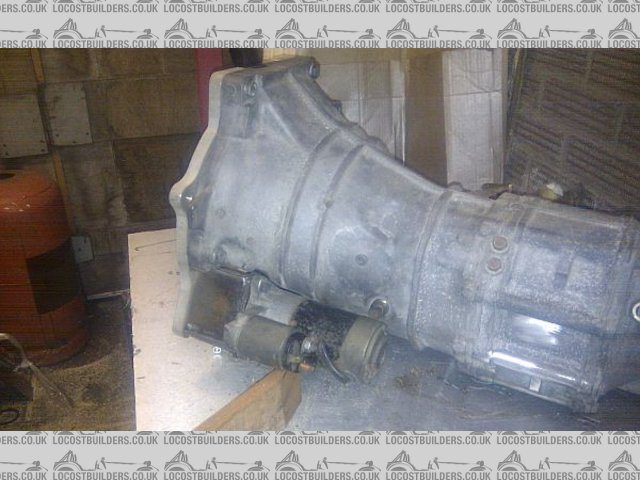
The conversion uses the Mx5 gearbox - I'm trying to put together a kit for easy installation of the Mazda V6 into an Mx5 , which would be the
subframe , adapter plate , engine mounts - and if I can find somewhere to get them made , exhaust manifolds .
clairetoo - 27/9/11 at 05:23 PM
I resisted the temptation to go for a blast in the Fury tonight - its warm , sunny , and I've got half a tank of gas..........but cars dont build
themselves 
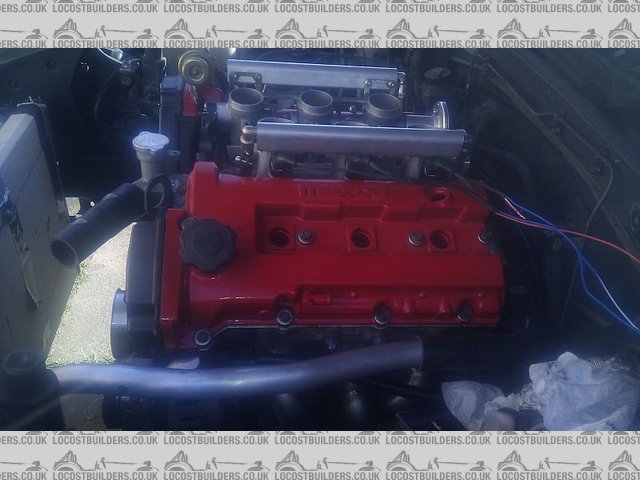
I fitted the new sump - and it went in a treat !
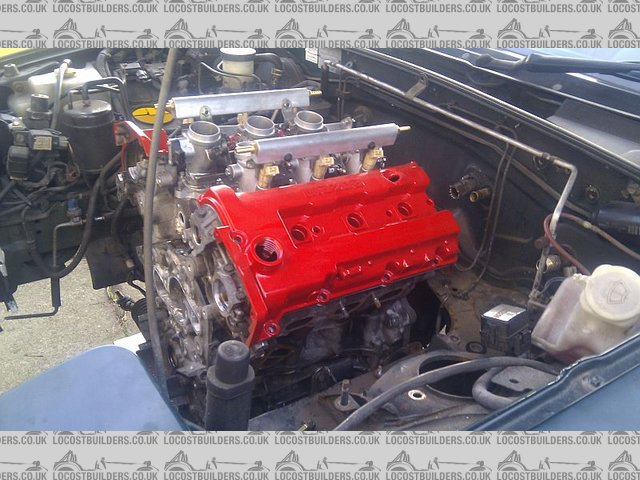
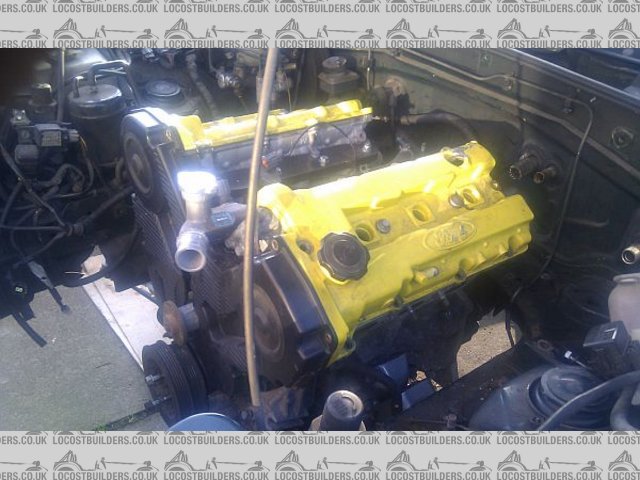
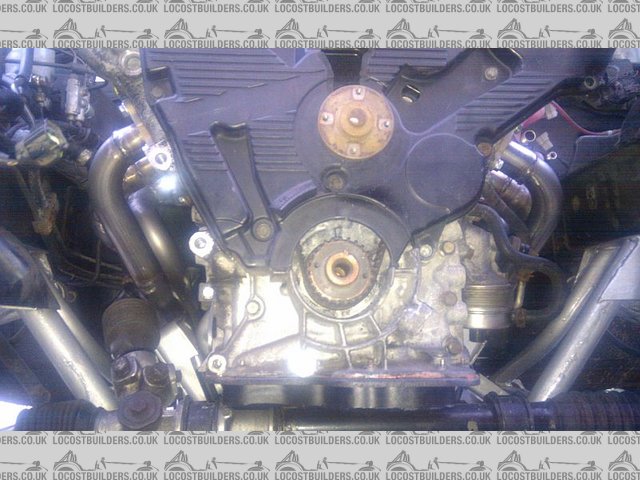
Then , I just had to see what it is going to look like as a whole engine - I needed to re-fit the heads to build the exhaust manifolds , so I sat a
few more bits on .
Wadda ya think ?
iank - 27/9/11 at 05:27 PM
quote:
Originally posted by clairetoo
Wadda ya think ?
Very nice, but I'm amazed how it looks lost in the engine bay.
mcerd1 - 27/9/11 at 05:29 PM
quote:
Originally posted by iank
quote:
Originally posted by clairetoo
Wadda ya think ?
Very nice, but I'm amazed how it looks lost in the engine bay.
thats what I was thinking - you'll need to do a V8 version next
clairetoo - 27/9/11 at 05:29 PM
quote:
Originally posted by iank
quote:
Originally posted by clairetoo
Wadda ya think ?
Very nice, but I'm amazed how it looks lost in the engine bay.
There is enough room in front of the engine to sit upright......I just checked clearance above the throttle bodies with the bonnet closed !
jonno - 27/9/11 at 05:43 PM
quote:
The conversion uses the Mx5 gearbox - I'm trying to put together a kit for easy installation of the Mazda V6 into an Mx5 , which would be the
subframe , adapter plate , engine mounts - and if I can find somewhere to get them made , exhaust manifolds .
Hmmm interesting, what sort or rough �'s you thinking if you go ahead ? even without exhaust manifolds
iank - 27/9/11 at 05:47 PM
If you can get away with charging half what the mini guys will pay for a subframe to put a K-series/Vauhall engine in then you'll do well with a
kit.
thefreak - 27/9/11 at 06:12 PM
Well a similar subframe from the states is $999 plus shipping etc! I recon �200 should do it
clairetoo - 27/9/11 at 06:22 PM
quote:
Originally posted by thefreak
Well a similar subframe from the states is $999 plus shipping etc! I recon �200 should do it
For one with stock Mx5 engine mounts , you are looking at $1095 - thats plus shipping , and import tax's - to give you some idea of how much that
is gonna hurt , I just got charged �28 import for a �63 flywheel
I've sold a few already - of both the adapters and subframes , and even got an order for a subframe from the states !
But they are a bit more than �200..................as my sig. says , I'll weld for food ( ) , but I dont work for free !
deltron63 - 27/9/11 at 06:36 PM
quote:
Originally posted by iank
quote:
Originally posted by clairetoo
Wadda ya think ?
Very nice, but I'm amazed how it looks lost in the engine bay.
I wish i had that amount of space

Description
Ninehigh - 27/9/11 at 07:00 PM
I wish I had an MX5... and whatever that V6 engine is... and some money for the kit
Then we'll see who has a "girly car" (says the missus)
clairetoo - 16/1/12 at 09:21 PM
Just to let you all know - this hasnt died a death , but it has turned into a bit of refurbishment nightmare
I do seem to spend far too much time making stuff , and getting nowhere , but over the last couple of weeks I have made real progress - the front end
is now going together , all shiny and loaded with new ball joints , as well as a properly de-powered rack (2.5 turns lock to lock )

The `bones and shocks did look like they had been in a canal for the last ten years - some idiot had undersealed the car , and included all the
suspension (over what was probably no more than surface rust at the time) . This `treatment' had allso destroyed every rubber component
Dangle_kt - 16/1/12 at 10:19 PM
glads its coming on well again.
I'd seriously consider one of these with a v6, of course turbo/supercharger is another option, but a v6 setup.
[Edited on 16/1/12 by Dangle_kt]
clairetoo - 29/1/12 at 07:58 PM
A bit more progress this week - I made the oil pickup pipe , welded the sump plug in and added the re-positioned dip-stick . Just a quick leak test
and a coat of paint and it will be fitted to the engine thats going into the car .
The exhaust manifolds still need a bit of finishing though.......
[Edited on 29/1/12 by clairetoo]
clairetoo - 11/3/12 at 05:12 PM
Loads of progress this weekend - well , the sun has been shining at last !
I got the oil pickup mounted , and test fitted the starter and adapter plate , as well as finishing the clutch slave cylinder setup .
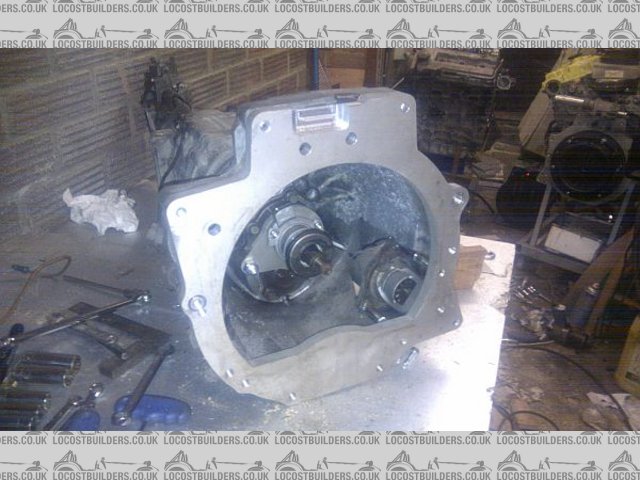
Then , after a test fit to check starter engagement (perfect ! ) , it was out with the trusty engine crane , and in went the engine .......
Now I can get on with finishing the exhaust manifolds , fitting the alternator - I've decided to use the Mx5 one as it saves messing with wiring
- and sorting the plumbing out .
[Edited on 11/3/12 by clairetoo]
rb968 - 11/3/12 at 06:35 PM
Looking good Claire.
Bet you've been asked this a few times before....but will one of those fit in an MK Indy chassis?
Rich
clairetoo - 11/3/12 at 06:43 PM
quote:
Originally posted by rb968
Looking good Claire.
Bet you've been asked this a few times before....but will one of those fit in an MK Indy chassis?
Rich
Cant see any reason not to try
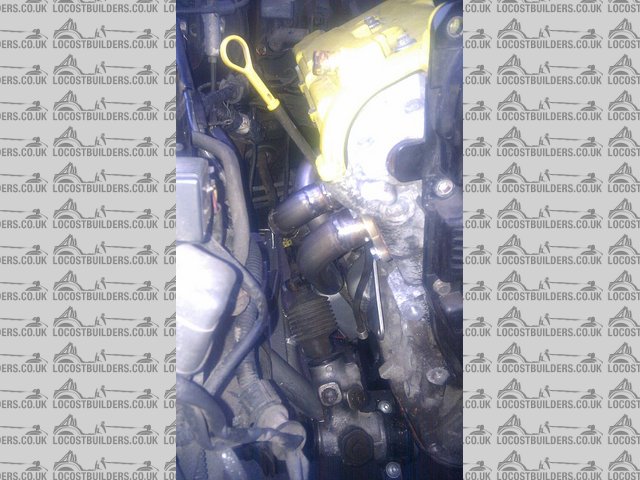
clairetoo - 13/3/12 at 10:28 PM
I found a small problem tonight while tackling the starter wiring.............tonight was the first time I had fitted the starter with the complete
engine and box in the car , and the solenoid hit the tunnel side
The easy answer was a small `adjustment' to the tunnel.................or take it all out and re-make the engine mounts to move it across a few
mm...............
So after a session with a hammer , in it went , on went the re-worked wiring , connect the battery .................................... and it turns
over on the key
To say that I am a happy bunny is an understatement !
alistairolsen - 15/3/12 at 07:08 PM
Really like the look of this, the v6 suits the roadster theme perfectly and 200bhp is just about spot on for the car. Shame they didnt do it from the
factory really!
Feel for you on the underseal too, it should be outlawed IMHO.
clairetoo - 24/3/12 at 07:44 PM
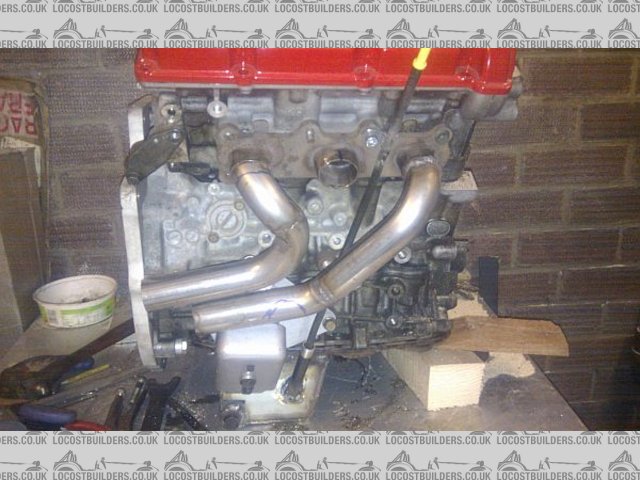
Since the post man did the business this morning and turned up laden with stainless bends and tube , I got well stuck in and made these -
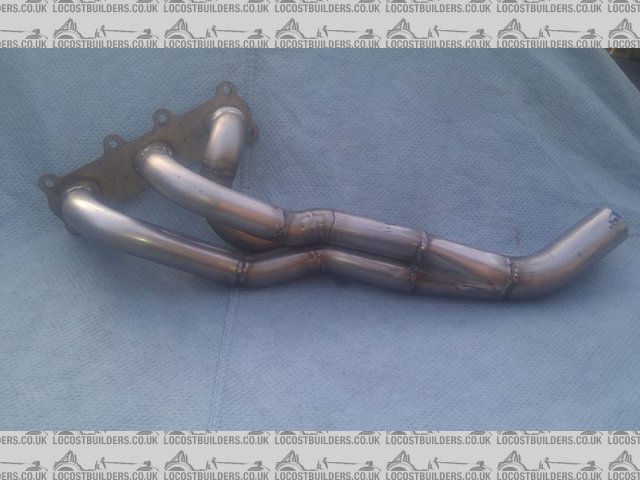
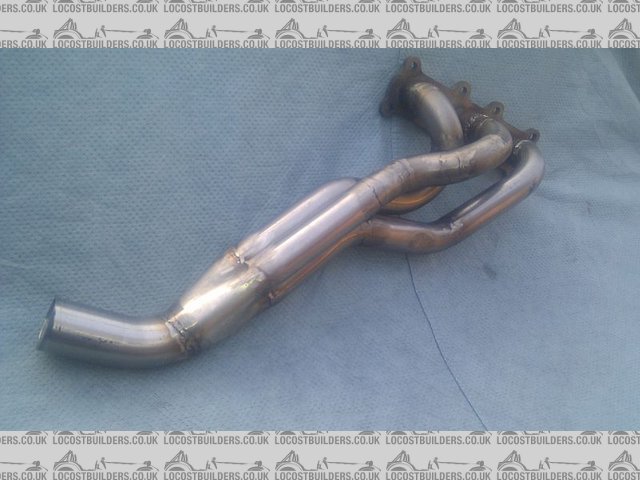
I did have to pop in to work first thing to borrow a welding mask - mine packed up , and after only twenty years
big_wasa - 24/3/12 at 08:14 PM
You have way to much talent
Benzine - 24/3/12 at 08:42 PM
great thread, top stuff!
what TBs are you using, claire? 2 sets of 3 cylinder TBs? daytona 675/955?
[Edited on 24-3-2012 by Benzine]
clairetoo - 24/3/12 at 08:57 PM
quote:
Originally posted by Benzine
great thread, top stuff!
what TBs are you using, claire? 2 sets of 3 cylinder TBs? daytona 675/955?
[Edited on 24-3-2012 by Benzine]
I'm using two sets of T595 TB's , my `standard' setup
clairetoo - 10/4/12 at 07:37 PM
Now that the rubbish Easter weather is over , I got under the bonnet tonight after work and fitted the exhaust manifolds , and oil filter
`bracket' (along with the stock oil to water cooler)
They were a bit of a struggle , getting past the steering column was not easy , but as the first complete manifolds I have ever made I am quite
chuffed
[Edited on 10/4/12 by clairetoo]
clairetoo - 17/4/12 at 09:47 PM
Just a little update - some alloy bar I had been waiting a week for arrived today , so a quick session on the lathe saw these finished tonight -
I'm trying to resist the urge to make an alloy idler pulley to complete the set , but it would finish it off nicely
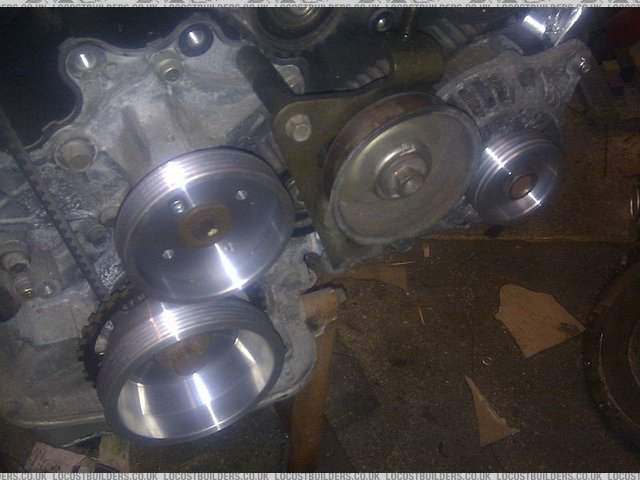
[Edited on 17/4/12 by clairetoo]
mcerd1 - 18/4/12 at 02:34 PM
very shinny
DIY Si - 24/4/12 at 02:59 PM
Does that mean you have enough ally to make me a set too?
Oh, I know I asked a few weeks ago and since forgot, but any chance of either a set of those exhaust flanges, or the drawing for them?
clairetoo - 24/4/12 at 08:44 PM
quote:
Originally posted by DIY Si
Does that mean you have enough ally to make me a set too?
Oh, I know I asked a few weeks ago and since forgot, but any chance of either a set of those exhaust flanges, or the drawing for them?
I just happen to have accidentally over-ordered.......so , yep , no problem to make more Allso the ally has arrived for your flywheel , I'll
be making a start on that very soon
If I have your email , I'll bung you that .dxf , again no prob
DIY Si - 25/4/12 at 03:37 PM
Cheers Claire. U2U on it's way!
clairetoo - 1/5/12 at 08:09 PM
Slow progress here........but progress never the less ! The weather is making it kinda hard to do much - I really need to get a heater in the shed
But tonight , the postman brought me an M3 tap and 2.5mm drill , so I fitted the trigger wheel to the bottom pulley , and finished off the alternator
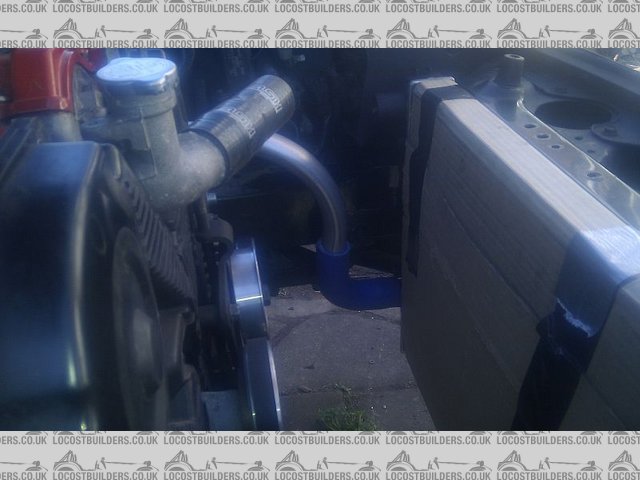
mount - heres the result
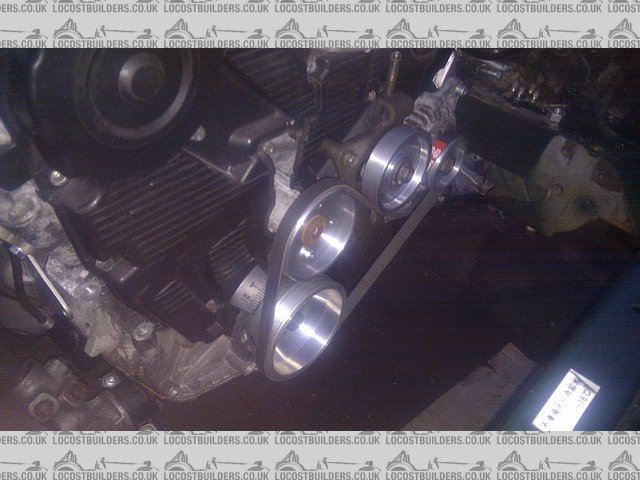
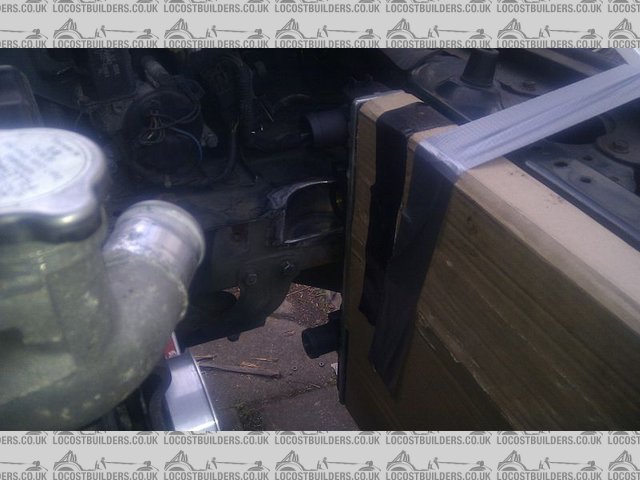
My new radiator arrived as well - but some idiot has put a chassis rail in the way of the fan switch
So a bit of `modification' needed
[Edited on 1/5/12 by clairetoo]
[Edited on 1/5/12 by clairetoo]
theduck - 1/5/12 at 08:17 PM
Love this build and your ability to machine/make parts!
clairetoo - 12/5/12 at 09:36 PM
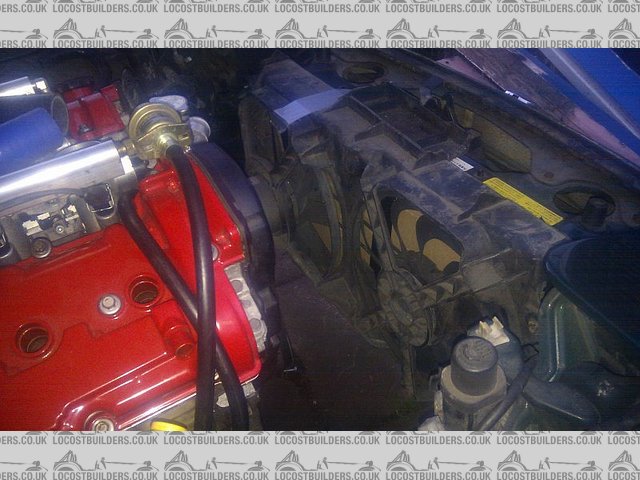
The radiator is now in place - I had to cut all the stock mounts off , trim a small amount from the drivers side rail (then seam weld the missing
corner) , and cut a recess in the left side to clear the fan switch (which I filled in with some 2mm steel)
With the rad in place , I then bent a bit of 1 1/4 alloy pipe to run down the left side from the thermostat connection to the bottom hose fitting on
the rad .
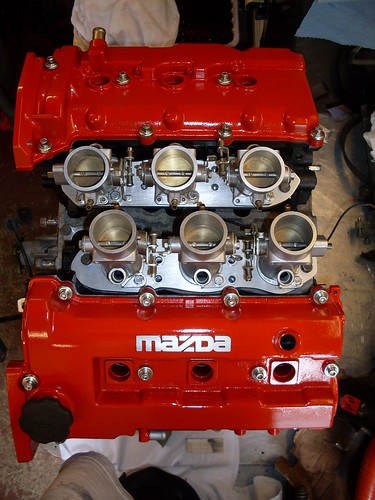
I allso got the re-painted cam covers on , fitted the throttle bodies and finished the linkages , fitted the FPR and started on the fuel pipes , and
finished off the alternator wiring .
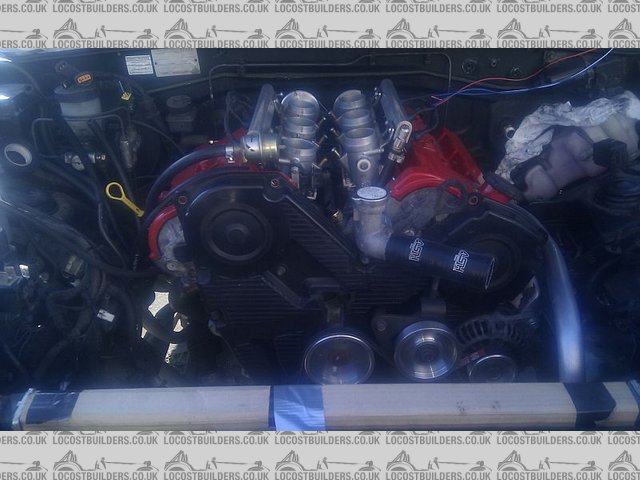
Quite a successful day - and if the sun shines , I'm hoping to get the exhaust finished tomorrow 
DIY Si - 16/5/12 at 02:37 PM
What spacing are your ITBs at Claire? My body for cylinder 1 doesn't have room to fit the TPS on it, but yours does.
clairetoo - 16/5/12 at 08:34 PM
The ITB's are in line with the ports - 97mm centers - but the TPS has been rotated 180 degrees (by machining a second flat on the spindle dead
opposite the original one)
This allows the TPS to fit at the front - my early setups had the linkage at the front .
clairetoo - 16/5/12 at 08:50 PM
Since I decided to use a Golf Vr6 radiator , I figured I may as well use the fans to go with it as well - so a quick visit to ebay Sunday morning
netted a complete slam panel , with twin fans and a rad thrown in , for the princely sum of �12
A quick session with the jigsaw to cut it down to a usable state and it now fits - still a couple of brackets to sort , as well as a bit of tidying up
- but the plan to try and make it all look like it left the factory with this engine in is still on track
Next bit to work out - anybody know where I can find the Golf 2.8 Vr6 fan wiring ? It has a four pin fan switch , as well as a four pin connection to
the fan motor.........
DIY Si - 19/5/12 at 01:00 PM
quote:
Originally posted by clairetoo
The ITB's are in line with the ports - 97mm centers - but the TPS has been rotated 180 degrees (by machining a second flat on the spindle dead
opposite the original one)
This allows the TPS to fit at the front - my early setups had the linkage at the front .
Ah, that'll be why then. Was thinking I'd somehow fitted mine differently. Is there any advantage to having the TPS at the front?
clairetoo - 19/5/12 at 01:43 PM
quote:
Originally posted by DIY Si
quote:
Originally posted by clairetoo
The ITB's are in line with the ports - 97mm centers - but the TPS has been rotated 180 degrees (by machining a second flat on the spindle dead
opposite the original one)
This allows the TPS to fit at the front - my early setups had the linkage at the front .
Ah, that'll be why then. Was thinking I'd somehow fitted mine differently. Is there any advantage to having the TPS at the front?
The TPS was moved to allow the linkage to go at the back , where there is loads more room - thanks go to Chris (ITI_UK) for this mod
MX5V6 - 21/5/12 at 03:43 PM
following with interest Claire (MAZLOC from MX5Nutz)
Can you U2U me with the cost of a pair of those manifolds please, they look great!
clairetoo - 21/5/12 at 04:01 PM
quote:
Originally posted by MX5V6
following with interest Claire (MAZLOC from MX5Nutz)
Can you U2U me with the cost of a pair of those manifolds please, they look great!
I dont know if I could make another set........those were the first manifolds I have ever made , and they are now on the car so not too easy to copy
MX5V6 - 21/5/12 at 04:31 PM
quote:
Originally posted by clairetoo
quote:
Originally posted by MX5V6
following with interest Claire (MAZLOC from MX5Nutz)
Can you U2U me with the cost of a pair of those manifolds please, they look great!
I dont know if I could make another set........those were the first manifolds I have ever made , and they are now on the car so not too easy to copy
do you have the dims for the manifold flanges?
clairetoo - 24/5/12 at 09:49 PM
All it took was a few warm dry evenings - and I now have a finished exhaust !
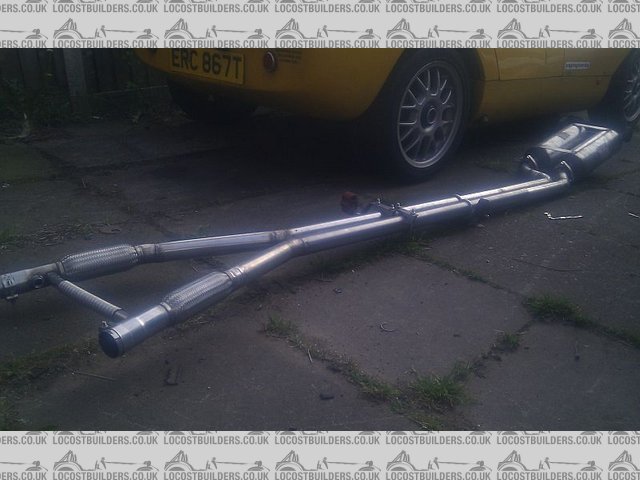
2" all the way to the back , then two small box's (same as on my Fury) , it just needs a small cutout in the center of the bumper
DIY Si - 25/5/12 at 10:37 AM
That's looking really good!!
scootz - 25/5/12 at 11:04 AM
adithorp - 25/5/12 at 11:23 AM
Those look erm... NOISEY! Not sure that'll fit your image.
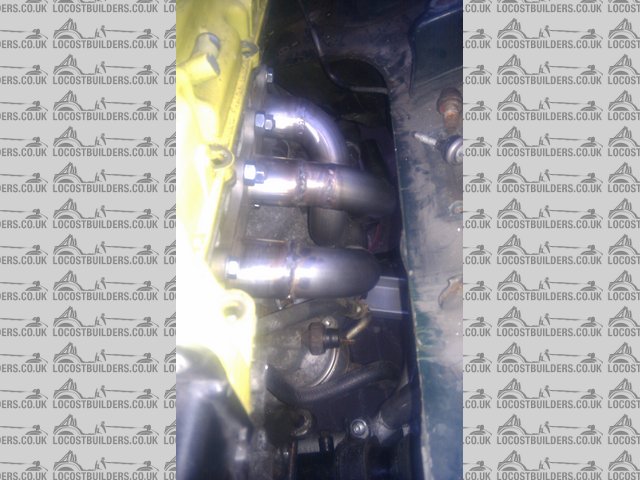
clairetoo - 30/5/12 at 09:32 PM
quote:
Originally posted by adithorp
Those look erm... NOISEY! Not sure that'll fit your image.
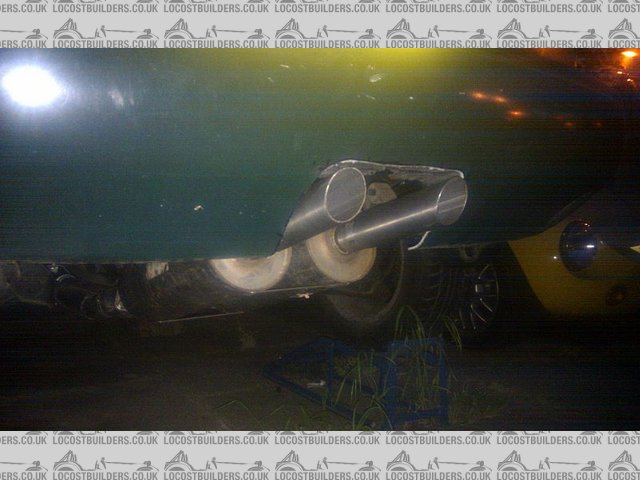
And this is where the noise will come out........
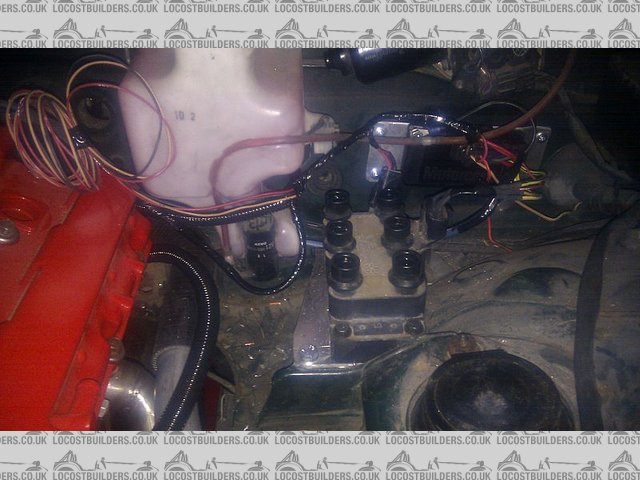
There has been a lot of progress over the last two (sunny ) weeks - but nearly all of it is electrics - not exactly exiting stuff , but the wiring
is about 90% done (I'm just waiting on a set of plug leads and a crank sensor)
I have allso got the coil and edis mounted and wired - with all the engine wiring running through a spare hole left by deleting the air con .
mcerd1 - 31/5/12 at 01:01 PM
so how much is left to do before you can fire it up ?
clairetoo - 31/5/12 at 04:03 PM
quote:
Originally posted by mcerd1
so how much is left to do before you can fire it up ?
Not much.....I just picked up my new custom Magnacore leads , the posty has delivered my VR sensor , and I have the relays and fuse box sitting on the
kitchen table
DIY Si - 1/6/12 at 08:08 AM
Claire,
How much was it to get your cam covers powder coated/painted? Thinking about doing the same for mine since I've got the heads off for some
porting.
clairetoo - 3/6/12 at 01:52 PM
quote:
Originally posted by DIY Si
Claire,
How much was it to get your cam covers powder coated/painted? Thinking about doing the same for mine since I've got the heads off for some
porting.
The covers (like just about everything else on my cars....) were a DIY job - de-grease , high power alloy cleaner , and a couple of coats of
Plasticoat red - then bake in the oven for a couple of hours
maccmike - 3/6/12 at 02:39 PM
I could marry you :-)
DIY Si - 4/6/12 at 09:20 AM
quote:
Originally posted by clairetoo
quote:
Originally posted by DIY Si
Claire,
How much was it to get your cam covers powder coated/painted? Thinking about doing the same for mine since I've got the heads off for some
porting.
The covers (like just about everything else on my cars....) were a DIY job - de-grease , high power alloy cleaner , and a couple of coats of
Plasticoat red - then bake in the oven for a couple of hours
I suspected as much!! Does Plasticoat go straight onto ally, or does it need etch priming first?
clairetoo - 4/6/12 at 11:04 AM
I rely on the alloy cleaner to key the surface (its the stuff you are supposed to dilute with water , but I just use it neat) . The covers on my Fury
were done the same way four years ago , and the paint has stayed put !
clairetoo - 5/6/12 at 02:54 PM
After 24 hours of head scratching , and trying to get it to start - I found another page in my notes , swapped the coil connections around - and it
started !
I didnt run it for long - I left the rad off to ease checking the timing - but damn it feels good to hear it after so much work
First start video - at last !
Think I may get a bit drunk tonight - at the moment I'm just sitting here with the broadest grin.......ever
MX5V6 - 5/6/12 at 02:59 PM
That looks and sounds great, well done Claire!!!
DIY Si - 5/6/12 at 04:53 PM
Well done that woman!!
mcerd1 - 6/6/12 at 11:33 AM
very
[Edited on 6/6/2012 by mcerd1]
scootz - 6/6/12 at 12:38 PM
Sounds great!
MX5V6 - 11/6/12 at 08:15 AM
quote:
Originally posted by clairetoo
Since the post man did the business this morning and turned up laden with stainless bends and tube , I got well stuck in and made these -
I did have to pop in to work first thing to borrow a welding mask - mine packed up , and after only twenty years
Claire, who do you get your tubing from please?
clairetoo - 11/6/12 at 09:47 PM
quote:
Originally posted by MX5V6
Claire, who do you get your tubing from please?
Ebay............
MX5V6 - 12/6/12 at 01:24 PM
quote:
Originally posted by clairetoo
quote:
Originally posted by MX5V6
Claire, who do you get your tubing from please?
Ebay............
Ta!
clairetoo - 13/7/12 at 08:33 PM
Well.......I'm sat here watching the rain , with a silly grin and a large JD and coke ......... The day has finally come that I was beginning to
wonder would ever happen..........................IT'S OFF THE STANDS , ON ITS OWN WHEELS , AND I DROVE OT OFF THE RAMPS UNDER ITS OWN POWER ! !
Just one slight mishap.......I forgot the servo isnt connected , so the brakes are crap - and I ran straight into some firewood piled on the drive and
cracked my Racing Beat front spoiler
I have to go into work tomorrow morning , but I see a quick test drive around the block as soon as I get home
owelly - 13/7/12 at 09:11 PM
Good work Claire. It's always a nice feeling when something you've done yourself, works as it should!
DIY Si - 15/7/12 at 09:41 AM
Well done Claire!!
MX5V6 - 18/7/12 at 11:52 AM
Any updates Claire?
MX5V6 - 21/7/12 at 11:03 AM
Claire, which fuel injectors did you use in your ITB setup please?
clairetoo - 21/7/12 at 11:38 AM
quote:
Originally posted by MX5V6
Claire, which fuel injectors did you use in your ITB setup please?
I've used Vauxhall V6 injectors in all my conversions .
No Major progress to report - I seem to have sorted the rough running / TPS signal noise issue by switching to shielded cable , and still have the fan
wiring to do , but this last week has been spent getting my Fury MOT ready
And it passed this morning , so I'll be off around the alps soon
MX5V6 - 21/7/12 at 11:46 AM
Cheers Claire, do you have any pics of your current ITB setup? Any tips on mounting them on the v6?? Thanks!
Also, which Vauxhall injectors please and do you mod the Vauxhall injector wiring loom! Cheers!
[Edited on 21/7/12 by MX5V6]
[Edited on 22/7/12 by MX5V6]
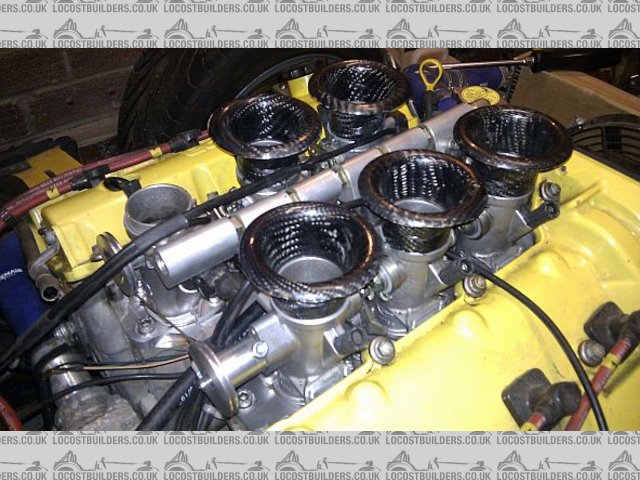
DIY Si - 27/7/12 at 11:56 AM
I think Claire and I mount them in the same way, although I've taken the heads off my KLDE to open the ports up a little as I'm using
throttle bodies from a Sprint RS, which I think might be a bit different from Claire's ones. I've not seen the two types side by side to
check though.
Anyway, I've used a 12mm thick ally plate to correct both the bolts holes and the port shapes. Easy enough to do by hand, but time consuming. I
don't have half the toys Claire does in her shed, so I have to make do with using a 1" hole saw in my pillar drill and then finishing the
shapes off by hand with a carbide burr in my drill and files. I also used the drill and burr to open the heads up to match the shape better, as the
KLDE heads are left with quite an obstruction. You might be able to move the ITBs out slightly to eliminate the worst of this, but I didn't want
the injectors any closer to the cam covers. This will also mean I have to make my own gaskets for the plate to head side of things, but the Triumph
gaskets can be used on the ITB side, as that's what I've cut them back to.
This is what mine look like now. They're nearly finished as I just need to extend the throttle linkages and persuade Claire to make me one of her
bank linkages.
Have a look here for the rest of my photos if
they're of any help. They're all viewable in much bigger sizes if needed too.
MX5V6 - 27/7/12 at 03:30 PM
Many thanks, some really good images there!
I was thinking of mounting my ITB's the other way round so they fire into the recess in the inlet manifold? What do you think?
DIY Si - 27/7/12 at 08:57 PM
Claire used to mount hers that way, but I'm not sure why she changed. There's nothing stopping you doing it, but the fuel rail gets a bit
fiddly as it will need to feed both banks.
MX5V6 - 28/7/12 at 07:14 AM
I saw a picture of her single fuel rail setup, was wondering what fuel rail she used as it looked like it was a bolted together with each piece
feeding an injecror!
mads - 28/7/12 at 11:59 AM
quote:
Originally posted by MX5V6
I saw a picture of her single fuel rail setup, was wondering what fuel rail she used as it looked like it was a bolted together with each piece
feeding an injecror!
I believe she made her own fuel rail to meet her needs
DIY Si - 28/7/12 at 05:47 PM
quote:
Originally posted by MX5V6
I saw a picture of her single fuel rail setup, was wondering what fuel rail she used as it looked like it was a bolted together with each piece
feeding an injecror!
It didn't look like that, it was like that! Must've been a right ball ache to sort out. With the injectors on the outside things are much
simpler, and the ITBs sit at a nicer angle for the ports too.
clairetoo - 5/8/12 at 06:52 PM
I did the new throttle body setup as a bit of an experiment - the angled adapter plates where a sod to make , but it put the 'bodies dead
straight over the ports . On full throttle you can see the inlet valves......!
I don't think there are any major issues with the 'normal' setup , its just so much easier to make . I will be getting the adapter
plates cad drawn as soon as I get back from my car wrecking holiday , so making the ITB sets will get a lot easier .
rb968 - 5/8/12 at 07:20 PM
Good to hear!
Hope your enjoying the holiday. Sorry to hear its been a bit of a disaster on the car front .
Rich
DIY Si - 5/8/12 at 09:31 PM
Have you got any pics of your latest set up to hand when you get back? I'm curious to see the difference between our set ups.
MX5V6 - 6/8/12 at 10:01 AM
quote:
Originally posted by DIY Si
Have you got any pics of your latest set up to hand when you get back? I'm curious to see the difference between our set ups.
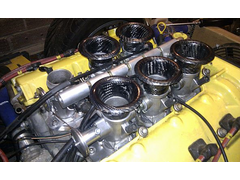
New bodies !
This is the one that got me thinking!
DIY Si - 6/8/12 at 09:46 PM
Ah, I think I'd seen that pic before, but hadn't clocked the upright ITBs as I thought it was the set up I'd seen before with the flat
plates and angled bodies. Be good to see my set up and Claire's side by side to see how they compare. I think hers is easier over all, as it
doesn't involved pulling the heads, but mine gives a slightly straighter shot at the valves and some very light porting. Overall though, if I
hadn't intended pulling my heads from the start, I suspect I'd go Claire's route. But since otherwise the engines are the same, bar the
exhaust manifold design (she's got way more room to allow longer primaries), we'll have to have a dyno run one day!
MX5V6 - 29/8/12 at 02:32 PM
quote:
Originally posted by clairetoo
I did the new throttle body setup as a bit of an experiment - the angled adapter plates where a sod to make , but it put the 'bodies dead
straight over the ports . On full throttle you can see the inlet valves......!
I don't think there are any major issues with the 'normal' setup , its just so much easier to make . I will be getting the adapter
plates cad drawn as soon as I get back from my car wrecking holiday , so making the ITB sets will get a lot easier .
What angle did you machine the adapter plates to?
clairetoo - 29/8/12 at 05:12 PM
Sorry to say I just dont know - I just eyeballed a throttle body , then set the 20mm thick plate in the lathe so it looked about right.........a bit
of trial and error
The hardest part was making a second plate to match
MX5V6 - 29/8/12 at 05:16 PM
No problem! Best engineering is by the mk1 eyeball!! Have you got the drawings for the throttle cams?
Liam - 29/8/12 at 07:25 PM
Loving this project, Claire. I already want to ditch my old Honda and have one of these with all your bits when I resume my project.
Apologies if you've posted before, but do you know what the engine weighs and roughly how much power you expect to make when you're up and
running? Will it be Megasquirted?
clairetoo - 29/8/12 at 07:58 PM
I weighed a bare engine at roughly 110 kgs - and theres not much to add to that (ally flywheel , 3 kgs , ally front pulley set another 3 kgs , bike
throttle bodies - probably lees than 4 kgs)
One identical to my Fury setup made 208 @ 7300 - I'm expecting a few more due to proper tubular exhaust manifolds .
I've had to put the project on hold for a while - all it needs is insurance , mot and tax.........but I am sitting here with no front teeth
wondering where the money is coming from to sort them out
MX5V6 - 22/9/12 at 07:25 AM
Any more progress Claire?
scootz - 22/9/12 at 08:25 AM
On the car... or on the teeth?
clairetoo - 22/10/12 at 07:21 AM
quote:
Originally posted by MX5V6
Any more progress Claire?
After a bit of faffing about , which included stealing the throttle bodies and megasquirt off my Fury (a dead gearbox and snapped cambelt mean its not
going anywhere for a while.....) , its now insured , MOT'd , and taxed !
Its on the road at last - let the fettling and tinkering begin
D Beddows - 22/10/12 at 09:32 AM
Resistance is pretty futile with this isn't it! I will be interested in how much a full kit costs when you've ironed out all the wrinkles
- if it all comes in the same or less than a half decent turbo install for the standard engine I'm probably interested! - 200 n/a bhp with
throttle bodies any day over a turbo
MX5V6 - 22/10/12 at 11:58 AM
quote:
Originally posted by clairetoo
quote:
Originally posted by MX5V6
Any more progress Claire?
After a bit of faffing about , which included stealing the throttle bodies and megasquirt off my Fury (a dead gearbox and snapped cambelt mean its not
going anywhere for a while.....) , its now insured , MOT'd , and taxed !
Its on the road at last - let the fettling and tinkering begin
How is your hand?
clairetoo - 22/10/12 at 12:46 PM
quote:
Originally posted by MX5V6
How is your hand?
On the mend
clairetoo - 29/10/12 at 09:11 AM
I've now put over 500 miles on it , and I dont like it .............I PIGGIN' LOVE IT
Smooth , quiet , civilized - all thing I wasnt quite expecting , and when the loud pedal is slapped - a total hooligan !

This might just persuade me to finally sell my Fury
imp paul - 29/10/12 at 09:24 AM
i hope your hand is getting better Claire the mx 5 is awesome i wish i had your skills
clairetoo - 9/11/12 at 09:05 PM
Took it out today , a friend shot some video - only sound , but you get the picture
http://www.youtube.com/watch?feature=player_embedded&v=vg9zZGOBRi8
Dangle_kt - 9/11/12 at 10:31 PM
quote:
Originally posted by clairetoo
Took it out today , a friend shot some video - only sound , but you get the picture
http://www.youtube.com/watch?feature=player_embedded&v=vg9zZGOBRi8
there isn't a petrol head around who at 43 seconds in won't go.... "PHWOARRRR!!!!"
superb.
Psuedo Clarkson is a bit annoying mind.
SeanStone - 26/11/12 at 08:58 AM
Have you noticed much of a difference in handling with the bigger lump in there?
clairetoo - 26/11/12 at 09:22 AM
While it may be a bigger lump , its actually lighter than the 1.6 its replaced - with all the changes I've made I've lost something like 20
kgs off the front end as well as stiffening things up a bit .
I feels pretty good , but I only drove it once before changing everything........
D Beddows - 26/11/12 at 09:35 AM
Oh heavens........... - how much?
clairetoo - 26/11/12 at 09:48 AM
Well........the complete `dressed' engine is 4 kgs lighter , but that is stock - I hace a lighter flywheel and ally pullies , plus I've
removed the air con and power steering . The tubular subframe is another 7 kgs lighter .
Add to all that , the new exhaust is probably lighter as well
D Beddows - 26/11/12 at 09:50 AM
no, I meant how much am I going to pay you next year for the bits to get one in my car
clairetoo - 26/11/12 at 09:58 AM
quote:
Originally posted by D Beddows
no, I meant how much am I going to pay you next year for the bits to get one in my car
Probably less than putting a turbo in there
The only bit missing from doing a complete kit is the exhaust - I've no idea where to get mine copied at sensible money
D Beddows - 26/11/12 at 10:01 AM
Have a think about a price Claire wont be till next year but it's either a turbo or this.......... and this wins by quite a long way! Would be
good to have a rough target to save towards
pewe - 26/11/12 at 11:30 AM
"The only bit missing from doing a complete kit is the exhaust - I've no idea where to get mine copied at sensible money"
There's a guy called Dave Tyler in Swindon did mine - not the cheapest but did a great job.
I think this is his current location:-
Unit 2 Woottonfields Farm, Marlborough Road, Swindon, Wiltshire SN4 7SA
Tel: 01793849430
Does lots for the classic racing fraternity, only mild steel but has patterns for everything - bits of wire hung from his workshop ceiling.
He's very busy in the early part of the year so prob. worth contacting now.
HTH
Cheers, Pewe10
[Edited on 26/11/12 by pewe]
rdodger - 26/11/12 at 11:46 AM
Come on Claire get a price list done!
adithorp - 26/11/12 at 12:15 PM
Claire's engine conversion (and sound) woud provide a very nice accompanyment to Tribute Auto's MX250 bodywork....
TimC - 26/11/12 at 12:18 PM
quote:
Originally posted by adithorp
Claire's engine conversion (and sound) woud provide a very nice accompanyment to Tribute Auto's MX250 bodywork....
A very good point Adi.
Hmm.
clairetoo - 26/11/12 at 12:53 PM
quote:
Originally posted by rdodger
Come on Claire get a price list done!
Tricky bit there is - this is just a hobby , but the way things are taking off I'm already too busy
I just need those damn fingers to heal so I can make whats ordered , and look into getting the more time-consuming parts subbed out..................
MX5V6 - 2/12/12 at 10:17 AM
Claire, have you got any pics/diagrams/dimensions or info on your setup for joining the two ITB banks?
Cheers, Nik
SeanStone - 13/1/13 at 10:50 PM
Would you ever do a kit for this? I'd be very keen!!
clairetoo - 13/1/13 at 11:01 PM
quote:
Originally posted by SeanStone
Would you ever do a kit for this? I'd be very keen!!
Well.......I already produce the adapter kit and subframe , and I've done a few sets of throttle bodies .
If I can find someone to copy the exhausts.........
SeanStone - 13/1/13 at 11:32 PM
I've just read through the topic but do you have a stress list on what needs to be done?
How much do you charge for the subframe and throttle bodies?
swanny - 14/1/13 at 09:14 AM
audio file (especially 0:43 onwards) reminded me of the first few seconds of this clip....
http://www.youtube.com/watch?v=wFB6FfaNQ40
very cool
KFC - 20/2/13 at 10:45 PM
I have to say Claire, I think you have inspired a lot of people on this subject!
As you know, I want to put the 2.5L V6 into a locost but having read this thread and seen the photo's, I think I might be changing my mind and do
the MX-5 V6 conversion instead! It looks like so much fun doing the fabrication and a lot quicker and cheaper than building a kit car.
More research on my part is needed but looks like the way forward!
How amazing is she to drive? How do you find the open diff? Contemplating an LSD? I prefer the plated version.
It's been a few months but any changes since you've posted this?
Kev
quote:
Originally posted by clairetoo
I've now put over 500 miles on it , and I dont like it .............I PIGGIN' LOVE IT
Smooth , quiet , civilized - all thing I wasnt quite expecting , and when the loud pedal is slapped - a total hooligan !
This might just persuade me to finally sell my Fury
RogueWraith909 - 25/2/13 at 11:29 PM
I'm also pondering doing one of these with my friend as a track day / beginners drift car.
RK - 26/2/13 at 03:09 AM
The level of skill and foresight on this site is amazing. There are a small handful (sorry...) who have the additional patience to post everything on
here, for which we are all thankful, to say the least. All I can say is wow!
vindi49 - 25/3/13 at 10:11 AM
Just read through this thread as I've accidentally bought a V6 engine & part of the adaptor kit off Ardler_Dan ... I've now got a lot of
reading to do!!
Russell.
MX5V6 - 25/7/13 at 05:27 AM
anybody heard that the probe V6 engine eats its heads because of oil starvation when configured upright?
clairetoo - 25/7/13 at 05:34 AM
quote:
Originally posted by MX5V6
anybody heard that the probe V6 engine eats its heads because of oil starvation when configured upright?
Its upright in a Probe , so thats not very likely !
MX5V6 - 25/7/13 at 05:36 AM
quote:
Originally posted by clairetoo
quote:
Originally posted by MX5V6
anybody heard that the probe V6 engine eats its heads because of oil starvation when configured upright?
Its upright in a Probe , so thats not very likely !
I know, some guy on another forum was saying that this engine is notorious for starving its heads of oil? Not heard that before have you Claire?
clairetoo - 25/7/13 at 05:49 AM
Its identical to the Mx6 engine , as well sharing major components with both the 2.0 and 1.8 versions - none of these have any such reputation ?
I have read that it is a good idea to block off the piston-squirters to increase flow to the crank , allso the main bearing oil galleries need to be
opened up , but I have only ever run completely bone-stock engines with no problems at all .
The only grey area that I know of is the piston rings in the Probe version are said to be lower quality due to those engines being made in America .
Which may well be true - I have never worked with a Probe engine that didnt smoke , whereas the Mx6 one fitted to my Mx5 doesn't
Vindi_andy - 25/7/13 at 11:13 AM
quote:
Originally posted by adithorp
Claire's engine conversion (and sound) woud provide a very nice accompanyment to Tribute Auto's MX250 bodywork....
I said this to myself as soon as I saw the MX250 knowing claire had done this conversion on her fury. Then when I met Claire at Stoneleigh I raised
the thought with her.
I am sooo tempted to do this conversion first then get the MX250 kit down the line. Just need to convince SWMBO and source a donor, and engine and
funds, and finish the teardop, and get the boot lining fitted back in Tango. Hmmm the list of things to do first seems to keep growing.
DIY Si - 25/7/13 at 04:19 PM
quote:
Originally posted by MX5V6
anybody heard that the probe V6 engine eats its heads because of oil starvation when configured upright?
I've heard/read the same, but it's all nonsense. It's based on a third hand rumour about the engine not fitting in an MX-5 as standard.
Which I don't think it will fit as the throttle body would be in the bulkhead. But otherwise this is tosh.
With regards to the oil squirters, the later engines don't have them at all. There can be an issue with either number 5or 6 big end bearing
going, but I can't remember which it is. But since you'll get valve float past 8K and the oil pump is pushing it that high up as well,
it's best kept with a limit of 8K. Checking and closing the cam cap clearances will go a long way towards solving a lot of the oil problems as
they share the same oil gallery as the crank. And with 20 caps, there can be a great lose of pressure/flow through the heads. Some of mine were at the
upper limit but have been closed down to near the lower limit. It's dead easy to do as well.
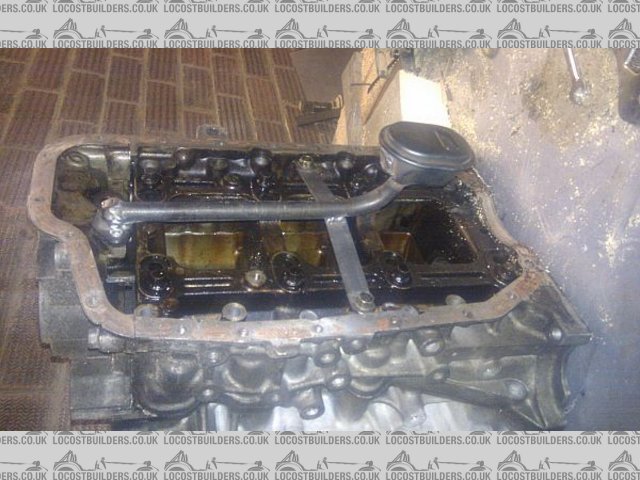
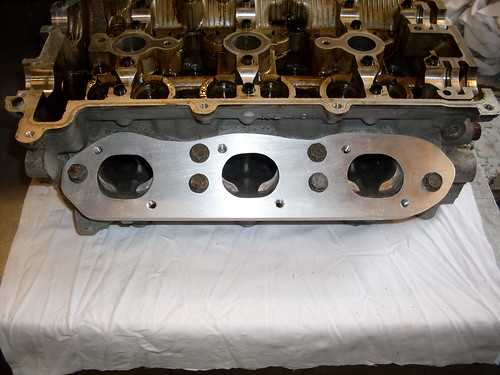
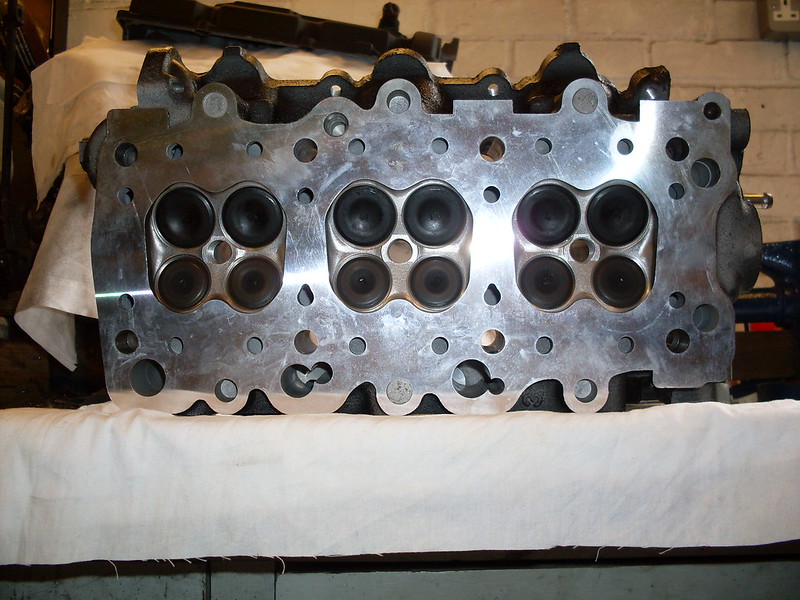
The later block with no squirters looks like this, should it be of interest to anyone:
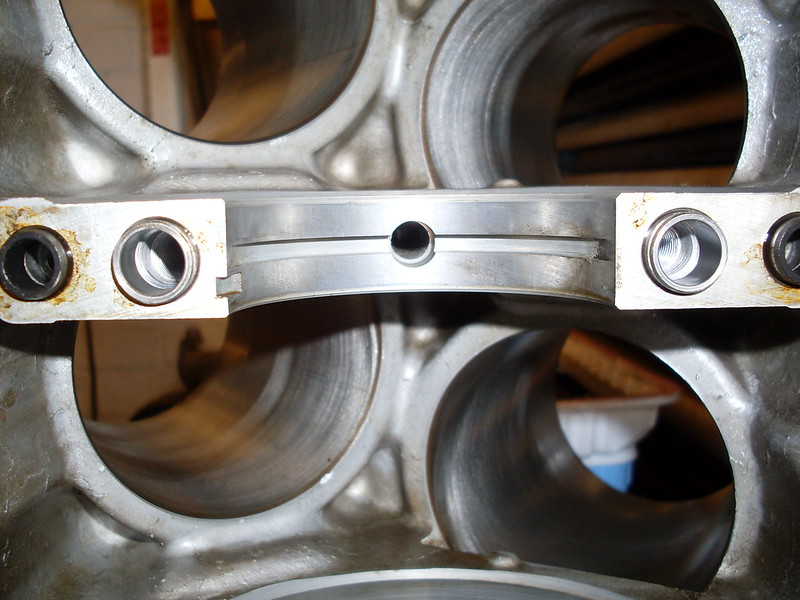
Otherwise the engines are pretty strong. They'll take reasonable boost as stock, but for N/A stuff the compression is low and the cams mild as
milk. But with ITB's, as Claire will agree, they'll still make 205-210BHP on an otherwise standard engine.
MX5V6 - 25/7/13 at 05:18 PM
Anybody had the heads flowed and uprated cams fitted? Worth doing if you are building an engine?
And anybody got any info on dry sumping one?
[Edited on 25/7/13 by MX5V6]
DIY Si - 29/7/13 at 08:05 AM
It depends what you're looking for and how much you have to spend. Tuning the KLDE isn't cheap as there's so little following around
the world for it. A set of KLZE pistons from the JDM spec engine will give you 10.5:1 compression, and along with the cams from the same engine is
probably the cheapest way to get some more power. Otherwise it's reground cams and forged pistons which will be much more.
Head work is only really worth it if doing something else to the engine. I've only port matched my ITBs to the head because I wanted to. But
de-shrouding the valves is worth it if you're looking to have a little play about, as the heads have a squish design to them, rather than a fully
open chamber:
MX5V6 - 3/8/14 at 03:58 PM
Due to a change of plans! (house DIY mainly!) here is my collection of V6 bits for sale
http://www.mx5nutz.com/forum/index.php?app=classifieds&module=core&do=view_item&item_id=1091

