garyt
|
| posted on 17/5/14 at 05:59 PM |

|
|
progress at last
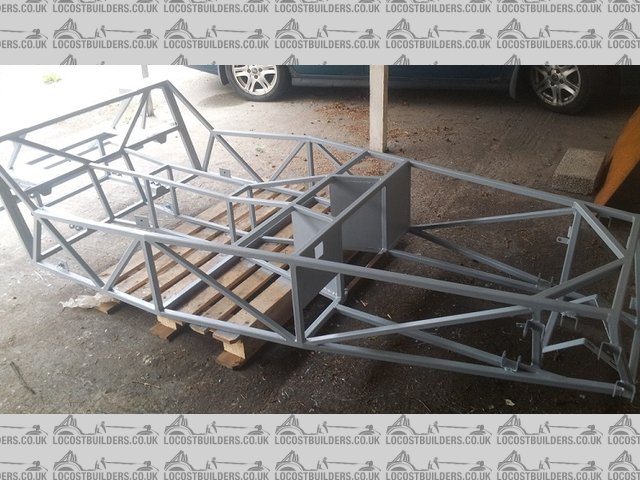
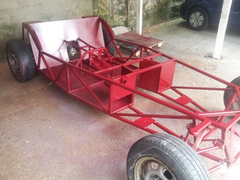
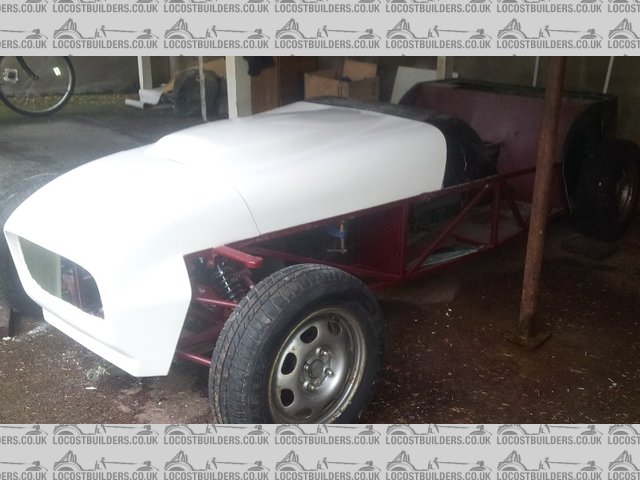
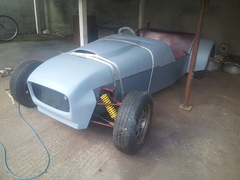
well here we have some progress at last, round 1 saw my lill car being claimed as an asset in my divorce so now I have a new wife and started on a new
car !!! Haynes roadster, mx5 based 
[img]
Description
[/img]
|
|
|
|
|
garyt
|
| posted on 17/5/14 at 06:01 PM |
|
|
[img]
Description
[/img]
|
|
|
garyt
|
| posted on 17/5/14 at 06:09 PM |
|
|
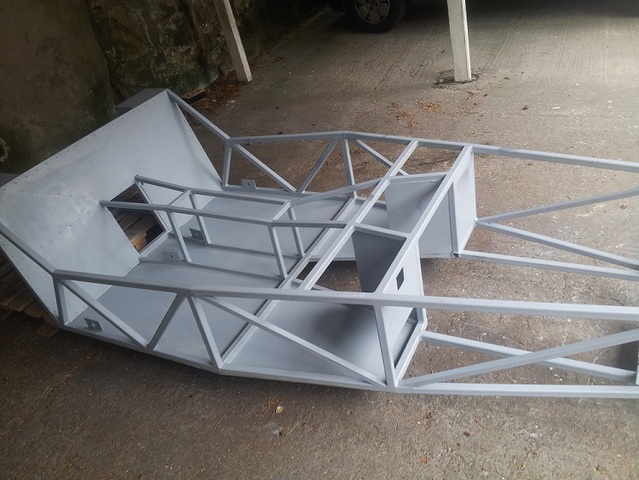
floor and back panel ready to go on tomorrow, make up column mounts, then start on the wishbones
bye the bye got all the mx5 wishbone plates cut by craig at plazcutz for £45 posted no interest just satisfied customer, plates from 5mm plate as per
Saturn drawings will add pic of these if anyone wants.
|
|
|
garyt
|
| posted on 18/5/14 at 04:35 PM |
|
|
ha ha, floor and back panel on , 
[img]http://
Description
[/img]
|
|
|
garyt
|
| posted on 8/6/14 at 04:14 PM |
|
|
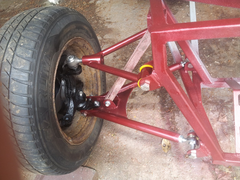
front wishbones made couldn't resist putting her on her feet (front ones anyway) now for the other end... anyone have the measurement rear
top wishbone mount hole centreline to upright mounting hole centreline Saturn / mx5 mk1
regards Gary (''
[img]
Description
[/img]
pg]105555[/pg]
[Edited on 8/6/14 by garyt]
[Edited on 8/6/14 by garyt]
|
|
|
garyt
|
| posted on 8/6/14 at 04:19 PM |
|
|
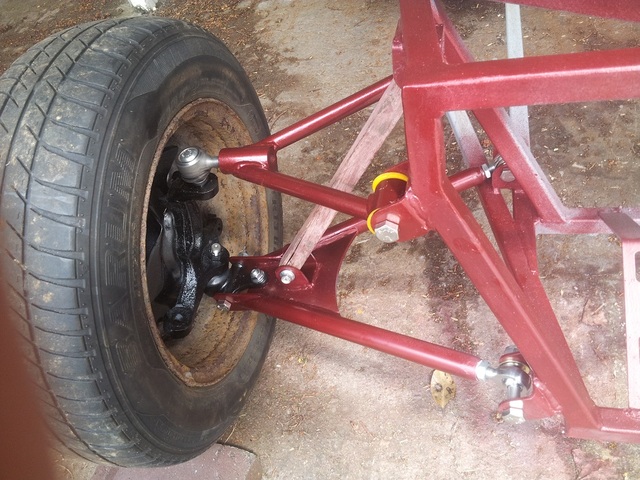
another pic
[img]
Description
[/img]
|
|
|
Slimy38
|
| posted on 8/6/14 at 04:44 PM |
|
|
quote:
Originally posted by garyt
anyone have the measurement rear top wishbone mount hole centreline to upright mounting hole centreline Saturn / mx5 mk1
Somewhere on the internet is a drawing of the back end of a Saturn, someone posted it on here in response to one of my questions but I cannot find it
now. I'll keep an eye out for it and post if I find it.
Personally I'm going to fit my diff, driveshafts and uprights and measure to suit. I just don't trust the Saturn build guide, and while
I'm following their general principles, I'm double checking all the measurements. I've already found the the upper crush tube in my
rear upright is only 54mm, whereas the wishbone design is for 67mm.
|
|
|
garyt
|
| posted on 8/6/14 at 04:55 PM |
|
|
Hi Thanks , I had planned to do much the same put diff ,driveshafts, bottom wishbones (made), hub together then measure up.
I got craig at plazcutz to do the plates as per drawings and on the dry run I found the difference in the rear upright top mount so welded the U
bracket to suit. I also put inserts/ rosejoints onto the outboard end of the rear lowers , neater and gives the camber adjustment.
thanks again gary
|
|
|
garyt
|
| posted on 26/6/14 at 06:34 PM |
|
|
[img]
Description
[/img]
|
|
|
garyt
|
| posted on 26/6/14 at 06:39 PM |
|
|
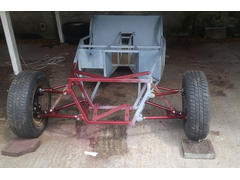
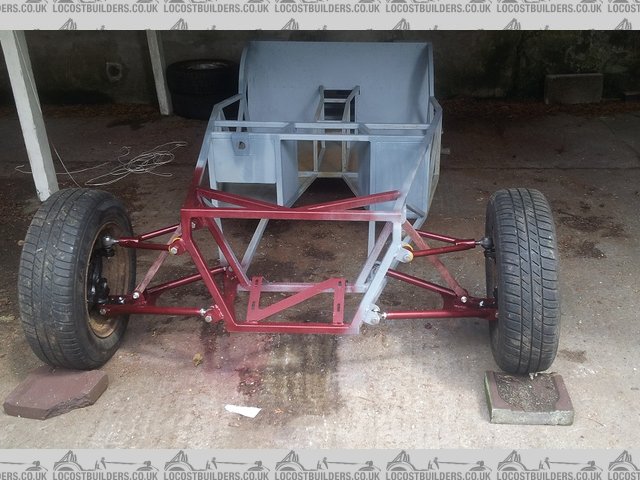
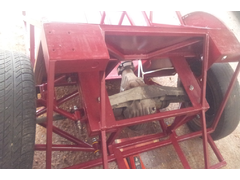
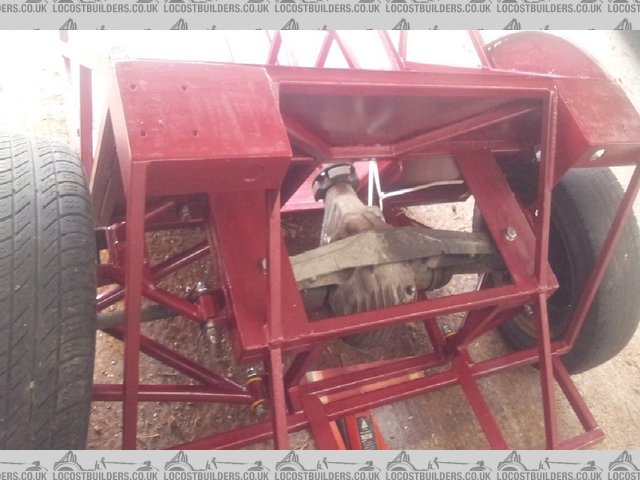
so here are a couple of pics , she's now on 4 feet not after some panic popped the diff driveshafts in and built up the back end to discover
about 15 deg camber... don't panic... measure and re measure , modify the lower wishbones and put back together.. breathe and 0 deg with the
adjusters all the way in
Also splashed some paint on to keep the rust bug away. must admit felt real chuffed seeing her sat there
[img]
Description
[/img]
|
|
|
garyt
|
| posted on 23/7/14 at 07:47 PM |
|
|
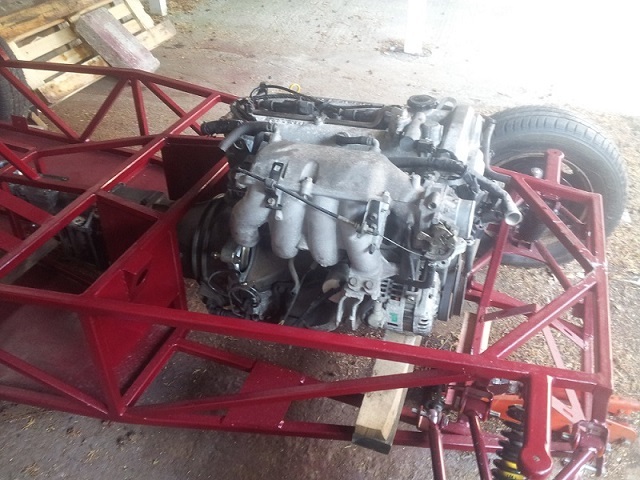
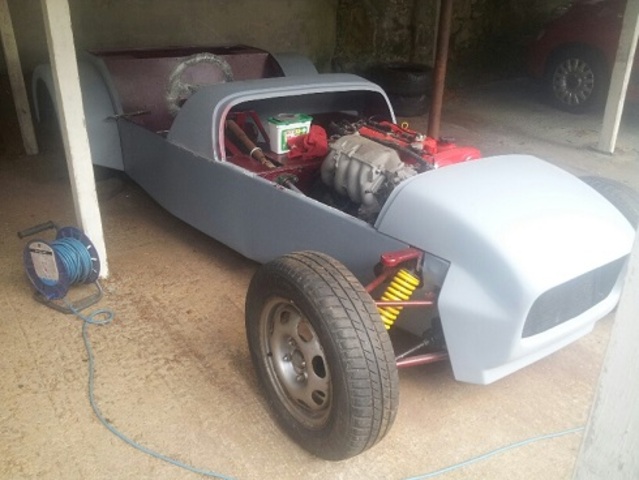
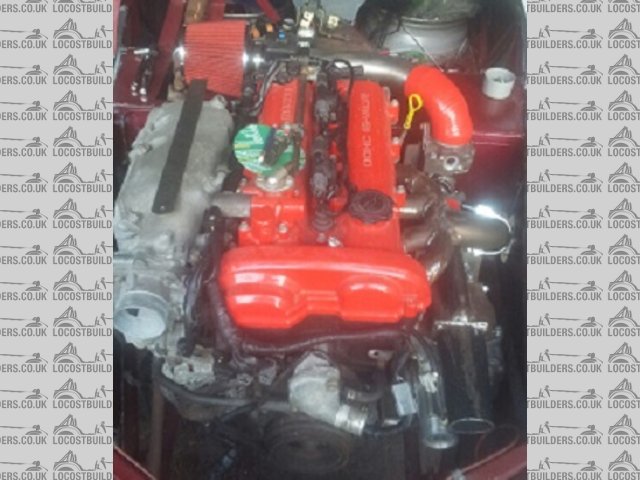
well been doing a bit as I can, and tonight got the heavy mob from work (Trina fed them) and they put my engine and box in for me seriously they
picked it up and said where about !! well chuffed now to get on and make up the mounts oh yes and some stiffer front springs . it sure feels good
to make progress
[img]
Description
[/img]
|
|
|
garyt
|
| posted on 16/8/14 at 05:23 PM |
|
|
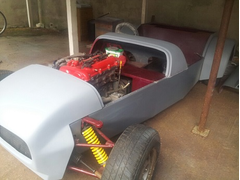
well made some progress fuel / brake lines in , m/c's in, pedal box in, got some bodywork so couldn't help myself had to try it on ????
the car..
oops engine will have to go down and over a "wee tadge" (flexible Scottish measurement) as hitting bonnet, will have to redo the engine
mounts, not a big job though.
[img]
Description
[/img]
|
|
|
garyt
|
| posted on 19/10/14 at 04:26 PM |
|
|
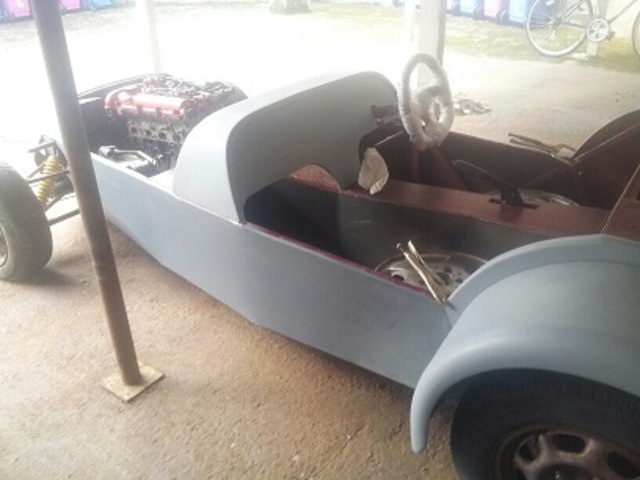
here some pics of the progress, sides are made and fitted and I shortened the headlight brackets made the trans tunnel sides and despite measuring and
remeasuring goofed the drivers side so will redo next week 
need to sort out bonnet catches carry on plumbing in the supercharger and redo the trans side .
at least she is looking proper now. also got my vin from dvla starting to be official aswell. lol.
[img]
Description
[/img]
|
|
|
garyt
|
| posted on 19/10/14 at 04:27 PM |
|
|
Description
|
|
|
garyt
|
| posted on 19/10/14 at 04:28 PM |
|
|
[img]
Description
[/img]
|
|
|
garyt
|
| posted on 19/10/14 at 04:29 PM |
|
|
[img]
Description
[/img]
|
|
|
coozer
|
| posted on 19/10/14 at 04:30 PM |
|
|
Looks good fella, keep up the good work and keep us posted
1972 V8 Jago
1980 Z750
|
|
|
garyt
|
| posted on 19/10/14 at 04:35 PM |
|
|
cheers, its starting to get real dark early up here and a bit colder now too, the cold I can handle , up the coffee intake but dark ? guess I
don't eat enuff carrots. lol. so need to sort some lighting out also got a massive tarp so can rig around to keep the weather out and me in ?
gary
|
|
|
garyt
|
| posted on 15/11/14 at 04:09 PM |
|
|
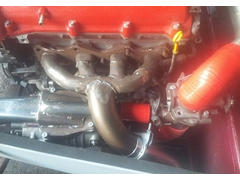
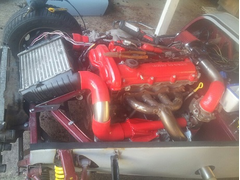
ok so out int cold and damp but got the sc install moving forward sorted out the inlet side and exhaust manifold / downpipe so next mount the
intercooler and pipework then going to play with the wiring........
gary
Description
|
|
|
garyt
|
| posted on 15/11/14 at 04:11 PM |
|
|
[img]
Description
[/img]
|
|
|
dubzter
|
| posted on 15/11/14 at 06:56 PM |
|
|
Looking good Gary, whats your plans for the SC, is it an eaton mini cooper charger?
I've read a bit about double throttles for the mx5 charger, are you going down this route?
|
|
|
garyt
|
| posted on 15/11/14 at 10:55 PM |
|
|
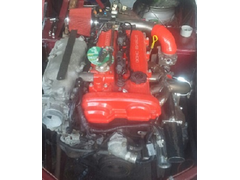
hi , thanks for the comments , yes its an eaton m45 cooper s charger with the mini by pass valve running dual throttle bodies although the second one
has no electronics on it , you can use only 1 but using 2 gives smoother idling , it is set slightly advanced from the "normal" one.
the bypass takes its vacuum from the plenum. As you can see its a bit of a "quart into a pint pot" job , and certainly gets the old grey
matter going !
the air filter I've routed to the inlet side at the rear along with the afm, and the air temp will go between the intercooler and main throttle
body thus giving a more accurate reading.
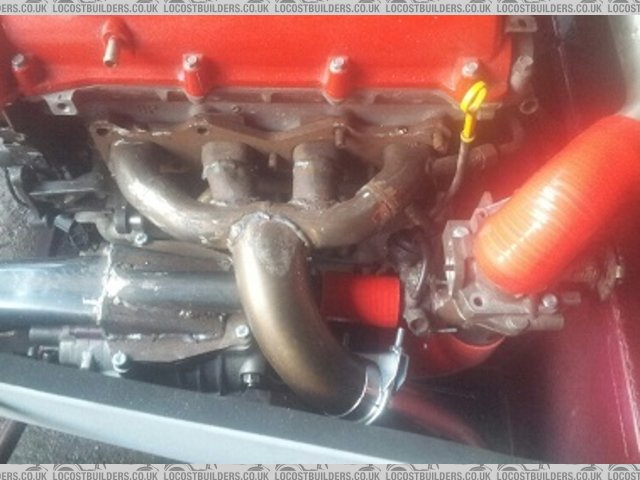
the exhaust was the next problem , there was no way the mk2 manifold would fit past the charger, bypass and pipework, so I set to and copied the Miata
turbo manifold to a 2.5" down pipe, not the best manifold design in the world but space was at a premium it will be wrapped as well to try and
reduce the heat transfer a little.
Next is to mount the intercooler and work out the pipework for it and make and mount a belt tensioner if anyone is considering going this route there
are some great write-ups on mx5nutz site
Really cant wait till I get it running.
how about yourself any progress yet?
Gary
|
|
|
dubzter
|
| posted on 15/11/14 at 11:07 PM |
|
|
quote:
Originally posted by garyt
hi , thanks for the comments , yes its an eaton m45 cooper s charger with the mini by pass valve running dual throttle bodies although the second one
has no electronics on it , you can use only 1 but using 2 gives smoother idling , it is set slightly advanced from the "normal" one.
the bypass takes its vacuum from the plenum. As you can see its a bit of a "quart into a pint pot" job , and certainly gets the old grey
matter going !
the air filter I've routed to the inlet side at the rear along with the afm, and the air temp will go between the intercooler and main throttle
body thus giving a more accurate reading.
the exhaust was the next problem , there was no way the mk2 manifold would fit past the charger, bypass and pipework, so I set to and copied the Miata
turbo manifold to a 2.5" down pipe, not the best manifold design in the world but space was at a premium it will be wrapped as well to try and
reduce the heat transfer a little.
Next is to mount the intercooler and work out the pipework for it and make and mount a belt tensioner if anyone is considering going this route there
are some great write-ups on mx5nutz site
Really cant wait till I get it running.
how about yourself any progress yet?
Gary
Sounds great and as you say a bit of a head scratcher.
I've finally bit the bullet and put a deposit down on a Talon MX-5 chassis, wishbones and diff cover, so now on the hunt for the right donor
car, I'll probably just build standard mx5 to start of with and then I'm thinking about the SC route after reading the threads on nutz
(and will be following your build with great interest). I have a SC on my VW Golf and love the delivery of power it gives.
I'm down in Inverness quite often and wouldn't mind coming for a nose at your build sometime if you are up for it.
|
|
|
garyt
|
| posted on 15/11/14 at 11:34 PM |
|
|
hi , your more than welcome any time .
the talon stuff is really good quality and I'm sure you will be happy with it. Yes its best if you can source a donor and strip it,
unfortunately I do not have the space for that so merrily shop as I go!! does make it interesting sometimes researching what fits what in the end I
opted for the mk2.5 vvt engine with a mk2 5 spd box as I read that the 6 spd had some weak points and questioned the use-ability of the ratios given
the lightness of the finished car .
good luck and just shout if I can be of any help
gary
|
|
|
garyt
|
| posted on 23/11/14 at 05:30 PM |
|
|
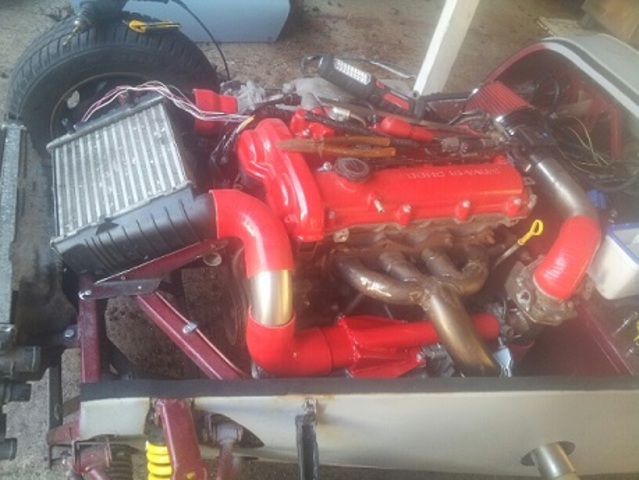
well got a bit done this weekend, got the fuel filter and lines in and done, made and mounted the s/c tensioner,mounted and plumbed the intercooler
and mounted the boost sensor, and put some paint on the s/c outlet.
then started stripping back the engine loom to move a couple of things, working back towards the scuttle wiring ... oh fun.... so next weekend is
shortening moving and retaping the engine loom
[img]
Description
[/img]
|
|
|