Fred W B
|
| posted on 17/7/13 at 08:25 PM |

|
|
Thanks Ceeb
Demoulding won't happen for a while yet, although I have since done the front faces of the clip. I am keen to see the finished part but after
all this time I can wait a little longer to make sure it is right and gone off properly.
Currently I'm busy with making the "nostril" inserts.
Cheers
Fred W B
You can do it quickly. You can do it cheap. You can do it right. Pick any two.
|
|
|
|
|
ceebmoj
|
| posted on 17/7/13 at 09:55 PM |
|
|
Great update. I really look forward to seeing updates to this thread.
|
|
|
AlfaDriver
|
 posted on 21/7/13 at 01:05 PM posted on 21/7/13 at 01:05 PM |
|
|
Just joined the forum to say...
What a FANTASTIC job you have done there.
I worked with GRP before and we did some big and complex jobs nothing close to yours.
We used to use chipboard, steel frames and body filer for detailing
Can you let us know what materials you used ?
I'm specially interested in the skin over the foam because the experiments I have done with body filer strait into the foam the foam reacted and
shrank/melted leaving a horrible surface.
Looking forward to you next update.
Ric
|
|
|
Fred W B
|
| posted on 22/7/13 at 05:32 PM |
|
|
Hi Ric
Thanks for your interest and compliment
The pattern was made out of wood and polyurethane foam, some shape added with plaster filler. Then the whole thing was skinned over with a good layer
of 600 gram chopped strand matt and resin. Upol body filler was then applied over this and finally 3 coats of Durabuild spray filler to get the final
finish.
Cheers
Fred W B
[Edited on 22/7/13 by Fred W B]
You can do it quickly. You can do it cheap. You can do it right. Pick any two.
|
|
|
Mistron
|
| posted on 22/7/13 at 05:57 PM |
|
|
I get mine from: http://www.ecfibreglasssupplies.co.uk/p-556-2-polyurethane-foam-sheets-50mm.aspx
You are right though - many people have tried to use pink, blue or yellow rigid foam insulation sheets from builders merchants. Yes it's cheap,
but sadly, it's also useless unless you skin it in tinfoil etcto prevent the reactions.
|
|
|
AlfaDriver
|
| posted on 22/7/13 at 08:49 PM |
|
|
Thanks Fred and Mistron
In the shop I used to work about 98% of the molds/panels we made were made with chipbord/mdf.
The really big stuff like buses rear ends were reinforced with a metal frame after the matting and covered with more mat.
I'm trying to remember the name of the stuff can can't figure it out...
Does any of you know the name of the polyester(?) that is fire retardant ?
We used to use it for places that were subjected to high temperature like the buses rear end and engine covers
All I remember is that is was white/milky type of resin.
Going to do some more investigation for my project.
Ric
|
|
|
Mistron
|
| posted on 22/7/13 at 08:54 PM |
|
|
Here's how I combined the foam and MDF on an old project, but sadly never got as far as Fred, of whom I am in awe!
13-05-07_2145 by
alastairbrownuk, on Flickr
|
|
|
Fred W B
|
| posted on 31/7/13 at 08:16 PM |
|
|
Thanks for the compliment Mistron
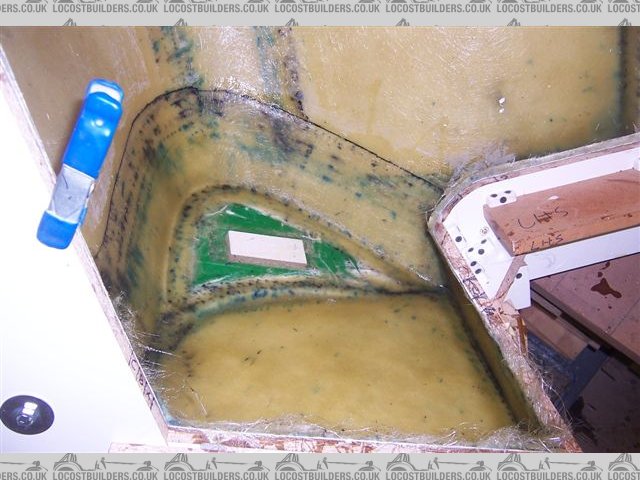
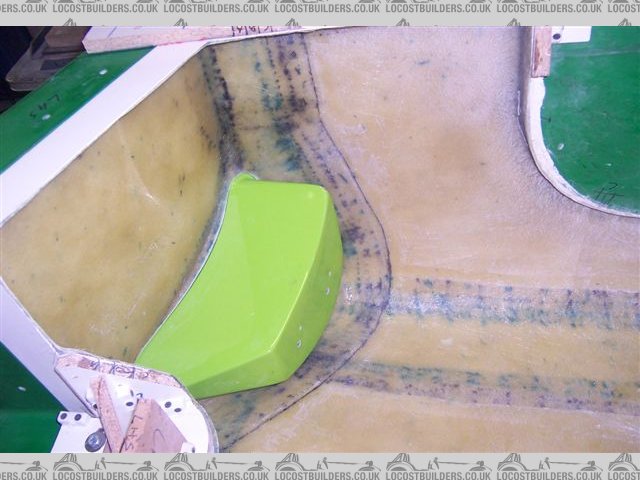
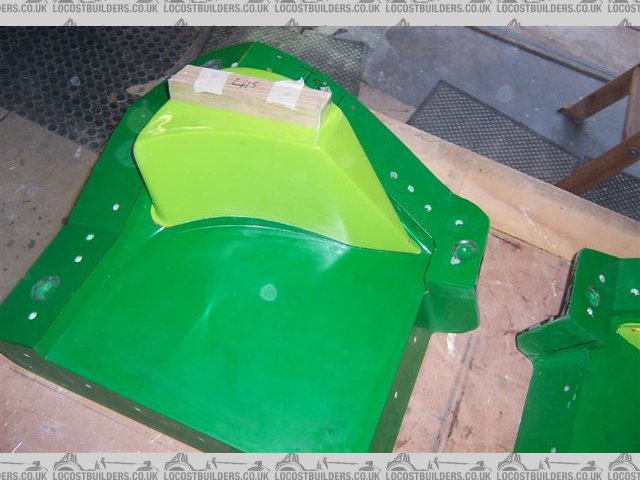
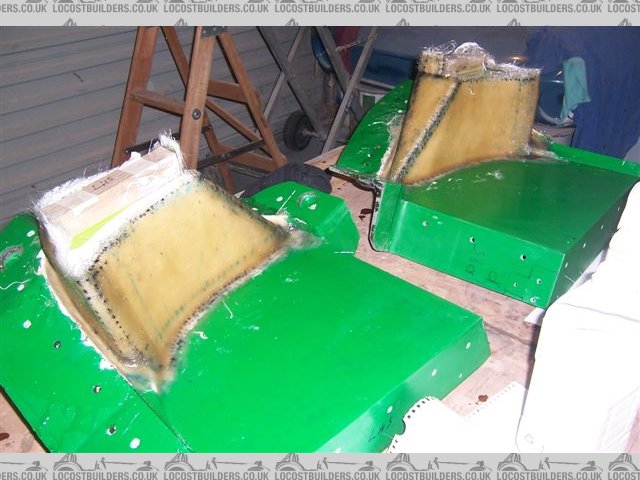
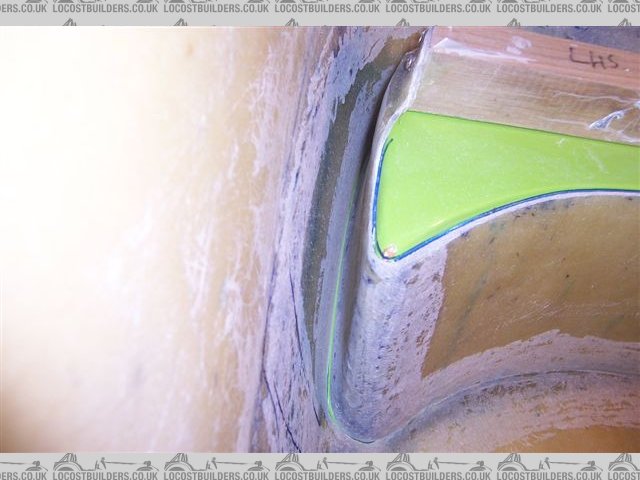
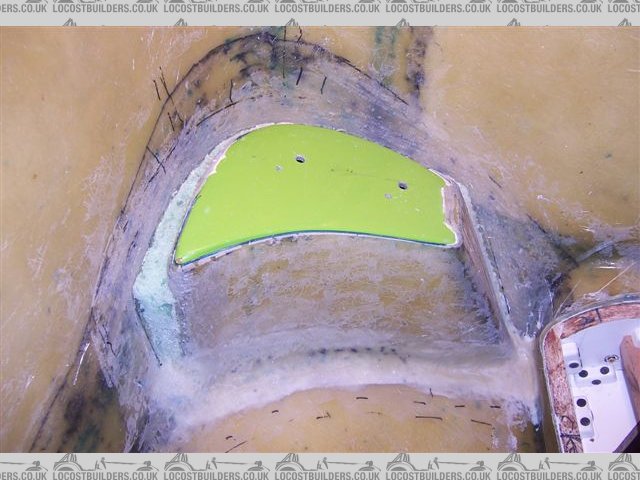
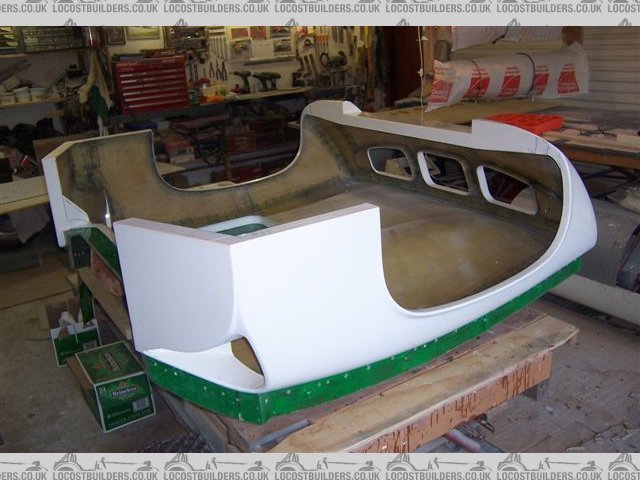
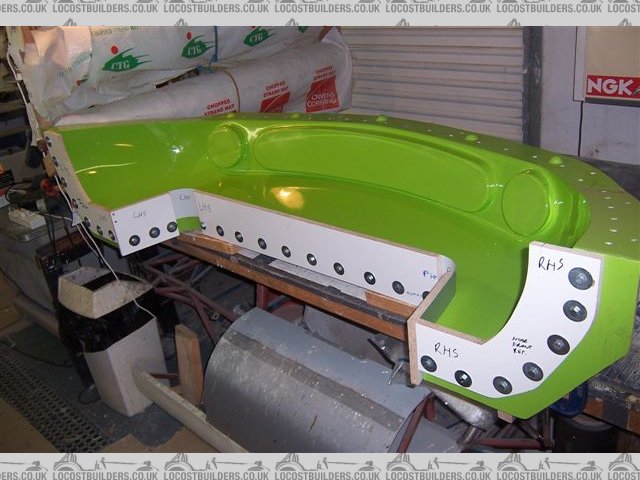
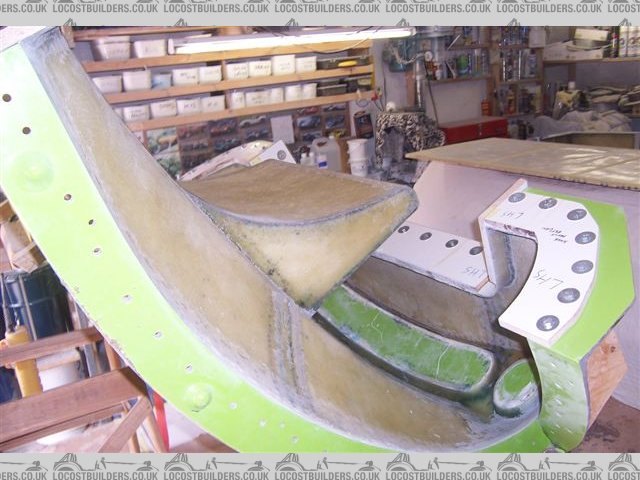
Made some more progress, and apologies if I'm going into lengthy detail on this, but I've now got the nostril inserts bonded in.
Parts looked like this once I pulled them off the moulds. The ridge across the upper face of the bottom part in this view is where the join will be on
that surface. On the rest of the perimiter the join will be on the centre of the edge radius.
Fettled them so that they fitted into the holes in the tail. The mould was bolted back together to support the inserts in the correct position.

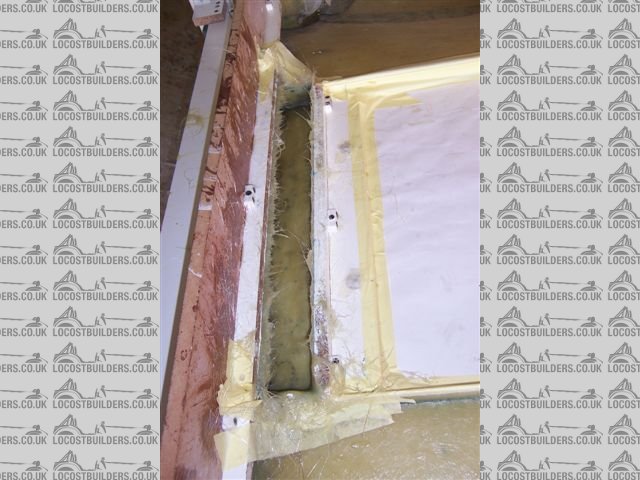
I tried to get a nice even 1 mm or so gap all round, so that I could hopefully get gel right through the joint to the front face.
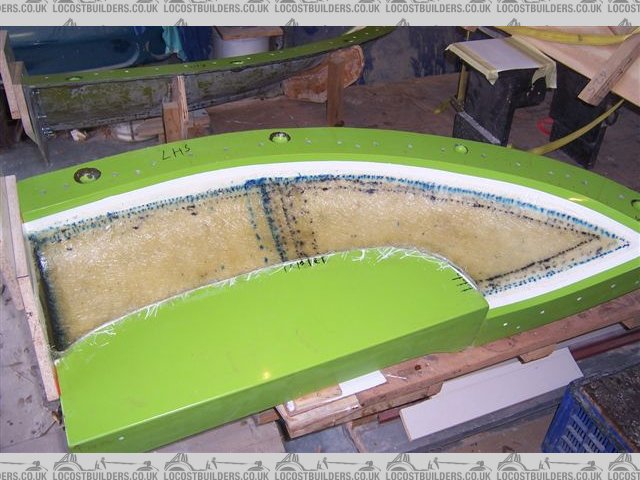
I made up a gel mix with some resin added and applied this with a long thin brush to the back of the join. Then applied matt and resin over the join
where I could, some of the area right of the bottom of the "valley" was difficult to get to so there I just flooded it with resin and
dropped a quantity of loose fibres in down the gap and worked them in with the thin brush.
Once that had gone off I dressed it and then applied expanding foam in the gap.
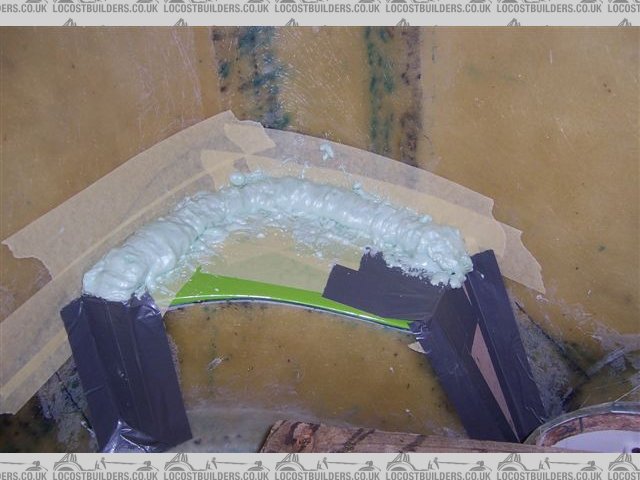
That was also dressed and then glassed over to finally secure the insert.
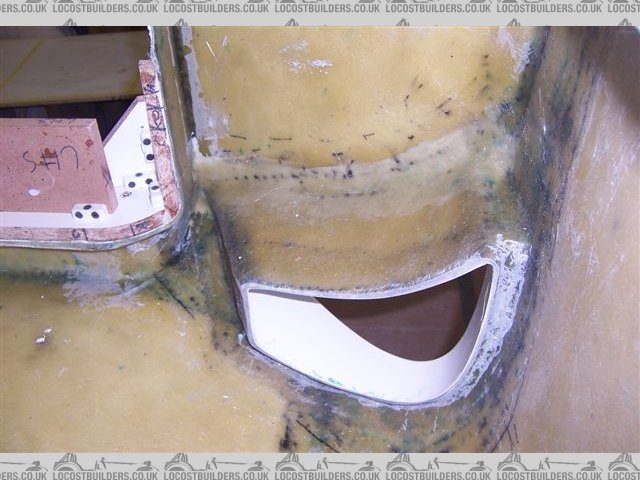
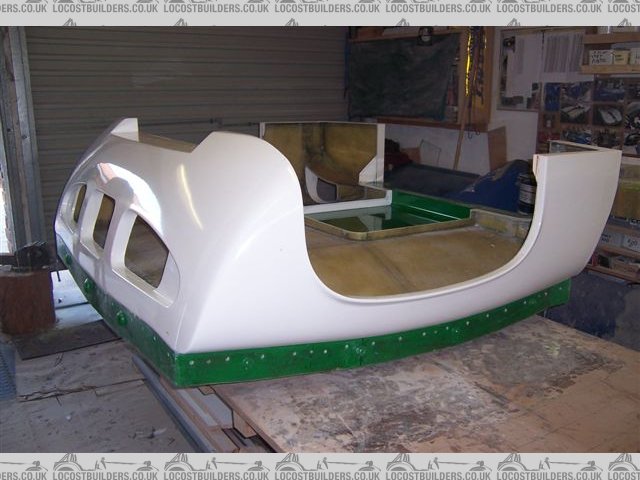
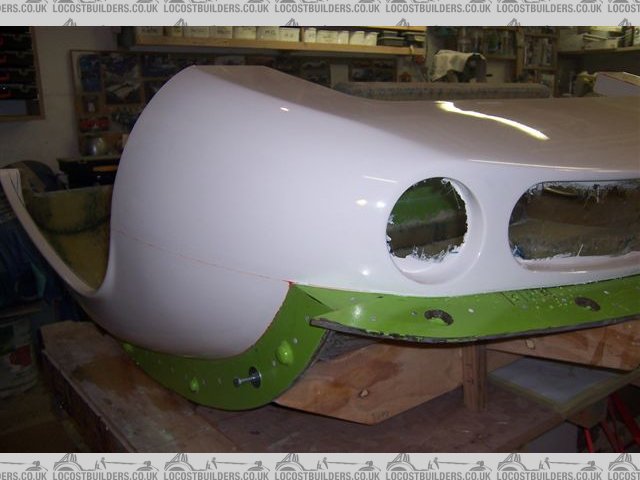
Must admit to being very happy with the result, it looks like just enough gel seeped though the join around most of the perimeter to make it easy to
flat it back to a good surface. The blue marks in this picture are from the marker pen ink that was on the edge of the part, they are not chips in
the gell coat.
Now just want to trim some edges and I can then get the tail out the mould
Cheers
Fred W B
[Edited on 31/7/13 by Fred W B]
You can do it quickly. You can do it cheap. You can do it right. Pick any two.
|
|
|
smart51
|
| posted on 31/7/13 at 09:34 PM |
|
|
quote:
Originally posted by Fred W B
... I can then get the tail out the mould ...
This I am looking forward to
|
|
|
Fred W B
|
| posted on 3/8/13 at 03:28 PM |
|
|
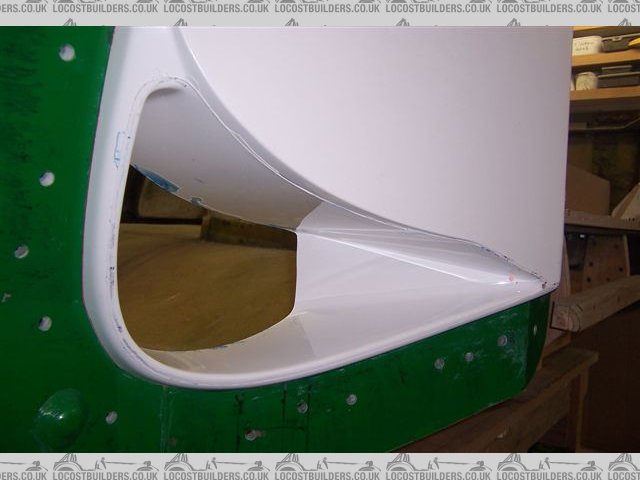
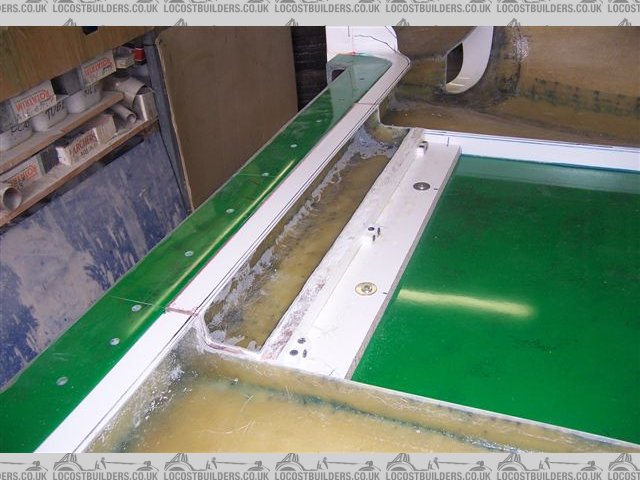
So now the tail is almost completely demoulded, I just need to make the panel that fits in this gap in front of the carb trumpets before I can turn it
over
Cheers
Fred W B
[Edited on 3/8/13 by Fred W B]
You can do it quickly. You can do it cheap. You can do it right. Pick any two.
|
|
|
Carbonman
|
| posted on 3/8/13 at 03:52 PM |
|
|
Quality work Fred 
Carbon Copies Ltd
|
NOTE:This user is registered as a LocostBuilders trader and may offer commercial services to other users
|
Xtreme Kermit
|
| posted on 3/8/13 at 06:30 PM |
|
|
I love catching up with this thread Fred.
Top work as always!
|
|
|
Fred W B
|
| posted on 9/8/13 at 05:54 PM |
|
|
Thanks for the comments guys.
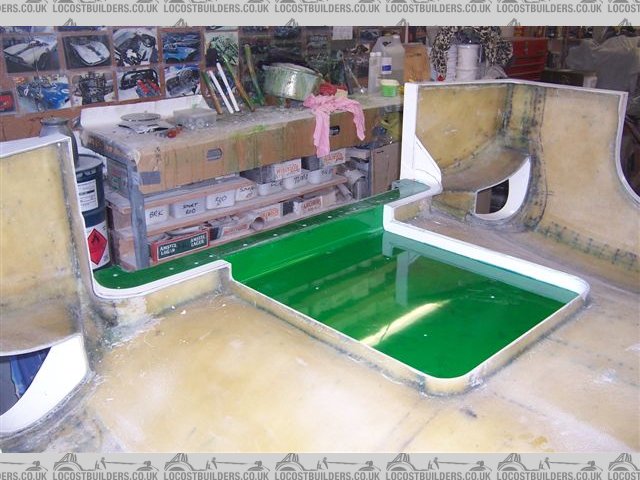
I gave myself quite a challenge in making this part as it is a 4 sided section that had to have the 3 layers of mat fed in and laid up through a slot
in one side of the part. It was touch and go far a while as the loose edges of the layup were always in the way but I finally managed to get them to
lay down and it turned out okay.
This had to be a seperate piece to allow the tail to open with fixed backstays fitted to the rollbar.
[Edited on 9/8/13 by Fred W B]
You can do it quickly. You can do it cheap. You can do it right. Pick any two.
|
|
|
Fred W B
|
| posted on 9/8/13 at 05:57 PM |
|
|
and I reckon the effort was worth it when I see the final result.
You can do it quickly. You can do it cheap. You can do it right. Pick any two.
|
|
|
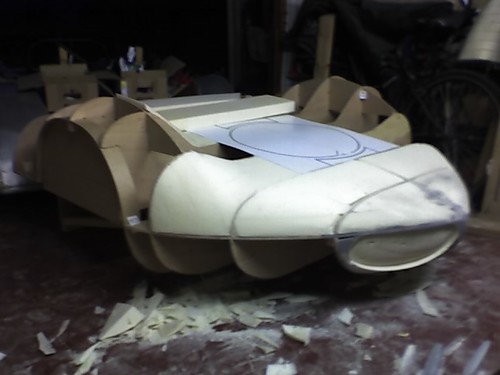
Fred W B
|
| posted on 9/8/13 at 06:06 PM |
|
|
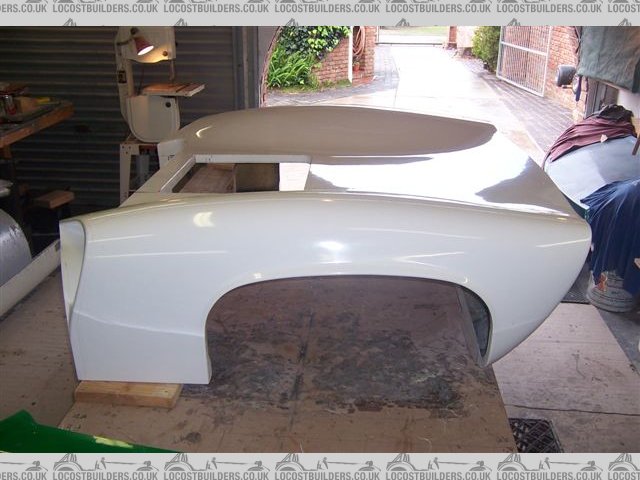
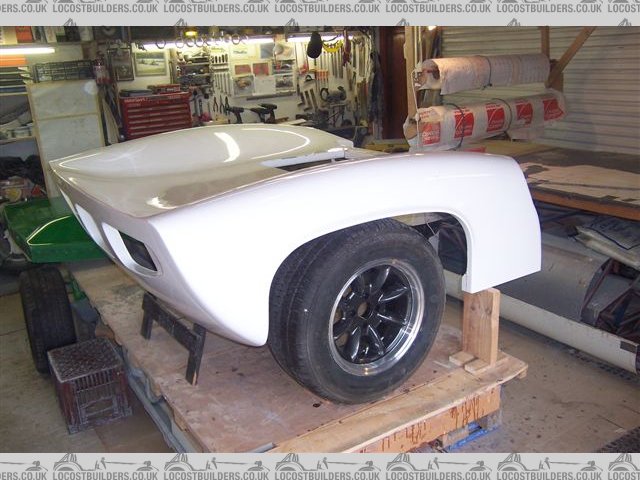
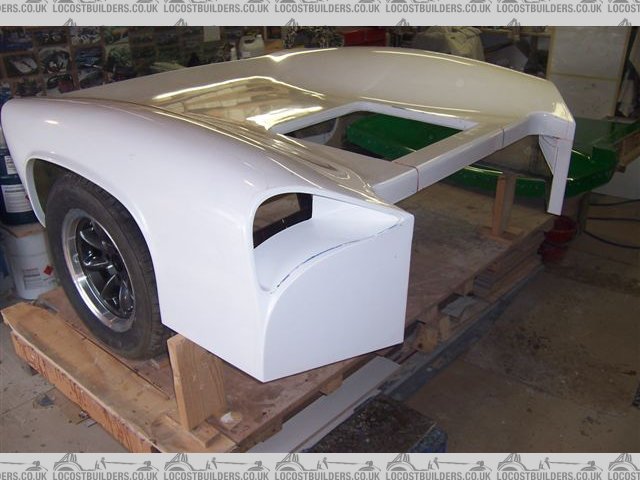
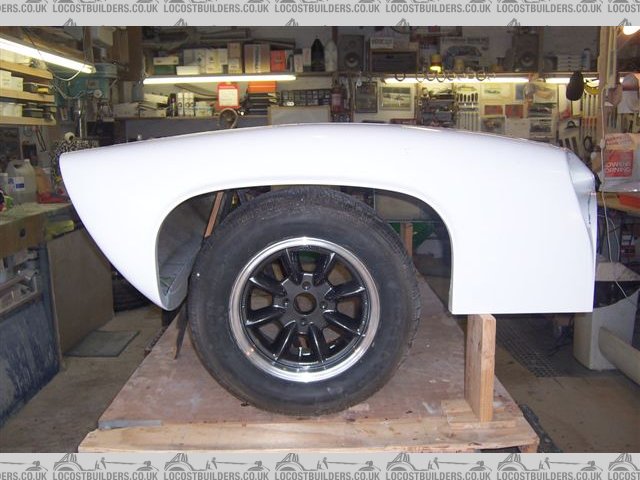
Positioned the tail at ride height and tried a wheel for fit in the wheelarch
You can do it quickly. You can do it cheap. You can do it right. Pick any two.
|
|
|
Fred W B
|
| posted on 9/8/13 at 06:09 PM |
|
|
Looks like it deserves something wider than the 245 section tyre shown here
The edge of the opening in the tail is not yet finally trimmed.
Cheers
Fred W B

[Edited on 9/8/13 by Fred W B]
[Edited on 9/8/13 by Fred W B]
You can do it quickly. You can do it cheap. You can do it right. Pick any two.
|
|
|
GonzoRacer
|
| posted on 9/8/13 at 06:11 PM |
|
|
Fred-
Beautiful! Amazing work, as always... I really enjoy your updates, can't wait until it all comes together in one big, gorgeous piece!
Thanks for posting!
JD Kemp
"And it wasn't even a full moon."
|
|
|
Ivan
|
| posted on 10/8/13 at 03:02 PM |
|
|
Wow - you must really be inspired to finish the body now Fred. 
|
|
|
Fred W B
|
| posted on 12/8/13 at 04:15 PM |
|
|
Thanks for the comments guys, just the nose to go now
Cheers
Fred W B
You can do it quickly. You can do it cheap. You can do it right. Pick any two.
|
|
|
Fred W B
|
| posted on 25/9/13 at 05:53 PM |
|
|
Small update!
Turned out I had some imperfections on some areas of the nose mould (particularly where I tried to get away without using the durabuild surfacing
primer on the buck under the nose) and I got a bit sucked into improving the finish on most of the mould by sanding and compounding. That took some
time, as did the making of return fences and the usual tedious waxing but I'm now finally making progress with the parts sections of the
nose.
Cheers
Fred W B

[Edited on 25/9/13 by Fred W B]
You can do it quickly. You can do it cheap. You can do it right. Pick any two.
|
|
|
ceebmoj
|
| posted on 28/9/13 at 11:35 PM |
|
|
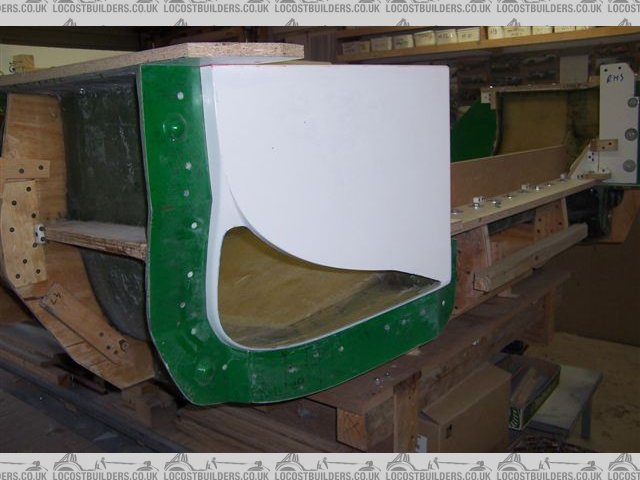
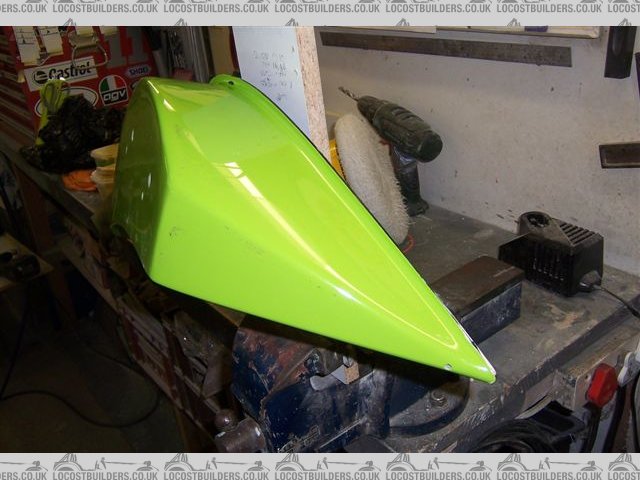
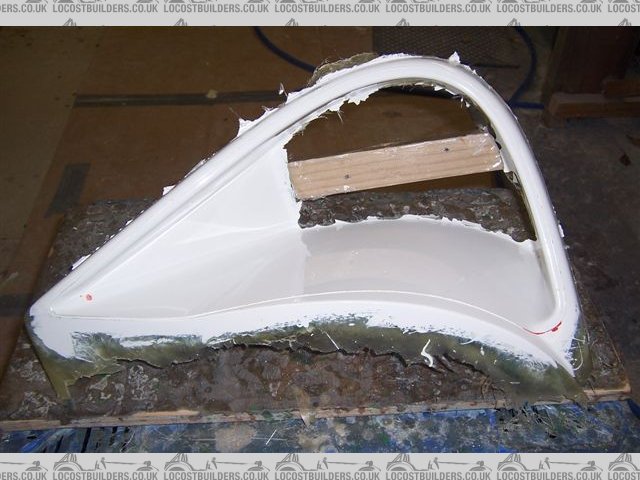
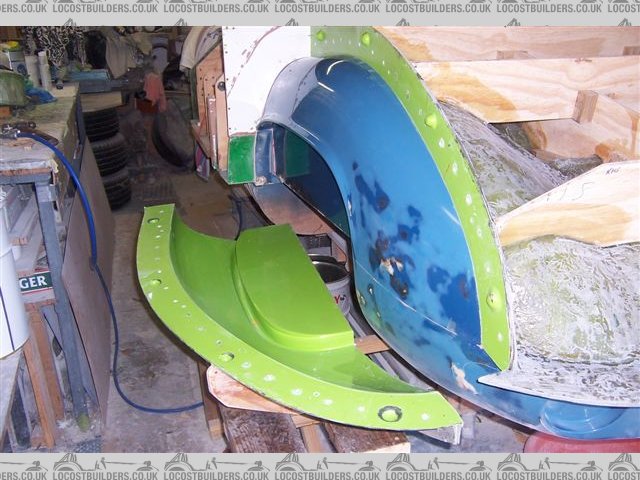
Looks great. I can't work out what the last piece pictured is.
|
|
|
Fred W B
|
| posted on 29/9/13 at 06:52 AM |
|
|
Thanks Ceeb. This picture should help you identify the part, its a section of the nose, although the other side to that shown below
Cheers
Fred W B
[Edited on 29/9/13 by Fred W B]
You can do it quickly. You can do it cheap. You can do it right. Pick any two.
|
|
|
Fred W B
|
| posted on 10/11/13 at 03:19 PM |
|
|
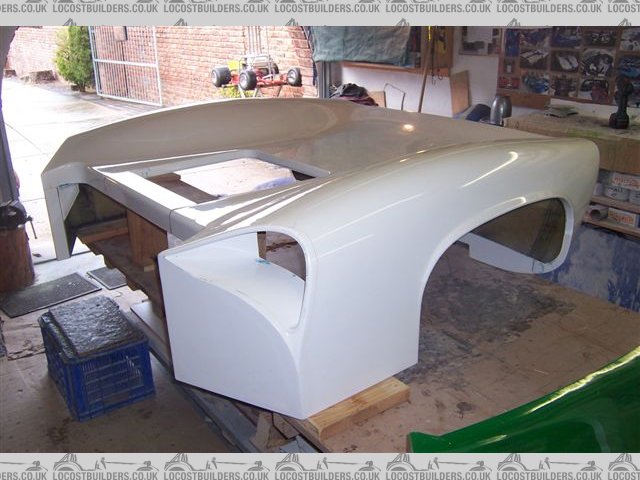
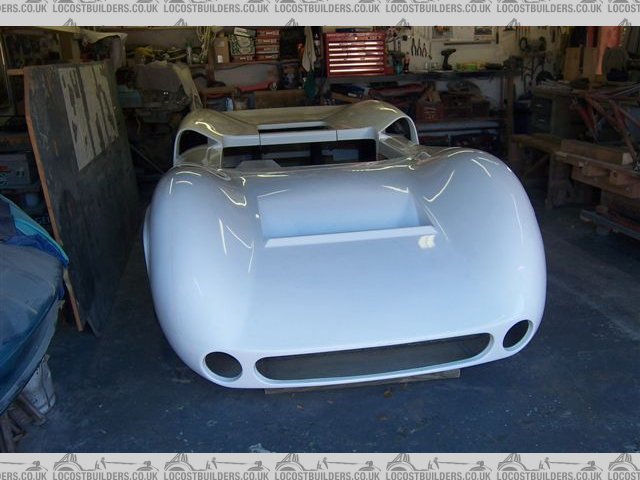
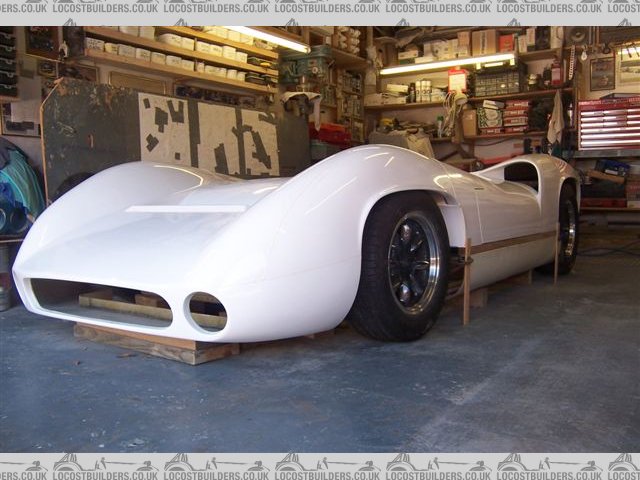
So I completed the nose, stitching the 4 sections together using the same technique I described for the tail

You can do it quickly. You can do it cheap. You can do it right. Pick any two.
|
|
|
Fred W B
|
| posted on 10/11/13 at 03:22 PM |
|
|
The nose completed the set of body panels, so finally I can say the body is finished! That is if your don't count the headlight arrangements and
the wheel arch inner panels.
These pictures are with the panels supported on blocks, and with the wheels just placed in the wheel arches.
Plan now is to take some time to spring clean the workshop, and then start to get to grip with the suspension and chassis.
Cheers
Fred W B
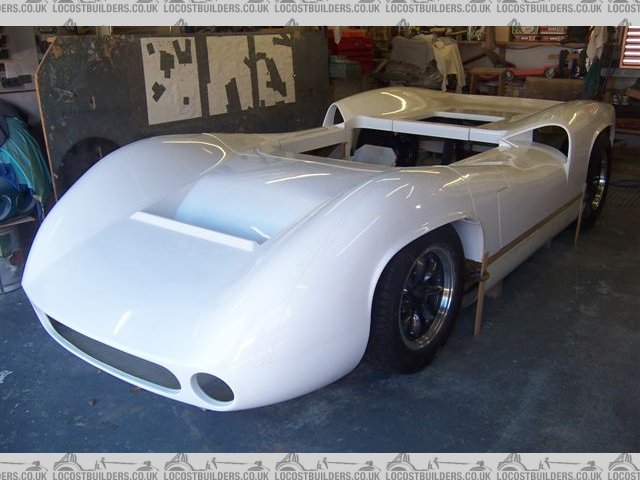
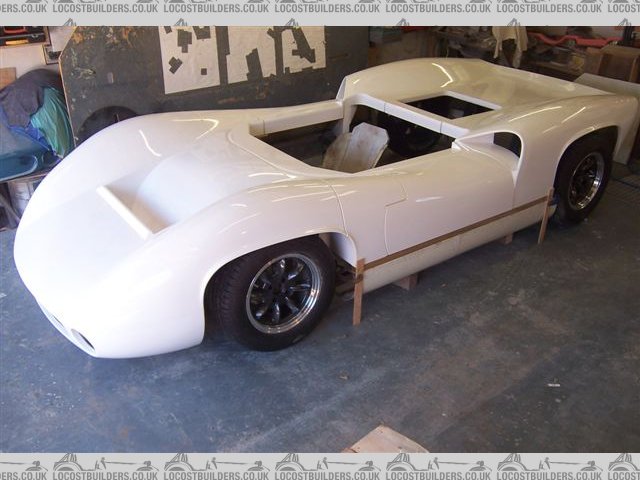
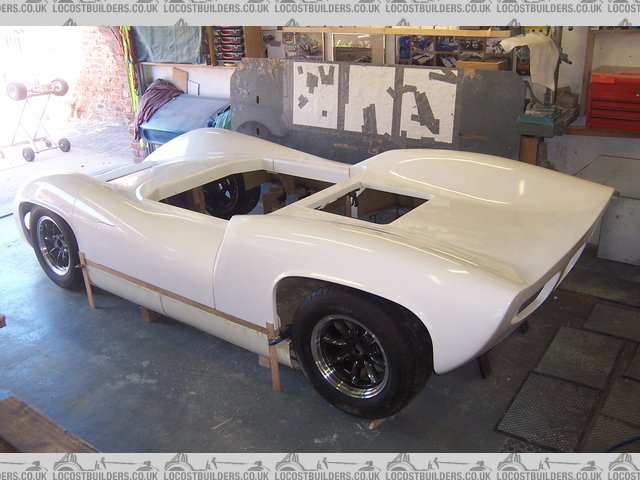
You can do it quickly. You can do it cheap. You can do it right. Pick any two.
|
|
|
Nickp
|
| posted on 10/11/13 at 03:40 PM |
|
|
WOW!! That's stunning fella. Brilliant work!!
|
|
|