designer
|
| posted on 16/11/14 at 06:27 PM |

|
|
Looking very good, if only I had the ability to draw my stuff in 3D!
|
|
|
|
|
bart
|
| posted on 18/11/14 at 12:16 AM |
|
|
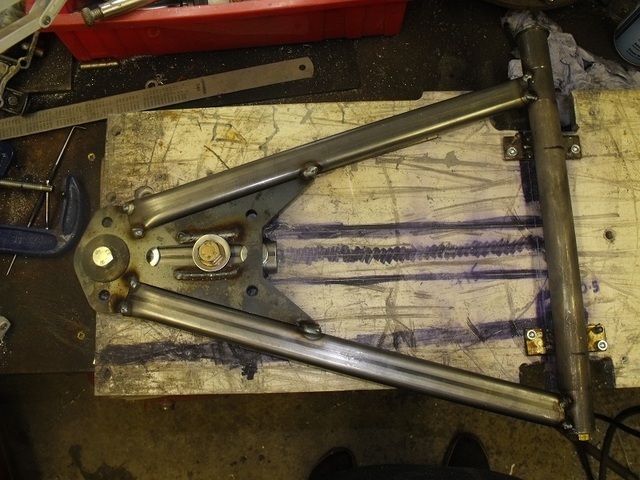
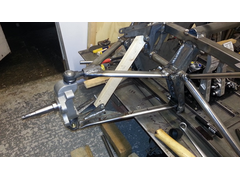
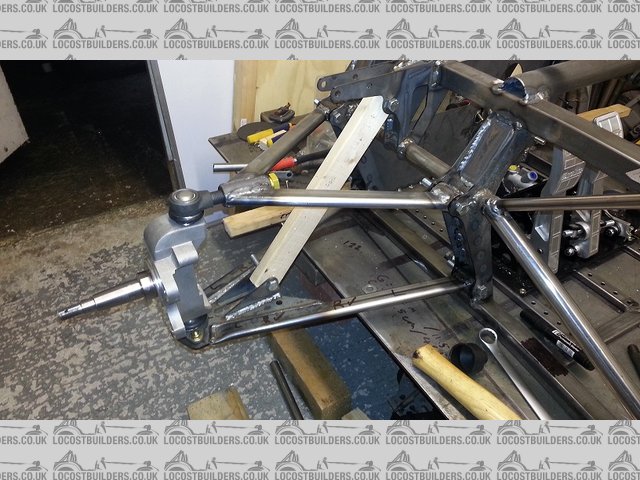
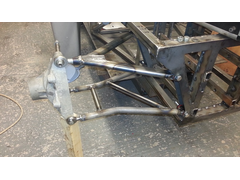
front suspension and jig
hello all
latest update
I spent the last few days making a fixture that make all the suspension arms
made from a piece of aluminium plate that I retrieved from a scrapped printing machine some 10 years ago
"I new it would come in handy one day
this will make all four different arms
only the front lower arm is handed for the fixture so I just flip the end over and it makes a rh and a lh
all the other arms are handed from lh to rh but are the same in the fixture " just flip them over when finished.
so far made the lower front and the upper front
could not wait to make the rest so broke off and assembled the front suspension . works perfect .and all lines up.
Description
jig fixture
Description
Description
Description
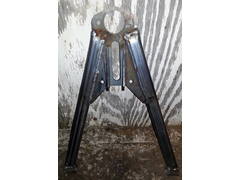
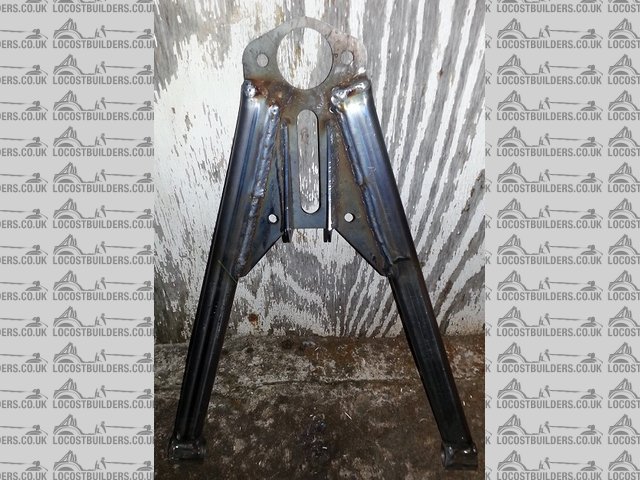
front lower arm outside cooling down
top tip these are very hot when you pic them up without a glove ! , but you soon put it down again
|
|
|
mysmallwheels
|
 posted on 18/11/14 at 02:08 AM posted on 18/11/14 at 02:08 AM |
|
|
Bart- "Cousin Jonathan" type here- wonderful build you have on there! Sooo many questions! Like the other guy said, you probably
can't bore us with too many details!
What are the front spindles from, or who produced them?
Can you give some details on the ovaled tubing you used to make the front suspension A-frames?
And don't stop! Great stuff! Colonial Boy Chris
|
|
|
bart
|
| posted on 18/11/14 at 09:14 AM |
|
|
spindels and oval tube
hi
the uprights are hi spec as are the brakes ands disks . I brought them as a complete 2 corner set
the oval tube or obround is 30 * 15 erw . did a few calcs and this should be fine
the rear is 1" seamless as under far more stress from drive.
|
|
|
Mr Whippy
|
| posted on 18/11/14 at 01:13 PM |
|
|
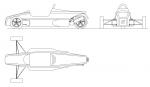
looks very good  interested in how it looks at the end with the bodywork interested in how it looks at the end with the bodywork
It you take loads of photos and Cad drawings and we could finally have the Haynes single seater...yeah!
|
|
|
Brian R
|
| posted on 18/11/14 at 01:33 PM |
|
|
quote:
Originally posted by prawnabie
Most trackdays will allow single seaters if the wheels are covered. I hope that doesn't chnge as my long term build is a terrapin single seater!
A mate of mine stuck some mudguards on his bike engined autograss special along with a set of fat slicks and done a trackday at Brands no problem.
Think it was with Javelin if I recall.
|
|
|
adithorp
|
| posted on 18/11/14 at 02:14 PM |
|
|
Looking good.
Is that an ally camber adjuster in the top wishbone? There have been several failures of those with it shearing under the hex'.
"A witty saying proves nothing" Voltaire
http://jpsc.org.uk/forum/
|
|
|
bart
|
| posted on 18/11/14 at 08:09 PM |
|
|
alloy adjuster
hi
yes it is an alloy adjuster , thanks for letting me know
I will have to get some stainless or steel ones
do you know of any one that sells them.
if not I will have to make then , and that's already a long list so if I can buy them all the better.
|
|
|
bart
|
| posted on 18/11/14 at 08:22 PM |
|
|
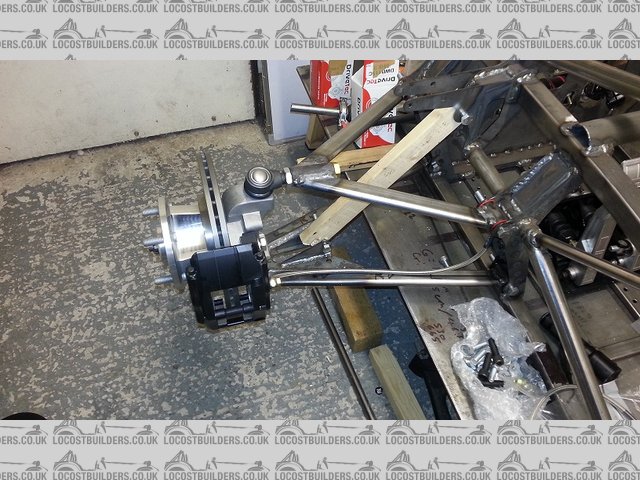
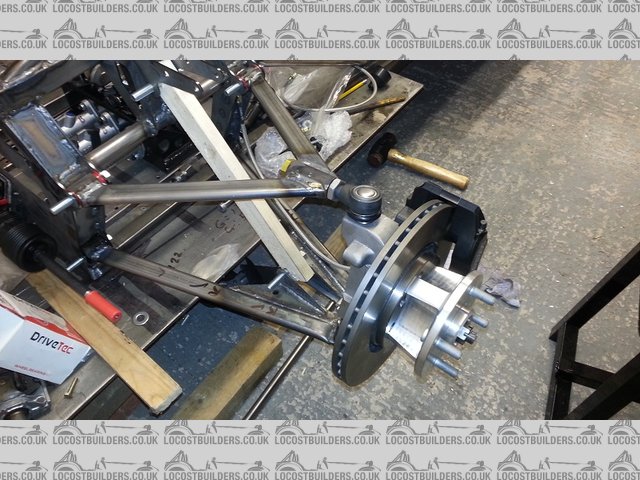
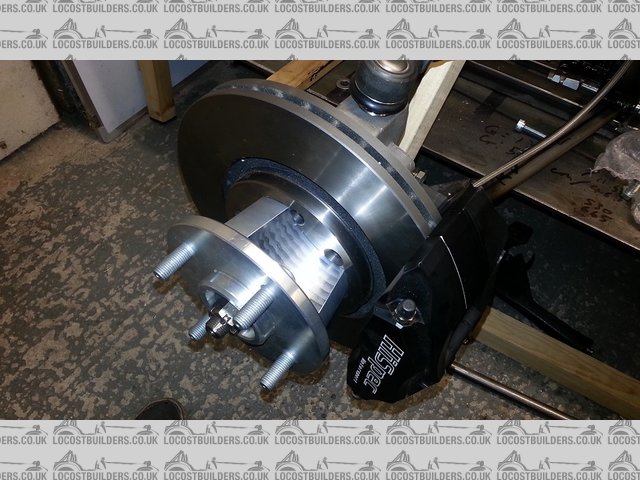
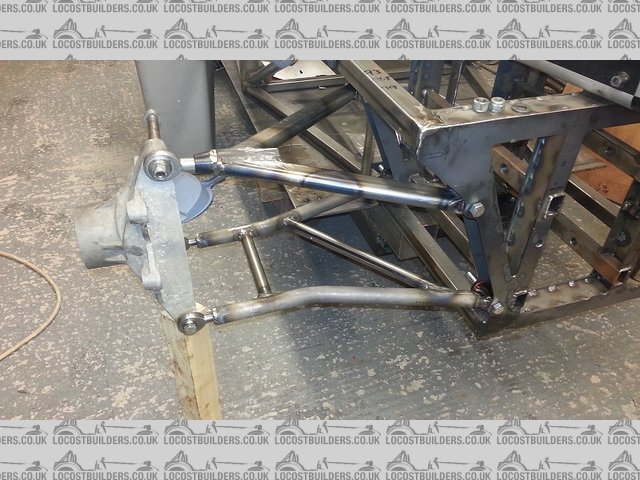
front disk and uprights
hi all
well I should have been making the rear suspension arms , but like a 10 year old at xmas
I could not contain myself putting the front uprights together for a full fit up check.
so hear are the pics of the lh front complete
[img]
Description
[/img]
[img]
Description
[/img]
[img]
Description
[/img]
|
|
|
Rosco86
|
| posted on 19/11/14 at 10:44 AM |
|
|
looking great, would like some front hubs like that on mine!
|
|
|
ceebmoj
|
| posted on 19/11/14 at 11:49 PM |
|
|
Geat build I look forward to seeing you progress.
|
|
|
bart
|
| posted on 21/11/14 at 10:50 PM |
|
|
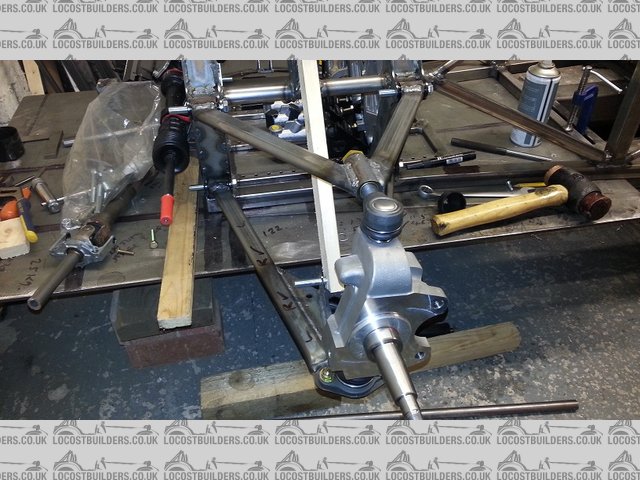
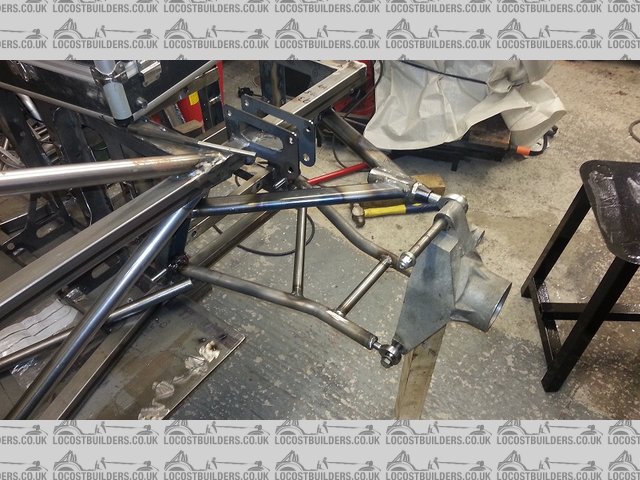
latest update : rear suspension
ok all
had Wednesday off rest the brain , although I did have several idea's during the day !
Thursday was a bad day , just seemed to achieve very little and did no enjoy it.
had a good day today : made the fixture and made the rear suspension arms
and just fitted the lh side for a trial
some pics of the event .
[img]
Description
[/img]
[img]
Description
[/img]
[Edited on 21/11/14 by bart]
|
|
|
mysmallwheels
|
| posted on 22/11/14 at 10:19 AM |
|
|
Bart- Thanks for info, however I'm still not sure or a source, Stateside or in your neck of the woods! Also, your rear uprights are another
question!
Don't slow down! Answer when you can, and thanks for a tremendous build experience! Chris
|
|
|
rdodger
|
| posted on 22/11/14 at 11:01 AM |
|
|
Great progress! Looks really nice.
Just one observation. Have you got enough camber adjustment on the front? There don't seem to be many threads left on the top drag link.
|
|
|
bart
|
| posted on 22/11/14 at 12:17 PM |
|
|
camber and wesfield rear uprights
think so
was designed with 1 deg
and should have another 1 deg to go
if it does prove to be a problem I will have to take a little of the bush at the top
its a bit deceptive , its only roughly put together to check fit etc. I think the front already has about 1 deg in the picture.
must admit I was a bit wary about to much thread hang out.
worst case scenario I will have to make some new top arms
I now have a jig that is fully adjustable so making new arms would only take 2 hours
"the joy of a proto type" fit take apart , adjust , fit , take apart . adjust ect ect ect
I have decided to fabricate steel rear uprights , will make them to the same dimensions as Westfield to take vw calliper's
with the brake disk not being so deep as normal don't think there will be much weight penalty. and be considerably stronger.
I have here'd that the Westfield rear uprights brake ( crack) > can anyone confirm this ???????
ok just rushed out to the garage for a check
with full adjustment I have 1.6 deg
anyone use more than that ????
ok looks like it's a bit of a mod on the front top link. car was designed to have as little roll possible. think i'll go for 3 deg max for
now.
in all the reading I have done , figures of 1 to 1.5 deg was mentioned
[Edited on 22/11/14 by bart]
|
|
|
rdodger
|
| posted on 22/11/14 at 12:37 PM |
|
|
I run around 2 degree of camber.
I am not expert on suspension design but I guess the amount you will need static would depend on how much it gains in role?
If I remember correctly the Caterham 620r runs around 4 degrees!
|
|
|
bart
|
| posted on 25/11/14 at 09:59 PM |
|
|
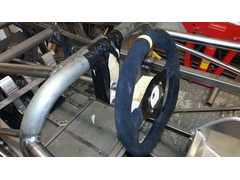
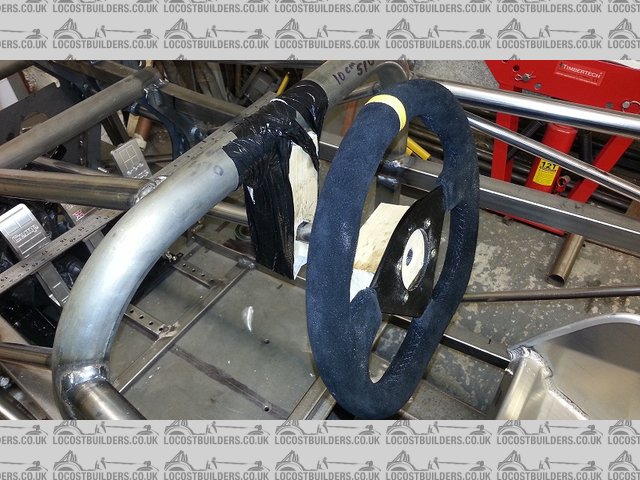
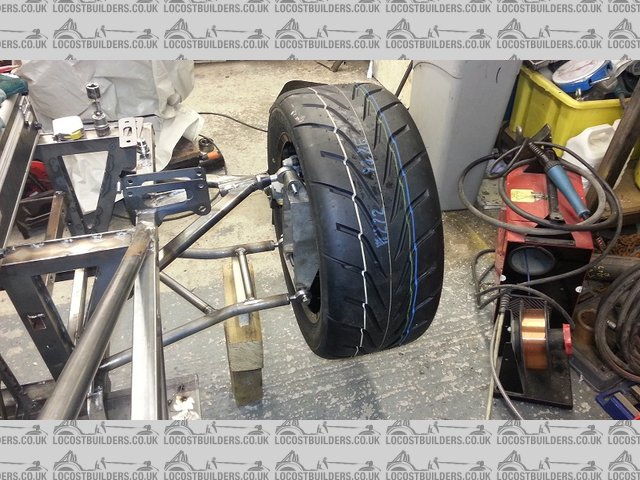
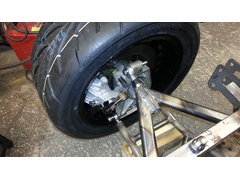
steering wheel try out
had a temp fit of the steering wheel just to get proper position
now making the column complete one off due to fit problems
one piece of good news the steering wheel to side walls is less than 127mm both sides.
[img]
Description
[/img]
? do you thick it would pass IVA with block o wood and gaffer tape !
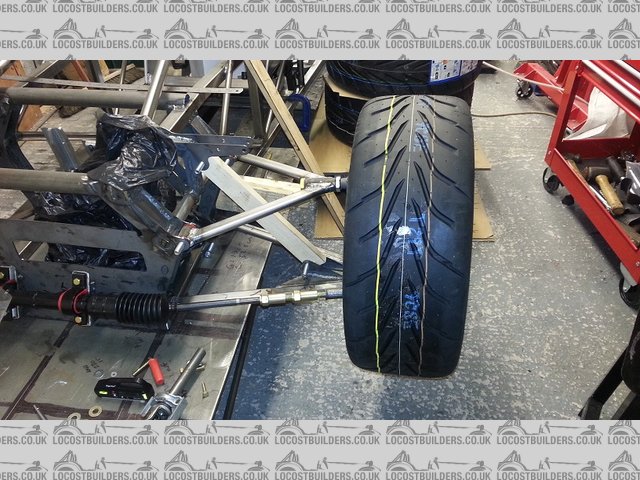
also went down and picked up the wheels and tyres "£200" the set . ( for the wife ! )
[img]
Description
[/img]
all 15" 195/50 front
225/45 rear
|
|
|
bart
|
| posted on 25/11/14 at 10:12 PM |
|
|
fyi lots of little jobs
FYI
been doing lots of little small jobs , I never have a good day when doing these but they need to be done.
1) made the seat belt anchor threaded tubes
2) altering the rear westfield uprights to take fiesta drive shafts
this includes fitting different size bearings.
fiesta hubs need machining - 0.5 mm on rear face
uprights need 2mm machining of front face
3) slight mod to allow full suspension travel at the rear , small cut out of the frame , I will reinforce this area later.
4) worked out that I need 150mm steering extensions for rack , did a quick drawing , will make them tomorrow.
5) drew up the steering column . will make that tomorrow as well.
|
|
|
bart
|
| posted on 27/11/14 at 10:04 PM |
|
|
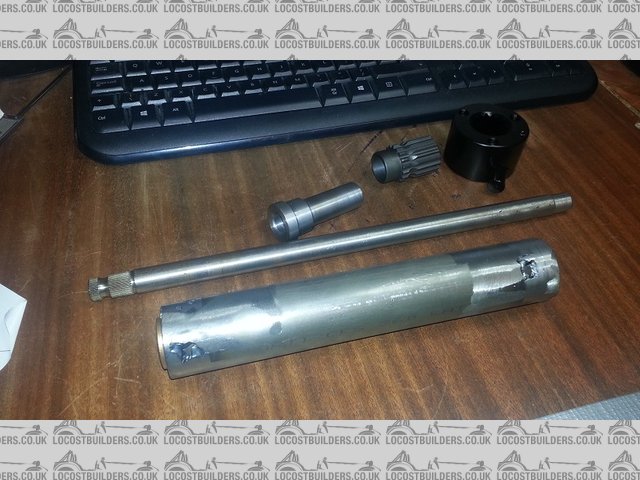
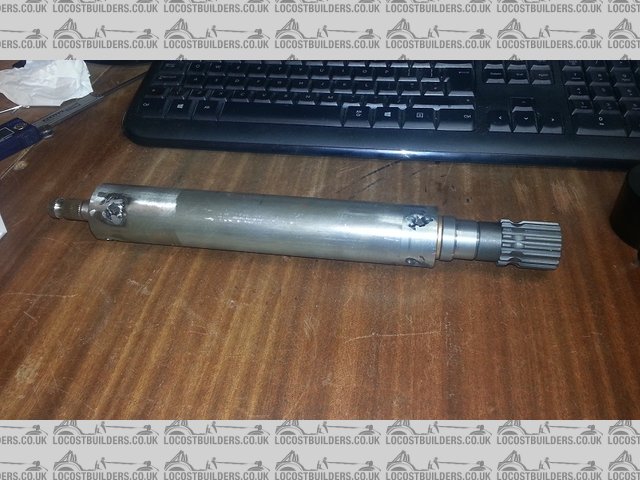
steering column
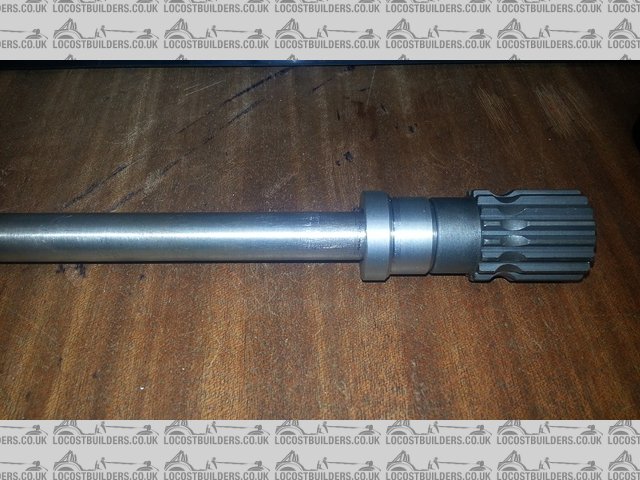
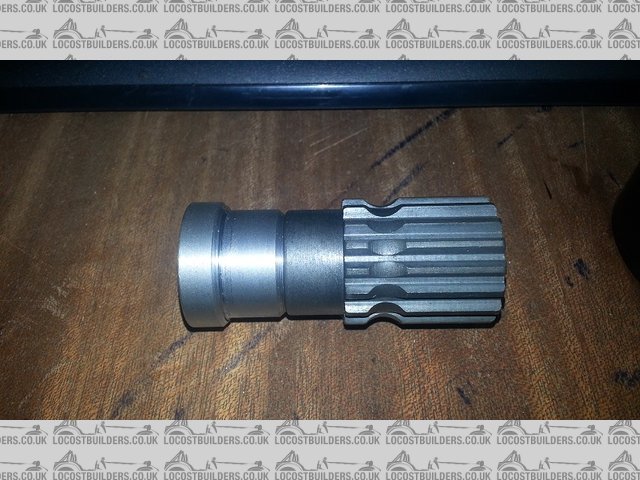
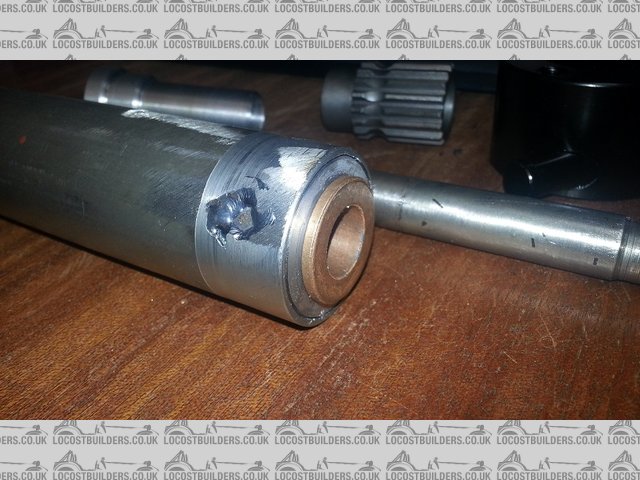
hear are some pics of the steering column that I have made
made from 1 1/2" 1.5mm tube
some made bushes
2 oillite top hats
adapter for inner shaft to quick release
any questions feel free
[img]
Description
[/img]
[img]
Description
[/img]
[img]
Description
[/img]
[img]
Description
[/img]
[img]
Description
[/img]
I also changed the bearing's and adapted the westfield rear uprights to take fiesta drive shafts.
if any one is interested let me know I will post details .
also made some 150 mm extensions for the steering rack.
|
|
|
bart
|
| posted on 28/11/14 at 10:44 PM |
|
|
rear corner build up
hello all
posting 3 pictures tonight showing the rear corner build up
I have now adapted the westfield rear upright to take the fiesta drive shafts and fitted the VW brake calliper's
the calliper's need a little tweaking but they are 90% there . changed the escort front brake disk I was using on the rear
to a bigger ford disk to match the calliper radius. (270mm) and a better offset to boot !
found all the specs I needed on the apec brake site , you can search by size and make fantastic reference source.
need to alter the hand brake mechanism a little to miss the upright.
also considering fitting the calliper's to the wrong sides they look to fit better this way.
my only concern is bleeding the brakes as the bleed nipples will be on the bottom.
I can always take the calliper of its mount to position for bleeding , we will see !
next tasks are
position steering column
measure for coil overs
weld up and finish front steering area ( just tacked in place to test )
work out full steering links to include a crush part.
fit up engine.
fully fit up all four corners
look at and decide on gear change
finish seat mounts and seat belt mounts
that should see me through this week
looking to under coat the chassis so if any one has suggestions for the best self applied paint please post your suggestion's.
[img]
Description
[/img]
[img]
Description
[/img]
[img]
rear fit up showing all
[/img]
|
|
|
wylliezx9r
|
| posted on 28/11/14 at 10:54 PM |
|
|
Cracking build. Have you got any ideas for the bodywork ? Perhaps you could use the BAC Mono for inspiration.
I spent a lot of money on booze, birds and fast cars. The rest I just squandered.
George Best
|
|
|
bart
|
| posted on 28/11/14 at 11:01 PM |
|
|
body work
not sure on body work yet .
thought I'd finish chassis to at least rolling stage then have a good think
easier to get a view when its all there in 3d in front of you.
maybe take some suggestion's from the forum.
|
|
|
bart
|
| posted on 29/11/14 at 06:56 PM |
|
|
pop rivits and floor
hi all
I am at the stage when I need to rivet the alloy floor to the frame
? what to use
I intend to use 1.5 mm half hard aluminium sheet and 4mm c/s aluminium pop rivet's with silicon sealant between.
any comment's would I be better using large head rivet's ? or steel rivet's ect
any advice welcome.
I have posted this question as a separate post as well , as long as I get some answers not bothered where you answer
|
|
|
Doctor Derek Doctors
|
| posted on 30/11/14 at 08:49 PM |
|
|
I used stainless steel rivets for bulkheads/floors and ally rivet for non-structural stuff on my first sprint car build. All has been fine. I'm
a bit of a fan of large head ally rivets as well, just neaten things up.
Enjoyed reading your build thread, you progress is fast! I'm planning to run mine at the end of 2015 for a shakedown and then in proper events
in 2016.
What I really like though is that two people with the same goal are building such different cars. Will be following the updates.
Designer and Supplier of the T89 Designs - Single Seater Locost. Build you own Single Seater Racecar for ~£5k.
Plans and Drawings available, U2U or e-mail for details.
Available Now: The Sports Racer Add-On pack, Build a full bodied Sports Racer for Trackdays, Sprints and Racing.
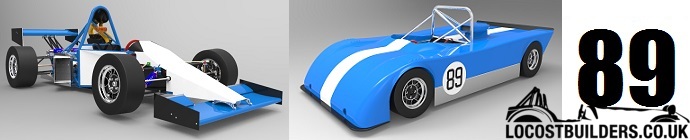
www.t89.co.uk
www.racecarwings.co.uk
callan@t89.co.uk
|
NOTE:This user is registered as a LocostBuilders trader and may offer commercial services to other users
|
bart
|
| posted on 30/11/14 at 09:20 PM |
|
|
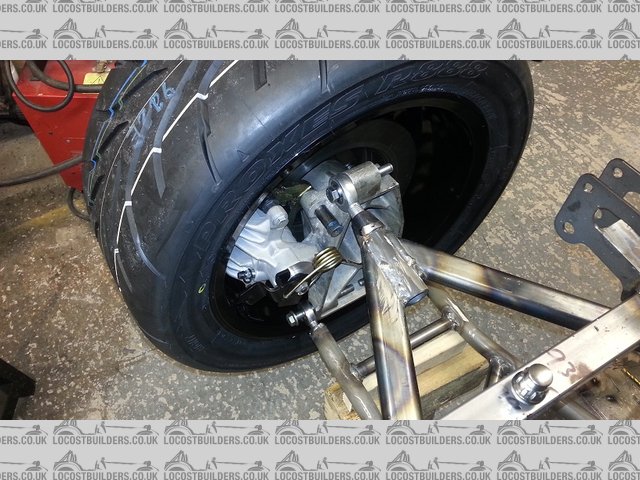
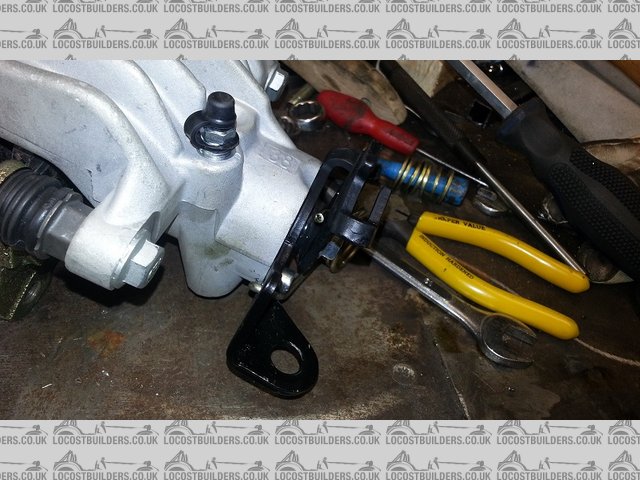
VW rear caliper conversion
hi all
had Saturday off / just did not feel like doing anything , ate and slept on the couch whilst my wife went to the sales.
Sunday arrived and after some food shopping I decided that I must do something
first of all I measured the shock absorbers full extension and max closure ,
this is so I can get in on the group buy of protect shocks.
on to the VW rear calliper's
I had a small problem . when mounted the pull cable for the handbrake would have fouled the rear of the upright casting.
mounting the left calliper on the wrong side and the right visa versa sort of solved it but I was not happy.
probably why I did not feel like working Saturday.!
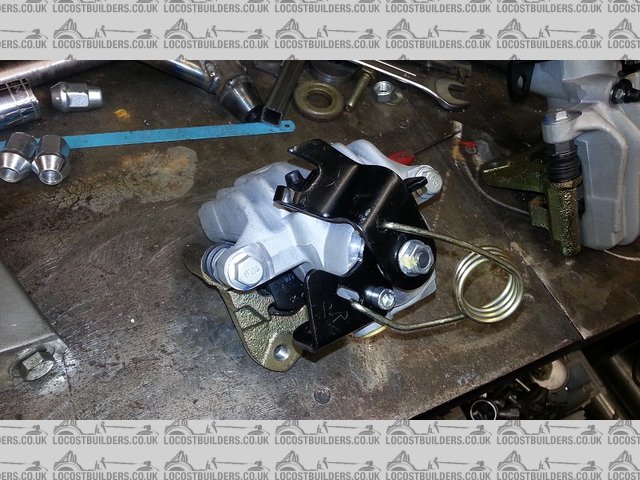
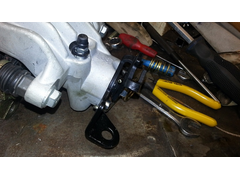
so came up with a solution as shown in the pics
first pic is as ! the pull brackets extend in to the bracket.
so I took the brackets of put the lh on the rh and the rh on the lh
I also modded the swing bracket part, took the off set out and re welded together.
and hey presto ! the bracket is now offset away from the calliper , effectively moving the cable approx. 35mm further out from the calliper. well
happy with that solution. one of my better idea's
re - my fast progress ( previous comment ) > I only tend to do about 3 hrs physical work per day as i'm older and unfortunately don't
have the stamina these days . you know the mind is willing the body is ******d !!
[img]
Description
[/img]
original config of brackets . off set into caliper
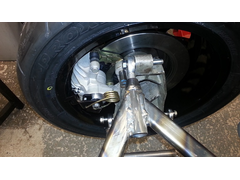
[img]
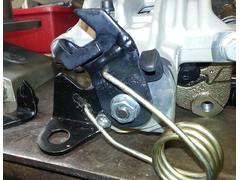 
Description
[/img]
lh swapped for rh
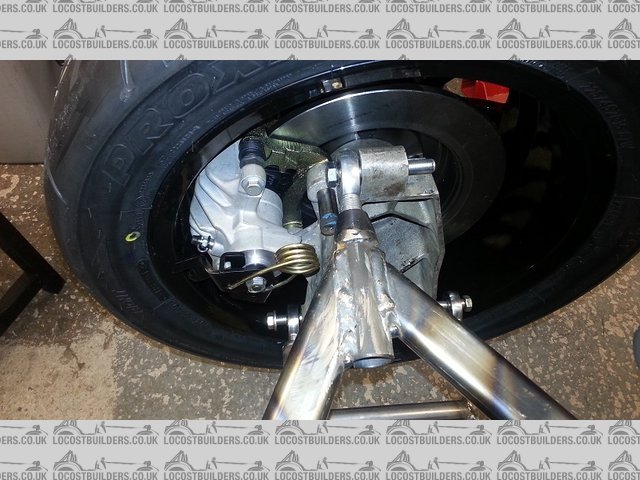
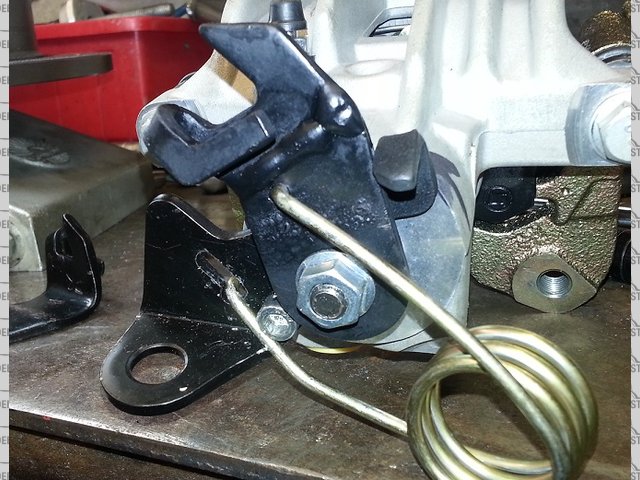
[img]
Description
[/img]
showing offset away from calliper now .
this also allows me to fit the callipers on the correct sides , making bleeding much easier.
|
|
|