cloudy
|
| posted on 8/12/14 at 11:17 AM |

|
|
nice job 
www.warnercars.com
|
|
|
|
|
adithorp
|
| posted on 8/12/14 at 04:13 PM |
|
|
quote:
Originally posted by bart
mmmmm need to think this through. thinking cap
on

any body out there runing
one of these sump ????
[Edited on 7/12/14 by bart]
I'm sure I've read somewhere that swinging sumps don't work on BUSA engined road/track cars. Seem to remember it was something about
them being designed for drag-racing/straight line acceleration. Might be worth having a word with Andy Bates.
"A witty saying proves nothing" Voltaire
http://jpsc.org.uk/forum/
|
|
|
fesycresy
|
| posted on 8/12/14 at 07:22 PM |
|
|
Best thing since Cloudy's R4
That KTM design body work would look so good.
-----------------------------------------------------------------------------------------------------
The sooner you fall behind, the more time you'll have to catch up.
|
|
|
bart
|
| posted on 9/12/14 at 10:01 AM |
|
|
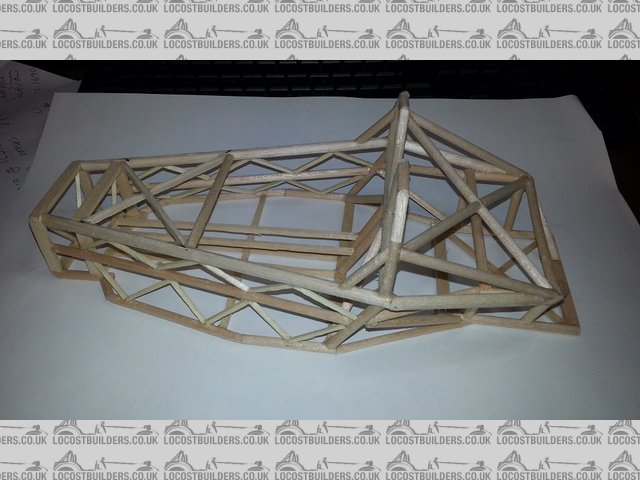
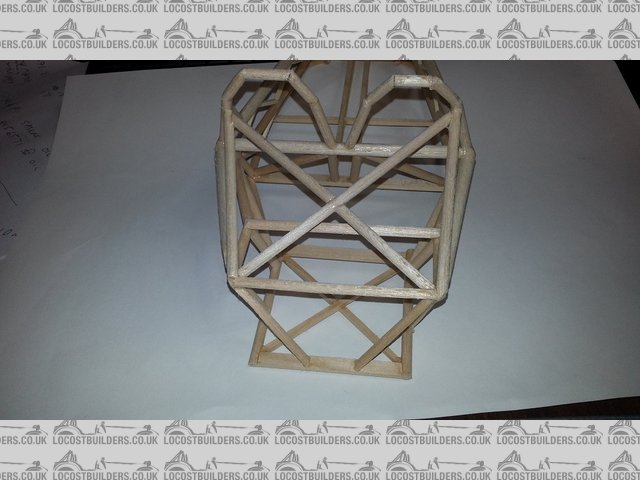
old history looking back
hi all
thought I would post some pictures of the design process I went through
this is a balsa model of a 2 seater I was thinking of , although the top rails a straight in the model
they would have been rolled radius in the real car.
I built this some 7 months ago to get a FEEL for the construction and rigidity of the chassis
and what happens when you add / take of bits
all I can say about this design exercise is , yes it ends up looking like an atom / warner r4 / mev ect
if you go down the exo route I suppose its inevitable.
that's why I ended up not building this design . I wanted to be a little different.
Description
Description
Description
as I say this was just a snap shot off one stage in the thought process .
BE ALERT > BRITAIN NEEDS LERTS
|
|
|
bart
|
| posted on 9/12/14 at 10:34 AM |
|
|
ps : I did not mean to insult anyone's designs , I know a lot of hard work and thought went in to all of them.
I was just explaining how I got to where I am today .
phew !!! dodged that one !
BE ALERT > BRITAIN NEEDS LERTS
|
|
|
bart
|
| posted on 10/12/14 at 04:41 PM |
|
|
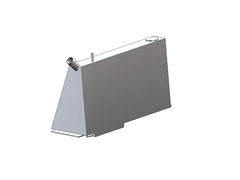
fuel tank
hi all
had a day off yesterday , needed to refresh the brain .
today I set about designing the fuel tank , that will be off to manufacture tomorrow .
could not decide how to mount it but problem solved now.
have found a fuel gauge sender that can be modded to work with my bike clocks.
any one need the info just u2u me
the rest of my exhaust bits arrived to day so I will be changing over to stainless wire tomorrow and tacking up the exhaust
the tank has a baffled sump with open dimples and a side baffle as well
holds 36 ltr ( or so my cad says )
making from 1.5 mm ally with 6 mm mounting pads that attach to rubber cotton reels
all gets loaded into the car from below.
I also need a double skinned insulated fire wall between the exhaust and the tank and a fire wall between me and the tank.
also measured up the gear change cable , that is on order with venhill with some other bits I need.
so all in all in been a measure and organise day today , which is just as well as the weather outside is horrible .
if I can summon the will to go outside to the garage I will put up some pics of the installed snake exhaust manifold
Description
BE ALERT > BRITAIN NEEDS LERTS
|
|
|
bart
|
| posted on 10/12/14 at 05:08 PM |
|
|
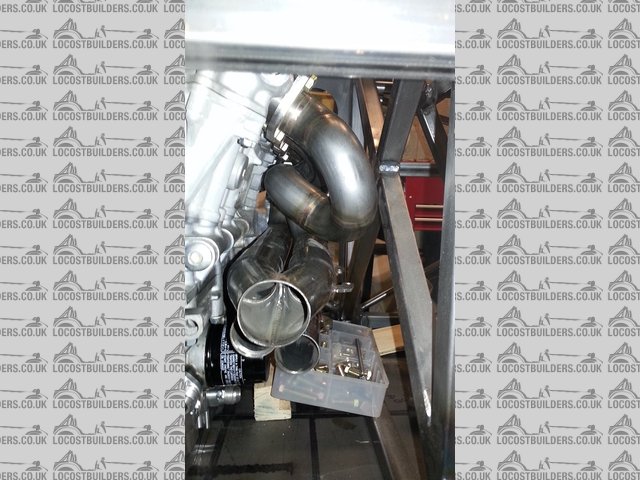
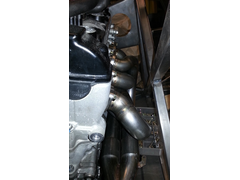
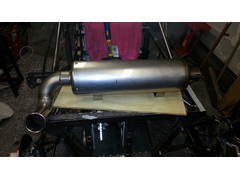
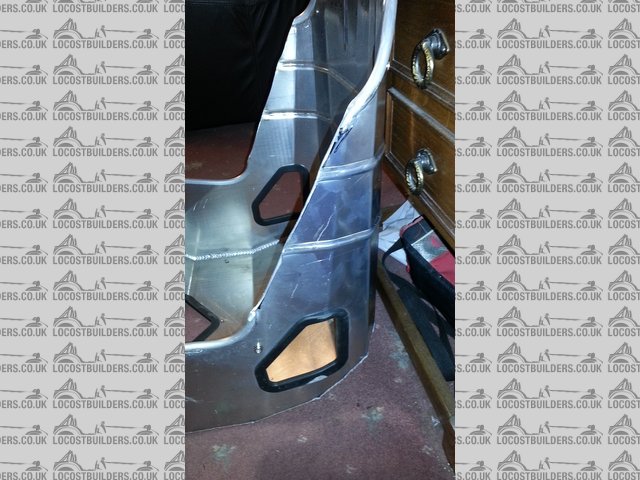
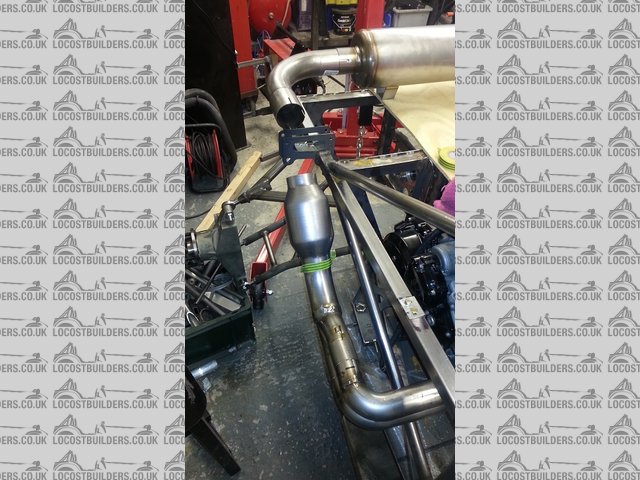
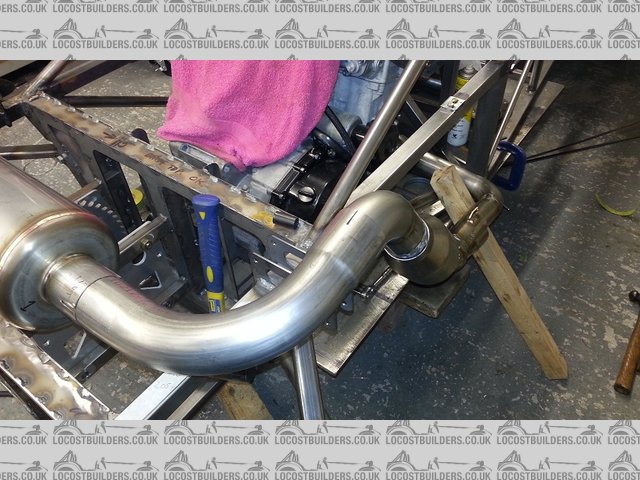
exhausted !
well I had to go outside and lock up so I took the pics I said I would.
these show the installed snake manifold .
yes ! at the moment I think its to tight to the block so I will be tinkering tomorrow / Friday to move it a little
have already started to mod the collectors to take them outside the rear frame ( all will become clear later )
I also need to add a cat witch arrived today.
you can still see the manifold through the chassis as I have not installed the fire wall yet ( job on list for xmas )
I have also shown the proposed position of the back box although the exit is not correct.
last pic show a mod I made to the seat , I took the underarm wings of and will be welding the rounded trim back on .
Description
Description
Description
Description
Description
BE ALERT > BRITAIN NEEDS LERTS
|
|
|
bart
|
| posted on 11/12/14 at 08:44 PM |
|
|
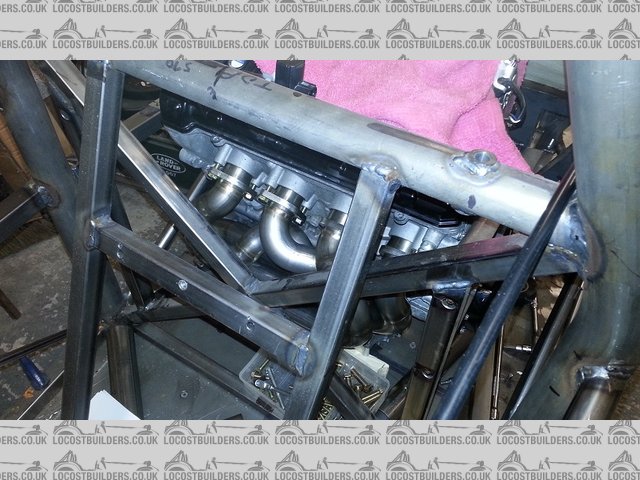
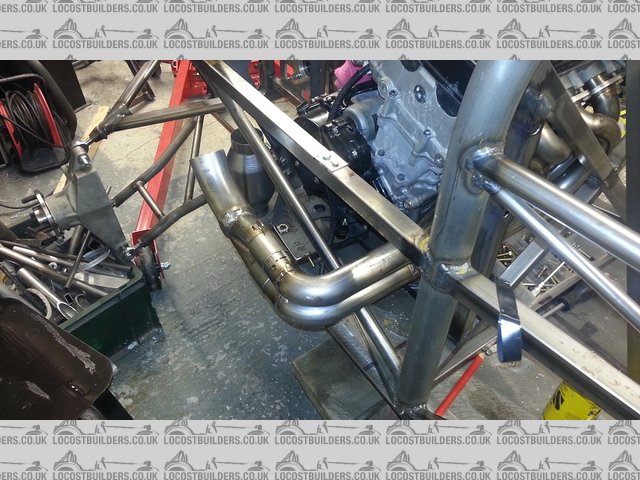
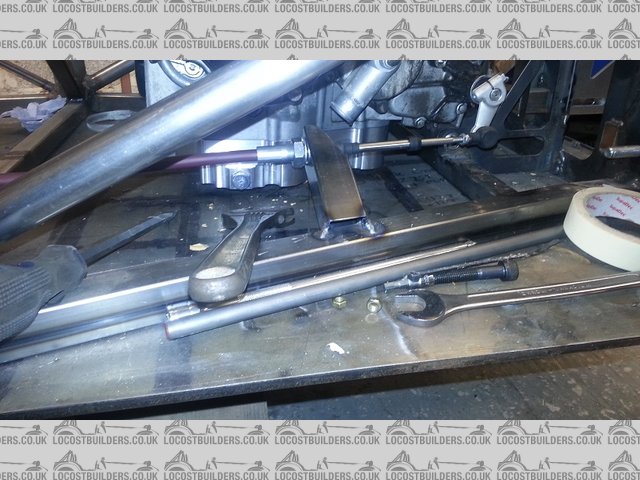
exhausted
hi all
spent the day finishing ( apart from radi for iva ) the gear change lever , added 2 alloy bosses got them welded . machined the lever out for swivel
bushes and put some more holes in , just waiting for gear change cable and 6 mm rod end.
need to spend a couple of hours making it all rounded for iva though.
got stuck into the exhaust.
turned the secondary's round and re welded , keeping the length the same.
this takes the system out side the car as per the picture.
I will add the cat tomorrow when the lambda sensor bosses arrive ( I hope , xmas post ! )
will mount the back box to the frame and more or less finish the system.
I then have to take the engine out and alter the headers slightly , then back in and finish the exhaust.
the cat is some way from the head , so I will wrap the system to keep the heat up at the cat , also to keep the fire wall cooler.
Description
Description
Description
BE ALERT > BRITAIN NEEDS LERTS
|
|
|
wylliezx9r
|
| posted on 12/12/14 at 11:03 AM |
|
|
Looking really good. Have you any interest in marketing this at all ?
I spent a lot of money on booze, birds and fast cars. The rest I just squandered.
George Best
|
|
|
bart
|
| posted on 12/12/14 at 11:27 AM |
|
|
short answer "maybe"
i'm a production engineer by trade so turning it into a makeable product is not a concern.
I would change several things, as after all this is a prototype to iron out the bugs.
I just have not decided it also depends on interest.
body will be very the main factor / I have several thoughts on this but not really worried until feb march time after mechanical finished.
so its a weight and see
BE ALERT > BRITAIN NEEDS LERTS
|
|
|
bart
|
| posted on 12/12/14 at 10:02 PM |
|
|
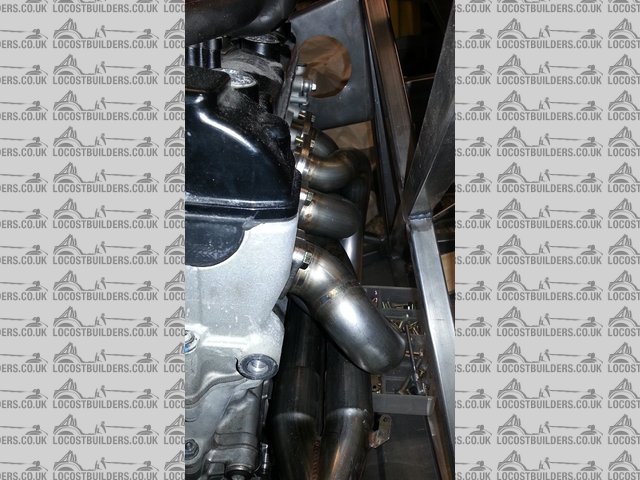
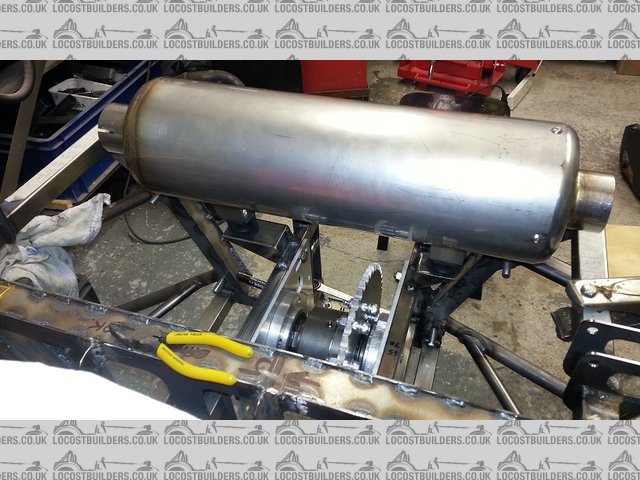
exhausted again
hi all
I almost finished the exhaust today
mounted the back box to chassis
altered the final exit pipe
and made some intermediate pipes.
mounting the back box to chassis
Description
new exit pipe
 
Description
rear view
 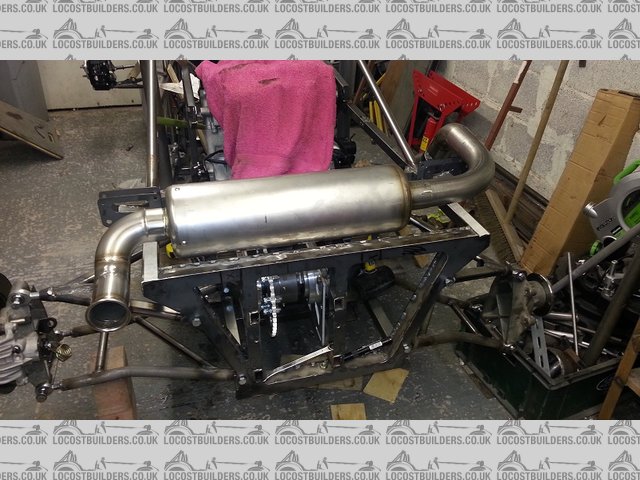
Description
intermediate pipes and cat
Description
BE ALERT > BRITAIN NEEDS LERTS
|
|
|
mark chandler
|
| posted on 12/12/14 at 11:45 PM |
|
|
That certainly is some exhausting work, I will be interested to see how you design the rear body around this
|
|
|
wylliezx9r
|
| posted on 13/12/14 at 03:52 AM |
|
|
quote:
Originally posted by mark chandler
That certainly is some exhausting work, I will be interested to see how you design the rear body around this
Puns keeping newspaper editors in employment since 1909 
I spent a lot of money on booze, birds and fast cars. The rest I just squandered.
George Best
|
|
|
43655
|
| posted on 13/12/14 at 08:16 PM |
|
|
only suggestion W.R.T. the chassis is the lack of support on the roll hoops, in my mind they'd want to bend in a roll, probably backwards.
The braces going back from the hoop are just from sort of a midpoint so could still bend enough to squish your head?
|
|
|
fregis
|
| posted on 13/12/14 at 08:39 PM |
|
|
i dont know are you calculated steering rack position, but from photo looking not good. As far as I am familiar rack position, it are to far in front,
rods angle to big. Than you steer, wheel angles go wrong, unless you using anti ackerman?
found pdf, where more information about rack position
http://woodwardsteering.com/images/cat05%20pdf%2064-79.pdf
[Edited on 13/12/14 by fregis]
Never be afraid to do what you are insolvent, remember: amateurs built the ark - Professionals built the Titanic.
|
|
|
bart
|
| posted on 13/12/14 at 10:38 PM |
|
|
the steering rack is where the suspension program told me to put it , but reading up I get your point .
I will do some further investigation.
any experienced comments from anyone else ?
further today
spent the day working on the exhaust again.
and making engine spacers for position.
and had a good tidy up
now im back out to the garage see if I can move the rack !!!!
BE ALERT > BRITAIN NEEDS LERTS
|
|
|
fregis
|
| posted on 13/12/14 at 11:04 PM |
|
|
Few years ago i try simulate rack position in draw. Use typical ackerman, all start in zero TOE, steering rack turned same (70mm), but rack position
moved 2cm, 4 cm and 6 cm ( start point rods are straight position looking from top)
it is little messy, but i think you see how much change turning
http://images60.fotki.com/v367/photos/1/1313721/8097125/auksine2Copy-
vi.jpg
It is different if you are using anti ackerman, single seater sometime use this, this position wil be ok
as far as I've noticed about rack position - when it in front axle or behind axle, rods have different angle. Because upright steering arm
have different angle, so need different others angles. Sorry for terrible english, sometimes it is difficult to explain what I know
[Edited on 14/12/14 by fregis]
Never be afraid to do what you are insolvent, remember: amateurs built the ark - Professionals built the Titanic.
|
|
|
bart
|
| posted on 14/12/14 at 12:56 PM |
|
|
move the rack
well I have spent most of the night and morning following up the comments about the rack position.
and I have to say at this moment I am now in agreement .
luckily I have more than enough room to move it to a better position behind the rod end line.
a few comments in other posts all sort of point to mid way between the axel line and the steering arm end line.
for ford Cortina geometry front end.
I will do some calculations starting at this point and work my way forward.
I'm just glad it was brought up now as one of the next jobs was to fully weld the rack mounts.
still some good news I can now mount the battery where the rack was , I was wondering where to put that.
ho hum forward we go
anything else any one spots , only to glad to consider it .
BE ALERT > BRITAIN NEEDS LERTS
|
|
|
bart
|
| posted on 16/12/14 at 07:07 PM |
|
|
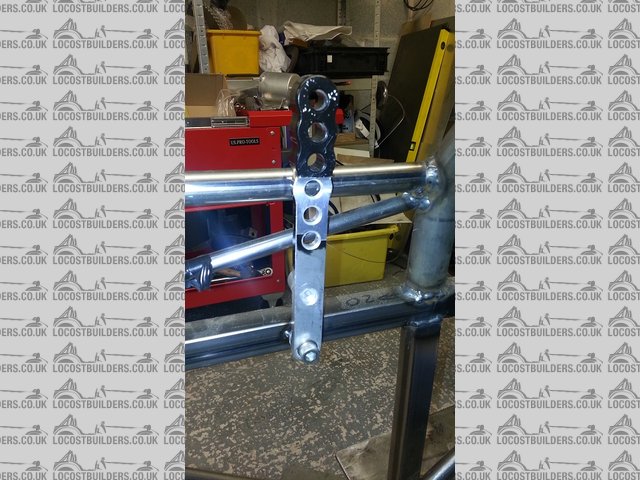
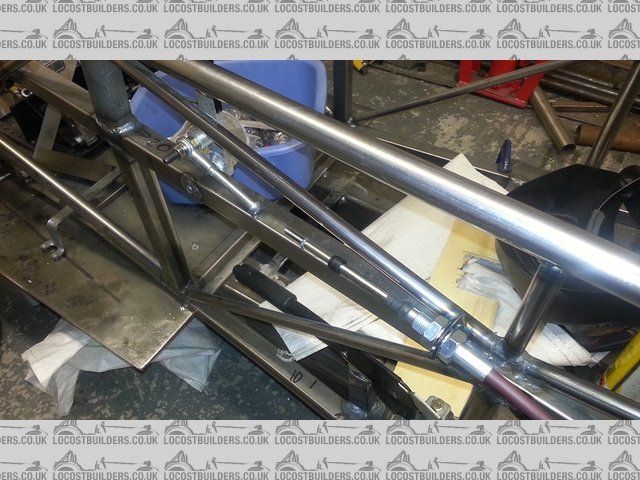
move the rack part 2
hello all
well I have spent the last 48hrs reading every thing I could from every conceivable place about Ackermann steering.
my car was designed with anti Ackermann and since being prompted to have another look I have decided to go quasi Ackermann or at least as close as you
can get using a ford Cortina front set up.
the rack has to be moved back behind the rod to rod line and that is what I am planning to do.
as you can see in the picture I have removed the brackets from the original position and temporarily placed it in the approximate correct position for
minimum bump steer and best steering position.
just enough room to get it in ahead of the brake pedals.
means I wont be able to adjust the pedals for any one else over say 6ft 5" > 7" but I can live with that.
just have to figure out the best way to fabricate some solid brackets for the rack now.
having stared at it for an hour I decided to sleep on it and got deviated onto the gear change mechanism.
gear change cable arrived today so fabricated the holding brackets . just need to make an adapter for one end.
 
Description
gear change mech rear
Description
gear change mech front - the missing adapter ( another job on the list for xmas )
Description
[Edited on 16/12/14 by bart]
BE ALERT > BRITAIN NEEDS LERTS
|
|
|
bart
|
| posted on 17/12/14 at 07:54 PM |
|
|
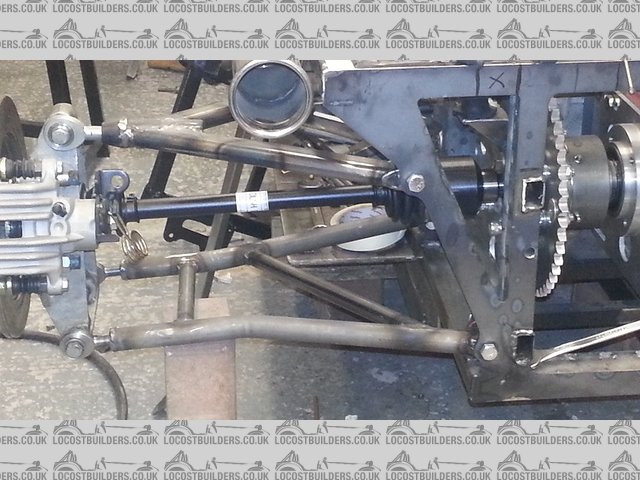
gear change finished
Description
drive shafts arrived temp fitted.
Description
BE ALERT > BRITAIN NEEDS LERTS
|
|
|
cloudy
|
| posted on 17/12/14 at 08:22 PM |
|
|
Looking good  - any reason for the stick shift over paddles? - any reason for the stick shift over paddles?
James
www.warnercars.com
|
|
|
bart
|
| posted on 17/12/14 at 11:07 PM |
|
|
stick shift
re stick shift
good question
couple of reasons
1) this is very much a prototype , see if it handles ,stops , what's the chain drive like ect
I have already learnt a hell of a lot so far and would change many things. so gear change did not need to be so fancy at this stage
2) trying to keep the cost down
3) sitting in the car ( going broom broom ect ) stick shift felt quite natural and is right next to the steering wheel.
4) lack of room - the mid bulk head needs to be 30 to 50 mm further forward , whilst not impossible to get manual paddles in it would be a task as
is
5) that leaves electronic paddle change see ( 2 )
6) its something that could be added when the rest of the car has been proven .
and some more that elude me at present
BE ALERT > BRITAIN NEEDS LERTS
|
|
|
bart
|
| posted on 20/12/14 at 09:34 PM |
|
|
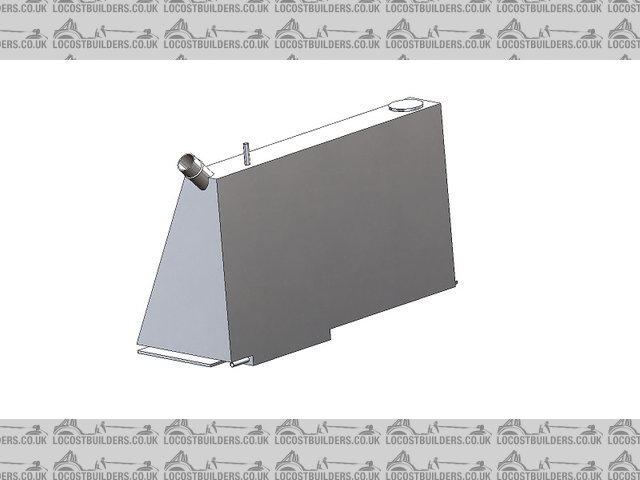
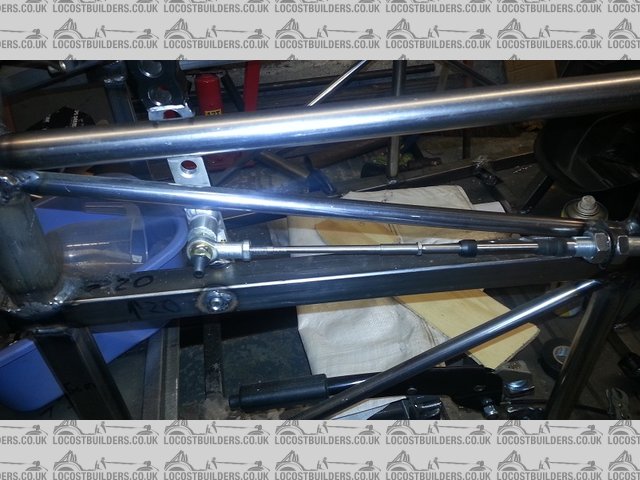
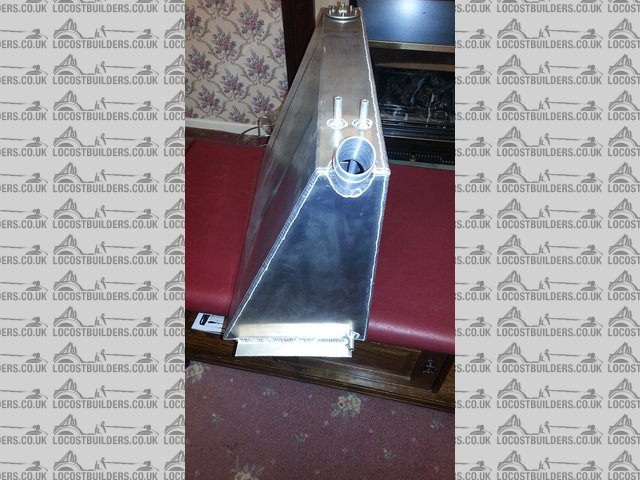
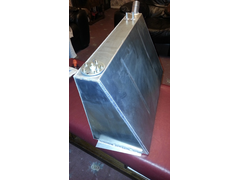
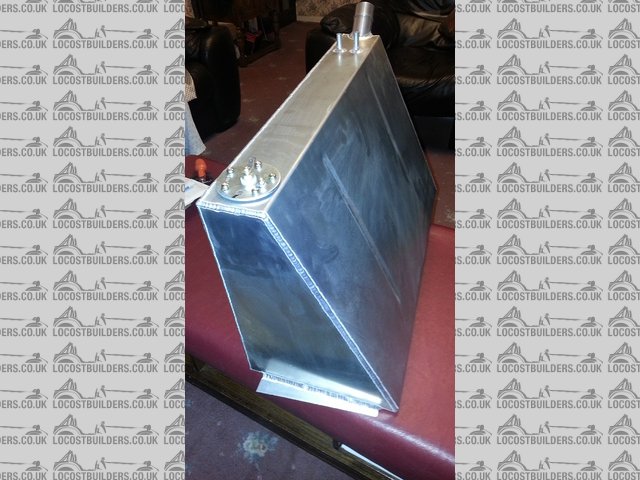
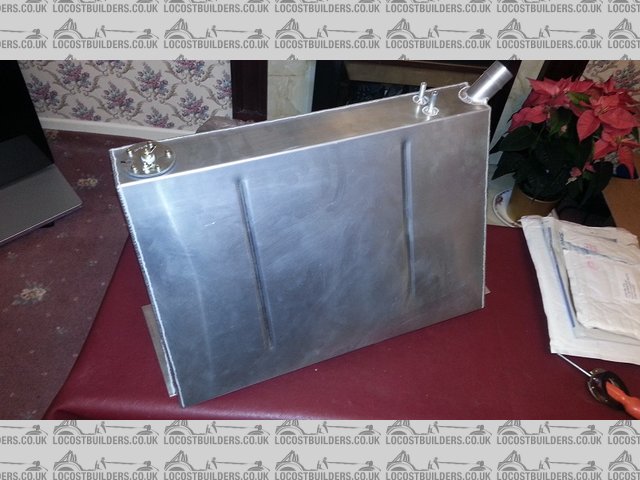
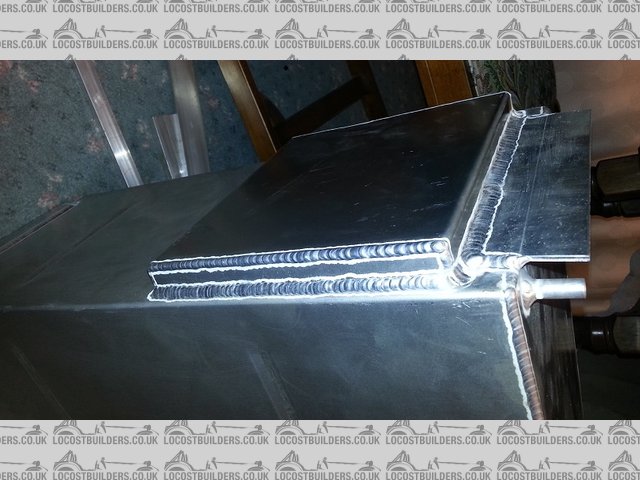
fuel tank done and steering
well today I finished my fuel tank all but two top mount brackets which I cant position till in the car
has an internal baffle
has a baffled bottom sump
a modified fuel sender that will work with bike clocks
1 bottom fed out let
1 in the top ( tube to bottom ) return
1 vent
and 1 inlet 1 1/2"
Description
Description
Description
Description
sump
also been working on the reposition of the steering rack 80% done now , just needs some cross bracing and will be finished
have made provision for adjustment as well. leave's the steering links a bit iffy , but nothing is unsolvable I always say
pics to follow tomorrow if the wife don't make me go shopping .
my aim is to complete all chassis fabrication in the next 10 days and paint and put the floor in . we will see how it goes , I can see xmas day in the
garage although I have to cook xmas dinner .
BE ALERT > BRITAIN NEEDS LERTS
|
|
|
big_wasa
|
| posted on 20/12/14 at 10:07 PM |
|
|
Nice work that
|
|
|
coozer
|
| posted on 20/12/14 at 11:06 PM |
|
|
Good work Bart, nice to see you more into the car than Xmas.. wish I could be bothered to get on with mine!!!
1972 V8 Jago
1980 Z750
|
|
|