craigdiver
|
| posted on 22/8/18 at 08:56 PM |

|
|
Spray painting advice
Going to be getting ready to spray paint the body of the car. I have a full respirator suitable for 1K & 2K paints. Access to a spray booth tent.
I have bought 1K white etch primer and 2K paint which has been matched to my scuttle and nosecone colour (by magic at the automotive paints place by
them scanning the colour from a piece of gel coated GRP from my nose cone).
The bodywork panels are all new semi-hard aluminium and were plastic film coated until I fabricated them into the body panels.
I have never spray painted before with compressor / spray gun so have done quite a bit of research and have come up with this process; (please advise
if iím doing something wrong)
1) going to degrease body panels
2) machine sand panels with 320 grit
3) clean and degrease panels
4) mix my white etch primer with 15% thinners as instructed by paint manufacturer.
5) spray only one coat and let dry for 24 hours.
6) ** do I sand it down before first coat of top coat, if so, with what grit?
7) mix 2K paint 2:1 10% ratio/thinners and apply first coat.
8) ** do I sand it down before next coat of top coat, if so, with what grit?
9) will I need to give it more than one top coat, if so, spray second coat.
Fingers crossed that all goes well!
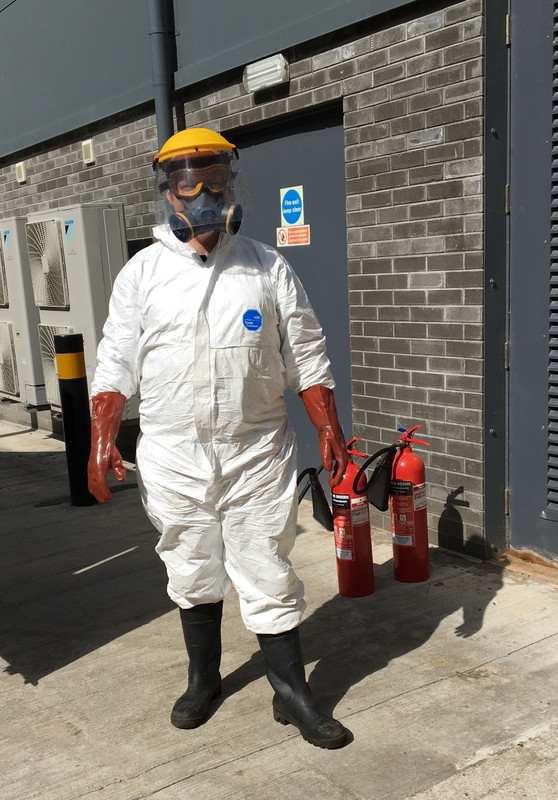
If it ain't broken, fix it anyway (just because).
Building - BMW powered Haynes Roadster/442E hybrid.
Volvo C30 T5 Polestar
|
|
|
|
|
Mr Whippy
|
| posted on 23/8/18 at 05:26 AM |

|
|
walk down the street like that carrying a white bag and a long reach grabber 
I'd be lightly sanding with wet & dry between each coat but I'm no expert it's just what you see people do in the custom shows.
Watched one where the sprayer was getting glass like shiny, oh we're just going to wet sand it again...what? why?! yeah the final results did
look very shiny (as much as my tv could show) but it did seem a tab OTT
|
|
|
cliftyhanger
|
| posted on 23/8/18 at 06:15 AM |

|
|
You are not using a primer, just the etch? are the panels that good?? ie perfect?
I use etch on bare steel(and the odd bit of ali I do)
Then a double coat (let it flash off for 10 mins between coats)of 2k filler primer to give me something to work with. That needs to harden off ideally
somewhere warm for 24 hours.
Then prepare that surface with 800 grit w+d (320 and you will have all sorts of scratch marks) You should use a guide coat at his stage to make sure
you don't have any high or low spots that need addressing. Acrylic stopper is dead handy
Clean up, panel wipe, tack cloth then a double coat of colour. If going for a top class finish flat with 800 or 1000, and sort the imperfections, and
another double coat. (this is for 2k, cellulose needs lots of coats)
In terms of colour, you have checked the actual match? worth doing by eye so you know the colour is spot on. It wouldn't be the first time the
machine is a bit off.....
You have practiced with a spraygun? if not you need to before you start on the car.
|
|
|
cliftyhanger
|
| posted on 23/8/18 at 06:18 AM |

|
|
Re mask, is that certified for 2k???? Check the numbers on the cartridge.
I thought the HSE guidance was that only an air fed mask was suitable. Especially for spending a significant time exposed to 2k.
Just so that you fully understand what you are doing....
http://www.hse.gov.uk/mvr/bodyshop/isocyanates.htm
re the type of mask you are seen in above
Please note that for occupational 2 pack paint spraying HSE guidelines state that airline breathing apparatus should be worn. The Scott Safety
Aviva 2 half mask and ABEK1 P3 filter combination that we offer here is suitable for occasional use in a well ventilated environment and where there
is a low level of atmospheric contamination.
edited to add safety links
[Edited on 23/8/18 by cliftyhanger]
|
|
|
craigdiver
|
| posted on 23/8/18 at 06:55 AM |

|
|
quote:
Originally posted by cliftyhanger
You are not using a primer, just the etch? are the panels that good?? ie perfect?
I use etch on bare steel(and the odd bit of ali I do)
Then a double coat (let it flash off for 10 mins between coats)of 2k filler primer to give me something to work with. That needs to harden off ideally
somewhere warm for 24 hours.
Then prepare that surface with 800 grit w+d (320 and you will have all sorts of scratch marks) You should use a guide coat at his stage to make sure
you don't have any high or low spots that need addressing. Acrylic stopper is dead handy
Clean up, panel wipe, tack cloth then a double coat of colour. If going for a top class finish flat with 800 or 1000, and sort the imperfections, and
another double coat. (this is for 2k, cellulose needs lots of coats)
In terms of colour, you have checked the actual match? worth doing by eye so you know the colour is spot on. It wouldn't be the first time the
machine is a bit off.....
You have practiced with a spraygun? if not you need to before you start on the car.
Thanks for the comments, it is new perfect panels.
It is an etch primer so presumed it was a primer and told by manufacturer to only do one coat.
Ill not use 320 grit, ill stick to 800 - thanks
Do you always do a double coat of colour
This is my first spray attempt and not expecting anything spectacular!
Spraygun setup and practiced with.
If it ain't broken, fix it anyway (just because).
Building - BMW powered Haynes Roadster/442E hybrid.
Volvo C30 T5 Polestar
|
|
|
craigdiver
|
| posted on 23/8/18 at 07:06 AM |

|
|
quote:
Originally posted by cliftyhanger
Re mask, is that certified for 2k???? Check the numbers on the cartridge.
I thought the HSE guidance was that only an air fed mask was suitable. Especially for spending a significant time exposed to 2k.
Just so that you fully understand what you are doing....
http://www.hse.gov.uk/mvr/bodyshop/isocyanates.htm
re the type of mask you are seen in above
Please note that for occupational 2 pack paint spraying HSE guidelines state that airline breathing apparatus should be worn. The Scott Safety
Aviva 2 half mask and ABEK1 P3 filter combination that we offer here is suitable for occasional use in a well ventilated environment and where there
is a low level of atmospheric contamination.
edited to add safety links
[Edited on 23/8/18 by cliftyhanger]
Thanks for the info, I was kitted up in the photo assisting with a chemical clean with hydrochloric acid. Filters are A1, B1 & E1 rated which is
adequate for 2k vapour in a non-commercial environment. (and much better than some of the shitty masks I see people wearing to spray paint!)
If it ain't broken, fix it anyway (just because).
Building - BMW powered Haynes Roadster/442E hybrid.
Volvo C30 T5 Polestar
|
|
|
macc man
|
| posted on 23/8/18 at 07:58 AM |

|
|
I have done a bit of spaying mainly with cellulose with very basic equipment and find practice is the main thing. The better the prep the better the
finish. It is a long process but worth the effort. Don't worry too much about runs as they can be flattened and polished out. You will need 2 to
3 top coats to allow for mistakes to be corrected. Rolls Royce used to repeatedly coat the cars and buff until perfect. Worst thing is water in the
system. This will ruin any pain job and will need starting from scratch. A good filter and dryer is a must. Best of luck.
|
|
|
tilly819
|
| posted on 23/8/18 at 08:20 AM |

|
|
quote:
Originally posted by craigdiver
Going to be getting ready to spray paint the body of the car. I have a full respirator suitable for 1K & 2K paints. Access to a spray booth tent.
I have bought 1K white etch primer and 2K paint which has been matched to my scuttle and nosecone colour (by magic at the automotive paints place by
them scanning the colour from a piece of gel coated GRP from my nose cone).
The bodywork panels are all new semi-hard aluminium and were plastic film coated until I fabricated them into the body panels.
I have never spray painted before with compressor / spray gun so have done quite a bit of research and have come up with this process; (please advise
if iím doing something wrong)
1) going to degrease body panels
2) machine sand panels with 320 grit
3) clean and degrease panels
4) mix my white etch primer with 15% thinners as instructed by paint manufacturer.
5) spray only one coat and let dry for 24 hours.
6) ** do I sand it down before first coat of top coat, if so, with what grit?
7) mix 2K paint 2:1 10% ratio/thinners and apply first coat.
8) ** do I sand it down before next coat of top coat, if so, with what grit?
9) will I need to give it more than one top coat, if so, spray second coat.
Fingers crossed that all goes well!
Right Its been a while but I used to do a fair bit of spraying, mainly with 2K most people know my views on doing this DIY as I now have isocyonate
ashma because of it but you seem determined. One thing I will say though is you need to be wearing your mask all of the time...even when you are
mixing the paint, Its amazing how many people don't do this. Make sure that mask fits properly around your nose. I had one just like that and it
used to leak down the side of my nose. Air will take the path of least resistance...I might as well have not been wearing it. If you can borrow an air
fed mash with the appropriate filters and set up your compressor outside.
Your order of operations sounds reasonable. A couple questions and tips though.
Is your etch primer High solids or low solids?
What type of gun are you using. Suction cup, gravity fed, lvlp, hvlp? do you have a couple of sizes of gun nozzle?
Tip#1 clean your gun before you start.
Tip#2 use a paint strainer to filter the paint into the gun.
Now drying time between 1K etch and 2K colour this is where it gets interesting.
Normally you would use a 2k etch, let it flash then apply 1 or 2 coats of high build or low solids (depending on surface quality) primer. As you
don't really want to sand through your etching primer (that's why you put normal primer over top of etching primer, to give you some depth
that you can sand into) You normally do this as a wet on wet process ie don't let it fully dry just let flash off.
Now with a 1k etch and no primer it gets a bit more interesting and i don't know the exact answer. Hopefully you have got a high solids/high
build etch primer. Now the chances are since you have not done this before you will either put it on thin and dry or wet/thick and get some runs... at
this stage i would say the latter is preferable because that means you have at least got some thickness to the paint. I would then let it fully dry
and block sand out any runs / orange peal. start fairly course to get rid of the runs etc then finish with somewhere around 800 grit.
Tip#3 Now have a dam good clean up and get rid of all the dust /cr*p etc. Mop the floor etc. you don't want dust in your topcoat. (you will get
some its inevitable but try to minimise it as much as you can.
Top cot time.
Tip#4 make sure your gun its spotlessly clean. Everything clean clean clean.
The way I was taught is as follows > You always do 2 coats of topcoat (this might not be true but it has always worked for me and that's how
we painted the aeroplanes.... With 2K the fist coat is a light coat a tack coat if you like. You just let it flash off 20 mins or so. The second coat
is then a thicker coat.
This is one of the main reasons other than HSE that I don't recommend 2K for beginners. It is not forgiving. If you screw up your first coat the
second coat will not hide your mistakes, it will just make them worse. Now if you do mess up your first coat then you have no choice you have to stop
/ dry / sand and start again. At this point you may as well have used cellulose.. All the 2K is doing is saving you time (yes it does give you a
harder finish but its not like you are going to be doing 25k miles a year and keeping it outside in the bad weather.)
Sorry slight tangent there but maybe some useful info as well.
Right back to your second coat.. if all has gone will with the fist coat (lets hope so) then the second coat is your finish. Again as a beginner I
would be shooting for slightly thicker and risk a few small runs, better to have a wet glossy finish with a few runs and plenty of paint thickness
that you can then sand and polish than a dry finish that you then sand and go through to the primer...
At this point you might have figured out you will probably have to do some wet sanding and polishing.. Let the paint fully harden before you do this.
Give it a few days.. Better safe than sorry. Same process as before block out the runs dust and orange peal gradually work your way up to around 1500
grit then start polishing with a medium ish compound, something like Ferecla G3. Keep the panel cool!! one burn mark and you are stuffed. Hand
polishing is a lot more forgiving than machine polishing (I have no idea if you have experience here so sorry if I am teaching you to suck eggs) Once
you are down to just seeing swirl marks you can swap to something like mirror glaze for the finish finish.
Now if you are very lucky you might get an out of the gun finish that you are happy with or maybe just a couple of small touch ups that need doing.
Ooops I have written an essay.. Sorry but hopefully it helps.
I know we have a couple of much more experianced painters on this forum who will hopefully chip in at some point. Don't take what I have said as
gospel but it's a reasonable starting point.
GOOD LUCK
F20C Haynes roadster 440 BHP/Tonne www.youtube.com/handmadeextreme
|
|
|
Barksavon
|
| posted on 23/8/18 at 12:18 PM |

|
|
I'm certainly no expert....however I have previously sprayed my Austin A35 with cellulose and had 2 major issues. The worst was that after a few
months the paint started to crack over much of the car. I was told this would be due to the solvent gradually evaporating out of the paint,
shouldn't be an issue with 2k. The second issue was moisture in the air supply which leaves tiny pinholes in the paint.
I have since repainted the car, bought a decent filter regulator from Machine Matt and rigged up a system of copper pipe with drain taps. This
improved things but was still getting ' fisheye' in the paint
Ended up buying a3 stage filter providing breathing quality air which seems to have done the trick.
So my advice is if you've gone to all the effort you seem to have, make sure you've got very clean very dry air to your spraygun.
My 3 stage filter was £150, good value i thought, can put details of supplier on if anyone wants to get one
|
|
|
craigdiver
|
| posted on 23/8/18 at 12:38 PM |

|
|
Fantastic post - thank you.
My mask is face fit tested regularly and ill keep it on throughout the whole process.
1K etch primer is high build - I have plenty alu sheet to practice on.
my spray gun is brand new and gravity hvlp and only has 1.00mm nozzle.
How critical is straining the paint into the gun?
Do I want to sand the panel before I start? it is new aluminium that has had the plastic film removed recently.
quote:
Originally posted by tilly819
quote:
Originally posted by craigdiver
Going to be getting ready to spray paint the body of the car. I have a full respirator suitable for 1K & 2K paints. Access to a spray booth tent.
I have bought 1K white etch primer and 2K paint which has been matched to my scuttle and nosecone colour (by magic at the automotive paints place by
them scanning the colour from a piece of gel coated GRP from my nose cone).
The bodywork panels are all new semi-hard aluminium and were plastic film coated until I fabricated them into the body panels.
I have never spray painted before with compressor / spray gun so have done quite a bit of research and have come up with this process; (please advise
if iím doing something wrong)
1) going to degrease body panels
2) machine sand panels with 320 grit
3) clean and degrease panels
4) mix my white etch primer with 15% thinners as instructed by paint manufacturer.
5) spray only one coat and let dry for 24 hours.
6) ** do I sand it down before first coat of top coat, if so, with what grit?
7) mix 2K paint 2:1 10% ratio/thinners and apply first coat.
8) ** do I sand it down before next coat of top coat, if so, with what grit?
9) will I need to give it more than one top coat, if so, spray second coat.
Fingers crossed that all goes well!
Right Its been a while but I used to do a fair bit of spraying, mainly with 2K most people know my views on doing this DIY as I now have isocyonate
ashma because of it but you seem determined. One thing I will say though is you need to be wearing your mask all of the time...even when you are
mixing the paint, Its amazing how many people don't do this. Make sure that mask fits properly around your nose. I had one just like that and it
used to leak down the side of my nose. Air will take the path of least resistance...I might as well have not been wearing it. If you can borrow an air
fed mash with the appropriate filters and set up your compressor outside.
Your order of operations sounds reasonable. A couple questions and tips though.
Is your etch primer High solids or low solids?
What type of gun are you using. Suction cup, gravity fed, lvlp, hvlp? do you have a couple of sizes of gun nozzle?
Tip#1 clean your gun before you start.
Tip#2 use a paint strainer to filter the paint into the gun.
Now drying time between 1K etch and 2K colour this is where it gets interesting.
Normally you would use a 2k etch, let it flash then apply 1 or 2 coats of high build or low solids (depending on surface quality) primer. As you
don't really want to sand through your etching primer (that's why you put normal primer over top of etching primer, to give you some depth
that you can sand into) You normally do this as a wet on wet process ie don't let it fully dry just let flash off.
Now with a 1k etch and no primer it gets a bit more interesting and i don't know the exact answer. Hopefully you have got a high solids/high
build etch primer. Now the chances are since you have not done this before you will either put it on thin and dry or wet/thick and get some runs... at
this stage i would say the latter is preferable because that means you have at least got some thickness to the paint. I would then let it fully dry
and block sand out any runs / orange peal. start fairly course to get rid of the runs etc then finish with somewhere around 800 grit.
Tip#3 Now have a dam good clean up and get rid of all the dust /cr*p etc. Mop the floor etc. you don't want dust in your topcoat. (you will get
some its inevitable but try to minimise it as much as you can.
Top cot time.
Tip#4 make sure your gun its spotlessly clean. Everything clean clean clean.
The way I was taught is as follows > You always do 2 coats of topcoat (this might not be true but it has always worked for me and that's how
we painted the aeroplanes.... With 2K the fist coat is a light coat a tack coat if you like. You just let it flash off 20 mins or so. The second coat
is then a thicker coat.
This is one of the main reasons other than HSE that I don't recommend 2K for beginners. It is not forgiving. If you screw up your first coat the
second coat will not hide your mistakes, it will just make them worse. Now if you do mess up your first coat then you have no choice you have to stop
/ dry / sand and start again. At this point you may as well have used cellulose.. All the 2K is doing is saving you time (yes it does give you a
harder finish but its not like you are going to be doing 25k miles a year and keeping it outside in the bad weather.)
Sorry slight tangent there but maybe some useful info as well.
Right back to your second coat.. if all has gone will with the fist coat (lets hope so) then the second coat is your finish. Again as a beginner I
would be shooting for slightly thicker and risk a few small runs, better to have a wet glossy finish with a few runs and plenty of paint thickness
that you can then sand and polish than a dry finish that you then sand and go through to the primer...
At this point you might have figured out you will probably have to do some wet sanding and polishing.. Let the paint fully harden before you do this.
Give it a few days.. Better safe than sorry. Same process as before block out the runs dust and orange peal gradually work your way up to around 1500
grit then start polishing with a medium ish compound, something like Ferecla G3. Keep the panel cool!! one burn mark and you are stuffed. Hand
polishing is a lot more forgiving than machine polishing (I have no idea if you have experience here so sorry if I am teaching you to suck eggs) Once
you are down to just seeing swirl marks you can swap to something like mirror glaze for the finish finish.
Now if you are very lucky you might get an out of the gun finish that you are happy with or maybe just a couple of small touch ups that need doing.
Ooops I have written an essay.. Sorry but hopefully it helps.
I know we have a couple of much more experianced painters on this forum who will hopefully chip in at some point. Don't take what I have said as
gospel but it's a reasonable starting point.
GOOD LUCK
If it ain't broken, fix it anyway (just because).
Building - BMW powered Haynes Roadster/442E hybrid.
Volvo C30 T5 Polestar
|
|
|
tilly819
|
| posted on 23/8/18 at 04:21 PM |

|
|
You might find you struggle with that nozzle especially with the primer. I normally use a 2mm nozzle with high build and 1.4mm for top coat. You might
need to play with the settings a bit to get a good spray pattern.
Cheers
F20C Haynes roadster 440 BHP/Tonne www.youtube.com/handmadeextreme
|
|
|
craigdiver
|
| posted on 4/9/18 at 02:16 PM |

|
|
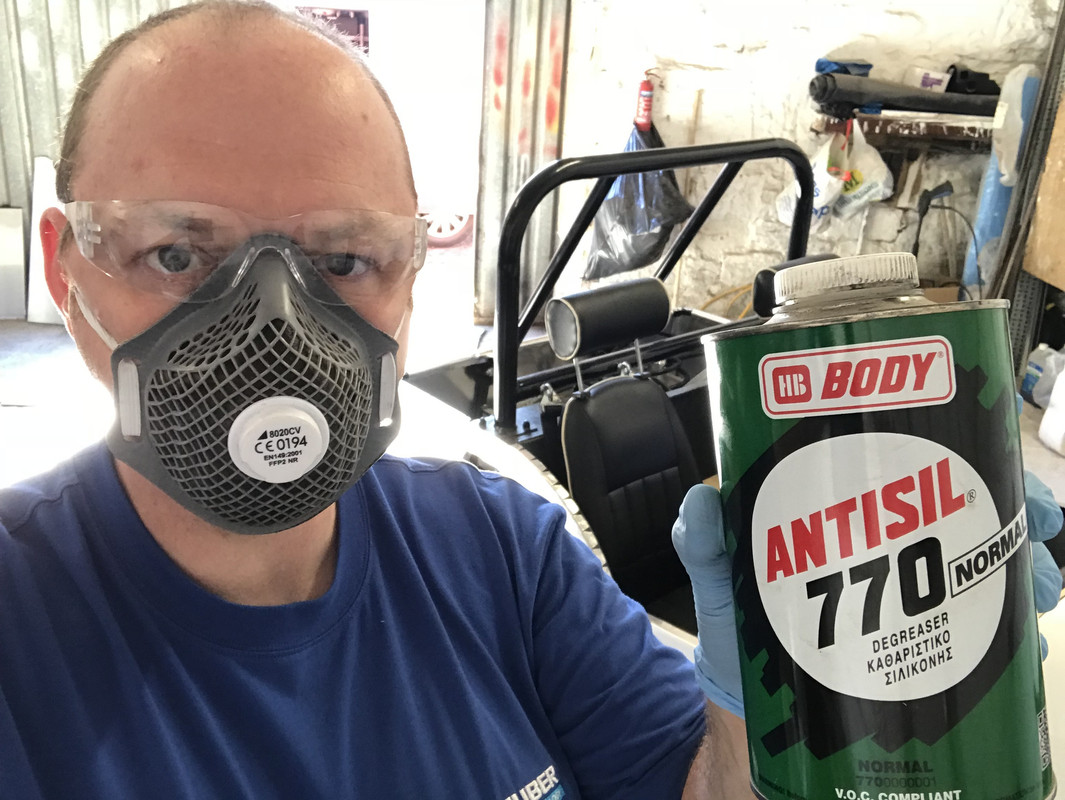
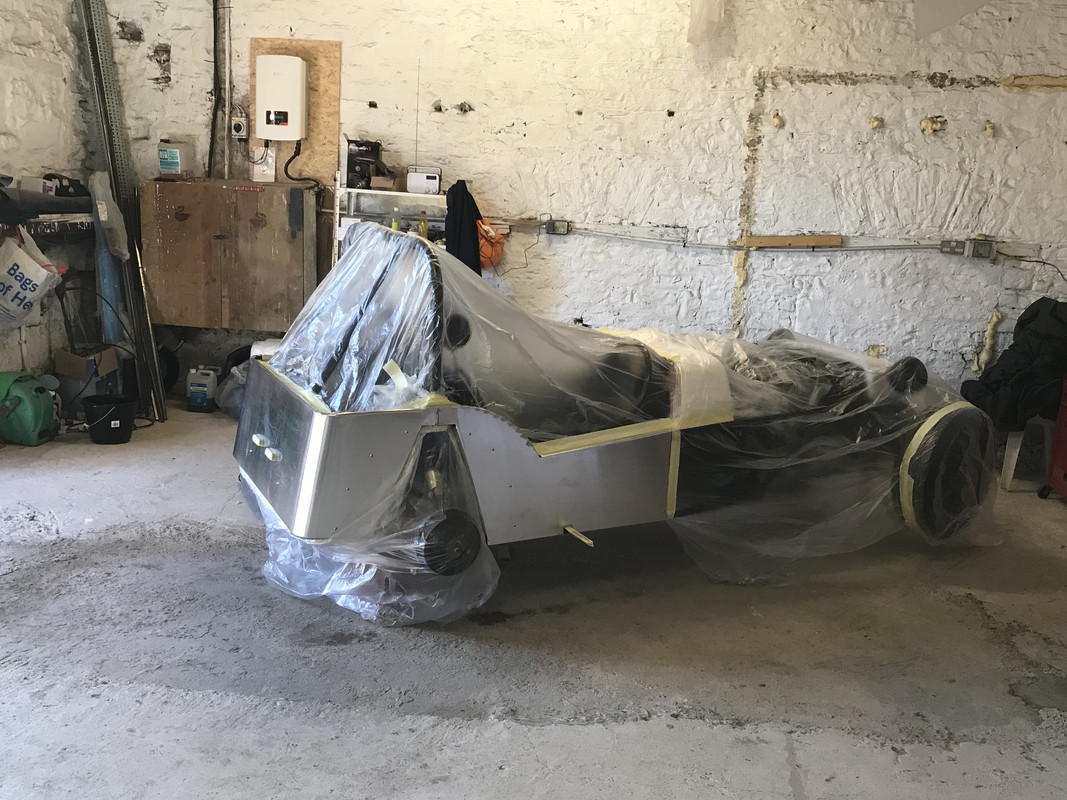
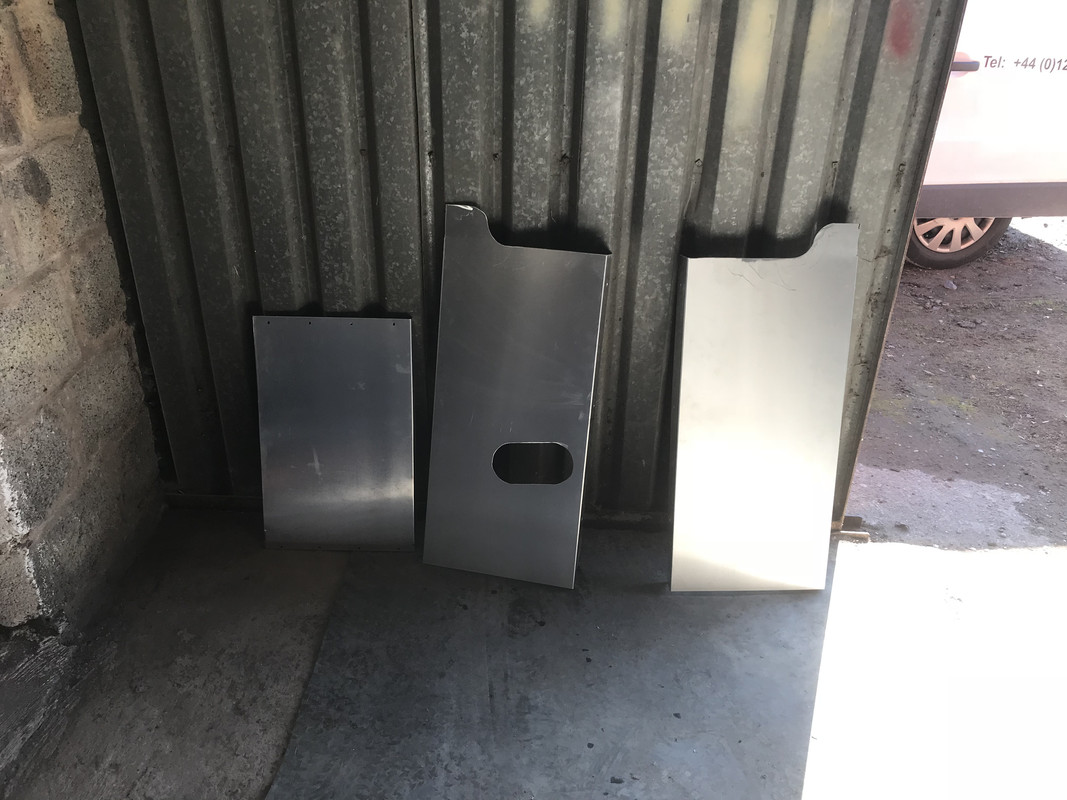
Spray painting fail
Had a productive start to the day, washed car and dried it, degreased, put car on axle stands so could dismantle removable panels and rear arches.
degreased again, masked off car and kitted up to start mixing paint and have my first go at spray painting on a scrap bit of material before hitting
the car. 1K white etch primer, supplier recommended adding 15% thinners for spraying so poured 200ml into cup and added a further 30ml thinners -
still seemed a little thick but went with it. Set HVLP spray gun up with 1.7mm nozzle and 2.5 bar, poured paint mix into gravity hopper via a 190
micron filter. Started spraying and getting air but very little paint - speckles rather than clean flow. Checked needle and flow control to max (as
recommended by youtube videos I watched). Gave up after fiddling with gun for 10 minutes. Iíve got a smaller gun iíll have a go with at the weekend,
failing that ill get a pro involved. When I took my chem suit, chem gloves, face mask, goggles and respirator off outside my unit only then did I
realise how much that paint stinks!
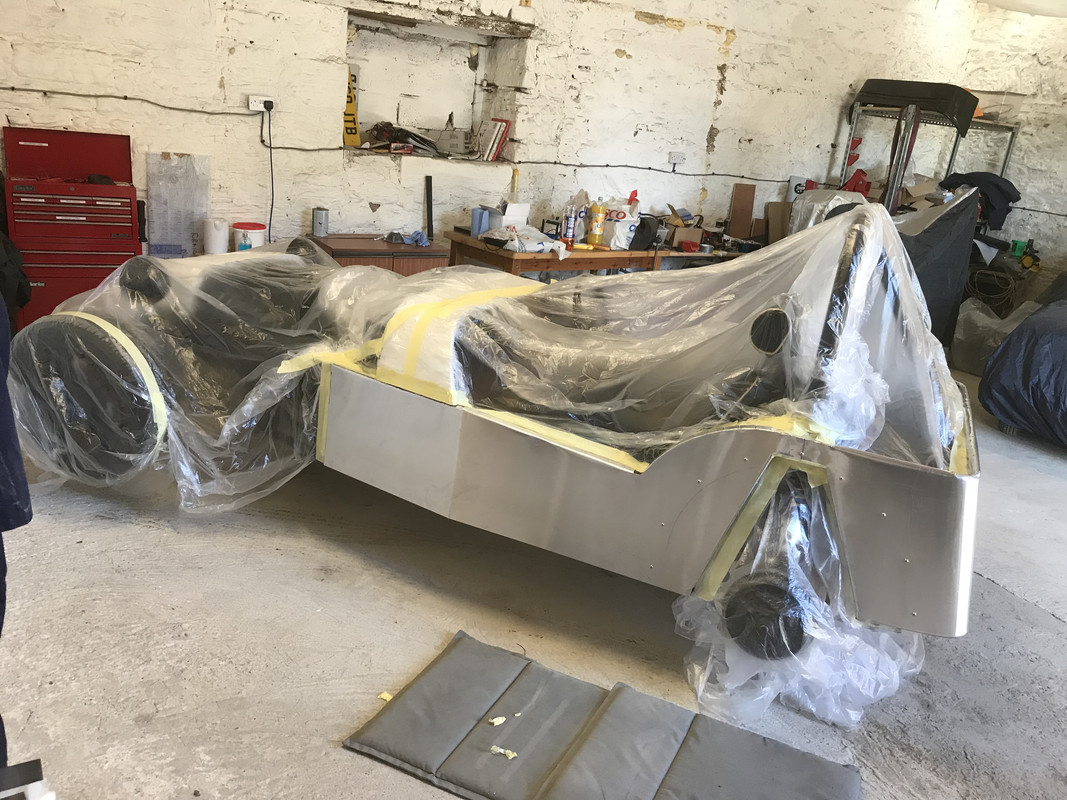
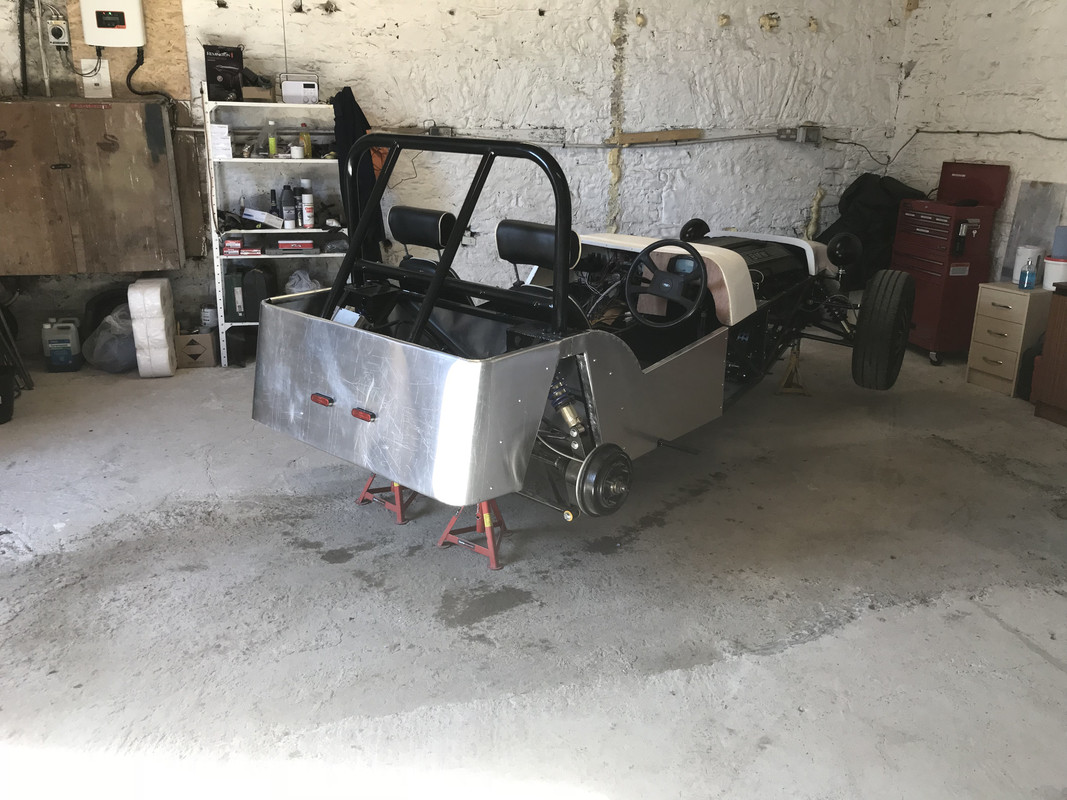
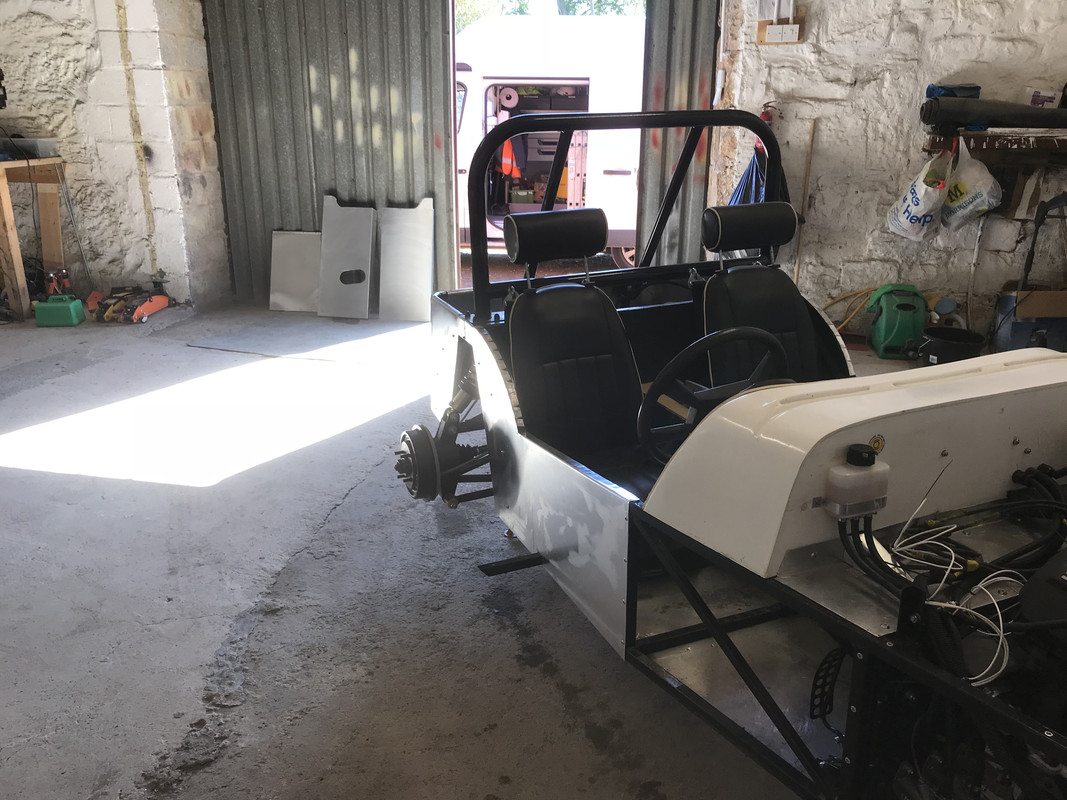
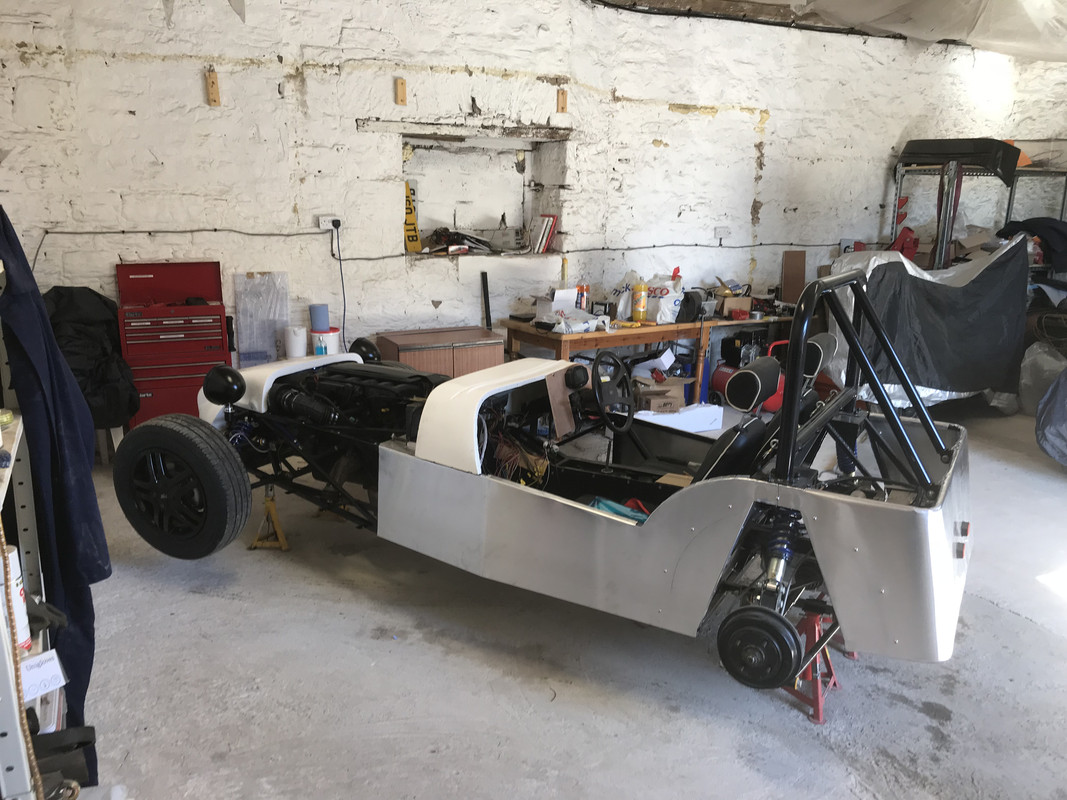
If it ain't broken, fix it anyway (just because).
Building - BMW powered Haynes Roadster/442E hybrid.
Volvo C30 T5 Polestar
|
|
|
Mr Whippy
|
| posted on 5/9/18 at 07:03 AM |

|
|
don't give up no now. Just sounds like you haven't thinned the paint enough, try to get the viscosity for the paint gun not the paint.
I'd mess around with any old paint even emulsion just to find out what viscosity sprays well then use that for the proper paint
Just some (hopefully helpful) observations....
1) You don't seem to have flattened the panels with wet and dry (600 grade will be good for aluminium, use plenty of water), you should do this
to remove the oxide layer and to give the paint a good key. Medium steel wool is good for prepping the rivet heads so the paint sticks to their shiny
surface.
2) You don't seem to have used any etch primer in the photos, you can use a spray can for this - U-pol acid 8 etch primer is a good choice, you
should apply this and then wet sand the flatten the primer.
3) I can see scratches or marks in the panels even in the photos which means they must be quite significant, there is no point whatsoever in spray
painting the panels like that as the marks will just show right through and you will be disappointed with the results.
4) In the cars location in the photo's I think you will find it quite surprising just how much paint will end up on you bench and tool box...
5) I'd recommend you hoover the garage floor, no really (sweeping just moves the dust about) and then get a watering can and wet the floor so
dust cannot be thrown up as you walk round the car. You'll also disturb dust lying on everything around the car as you spray so I'd get
some old sheets, dampen them down with a hose (outside) and while still damp throw them over everything in the garage. The damp sheets will not flap
if hit by the air stream and will help catch dust landing on them. Dust is your enemy as is flying bugs... (spotlight positioned outside the garage is
good for diverting those)
|
|
|
craigdiver
|
| posted on 5/9/18 at 08:38 AM |

|
|
Thanks Mr Whippy,
All iím trying to achieve at the moment is to get the panels white, not fussed about the paint job as once road legal ill get it done professionally.
The coat iím trying to apply is 1K white etch primer, manufacturer recommended 15% thinner but still seemed quite thick.
Did give the floor a good hoover but great advice on overspray. Will have another go later.
What are the consequences of over thinning the paint?
quote:
Originally posted by Mr Whippy
don't give up no now. Just sounds like you haven't thinned the paint enough, try to get the viscosity for the paint gun not the paint.
I'd mess around with any old paint even emulsion just to find out what viscosity sprays well then use that for the proper paint
Just some (hopefully helpful) observations....
1) You don't seem to have flattened the panels with wet and dry (600 grade will be good for aluminium, use plenty of water), you should do this
to remove the oxide layer and to give the paint a good key. Medium steel wool is good for prepping the rivet heads so the paint sticks to their shiny
surface.
2) You don't seem to have used any etch primer in the photos, you can use a spray can for this - U-pol acid 8 etch primer is a good choice, you
should apply this and then wet sand the flatten the primer.
3) I can see scratches or marks in the panels even in the photos which means they must be quite significant, there is no point whatsoever in spray
painting the panels like that as the marks will just show right through and you will be disappointed with the results.
4) In the cars location in the photo's I think you will find it quite surprising just how much paint will end up on you bench and tool box...
5) I'd recommend you hoover the garage floor, no really (sweeping just moves the dust about) and then get a watering can and wet the floor so
dust cannot be thrown up as you walk round the car. You'll also disturb dust lying on everything around the car as you spray so I'd get
some old sheets, dampen them down with a hose (outside) and while still damp throw them over everything in the garage. The damp sheets will not flap
if hit by the air stream and will help catch dust landing on them. Dust is your enemy as is flying bugs... (spotlight positioned outside the garage is
good for diverting those)
If it ain't broken, fix it anyway (just because).
Building - BMW powered Haynes Roadster/442E hybrid.
Volvo C30 T5 Polestar
|
|
|
craigdiver
|
| posted on 5/9/18 at 03:57 PM |

|
|
happy days
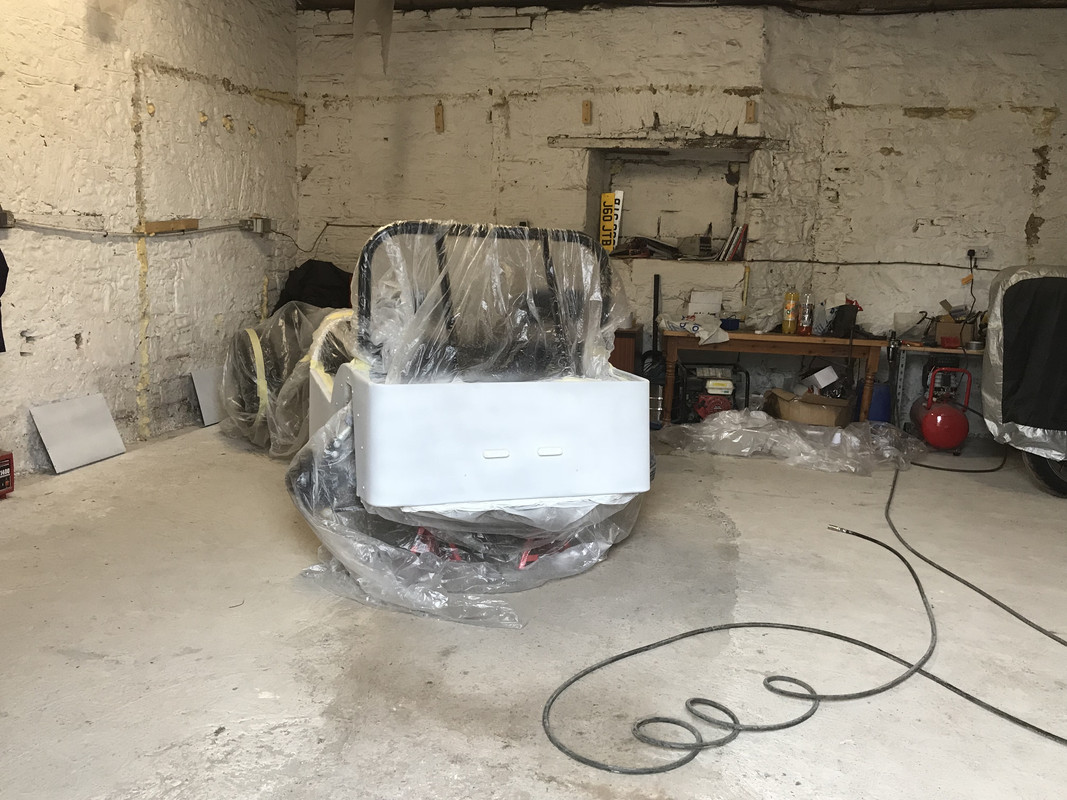
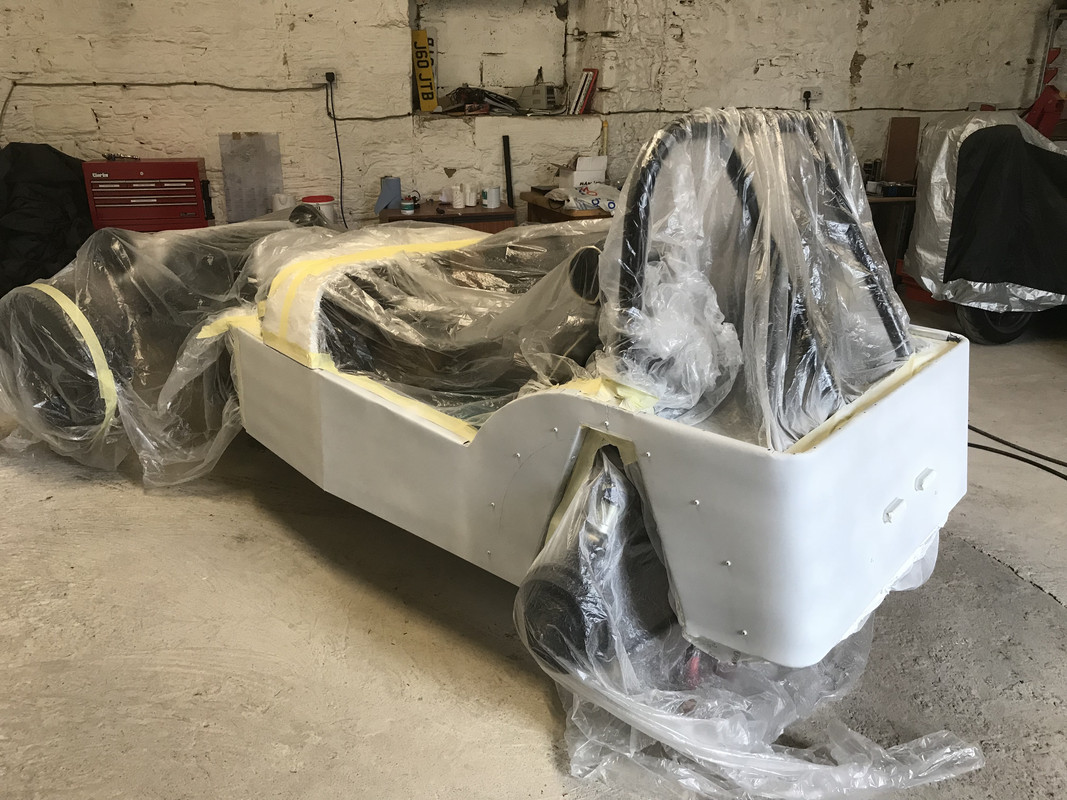
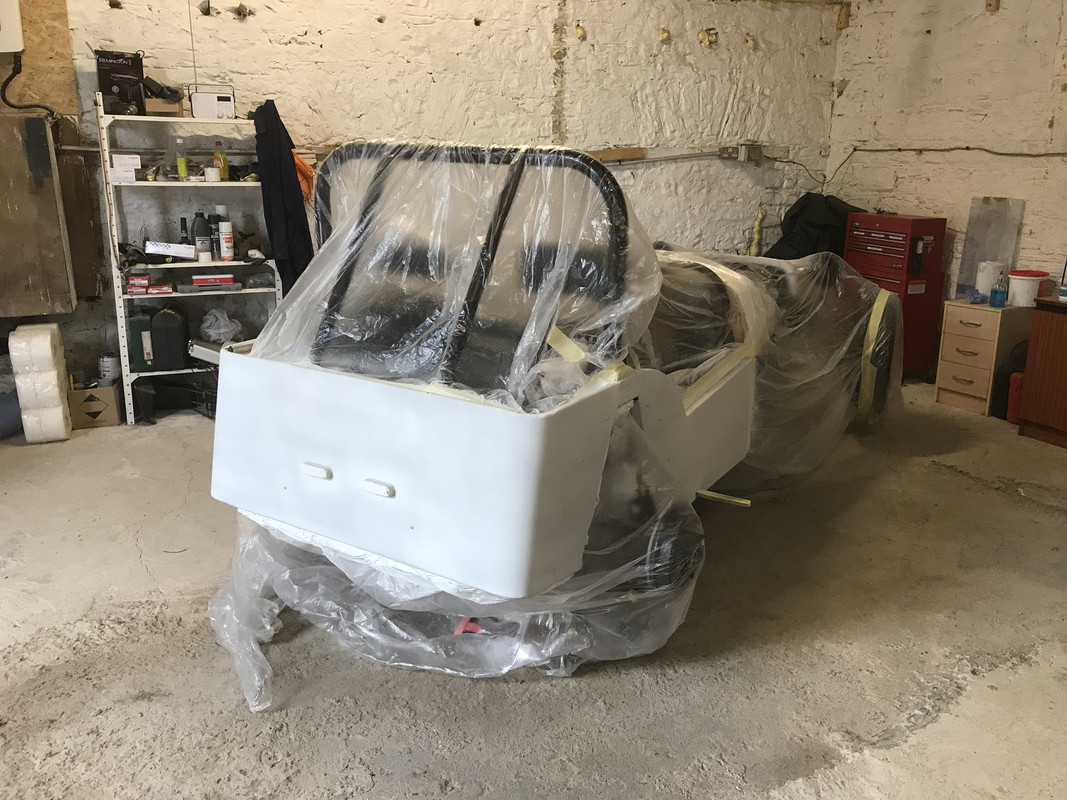
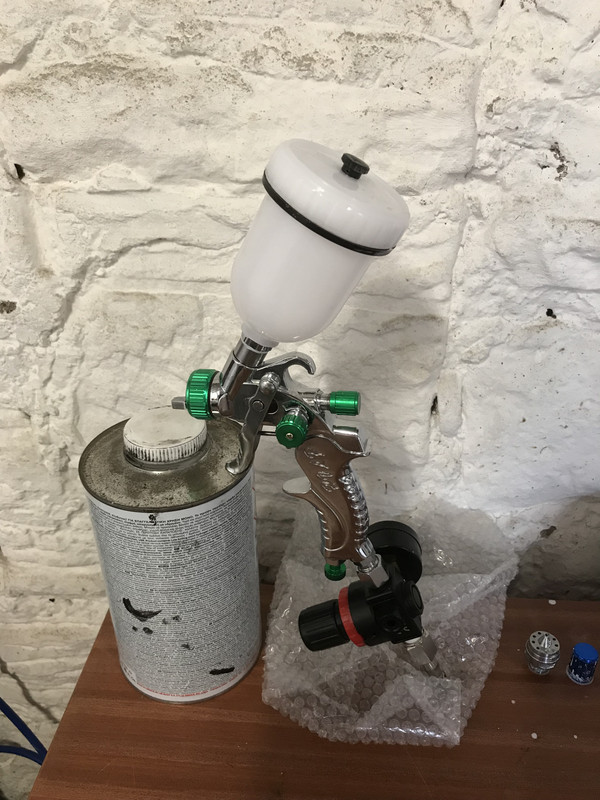
Spoke to manufacturer of paint, Clostermann, who were very helpful and said try adding up to 25% thinner until get a thick milk consistency! Stuck the
mixture into my little spray gun and went for it! really happy with the results - patchy in most places due to my technique (or lack of!!!) but just
initial etch primer coat. Hopefully the top coat will hide a multitude of sins.
Going to let that set until tomorrow evening then give it a bit of sand and clean before applying an initial white top coat. Watch this space.....
[Edited on 5/9/18 by craigdiver]
If it ain't broken, fix it anyway (just because).
Building - BMW powered Haynes Roadster/442E hybrid.
Volvo C30 T5 Polestar
|
|
|
Mr Whippy
|
| posted on 6/9/18 at 06:35 AM |

|
|
Well done 
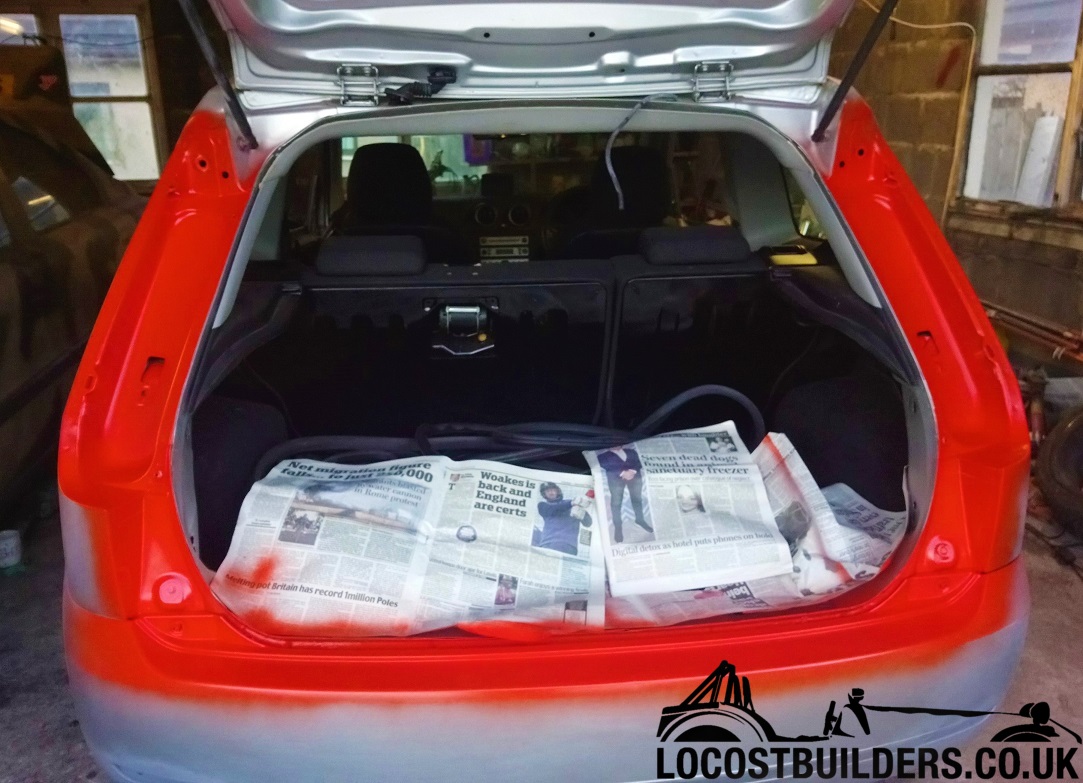
I'm just about to throw the other car out the garage to do the rest of the Fiesta, just been doing inside the surrounds...
Roof, bonnet, mask them off and then hit the rest of the car in one go. Oh and if you think that's bright... it's much more orange and
bright in real life 
Very pleased with the paint btw, goes on thick and cures slowly, much easier than normal car paints
[Edited on 6/9/18 by Mr Whippy]
|
|
|
craigdiver
|
| posted on 6/9/18 at 11:51 AM |

|
|
quote:
Originally posted by Mr Whippy
Well done 
I'm just about to throw the other car out the garage to do the rest of the Fiesta, just been doing inside the surrounds...
Roof, bonnet, mask them off and then hit the rest of the car in one go. Oh and if you think that's bright... it's much more orange and
bright in real life 
Very pleased with the paint btw, goes on thick and cures slowly, much easier than normal car paints

[Edited on 6/9/18 by Mr Whippy]
looks awesome that colour
If it ain't broken, fix it anyway (just because).
Building - BMW powered Haynes Roadster/442E hybrid.
Volvo C30 T5 Polestar
|
|
|
craigdiver
|
| posted on 6/9/18 at 04:42 PM |

|
|
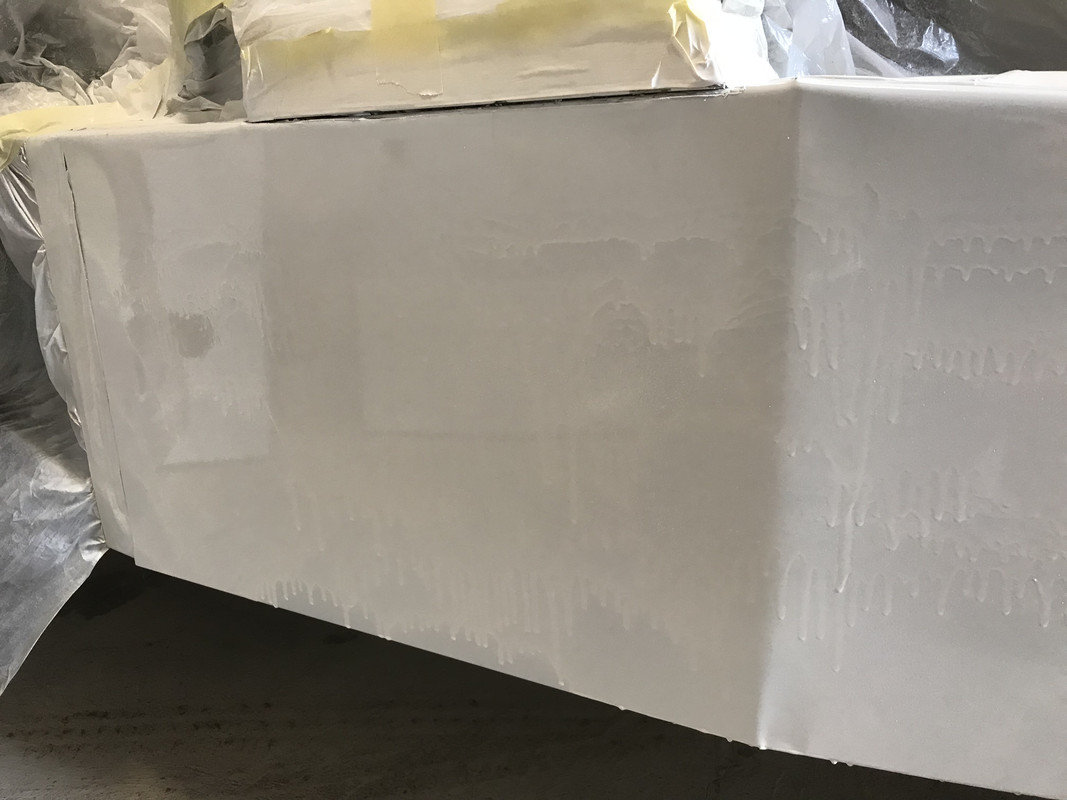
overconfidence!!!
Since after laying down the etch primer I though I was master spray painter!!! Had a go at the first top coat and mega runs everywhere! ill just have
to give it a couple of days then hit it with the machine polisher with a sanding pad!
If it ain't broken, fix it anyway (just because).
Building - BMW powered Haynes Roadster/442E hybrid.
Volvo C30 T5 Polestar
|
|
|
Mr Whippy
|
| posted on 6/9/18 at 05:04 PM |

|
|
oops
don't panic...
when its cured the runs will look a lot less, simply flatten them with 1200 wet & dry wrapped round large a wooden sanding block, loads of soapy
water and then polish back to a shine with rubbing compound, nothing more is needed. Been there done that many times...
|
|
|
craigdiver
|
| posted on 6/9/18 at 05:27 PM |

|
|
quote:
Originally posted by Mr Whippy
oops
don't panic...
when its cured the runs will look a lot less, simply flatten them with 1200 wet & dry wrapped round large a wooden sanding block, loads of soapy
water and then polish back to a shine with rubbing compound, nothing more is needed. Been there done that many times...
Thanks - feel better already, the coat went on amazing and didnít run immediately so didnít adjust the paint flow rate on the gun. Lesson learned, ill
get busy with the sanding block at the weekend.
If it ain't broken, fix it anyway (just because).
Building - BMW powered Haynes Roadster/442E hybrid.
Volvo C30 T5 Polestar
|
|
|
craigdiver
|
| posted on 7/9/18 at 03:12 PM |

|
|
promise not to laugh....... haha
If it ain't broken, fix it anyway (just because).
Building - BMW powered Haynes Roadster/442E hybrid.
Volvo C30 T5 Polestar
|
|
|
craigdiver
|
| posted on 7/9/18 at 03:16 PM |

|
|
2K Paint mix is 2:1 + 10% thinner
Do I need to add thinner - very water like consistency with recommended 10% thinner.
Once I sand the runs (whole panels!) with 400 grit, can I paint over it with the flow control on the gun turned right down?
[Edited on 7/9/18 by craigdiver]
If it ain't broken, fix it anyway (just because).
Building - BMW powered Haynes Roadster/442E hybrid.
Volvo C30 T5 Polestar
|
|
|
Angel Acevedo
|
| posted on 7/9/18 at 04:00 PM |

|
|
  
What did you used to paint?
A bucket?
On a serious note, I have a cousin that is a painter, I recall seeing him apply very little paint on each stroke, almost like it is insufficient.
If you see the surface Wet from the paint it may be too much and then it starts to run....
Itīs been a long time since I apllied any coating on a "large" scale (Iīve done an electric pot and some small stuff for the car like
suspension links) but thatīs the approach I use, Sometimes i feel like Iīm not applying enough and rush it... Then I get runs...
[Edited on 9/7/2018 by Angel Acevedo]
Beware of what you wish.. for it may come true....
|
|
|
craigdiver
|
| posted on 7/9/18 at 04:12 PM |

|
|
quote:
Originally posted by Angel Acevedo
  
What did you used to paint?
A bucket?
That made me laugh :-)
If it ain't broken, fix it anyway (just because).
Building - BMW powered Haynes Roadster/442E hybrid.
Volvo C30 T5 Polestar
|
|
|
craigdiver
|
| posted on 9/9/18 at 10:53 AM |

|
|
Productive happy morning
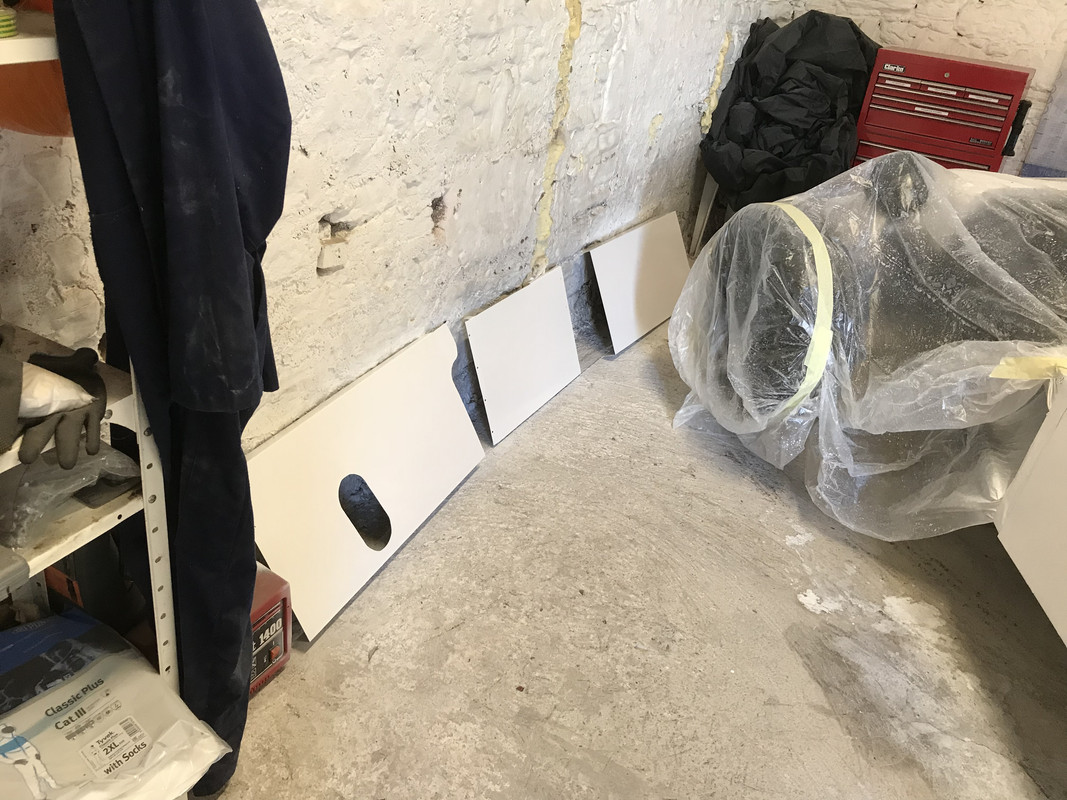
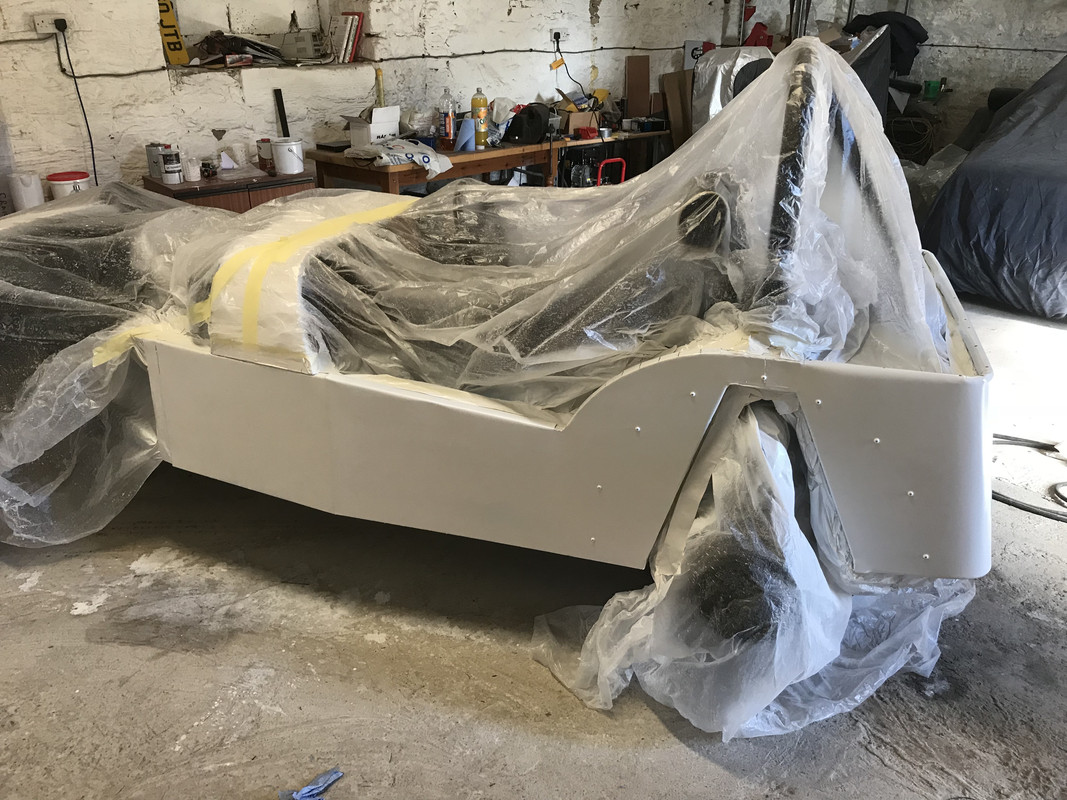
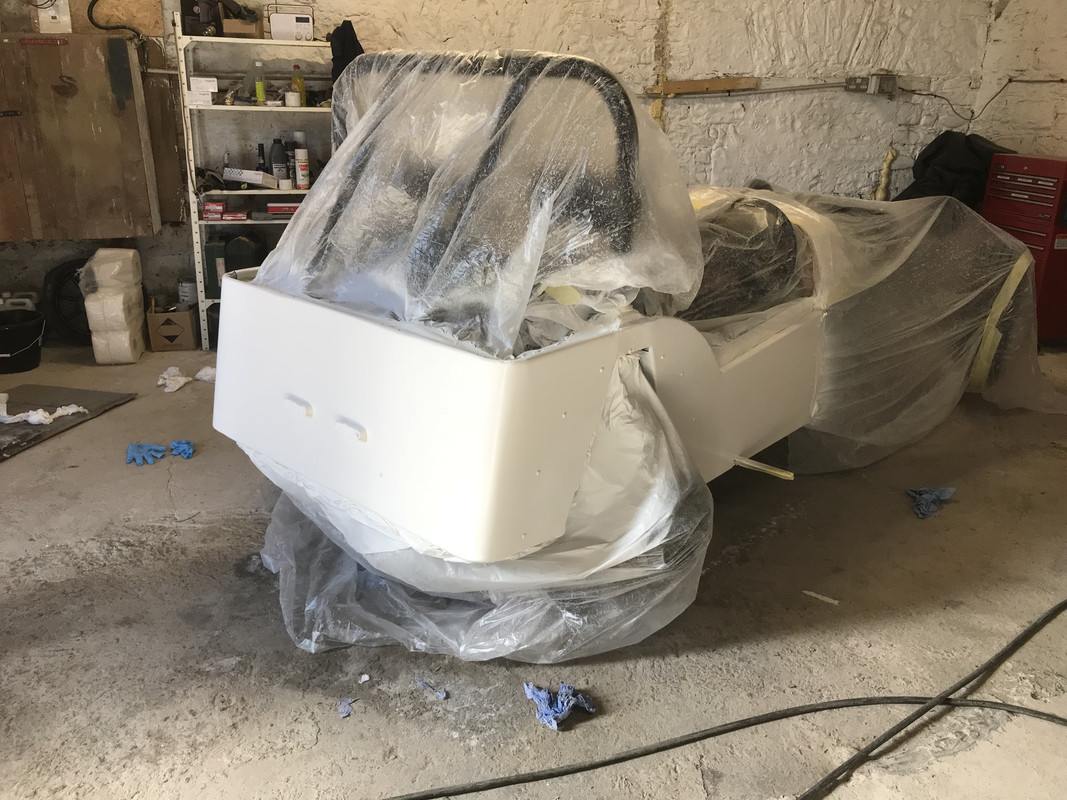
Watched a few more youtube videos on how to set gun up. sanded down paintwork and flattened the million runs!. washed and degreased panels. Took it
upon myself (as a pro painter now lol) to mix the 2k paint but not add thinner. 5 coats later looking good (in my opinion!). I think if I were going
to paint your £150 banger (thats due to be scrapped) you would be delighted with my spray paint job. :-)
If it ain't broken, fix it anyway (just because).
Building - BMW powered Haynes Roadster/442E hybrid.
Volvo C30 T5 Polestar
|
|
|


