seventhheaven
|
| posted on 21/11/12 at 10:48 AM |

|
|
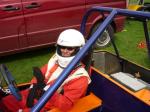
V8 4x4 Haynes Roadster
This Locost Roadster has been a long while in the making. Mostly because I stand and stare, scratching my head more than I do building. I'm not
after a super quick, ultra light race car. If fact for me, the driving is not of interest as for health reasons I no longer drive. I like a challange,
so this Locost is 4x4 and currently houses a Rover V8. I want to replace that with a Lexus V8, but unless one comes up cheap I'll stick with my
J.E. Motors 3.9.
I've been learning CAD, so everything has been modelled in 3D AutoCAD first.

This car will hopefully end up with a custom body. - New body under virtual development.
The chassis is 80% complete. It is 4 inches wider than standard at the rear and standard width at the front. It is also 4 inches longer. Height is
still standard. Every tube is different from the book as there has been a fair bit of extra triangulation added after a friend did some FEA flex
analysis. Weight, hopefully, should be only a couple kg's up on standard.
The push rod, cantelever Rear Suspension is 90% complete. It incorporates 20% anti-squat and a Sierra 3.9:1 diff. It is fully adjustable. The hubs are
Granada as I'm using 19" VW/Audi Wheels.


The front suspension is all custom. It is fully adjustable, again with push rod canteliver, inboard suspension. As you can see in the picture below
I've also made a custom 4x4 front diff from a 2.0lt 3.9:1 Sierra unit.

This weekend, I finally got around to mounting the Rover V8 engine. This will attach to a Sierra Cosworth MT75 4x4 gearbox with a custom made
casing.
There is still a huge amount of work to be done - check my blog http://www.super7thheaven.co.uk
I will try to post regular build updates and photos.
4wd 3.9 Rover V8 Locost 7 - Super 7th Heaven
|
|
|
|
|
D Beddows
|
| posted on 21/11/12 at 10:54 AM |
|
|
Wow, 3D AutoCad? really? you must have the patience of a saint! 
Car looks OK too 
|
|
|
mcerd1
|
| posted on 21/11/12 at 11:09 AM |
|
|
Good work so far
I've seen John Cellier's dax rush RV8 4x4 in the flesh and it looked like a tight squeeze 
(looks like its for sale at the moment: http://classifieds.pistonheads.com/classifieds/used-cars/kit-cars/dax/dax-rush-v8-quadra/565818 )
quote:
Originally posted by D Beddows
Wow, 3D AutoCad? really? you must have the patience of a saint!
my thoughts exactly
I use autocad everyday (all be it the ancient 2000 version) and I'd have given up years ago...
-
|
|
|
D Beddows
|
| posted on 21/11/12 at 11:15 AM |
|
|
It's 3D capabilities haven't improved much in the intervening 12 years! - not that I've really tried for about 5
|
|
|
mcerd1
|
| posted on 21/11/12 at 11:22 AM |
|
|
Re: Granada hubs
If your using granada hubs with VAG wheels how are you getting round the smaller centre bore in the VAG wheels ?
(i.e. the granada has 63.4mm spogots and I think the VAG wheels have ~57mm centre bores, and I beleve are made to suit 14mm studs)
I've been looking at options for my granada hubs and I'm thinking Merc wheels / discs are a better option (also 112mm P.C.D. but 66.6mm
centre bore and 12mm studs)
quote:
Originally posted by D Beddows
It's 3D capabilities haven't improved much in the intervening 12 years! - not that I've really tried for about 5
lol 
I used to model everything we make her in full autocad 3D, no complex curves, but alot of parts and holes... (20 to 2500 parts per model !)
we still use it for the 2D drawings the customers see, our specialist fancy 3D package just can't do the 2D bit that well 
[Edited on 21/11/2012 by mcerd1]
[Edited on 21/11/2012 by mcerd1]
-
|
|
|
seventhheaven
|
| posted on 21/11/12 at 12:38 PM |
|
|
The Audi wheels I've got, have a 68mm center bore - I've not measured them exactly. (2004 RS6 I think).
The Granada has 63.25 spigots
As a trial.....
To match the center hole sizes, I made some steel rings up on the lathe for the Granada hub centers. (Granada 63.25mm - Audi 67.2mm). Before heating
the turned center diameter was 62.5mm. I then heated them up, with the oxy torch the tapped them onto some scrap rear 5 stud hubs. For the real thing,
I was planning to weld them as well. To do this I'd heat up the cast hubs with the oxy then TIG weld them on. Heating up the cast hubs will help
the TIG welding no end. If necessary, I'd turn them up them on the lathe to the correct diameter (I measured some Audi ones in a scrapyard at
67.2mm). I measured the discs up at pretty much 68mm dead.
The trial went well and without welding there was no way on earth the adapter rings were coming off, at least whilst the hubs were cold. They ended up
at 67.8mm cooled down. This cleared the discs and wheels I have, no problems. A local wheel dealer said they could make up some special sleeved wheel
nuts, no problem as the stud holes on the Audi wheels are bigger too. My preffered option was to fit thicker studs in the Granada hubs. I'll
worry about the wheel nuts more when I get to it.
I haven't played with the Granada 5 stud hubs yet. The 5 stud front 4x4 hubs are as rare as hens teeth, so I'm a little chicken. I'm
so protective of them, I even got a garage to press in the bearings rather than do them in the vise! If I knacker them, it's another years wait
trawling ebay for more or expensive custom steel ones. Anyone with some - please U2U me!
The plan is to use 330mm discs and calipers - can't remember which ones but they were VW/Audi somethings (A8 ?)... I made up a spreadsheet of
everything 5x112 that Brembo did and bought the ones with the right offset. I don't have the brake calipers yet, I want 4 pots all around but
everything I measure up is way too chunky and would foul the wheels. Aftermarket, at present, looks the only option.
CAD wise I occasionally use Solidworks as well as AutoCAD 2013 (swapping between the two when necessary). Since 2011, AutoCAD has started to close the
gap drastically for the 3D stuff. Some of the new features have obviously been 'robbed' from the competition. The reason why I used
AutoCAD is for the reasons you mentioned. I need a lot of parts made and I find the 2D drawings much simpler to export and hand over to a machine
shop. Don't forget, that's not a professional talking, thats just me and I don't do CAD for a living. Never did, Never will.
I haven't blogged my brake experiments yet, but you can see some ramblings here.
http://www.super7thheaven.co.uk/blog/massive-brakes-a28.html
4wd 3.9 Rover V8 Locost 7 - Super 7th Heaven
|
|
|
D Beddows
|
| posted on 21/11/12 at 12:44 PM |
|
|
I'm an Architectural Cad Monkey so I still use AutoCad a lot (well Architectural Desktop) and many years ago I used to use the 3D bit a fair bit
- it's probably why I don't have nearly as much hair as I once had
Sorry seventhheaven for spamming up your thread btw
|
|
|
mcerd1
|
| posted on 21/11/12 at 12:55 PM |
|
|
I didn't know that the RS wheels had a bigger centre bore
I think I'll still look for some merc wheels for mine - 14" to 16" idealy maybe 17" max (6" wide fronts and 7"-
8" wide rears ? )
I'm keeping the granny hubs and brakes as is (the 278mm cossie discs will be plenty if i need an upgrade from teh std. 260mm ones)
already got a set of nice aftermarket wheels to suit but I'm also keeping a eye out for some fairly cheap and easliy avalible wheels to use for
trakdays etc....
quote:
Originally posted by seventhheavenThe 5 stud front 4x4 hubs are as rare as hens teeth, so I'm a little chicken. I'm so
protective of them....
I was looking too, was going to build my dax as a 4x4 with 5 stud hubs but I got talked into 2wd in the end (still 5
stud though )
there was a complete car next to one of the scrapyards up here, but it was being used daily so he wouldn't be too chuffed to find his front hubs
missing
[Edited on 21/11/2012 by mcerd1]
-
|
|
|
v8kid
|
| posted on 21/11/12 at 12:58 PM |
|
|
Excellent site and good info
You'd be surprised how quickly the sales people at B&Q try and assist you after ignoring you for the past 15 minutes when you try and start a
chainsaw
|
|
|
ali f27
|
| posted on 21/11/12 at 01:46 PM |
|
|
Like the car very similar to the way mark and i did it we just used the ford engine. before you go too far have you figured out the steering as this
takes a bit of doing to eliminate bump steer.
Cheers Ali
|
|
|
froggy
|
| posted on 21/11/12 at 01:55 PM |
|
|
If you use a v6 4x4 box the input shaft is 25 mm longer so enough room for an adaptor plate and full contact with the clutch plate and spigot . That
way you can just swap boxes rather than rebuild . I have a couple of these boxes spare if you need one .
[IMG]http://i144.photobucket.com/albums/r187/froggy_0[IMG]
|
|
|
seventhheaven
|
| posted on 21/11/12 at 03:30 PM |
|
|
My front suspension unlike the standard set-up has 20% anti dive incorporated.
Some might laugh, but I used gaming software to model and develop the front and rear suspensions. I used Kangaloosh and suspEdit, which were
originally used by gamers to mimic the suspension characteristics of race car much more closely for their computer games. However, since its humble
beginnings its grown up and race teams are now using it to check out how their cars will 'virtually' perform on certain tracks. It seemed
the best freebie suspension package at the time. Too late to re-do things as everything is welded.
I'm using a the usual Ford Escort MKII rack and Sierra steering components. The height of the rack wasn't quite as simple as matching the
width between the ball joints and a vertical line between the A Arm mounts. It was actually a fair bit more taxing because to the Anti-squat geometry.
The Top A Arm is not 100% horizontal, therefore a projected rack height was needed. Slightly lower than if no anti-dive was present. Although, to be
honest the amount is very small and I recon the rack could move about on its poly mounts more than I dropped it.
I guess the proper test will be to get the missus to test drive it for me.

NB. Where I'm using 19" wheels, the suspension had to be moved up the car. Otherwise it would look like a jacked up off-roader.

More info here:
http://www.super7thheaven.co.uk/Bump_Steer
Thanks for the Gearbox offer 'Froggy Contributor' (Well cool Reliant by the way!) , I'll find out in the next couple of weeks on
how my box conversion is going from the welder. I might need to take you up on it. Did you weld the two halfs on your Reliant? If so did each half
weld ok to the plate? Is that a LT77 bellhousing? Any welding tips greatly appreciated.
I've currently got a cossie box, to which I took a hacksaw to the the bellhousing. I want to weld on a BW35 bellhousing from an automatic
1960's P5B automatic. Last I heard, the welding wasn't going too well. The brother-in law is TIG welding it. The two cast aluminiums seem
very different. Each welds fine on their own but together they froth and spit and leave a horrid black brittle weld. He can weld new plate to each
with a good joint, but one to the other just seems to be fighting back.
The next thing to try, is to pre-heat both aluminiums before attempting it. I can't TIG so I'm only relaying the info here....
My reasoning for welding was, the Rover bellhousing would let me use my SD1 Vitesse clutch. I don't know what it is but some strange voice I
can't silence says adaptor plates are cheating. - Shush!!!
If the welding all goes pear shaped then it will be a v6 box and an adaptor plate.
If I seperate the the cossie box from the rover bellhousing (with a spacer plate of fresh material), then I will need the longer shaft you mentioned.
(Ahem! Phanah!)


More pictures here:
http://www.super7thheaven.co.uk/blog/rover-v8-mt75-gearbox-adaptor-a
102.html
If, miraculously, things work, a local company will take it away and rebuild all the internals.
If anyone has any aluminium TIG welding tips for cast material - please please help!
[Edited on 21/11/12 by seventhheaven]
4wd 3.9 Rover V8 Locost 7 - Super 7th Heaven
|
|
|
deezee
|
| posted on 21/11/12 at 04:00 PM |
|
|
I expect the metal hasn't been cleaned properly. I welded up my cast aluminium sump without any problem. What set, gas and rods is he using?
|
|
|
seventhheaven
|
| posted on 21/11/12 at 04:29 PM |
|
|
I did ask about if they were clean - but he just grumbled 'stick to your computers and leave this to the big boys'.
The box was only steamed cleaned, but he said he'd re-cleaned it?!!?
It was a right mess when I pulled it out. Maybe the oil penetrated the pores in the ally? Maybe there is still cleaning fluid on it?
I'll find out more soon - Plus I'll find out more on rods etc.
Maybe that is why he wants to pre-heat the two halves??? Burn off the oil or cleaning fluid? I really don't know.
This is definately not my area of knowledge, so the more questions I've got to ask him the better
Thanks for the advice
4wd 3.9 Rover V8 Locost 7 - Super 7th Heaven
|
|
|
froggy
|
| posted on 21/11/12 at 04:45 PM |
|
|
The only thing I do is degrease with a high flash point solvent then clean the area off with a Linisher exposing clean metal at least an inch around
where il be welding . A 250 amp Tig should be ample to do that but the hf may need some adjustment to compensate for the dirtier material . My cheapo
Tig will do 1/2 thick ally plate as long as I go over the surface with a plumbers map gas torch to warm it up a bit .
[IMG]http://i144.photobucket.com/albums/r187/froggy_0[IMG]
|
|
|
40inches
|
| posted on 21/11/12 at 05:50 PM |
|
|
Might be too late, but you can get spigot ring adaptors here
|
|
|
seventhheaven
|
| posted on 26/11/12 at 01:49 PM |
|
|
Things have been going much better this weekend. Cheers everyone for their help and advice!!!
The gearbox is welded!!
We think the problem was down to the engine cleaning fluid or the copper brush / drill attachment I had used to clean the gearbox casing. The
bellhousing seemed fine. It was strange that a good weld could be made on the halves seperatly, but when butted together they just fought back.
The cheap copper brush had left a very slight gold tint to the surface that you could only see under bright lights at the right angle. Plus when there
was a chemical /alcohol smell that could have been engine cleaner.
Anyway, the gearbox is welded and fitted.

This is how the brother in law, finally got a good weld:
Both halves were stripped back and cleaned with a stainless steel wire brush
Both halves were pre heated with a oxy flame.
The box and bell-housing were inverted whilst centred on the special plate I made.
The following set-up was used:
200 amp square wave TIG (water cooled torch)
Green Pure Tungsten 2.4mm tip
3.2mm Silicon Ally Rods
Although the Cosworth this box came out of was low mileage (60+ thou miles) the box was very oily and when heated up you could see the crud boiling
from it's pores.

I'm pleased to say that it just slid on smoothly. Just 2 light taps of the mallet on each dowell locator and it was tight.
The plate I had made to align everything simply slid off, proving there was no distortion and I checked it out with squares at it looked bang on.
Instead of a bronze centre bearing in the centre of the crank, I removed this and put in a roller bearing to take the larger diameter cosworth output
shaft.
All in all - very happy. I have one cross member at the rear of the engine that only clears the gearbox by 6mm (not 25mm), but apart from that it is
very close to my CAD. I knew this tube was placed wrong before I fitted the box but it will be a quick job to move it. There are a couple others that,
in theory, have plenty of clearance (I have also tried pushing the box around with my feet) look a little close but I think I might move anyway. They
are only tacked (like half the chassis!).
More Info Here
The gearbox was the big deal breaker with the whole project and with this fitted tons of other jobs are now possible and in theory there is nothing
that can end the project. My next jobs are to finish the steering and to mount the custom front diff assembly.
The brother in law is a metalwork god - if you want to check out his hand rolled 37 Chevy pick-up it is here.
37 Chevy Pickup
Every panel will be hand formed to match an artists impression. A lot of what you see here, will or already has been, re-made from flat sheet:

4wd 3.9 Rover V8 Locost 7 - Super 7th Heaven
|
|
|
fregis
|
| posted on 6/1/13 at 10:05 PM |
|
|
how to lengthen the front driveshaft? tip- same driveshaft joints used volvo 940 (2.4td) and there longer driveshaft
Never be afraid to do what you are insolvent, remember: amateurs built the ark - Professionals built the Titanic.
|
|
|
seventhheaven
|
| posted on 28/11/18 at 09:23 PM |
|
|
Wooden Buck Hot Rod
I've finally started the bodywork.
In the end I went for a 1937 Hot Rod style.
I built a wooden buck


From that I made a wireframe

I've now started the metalwork. This is my first attempt at this kind of thing and I've only just learnt to Gas weld (eyes too bad to
MIG)
I want to use the hinge pins as datum points for the whole bodywork, so I started with the A pillars.
I went for modern style hidden door hinges

I had to make my own dimple dies.

I'm kinda making this up as I go and realistically I'm a little clueless to what I'm doing.
4wd 3.9 Rover V8 Locost 7 - Super 7th Heaven
|
|
|
HowardB
|
| posted on 29/11/18 at 10:40 AM |
|
|
that is amazing - I am looking forward to seeing the next developments...
Howard
Fisher Fury was 2000 Zetec - now a 1600 (it Lives again and goes zoom)
|
|
|
seventhheaven
|
| posted on 28/12/18 at 11:35 PM |
|
|
Bulkhead
With the 2 door pillars done, I moved onto the bulkhead.
I braced the two, which also gave me a level datum.

I then needed to make the bulkhead panel. I wanted this bead rollered, so I made it it two sections then butt welded it back together.

I Cleco'd this in place so I could adjust it later.

The tricky bit is going to be the section between the bulkhead and the screen. I'm using an MG Midget screen with a double curvature.

read more here
http://www.super7thheaven.co.uk/blog/hand-made-bulkhead/
4wd 3.9 Rover V8 Locost 7 - Super 7th Heaven
|
|
|
froggy
|
| posted on 29/12/18 at 10:42 AM |
|
|
I used a midget screen on my 32 roadster body grafted onto a seven frame , I bought screens from moss Europe in Stockport and collected them in person
so they were £70 a piece . Mine leans back 15 deg and I used a diamond tipped 4 cutter in a grinder to remove the corners on the bottom to sit flat
against the body . Didnt use a lower frame just used a rubber section to seal it .
[IMG]http://i144.photobucket.com/albums/r187/froggy_0[IMG]
|
|
|
seventhheaven
|
| posted on 2/1/19 at 08:26 PM |
|
|
Scuttle
My scuttle started off well. I got the triple curved scuttle panel pretty close.

Then I welded it..... Oh dear what a mess

I've got it somewhere close but there is still quite a few hours of shrinking / stretching and beating left to get it straight.


Never done heat shrinking - that might end up messy.
read more here:
http://www.super7thheaven.co.uk/blog/bespoke-steel-scuttle/
4wd 3.9 Rover V8 Locost 7 - Super 7th Heaven
|
|
|