Samuele
|
| posted on 7/3/18 at 11:28 AM |

|
|
Now I just have to find out how to make the photos smaller ...
|
|
|
|
|
40inches
|
| posted on 7/3/18 at 11:56 AM |
|
|
quote:
Originally posted by Samuele
Now I just have to find out how to make the photos smaller ...
I use this https://www.digitalred.com/support/windows/image-resizing/
Just a right click on image and select size
|
|
|
Samuele
|
| posted on 7/3/18 at 01:53 PM |
|
|
I finally solved the problem with the photos
as already mentioned,
There have been some updates regarding my construction. not missing much to finish the chassis.


|
|
|
Samuele
|
| posted on 7/3/18 at 02:25 PM |
|
|
after weighing the rear drums,
I decided to switch to discs.
It was not easy because I had nothing to refer to,
but after countless tests and measurements eventually worked


|
|
|
Samuele
|
| posted on 8/3/18 at 10:58 AM |
|
|
as already mentioned in advance, it will be used where titanium is possible.
for example I made the titanium pins for the rocker arm,
using an EDM machine it was possible to obtain perfect holes throughout the entire length.
a few months ago,
not being able to proceed with the chassis I gave a little to chemistry,it was more like a test
with simple tools it was possible to permanently color all the titanium I have done so far.


|
|
|
peter030371
|
| posted on 8/3/18 at 12:16 PM |
|
|
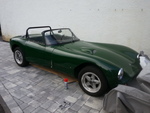
The level of engineering you are going to is stunning, you are going to have a very unique Fury when you finish it 
|
|
|
Samuele
|
| posted on 8/3/18 at 12:39 PM |
|
|
here are some photos where you can see the possible weight savings of the individual pieces.
with a some pieces it is possible to make a direct comparison regarding the saved weight.
titanium exhaust with 160mm diameter.
I hope it's not too noisy ...


|
|
|
Samuele
|
| posted on 8/3/18 at 02:10 PM |
|
|
you also start to see some colors on the frame,
after seeing the color of a chassis of a member of the orange forum here, I really liked it,
I also decided to use this color. also to highlight possible cracks in the frame,
which I do not hope,but you never know.
both in front of and behind it came quite wide.
bodywork must be done.
I'm not sure yet whether to use simple wheel arch extension or to make the modification directly on the body


|
|
|
Samuele
|
| posted on 8/3/18 at 02:13 PM |
|
|
quote:
Originally posted by peter030371
The level of engineering you are going to is stunning, you are going to have a very unique Fury when you finish it
I hope I finish soon.
I would also like to drive it a bit
|
|
|
peter030371
|
| posted on 8/3/18 at 02:59 PM |
|
|
Do you have a mechanical handbrake on the rear wheels?
|
|
|
Samuele
|
| posted on 8/3/18 at 03:40 PM |
|
|
quote:
Originally posted by peter030371
Do you have a mechanical handbrake on the rear wheels?
my intention is not to do it mechanically but use the Sierra style handbrake I did and use a cylinder with a lever,
then a hydraulic handbrake
|
|
|
peter030371
|
| posted on 8/3/18 at 04:12 PM |
|
|
quote:
Originally posted by Samuele
my intention is not to do it mechanically but use the Sierra style handbrake I did and use a cylinder with a lever,
then a hydraulic handbrake
Are you allowed hydraulic handbrake then? We have to have mechanical (it can be electro-mechanical) and its checked every year over here 
|
|
|
Samuele
|
| posted on 9/3/18 at 11:21 AM |
|
|
quote:
Originally posted by peter030371
quote:
Originally posted by Samuele
my intention is not to do it mechanically but use the Sierra style handbrake I did and use a cylinder with a lever,
then a hydraulic handbrake
Are you allowed hydraulic handbrake then? We have to have mechanical (it can be electro-mechanical) and its checked every year over here
on the other hand, you can build cars in your garages and get a MOT.
which is unthinkable here
|
|
|
Samuele
|
| posted on 9/3/18 at 11:37 AM |
|
|
in the meantime during my construction,
some extra work has to be done for good friends.
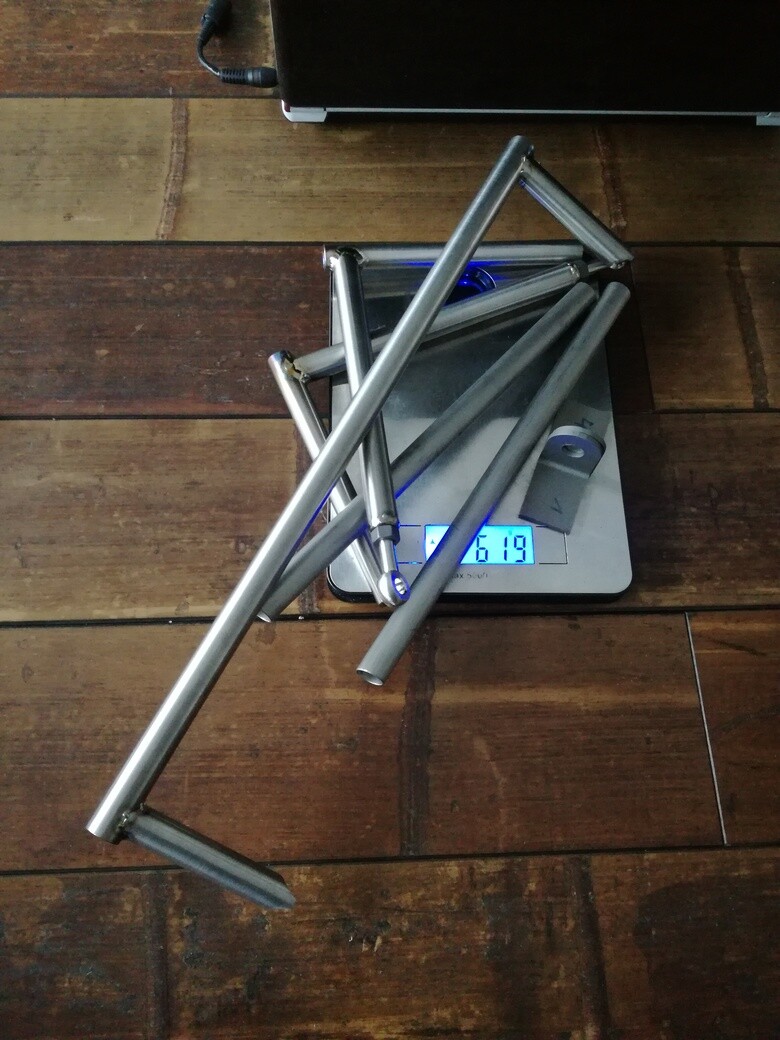
for this series of suspension parts,
25CRMO4 material was used.
A weight saving of around 6kg has thus been achieved.
comparing it to the original weight.
since we are talking about unsprung masses is a good result.
For others, there are stainless steel accelerator pedals.
now I hope I can continue my construction and finish as soon as possible.
The next stage and get a complete pedal board that weighs less than a kilogram.


|
|
|
Samuele
|
| posted on 26/8/18 at 12:28 PM |
|
|
now some updates regarding the bodywork.
in the beginning my idea was to use the old bodywork.
Of course, having now about 25 years of age,
had in many points cracks is deep scratches.
I started with repairs,
but I realized very early that it would have cost me too much time.
so after a few weeks of reflections I decided to take the hardest path,
but probably safer as a result.
doing everything from the beginning we also tried to improve the symmetry of the pieces.
improving stability is naturally lowering weight.
the form has come rather well.
while the final piece weighs about 8kg instead of 12.8 as the original one.
now you start with the front hood is headlight covers.
[img] [/img] [/img]
[img] [/img] [/img]
[img] [/img] [/img]
[img] [/img] [/img]
[img] [/img] [/img]
[img] [/img] [/img]
[img] [/img] [/img]
[img] [/img] [/img]
[img] [/img] [/img]
[img] [/img] [/img]
[img] [/img] [/img]
[img] [/img] [/img]
[img] [/img] [/img]
[img] [/img] [/img]
[img] [/img] [/img]
[img] [/img] [/img]
|
|
|
steve m
|
| posted on 27/8/18 at 08:33 AM |
|
|
Just found this thread, and very pleased I did!
The work, and detailing is fantastic, way way more than I could ever achieve, even if I had the right tools and garage
However, on a weight saving exorcise I did on my car, removing redundant bits, cutting bolts down etc,
My Wife commented , that if I was to lose about 25kg that would be far more beneficial 
She is right, but I didn't listen !
steve
Thats was probably spelt wrong, or had some grammer, that the "grammer police have to have a moan at
|
|
|
Samuele
|
| posted on 14/2/19 at 06:10 PM |
|
|
Update:
The front engine hood is finished. The weight has decreased from 18.8kg to 13.9kg, I thought less but having reinforced it in several points with the
use of the coremat, especially the front, where the old bonnet had several cracks, it was not I could have done better. In addition we started with
the realization of the headlight covers in plexiglass. I made several tests but I still have not a satisfactory result. If you want to waste time
anyway. I hope it works.


Custom mirrors is water / oil cooler in place.


And finally Pie Cut Titanium for the exhaust manifold construction. There will be a lot to weld .....
And pedal box made from billet aluminum aeronautics not yet anodized is mounted.


![]()


|
|
|
pigeondave
|
| posted on 24/2/19 at 05:38 PM |
|
|
I've been following this with out signing up for ages.
So now I've just signed up.
Don't forget to put some form of inner wheel arch in the bonnet.
My current bonnet doesn't have any protection from wheel spray to the engine / air filter.
Keep up the good work
[Edited on 24/2/19 by pigeondave]
|
|
|
Samuele
|
| posted on 25/2/19 at 03:49 PM |
|
|
The front bonnet will now receive modifications to improve airflow.
the old bonnet had internal fiberglass covers made very badly.
I have seen various roofing solutions.
some in fiberglass,
others in Aluminum.
some mounted fixed to the frame,
others attached to the hood.
I'm working hard to get a lot of different solutions from the original.
some solutions are really bad and it is not very practical.
for example the hinges of the doors ....
However, it is things that take a long time with relative tests
|
|
|
tims31
|
| posted on 25/2/19 at 05:42 PM |
|
|
Keep the updates coming Sami, looking forward to seeing this finished but also the progress you are making.
Keep the moulds for the bodywork too as you will be the only person to have ones for the standard body.
Build: http://www.martinsfurybuild.co.uk/
|
|
|
Samuele
|
| posted on 26/2/19 at 01:43 AM |
|
|
I have been working for almost 3 years to finish my fury and I can not wait to drive it.
above all these continuous improvement works never end.
And you know something about it too.
although I have to admit that I did not do much on the car last year for several reasons.
in fact for the bodywork molds I occupied an entire room in my basement.
|
|
|
pigeondave
|
| posted on 11/3/19 at 01:10 PM |
|
|
"above all these continuous improvement works never end."
Don't forget to check the bump steer.
Some suffer quite badly from it. Especially on Sierra uprights.
Adi had massive amounts of tow out under bump, if i recall.
He checked it using a similar method to this.
https://youtu.be/LO07qmJ9zkk
|
|
|
Samuele
|
| posted on 25/3/19 at 07:53 PM |
|
|
I should have a wide possibility of adjustment to the wheels in all directions.
I'll try to adjust everything as much as possible at the beginning.
I think anyway,
as soon as the car is able to go a long way,
I will make the final adjustments to the AB Performance
|
|
|
Samuele
|
| posted on 12/6/19 at 10:41 AM |
|
|
there is little to say ...except that I haven't finished yet.
I mounted the whole body about 2cm higher than normal.I had many advantages,but I had to redo several pieces again,such as the front hood support,now
also in very light titanium


|
|
|
Samuele
|
| posted on 12/6/19 at 10:54 AM |
|
|
I also received the tools with GPS.
while on the door it was possible to save a lot of weight.
The rear diffuser is almost ready and the lights with relative aluminum mounting supports are mounted.
the completely homemade mirrors weigh around 150 grams.
At this time the fury as seen in the photos weighs 358kg.
we will see at the end where we arrive with the weight


|
|
|