simon2b
|
| posted on 3/7/16 at 03:37 PM |

|
|
robinhood2b
well I purchased my 2b last june or there abouts. But due to various other projects of more concern(well mrs say so), I have not touched it till the
last couple of weeks. I brought it as a rolling chassis with a rebuilt 2.0 pinto, new webber etc .parts were either reconditioned or new.
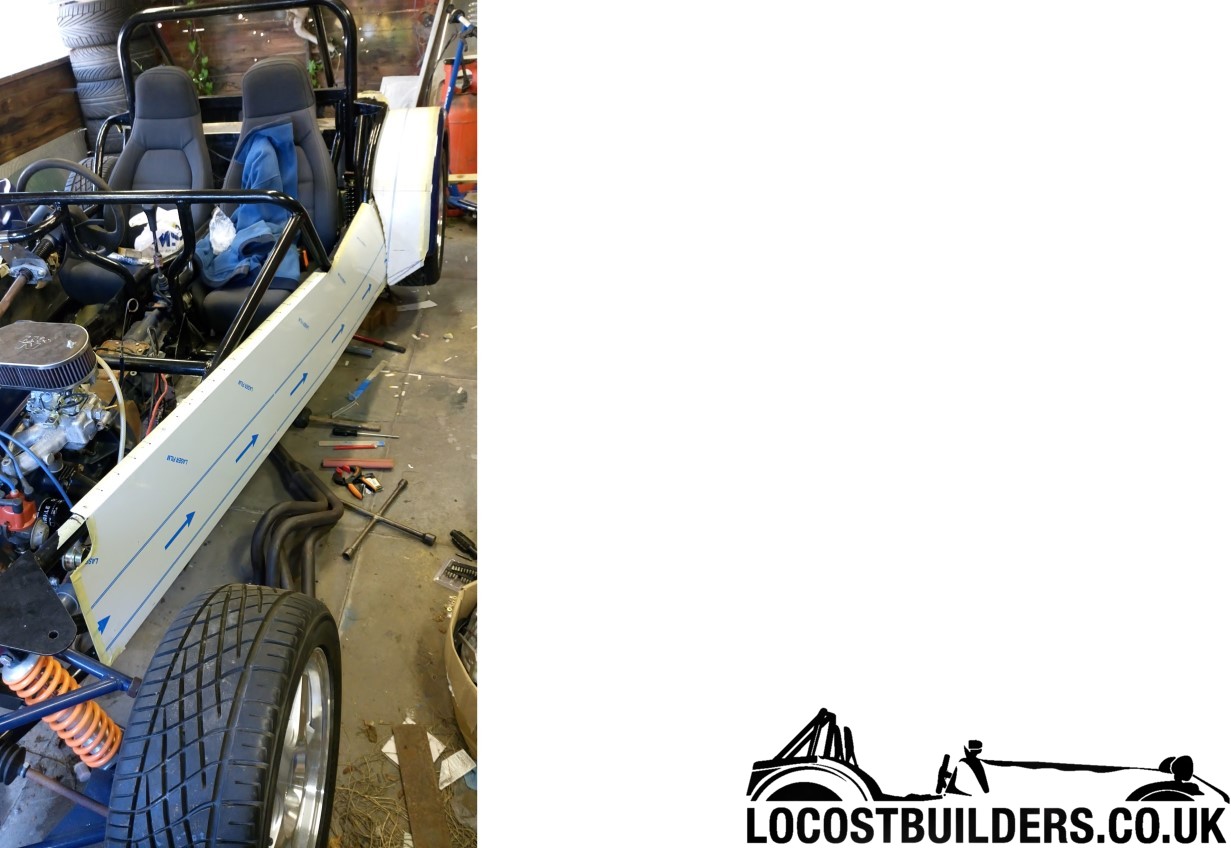
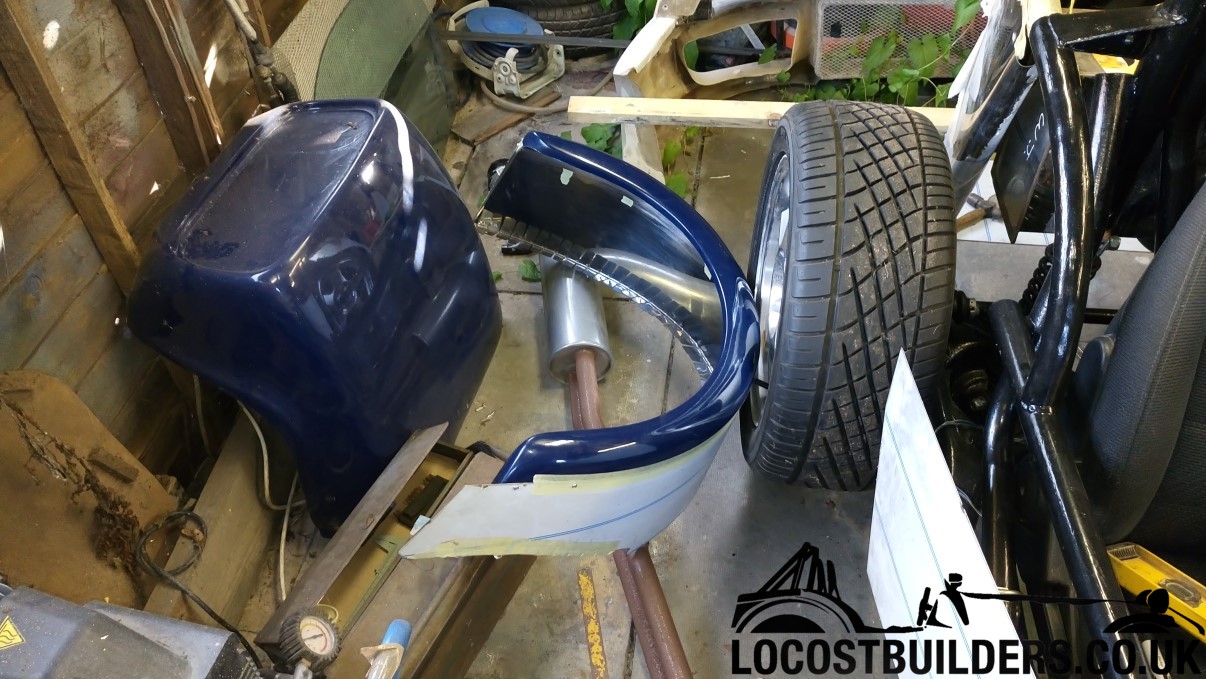
I know the bodywork is suppose to be abit of a pain on these so I decided to temp fit all of them before going any further with the rest of the build.
The rear/back panel had already been attempting in past by some one and was abit worse for wear so thought it was ideal to practice on.
Must admit that st/st is a pain as it does not like being shaped but managed to fit it and looks ok. Most of the panels have got very minor
imperfections?dents already as think they have been kicking around in various sheds/garages since 2001.
over the next couple of days I also did the arches/sidepanels and then the nosecone and bonnet.
I have pictures but it does not seem to be letting me attach them. Is this because it is my first post etc?
regards
sie
[Edited on 3/7/16 by simon2b]
simon2b has attached this image:
|
|
|
|
|
simon2b
|
| posted on 3/7/16 at 03:40 PM |
|
|
what am I doing wrong. when attaching the pic it did not show an image but when posted it as. I want to post multiple images is same post. How will I
know if its attaching them before submitting it.
|
|
|
Chris_Xtreme
|
| posted on 3/7/16 at 06:42 PM |
|
|
pretty certain you can 'preview post' before you 'post reply'
ps - have fun with the build, the car i got through the SVA was a Robin Hood new 3. stainless steel all over and a monoque, so I know what you mean by
it is a joy to work with! decent drill bits and keep the bit cool.

[Edited on 3/7/16 by Chris_Xtreme]
|
|
|
Chris_Xtreme
|
| posted on 3/7/16 at 06:48 PM |
|
|
preview post - just edited the above to add the pic - lets you see what you linked to.
cheers
|
|
|
tegwin
|
| posted on 3/7/16 at 09:07 PM |
|
|
I built a 2B several years ago. Its a pretty god awful design but if you take your time you can get something driveable out of it.
Get yourself some shallow angle cobalt stub drills for drilling the stainless.
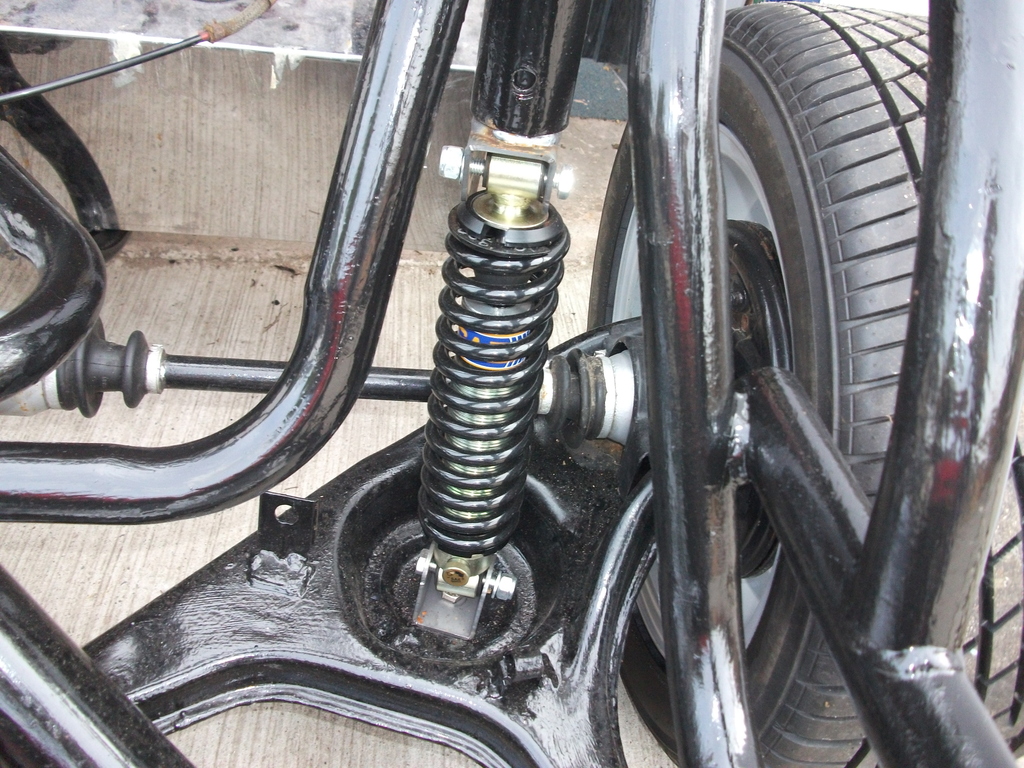
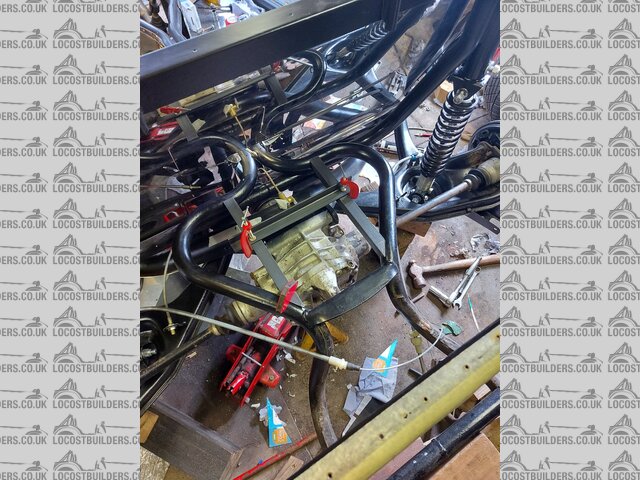
In the picture you just posted of the read shocks... when you slide the upper shock mount into the chassis tube make sure there is a crush-tube in
the adapter. Was one of my fail points and a faff to rectify it.
------------------------------------------------------------------------------------------------------------------------
Would the last person who leaves the country please switch off the lights and close the door!
www.verticalhorizonsmedia.tv
|
|
|
simon2b
|
| posted on 4/7/16 at 05:14 PM |
|
|
ok, thanks Chris, will try that next time. Nice looking hood you built there.
thanks for the heads up regarding the crush tube tegwin. I have not had to play with the mechanicals yet. It was just all loosely fitted together so
car could be a rolling chassis.
I did get a cobalt drill but machine mart only had one  and I have just managed to break it lol. been having fun with the bonnet as I plan on
cutting it to have a separate panel for the screen(skuttle panel?) I forget the jargon sometimes. and I have just managed to break it lol. been having fun with the bonnet as I plan on
cutting it to have a separate panel for the screen(skuttle panel?) I forget the jargon sometimes.
The edge of the bonnet is a good 1 inch above the chassis loop which to me should be the support, so not sure if the one working the brake press
messed up or the tubing. bit odd if it suppose to be like that.
oh well, suppose that's the fun of doing a hood.
|
|
|
simon2b
|
| posted on 26/3/21 at 03:20 PM |
|
|
wow, its been a lot longer than i thought. Not alot as happened since last post as unfortunately 3 of my lower discs decided to spill there guts which
as had rather a negative effect on how long i can spend kneeling down /bending etc. So did not touch it much as it did my head in having to stop when
i didn't want to .
Fortunately I eventually realised that some work is better than no work so have plodded on as and when i can.
being as the car was on wheels i decided to attempt the fixing of the body panel which was a pain in the bum i must say but with some struggling i got
them all done and looking ok.
[Edited on 26/3/21 by simon2b]
4 years later and i still cant fathom the image attachment on this site lol.
choose image tab at bottom, show my file but when post it its not there?
yay sussed one way out but dont think its the normal way lol
[Edited on 26/3/21 by simon2b]


[Edited on 26/3/21 by simon2b]
[Edited on 26/3/21 by simon2b]
|
|
|
Deckman001
|
| posted on 27/3/21 at 12:39 PM |
|
|
Wehey !! Well done for carrying on, even if small steps taken, it'll get there in the end.
Jason
|
|
|
simon2b
|
| posted on 27/3/21 at 01:49 PM |
|
|
Thanks Jason, Alot as been done, but not considering the time frame or to my liking since those pics as they were fitted at same time as 2016 post but
then my back went and couldn't do anything for a year or so due to pain. Things i would expect to get done in a day have took me weeks etc,
I have just had to learn what i can and can't do.
I have alot of pictures but putting them last ones up was a complete pain in the ass so need to resize and rotate to make work on this site so might
only be main pictures of finished things instead of as being done pics.
[Edited on 27/3/21 by simon2b]
|
|
|
simon2b
|
| posted on 27/3/21 at 02:10 PM |
|
|
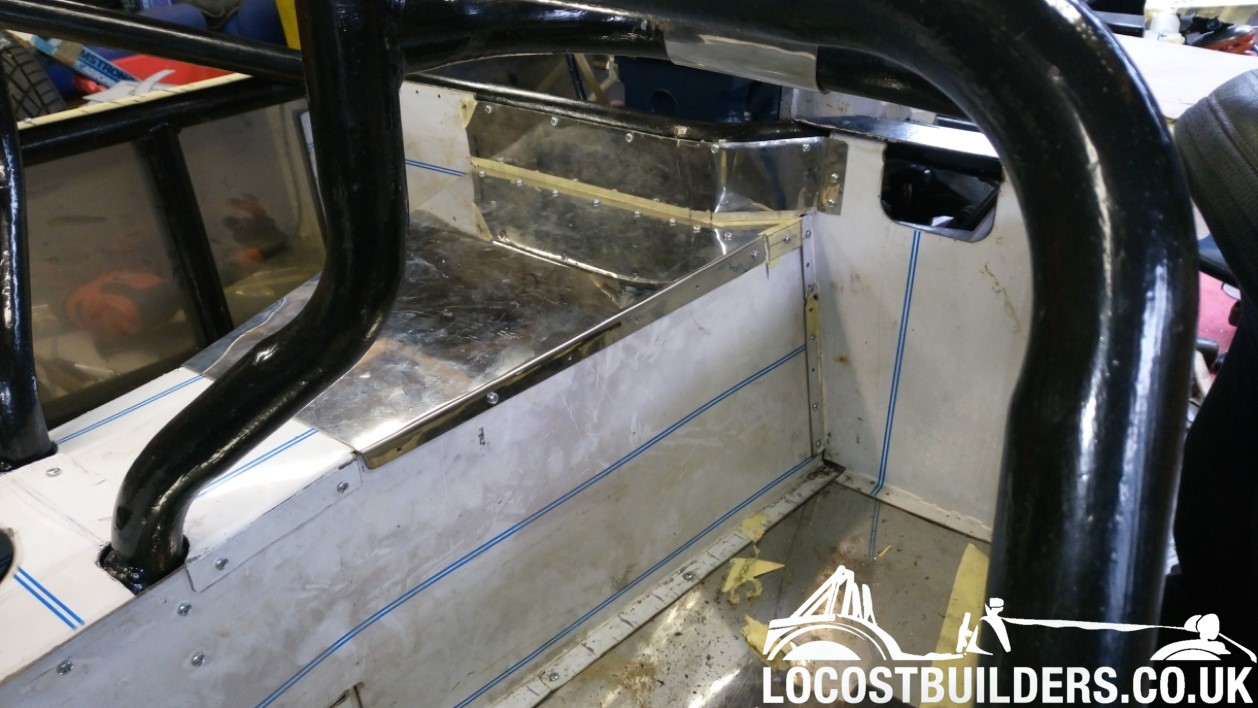
I started to think about paneling the interior and decided i did not want to squish the rear bulkhead in and put bracket covers on etc,so after some
measuring(I am 6'3" decided to put a piece of angle iron to the rear of outer crossmember mounts and panel the mounts in aswell to give
mount alot more strength.
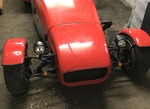
For anyone who doesn't now what the 2b looks like, heres a pic.

I decided to do this. The rail goes across the entire rear with a cut out for the prop.

[Edited on 27/3/21 by simon2b]
|
|
|
simon2b
|
| posted on 27/3/21 at 02:28 PM |
|
|
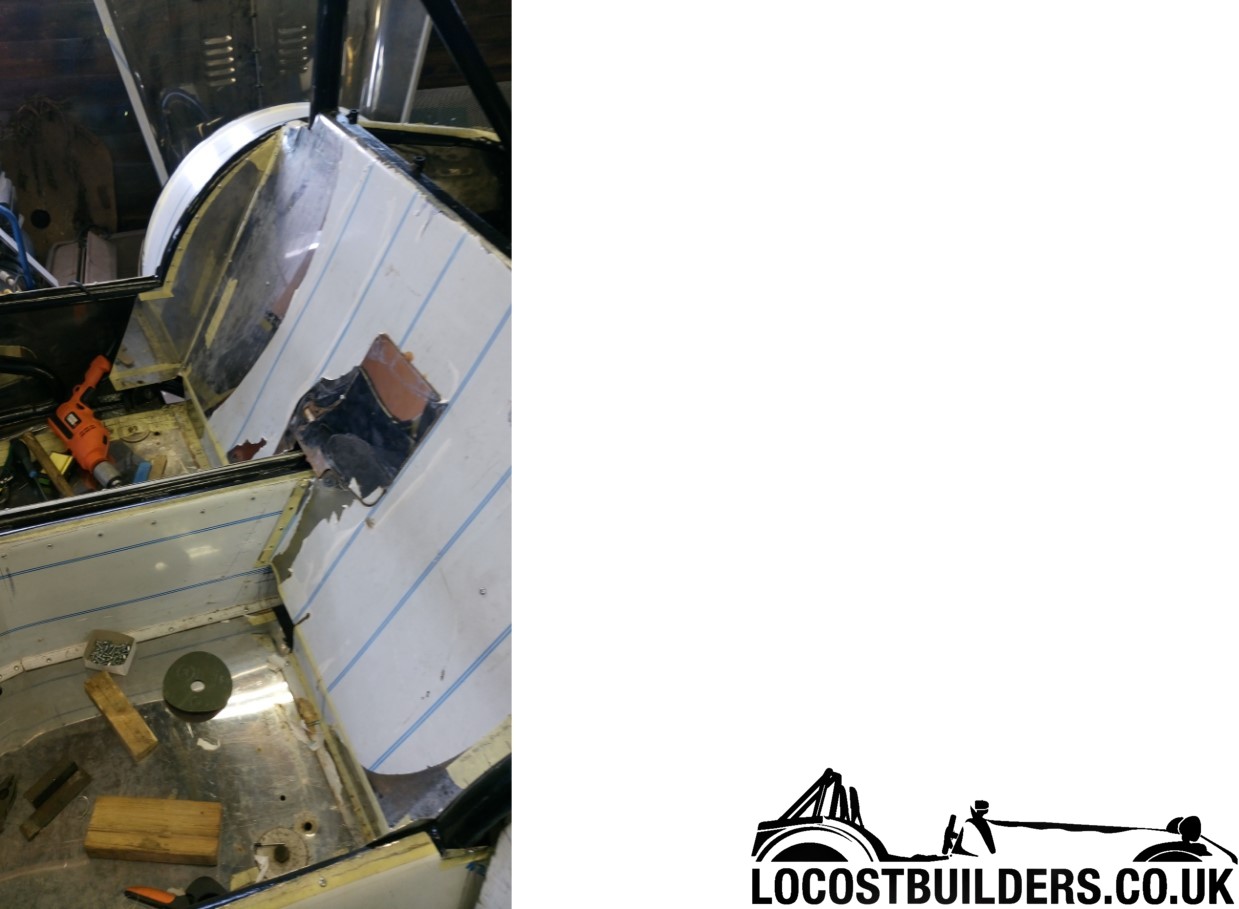
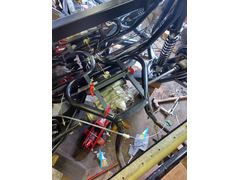
I left that at that for the moment and started on the pedal arrangement. Used a bearing instead of bush and paneled it .

After this stage I started to worry alot about the iva and seat belts and seat mountings fuel pipes etc. I eventually came up with a plan and did
this over a long period of time. This is when i use to get fed up of lack of process due to back,


|
|
|
simon2b
|
| posted on 27/3/21 at 03:09 PM |
|
|
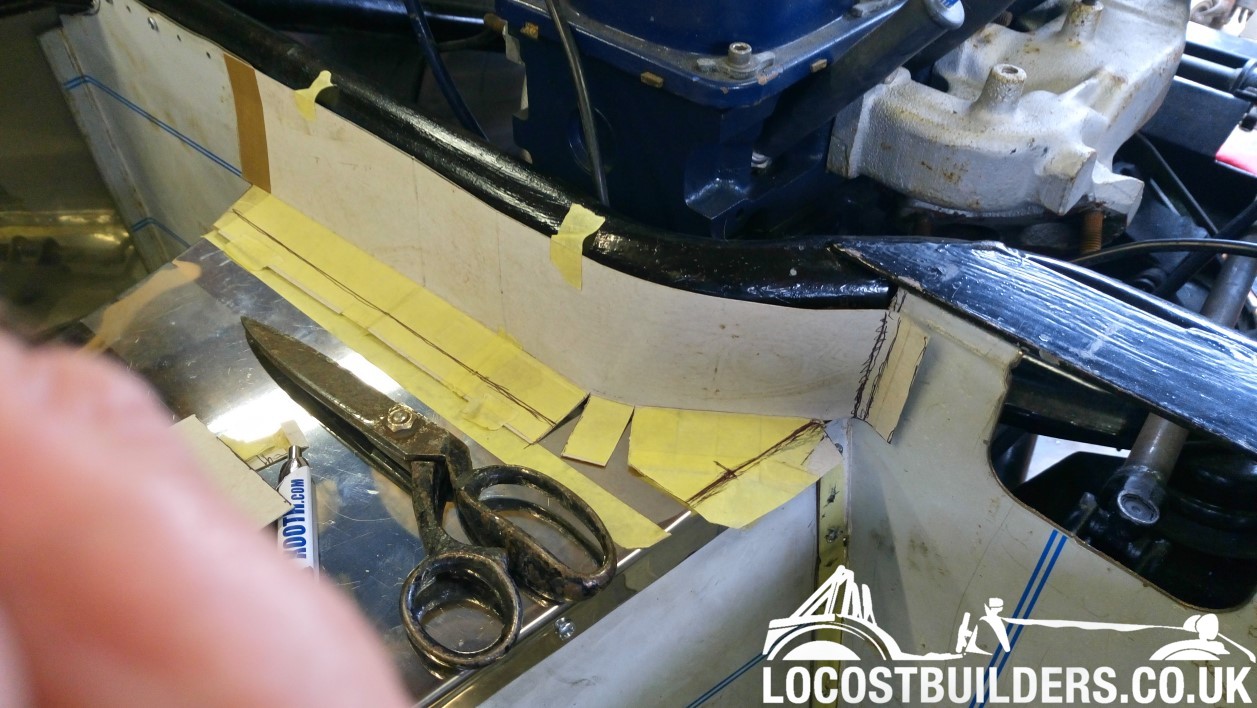
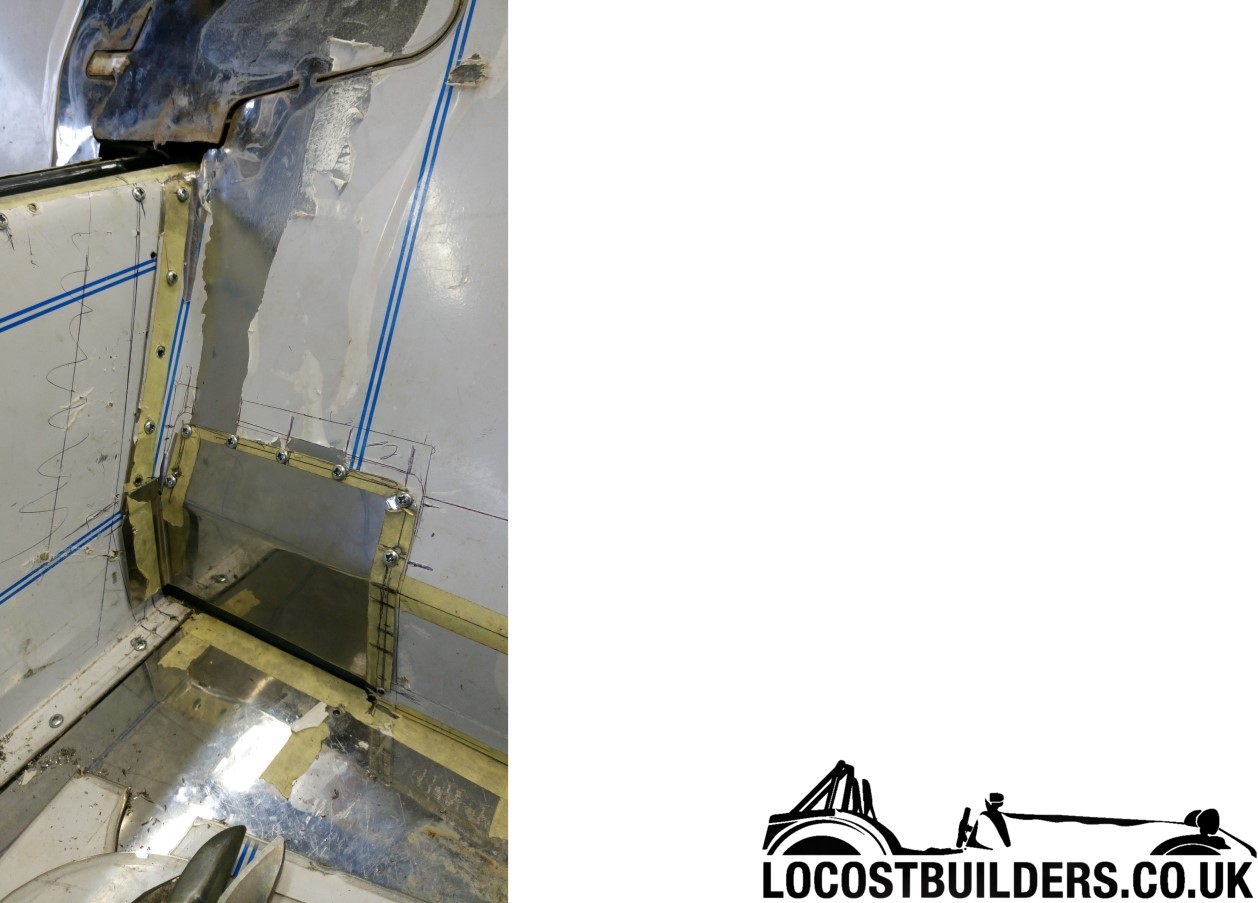
Anyone who has built a hood will know how many times you have to make templates and fit, remove again and again lol. I recut the rear bulk head so it
was a single item .Arch infill panels were made seperately and any holes which went over suspension mounts were able to to blanked off due to the the
I had done my panel. I put a fold near bottom to match the angle and drilled alot of hole for fitment later.
this was also done before all the chassis reinforcements.


|
|
|
Mr Whippy
|
| posted on 27/3/21 at 05:49 PM |
|
|
This is really interesting. Thanks for posting the pics  your going to laugh when you see my solution to the rear bulkhead... great minds think
alike as they say your going to laugh when you see my solution to the rear bulkhead... great minds think
alike as they say 
|
|
|
simon2b
|
| posted on 30/3/21 at 08:41 AM |
|
|
Look forward to seeing pictures. I have been going through as many old drive,phones etc as I can find looking for more pictures as I love seeing the
progress in that way, but it is so time consuming lol.
|
|
|
Mr Whippy
|
| posted on 30/3/21 at 09:46 AM |
|
|
Here you go, here's some pics. You can see I went along a similar route with the rear bulkhead issues. I also tied in the centre suspension
mounts with the angle section and made a lower tunnel floor. All are now super strong. I've also welded on the plate for the pedals and brake
servo and will plate all that up. Your further on with the sheeting although I have binned all the stainless and am doing it from scratch with
aluminium. I'm also doing the sides flat against the chassis, riveting them on all down the side. The floor also next in aluminium too with 2mm
sheet just waiting to be cut.
I have a full hood, sidescreens and windscreen btw I'm selling... 


|
|
|
simon2b
|
| posted on 30/3/21 at 10:15 AM |
|
|
Pic are great, you was right, can't believe how near enough identical they are.
I nearly totally binned the rear end and was hoping to retro fit the Haynes roadster rear, but then my sensibility meter kicked in luckily. I have
half plated the pedal assembly since those pics as was toying with the idea of inboard cylinder.
I like the way you have welded the big washers to the outside mounts. I wish I had done that kind of thing but don't want to take it off again,
ita pain on you own. Could probably even get rid being as we have boxed the end in but extra precautions are always a good thing.
|
|
|
simon2b
|
| posted on 27/8/25 at 09:08 AM |
|
|
wow, over 4 years. Apologies for the time frame. other house related projects are to blame. In those 4 years I have worked on the car on and off, but
until this summer did not really have a good stint at it.
pictures have been taken but i can not remember what order they were done in, but will just put them up as and when i can.
handbrake brackets were made by using 2 angle in parallel then bracing between.
bugger, still having problems with the picture posting.
Description
[Edited on 28/8/25 by simon2b]
[Edited on 28/8/25 by simon2b]
[Edited on 28/8/25 by simon2b]
|
|
|
simon2b
|
| posted on 31/8/25 at 01:36 PM |
|
|
[Edited on 31/8/25 by simon2b]
|
|
|