quinnj3
|
| posted on 5/3/23 at 09:24 PM |

|
|
MX5 Vodou Build
Hi Guys,
I thought I'd start a build diary, we'll see where this takes us! I've been a little reluctant to post a build diary but I'm
motivated and have been all consumed by this project since I took the decision to build a locost back in October '22. I've been working
towards starting this project for a few months now. I bought my donor back in Dec '22 and started to strip it down in Jan '23. While I was
doing that I was researching chassis, tooling up and gathering bits in between some DIY for the house.
Privately I'm keeping a spreadsheet of costs and a build log detailing any time spent fabricating. I've already noticed I'm spending
almost the same time again researching each step in front of me which I'm not documenting.
Steel arrived in Feb '23 and I made a start 2 weeks ago on the front end. The first week I hit it hard putting in 25 hours. The following week I
put in about 10 hours but a flu has come over me stopping play and really frustrating me. I don't have a finish goal as yet. I think looking so
far in front is just too daunting. Instead my goal is to average 10 hours of fabrication / assembly each week.
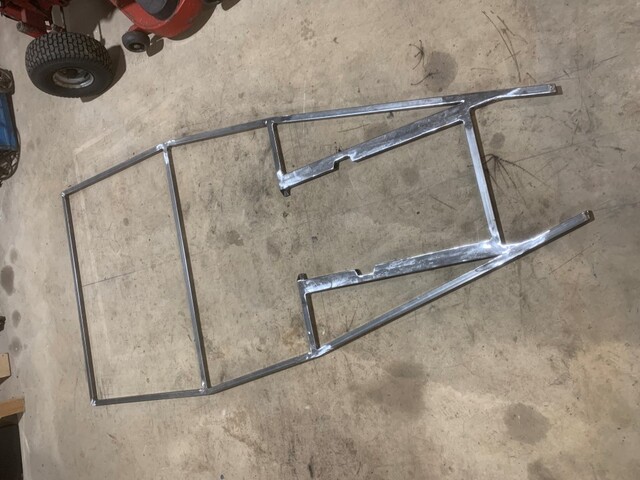
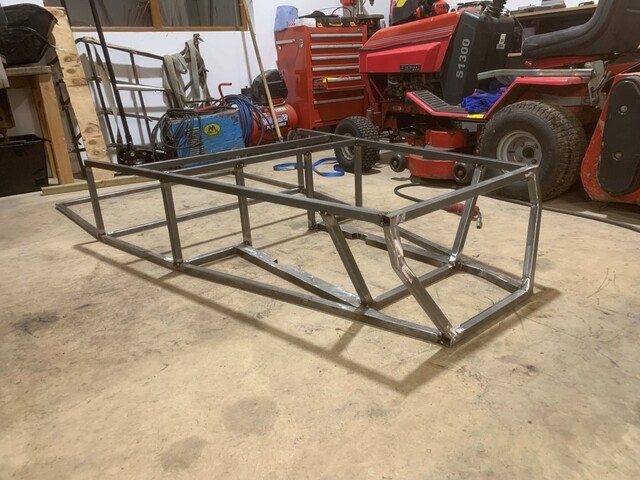
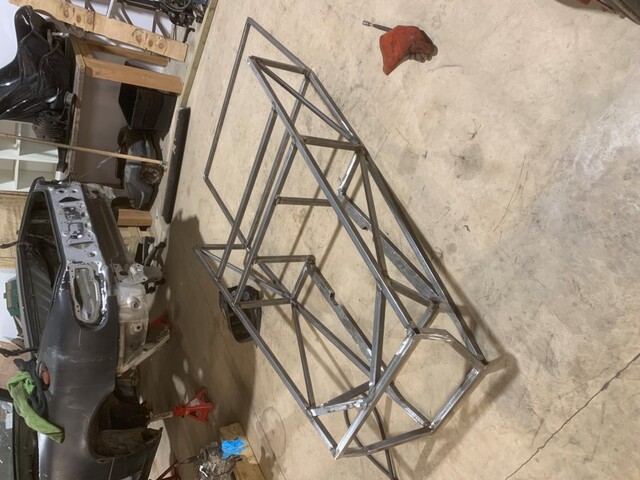
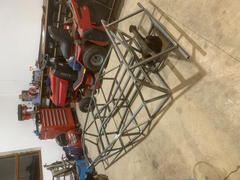
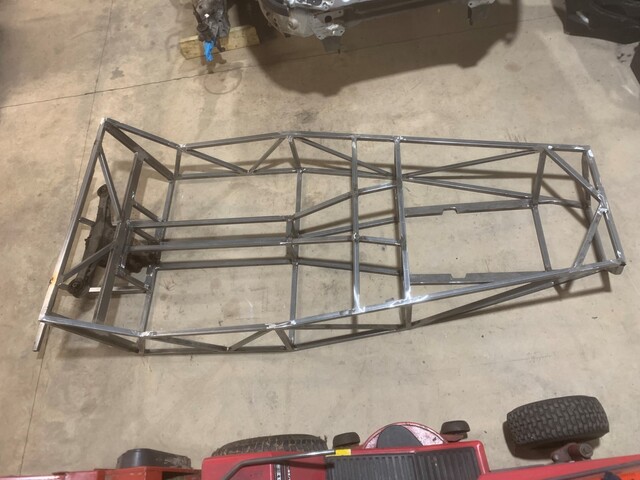
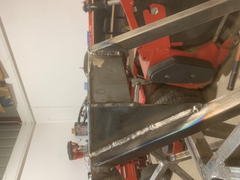
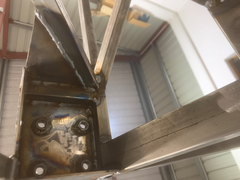
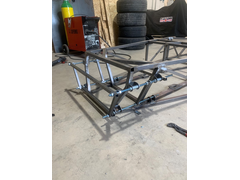
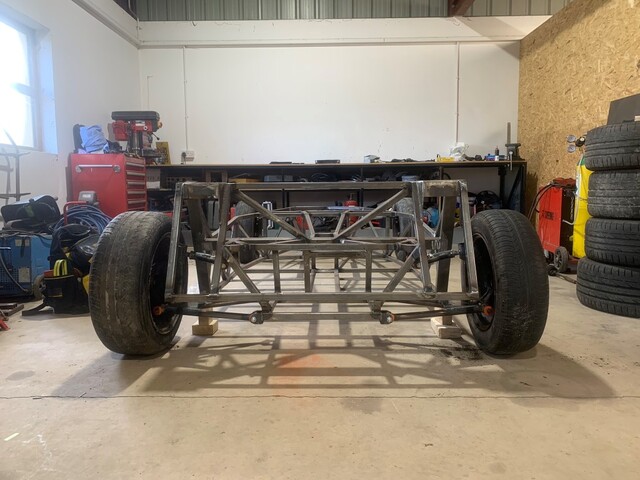
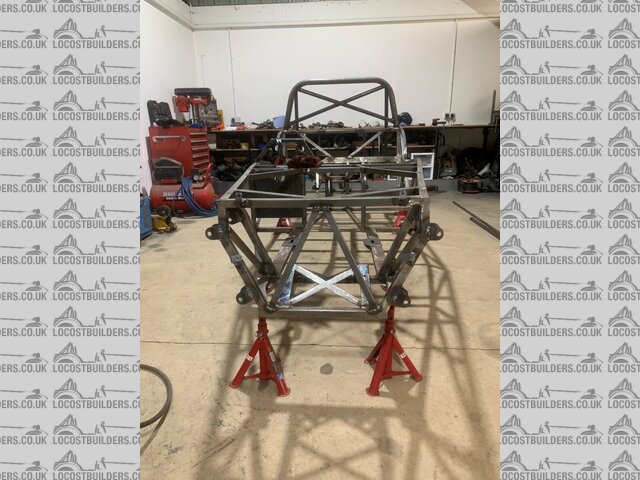
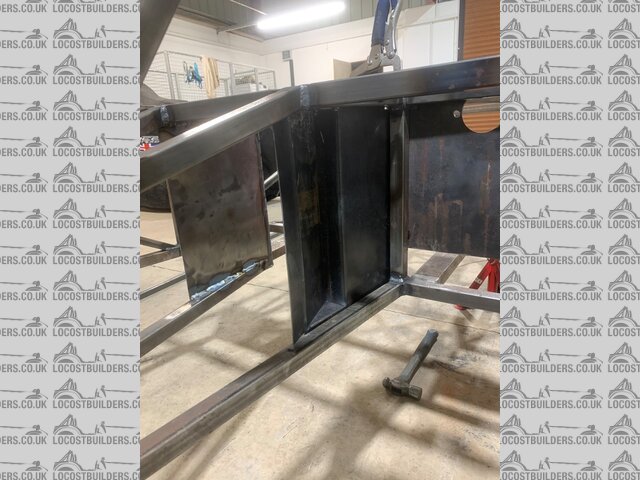
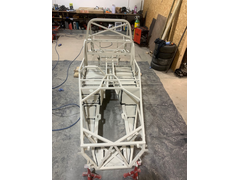
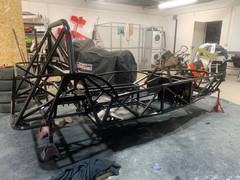
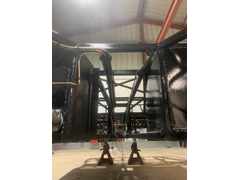
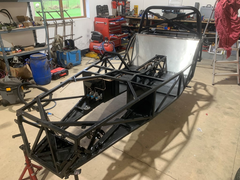
For this first post I have pictures of the front of the chassis fully welded. I know the advice is to tack all then weld however I felt the structure
at the front was complete and wasn't going to change so decided to fully weld. This didn't induce any major warpage. Diagonals so far are
measuring about 2mm difference. It means now I don't have to worry about breaking tacks when turning over etc.
Any constructive comments welcome. I'm not a mechanical guy and don't have much background with fabrication however over the years
I've dabbled in various welding jobs and never had an issue so far.
One things for sure this is not going to be locost. Steel was about £450 including some extra in the order!
Description
Description
Description
Description
Description
Description
Description
Description
[Edited on 5/3/23 by quinnj3]
|
|
|
|
|
Mr Whippy
|
| posted on 6/3/23 at 07:24 AM |
|
|
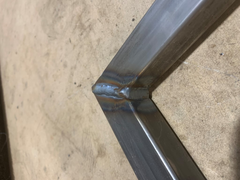
Your getting on really well and nice welds. Good to see a new build from scratch 
|
|
|
Slimy38
|
| posted on 6/3/23 at 08:00 AM |
|
|
Aye, definitely good to see at least one new build, it's been ages since I saw anything being welded up and it's great inspiration for those
of us (me!) who's struggling to find garage time.
As for fully welding sections of the chassis, I did the same and I've not had any issues. As you say it makes it easier to move around without
popping a tack.
It's only the second time I've seen a Vodou build, it definitely has some interesting variations. For example the standard chassis has the
middle section as a complete tube from side to side, then the centre section is removed. Also I will have to look at why they went for a double
thickness bar for the engine mounting, but then cut a couple of notches in it.
|
|
|
quinnj3
|
| posted on 1/4/23 at 09:03 PM |
|
|
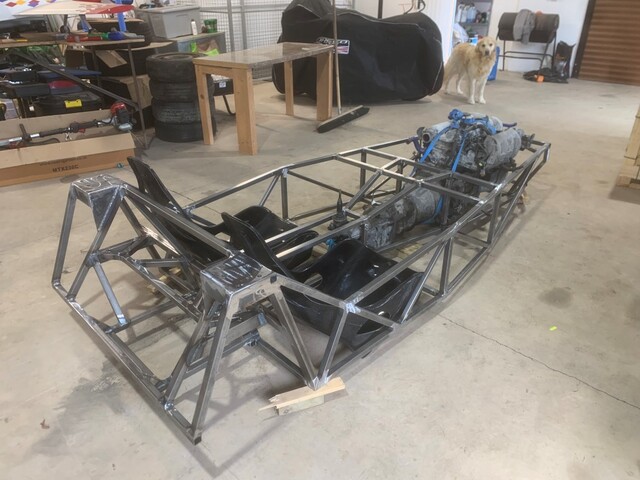
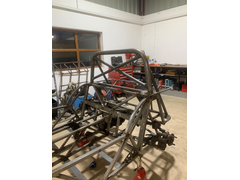
Ok, I thought it was time for a quick update.
I didn't get as many hours as I would have liked done in March however I had taken a mild flu and didn't feel up to working in the garage in
sub zero temperatures for the first couple of weeks of the month. When I did eventually get back to it I haven't quite hit my target of 10 hours
per week but I've been close. It's getting into gardening season so some time has to be dedicated to keeping the yard right.
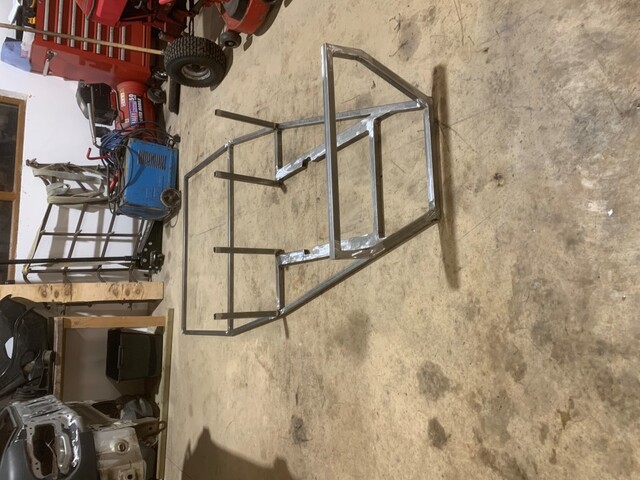
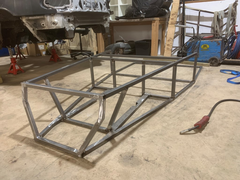
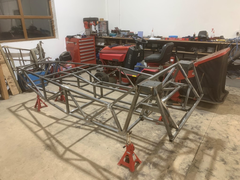
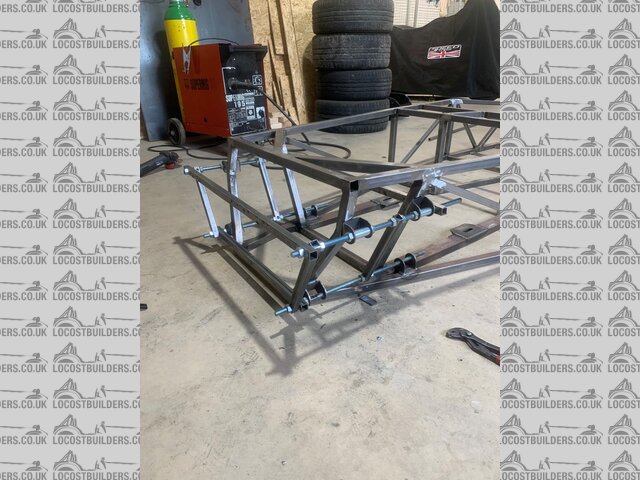
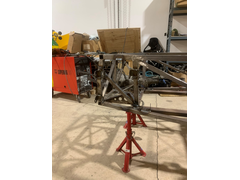
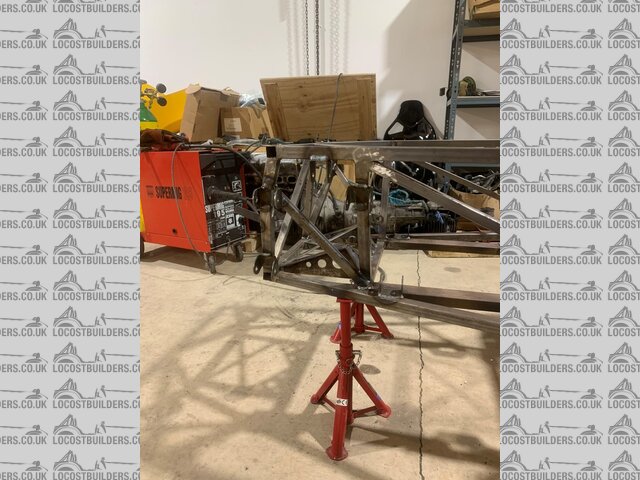
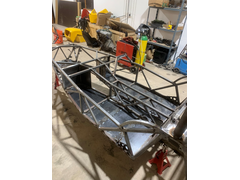
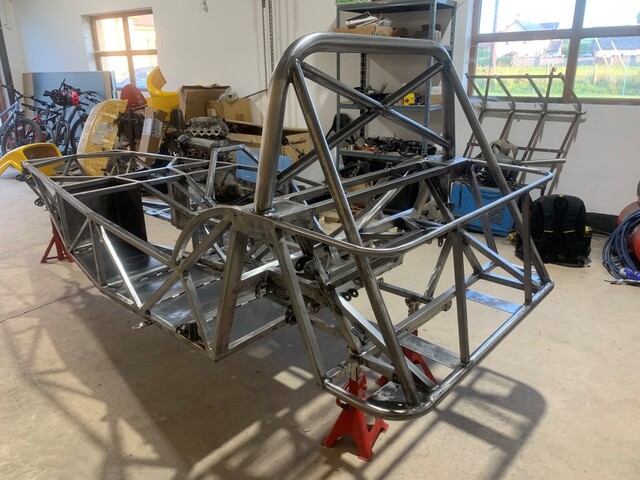
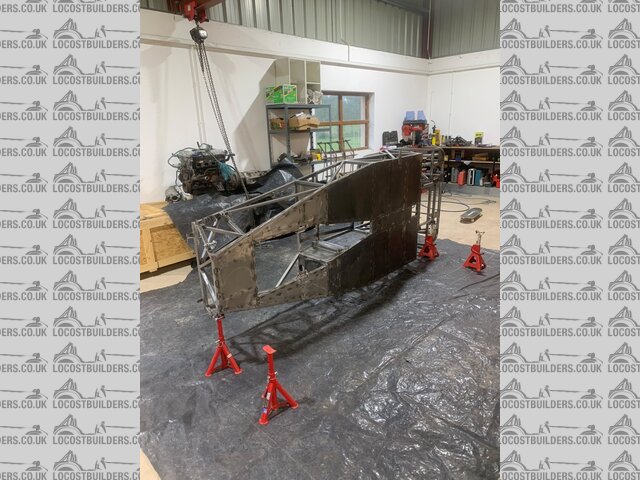
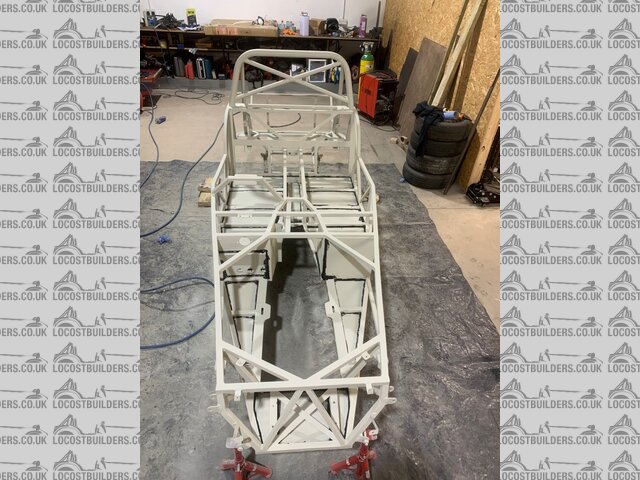
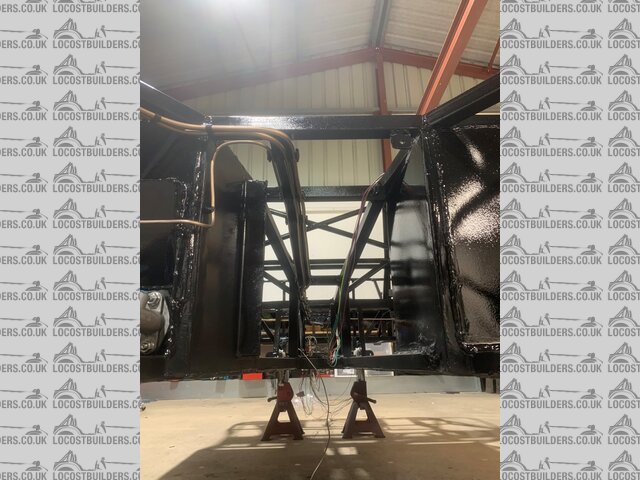
Anyway progress pictures to follow. To date I've spent 57 hours on what you see in the pictures. The front 'tub' including
trans' tunnel is fully welded and ground back. There has been a little 'banana-ing' of the chassis but its only a couple of mm either
side of the centre after welding the tunnel up. I don't think there's much I could have done to avoid it. Chassis is still measuring
within a couple of mm across diagonals. I've a feeling the rear end is going to take at least 20 hours on its own now. I'm happy enough
with progress so far. Every time I spend a few hours I can see progression which encourages me to keep going.
I'm aiming to have a rolling chassis by end of may. I have all the suspension parts here now to make it happen. Engine may or may not be
mounted at that point.
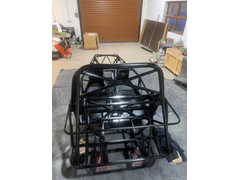
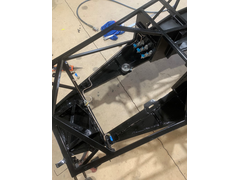
Chassis apr23 1
Chassis apr23 2
 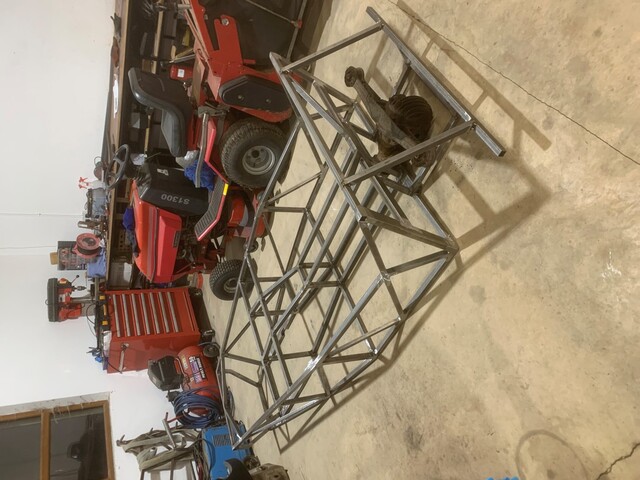
Chassis apr23 3
Chassis apr 23 4
Chassis apr 23 5
|
|
|
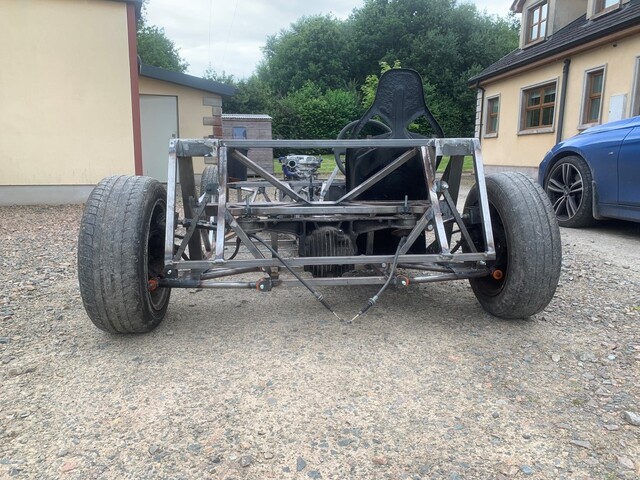
quinnj3
|
| posted on 30/4/23 at 09:23 AM |
|
|
Well, another month is just about through so I thought it was time for another progress update. Looking back at March's update has really
highlighted the progression so far. It helps to keep me motivated.
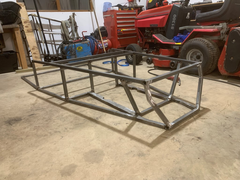
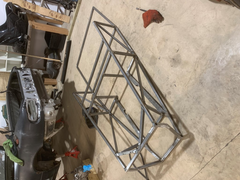
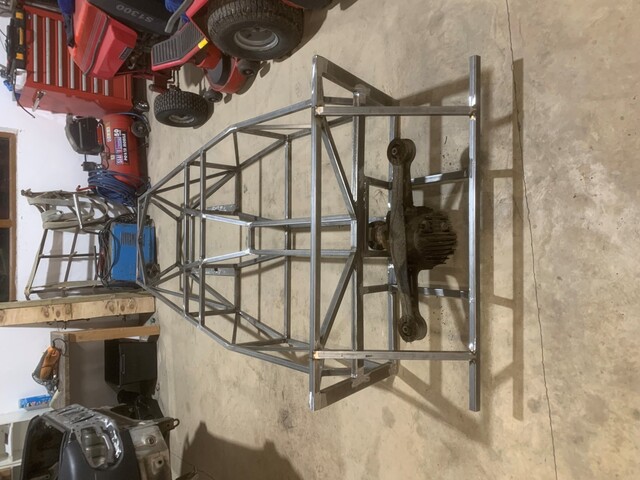
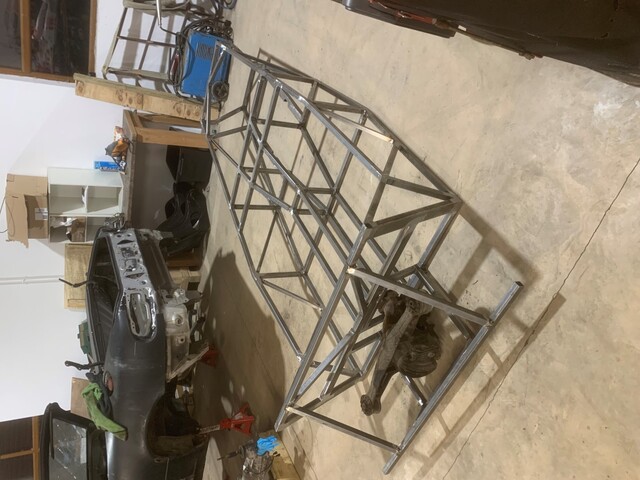
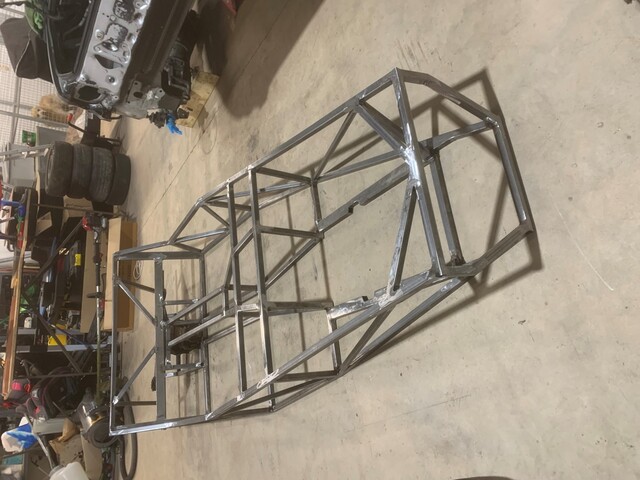
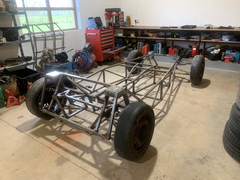
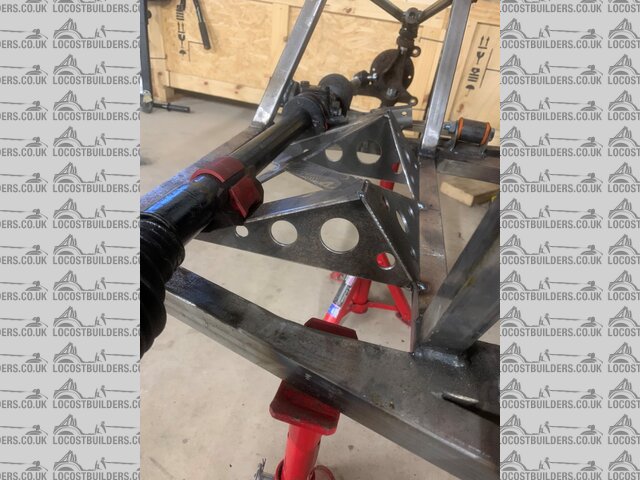
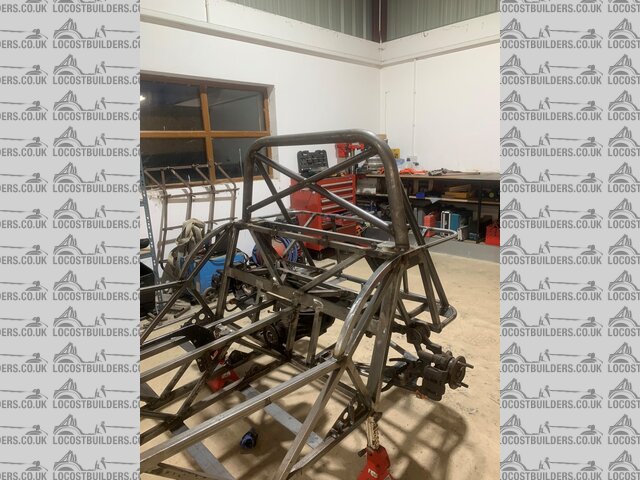
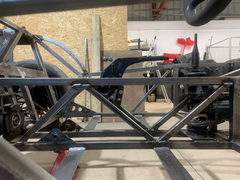
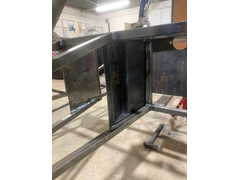
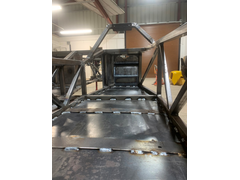
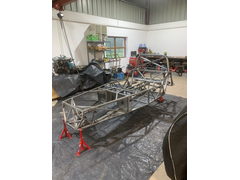
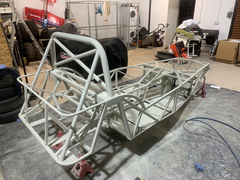
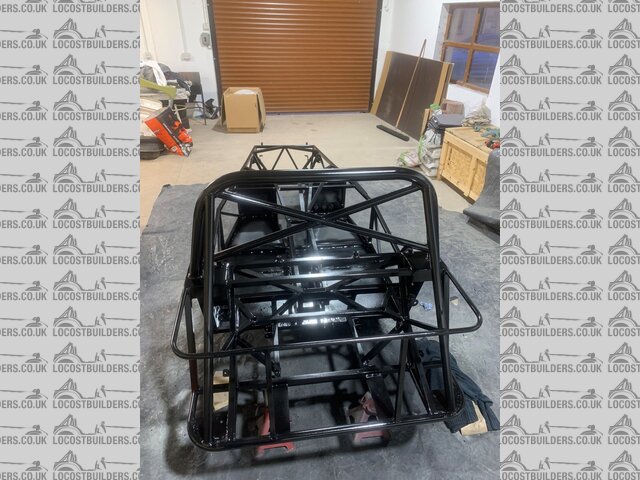
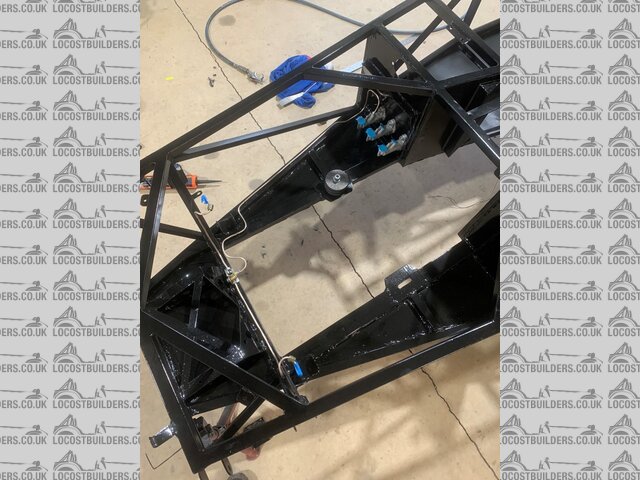
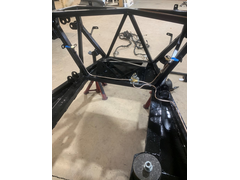
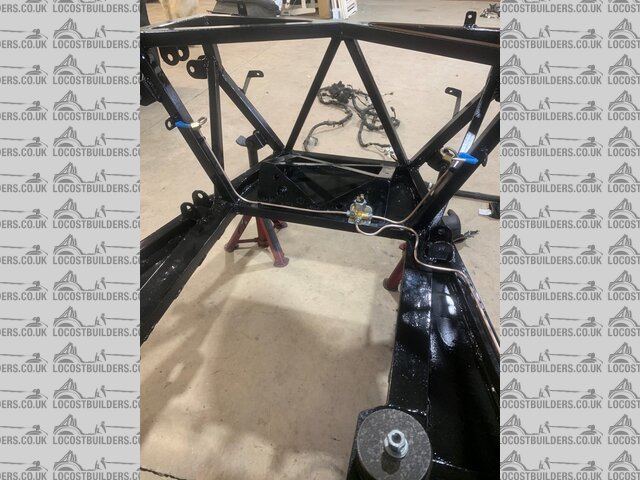
This month I completed hanging the differential and roll bar mounts. I've also started to install the engine & gearbox. I only got the
offside engine mount complete. The engine mount alone has ate up about 8 hours of work.
This month's hour log so far totals 41 which I'm really happy with. I was feeling a tad burned out when I completed the rear end as I put
in about 15 hours in back to back weeks (30 hrs in two weeks) all within a standard work week so I took it easy the past couple of weeks or so with an
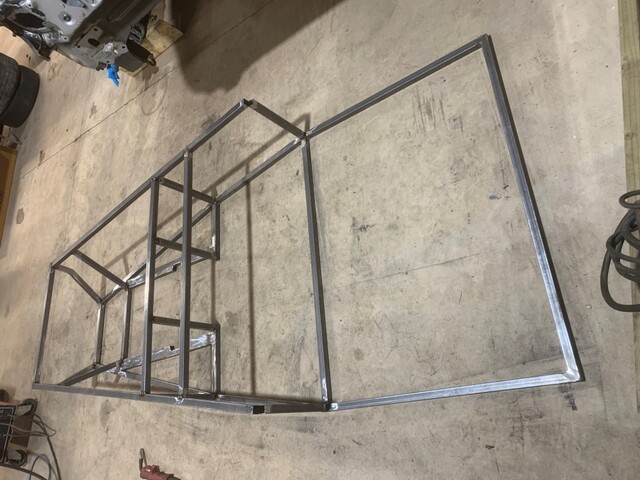
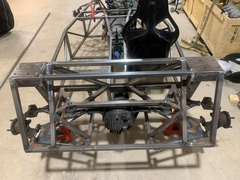
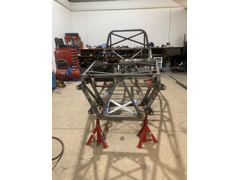
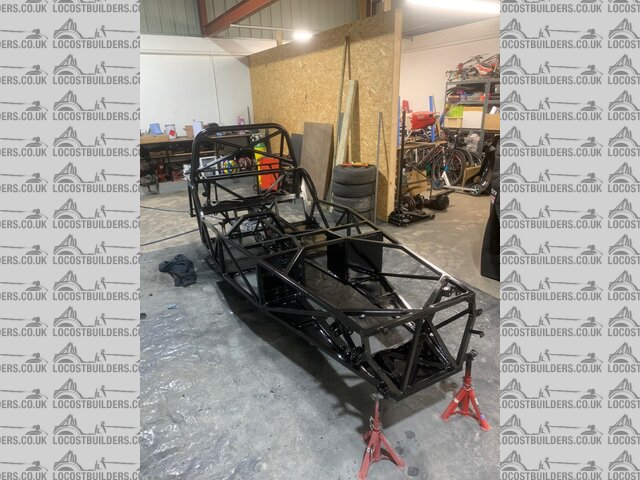
hour here and there. Just getting back into it again now. It felt like a real milestone to have a fully welded frame completed.
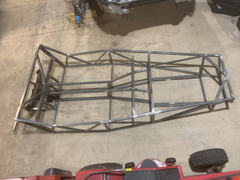
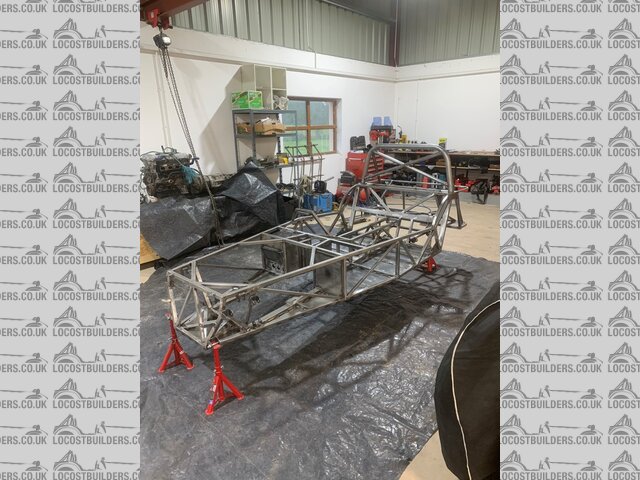
Completed frame
 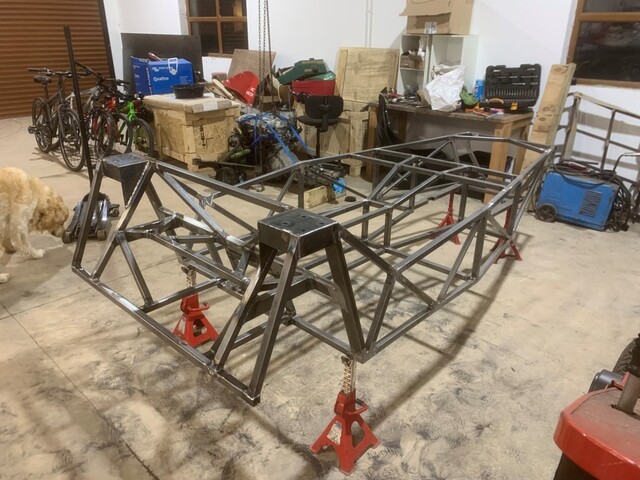
Completed frame 2
Roll bar base 2
Weld Nuts
Then it was time to trial fit the engine. There may or may not have been a few vroom vroom noises made!
 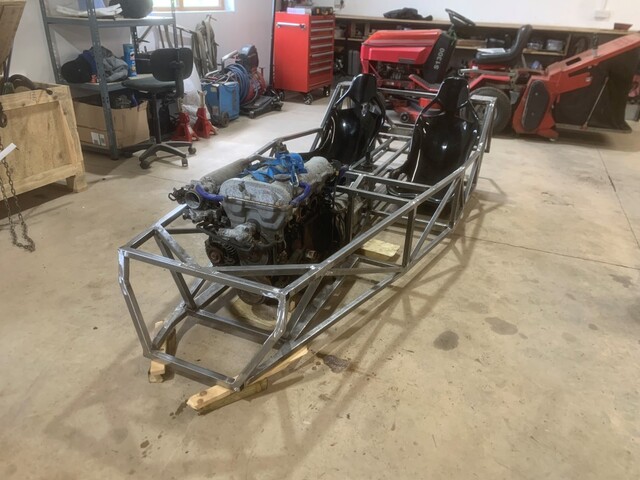
Engine trial fit
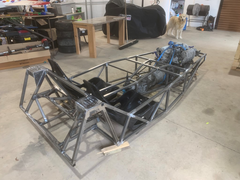 
Engine trial fit 2
Then onto the engine mount which I'm quite proud of. :Cool: This design allows for full positioning of the engine. I can move the engine
left/right, forward/back, turn a couple of degrees and raise/lower with shims. The mount consisted of 3 parts; lower mount, upper mount and cheap £4
bush from ebay.
 
Engine mount 1
 
Engine mount 2
 
Engine mount 3
Lower engine mount which allows for forward/back positioning.
 
Lower engine mount
 
Lower engine mount 1
Total hours on building (excluding stripping of donor car) is 91.5.
|
|
|
James
|
| posted on 3/5/23 at 11:40 AM |
|
|
Nice looking project. Will follow your excellent progress with interest!
------------------------------------------------------------------------------------------------------------
"The fight is won or lost far away from witnesses, behind the lines, in the gym and out there on the road, long before I dance under those lights."
- Muhammad Ali
|
|
|
Robski
|
| posted on 21/5/24 at 12:16 PM |
|
|
I shall follow this with interest.
Are you just working from the Haynes book and the 19 page pdf that has turned up on here somewhere or have you found more info from Vodou?
Still early days for me but I am trying to visualise / work out the rear end framework. I think the info is probably all there in the pdf, but more
detail is welcome.
Your pictures have helped me - like how the heck the diff is attached to the chassis. That crossmember with those 'cottonreels' now makes
sense!
I'm just considering building a very basic Vodou VR5: no screen so no heater/blower or wipers, no weather protection, minimal bodywork with cycle
wings, rollbar, lightweight seats, no interior trim, minimal instrumentation and lights etc. Essentially a 4 wheeled motorcycle to be driven wearing
leather jacket, gloves and crash helmet!
I await your next instalment which hopefully might cover building the wishbones and fitting the suspension mounting brackets.
Rob.
Hoping to build a 4 wheeled bike!
Fast, nimble and delinquent!
|
|
|
RAYLEE29
|
| posted on 21/5/24 at 06:05 PM |
|
|
Hi Rob, Jonathan want to respond but can't login if you click the link below it's his post on face book.
https://www.facebook.com/share/p/4euph3EaPHwacSqX/
build diary1
http://picasaweb.google.com/raylee290/RoadsterPics#
build diary2
http://picasaweb.google.com/raylee290/KITCARPICS?authkey=Gv1sRgCI2AouyYgpuQmAE#
|
|
|
gremlin1234
|
| posted on 21/5/24 at 07:29 PM |
|
|
I shall send a note to Luke, by reporting my own (this) post with the quote
"people are still having problems logging in, what can we recommend?"
|
|
|
Robski
|
| posted on 22/5/24 at 09:20 AM |
|
|
Thanks.
I can't get facebook to work.
That's not a reflection on your links - just the general state of the world.
I guess if I knew what faceache was for it might help, but I've never understood it so I settle for having lots more free time than most people I
know who use it.
Why do people put useful info on facebok rather than on a proper forum where it has a proper context, thread and organisation, where people can find
it, and where it remains searchable and findable for years to come?
Fb is just a black hole where useful information goes to die.
Rob.
Hoping to build a 4 wheeled bike!
Fast, nimble and delinquent!
|
|
|
quinnj3
|
| posted on 30/12/24 at 03:08 PM |
|
|
Good afternoon all. I hope you have had a nice Christmas and look forward to the new year incoming.
It has been a long time since I last updated. I've just got my account recovered. Sorry for the delay. I will post a current progress update
within the next few days. In the meantime I did a piece with 7Spot on Facebook in November although the video and interview has been cut considerably
due to poor audio quality. At the end of the interview there is a walk around of my chassis mostly in it's current state. I've done little
bits here and there over the last few months but nothing that shows progress in pictures. Motivation has waned although I do still think about things
constantly I just haven't been putting plans to action. Procrastination hits me regularly. I've had a good Christmas break and plan to get
back at it now I've had a considerable rest. Watch this space!
[Edited on 30/12/24 by quinnj3]
my aim is to build my own locost wether it takes me a week or 10 years to get started, i'm sure i will sometime
|
|
|
Robski
|
| posted on 30/12/24 at 07:24 PM |
|
|
Hope you get your building mojo back as it looked so good.
In the meantime I have shelved the idea of an MX5 based Locost. It might get resurrected - who knows - but...
I always wrestled with the fact that the MX5 has a couple of subframes - front and rear - that almost all of the oily bits hang on to. They are all
properly built with the correct alignment, camber & castor together with a useful amount of suspension adjustment. And the Locost Vodou throws all
that away to start again from scratch!
Hmmm.
I found an unfinished (largely unstarted actually), very old (2012 kit) MEV Exocet project on fleaBay that was a fraction of the cost of a current kit
and included a full set of MX5 running gear, some of which had already been cleaned and fettled. So I bought that and haven't looked back.
It has been fun (e.g. major engine servicing including new oil and water pumps, cambelt kit, major engine seals, refaced flywheel, new clutch etc),
rewarding to see it come together quite fast - just 5 months in and it looks like a car, so I am about 50% of the way there, and
'interesting' where the donor basis is a mixture of MK1 and Mk2.5 parts with some having to be modified to make a safe solution. The biggest
challenge has been the wiring. Nearly there now but I wasn't helped by the fact one of the many previous owners had started hacking around the
MX5 loom and got bored. She runs and I think I have all the lighting requirements now sorted. Just need to solve any remaining engine warning light
issues once the exhaust, cat and lambda sensors are installed.
I might be tempted to build an 'MX5 Locost' in the future but I think I would design my own chassis around the MX5 subframes as Mazda have
done so much already!
Rob.
Hoping to build a 4 wheeled bike!
Fast, nimble and delinquent!
|
|
|
quinnj3
|
| posted on 31/12/24 at 03:54 PM |
|
|
Hi, as promised I've put together an update to bring you up to where the project sits as posted. I've attempted to post chronologically but
image posting on this forum is a little clunky. Certainly when there is as much to update as I've got.
I basically went a whole year without much progress and in April and May of '24 did a little more:
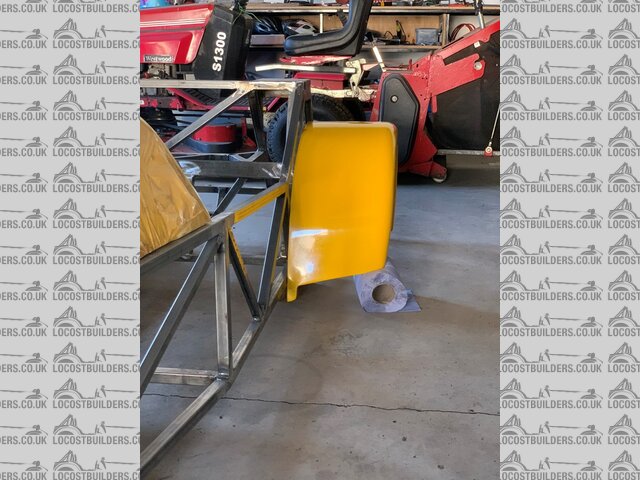
I purchase a nose cone, scuttle and rear arches however they were for a RC Locost, not a Haynes. i was quite disappointed as I had specifically
queried it with the seller on marketplace. Suffice to say I've sold the nose cone; I will keep the scuttle for a little while as
'inspiration', it was a nice height and shape. The rear arches should be ok.
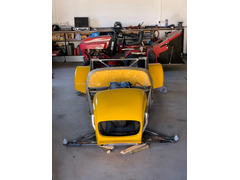 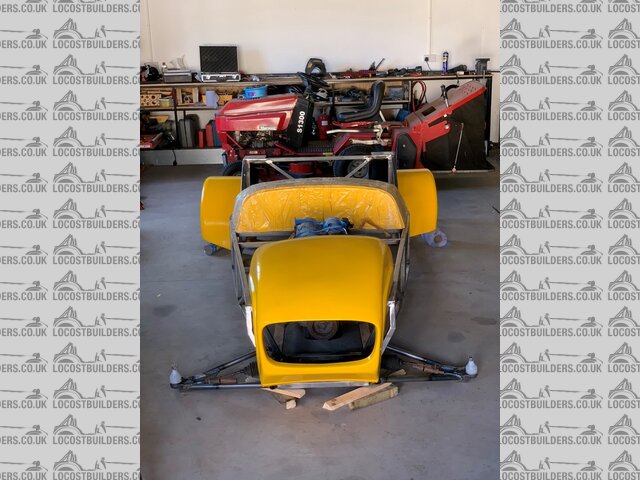
Front nose
Description
Then onto the task of fitting up the suspension. I don't have many photos of wishbone fabrication however that took a considerable time to
complete.
Description
Description
Description
July 24 was steering and suspension mount configuration:
Description
Description
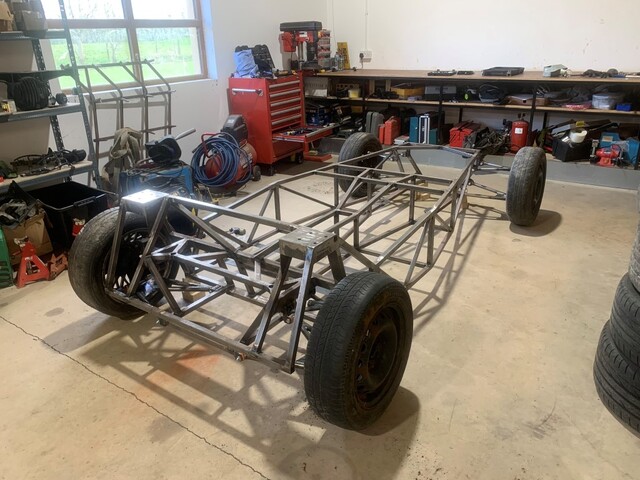
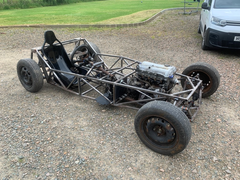
And getting it on 4 wheels. I ahve a video of my kids pushing me around our house. I pushed them also. We had to simulate the engine noises
 . I'll link to the 7Spot interview on YouTube where the intro starts off with that video. . I'll link to the 7Spot interview on YouTube where the intro starts off with that video.
Description
Description
Ground clearance is low however everything was loose and the wheels are scrappers with worn lugs with the wrong rolling radius. I'm going to
modify the sump for piece of mind. I expect final clearance to be around 80mm.
 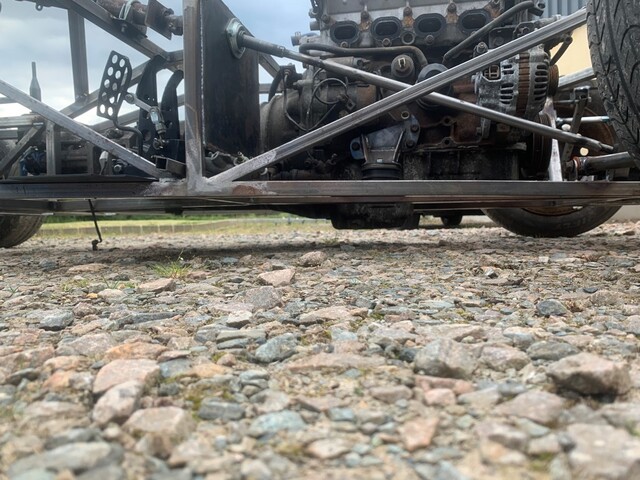
Description
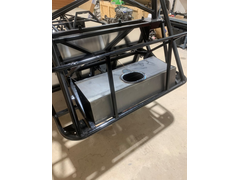
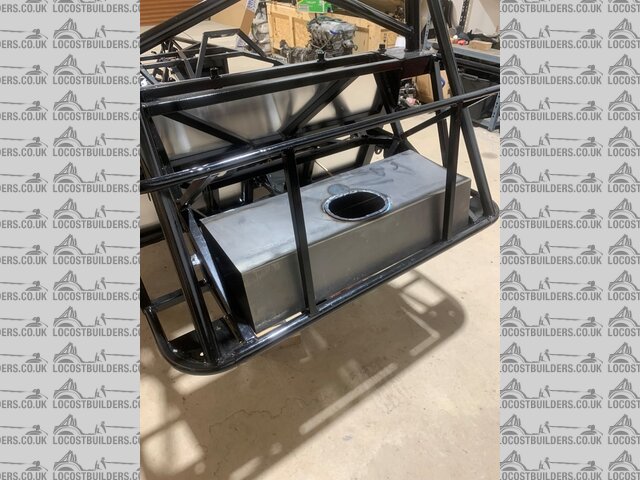
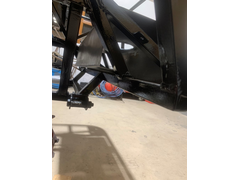
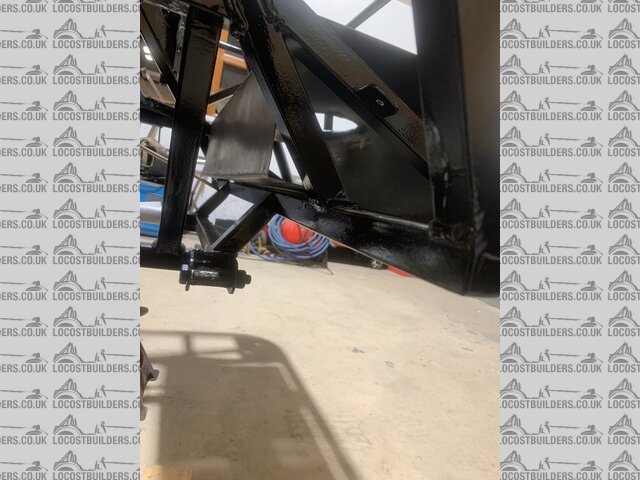
And back into the garage to fabricate the boot area. The roll bar is crs 3mm 50mm mild steel mandrel bend via an ebay seller. The rest was
fabricated by me. I decided to weld the roll bar on as I didn't see the point in having it removable.
 
Description
Description
Description
Handbrake fitting:
Description
August 24 was when I planned to get this painted. It didn't quite work out. The photos don't do justice to the number of small jobs
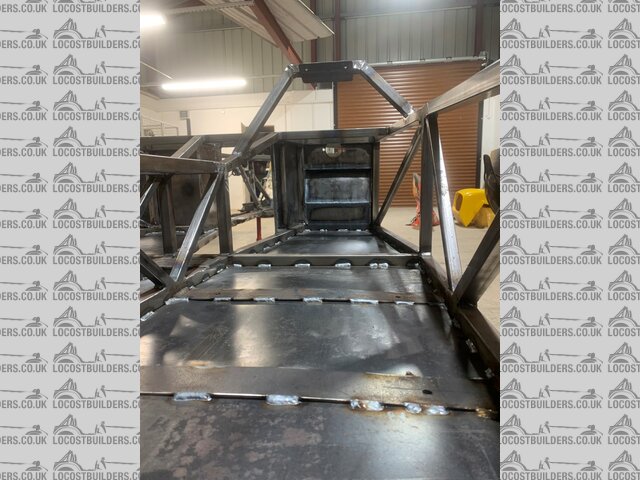
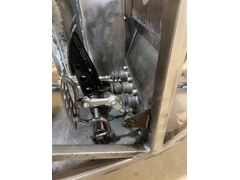
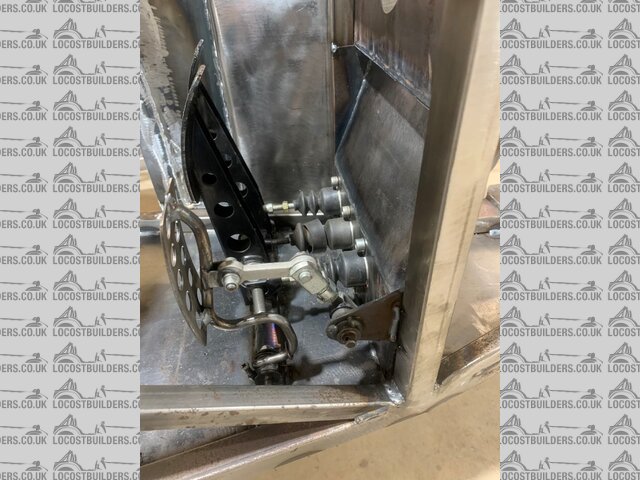
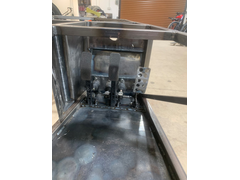
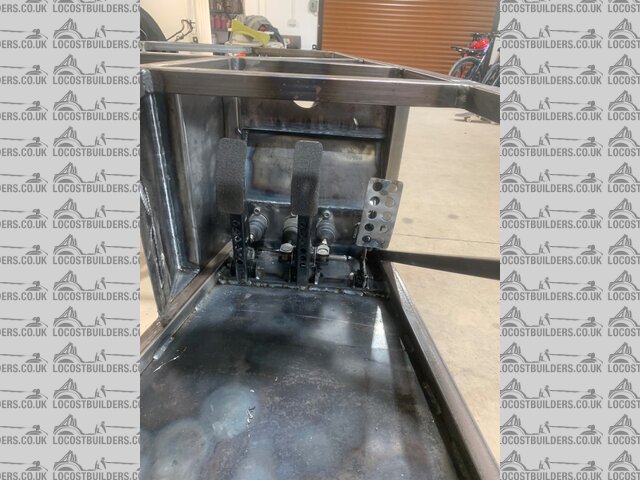
completed in preparation. I added stiffening tubes to the chassis, fitted the steel floors (1.6mm), got my VIN number etched in, and set to the pedal
box. The pedal box took quite a bit of work. I bought a used OMP unit but it didn't fit as intended so I set about cutting it up and using the
pedals, mounts and spacings. Worked out well in the end but it wasn't much less effort than it would have been to fabricate myself. I also
added a clutch foot rest. Time will tell if it works out.
Description
Description
Description
Description
Description
Description
Description
Description
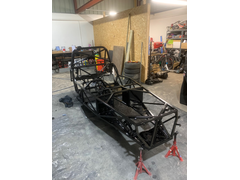
September 24 wasn't going to slide past without the paint being completed. It was a horrible job to prepare with some grinding of welds (really
not many, I surprised myself there), looking for missed welds, several rub downs with scotch bright and the grinder to de-rust and de-scale followed
by several more rub downs with a degreaser and panel wipe. Against all recommendation I cracked out the spray gun and spray painted an epoxy primer,
followed by tiger sealing all gaps. The underside and footwell areas were sprayed with Upol Raptor Liner (2 coats) and then the whole chassis was
given 3-4 coats of 1K black chassis paint. The garage was a mess with dust afterwards. I did wear a full white suit goggles and 3M painters face
mask.
Description
Description
Description
Description
Description
Description
Description
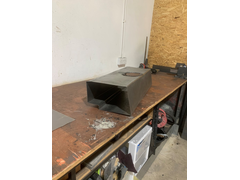
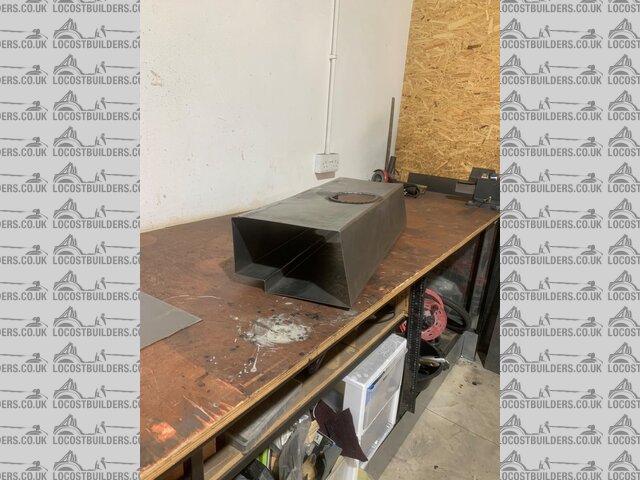
And then for the rest of 2024 I have been doing small jobs but not making much progress. I ran in the brake lines and fuel lines some of which still
to finish. I made a start on the rear wiring loom which is fairly straight forward and started the fuel tank. I've been starting and stopping
as I can't make my mind up which is the best way to complete things. I want to complete to the best of my ability which means learning new
skills and taking time to ponder.
Description
Description
Description
Description
Description
Description
Description
And that's all up to date to end 2024. I have built a full project plan (minus the dates) to aid ordering parts and the order to assemble. I
have purchased a powder coating gun and built an oven along with purchasing a sand blasting cabinet and zinc plating kit all of which is due to arrive
soon. I plan to powder coat the differential, wishbones and any small parts to give durability. I really don't like how easy the 1k paint marks
on the chassis. Thankfully the epoxy undercoat is really tough below the paint.
Interview with 7Spot on YouTube follows. The start is a video of kids pushing me around the house and if you don't want to listen to the
interview skip through to 5:37 for a montage and video walkthrough of the chassis:
Inteview Here
[Edited on 31/12/24 by quinnj3]
[Edited on 31/12/24 by quinnj3]
my aim is to build my own locost wether it takes me a week or 10 years to get started, i'm sure i will sometime
|
|
|
Robski
|
| posted on 31/12/24 at 06:06 PM |
|
|
That chassis is a thing of beauty.
Rob.
Hoping to build a 4 wheeled bike!
Fast, nimble and delinquent!
|
|
|
quinnj3
|
| posted on 1/1/25 at 03:05 PM |
|
|
quote:
Originally posted by Robski
That chassis is a thing of beauty.
Thanks Rob. There are a few changes I would make already on a do over.
1) Make the steering column support run across the width of the car. the present design kind of dictates a boxed area around the gear shift.
2) make the rear a little more open to facilitate getting the diff in and out easier. Granted once final fitted it should not need to be removed as
I'm rebuilding it prior to installation. It can be fitted in one piece however I may be sacrificing some paint on the chassis and diff to fit it
in.
3) Build a custom rear wishbone to allow for toe adjustment. I could still do this but I plan to get it on the road first and only if i find it
necessary will I rebuild the lower rear wishbone.
4) I accidentally used 1.5mm wall tubing to extend the steering column. This needs to be 3mm wall for IVA. I hate do overs!
To date I have spent over 300 hours building this. As I need to refurbish the engine I anticipate a similar time investment or even more to finish.
Things which I didn't update on are:
I have the prop shaft shortened and refurbished ready to install
I will be refurbishing the engine.
I don't have an ECU and intend to use a speeduino DIY unit.
I still need to find the following parts. If I don't find them soon I will purchase new:
14" coilovers with 350lb front springs and 225lb rears.
Haynes roadster wide nose cone
Lights front & rear
Front wheel mud guards
There's a lot more but these are the main ticket items.
my aim is to build my own locost wether it takes me a week or 10 years to get started, i'm sure i will sometime
|
|
|