
using a relay board with Microsquirt and edis
Valtra - 21/4/13 at 10:05 PM
Hi all
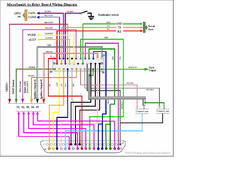
hopefully there is a diagram i'm working from somewhere here . just wondered what I'm looking at re all the pink wires S1-S5
Description
also the wires ending in down arrows on the left . are they bypassing the relay board and going straight to their intended destinations ? plus which
are relevant for an edis setup.
it's getting late
so perhaps I need to retire for the evening 
peter030371 - 22/4/13 at 08:29 AM
I am thinking of 'microsquirting' my Fiat t/c in my Striker but sorry I will not be using a relay board so can't help
However I will be watching your progress with a lot of interest 
Valtra - 22/4/13 at 01:12 PM
quote:
Originally posted by peter030371
I am thinking of 'microsquirting' my Fiat t/c in my Striker but sorry I will not be using a relay board so can't help
However I will be watching your progress with a lot of interest
I'm feeling my way there at the moment I'll help when the time comes if I can 
Valtra - 23/4/13 at 11:54 PM
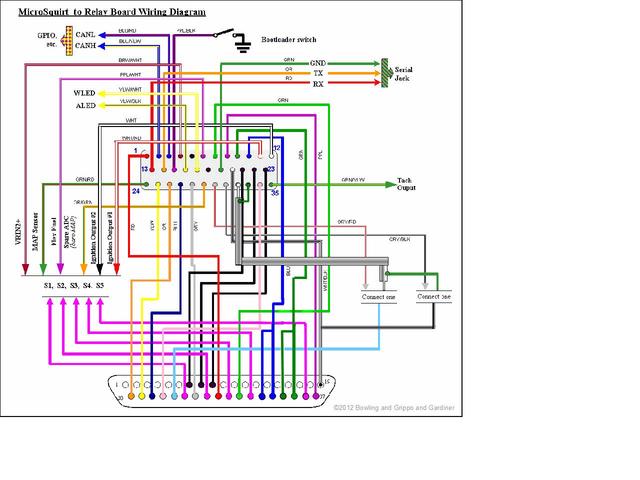
Think I've sussed it , following the instructions from Trigger Wheels and a couple of diagrams I now have a microsquirt to relay board cable for
edis
Description
[Edited on 24/4/13 by Valtra]
peter030371 - 24/4/13 at 07:54 AM
I was just looking at your pictures, where did you get your Trigger wheel/ crank pulley from? It looks very neat
Valtra - 24/4/13 at 01:16 PM
Hi
I bought it from Trigger Wheels in Ely who also supplied the Microsquirt
They are not far from me.
It's just a laser cut ring gear which I super glued in about the right position , clamped, heated on a camping stove and stick welded. Then my
mate centred it on a lathe to remove a little run out.
Valtra - 24/4/13 at 07:29 PM
quote:
Originally posted by peter030371
I was just looking at your pictures, where did you get your Trigger wheel/ crank pulley from? It looks very neat
Oh yes and this is pre welding 
I'll post a few more pics when I get a chance

