
finally some progress.
suparuss - 11/7/11 at 03:00 PM
well what with the recession i had to put the car on hold for quite some time, infact almost sold it at one point! i
i built the larger garage so that i could finish the car just as the recession started but due to the construction industry being completely dead i
had to use the workshop for work instead. i have now moved the business into a proper industrial unit so i have some space to work on the car!!
so recently i have finally cast the main body shell for the car and got it mounted. this had been getting put off because i needed to put a long
weekend into it to get it all cast and mounted, mainly because the mould had been stored in an awkward position so i wasnt sure if it had held the
right shape so wanted to get it mounted while it was still green to enable me to bend it back into shape if required.
so here are some photos-
this is the mould for the shell which is made in 2 halves to make it easier to handle. it is in 5 parts to each side to help with demoulding!
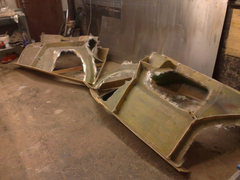
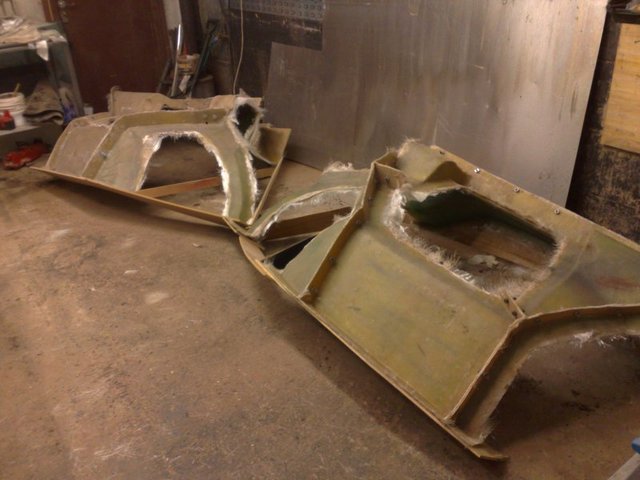
main shell mold

shell mould again
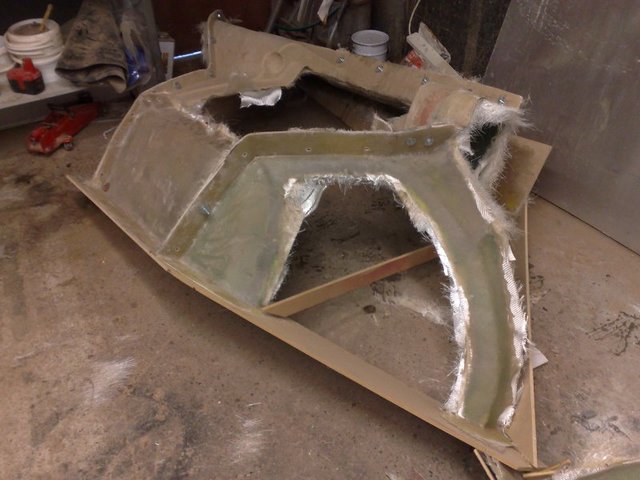
heres an old photo of the plug being made and one with the car with the plug dismantled.
middle section progress
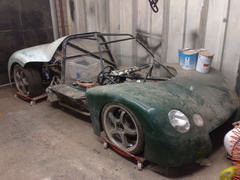

before shell goes on
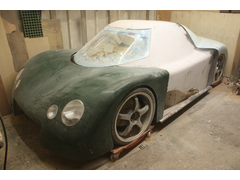
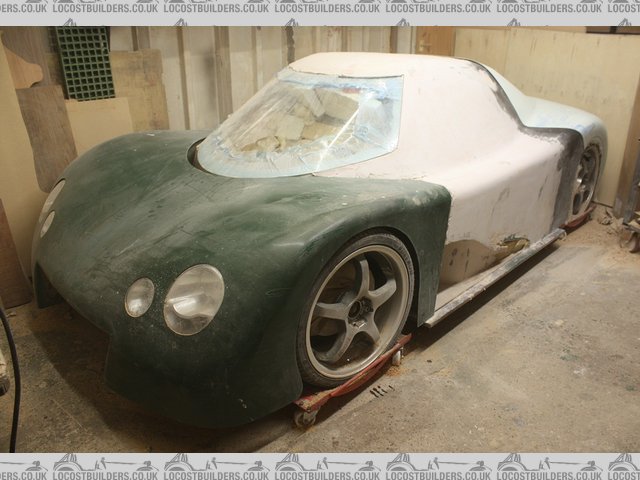
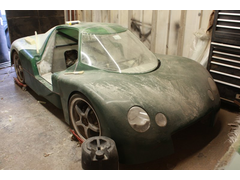
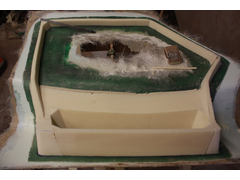
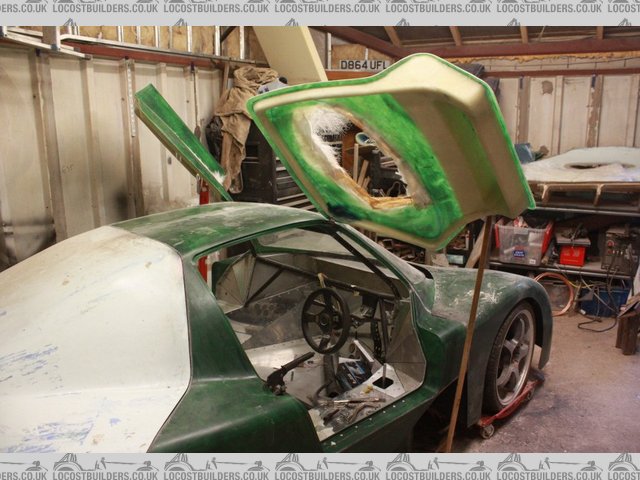
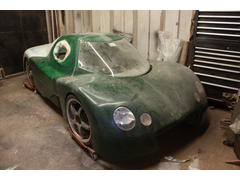
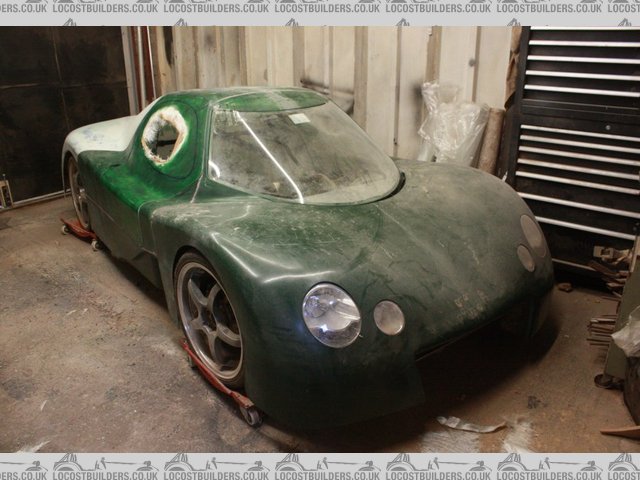
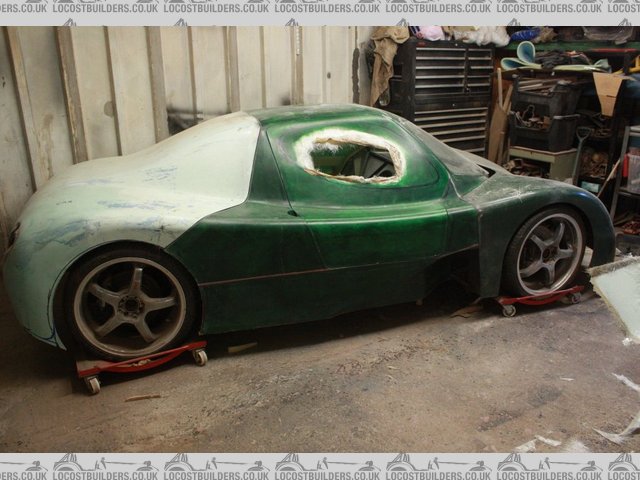
and here is the shell mounted and ready to start fixing in place.
with shell mounted
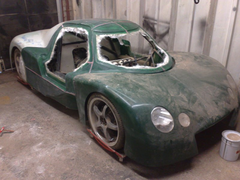
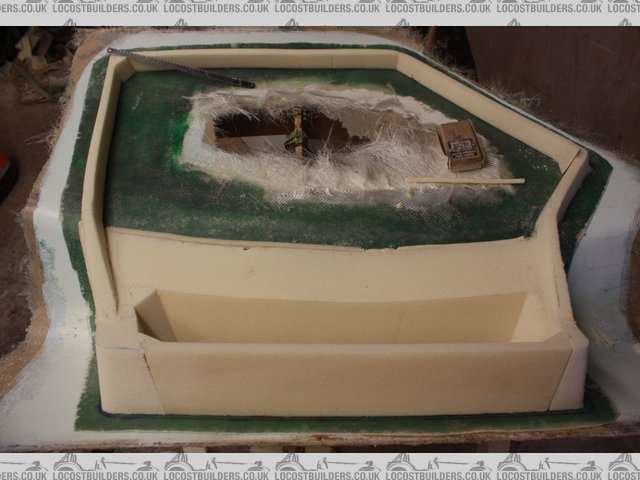
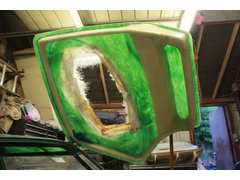
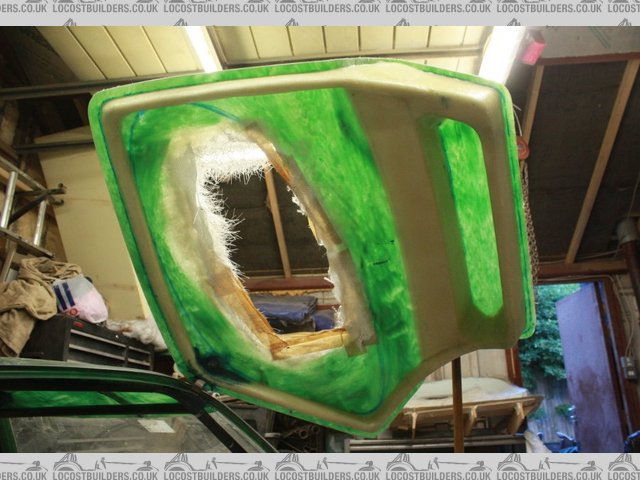
and here is the car with the shell trimmed, mounted full and the windscreen in place temporarily.
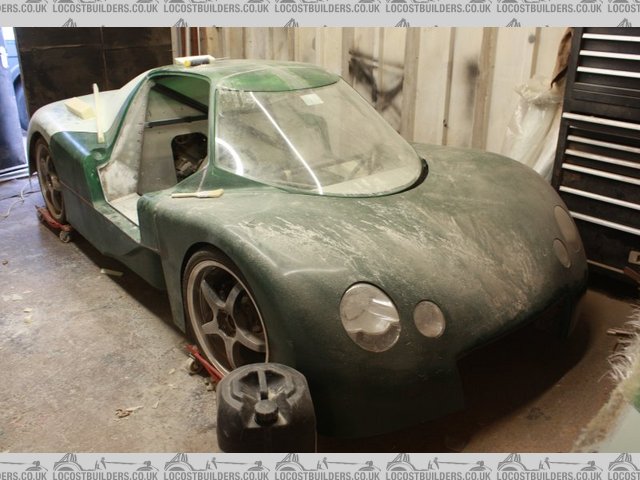
shell trimmed and windscreen
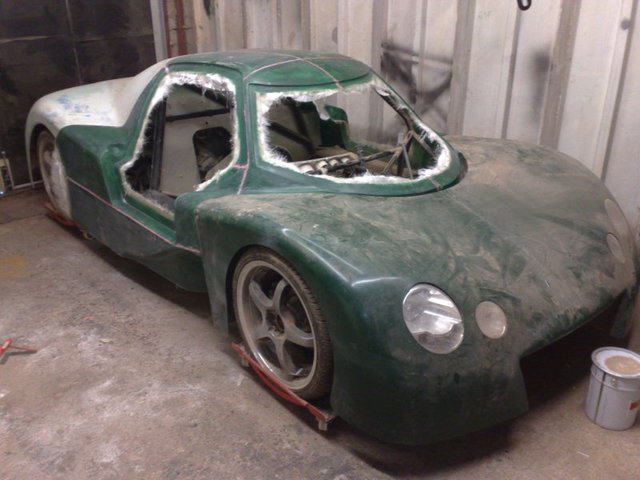
and the inside showing how ive filled all the gaps with alluminium. in hindsight i could have avoided the need for this with better planning with the
body work but it would have required a hell of a lot more fibreglassing which i wanted to avoid more!
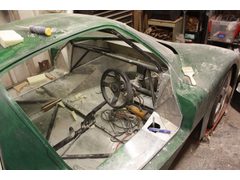
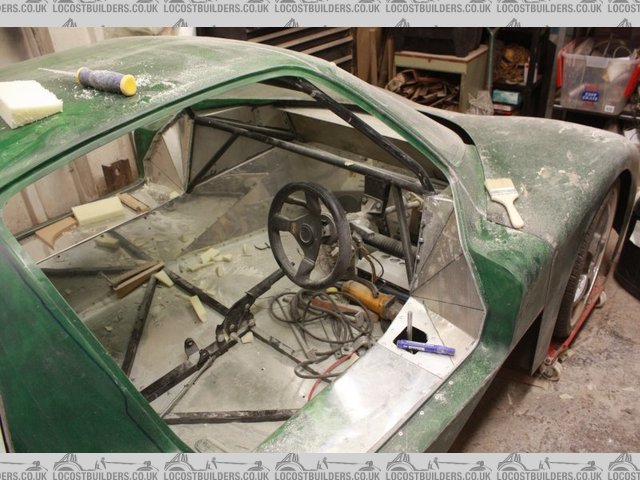
internal paneling
So looking pretty good now! ive already started the doors and have cast the outer skins for those yesterday and glued the foam reinforcement into them
ready to be glassed over. ill get them finihsed next weekend and try and post some more photos.
Cheers,
Russ.
[Edited on 11/7/11 by suparuss]
SeanStone - 11/7/11 at 03:11 PM
Looking very good!
What engine is going in?
rallyingden - 11/7/11 at 03:16 PM
I want one ................ 
Excellent
RD 
RazMan - 11/7/11 at 03:24 PM
I was wondering when you would surface again Russ
Good luck with the doors - they can take as long as the rest of the body you know....... so many surfaces and angles to get right.
steve m - 11/7/11 at 04:12 PM
I do like that!!
moving the car round on those castors, must make the job easier as well
HowardB - 11/7/11 at 05:16 PM
car looks awesome, what is the chassis, or is it homebrew?
as for casters, I found some bread trollies and dexion/ply worked almost as well, and were much less expensive
Fred W B - 11/7/11 at 07:21 PM
Great progress Russ, looks like you are not far away from getting in out into the sun.
Thanks for the pics
Cheers
Fred W B
[Edited on 11/7/11 by Fred W B]
Doug68 - 12/7/11 at 02:18 AM
Good to see you're back at it!
Car looks great, keep going!
suparuss - 18/7/11 at 10:46 AM
Thanks for the encouragement everyone. here are some more progress photos-
The doors are now made and just need the latches and handles fitting. im using external handles from an obscure hatchback i can remember the name of,
internal handles form an audi A4 and these all need modifying in one way or another! latches are bearclaw and ill also be using a central locking kit.
ive also ordered some gas struts to keep the doors open, dont have time to make brackets for a sweeping brush!
reinforcing door skins

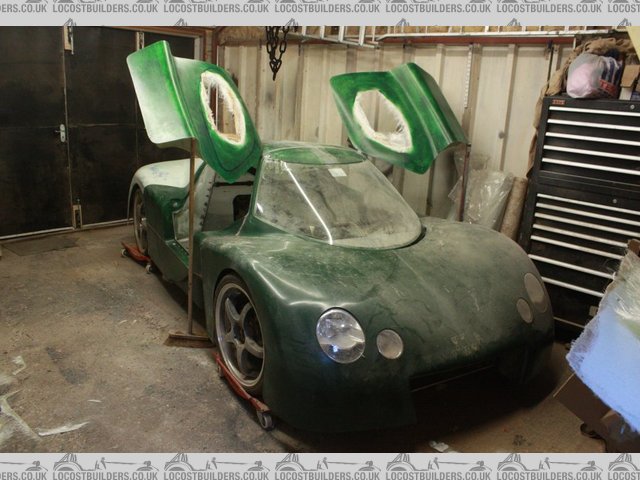
doors mounted
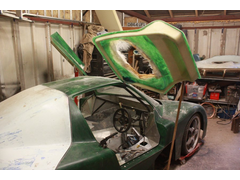
doors from rear
close up of door
doors closed

and from side
I quite like the 1 hinge approach, wasnt sure if it would be rigid enough but it is really quite good. the hinges are modified from a merc 4x4 boot
door which probably weighs around 80kg my doors weigh nearer 4kg!
Cheers,
Russ.
RazMan - 18/7/11 at 11:49 AM
quote:
Originally posted by suparuss
I quite like the 1 hinge approach, wasnt sure if it would be rigid enough but it is really quite good. the hinges are modified from a merc 4x4 boot
door which probably weighs around 80kg my doors weigh nearer 4kg!
Cheers,
Russ.
Very striking but I can't help thinking that it will be too fragile - 2 hinge points would be 10 times stronger and make the shut lines parallel
every time. Flexing and heat expansion does horrible things to GRP and I had to heavily reinforce the body & doors to keep everything lining up.

Fred W B - 18/7/11 at 05:46 PM
quote:
my doors weigh nearer 4kg!
What layup did you use Russ, if I may ask?
Cheers
Fred W B
suparuss - 18/7/11 at 07:51 PM
quote:
Originally posted by RazMan
Very striking but I can't help thinking that it will be too fragile - 2 hinge points would be 10 times stronger and make the shut lines parallel
every time. Flexing and heat expansion does horrible things to GRP and I had to heavily reinforce the body & doors to keep everything lining up.
This is how i always intended to do it, mainly because of the way it looks, will be interesting to see how the hinges hold up long tem. if i use extra
strike plates i should be able to get it allign pretty well i think. the body is bonded to the chassis all around the door opening so hopefully that
will narrow any warping down to the door its self.
quote:
What layup did you use Russ, if I may ask?
The layup of the doors consisted of the following process-
1- gelcoat, left to cure untill tacky
2- 1 layer 300g chopped strand + 1 layer 280g twill weave cloth, left to harden and sanded
3- repeat stage 2
4- PU foam glued in place with hot melt glue and shaped
5- repeat stage 2
most of the rigidity comes from the fibreglass around the foam structure, unitll i did this they were quite flimsy.
Cheers,
Russ.


