flak monkey
|
| posted on 19/2/10 at 07:52 PM |

|
|
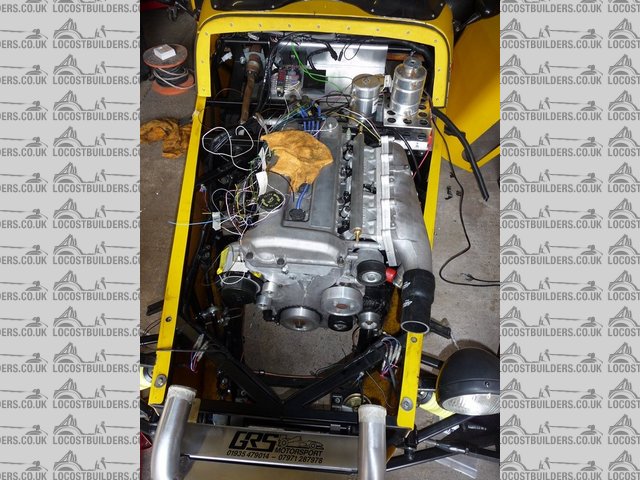
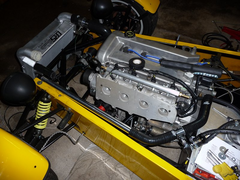
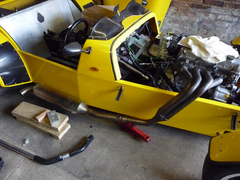
Made a little more progress this afternoon. Had to come in as its really quite cold and damp outside now 
First job was to add another bit to the supercharger bracket. There was a bolt hole in just the right place, and the mod should stiffen up the bracket
as I was concerned about it twisting should I start to increase boost.
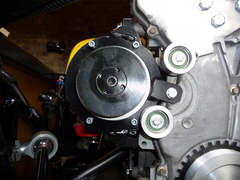 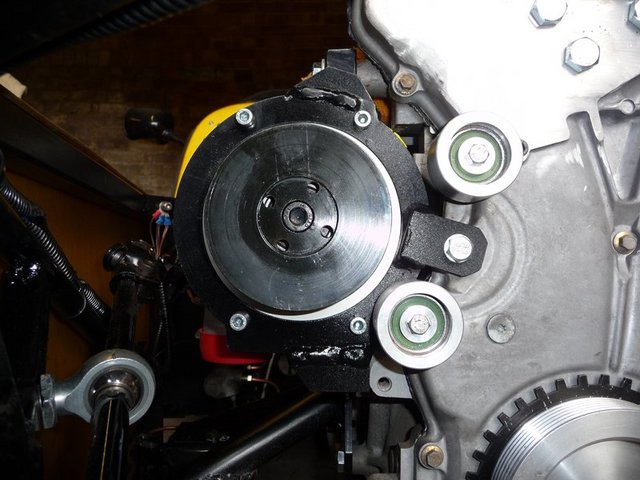
Supercharger mount mod 2
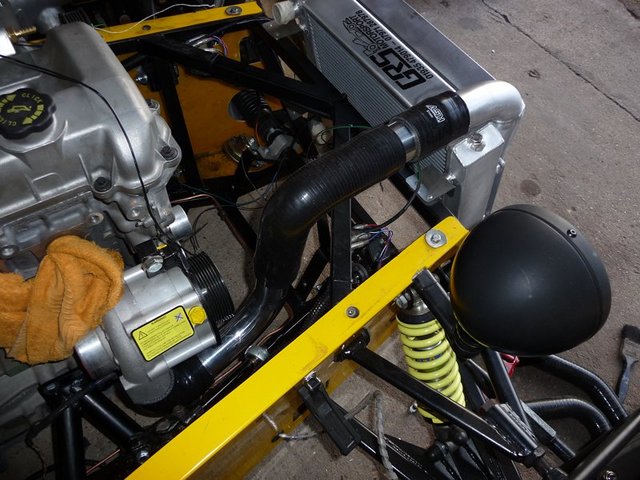
Also got the water outlet fitted after drilling and tapping to fit the water temp thermocouple for the dash. Can start working out the cooling pipe
layout, along with fuel pipe layout etc.
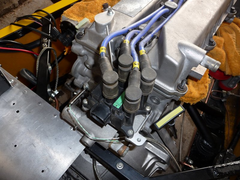 
Water outlet and coil
Next started making the mounting brackets for the supercharger oil cooler.
 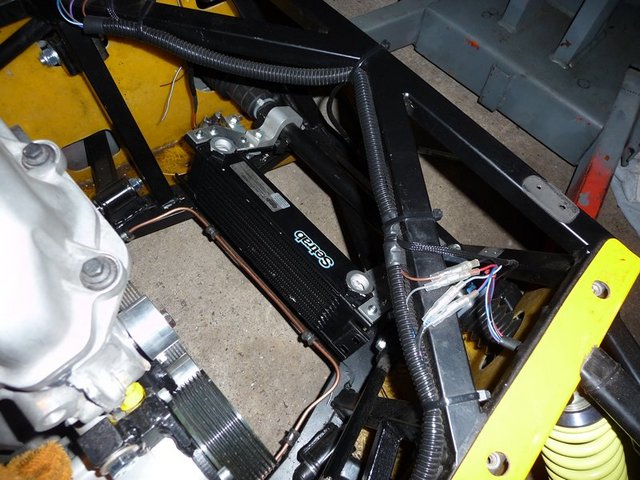
Charger oil cooler 1
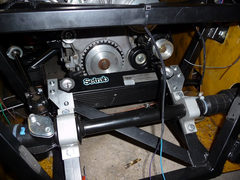 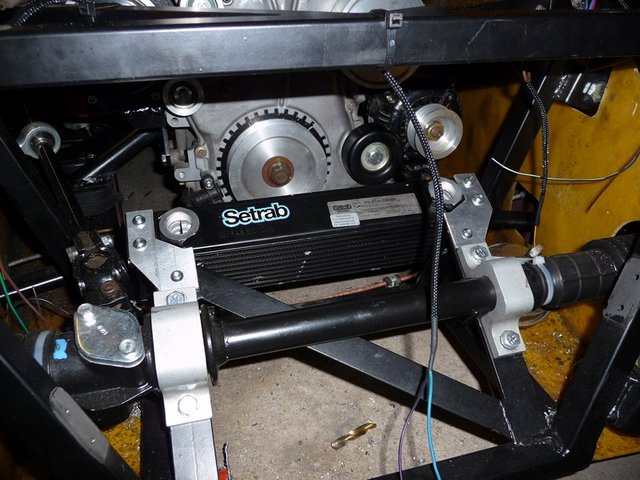
Charger oil cooler 2
Tomorrow I plan to start having a look at the mounts for the rad/intercooler. Then I really need to test out the hydraulic clutch before finally
starting to connect the electrics, cooling and fuel up.
Sera
http://www.motosera.com
|
|
|
|
|
goaty
|
| posted on 20/2/10 at 08:05 AM |
|
|
looks very good, does look like it will start gettint tight once pipes start going in.
Out of interest, what injectors are you running now? one in the Tb's? any idea on size yet???
I basically trying to work out what power you think you will be seeing now 
now you got the roller barrels on there 
Also, are you going to run an oil cooler for the engine too???
Cheers dave
[Edited on 20/2/10 by goaty]
|
|
|
flak monkey
|
| posted on 20/2/10 at 05:43 PM |
|
|
New injectors are 60lb/hr (630cc/min) siemens deka's which at std pressure should be enough for around 400bhp, which is more than I am looking
for anyway.
Made some more progress today. Still havent got the clutch tested, but got plenty of other jobs done....
Fitted the fuel rail complete with the new injectors. It did originally foul the idle screw on the throttle bodies, so I had to cut that down. Also
looks like access will be tight to the balance screws, but not impossible 
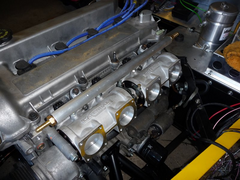 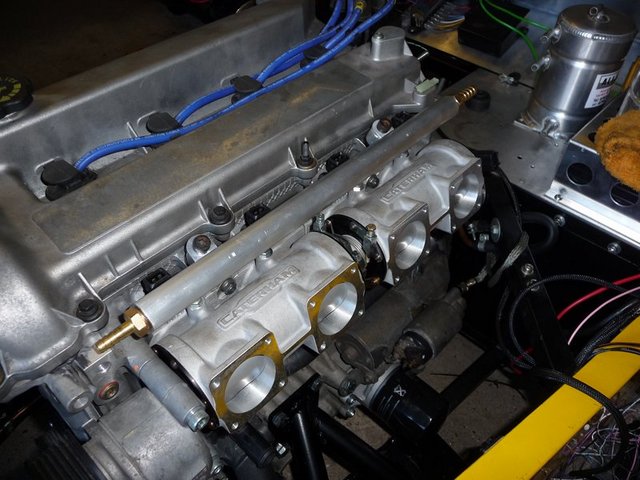
Fuel rail fitted 1
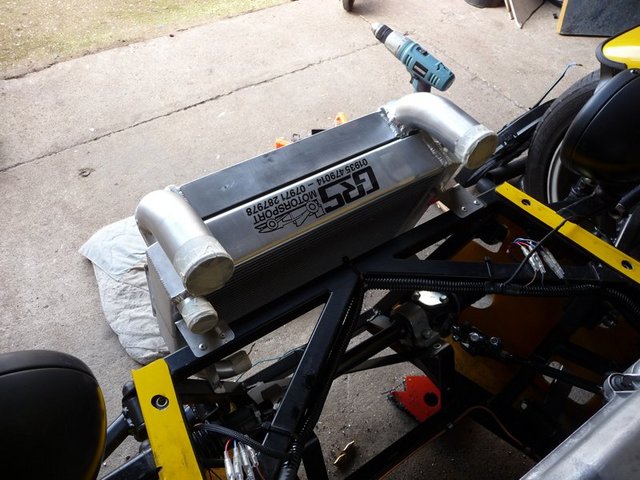
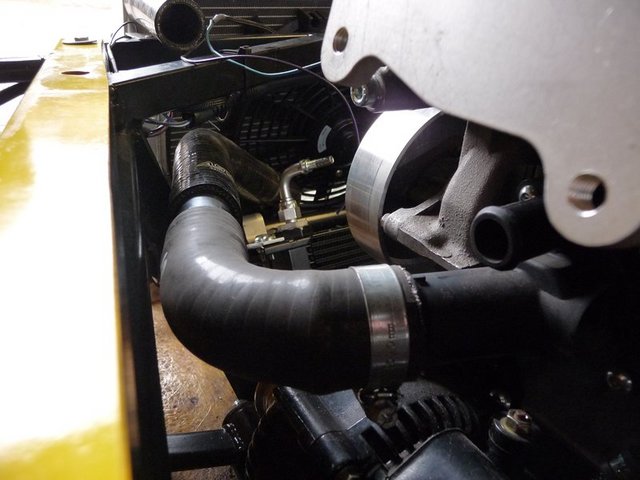
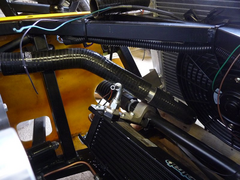
Next job was to test fit the rad/intercooler. I have recycled the old 1.5mm thick stainless brackets I made for the original polo radiator, and just
chopped them about a bit so that they suit the new rad/intercooler. I had to make sure that it was as close to chassis as possible, but still allowing
space for the rad fan behind it as it is so thick there is no room at all to spare in the front.
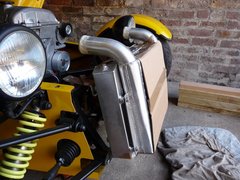 
rad fitting 1
Rad fitting 2
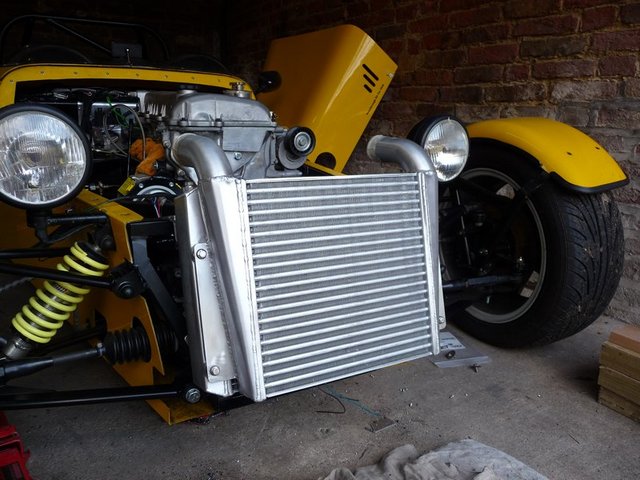
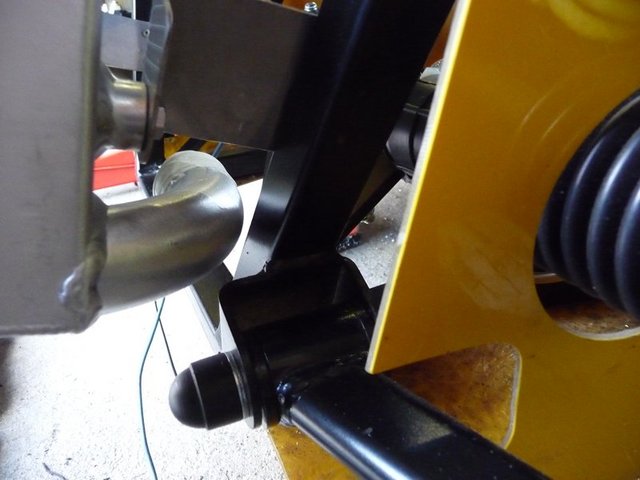
Once I was happy with the position of it, the brackets were riveted to the chassis. And this is how its all ened up. Very happy with the fitment.
Theres 3mm clear to the chassis on the bottom hose, and the same to the intercooler hoses in the nose.
Rad fitting 3
Rad fitting 4
Rad fitting 5
Rad fitting6
 
Rad fitting 7
Test fitted the plenum with the spacers too. Looks like I could skim around 5mm off the thick spacer, and maybe 3mm off the middle spacer. This would
mean there would be plenty of clearance between the plenum and the inside of the bonnet and mean nothing sticking out the side of the bonnet.
Plenum test fitting 1
 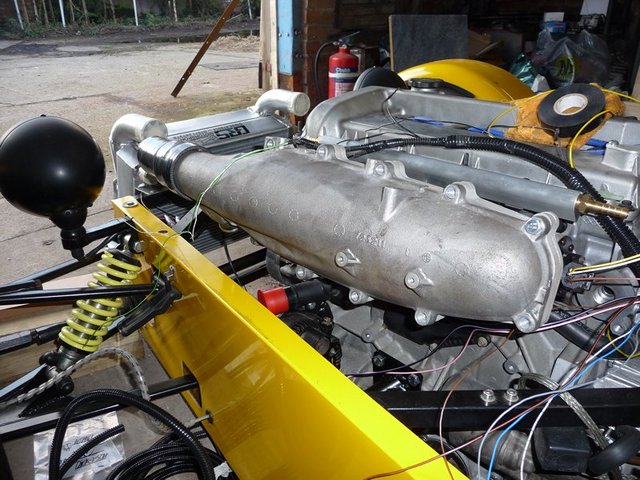
Plenum test fitting 2
Its going to be tight in several places once all the pipe work is in situ, so I am trying to mock as much up as possible now so I can figure out where
everything is going to end up. Spent some time tidying the wiring too, looks like it will all work out ok.
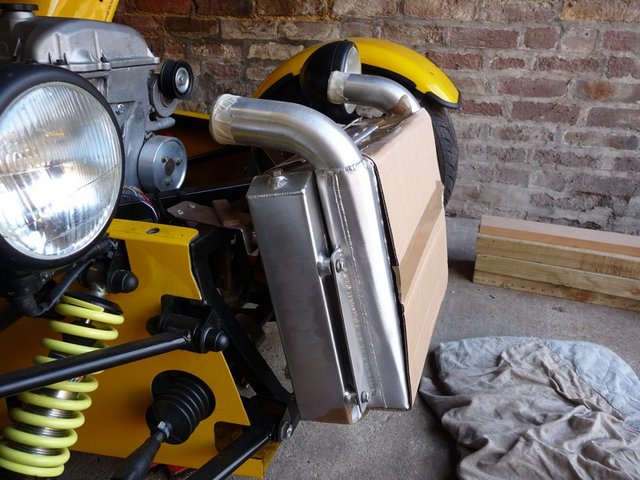
Last job today was to mock up the supercharger to intercooler pipework, and it looks like it will work out as planned.
 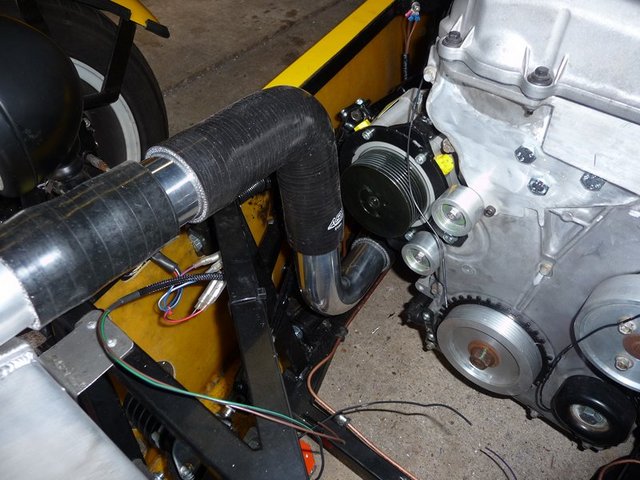
Intercooler pipe work mock up
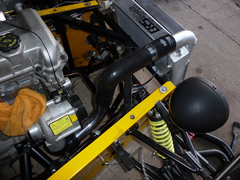 
Intercooler pipe work mock up
Sera
http://www.motosera.com
|
|
|
beaver34
|
| posted on 20/2/10 at 06:22 PM |
|
|
looks good, nice short pipework to cooler and looks neat!
|
|
|
goaty
|
| posted on 21/2/10 at 10:50 AM |
|
|
that looks abosutley amazing, the look of it with all the bits coming together makes it look wicked, really love the pic looking from the front with
the nose sat on.Bet you are really pleased with progress
|
|
|
Stuart_B
|
| posted on 21/2/10 at 11:14 AM |
|
|
wow, that is coming on nicely.
i do not think i would have been brave enough to drill those throttle boddies.lol
i am looking foward to seeing this.
keep up the good work david.
stuart
black mk indy, 1.6pinto on cbr600 bike carb's.
|
|
|
eddie99
|
| posted on 21/2/10 at 11:30 AM |
|
|
Stunning as usual... keep it up! Can't wait to see it this summer!
|
NOTE:This user is registered as a LocostBuilders trader and may offer commercial services to other users
|
FASTdan
|
| posted on 22/2/10 at 12:57 PM |
|
|
Looking very nice indeed, custom rad and cooler are bang on!
Have you got round to looking at fitting the pinto exhaust manifold yet?
We provisionally dropped our dura in over the weekend. I was looking at the manifold and hadnt appreciated the quite big difference in exhaust port
spacing.
I'm just uming and ahing about which way to go. I've got a duratec flange, and my intention was to mod the existing headers to suit, but
just not sure the best way to go about it.....
|
NOTE:This user is registered as a LocostBuilders trader and may offer commercial services to other users
|
flak monkey
|
| posted on 22/2/10 at 02:46 PM |
|
|
Exhaust is on the list of jobs for this weekend.
The middle 2 ports are pretty close (about 5-10mm) the outer 2 are further apart and need a bend welding in to get them to meet up. I reckon some
welding/cutting and a 45deg bend should sort it.
David
Sera
http://www.motosera.com
|
|
|
goaty
|
| posted on 22/2/10 at 08:00 PM |
|
|
i see you managed to sort out a tps, what was it off in the end? zetec??
do love the look of the plenum on it, sweps round lovely. 
|
|
|
flak monkey
|
| posted on 22/2/10 at 09:09 PM |
|
|
The TPS is from a duratec engined mondeo from what I can tell.
Got a new one from cosworth though as it was only £25
Itching to get back out in the garage really....shame the car's 20miles away
Should be able to test the clutch this week. If all OK then its time to sort the exhaust and finish the rest of the wiring....
Sera
http://www.motosera.com
|
|
|
goaty
|
| posted on 23/2/10 at 07:17 AM |
|
|
wont be long till she firing up
|
|
|
flak monkey
|
| posted on 23/2/10 at 08:25 PM |
|
|
Well the clutch seems to function (rocking the car backwards and forwards in gear it seems to release with spare travel ok).
Time will tell if there are any leaks anywhere inside the bellhousing.
The master cylinder just needs finally bolting in (could be challenging as access to bolts is tight to say the least!) and the clevis and pedal
setting up properly. Which will be the first job next time I am in the garage.
Then its time to start sorting the plumbing for the radiator and fuelling. Its all going to be very tight, I know that much, and I think I will
probably spend longer staring at the car trying to figure out where everything is going to go!
Sera
http://www.motosera.com
|
|
|
goaty
|
| posted on 23/2/10 at 10:09 PM |
|
|
tell me about it, took me 3 hours today standing looking at making engine mounts, got the basis sorted at least, on with 2mo
just keep plugging, no questioning it will be tight, i got inboard suspension too 
|
|
|
flak monkey
|
| posted on 27/2/10 at 09:12 PM |
|
|
After the annoyance of having to have the engine out as the clutch cylinder was leaking, things are picking up again I think, though I dont want to
speak too soon!
Spent all afternoon yesterday trying to cure the leak on the concentric slave cylinder. Typically it was the fitting I made that was leaking.
Tightening it up some more seems to have cured the major leak. There was also a secondary leak from the compression fitting on the hose, which I also
think I have now fixed...I'll find out sooner or later I guess!
Today has been spent getting the engine mounted back in the chassis properly making sure all the bellhousing bolts are tight and properly fitting the
clutch master cylinder. Then loads of other little jobs...
Made new battery cables to suit from the more newer, more flexible stuff. Well recommended over the older hard to work with stuff.
Finished off the engine wiring too, just the coil pack to connect up when I can find a suitable connector for it and the VR sensor to connect.
Mocked up the top hose for the cooling too, need another 45 deg bend to bring it all in alignment though.
Started to try and figure out how to layout the fuel system too, as there's not much space. Looks like its all going to fit in there some how
though.
Sera
http://www.motosera.com
|
|
|
flak monkey
|
| posted on 28/2/10 at 05:27 PM |
|
|
Finished off a few more bits today.
Found a home for the fuel pump, which keeps it out of the way of all the other piping which has to fit in the same area. Just need to tidy up the
wiring running alongside the battery. But I have yet to run the MAP line for the ECU, alternator charging cable and the starter cable.
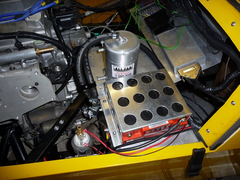 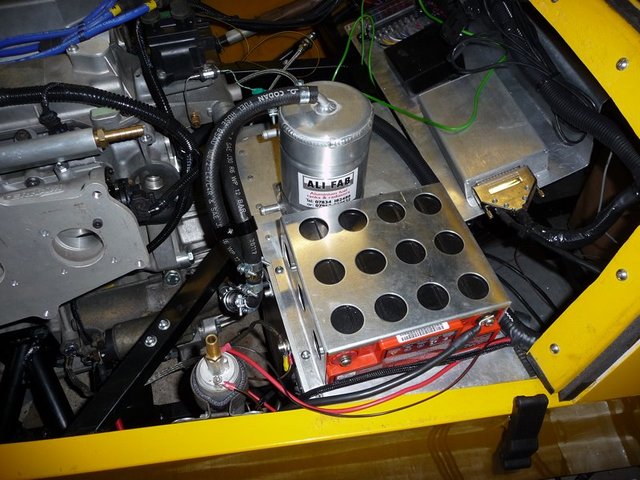
Fuelling
Fuelling 2
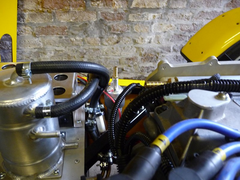
This is the mock up of the top hose.
Top hose mock up
Mocked up the bottom hose to the radiator too which looks like it might just fit around everything else....
Bottom hose 1
Bottom hose 2
Finally finished the last idler pulley off too, so there is now a full complement of alloy pulleys on the engine.
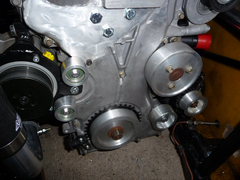 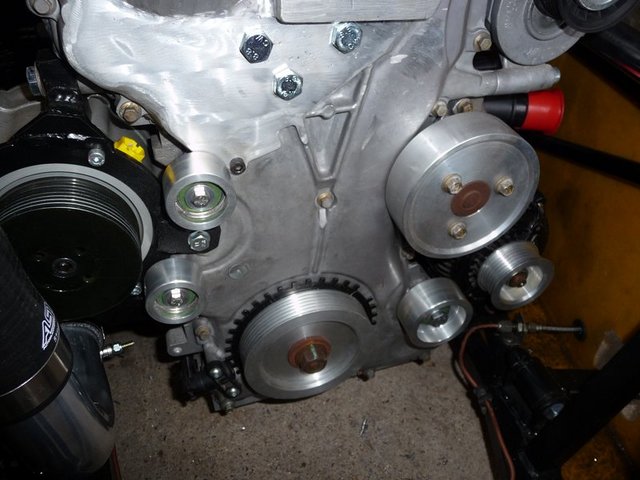
Idlers
[Edited on 28/2/10 by flak monkey]
Sera
http://www.motosera.com
|
|
|
goaty
|
| posted on 28/2/10 at 06:06 PM |
|
|
not too far left now
|
|
|
goaty
|
| posted on 28/2/10 at 07:46 PM |
|
|
also, on the top of your roller barrel's, what are the what look like bleed screws for??
cheers
and i keep forgetting to ask what spark plugs you have gone for?? not sure which would suit best...lol
[Edited on 28/2/10 by goaty]
|
|
|
flak monkey
|
| posted on 28/2/10 at 08:30 PM |
|
|
They are bleed screws so you can balance each individual throttle body
I have just put 1 stage colder plugs in than standard, can't remember what the number is off the top of my head though
Sera
http://www.motosera.com
|
|
|
eddie99
|
| posted on 28/2/10 at 11:40 PM |
|
|
Keep Plugging away David, You'll be done soon at that rate
|
NOTE:This user is registered as a LocostBuilders trader and may offer commercial services to other users
|
Tim 45
|
| posted on 1/3/10 at 06:30 PM |
|
|
David, looking good!
Just reading through some of your posts you keep mentioning you want around 300bhp/300Nm....
What have you done to your gearbox to rate it to that sort of power? I was under the impression that the heaviest duty "off the shelf"
kits were rated to 280bhp/250 Nm(bgh) and 250bhp (quaife)...
With the power that you're getting, I wouldnt have thought the type 9 box is capable in any configuration of the power you're after....
Caterham use their own custom built box, and i'm assuming that had to be uprated for their X330 concept...
I find that given a gearbox upgrade is needed on an install this powerful brings in an added cost that has no real option of DIY...and hence the idea
that an install such as yours can be done on the cheap, is slightly misleading...
[Edited on 2/3/10 by Tim 45]
|
|
|
sebastiaan
|
| posted on 1/3/10 at 08:52 PM |
|
|
MAP sampling
Hi David,
As you've drilled your TB's (and are going to run MS2?), you might want to try the latest version of the MS2 extra code once the engine is
ready to fire up. A change to the MAP sampling has been (finally!) implemented to make sure the MAP is only measured in a certain crank angle degree
window (which you can specify). The code then uses the lowest value measured in that window. This should enable you to run just one MAP line from one
throttlebody and do away with the horrendous map filter / transient detection killer / vacuum manifold that is so often used.
Good luck! ;-)
Sebastiaan
ETA: this topic describes the alorithm in a bit more detail:
http://www.msextra.com/forums/viewtopic.php?f=91&t=31877&hilit=sampling
[Edited on 1/3/10 by sebastiaan]
|
|
|
flak monkey
|
| posted on 6/3/10 at 03:21 PM |
|
|
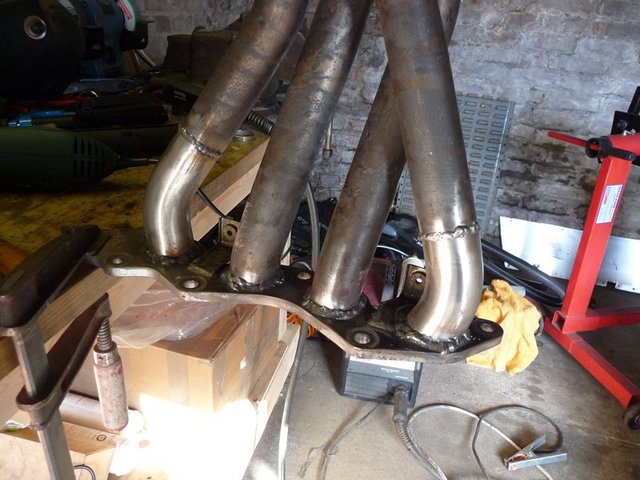
Just finished off my exhaust manifold. Took a bit of doing, but I am quite pleased with the results. The welding isnt the neatest, but there we go.
Started off by chopping the old flange off the pinto exhuast, then clamping cyl 2 and 3 runners in the right place using a jubilee clip. The spacing
is about 10mm different between the duratec and pinto.
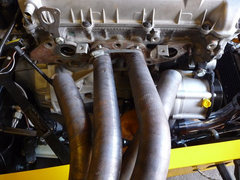 
Exhaust 1
Cyl 1 and 4 required more adjustment, and I cut the runners back about 4". The cut and welded 2 mandrel bent 45 deg tubes to suit.
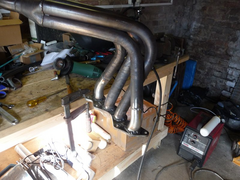 
Exhaust 2
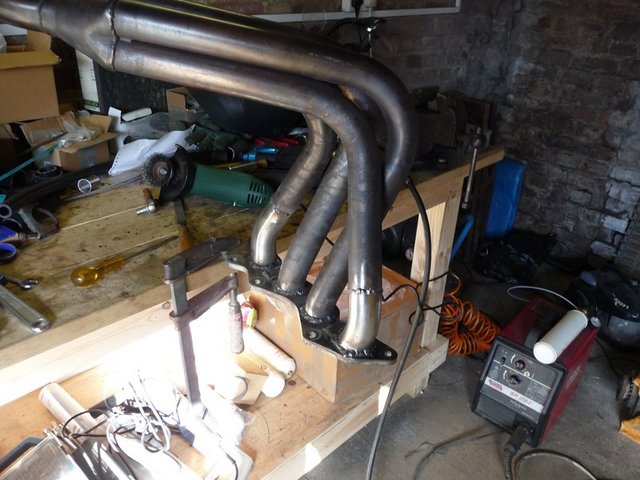
Not too worried about the visual appearance of the welds on the runners as they will be covered by exhaust wrap eventually.
Exhaust 3
And thankfully it all fits ok.
 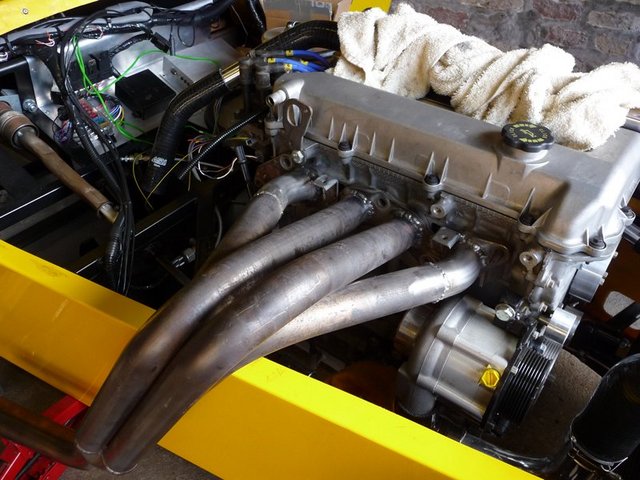
Exhaust 4
And there's plenty of clearance to the supercharger too.
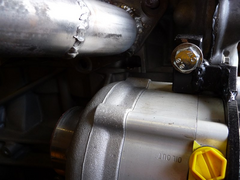 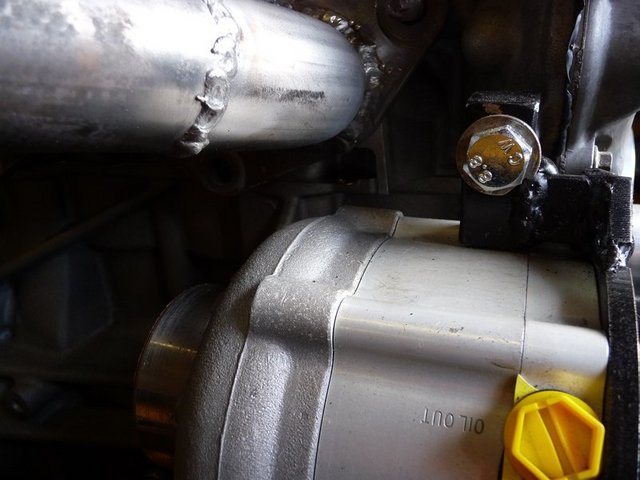
Exhaust 5
Now going to go and sort the link pipe for between the manifold and silencer
Sera
http://www.motosera.com
|
|
|
iscmatt
|
| posted on 6/3/10 at 04:47 PM |
|
|
excellent work on the manifold there, looks very neat, what are the main jobs left on the list before stonleigh? Also, out of interest, what has been
the hardest bit of the conversion so far?
cheers!
|
|
|
flak monkey
|
| posted on 6/3/10 at 06:33 PM |
|
|
Thanks, its coming on. Theres still quite a bit to do before stoneleigh, though I am hoping to get it running in the next couple of weeks.
I need to get the supercharger oil system finished, rad fan mounted, wiring for the coil and VR sensor, plumbing finally clipped in, rad fan mounted,
fuel system finished, header tank mounted and thats about it for the engine side. After that the whole back end needs to be stripped down so I can
change the diff and fit the discs etc. The suspension all needs repainting too.
Will see how I get on tomorrow, hoping to tidy up a lot of the small odd jobs tomorrow.
Cut the original link pipe to suit so now the exhaust is all sitting as it should
Exhaust finished
Also tidied up the top hose, just needs clipping to finish
 
Top hose
Not sure what the trickiest job has been. Nothings been really difficult but there has been a lot of things to work out along the way. Clutch has been
a pain from start to finish...
Sera
http://www.motosera.com
|
|
|


.jpg)