big_wasa
|
| posted on 13/1/13 at 08:07 PM |

|
|
Shame, but if it wont fit it wont fit.
|
|
|
|
|
Lingy
|
| posted on 13/1/13 at 08:12 PM |
|
|
Will have another look tomorrow after work
I Might have room to twist it slighty ..
|
|
|
Lingy
|
| posted on 15/1/13 at 03:36 PM |
|
|
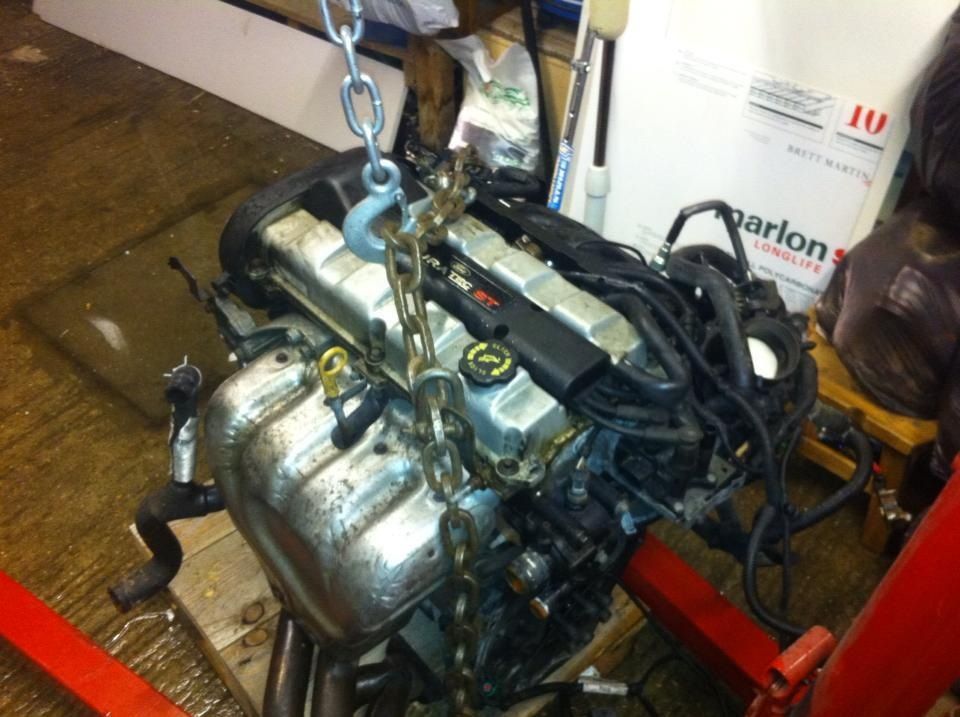
Had another look ,Seems like i was wrong ,OEM bits will fit ,Thankfully

Not sure what that pipe is

I will buy some silicone tonight off ebay and get it fitted up ,I will need to fab a bracket to hold it ,But looks like its going to fit upside down
,Ok not perfect looking but who is looking but locost 
What do you think?
|
|
|
big_wasa
|
| posted on 15/1/13 at 05:21 PM |
|
|
Yeh that hole can be blanked, There are a few ports for the canister and brake servo.
|
|
|
Lingy
|
| posted on 15/1/13 at 05:28 PM |
|
|
I have no servo yet ,But i am looking for bits to complete this now
Do i need the ignition to dash loom if i have my loom
Trimmed down ? I got the full steering column with barrel key
Transponder ring thing Etc but that part of the loom was cut ,Leaving me just the plug
With a few wires hanging out of it .
|
|
|
big_wasa
|
| posted on 15/1/13 at 05:48 PM |
|
|
I dont think I will need the clocks or the wirring for them. You only need the aerial around the ignition and the plug. You will also want an obd2
plug from under the steering. You could nick this from any ford of the year. I took mine from a 2001 mondeo and it cost me a quid.
|
|
|
Lingy
|
| posted on 15/1/13 at 09:51 PM |
|
|
Will grab the obd thing from a Scrappy
|
|
|
Lingy
|
| posted on 4/2/13 at 12:33 PM |
|
|
Hows it coming along 
|
|
|
big_wasa
|
| posted on 4/2/13 at 12:45 PM |
|
|
No real progress due to work and the scooby needing some attention.
I still need a cheap engine.
If you get yours installed with all the bits let me know and you c
an be guinea pig. I will make you a loom and you can test it.
|
|
|
Lingy
|
| posted on 4/2/13 at 06:33 PM |
|
|
That would be Brilliant although i just removed the motor to bare metal the bay
Its primed so ile build it back up and let you know 
|
|
|
big_wasa
|
| posted on 4/2/13 at 07:42 PM |
|
|
No rush then. 
I will see what I can come up with.
|
|
|
Lingy
|
| posted on 4/2/13 at 08:00 PM |
|
|
|
|
|
big_wasa
|
| posted on 16/2/13 at 08:35 PM |
|
|
And I now have an engine to play with.
|
|
|
big_wasa
|
| posted on 24/2/13 at 09:04 PM |
|
|
So ive striped the engine down to a tall block.

And ive picked up a spare sump and flywheel from a 1.8 blacktop and started choping the sump.


|
|
|
ludsonline
|
| posted on 26/2/13 at 06:23 AM |
|
|
Some progress m8.
Will be watching this one
|
|
|
Lingy
|
| posted on 27/2/13 at 02:15 PM |
|
|
Excellent
|
|
|
big_wasa
|
| posted on 3/3/13 at 10:11 PM |
|
|
Some progress.
Saturday. Having read off a local builder building a jig to chop the sump. An email was fired of and a quick ride across town see the top of the sump
snipped of perfectly square. He then gave me the idea of building the short end up and running it back under the jig to make it square and equal to
the rest. so another ride back an hour later, Thanks Martin  . .
The bottom was mabe out of the last of the steel from the locost floor.

Sunday. Having been dragged around Primark this morning I escaped to the garage after tea. I chopped up two pick up pipes and mocked it up with a fuel
clip. When I got it where I wanted it I thought I would just get the tig out and join it up. Then I decided I would cut of the bracket and weld it on
for suport.

Being nagged to come in, I thought I would just tack the bottom on, I got carried away and welded it around.
There is still one pin hole in the mig welding but the tig weld is good to go. Then I can test its oil tight.


Progress may get a little slower as ive taken on another wiring job that was offered a few weeks back, vag 20vt on a dta into a vw Caddy.
[Edited on 5/3/13 by big_wasa]
|
|
|
Lingy
|
| posted on 24/3/13 at 08:00 PM |
|
|
I trimmed the ali bits off mine and modded the crossmember keeping it simple
That looks like top work there bud
|
|
|
big_wasa
|
| posted on 24/3/13 at 08:08 PM |
|
|
There is one pin hole in a mig weld where three corners meet.
I just need some time and some better weather to crack on again. 
Need to finish the Dta/1.8t loom by next weekend so will be after that.
|
|
|
big_wasa
|
| posted on 31/3/13 at 09:35 AM |
|
|
Well thats the Vag 1.8t / Dta loom finished I hope
Just over there to test fire it............Arse is twitching, s60 is somthing like £800  one wrong wire and puff....... one wrong wire and puff.......
I should be able get on with my project next weekend.

|
|
|
big_wasa
|
| posted on 24/5/13 at 07:05 PM |
|
|
Some progress....
Work has steadied up but that just means the wife had me do the garden
So I've
Cut up and remade the loom.
Cleaned up the engine.
Cut and shut the sump.
Replaced the leaking cam cover gasket and grommets. ££ 
I've made up the alternator kit
I've cut a set of plates out of 6mm plate for the engine mounts.
I've now got to mount it to something. Getting closer.

|
|
|
ManuFromParis
|
| posted on 24/5/13 at 10:05 PM |
|
|
Nice work !!
Eventually, do you know if your sump goes lower than a Zetec Short Sump ? (raceline for instance)
|
|
|
big_wasa
|
| posted on 24/5/13 at 10:23 PM |
|
|
I am not sure about the race line but other silvertop sumps like the scholar engines and dunnell are 165mm. This one is 150mm as recommended by
others.
No point in going lower as the gearbox will be sticking out below the sump.
|
|
|
JeffJeffers
|
| posted on 28/5/13 at 10:43 AM |
|
|
quote:
Originally posted by big_wasa
I've now got to mount it to something. Getting closer.
I know of a little green car you can mount it to if you struggle to find something!
|
|
|
big_wasa
|
| posted on 29/5/13 at 08:59 PM |
|
|
quote:
Originally posted by JeffJeffers
quote:
Originally posted by big_wasa
I've now got to mount it to something. Getting closer.
I know of a little green car you can mount it to if you struggle to find something!
Ha ha trying to keep up with lee down the pod
|
|
|