Sitting watching the GP highlights after a day in the garage. Bloody miserable weather though.
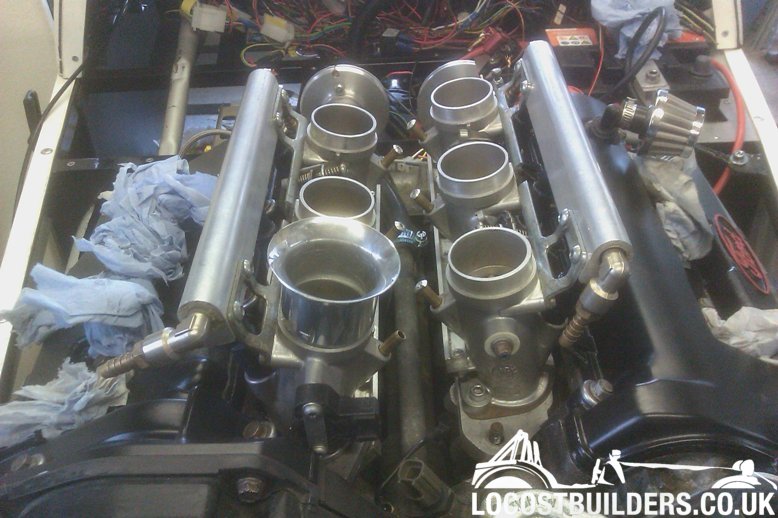
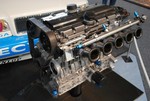
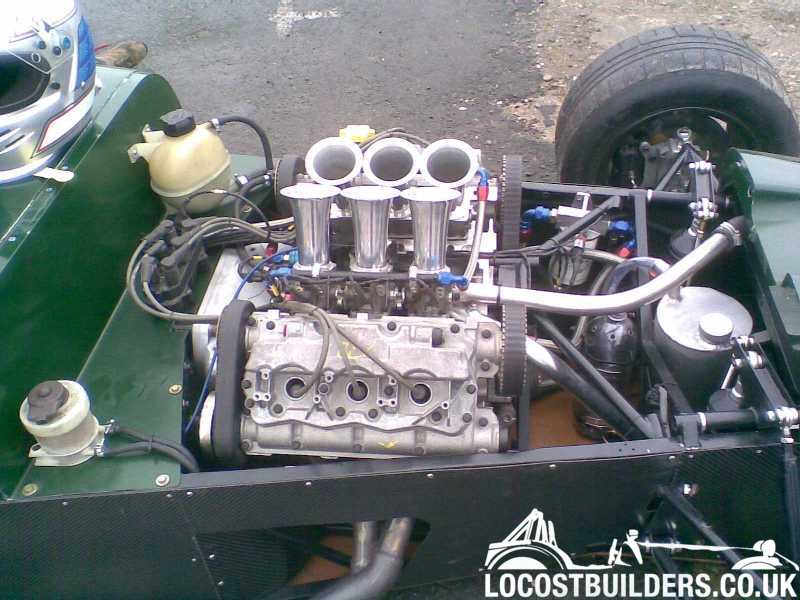
Claire managed to get my throttle bodies to me. These are 2 lots of Triumph triple 595 bodies on custom alloy manifolds, spaced to the KLDE ports and
with Claire's own linkage. Claire uses Vauxhall 2.5 v6 injectors on custom fuel rails.
No offence to Claire intended but they had the patina of use.....and quite a lot of orange sealant so I spent an hour cleaning them up a bit. Cleaned ITBs RB Cleaned itbs 2 RB
I have also started wiring in my Microsquirt and EDIS.....well to be honest so far I have been trying to extract the motorbike Ignitor unit and
fusebox and replace with additional fuses and relays.
Wiring Micrososquirt RB
Luckily the Microsquirt docs online are really clear and so once I have pulled all the crap out I no longer need it should be pretty straightforward.
Bit limited with what I could do or test until the engine was in so.......
Sunday's job was to get my 2 assistants in and a couple of little jobs like torquing the crank pulley bolt and resealing and fitting the sump
were done. Clutch slave cylinder was fitted to the gearbox and the gearbox filler plug loosened so we can fill it once in and it was time to drop the
engine and box in......hopefully for the last time.
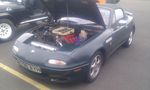
All looking good eh? They look great. Slight issue in that the bonnet clashes with the fuel rail on cylinder 1. This is the furthest forward and
basically hits the flat of the bonnet in front of the scoop. So it looks like I will need to cut away the bonnet in front of the scoop and make a
larger mesh cover. Always knew clearance was going to be tight. Shame as the rearwards itbs have loads of room above them where the scoop is.
I suspect I may have to run individual filters as opposed to an airbox unless I mod the bonnet massively. I am sure this will look and sound fantastic
but not sure of the downsides? Thoughts welcome.
Fitted the manifolds and checked clearance on the steering column. TIGHT! Manifold clearance RB1
Quick shot of the tunnel. Prop fitted and clear of everything Woohoo!. You cans see how high the gearstick sits but I am not concerned about this. A
decent gaitor will cover that. Tunnel final engine fitted RB
So a busy week next week getting it all wired and plumbed in. No doubt a few more issues to sort but the clutch is working. Made a custom hose up and
in case I haven't mentioned it, am using an MX5 clutch pedal assembly, master and slave cylinders. We jacked the car up and check it is
releasing ok. Good pressure and feel so fingers crossed.
Photo Archive
Building: Built - V6 Fury , V6 Mx5...what next ?
posted on 29/10/12 at 08:26 AM
quote:
No offence to Claire intended but they had the patina of use.....and quite a lot of orange sealant so I spent an hour cleaning them up a bit.
I dont really do polish , me
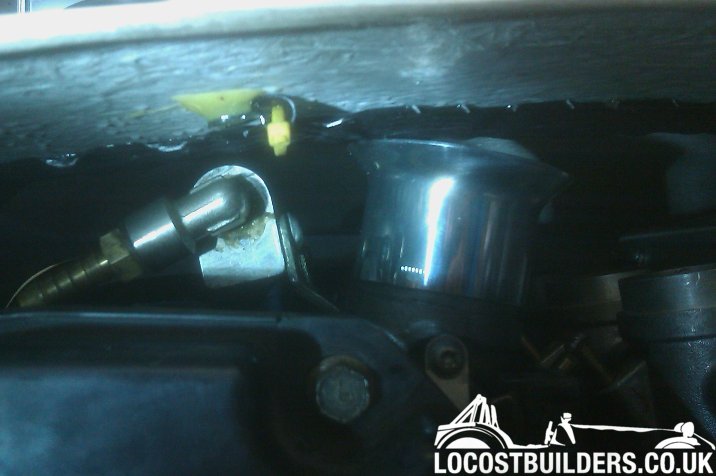
I see you have put a filter on the PCV valve........that'll be a bit redundant since nothing will come out or go into that , I'll have to
see about turning up a blanking plug .
Looking good now though - I'll chase up the plug leads today
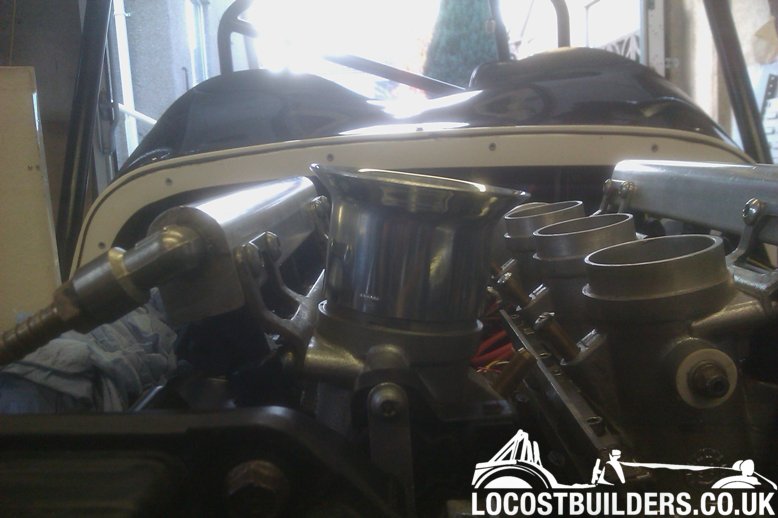
The other day whilst trawling eBay I looked at some really cheap intake trumpets and decided with Claire's hand out of action (she was making me
a set of carbon ones) I would order one to test fit.
It turned up today. Its aluminium, no taper £2.50 delivered!!! Ok no rolled edge but beggars can't be choosers.
Photo Archive
Building: Built - V6 Fury , V6 Mx5...what next ?
posted on 29/10/12 at 02:13 PM
The thing with individual filters is - they are a power killer , plus you will need to raise the bulge about three inches to clear them.......
I've just ordered some resin and carbon , I think I can do a bit of molding with 1 1/2 hands
Those are almost the same trumpets I have for mine! The only difference is I wanted mine to be sliding fit to the inner edge of the bodies once
they're cut back a little to leave a lip for them to seat against. I don't like the idea of having the exposed lip like you do, although
it is a much easier option!
The other thing to remember with an airbox is that ideally it would be at least the diameter of the trumpets above them. But this is often easier to
achieve than with filters.
PS, any chance of a view of the bottom of the adaptor plate? Curious to see if all the extra work I've put into mine is worth it or not......
Let your plans be dark and as impenetratable as night, and when you move, fall like a thunderbolt.
Sun Tzu, The Art of War
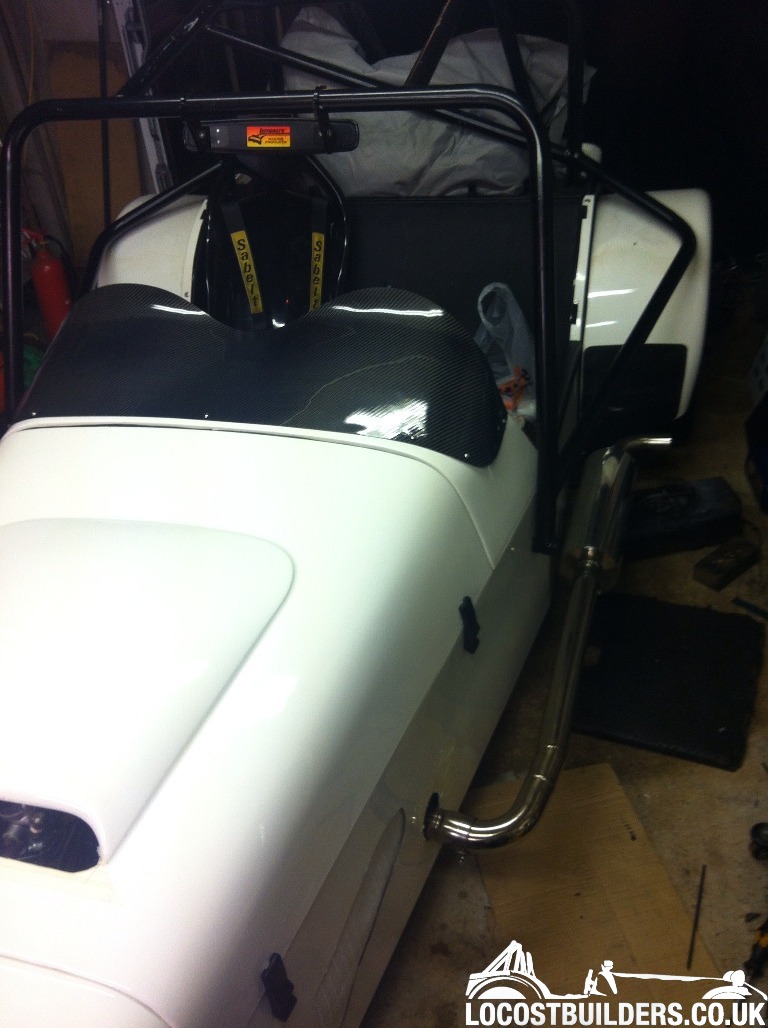
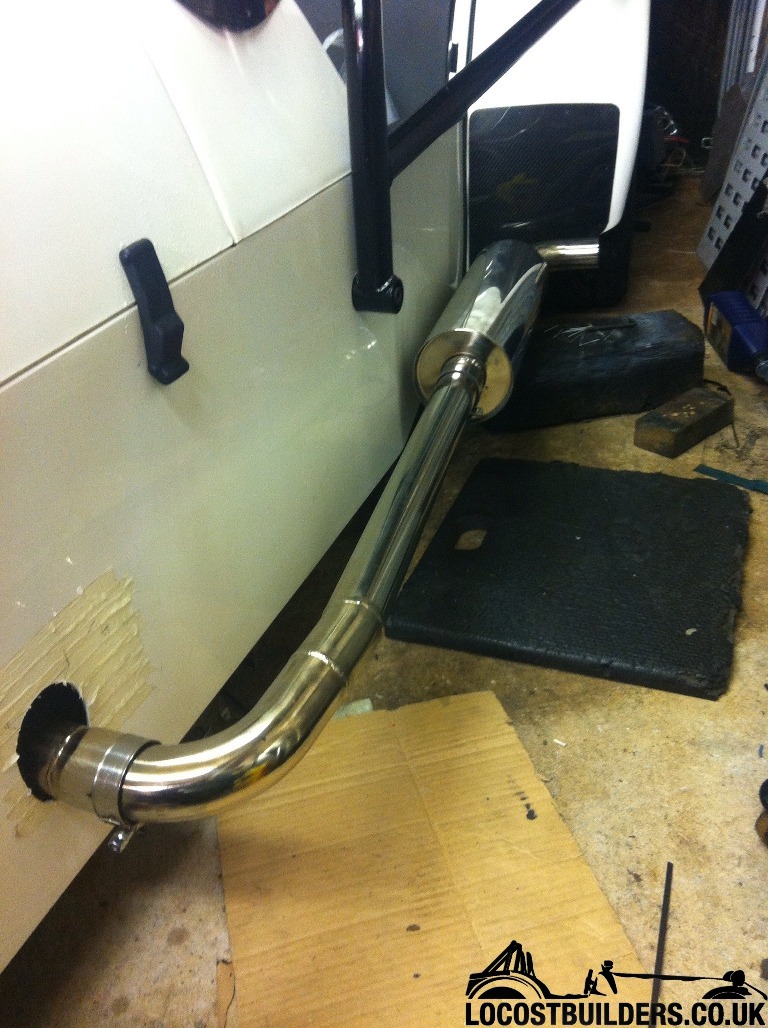
Exhausts are now finished with new mounts. First attempts weren't strong enough so new ones are belt and braces strong!
Exhausts worked out pretty well and pretty cheap. Drivers side is VERY close to the fibreglass. It has discoloured slightly so I have added more heat
protection and wrap to the joint that is nearly touching.
They are now assembled and sealed hopefully won't leak too much.
Replaced my Koso RX1N with some new Koso gauges as 15k revs is overkill even for the KL engine! Bit disappointed the rev counter is considerably
smaller than the speedo for a matching gauge but its my fault for reading the dimensions wrong from the website.
Due to the weird holes I cut for the RX1N I made a small ally plate, covered it in black vinyl and mounted the clocks into it. Covers most of the
holes. Went for these because the rev counter has a water temp gauge built in and the Speedo has the same warning lights for indicators, main beam etc
as the old RX1N plus fuel gauge and uses all the same existing speed and temp sensors.
Just got the tunnel top to recover in vinyl and I need to make a cover for the gearbox gearstick tail that sticks up through the tunnel.
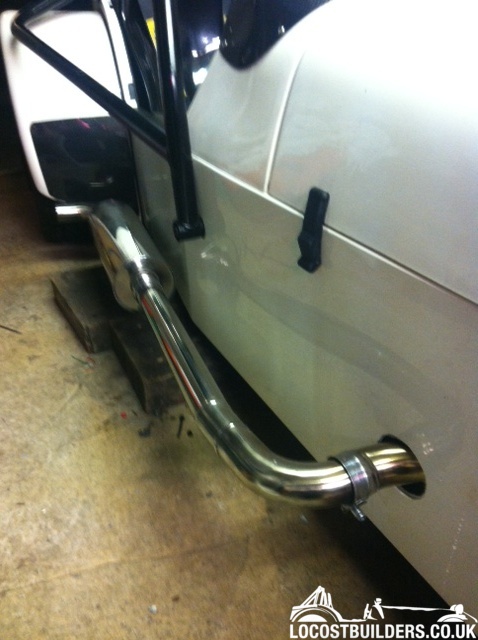
New mirrors fitted. These were a bit of a punt they would be long enough to be visible past the front cage legs but the passenger side just about
works. Might put a 15 mm spacer under the fixing to help it out.
Made a small cover out of some thin steel for the gearbox tail that now sits proud of the tunnel top. It ain't quite as pretty as I envisaged
but will do the trick for now. Mk2 version may be needed! Gearstick surround rb2
I've been following your thread, your project looks very nice, near identical to what I want to do. When you get a chance of driving on the
road, you'll need to do a video to hear that gorgeous engine! What diff are you running?
Kevin
quote:Originally posted by rb968
Interior update.
Installed the recovered tunnel top and gearstick surround and attached the new leather mx5 gaitor I bought off eBay.
Cheers Kevin, getting much nearer now. Interior is all back together, seats and harnesses back in.
Even more tie wraps still needed to tidy wiring behind the scuttle and dash.
Oh I can assure you there will be video once its on the road!
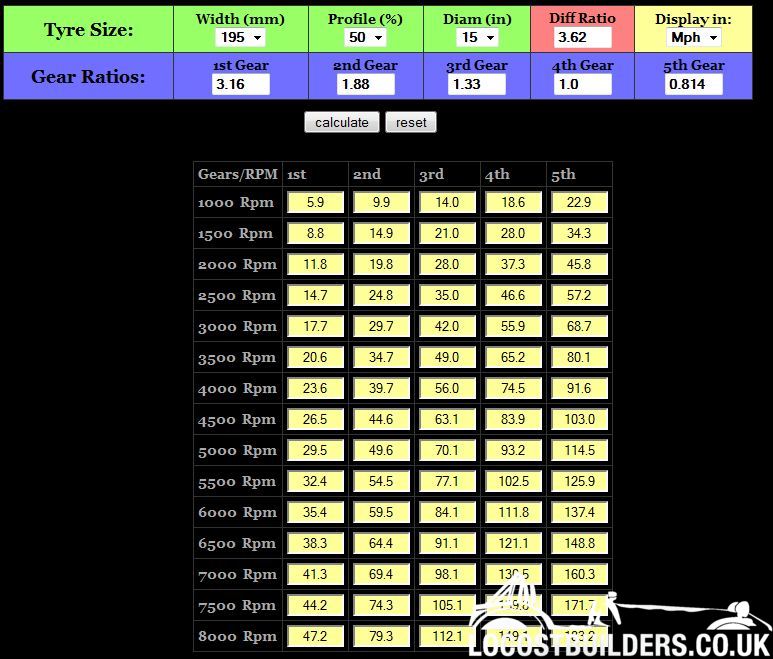
Running an open Sierra 3.62 diff. Did the online calcs which came out as below:
Which I don't think look too bad. 75 in 2nd could be interesting ! 80 mph in 5th is 3500rpm so not horrendous.
Can't wait to drive it. I am seriously considering loading it on the trailer and taking it to get tuned on a rolling road though. however I
would like to drive it first and autotune a bit just to shake down any minor leaks etc so as not to embarrass myself on a rolling road with bits
dropping off!
I have adjusted my ride height slightly now the suspension has settled with the KL in place and with an un-chopped sump I have a sump clearance of
about 85mm. Sump height rb98
I suspect I might have to chop the sump at some stage but hoping this will be ok while I get it running.
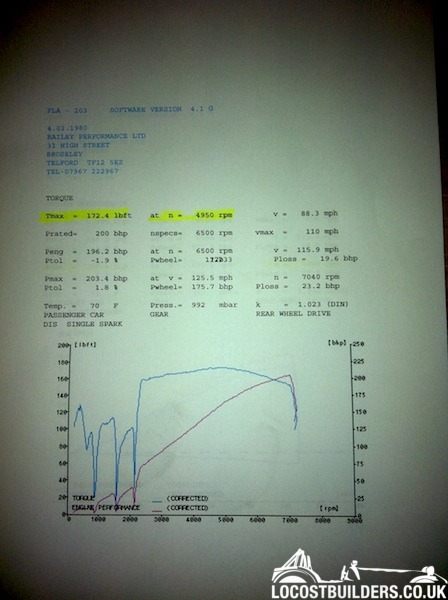
Great result but loads of niggly things to sort out now that Dale found. Plus the VR sensor packed up right at the end of the day so I have ordered a
replacement. Just need the DVLA to pull their finger out and send my V5 back so I can tax it !
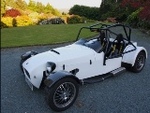
Been to Preston today to sort out my tax disc after the DVLA lost my V5C. Thought it rude not to take the car out for my first drive tonight as the
weather is nice.
LOUD! Loads of torque. Sliding around in 2nd with a small amount of throttle at low speed. Clutch and gearbox feel great. Engine sounds brilliant and
plenty of pops and bangs. Kids on the estate where I keep it were loving it!
I know no video and it never happened. Will sort something out on Monday if we have decent bank holiday. Off to buy a GoPro.
Bloody chuffed to bits. Might have to borrow a sound meter before any trackday action though!
Thank you Dale at Bailey Performance, thank you Clairetoo.


 [/img]


 but they had the patina of use.....and quite a lot of orange sealant so I spent an hour cleaning them up a bit.