You could use that to slosh paint around inclosed box sections or up into joints to seal them. To repair my first beetle I made a frame that mounted
onto the hubs so that the car could be rolled onto its side for welding the floor. Worked a treat but was scary getting it back down as we just pushed
it back with a big bounce. Your mount is much more civilised.
Photo Archive
Building: Triumph GT6 replica body in aluminium Built and so
posted on 24/3/21 at 01:20 PM
I've just inserted two small but important pieces of 6mm wire to complete the profile of the outer wheel arches. These will be left in position
after the rest of the buck has been removed and used to wire the edges of the wings. These two key pieces now allow fitting more buck stations to the
sides of the body and more importantly defining the line of the side valance. Being able to invert the body really does make this so much easier.
Photo Archive
Building: Triumph GT6 replica body in aluminium Built and so
posted on 24/3/21 at 09:51 PM
quote:Originally posted by gremlin1234
another kitten project, but I prefer yours.
I do hope he manages to get it on the road though.
A good find and thank you for sharing it. He certainly has a mountain to climb, that's for sure. The chassis needs a huge amount of work and
done properly on a jig using folded channel sections to match the original. The chassis on my car wasn't great but his is in a different league
altogether. If it were me, I think I would try to source a replacement chassis or bin the whole thing and find something else.
I shall be very interested in seeing how he decides to tackle the project.
Photo Archive
Building: Triumph GT6 replica body in aluminium Built and so
posted on 25/3/21 at 07:15 AM
quote:Originally posted by Ian2812
Just read all 16 pages! I'll keep it simple...
Pure Class!
Will be logging in more often to see how the car progresses and can't wait to see the end result!
Excellent effort!
Crikey, you must have been very bored but thank you for your kind words. I very much appreciate the support everyone is giving me which really does
keep me motivated and keep the project moving forward.
Photo Archive
Building: Triumph GT6 replica body in aluminium Built and so
posted on 25/3/21 at 04:56 PM
I never expected the wireform buck was going to be easy to make and in that sense it hasn't disappointed. I spend much time fitting and removing
stations because the curve doesn't follow through and in two days I've probably fitted less than half a dozen stations. And there are more
to come out to be adjusted. Fortunately the 6mm wire is very cheap and I have loads of it. But slowly and surely the shape of the body is revealing
itself and the more it does the better pleased I am with what is developing.
The eagle eyed amongst you will have noticed that the paper covering on the roof is no more. It caught light during welding!
Photo Archive
Building: Triumph GT6 replica body in aluminium Built and so
posted on 26/3/21 at 05:59 PM
At the risk of boring you, here are a couple more photos of the wireform after another day shaping and reshaping. Just one more staion to add on each
side. I'm pretty happy with the curvature and hopefully I can put this bit to bed and move on to forming the drip channel and boot lid.
Photo Archive
Building: Finally swapped ZX9R to ZX10R Indy after 9 years
posted on 26/3/21 at 08:31 PM
Not boring at all John.
You keep posting them photos.
I like looking at pictures.
Great build by the way.
I like to think I'm quite handy and clever but you are on another level altogether.
Photo Archive
Building: Triumph GT6 replica body in aluminium Built and so
posted on 26/3/21 at 08:48 PM
quote:Originally posted by roadrunner
Not boring at all John.
You keep posting them photos.
I like looking at pictures.
Great build by the way.
I like to think I'm quite handy and clever but you are on another level altogether.
Brad
Not at all Brad. I'm just a plodder who doesn't like to be beaten. I also have the advantage of being retired and having unlimited
workshop time so I can try and try again until I finally get there. I haven't posted any pictures of my impressive scrap bin. You only see the
successful bits and none of the failures.
Photo Archive
Building: Triumph GT6 replica body in aluminium Built and so
posted on 27/3/21 at 06:18 PM
With the remaining wire stations inplace I got a bit sidetracked and went back to the practice panel which because of the revised profile defined by
the replacement buck stations needed a lot of stretching to produce a reverse curve. It is really satisfying to see a panel develop from a flat sheet
of metal and it still surprises me how much metal can move, either by stretching or shrinking.
Photo Archive
Building: Triumph GT6 replica body in aluminium Built and so
posted on 28/3/21 at 12:13 PM
I'm not sure how much benefit there has been by wrapping the wireframe in paper but it didn't take long to do. But on balance, it has
served to confirm that the body shape is pleasing to my eye and close to what I am hoping to achieve. So, I'm taking the rest of the day
off!!
I doff my hat to you! Those last pictures really do give an idea of a truly fantastic looking car.
I came to this thread in December when I joined the site and eagerly check to see if there has been any progress reports. Its one thing putting a well
designed kit together but to do a coupe from scratch is on another level. I do also enjoy seeing those "man in a shed" engineering
projects as long as that isn't to insulting to your project.
Now if only someone would commission a tv show to follow an idea through like this, as not to make something cool, extreme or whatever but a nice,
classic looking car to inspire clumsy, hamfisted dreamers like me, I'd be glued every episode.
Thanks for continuing sharing your progress and I look forward to seeing your next update. All the best for the rest of your build.
Photo Archive
Building: Triumph GT6 replica body in aluminium Built and so
posted on 28/3/21 at 03:56 PM
quote:Originally posted by ADH75
I doff my hat to you! Those last pictures really do give an idea of a truly fantastic looking car.
I came to this thread in December when I joined the site and eagerly check to see if there has been any progress reports. Its one thing putting a well
designed kit together but to do a coupe from scratch is on another level. I do also enjoy seeing those "man in a shed" engineering
projects as long as that isn't to insulting to your project.
Now if only someone would commission a tv show to follow an idea through like this, as not to make something cool, extreme or whatever but a nice,
classic looking car to inspire clumsy,.hamfisted dreamers like me, I'd be glued every episode.
Thanks for continuing to sharing your progress and I look forward to seeing your next.update. All the best for the rest of your build.
That is so nice. I welled up when I read that. Thank you so much.
My next step was to be the boot area, drip channel, hinges and boot lid but I've decided to focus on panelling in the floor and rear firewall
and when that's done the body can go back on the chassis and the whole thing mounted on the rotisserie. Even with the chassis in place there
will be full access to everything I need to get to.
Before the chassis can be fitted there is more welding needed to the underneath followed by paint. So, plenty of varied jobs to get on with.
Frightening how quickly the MIG gas is being consumed.
Photo Archive
Building: Triumph GT6 replica body in aluminium Built and so
posted on 28/3/21 at 05:28 PM
quote:Originally posted by rdodger
This is going to look so good John
Dare I say even better than the last one!
Will you keep this one when finished?
It has always saddened me to sell on my projects but apart from a lack of space to keep them all, by necessity one has go to fund the next. Both the
lightweight and the G15 went to good homes and are being cherished which eases the load no end. But this has to be my last major project so there will
be no reason to move it on when it is finished and every reason to keep it. I'm hoping it will be a comfortable and civilised car and good for
road trips which I hope will be possible once again once the Covid rules have been relaxed. Still a very long way to go but I'm hoping to have
it running and being able to drive it around the farm by the end of the summer.
Photo Archive
Building: Triumph GT6 replica body in aluminium Built and so
posted on 28/3/21 at 05:58 PM
quote:Originally posted by rdodger
That's a bit bitter sweet. What will we all have to look forward to if you aren't building a car?
You will just have to report on your road trips.
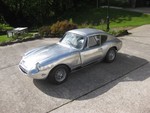
Has colour been discussed yet? I'm thinking the Aston Martin metallic sage green would look good.
Do you know Rodger I haven't even considered the colour but you're right that would be a fabulous colour to paint it. Thank you for
that.
I always regretted painting the lightweight but if a car is going to be used and exposed to the elements it has to be protected but in its unpainted
stage nobody could resist stroking it and to my sheer amazement even the lady manning the immigration kiosk at Roscoff leaned right out of her window
and ran her hand over the roof. Once it was painted nobody did that anymore.
You are correct about bare aluminium cars. Gerry Hawkridge gets very wound up with people touching the bare ally Cobra he keeps taking to the shows.
Even worse the people who knocked on it to check it wasn't grp!
I guess you would especially since hours and hours had gone into the polishing then scotch brighting to give the brushed look with mirror finish
roundels and stripes.
Photo Archive
Building: Triumph GT6 replica body in aluminium Built and so
posted on 9/4/21 at 11:01 AM
Over the last few days I've been concentrating on panelling the rear bulkhead and some more of the floor. I'm using 18 gauge NS4 aluminium
alloy bonded to the frame using Wayside panel adhesive and 4mm countersunk rivets spaced every 50 mms. A laborious job but made much easier by having
an air riveter.
I have finally decided on the corrosion protection for the chassis which will be a coat of Bilt Hamber zinc rich primer followed by two pack epoxy
mastic also from Bilt Hamber. This will be sprayed on.
I have ordered the DTA ecu and at some point in the near future will get the engine across to my builder to have an ecu loom made and the engine set
up on his dyno. Unfortunately the S40Pro which I was set on has been superseded by a later model with the inevitable price increase. I should have
ordered it sooner.
I'm just waiting for a quote from Simon Hall at SiFab for the fuel tank. I'm using the Focus in-tank pump but am not taking advantage of
the float type fuel sender built in to the pump because its output is not compatible with an ETB fuel gauge without additional circuitry. So I'm
having an ETB sender fitted which is the simplest and probably the cheaper solution.
The chassis is currently still separated from the body having now been fully welded but ready for the body to be trial fitted just to check that
nothing has moved during welding, before removal for painting.
So, lots going on and the project is moving in the right direction.
Photo Archive
Building: Triumph GT6 replica body in aluminium Built and so
posted on 17/4/21 at 05:35 PM
It has taken most of the week but the passenger footwell is now in place and the remaining floor panelled. I have reduced the depth of the footwell by
four inches compared with the one on the driver's side in order to give clearance for the throttle bodies and airbox. Taking into account the
pedals the legroom on both sides is probably the same.