Deckman001
|
| posted on 6/12/20 at 03:26 PM |

|
|
quote:
Originally posted by rusty nuts
Now might be the ideal time to uprate the engine ? If the bores and pistons are worn maybe a rebore with 1300 pistons to increase compression , a
performance cam kit correctly timed if you need a new cam and a modified head etc
Would 1300 pistons overcome a semi chambered head if installed instead of a flat bottoms 711M as my pistons are std 1600 and have bowls in them ?
Jason
|
|
|
|
|
rusty nuts
|
| posted on 6/12/20 at 05:34 PM |
|
|
Ive not had any experience modifying a x flow engine with small combustion chambers so I cant help with that one.,
|
|
|
Deckman001
|
| posted on 8/12/20 at 07:21 PM |
|
|
No worries,
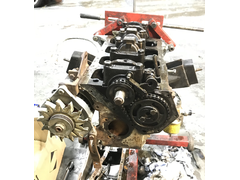
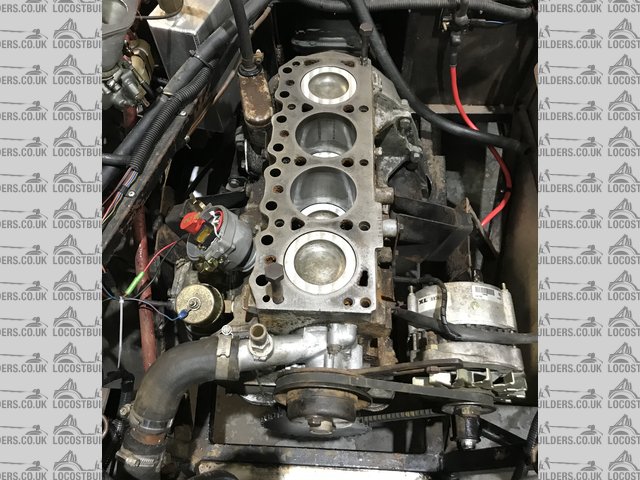
The engine is now stripped down, head off and the pistons and con rods are out and separated. The cam is the next one to be removed ready for the new
to me cam and for the new main and big end bearings also ready for when the pistons return from the machine shop skimming 25thou off the top off each
to ensure the exhaust valves don't make more contacts with the pistons. I've bought a refurbished head so should be delivered by Tuesday
15th so with any luck I might have all the bits back by that weekend so a rebuild could start.
Jason ( looking forward to a winter drive to the retest in Gillingham )
|
|
|
rusty nuts
|
| posted on 8/12/20 at 09:24 PM |
|
|
quote:
Originally posted by Deckman001
No worries,
The engine is now stripped down, head off and the pistons and con rods are out and separated. The cam is the next one to be removed ready for the new
to me cam and for the new main and big end bearings also ready for when the pistons return from the machine shop skimming 25thou off the top off each
to ensure the exhaust valves don't make more contacts with the pistons. I've bought a refurbished head so should be delivered by Tuesday
15th so with any luck I might have all the bits back by that weekend so a rebuild could start.
Jason ( looking forward to a winter drive to the retest in Gillingham )
Check the bearings are the correct size on the outer diameter, Fords apparently salvaged some blocks by line boring the main bearings oversize , so
you can have undersized for the crank and oversize caps etc . The old bearings might be marked with the size? Ive never come across it myself but an
old workmate did in the early 70s
|
|
|
Deckman001
|
| posted on 8/12/20 at 11:17 PM |
|
|
quote:
Originally posted by rusty nuts
quote:
Originally posted by Deckman001
No worries,
The engine is now stripped down, head off and the pistons and con rods are out and separated. The cam is the next one to be removed ready for the new
to me cam and for the new main and big end bearings also ready for when the pistons return from the machine shop skimming 25thou off the top off each
to ensure the exhaust valves don't make more contacts with the pistons. I've bought a refurbished head so should be delivered by Tuesday
15th so with any luck I might have all the bits back by that weekend so a rebuild could start.
Jason ( looking forward to a winter drive to the retest in Gillingham )
Check the bearings are the correct size on the outer diameter, Fords apparently salvaged some blocks by line boring the main bearings oversize , so
you can have undersized for the crank and oversize caps etc . The old bearings might be marked with the size? Ive never come across it myself but an
old workmate did in the early 70s
Yeah I will, the rings are marked as "Std" and tomorrow I might get a chance to take the cam and crank out and check the main bearings
ready to buy new ones as long as it doesn't need a regrind.
Jason
|
|
|
Deckman001
|
| posted on 19/12/20 at 12:02 PM |
|
|
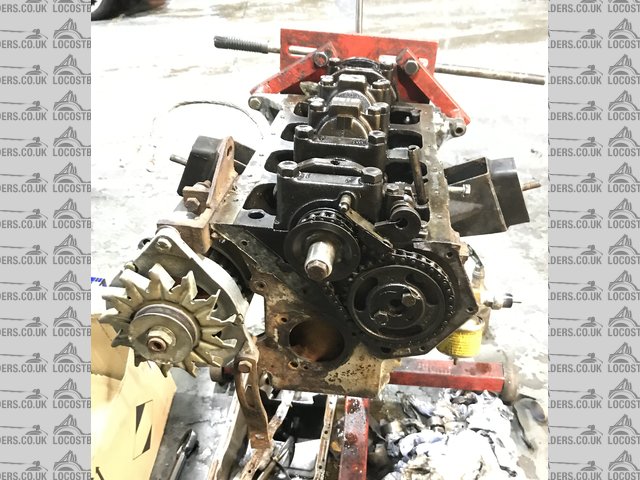
So, just a little engine rebuild update. The new cam is in along with new cam followers. The skimmed pistons have had the new rings installed
correctly and put onto the con rods, new big end bearings fitted and all installed.The cam has been timed up and set, it all turns over very nicely so
seals and covers will be next along with the oil pump and dizzy. Then it'll be oil pick up and sump, ready for the new head turning up next
week.
So all coming along nicely all be it slowly with limited time at the garage due to the time of year and work.
No pics as I can't upload them on here.
Jason
|
|
|
big_wasa
|
| posted on 19/12/20 at 12:55 PM |
|
|
Yep the photo hosting fault on here is a real shame.
|
|
|
rusty nuts
|
| posted on 19/12/20 at 01:53 PM |
|
|
What cam did you go for in the end? Did you just line the dots up on the timing gears when timing?
|
|
|
Deckman001
|
| posted on 19/12/20 at 06:26 PM |
|
|
Hi Ya, I went for a BCF2 with new followers. and yes I timed the cam with the dots lining up, we turned the engine over by hand a few times and
rechecked it, and it was still perfectly set up 
Jason
|
|
|
rusty nuts
|
| posted on 19/12/20 at 08:54 PM |
|
|
You may have been better off ignoring the timing marks and setting the timing using a dial gauge and degree wheel
FITTING
Hope the link works , if not have a look at Burtonpower for camshaft fitting and timing to get the best from the cam , ignore the timing marks on the
crank pulley unless you check it is accurate. I used a duplex vernier gear on mine but if you check it and find it is out offset cam keys are
available but I have in the past filed the slot in the sprocket and used shims to adjust the timing ( shim stock or old feeler gauge will work )
|
|
|
steve m
|
| posted on 19/12/20 at 09:56 PM |
|
|
Jason,
Dialling the cam in using the dots is fine, you will be pretty close, but i do have a dial guage and 360 wheel, etc, if you want to do it properly,
You will be within a couple of degrees, with the dots,
You can still use the guage to verify, even with the head on, if you want to add some more of my garage tools to your collection !
steve
Thats was probably spelt wrong, or had some grammer, that the "grammer police have to have a moan at
|
|
|
rusty nuts
|
| posted on 20/12/20 at 08:19 AM |
|
|
quote:
Originally posted by rusty nuts
You may have been better off ignoring the timing marks and setting the timing using a dial gauge and degree wheel
FITTING
Hope the link works , if not have a look at Burtonpower for camshaft fitting and timing to get the best from the cam , ignore the timing marks on the
crank pulley unless you check it is accurate. I used a duplex vernier gear on mine but if you check it and find it is out offset cam keys are
available but I have in the past filed the slot in the sprocket and used shims to adjust the timing ( shim stock or old feeler gauge will work )
Ignore the bit about shimming the gear, that works on A series engines, the x flow uses offset dowels ,
|
|
|
Deckman001
|
| posted on 21/12/20 at 03:45 PM |
|
|
Hmmm, interesting thoughts, I've been checking what I have done by asking each thing checked by my garage friend who is letting me keep my car
there on a ramp so I can lift the car up and work on the engine underneath it. He is my engine rebuild expert as he has already built lots of engines
and loves x/flows as they are so easy for him. I'll pass on the views when i pop back tomorrow to fit the sump and maybe the flywheel and clutch
, if so I'll get the engine back in just waiting for the new head and take it from there.
Thanks for your replies , all input is gratefully received.
Jason
|
|
|
rusty nuts
|
| posted on 21/12/20 at 06:44 PM |
|
|
I would recommend a competition sump gasket, the normal item is cork and tend to leak , my gasket has been used 3 times and is still oil tight
|
|
|
steve m
|
| posted on 21/12/20 at 07:54 PM |
|
|
I would say the same, the cork sump and rocker gaskets are a bit one time only
Thats was probably spelt wrong, or had some grammer, that the "grammer police have to have a moan at
|
|
|
James
|
| posted on 22/12/20 at 08:22 PM |
|
|
How about an engine from something closer to this century?
------------------------------------------------------------------------------------------------------------
"The fight is won or lost far away from witnesses, behind the lines, in the gym and out there on the road, long before I dance under those lights."
- Muhammad Ali
|
|
|
steve m
|
| posted on 22/12/20 at 10:01 PM |
|
|
Lets get him through the process first, and then upograde
To a Pinto
hhahahahahahaha
Thats was probably spelt wrong, or had some grammer, that the "grammer police have to have a moan at
|
|
|
Deckman001
|
| posted on 2/1/21 at 02:31 PM |
|
|
Cheers guys,
Iv'e also just realised that I got my retest dates slightly out, I have to be retested by 14th April, so I may have a bit of time running in my
rebuilt engine as long as I can get it rebuilt and installed correctly and then it's just the emissions and self centring to sort before the
retest.
Then a few hundred miles on trade plates running it in I guess.
Description
Jason
[Edited on 3/1/21 by Deckman001]
|
|
|
Deckman001
|
| posted on 3/1/21 at 02:25 PM |
|
|
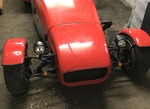
Engine was out before Xmas
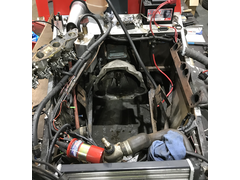 
Description
But is now mostly back in apart from the head which should be delivered by mid week
|
|
|
Deckman001
|
| posted on 5/1/21 at 09:23 AM |
|
|
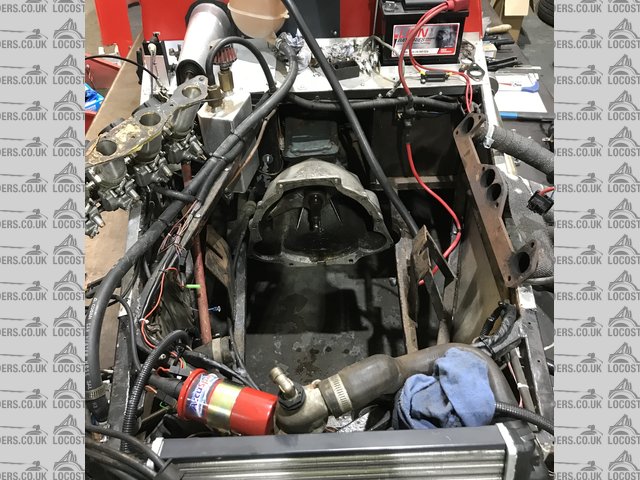
Engine rebuilt and lifted back in apart from the head.
Description
|
|
|
James
|
| posted on 5/1/21 at 07:19 PM |
|
|
quote:
Originally posted by steve m
Lets get him through the process first, and then upograde
To a Pinto
hhahahahahahaha
Ah, you want him to have a proper engine! Good!
Wish I'd gone Duratec myself. I'm sure I'll find time to upgrade soon!
------------------------------------------------------------------------------------------------------------
"The fight is won or lost far away from witnesses, behind the lines, in the gym and out there on the road, long before I dance under those lights."
- Muhammad Ali
|
|
|
Deckman001
|
| posted on 5/1/21 at 09:48 PM |
|
|
This engine rebuild will cost about £1k so I think I'll be keeping it for quite a while as it should live well.
Jason
|
|
|
Deckman001
|
| posted on 10/1/21 at 05:02 PM |
|
|
Well, it's back together and is now running. slightly noisier than i expected, but my engine guy seams very happy with it running. Water pump
was leaking so that was taken off again and re-sealed, it's back on now with water and no more leaks showing. Am so happy to see no oil from
around the sump gaskets or seals
It has also been 'timed' correctly at 10 degrees, it coughs and spits a bit on choke, but soon runs without it and is lovely and smooth
now, and picks up so quickly i couldn't stop smiling. It also now Barks from the exhaust!! (good job I've already passed the noise level
checks as IVA)
Jason
|
|
|
Deckman001
|
| posted on 15/1/21 at 08:43 PM |
|
|
A new update after this weeks work on it.
The engine is now back together and water tight, a slight weep from around the rocker cover, but I can live with that at the moment.
I set up the head lights and then tried the emissions, sadly a thermostat wire had come loose and at the time of testing, it blew its nose and emptied
its water all over the mot station !! 
next visit let me sort the stat issue and re fill of the water works, then a pressure test showed where the water had exploded from, thankfully just a
re seating of a pipe needed on the thermostat housing and tightening of the jubilee clip once more cured the problem. So i fired it up again and found
that no.4 was running colder than the others by quite a lot and removing the plug lead didn't change the engine note. I borrowed an infared
thermostat and it showed the same on that exhaust manifold part. So engine water drained again and carbs off to inspect. Cleaned out no 4 and then
bathed each carbs jets in cleaner for an hour and then reassembled them but with no 4's jets in no 1. It started on the button and ran really
well until I twisted the throttle a few times seriously and then it started to burble again, so i checked the temps again of the manifold and low and
behold, no 1 was now playing up showing the same temp as no 4 was previously.
This time I couldn't be bothered to take the manifold off again so i took off the bowl of no.1 carbs and removed the idle jet. Took a while to
find anything small enough to get down the jet to try and clear it out, but with alternate poking and blasting with compressed air, it started to blow
through better. I repeated this a few time for good measure but couldn't get any more air through it so put it back in and reconnected the fuel
line and it fired up even better this time. I pulled over the emissions testing machine and the h/c were almost non existent !! but the c/o was three
times the limit, then over three or four adjustments, I have finally gotten a passable result with 283 h/c (1200 the limit) and 1.8 c/o (4.5 the
limit).

So next thing on the list is tracking and steering, although I have proven that the steering is light enough for a 7 so it looks like the geometry is
the issue and next week I'll be looking to get it set up on a laser set up as before, otherwise it'll mean either a new top wish bone on
the right, or cutting off the brackets and welding then back on a bit further back. Next week will be the tell tale last issues I hope before I can
call the test centre to see the testing situation.
Jason
|
|
|
rusty nuts
|
| posted on 15/1/21 at 09:25 PM |
|
|
A little tip for clearing jets without stripping the carbs , open the throttle so the engine revs then place the palm your hand over the carb inlet
for a couple of seconds, the engine revs will drop, quickly remove your hand while holding the throttle open . Repeat if needed. The vacuum created
often clears any blockage. Poking anything through a jet is likely to enlarge it.
|
|
|


.jpg)