mat.price
|
| posted on 5/11/05 at 05:19 PM |

|
|
avon body
hello all
i am having trouble with the body on the Avon
in the book it says that the body goes over the round bars on the sides where you sit
have any of you got over this as the body is about 10mm shorter then the bars
also can you send pictures as this will help a lot?
thank
|
|
|
|
|
carlgeldard
|
| posted on 5/11/05 at 07:55 PM |
|
|
Mat
You would have an easier job fitting the Tiger bodywork to an MK chassis. The Avon bodywork is just dreadful. I had to remove most of that GRP in that
area you are talking about, In my opinion the bodywork needs to be at least 2 inchs wider. And then there is all the other problems.
Send the bodywork back and make your own.
Carl
|
|
|
Lightning
|
| posted on 5/11/05 at 10:19 PM |
|
|
The body is plainly not that good. Although I have to say mine fitted reasonably easily. The main problem is the rolls as you say. I used a dremmel to
remove a great deal of the underside of the body roll. It also had to be gently persuaded over where the body goes over the chassis to the rear of the
aforementioned rolls. A few splits appeared that had to be repaired after.
There are some photo's in my archive.
Where are you? I'm sure there must be someone near you to help.
Steve
|
|
|
Andrew Bause
|
| posted on 6/11/05 at 12:27 AM |
|
|
Hi Matt,
Could you post a picture of the problem you are having?
I know there are builders on this list who have had problems with the AVON bodywork and I would agree that there are indeed issues with its symetry
but In my personal experience the bodywork fitted fine. I have a large collection of photographs taken during the build, I'd be more than happy
to email some of them to you?
Cheers!
Andy Bause
[Edited on 6/11/05 by Andrew Bause]
We have been doing so much with so little for so long - Now we can do anything with nothing!
|
|
|
mat.price
|
| posted on 6/11/05 at 10:48 AM |
|
|
 what i will do is take some pictures today then setup the photo thing a.s.a.p what i will do is take some pictures today then setup the photo thing a.s.a.p
i live in histon but my car is hold in st ive if there's anyone near there?
thank all
|
|
|
carlgeldard
|
| posted on 6/11/05 at 12:35 PM |
|
|
From what I have seen the red bodywork is thinner and therefore more flexable. The Yellow is the heavyweight option.
Carl
|
|
|
Lightning
|
| posted on 6/11/05 at 06:09 PM |
|
|
Carl, Viper who is on here also said that his body was about 2" out on the width, but when he measured his chassis it was a different width to
mine. How old is your chassis. I beleive his was one of the first from Tiger.
Although I would agree , in hind sight I would have made my own. Seperate rear wings is an advatage as they can then be replaced if you have a Murry
Walker "Bit of a moment". Or lorrys reversing into you , like my car.
Steve
[Edited on 6/11/05 by Lightning]
Steve
|
|
|
carlgeldard
|
| posted on 6/11/05 at 08:31 PM |
|
|
I will agree with what Viper said. I made my own chassis and it was the same as Pat's (Avoneer) tiger built chassis. His bodywork fitted better
due to him having the lightweight racing red bodywork. But it still didn't right.
Carl
|
|
|
ayoungman
|
| posted on 7/11/05 at 09:26 AM |
|
|
I've got one of the very early production body shells going on my chassis. At first it would appear that it won't fit, however, with much
filling and sanding it does eventually go on. You've identified the main problem area. I used the same method as Lightening, Dremel to grind out
the bulk of the thickness so the top overlap hooks onto the tube. Once this is done, then work on the bottom fitting under the chassis rails.
i'll post a picture tomorrow if it Helps !
"just like that !"
|
|
|
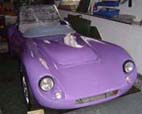
mat.price
|
| posted on 8/11/05 at 07:12 PM |
|
|
 got the pictures on the photo archive have a look see what you think?? got the pictures on the photo archive have a look see what you think??
any help or idea sent them my way please
any advice will be helpfull
thanks
|
|
|
ayoungman
|
| posted on 9/11/05 at 12:12 PM |
|
|
finally got the pictures I needed. Here's what most people have done to the top tube. cut off most of the overlap, then grind out from
underneath until the grp hooks onto the tube. The other bodytub pictures are in my archive now. HTH.
"just like that !"
|
|
|