suparuss
|
| posted on 20/5/07 at 05:38 PM |

|
|
front bodywork
finally finished (ish) my front body panel! took some work but looks nice although it still needs some work.
heres some piccies!!-
here is where i left off last time with the mould finished. the next step was to give it 5 coats of release wax and 1 coat of pva release fluid. then
2 coats of gelcoat in british racing green.
inside of first mould
i also made a seperate mould for some inner wings which both act as a mud guard and add stiffness to the panel-
inner wing thingy
the inner wings were held in place with plasticine (fiberglassers best friend) then filleted with chop strand filler then cloth wetted out over the
joint.
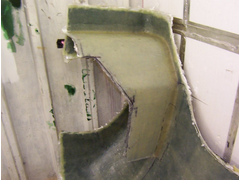 
inner wing bonded
and both mounted-
both inner wings bonded
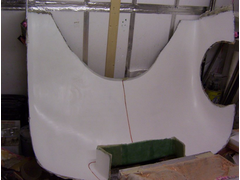
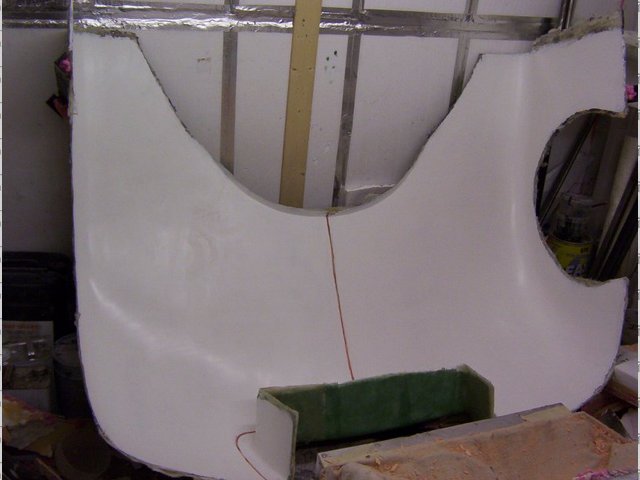
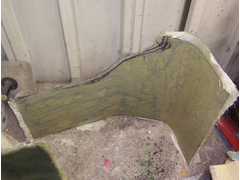
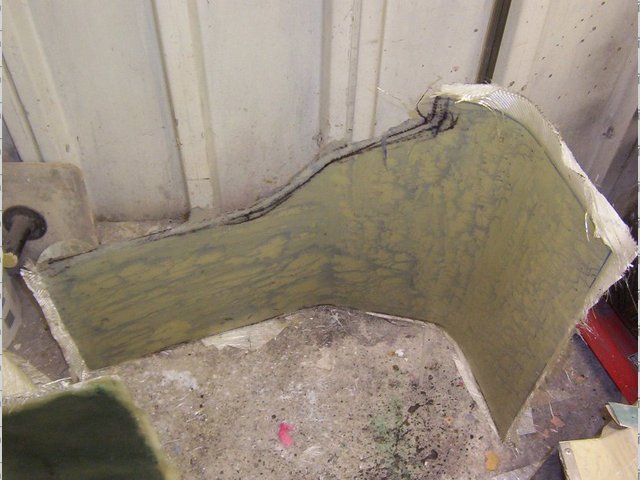
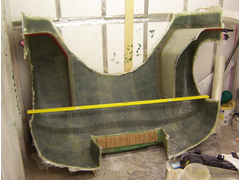
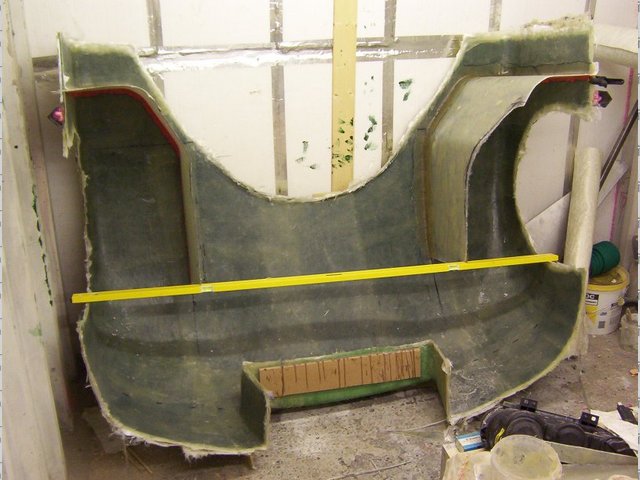
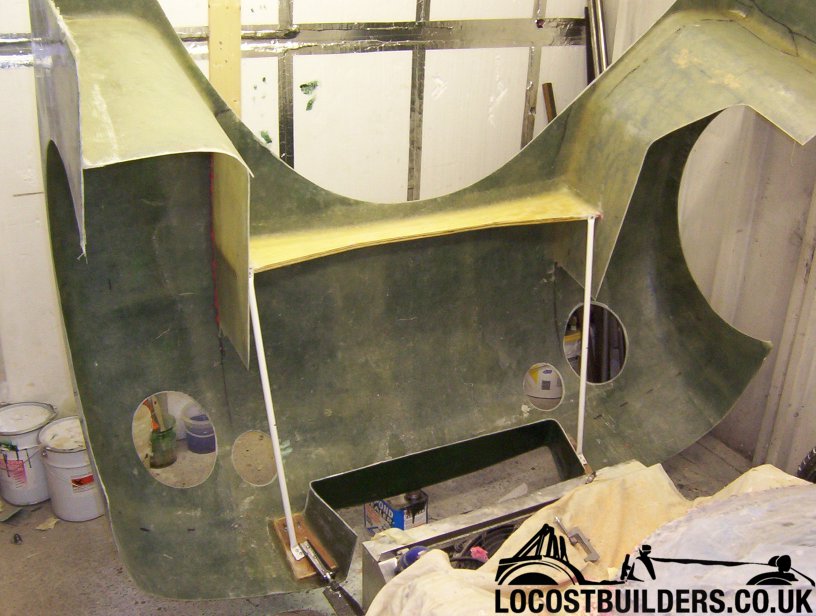
here is the part demoulded, trimmed and sat in place. it popped out of the mould without a hitch but there seems to be a step where the middle split
line is and a slight bulge on one side which must have been caused by heat as it isnt present on the mould. i always intended to have the whole thing
sprayed in metallic racing green eventually so these can be sorted in the bodyshop after the car is on the road.
demoulded and trimmed
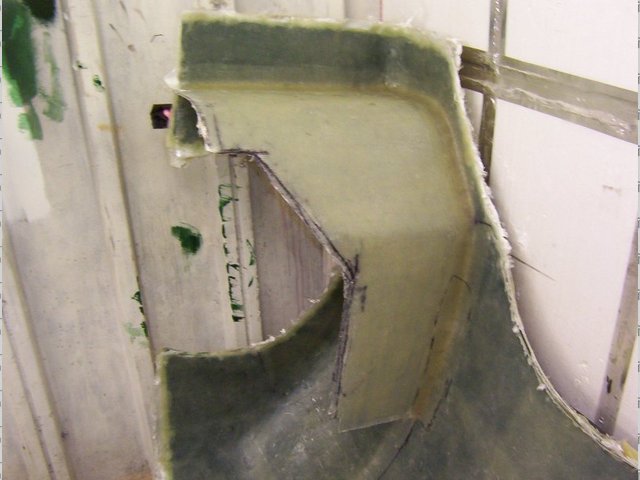
i also added some extra reinforcement to stiffen the part up a bit. the wood one i added before the demould and the ally tubes after it was was
mounted due to it sagging when upright.
the whole thing is only about 3-4mm thick comprising 3 layers twill weave cloth and 2 layers csm alternating which is quite flexible but very strong.
i can bend a 16inch long off cut right back on its self and it just springs back into shape.
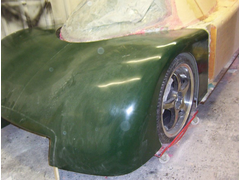
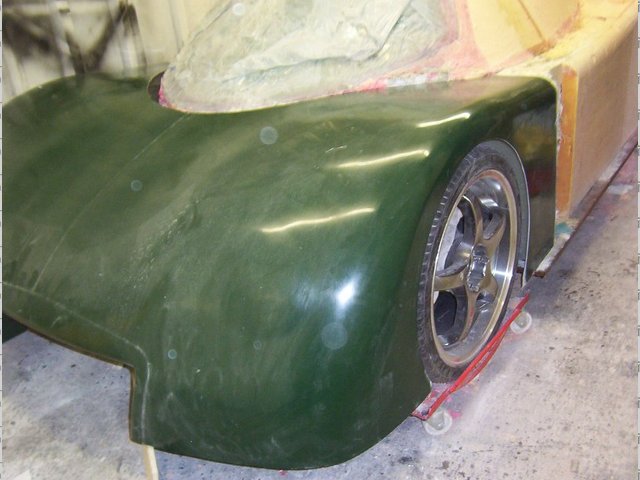
and here it is with the headlights mounted (actually they are held in place with plasticine while i make permanent mounts which is the next task)

and now i can start the next part! bugger! all that and now i have to do it again. 
|
|
|
|
|
jambojeef
|
| posted on 20/5/07 at 05:44 PM |
|
|
Wow!
How you did that I will never know.
What work needs doing? Look just great to me - nice one!
Geoff
|
|
|
blakep82
|
| posted on 20/5/07 at 05:55 PM |
|
|
stunning. like a young burt reynolds 
[Edited on 20/5/07 by blakep82]
________________________
IVA manual link http://www.businesslink.gov.uk/bdotg/action/detail?type=RESOURCES&itemId=1081997083
don't write OT on a new thread title, you're creating the topic, everything you write is very much ON topic!
|
|
|
The Baron
|
| posted on 20/5/07 at 06:00 PM |
|
|
Very impressive, I'm struggling to get my bonnet buldge to look right, your just making me look like a amature!!!!!!
|
|
|
ecosse
|
| posted on 20/5/07 at 06:17 PM |
|
|
And I thought making a 7 scuttle was an achievement
Looking good
Cheers
Alex
|
|
|
RazMan
|
| posted on 20/5/07 at 06:24 PM |
|
|
Stunning work there Russ. I wondered if you would put returns on all the edges to make everything much stiffer, it is suprising how much strength that
a 20mm return adds to the whole shell and there is less distortion too.
[Edited on 20-5-07 by RazMan]
Cheers,
Raz
When thinking outside the box doesn't work any more, it's time to build a new box
|
|
|
Confused but excited.
|
| posted on 20/5/07 at 08:20 PM |
|
|
That car is going to look SOOOOO RUDE when it's finished!
Tell them about the bent treacle edges!
|
|
|
NeilP
|
| posted on 20/5/07 at 08:52 PM |
|
|
Phenominal piece of work - True car building and based on the look of the front (both inside and out) the finished result will be superb.
Hats off to you, Sir!
If you pay peanuts...
Mentale, yar? Yar, mentale!
Drive it like you stole it!
|
|
|
suparuss
|
| posted on 21/5/07 at 05:56 PM |
|
|
cheers for the nice comments. im really not looking foreward to carrying on with the body work. there is so much work involved so any moral boost is
good.
quote:
Originally posted by RazMan
I wondered if you would put returns on all the edges to make everything much stiffer, it is suprising how much strength that a 20mm return adds to
the whole shell and there is less distortion too.
[Edited on 20-5-07 by RazMan]
i would have done this but wanted to be able to trim most of the edges to get a perfect fit against the other panels. it is pretty stiff in all but
the bits in front of the wheels, so it wont bugger the body work when i prang it! itll just bounce back into shape.
|
|
|
gttman
|
| posted on 23/8/07 at 08:43 AM |
|
|
Long time no hear..... have you made an recent progress with your car.
At the rate you were going I was almost expecting a finished item by Xmas.
Andygtt
Please redefine your limits
|
|
|
ned
|
| posted on 23/8/07 at 09:40 AM |
|
|
Nice progress.
A friend of mine added a bulkhead to his nose section to add stiffness like you have. He also got some deflection to the shape caused by the heat of
the grp setting off, he was told in future to graft the bulkhead on whilst he panel was still in the mould, this should reduce or eliminate any knock
on distortion to the panel.
Ned.
beware, I've got yellow skin
|
|
|
violentblue
|
 posted on 23/8/07 at 04:15 PM posted on 23/8/07 at 04:15 PM |
|
|
Love the job you've done, I'd like to do something similar some day.
What did you used for a windshield?
have you seen what Steve Graber did with the windshield surround/rollbar on his Labala? He formed the tube to fit the windshield then integrated irt
to his chassis. I was thinking that this was definatly the way to do it, looks less like a roll cage.
definatly a thumbs up
a few pics of my other projects
|
|
|
Peteff
|
| posted on 23/8/07 at 05:03 PM |
|
|
Very nice
Can you make me a Frogeye Sprite body to fit on my Locost chassis while you're at it?
yours, Pete
I went into the RSPCA office the other day. It was so small you could hardly swing a cat in there.
|
|
|
geoffreyh
|
| posted on 19/1/08 at 11:28 AM |
|
|
I'm wondering how this project is doing.
I'm hoping business is doing well but you're getting some time off as well.
Geoff
|
|
|