Dale
|
| posted on 24/10/07 at 09:35 PM |

|
|
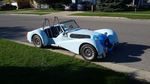
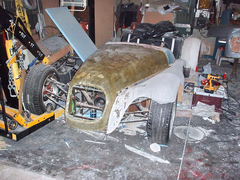
First attempt at fiberglassing.
Well I certainly would not want to be paying me by the hour for my body part making. AT the point of no return on the bonnet and nose now. First
layers on and a couple more to go before seeing if it will come off my buck without destroying it. It will need a good coating of bondo over the
part to get a nice finish on it but its looking tollerable so far.
Dale
Rescued attachment DSCF0007_resize.jpg
Thanks
Dale
my 14 and11 year old boys 22
and 19 now want to drive but have to be 25 before insurance will allow. Finally on the road
|
|
|
|
|
emsfactory
|
| posted on 24/10/07 at 10:17 PM |
|
|
Coming on Dale.
Might want to put something in to support the mould. Some stiffeners or some transverse and longitudinal frames. Would also make it easier when your
making your part from the mould as you would have a built in stand.
|
|
|
Dale
|
| posted on 25/10/07 at 12:25 AM |
|
|
I am not making a female mold. The glassing that I am doing now will be the final part. the buck was made to have an 1/8 inch of glass on it to
bring it up to full size and be skined with body filler to give a proper finish. For a one off part I could not see going the full route of making
the buck + mold +part. Let alone the cost involved. Hopefully it works out.
Dale
Thanks
Dale
my 14 and11 year old boys 22
and 19 now want to drive but have to be 25 before insurance will allow. Finally on the road
|
|
|
Mark.
|
| posted on 25/10/07 at 07:55 AM |
|
|
Dale, If you flat that down then use grp tissue you won't have so much filler work to do and it will help keep the finished weight down.
Looks good though....lots of hard graft gone into that.
Mark.
|
|
|
02GF74
|
| posted on 25/10/07 at 08:55 AM |
|
|
Although I have not done this I have thought about it.
My approach would to build it up in layers, then smooth each one and use a finer mat on top ending up with tissue.
A bit like painting and rubbing down with 240, 400, 800 and 1200 wet 'n'dry.
May not be necessary as I am sure you can be quite brutal with the sanding on the final layer.
|
|
|
emsfactory
|
| posted on 25/10/07 at 09:10 AM |
|
|
quote:
Originally posted by Dale
I am not making a female mold. The glassing that I am doing now will be the final part. the buck was made to have an 1/8 inch of glass on it to
bring it up to full size and be skined with body filler to give a proper finish. For a one off part I could not see going the full route of making
the buck + mold +part. Let alone the cost involved. Hopefully it works out.
Dale
Ah, didn't get that.
You have a lot of sanding coming then
|
|
|
RazMan
|
| posted on 25/10/07 at 10:06 AM |
|
|
quote:
Originally posted by emsfactory
You have a lot of sanding coming then
Rubbing down resin & mat is a hell of a job so Mark's suggestion of applying a layer of tissue makes sense (after grinding off any high
spots). You can then have a thin skim of filler which will sand easily .......... still loads of work though so be prepared to spend LOTS of time
getting the finish smooth and ripple free.
Cheers,
Raz
When thinking outside the box doesn't work any more, it's time to build a new box
|
|
|
Syd Bridge
|
| posted on 25/10/07 at 10:25 AM |
|
|
1/8" is plenty to work with for Locost bodywork. That'll be at least 3/16 in places.
Get stuck in with 80 grit on a longboard before you go any further. When you've got all the high spots down to the lows, ( a light spray with a
'shadow coat beforehand helps a lot),just give a light skim with Bondo, then longboard again with 120.
You should then be able to spray on some hi build primer, then it's longboard once more with 240, then more hibuild, then hopefully paint!
The above is method that I am not amiss to doing, ...but not too often!  To be avoided if at all possible!!! To be avoided if at all possible!!! 
Cheers,
Syd.
|
|
|
Delinquent
|
| posted on 25/10/07 at 10:55 AM |
|
|
quote:
The above is method that I am not amiss to doing, ...but not too often! To be avoided if at all possible!!!
Cheers,
Syd.
Too right, avoid like the plague in fact 
Good luck with it - personally think you'd have been better off with a mould (if for no other reason than any damage means a very easy
replacement) but it's very rewarding when you finally get to sweep up the knee deep dust and put a coat of paint on
|
|
|
Dale
|
| posted on 25/10/07 at 01:36 PM |
|
|
It is done with two layers of 1 oz mat- so far. I am considering taking it off the buck while it is still some what flexable. Then be able to set it
back on the buck for more top coats. But I would like to do most of the reinforcing on the underside.
Thanks
Dale
Thanks
Dale
my 14 and11 year old boys 22
and 19 now want to drive but have to be 25 before insurance will allow. Finally on the road
|
|
|
RazMan
|
| posted on 25/10/07 at 03:24 PM |
|
|
It's a big lump to hump around and will probably distort under its own weight. I would work on getting a good outside finish (tissue &
filler) then carefully do the inside with more matting.
Cheers,
Raz
When thinking outside the box doesn't work any more, it's time to build a new box
|
|
|
Dale
|
| posted on 26/10/07 at 12:54 AM |
|
|
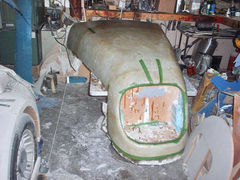
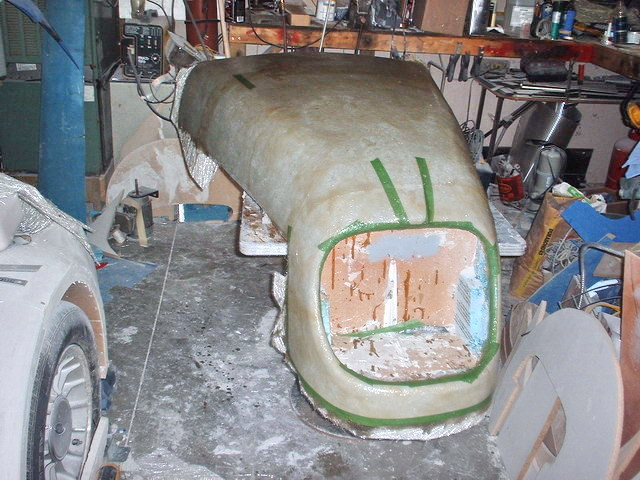
Its gong back on the buck for the next top coat. then I will make a cradle to hold it upside down for reinforcing. Its remarkably stiff as it is
alreadly ( must be the complex curve of the top of the bonnet)
Rescued attachment DSCF0010_resize.JPG
Thanks
Dale
my 14 and11 year old boys 22
and 19 now want to drive but have to be 25 before insurance will allow. Finally on the road
|
|
|
Dale
|
| posted on 26/10/07 at 12:56 AM |
|
|
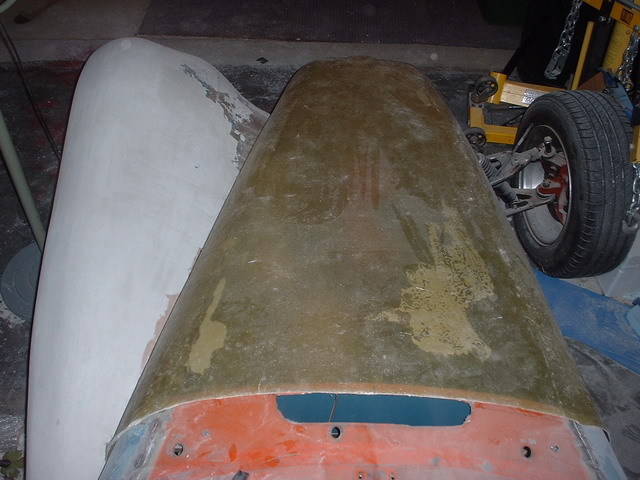
Time to reshape the front wing where the join soon.
Rescued attachment DSCF0011_resize.jpg
Thanks
Dale
my 14 and11 year old boys 22
and 19 now want to drive but have to be 25 before insurance will allow. Finally on the road
|
|
|
Fred W B
|
| posted on 26/10/07 at 06:15 AM |
|
|
That is really starting to look like something now. The wing curve at the front has a lot of MG TC/TD about it.
Well done
Cheers
Fred W B
[Edited on 26/10/07 by Fred W B]
You can do it quickly. You can do it cheap. You can do it right. Pick any two.
|
|
|
ross
|
| posted on 2/11/07 at 11:58 AM |
|
|
Hi Dale,
You can get a material called peel tape which you lay up with resin as your final layer. This kinda floats on the suface and levels the surface. Once
cured you just pull the tape off the resin to leave a pretty level surface with a finish that mimics the weave of the tape. It's designed for
making one offs like you are doing.
Cheers
Ross
|
|
|