tims31
|
| posted on 23/7/12 at 10:40 PM |

|
|
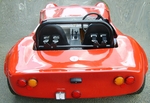
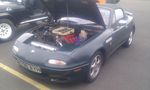
Chassis Collected Today
Just thought I would share with you all, I collected my chassis today from Steve Hughes at Fury Sportscars. Must say every time I go down there he is
very helpful and knowledgeable and willing to give some advice.
Anyhow, attached are some photos and hopefully this will now be what will be taking over my summer and not what the boss thought I was to be doing

Will hopefully post regularly to keep you updated.
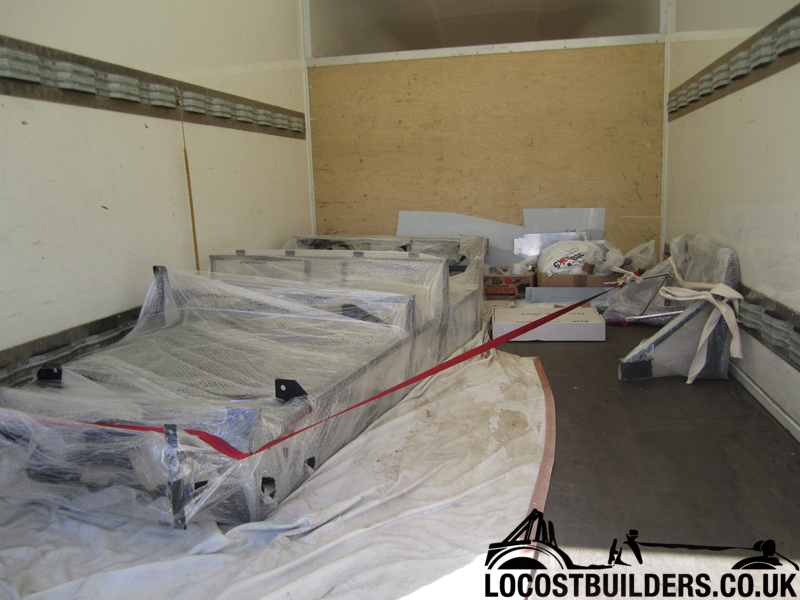
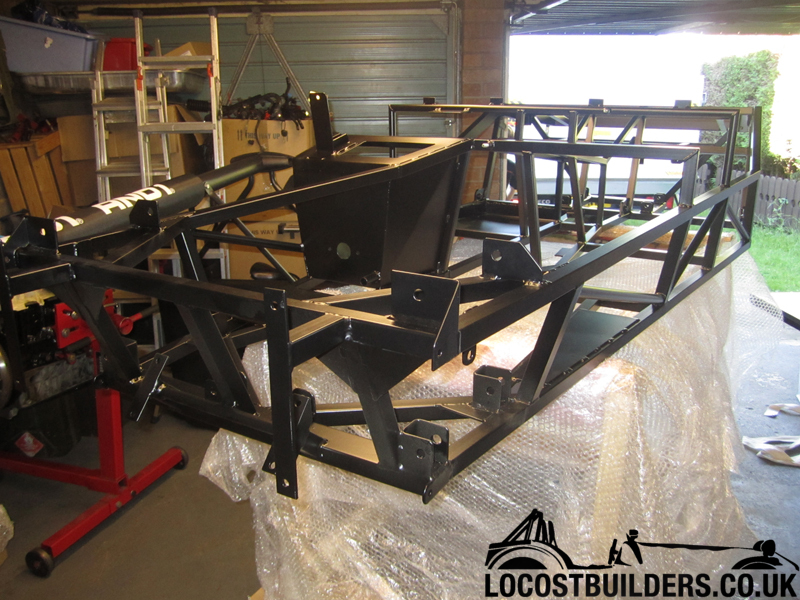
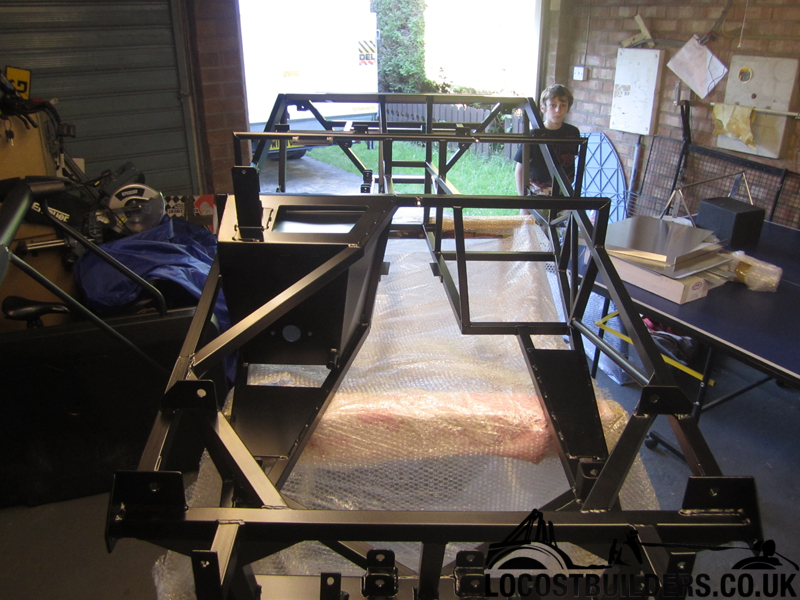
Thats the footwell helper in the last photo...
Build: http://www.martinsfurybuild.co.uk/
|
|
|
|
|
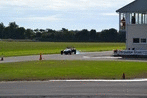
bi22le
|
| posted on 23/7/12 at 11:18 PM |
|
|
I bet he is just as excited as you, contrary to his facial expressions!
Track days ARE the best thing since sliced bread, until I get a supercharger that is!
Please read my ring story:
http://www.locostbuilders.co.uk/forum/13/viewthread.php?tid=139152&page=1
Me doing a sub 56sec lap around Brands Indy. I need a geo set up! http://www.youtube.com/watch?v=EHksfvIGB3I
|
|
|
tims31
|
| posted on 24/7/12 at 07:28 PM |
|
|
Oh Yes he's excited, it had just been a long day trying to get around the M25
Both of my boys can't wait to get started now, since the main work on the engine has been finish they have lost interest in the 'cleaning
up' of bits.
Build: http://www.martinsfurybuild.co.uk/
|
|
|
pjay
|
| posted on 30/7/12 at 06:55 PM |
|
|
Congrats! I'm due to pick up my Fury Duratec chassis shortly so interesting to see how you progress.
Looks like you've got more than just the chassis pack is that the case?
|
|
|
tims31
|
| posted on 2/8/12 at 11:05 PM |
|
|
Hey,
I got the chassis pack which includes the drive shafts modified, handbrake and steering UJ extension and panels, shocks and springs, roll hoop and the
bolts pack. That was it but it looks a lot more.
The paneling is going well with the drivers side all drilled and the centre panels drilled with rivnuts fitted so these can be removed if needed. Will
start the passenger panels tomorrow and again fit rivnuts so they can also be removed for access if needed. Going to get all the panels powder coated
before I fit them though.
I trial fit all the wishbones, diff and drive shafts before doing the panels though just to check it all fits and to clean out the holes as the powder
coating does make fitting the bolts more difficult.
Will keep you updated.
Build: http://www.martinsfurybuild.co.uk/
|
|
|
pjay
|
| posted on 3/8/12 at 11:29 AM |
|
|
As you say does look more.
I was thinking of rivnuts for the centre panels as well. Will you still use mastic/sealant to get it watertight?
|
|
|
tims31
|
| posted on 3/8/12 at 03:02 PM |
|
|
I have thought about that but could be a pain to remove them once the sealant sets. I am half thinking of using the draft excluding tape that you get
from the DIY places. It is self adhesive, high density foam that once compressed should make it fairly water tight so I was thinking of putting it
over the holes that the screws will come through, open the holes out and this should then form a water tight seal around the screw holes and along the
panels.
Not sure if anyone else has tried this?
[img]
 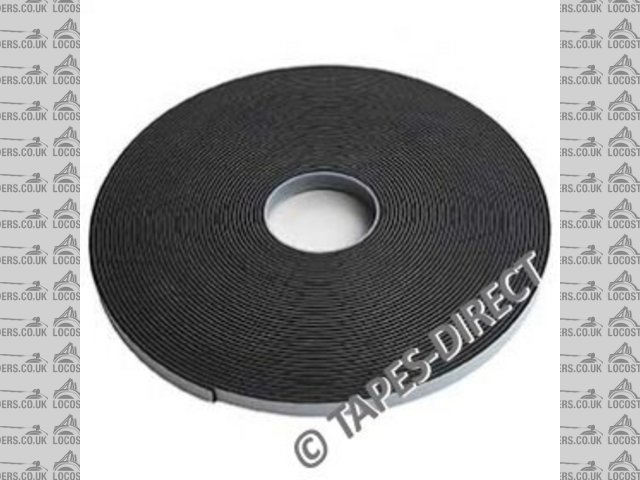
foam tape
[/img]
Build: http://www.martinsfurybuild.co.uk/
|
|
|
avagolen
|
| posted on 3/8/12 at 08:54 PM |
|
|
Hi guys, looking nice.
I am at present building a Fury with a chassis supplied by BGH.
Steve is a great guy and has a great deal of useful knowledge.
Like you plan to do, I fitted my driver side panel with bolts and rivnuts with some
self adhesive foam to prevent water getting into the joins.
I only used the 'thick' foam like you have in the picture for the front vertical of the panel
and normal draught excluder for the other areas.
You may find the front vertical a challenge to line up as the vertical tube
is 15mm and the bottom rail is 25mm. This gives an uneven joint at the bottom area. Have fun.
On the passenger side, I cut the panel in half roughly in line, but forward of the handbrake support vertical
member. I fixed a 'joining 'panel to the front section which I riveted/sikaflexed in place. The rear section
I screwed and to maintain the panel alignment used nuts/bolts to the joining section.
No photos of this but I can get some if you want. This will give access to the handbrake
lever mechanism if required......
All other panels were fixed with sikaflex and rivets (apart from the rear tunnel upper panel which is screwed in place).
Another thing I did was to fit ally angle brackets to the forward surfaces of the tunnel so that the front tunnel
panels would be flush with the rear panels.
HTH
Len.
The Answer for everything, but never the last word....
|
|
|
pjay
|
| posted on 4/8/12 at 05:45 PM |
|
|
quote:
Originally posted by tims31
I have thought about that but could be a pain to remove them once the sealant sets. I am half thinking of using the draft excluding tape that you get
from the DIY places. It is self adhesive, high density foam that once compressed should make it fairly water tight so I was thinking of putting it
over the holes that the screws will come through, open the holes out and this should then form a water tight seal around the screw holes and along the
panels.
Not sure if anyone else has tried this?
[img]
foam tape
[/img]
Sounds good I'll take a look once I get started. Please keep us posted on what you find.
Hi Len - I've had a quick look at your photos already but any additional on what you've done would be great - thanks.
|
|
|
avagolen
|
| posted on 4/8/12 at 07:14 PM |
|
|
Ok, I will go and take some more pictures. I will post when done.
Len.
 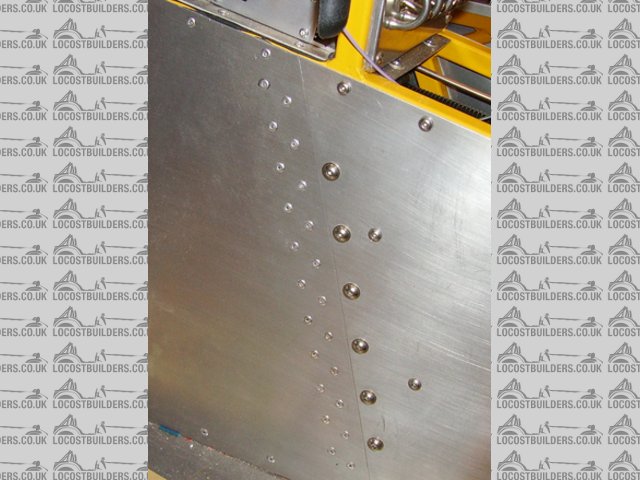
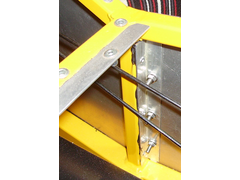
Pass_tunnel_join
This shows the join on the passenger side. It allows the handbrake lever nuts and bolts to be removed with ease.
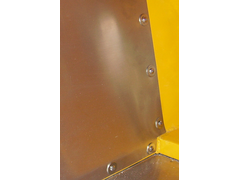 
Driver_side_panel_fwd
This shows the forward edge of the drivers side panel. The lower edge has been gently bent so that it does not strain agains the bolts etc.
 
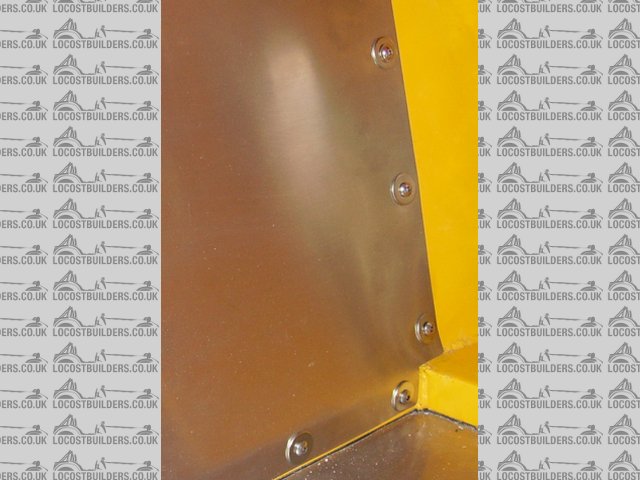
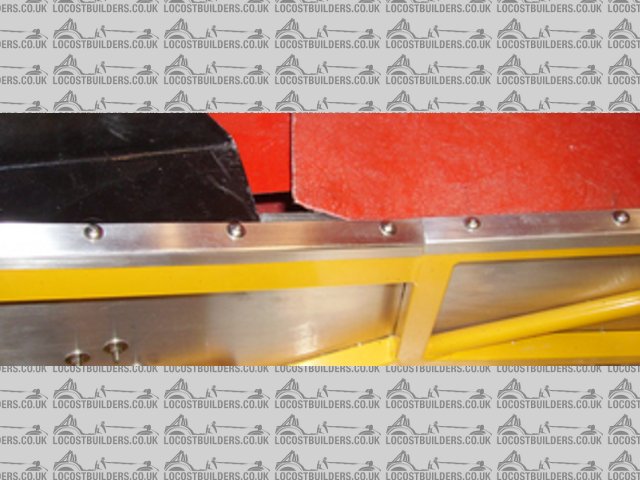
driver_tunnel_rear
This shows the rear edge of the drivers tunnel panel. It lays flush with the rear panel. You can also see one of the ali' brackets for mounting
the top panel.
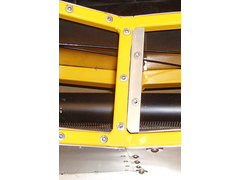 
Tunnel_top_1
Clear photo of the top bracket.
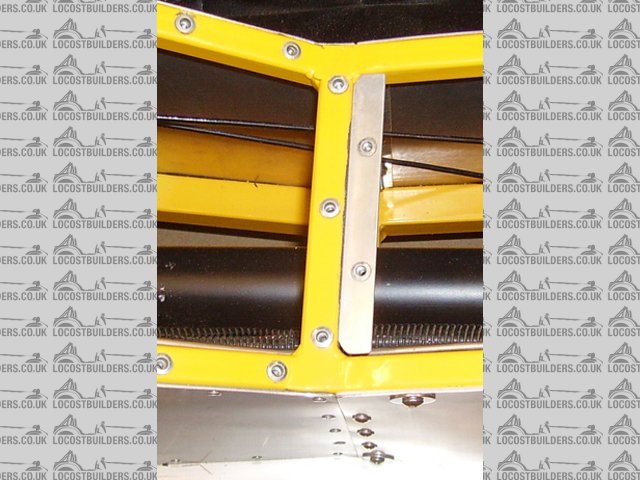
tunnel_top_2
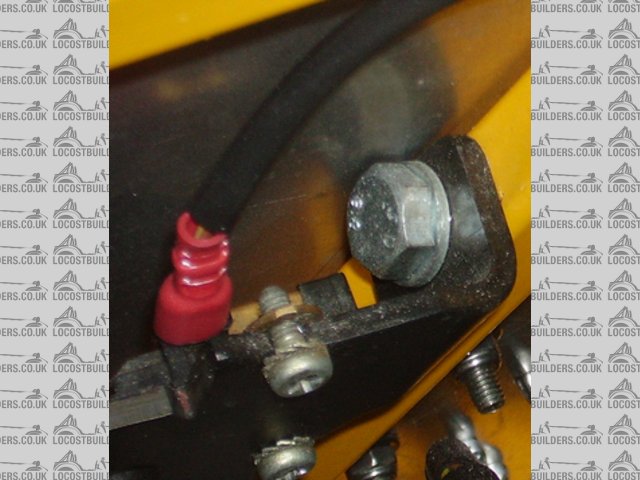
This picture shows the inside of the passenger rear edge and the ali' bracket.
You will notice on the Driver side panel some repair washers. The top ones will be replaced with an ali' plate that will create the correct
radius edge for the IVA. These washers are to finish the way I make the panels fit on the rivnuts.
To make the panels sit on the chassis rails, I make the holes larger than required for the screw, and use the repair washers to clamp the panel in
place. The holes are quite accurately made so that they locate the panel well. This is because I do not use countersunk rivnuts.
All of the tunnel top edges will have the corner covers made the same to tidy it all up and ensure I do not have to cover it all up with carpets.

[Edited on 4/8/12 by avagolen]
The Answer for everything, but never the last word....
|
|
|
Slimy38
|
| posted on 4/8/12 at 08:29 PM |
|
|
I don't know whether this may help but I'll post it just in case. The Volkswagen Audi Group used the Golf Mark 4 chassis for quite a few
cars in their range, and they all suffer from one thing. Leaking door panels. By default the panels are sealed with the spongelike stuff that you
mention below, and it basically degrades over time.
The best fix is to replace the rubber with a butyl tape, like this;
BOLT ON PANEL SEALER BUTYL TAPE ROLL STRIP SEALANT BONDING CARS BOATS VANS | eBay
I do wonder whether the same tape would be of use here? You mention that using sikaflex would make the panels difficult to remove once it sets, this
tape doesn't 'set' as such and would allow a panel to removed and replaced yet still maintain the seal.
|
|
|
pjay
|
| posted on 5/8/12 at 07:52 AM |
|
|
quote:
Originally posted by avagolen
You will notice on the Driver side panel some repair washers. The top ones will be replaced with an ali' plate that will create the correct
radius edge for the IVA. These washers are to finish the way I make the panels fit on the rivnuts.
To make the panels sit on the chassis rails, I make the holes larger than required for the screw, and use the repair washers to clamp the panel in
place. The holes are quite accurately made so that they locate the panel well. This is because I do not use countersunk rivnuts.
All of the tunnel top edges will have the corner covers made the same to tidy it all up and ensure I do not have to cover it all up with carpets.
Hi Len - great photos (and very tidy work) - many thanks.
Very interested in your point about the radius for IVA. So do you plan to have the tunnel top panels curved so that the flat of the panel are raised
above where the tunnel top would normally be? If so how do you plan to strengthen the panels to they don't flex (apologies if I've
misunderstood).
quote:
Originally posted by Slimy38
The best fix is to replace the rubber with a butyl tape, like this;
BOLT ON PANEL SEALER BUTYL TAPE ROLL STRIP SEALANT BONDING CARS BOATS VANS | eBay
Hi Slimy38 - thanks have seen something similar sold by CBS did wonder whether this would be an option on all panels including the fixed ones (e.g.
instead of Sikaflex). I may get some and see what its like. Have you tried it yourself?
http://www.cbsonline.co.uk/product/Butyl_Sealer_Strip_7M_BUTYL
[Edited on 5/8/12 by pjay]
|
|
|
clairetoo
|
| posted on 5/8/12 at 08:11 AM |
|
|
Just one question - what are to putting in to replace the stiffness you will lose by not fixing those panels properly ?
When I first built mine I used a cheap sealer , and at three years old all the panels were falling off , the rivet holes were slots where the chassis
had been flexing . The panels contribute hugely to the stiffness of the chassis !
I wouldn't worry about access to the tunnel - my handbrake has needed no maintenance in twelve years ....
Its cuz I is blond , innit
Claire xx
Will weld for food......
|
|
|
Slimy38
|
| posted on 5/8/12 at 08:51 AM |
|
|
quote:
Originally posted by pjayHi Slimy38 - thanks have seen something similar sold by CBS did wonder whether this would be an option on all
panels including the fixed ones (e.g. instead of Sikaflex). I may get some and see what its like. Have you tried it yourself?[Edited on 5/8/12 by
pjay]
Not on a kit car (I've not started one yet!) but it's worked perfectly on my SEAT Toledo doors, which is based on a mark 4 Golf! As the
description says, think of it as very sticky plasticene.
|
|
|
avagolen
|
| posted on 5/8/12 at 03:30 PM |
|
|
Hi All,
Thanks for your comments.
I did consider the 'structural' effect but it was Steve at Fury SC that said about one panel being screwed on
so I gave them the benefit of the doubt and did the same.
I have seen carbon fibre panels fitted but with only a few rivets, so what structural contribution are they adding?
Claire, as regards to your 'slotted rivet holes', I am suprised but hopefully because I have 'large holes' sitting snug
around the heads of the rivnuts, there should be a lot of resistance to wear at those points.
The clamping effect of the socket head bolts and repair washers should be good as long as the bolts do not become loose.
Something I must keep an eye on during maintenance checks.
I do not mind if the draught excluder spong becomes sticky and rubbish as long as it keeps the water and grit from
getting into the joins. I have the butile stuff in the front edge of the drivers panel and have used it to seal my bodyshell
to the chassis - nothing else except for socket head bolts.
Pjay, I will make the top tunnel panel in the normal way, but use 25mm angle ali' to create the corners similar to
what I have done on the outer edges of the compartments, with the exception that there will be screws on both faces.
This should keep everything nice and stiff.
I do not want the panels vibrating creating unwanted wear and fatigue.
side_panel_trim
The radius on this example is only 2mm at the moment, aiming for 2.5 mm for the SVA standard.
Len.
[Edited on 5/8/12 by avagolen]
The Answer for everything, but never the last word....
|
|
|
avagolen
|
| posted on 5/8/12 at 03:58 PM |
|
|
Hi Claire,
Just a question about your handbrake.
Is it inside the tunnel or outside it in the passenger area?
I cannot tell from any pictures in your photo archive.
I always feel that if something is bolted in, there should be a way
of getting to the bolts for checking etc. if you see what I mean..
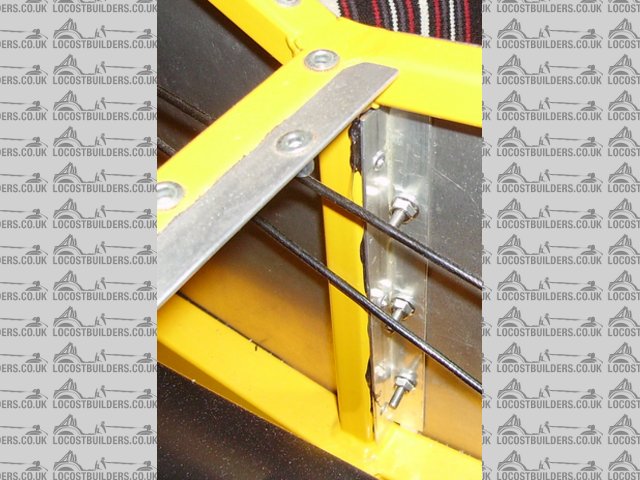
Handbrake_top_bolt
Len.
[Edited on 5/8/12 by avagolen]
The Answer for everything, but never the last word....
|
|
|
GOJO
|
| posted on 5/8/12 at 04:06 PM |
|
|
Is the draft excluder the foam style? If so if it gets wet it will hold water and accelerate corrosion??
|
|
|
clairetoo
|
| posted on 5/8/12 at 04:14 PM |
|
|
Mine is the Mk2 escort handbrake , so the lever and mechanism is outside the tunnel , but the bolts holding it are inside .
Its cuz I is blond , innit
Claire xx
Will weld for food......
|
|
|
avagolen
|
| posted on 5/8/12 at 06:30 PM |
|
|
Hi GoJo,
I think it is sponge, but hopefully closed cell.
I do not have any left over to test.
The butyl stuff is closed cell, so that is OK.
Thanks Claire.
Len.
[Edited on 5/8/12 by avagolen]
The Answer for everything, but never the last word....
|
|
|