ChrisL
|
| posted on 9/1/13 at 07:47 AM |

|
|
Engine mounts advice
Hi, I'm making some new engine mounts, as the tiger ones have failed (see photo archive). Just wondering if anyone has some advice, tips,
pitfalls to avoid etc...?
|
|
|
|
|
Alfa145
|
| posted on 9/1/13 at 09:12 AM |
|
|
Loggyboys post on this thread has some good pics, I will be copying that design too when I get round to it.
http://www.locostbuilders.co.uk/viewthread.php?tid=175965
|
|
|
ChrisL
|
| posted on 9/1/13 at 09:30 AM |
|
|
I was planning on following the Loggyboy design as it doesn't seem to have any obvious weak spots, unlike the tiger ones!
|
|
|
loggyboy
|
| posted on 9/1/13 at 09:56 AM |
|
|
Whlst I would love to claim credit for the design, I merely copied the Raw items, just made them myself for a fraction of the cost!
Mistral Motorsport
|
|
|
neilp1
|
| posted on 9/1/13 at 10:25 AM |
|
|
quote:
Originally posted by ChrisL
Hi, I'm making some new engine mounts, as the tiger ones have failed (see photo archive). Just wondering if anyone has some advice, tips,
pitfalls to avoid etc...?
I would just copy the tiger ones, but use heavier plate 6mm as the 3mm plate is way too light.
|
|
|
loggyboy
|
| posted on 9/1/13 at 12:01 PM |
|
|
quote:
Originally posted by neilp1
I would just copy the tiger ones, but use heavier plate 6mm as the 3mm plate is way too light.
It seems they are pretty fundamentally floored though, by not having the load centrally on the mount.
Mistral Motorsport
|
|
|
JF
|
| posted on 9/1/13 at 12:04 PM |
|
|
You could even repair your current tiger ones. Just add a pair of gussets from the piece of tubing on either side of the broken plate. You simply need
to transfer the bending load.
New ones will be easy to make as well. Just add gusset plates in the right places or build it the agricultural way... Thick and heavy.
|
|
|
britishtrident
|
| posted on 9/1/13 at 01:54 PM |
|
|
quote:
Originally posted by JF
You could even repair your current tiger ones. Just add a pair of gussets from the piece of tubing on either side of the broken plate. You simply need
to transfer the bending load.
New ones will be easy to make as well. Just add gusset plates in the right places or build it the agricultural way... Thick and heavy.
Yes the Tiger ones just need a new bottom plate and an extended gusset at either side of tube to take the bending moment off the plate.
[I] What use our work, Bennet, if we cannot care for those we love? .
― From BBC TV/Amazon's Ripper Street.
[/I]
|
|
|
umgrybab
|
| posted on 9/1/13 at 08:23 PM |
|
|
SAE rules insist that bolted tubes used for mounting as in this scenario have at least one continuous tube to the point of mounting. They then have a
diagram similar to loggyboy's mounts. The majority of the other mounts in that thread look under built and as though they could suffer the same
fate as your old one.
|
|
|
JF
|
| posted on 9/1/13 at 09:04 PM |
|
|
quote:
Originally posted by umgrybab
SAE rules insist that bolted tubes used for mounting as in this scenario have at least one continuous tube to the point of mounting. They then have a
diagram similar to loggyboy's mounts. The majority of the other mounts in that thread look under built and as though they could suffer the same
fate as your old one.
Now actually haven taken the time to look at that link... And yes I must say loggy's mounts look pretty nice. But don't really agree with
you bab. Although I don't really like the look of Big_wasa's mounts as those are seriously small gussets. But they're still
significantly stronger then the tiger mount shown by Chris, as having much more thickness (double) and some form of gussets. Bigger gussets would
seriously improve the design.
But in the same post wasa also shows us a pic of mounts made by Muzchaps which are properly designed and made from the looks of it. Practically no
bending force there. Certainly strong enough if you look at the materials used.
Scutter's seem to be about the same design, although I can't really get a clear look on the pics. They seem a fair bit thinner though and
the offside seems a bit longer then needed.
And finaly FuryRebuild refers to his blog on how he redid his. Totally different approach to the problem, he more or less used suspension points as
engine mounts. Again pretty strong construction. Only real weakness I spot on the pics are the chassis plates bending under braking/collision, but he
says he's adding further plates to take those forces as well.
So as far as I can see there is only one design in that thread which is similar to the tiger design, and thus weak to the same failure. Although
it's still a lot stronger then the original tiger one. I quite like the design Fury did, although it's probably quite a bit stiffer then
the others. Biggest downside of Muzchaps to me is that the tube is left open, so expect some brown stuff over time, but you could blank of the end to
counter that. Loggy's design has the about the same thing... open ended tubing. Hard to paint, and this time the open end is up. So any water
that makes it's way there will stay there. But then again... how much water will these cars see in their life? 
|
|
|
loggyboy
|
| posted on 9/1/13 at 09:52 PM |
|
|
quote:
Originally posted by JF
Biggest downside of Muzchaps to me is that the tube is left open, so expect some brown stuff over time, but you could blank of the end to counter
that. Loggy's design has the about the same thing... open ended tubing. Hard to paint, and this time the open end is up. So any water that makes
it's way there will stay there. But then again... how much water will these cars see in their life?
Very easy to powdercoat them, and not hard to paint, the hole is only an inch or so and with a harsher radius could nearly be made non existent. Pop
the hood on any tintop and you'll see loads of water/mud traps that cause no issues.
Mistral Motorsport
|
|
|
JF
|
| posted on 9/1/13 at 10:03 PM |
|
|
quote:
Originally posted by loggyboy
Very easy to powdercoat them, and not hard to paint, the hole is only an inch or so and with a harsher radius could nearly be made non existent. Pop
the hood on any tintop and you'll see loads of water/mud traps that cause no issues.
Very true, and not a major problem. Just the only thing I don't like about that design. Although I must say quite a few tintops do have rust
problems due to mud traps/buildup.
Personally I do a lot of work on supports and mounts on trucks and there this would be a big nono. Simply because even a well designed part can easily
suffer from rust. Most cases it's just that it looks crappy when it's brown and rusty. Usually not much problems with the parts actually
rusting through or anything. But then again that is often in the open on a truck that spends 5-15 years, 10 hours a day, 5 days a week on the road in
all weather. And more often then not parked outside when not in use.
Not really conditions most kitcars will have to face.
|
|
|
coozer
|
| posted on 10/1/13 at 10:06 PM |
|
|
Heres mine...

1972 V8 Jago
1980 Z750
|
|
|
ChrisL
|
| posted on 19/1/13 at 07:11 PM |
|
|
Cheers for the advice chaps. I would have responded sooner but didn't gat any emails to say there'd been posts!
I've decided to not repair the tiger ones as they're too short, the engine leans and the bloke who build the car used about 1 cm of
washers to prop up one of the rubbers, so I want to do it properly (well try too!)
Good point re a water trap, I think that I'll weld a nut in and have the tube come all the way down to the plate rather that have the upright
tube. So far I've made the plates for the engine block. Tomorrow I'll do the tubes...
|
|
|
ChrisL
|
| posted on 1/2/13 at 10:24 AM |
|
|
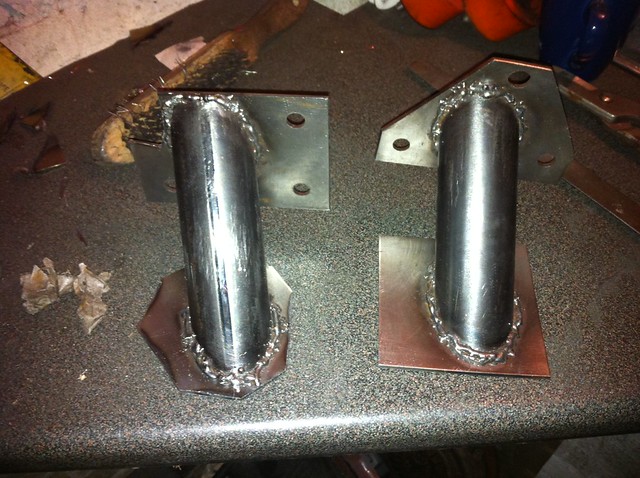
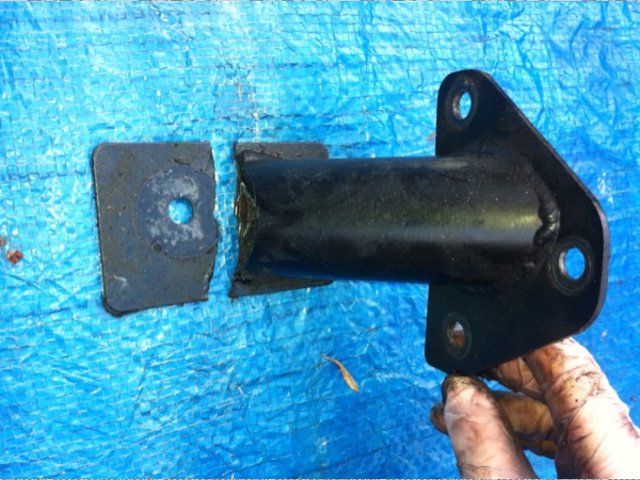
Here we go:
New engine mounts, OK the weldings not great, with hindsight I thing the wire speed was too high, that said I think they are strong enough, time will
tell. Deviated from the original design as I didn't was to create a water pool, so have welded the top nut in. Also the reason one of the bottom
plates looks like a dogs dinner is it needed reducing in size to avoid a brake line and I err ahem go a bit carried away without actually looking at
the shape of it, I can cut it to the shape of the rubber underneath (round) as the down tube just goes outside it. So I stopped whist it just looked
dodgy before I cut something off that I needed! Luckily it sits underneath the exhaust / water pump so it's not going to irk me every time
I'm in the engine bay!
|
|
|
neilp1
|
| posted on 1/2/13 at 10:50 AM |
|
|
More juice required i would say. Lack of fusion
If it was me i'd grind the weld off and reweld after some practise.
|
|
|
ChrisL
|
| posted on 1/2/13 at 02:00 PM |
|
|
You could be right, had the welder at full power, only 100 amp so probably on it's limit, although when I dropped the power down, it
didn't seem to make much difference, hence coming to the conclusion that it must have been wire speed.
Seems pretty solid though...
|
|
|
loggyboy
|
| posted on 1/2/13 at 02:27 PM |
|
|
I had a similar issue on my mounts using a 90amp welder. I ground them back down after the first sweep and went again just to be sure. They seem ok,
but like you say only time will tell. If they fail it will be an excuse to buy a better welder!
Mistral Motorsport
|
|
|
jps
|
| posted on 1/2/13 at 04:34 PM |
|
|
quote:
Originally posted by ChrisL
Here we go:
New engine mounts, OK the weldings not great, with hindsight I thing the wire speed was too high, that said I think they are strong enough, time will
tell. Deviated from the original design as I didn't was to create a water pool, so have welded the top nut in. Also the reason one of the bottom
plates looks like a dogs dinner is it needed reducing in size to avoid a brake line and I err ahem go a bit carried away without actually looking at
the shape of it, I can cut it to the shape of the rubber underneath (round) as the down tube just goes outside it. So I stopped whist it just looked
dodgy before I cut something off that I needed! Luckily it sits underneath the exhaust / water pump so it's not going to irk me every time
I'm in the engine bay!
What thickness plate have you used there? I am about to make some, with 40mm box and a choice of 3mm plate or 6mm plate - don't know which to go
with...
|
|
|
ChrisL
|
| posted on 1/2/13 at 04:41 PM |
|
|
quote:
Originally posted by jps
quote:
Originally posted by ChrisL
Here we go:
New engine mounts, OK the weldings not great, with hindsight I thing the wire speed was too high, that said I think they are strong enough, time will
tell. Deviated from the original design as I didn't was to create a water pool, so have welded the top nut in. Also the reason one of the bottom
plates looks like a dogs dinner is it needed reducing in size to avoid a brake line and I err ahem go a bit carried away without actually looking at
the shape of it, I can cut it to the shape of the rubber underneath (round) as the down tube just goes outside it. So I stopped whist it just looked
dodgy before I cut something off that I needed! Luckily it sits underneath the exhaust / water pump so it's not going to irk me every time
I'm in the engine bay!
What thickness plate have you used there? I am about to make some, with 40mm box and a choice of 3mm plate or 6mm plate - don't know which to go
with...
Funnily enough I'm doing the research now!
It's 3mm plate as that's what the old ones were, yes they failed but because of a design error rather that the plate being too thin
|
|
|
loggyboy
|
| posted on 1/2/13 at 04:59 PM |
|
|
quote:
Originally posted by jps
What thickness plate have you used there? I am about to make some, with 40mm box and a choice of 3mm plate or 6mm plate - don't know which to go
with...
I used 5mm plate for the flanges, and 3mm walled, 37mmdiameter tube.
Whilst the 3mm was insufficient for the original design of the Tiger mounts, 3mm would be adequate if the design is not in the same amount of sheer as
the tiger ones.
Mistral Motorsport
|
|
|
ChrisL
|
| posted on 2/2/13 at 01:01 PM |
|
|
The new design avoids the obvious stress points, heres a couple of pics of the old ones:
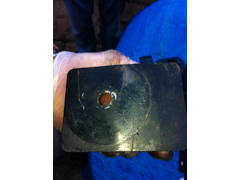 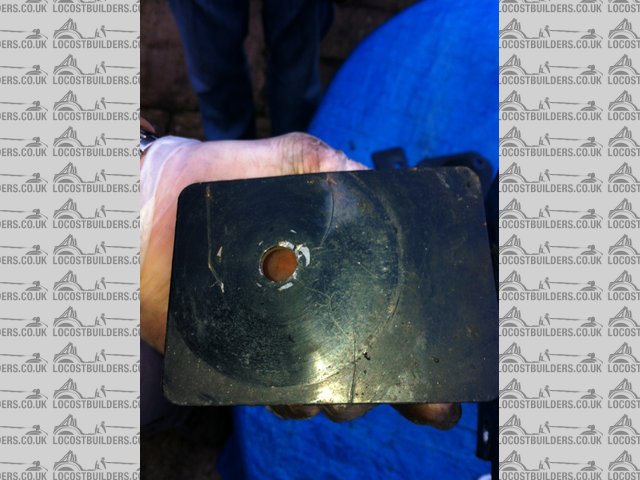
Description
and
Description
|
|
|
ChrisL
|
| posted on 3/2/13 at 08:50 PM |
|
|
So I've bought a 150 amp welder, with a view to redoing the mounts. Was using my 100 amp welder today and realised that I hadn't switched
into high mode (that's why switching between the 2 high power outputs made no difference!), so I never really used max power grrr so my existing
welder may well have been good enough!! Oh well I got a more powerful welder out of it!!!
|
|
|