JeffJeffers
|
| posted on 15/1/14 at 10:33 PM |

|
|
MK Indy engine change
My car is away having a propshaft made. So I thought I would spend some time and start a build thread.
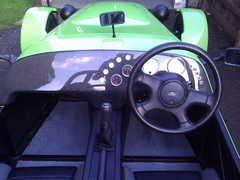
I finished the car originally about 2 years ago. I built it with a 2.0l Zetec engine with standard Ford ECU. After 2 years of driving I decided I
wanted a bit more power and the best way to do this would be an Hayabusa engine.
Here is a video of a track day I did last year at Blyton Park.
http://youtu.be/33_m3cjcXm4
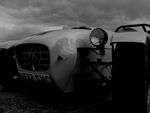
This is the week before I started the project.
 
before
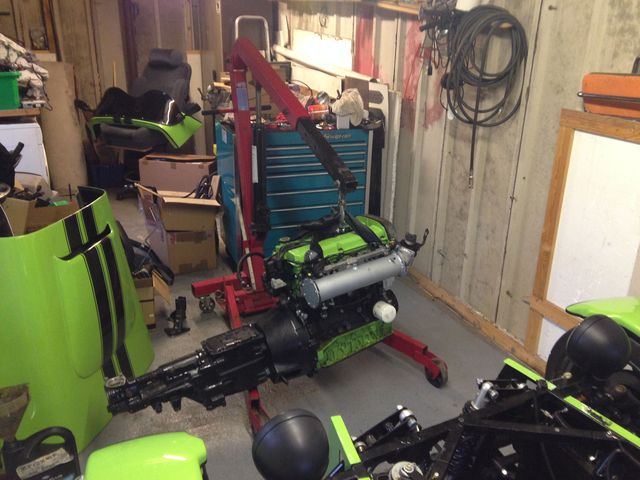
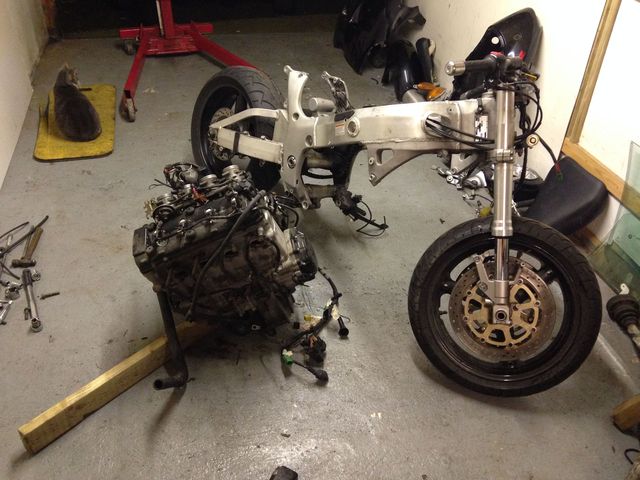
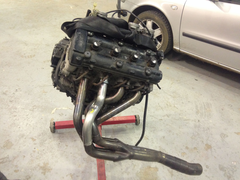
So the hunt began for a Hayabusa engine. I decided the best thing to do was to buy a complete bike and try to make some money back by selling some of
the unneeded parts.
After a trip to Solihull I returned with this
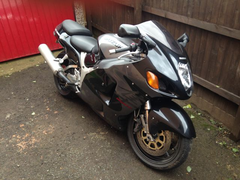 
The engine
I must admit the selling of parts is a little slow but I'm sure they will go eventually.
|
|
|
|
|
JeffJeffers
|
| posted on 15/1/14 at 11:04 PM |
|
|
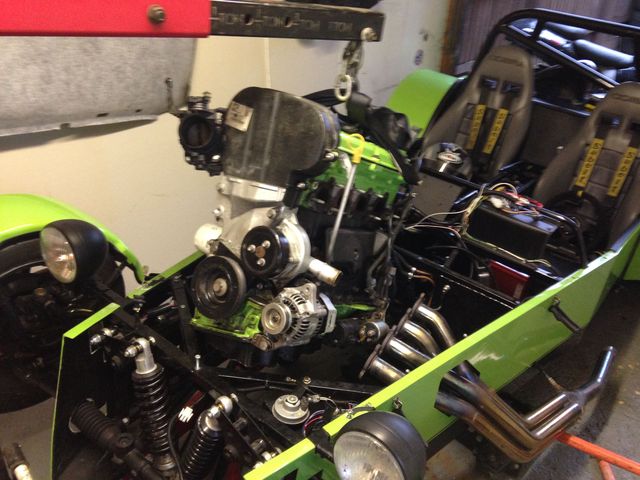
1st job was to take the, not so old, engine out.
Description
Description
Description
Description
Space for a nice new engine.
Description
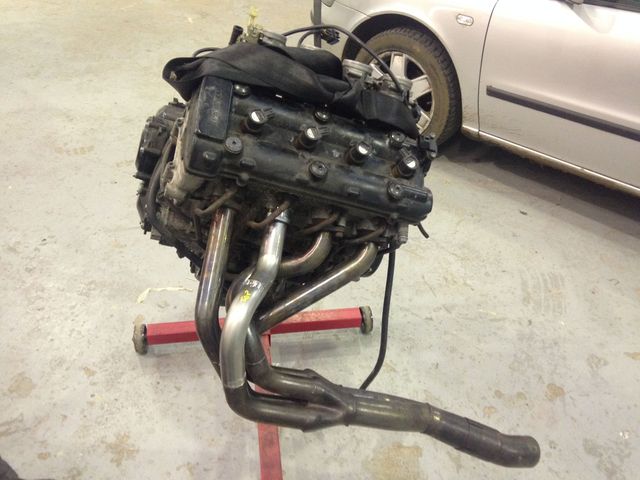
Next job was to take the engine out of the bike.
 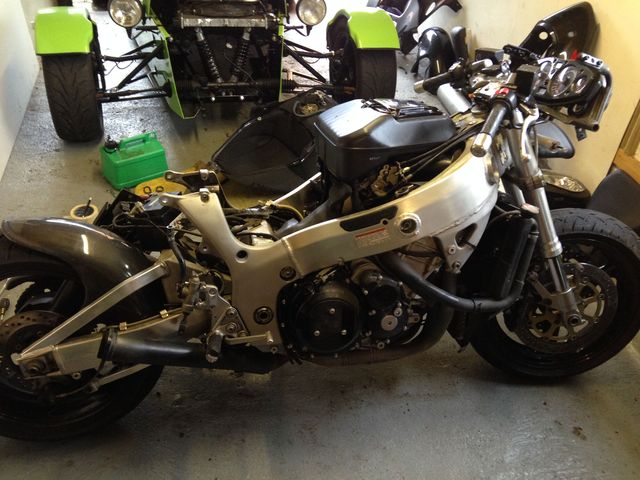
Description
 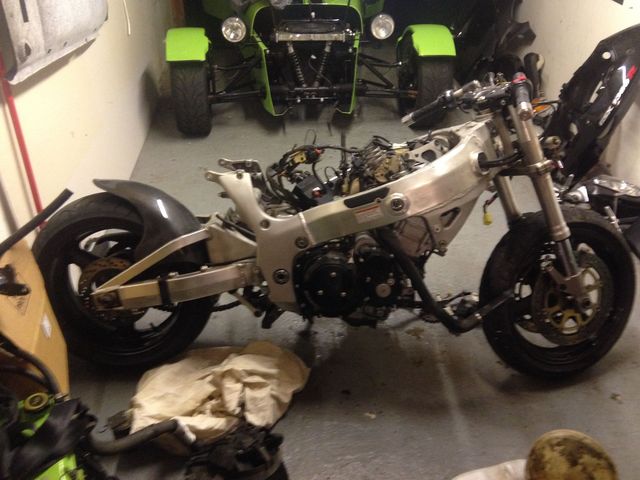
Description
Not the hardest job ever. The worse part was trying to get the bolts out that held the engine in place. I had to adapt a socket or two for the job.
 
Description
Engine out and ready to go
Description
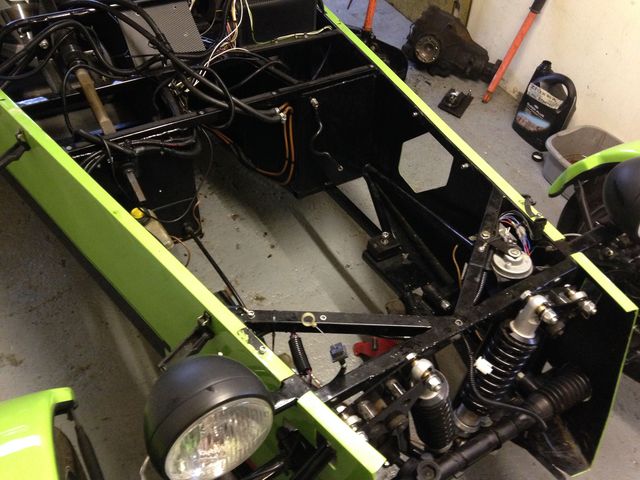
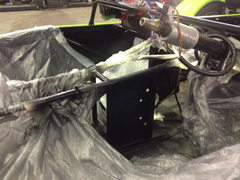
After a trip to MK I returned with an engine cradle. Which I had to weld in place. I'm not the best welder in the world but it is amazing what a
grinder and some paint can hide.
 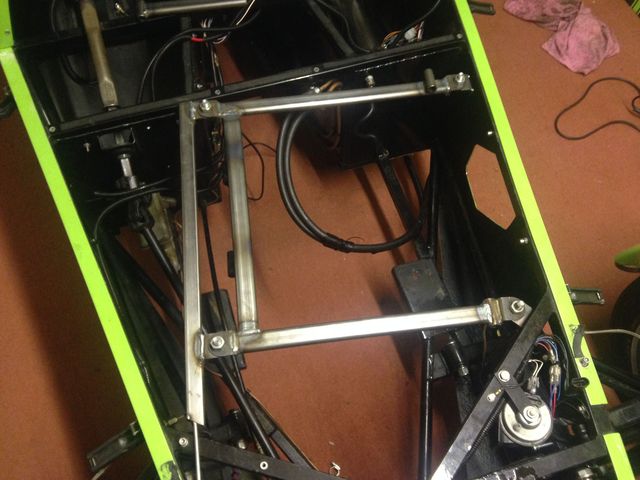
Description
Here is everything tacked in place to check it all fits.
Description
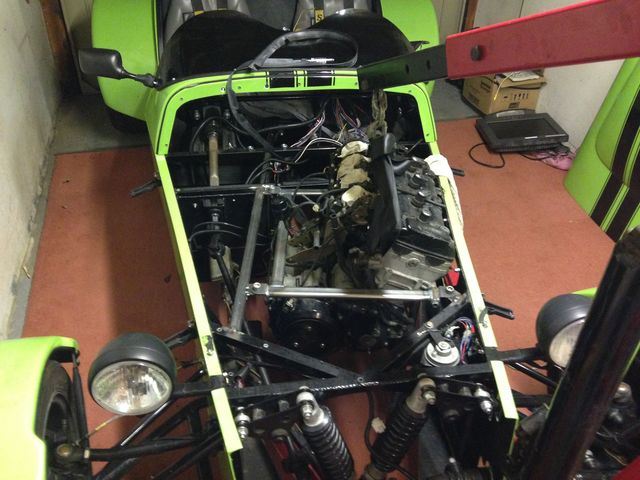
After I finished the welding it all needed painting
Description
Description
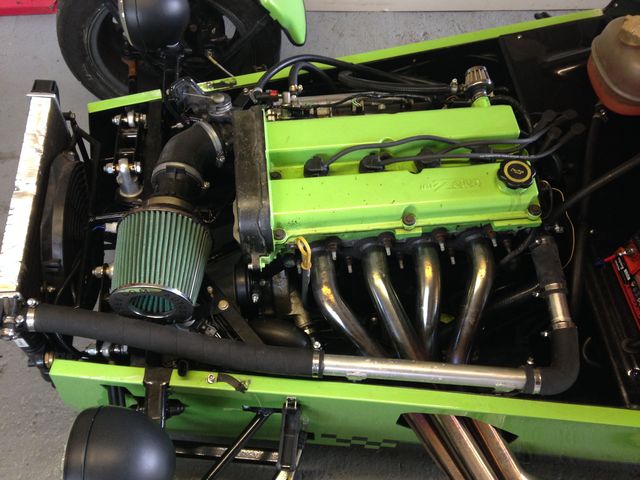
And here is the engine in place.
 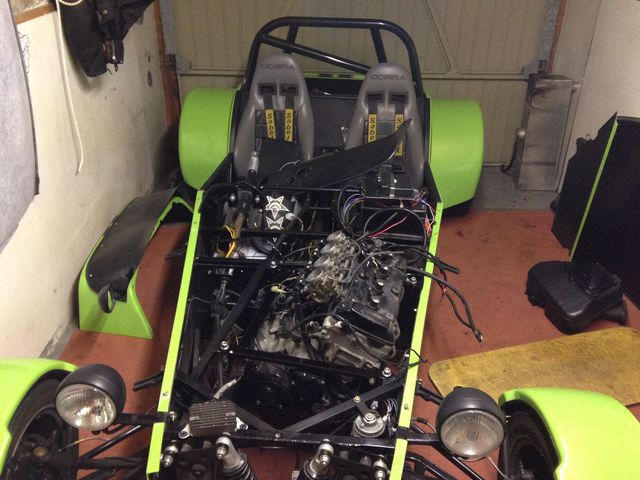
Description
|
|
|
Simon
|
| posted on 15/1/14 at 11:07 PM |
|
|
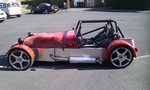
Nice bike - had mine (identical to that, but with seat hump) for nearly 6 years, sold about 7 years ago 
Good luck with the project
ATB
Simon
|
|
|
daveb666
|
| posted on 16/1/14 at 12:36 AM |
|
|
Hi Jeff,
How much was the cradle?
2007bc Photography - Commercial and Wedding Photographer based in West Yorkshire
http://www.2007bc.co.uk / http://www.huddersfieldcommercialphotographer.co.uk
|
|
|
yellowcab
|
| posted on 16/1/14 at 10:14 AM |
|
|
Subscribing to this thread and watching with interest 
Which bit did you weld in?
I only ask because mine is bolted in, and that's how I remove the engine, just by unbolting cradle from chassis and picking it up using that, as
it's easy to hold. Also I can see bolts in a similar position to where mine is bolted in
Keep up the photos and progress updates
|
|
|
CosKev3
|
| posted on 16/1/14 at 12:39 PM |
|
|
Great pics and start to your thread
Ollie it's the bar from the drivers bulkhead above master cylinder to diagonal top chassis bar, if you look in above pics its unpainted in some

just done the same to my project
Will start a thread soon
[Edited on 16/1/14 by CosKev3]
|
|
|
yellowcab
|
| posted on 16/1/14 at 03:46 PM |
|
|
Ahh yes - that'll teach me for looking on my phone (my eyes aren't what they used to be)
|
|
|
JeffJeffers
|
| posted on 16/1/14 at 08:42 PM |
|
|
quote:
Originally posted by daveb666
Hi Jeff,
How much was the cradle?
I can't 100% remember but I think it was £150.
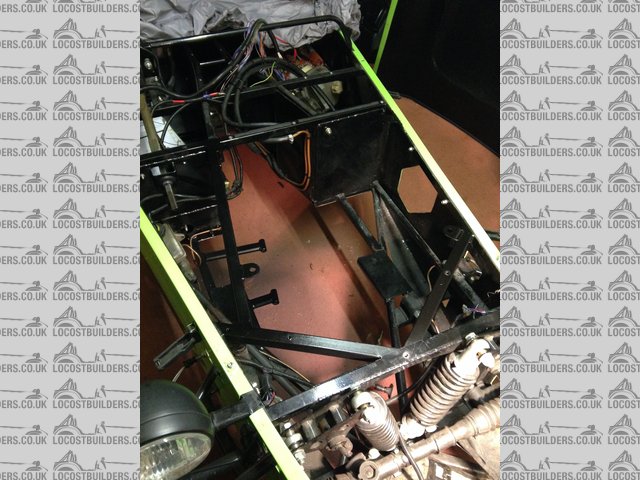
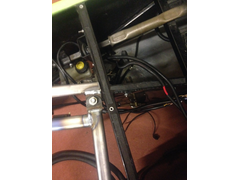
As 'CosKev3' said I had to weld the cross bar on the drivers side and the tabs for the cradle to sit on.
Description
 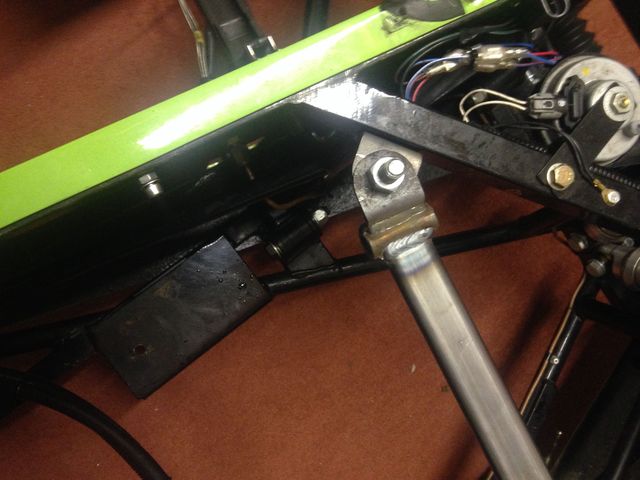
Description
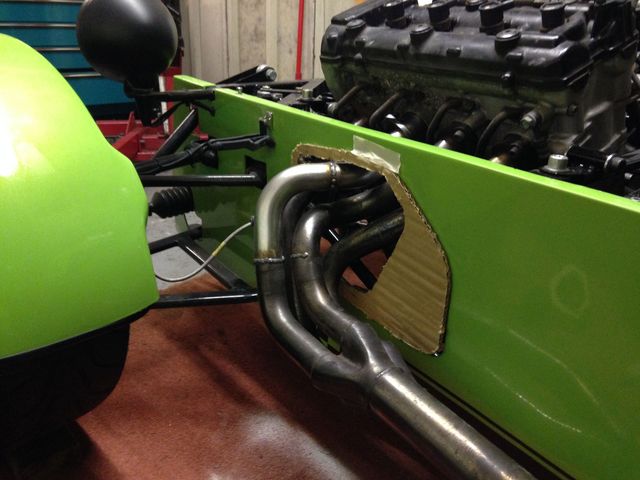
On one of my trips to MK I returned with a damaged Hayabusa exhaust manifold. I think it had been in an accident and part of one of the ports was
missing. As my welding skills aren't up to much I decided to take the engine and manifold to work to get one of the mechanics to do it for me. I
left him alone for 30 min and when I returned he had already fixed it.
Description
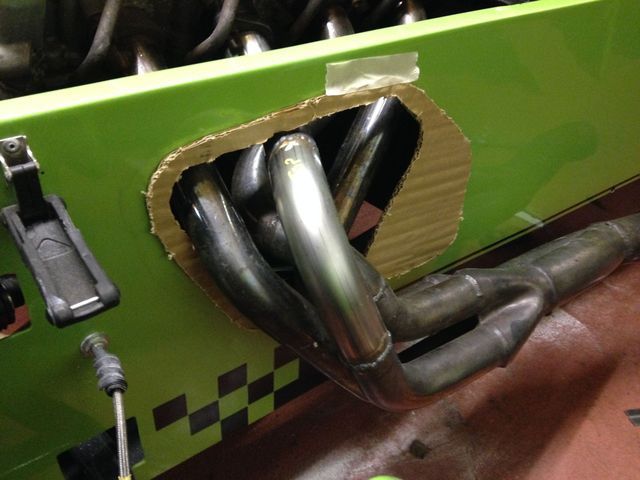
So the next job when I got home was to cut a bigger hole in my bodywork for the newly repaired manifold to fit through. I decided the best way to do
this would be to make a cardboard template. After that I drew it roughly on the side panel and set about cutting it out with a Dremel.
 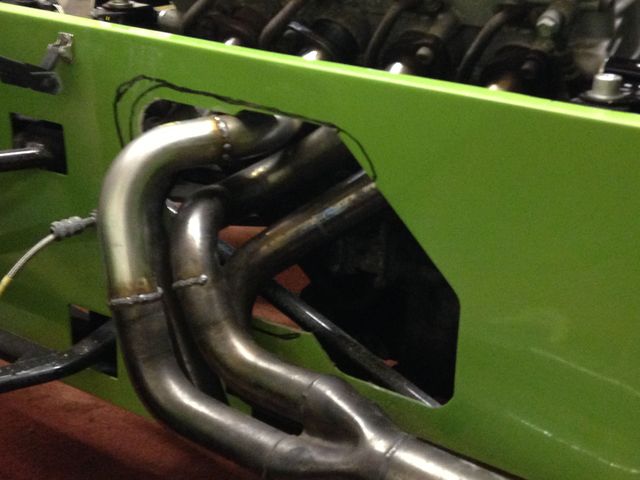
Description
I tidied up the hole with a file. I do now have a large hole because the old Zetec exhaust was much further back. I think i will try to cut a plate
out of something as a trim piece. I used my cardboard template to see what that would look like.
Description
Description
I just need to decide the best thing to use to make the trim panel and the best way to cut it out.
|
|
|
yellowcab
|
| posted on 16/1/14 at 08:48 PM |
|
|
Great update Jeff, my wider side panels on my car are just bent piece of aluminium, 2mm thick, wrapped in the cars original colour
|
|
|
CosKev3
|
| posted on 16/1/14 at 09:09 PM |
|
|
What have you done for mounting your centre bearing on propshaft?
I would consider making new side panels like yellowcabs, if you can find a good colour match.
as imo the stepped out side panels look the bollox B)
|
|
|
JeffJeffers
|
| posted on 22/1/14 at 11:39 PM |
|
|
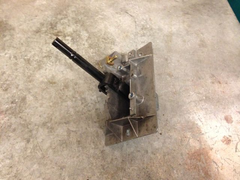
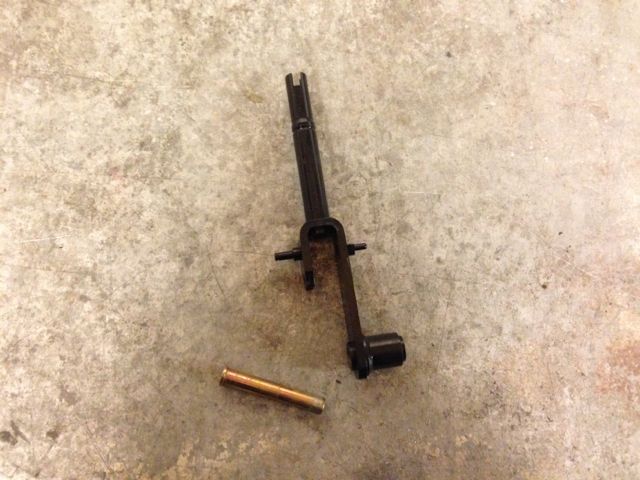
Ok next job was to make a gear lever. I managed to get an old lever from an automatic BMW E36.
Description
All I really wanted was the pivot part.
Description
After attacking it with a hack saw I cut a piece of threaded bar to attach the gear knob. I need to add a piece to the bottom to be able to attach the
gear change cable.
 
Description
 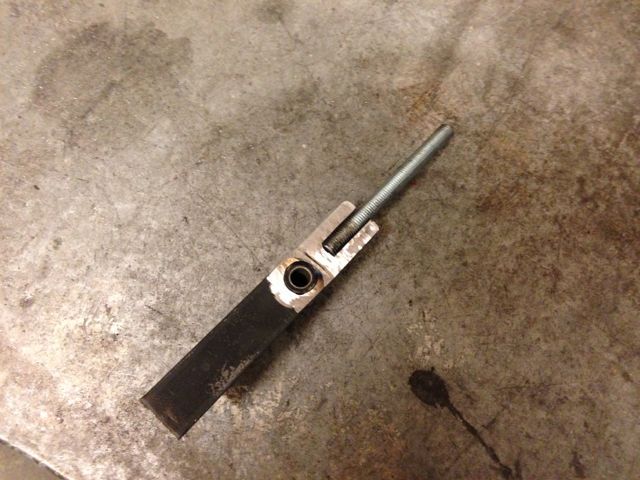
Description
I welded it all together and I have a functioning gear lever. All that is left is to tidy it up and paint it. I will check it works 1st.
 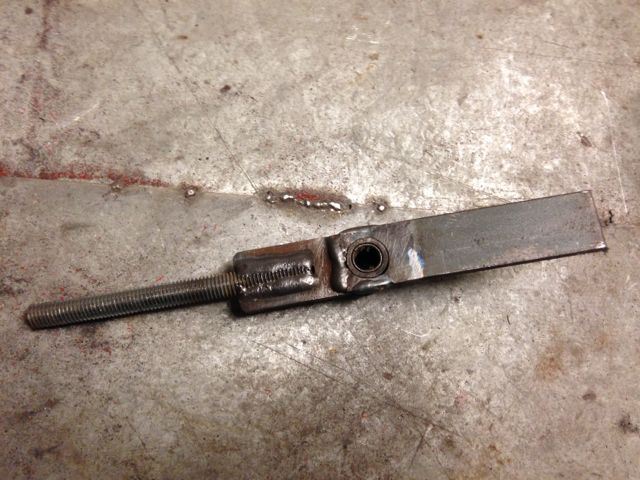
Description
 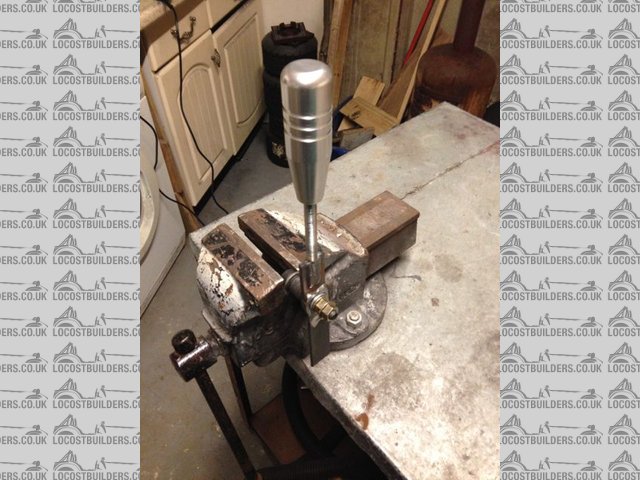
Description
While I had the welder out I welded a bolt on the chassis for the gear lever to bolt to.
 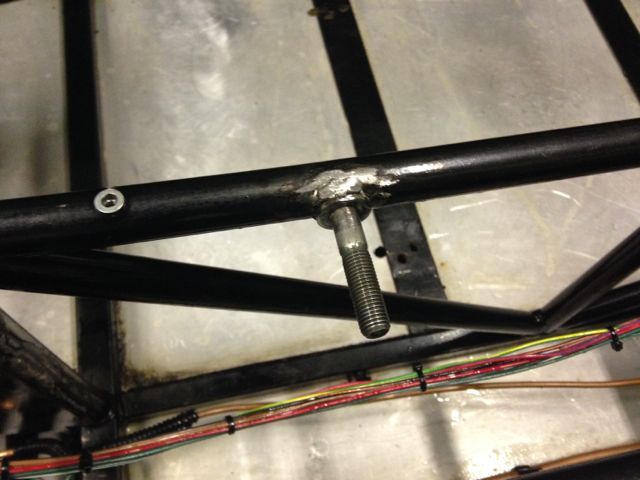
Description
[Edited on 22/1/14 by JeffJeffers]
|
|
|
JeffJeffers
|
| posted on 22/1/14 at 11:42 PM |
|
|
quote:
Originally posted by CosKev3
What have you done for mounting your centre bearing on propshaft?
I would consider making new side panels like yellowcabs, if you can find a good colour match.
as imo the stepped out side panels look the bollox B)
I have got a plate to weld in the tunnel to mount the propshaft. When I get it in place I will post some pictures.
|
|
|
JeffJeffers
|
| posted on 23/1/14 at 10:52 PM |
|
|
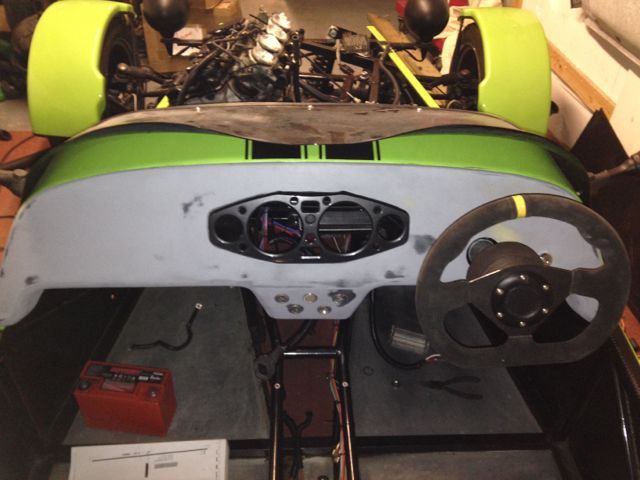
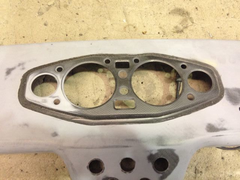
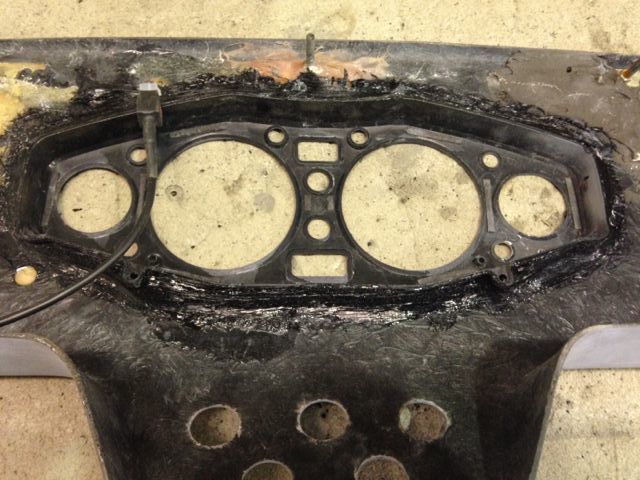
I have decided to use the Hayabusa clocks. I didn't want to buy a new dash panel. So the only other choice is to modify the old one. I used some
P40 fibre glass to fill in the holes from the old dials. As I was going to need to paint the dash I thought it might look good if I moulded the clocks
and dash together.
I cut a hole for the dash panel so the clocks fit snug.
This is how my dash used to look.
dash
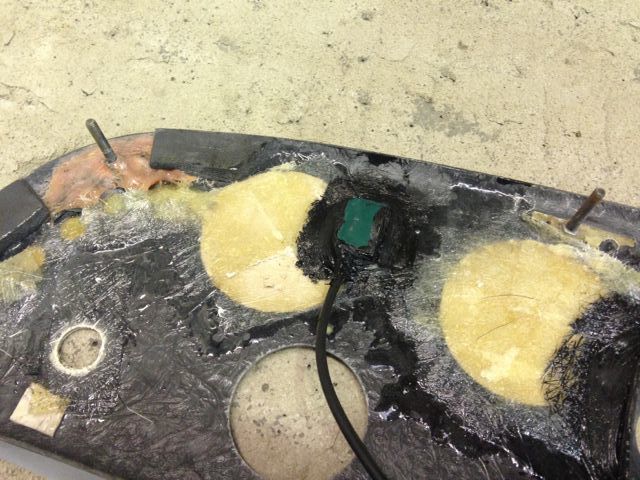
Here it is with the Hayabusa clocks resting in.
Description
I wasn't sure the best way to glue the clocks in the dash. Working at a garage with a bodyshop I decided the best thing to do was to ask one of
the painters. We decided window bond would be best as it sticks like s*** to a blanket. The best bit was he said to leave it with him and he would
sort it.
He has now been working on it for about 3 weeks in his lunch hour and it looks awesome.
Description
Description
Description
Description
 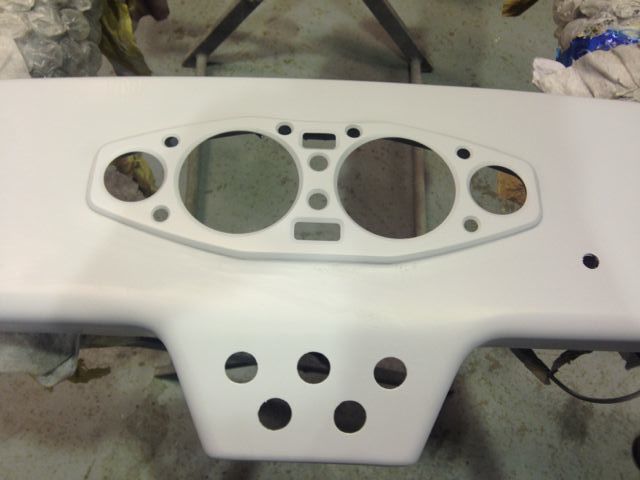
Description
|
|
|
JeffJeffers
|
| posted on 29/1/14 at 08:52 PM |
|
|
Tried to get the clutch sorted today but it didn't go well.
I started by mounting the new master cylinder on the bulk head.
 
Description
Next I fitted the pipe from the master cylinder to a Westfield slave cylinder. After I had bleed the system i gave the clutch a try. After a few
presses the pedal seemed to lock and I couldn't push it down.
After some head scratching I decided to take the clutch housing apart to see what was happening.
I found the end clutch plate had come out the clutch basket and had turned slightly causing the clutch to lock.
I refitted the clutch disc and tried the clutch. The end clutch plate is going outside the end of the clutch basket.
Description
Is the clutch meant to go this far or do I need to put a stop on the pedal?
|
|
|
Nick DV
|
| posted on 30/1/14 at 11:37 AM |
|
|
Definitely use a pedal stop
"The force will be with you, always!"
|
|
|
JeffJeffers
|
| posted on 2/2/14 at 11:06 AM |
|
|
One of my jobs today is to fit my billet sump. I have taken the old sump off. There is a tube that hangs down lower than the new sump. Do i Just leave
it off or do I cut it shorter?
Description
|
|
|
daniel mason
|
| posted on 2/2/14 at 11:28 AM |
|
|
did you not get the swinging pickup one in the end?
|
|
|
danny keenan
|
| posted on 2/2/14 at 11:31 AM |
|
|
Hi James cut it shorter so the pick up swings past it,the steal pipe is the return back to the sump
Thanks Danny
|
|
|
JeffJeffers
|
| posted on 2/2/14 at 06:34 PM |
|
|
Thanks Danny great help as always.
quote:
Originally posted by daniel mason
did you not get the swinging pickup one in the end?
I had already bought the billet sump. I was enquiring about the Westfield dry sump because I thought I had been offered one cheap but changed my mind.
Got a little bit done today but not as much as I had hoped. As always I forgot to take any pictures, not that much looks different.
I'll try to take some pictures tomorrow and write a bit of an update.
|
|
|
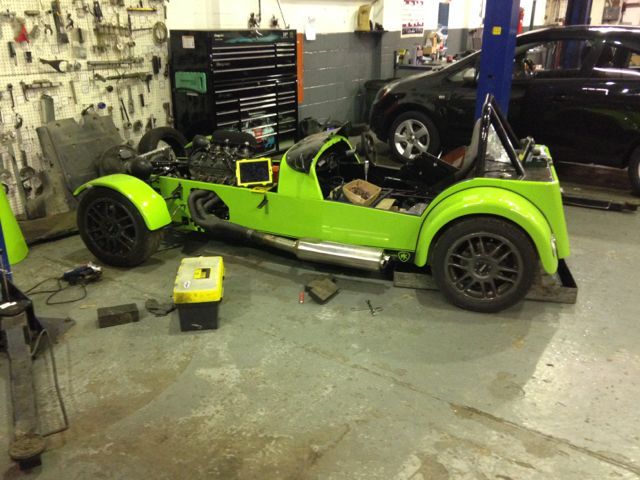
JeffJeffers
|
| posted on 15/2/14 at 08:33 PM |
|
|
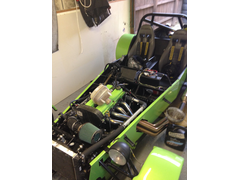
It has been a while since my last update. My biggest problem is remembering to take pictures of what I'm doing.
I sorted my clutch problem out by fitting a clutch pedal stop.
 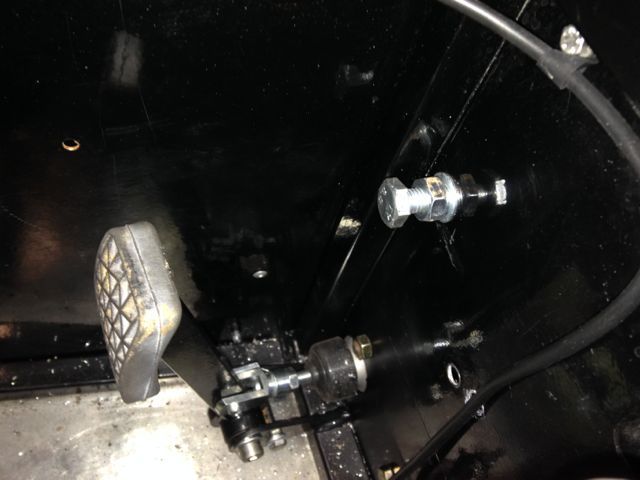
Description
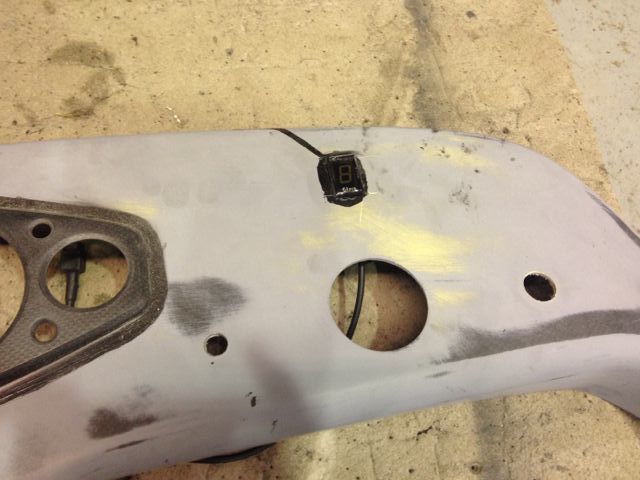
While I was on the clutch I made my self a clutch pedal switch.
 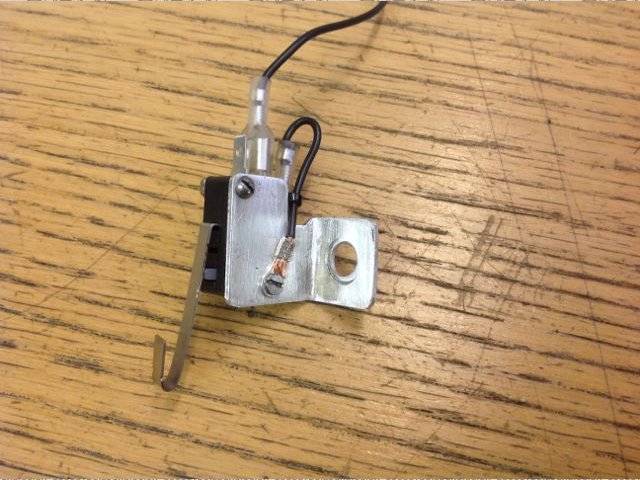
Description
 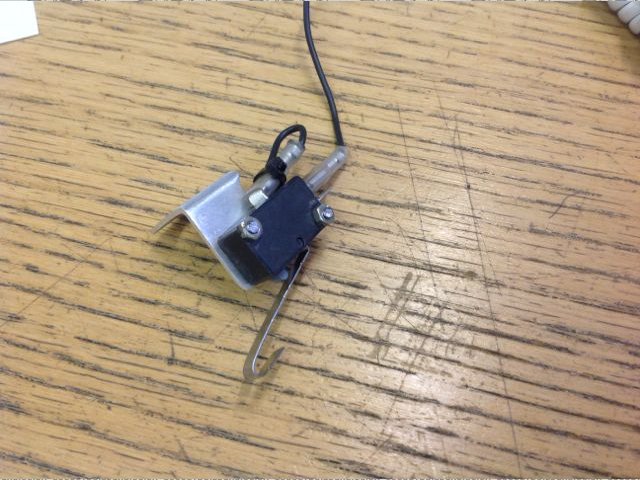
Description
Like I said I didn't think to take a picture with the pedal switch fitted.
A few weeks ago now I collected my propshaft.
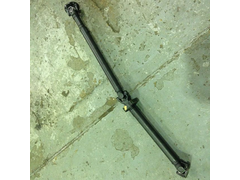 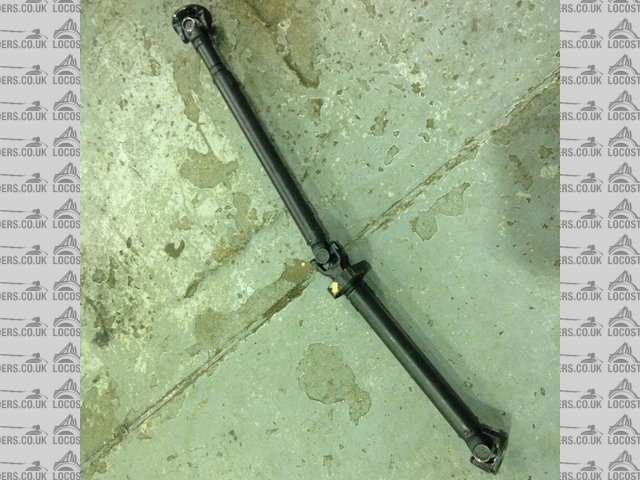
Description
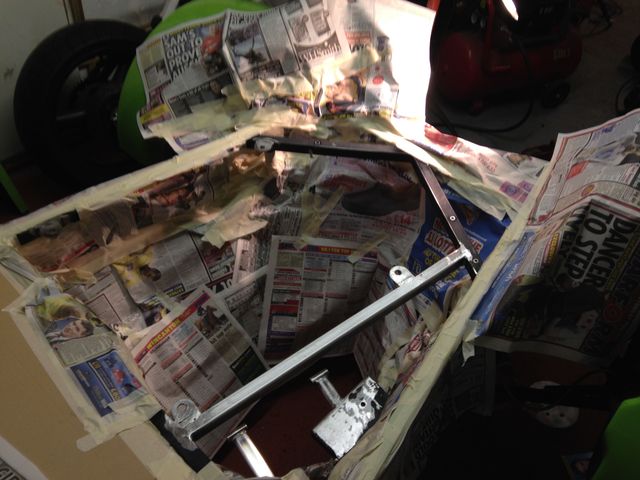
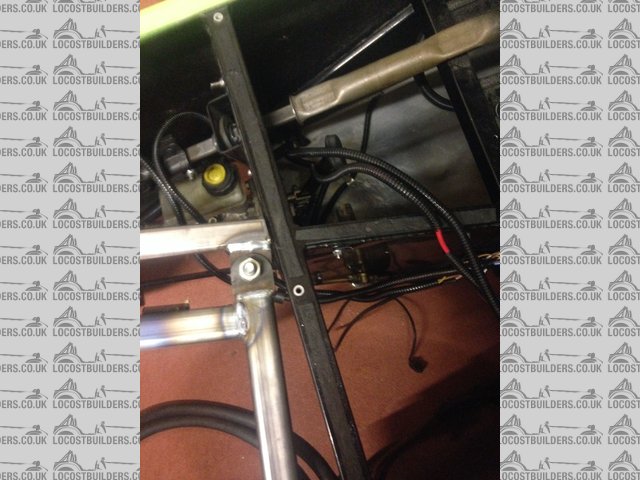
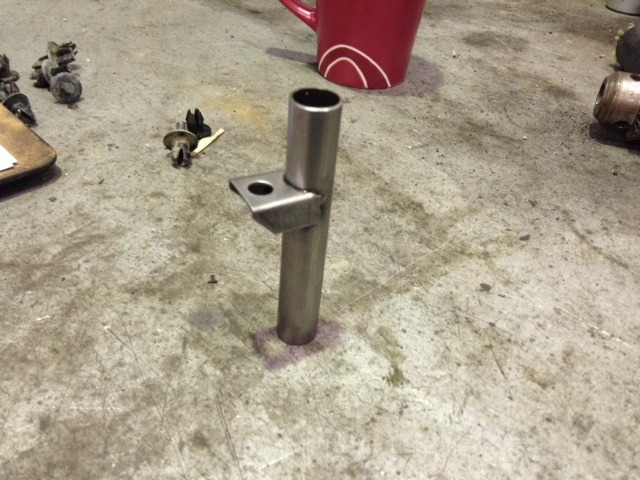
Before I could mount the propshaft I had to weld a plate in the tunnel to bolt the centre bearing to.
 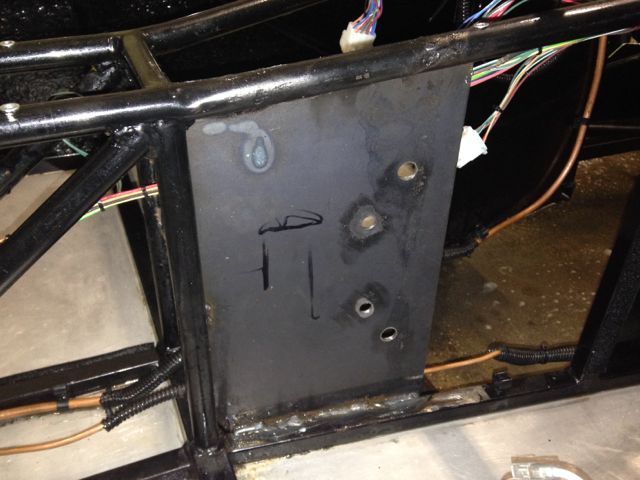
Description
Description
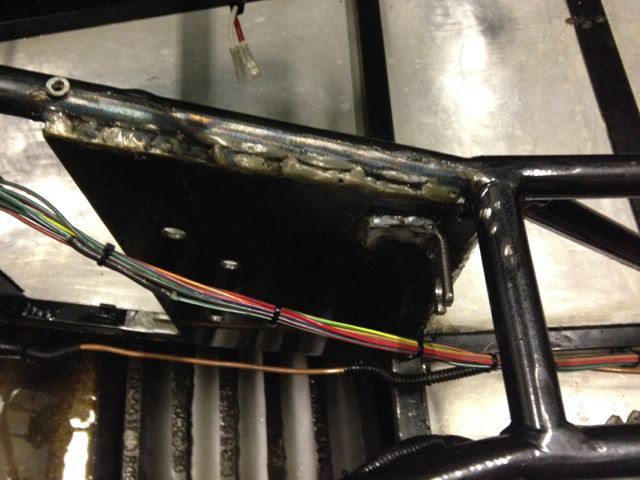
A touch of paint later and that job was finished
Description
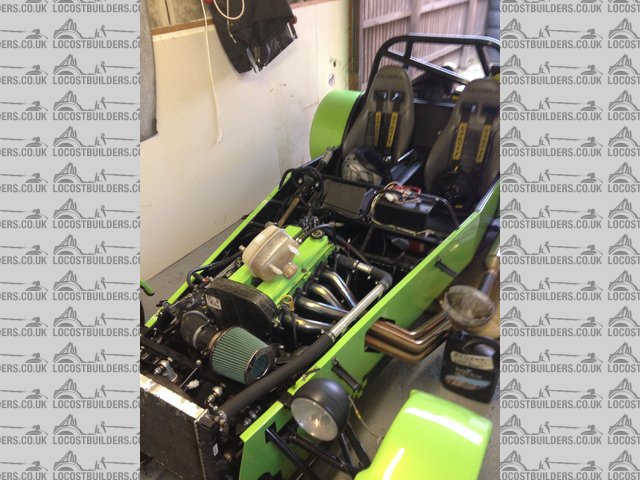
After 1 of many trips to MK I collected 2 water pipes to connect the engine to the radiator.
 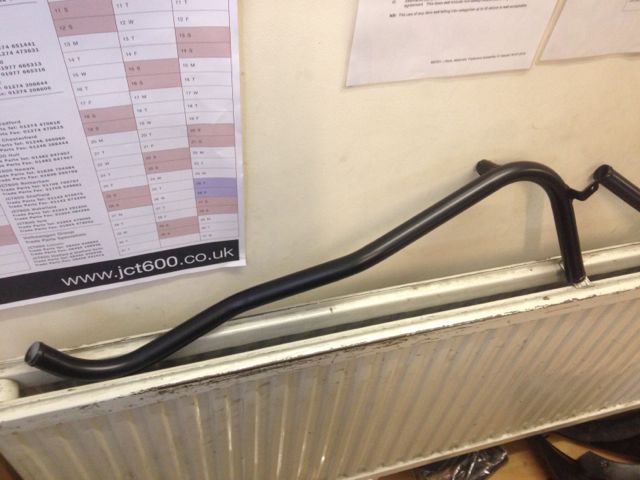
Description
 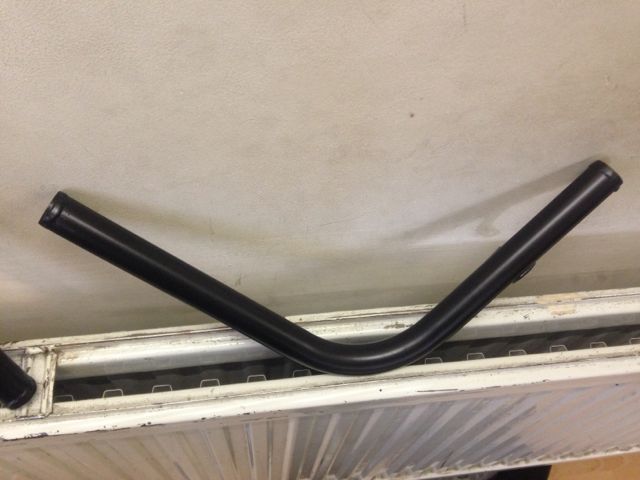
Description
I did try making some myself with a cheap pipe bender but failed miserably. I used aluminium pipe which just cracked. The job took Baz at MK about 10
min. It fitted lovely and cost less than the piece of aluminium pipe I bought to try myself.
While I was there I picked up an Accusump from Danny so that is something else I need to get fitted. Also took the opportunity to take plenty of
pictures of how MK put the cars together.
|
|
|
JeffJeffers
|
| posted on 15/2/14 at 09:05 PM |
|
|
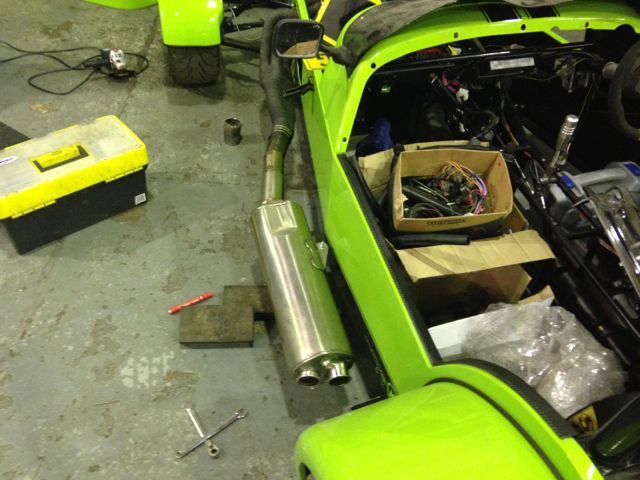
I stole an idea from yellowcab for my exhaust silencer. The spend was getting a bit out of control so I was looking for a cheap silencer. I noticed
yellowcab had used a Aprilia Mille. I found one cheap on Ebay so went with it.
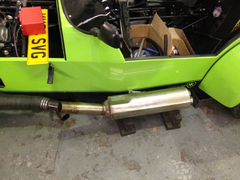 
Description
 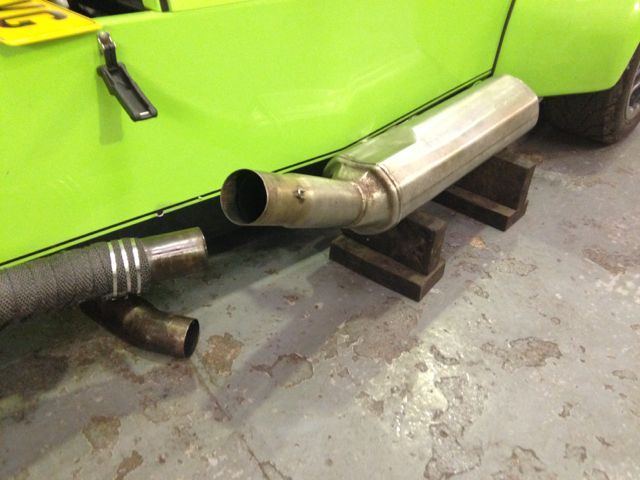
Description
As you can see it needed a little modifying to fit. This means I got to use one of my favourite tools the grinder.
 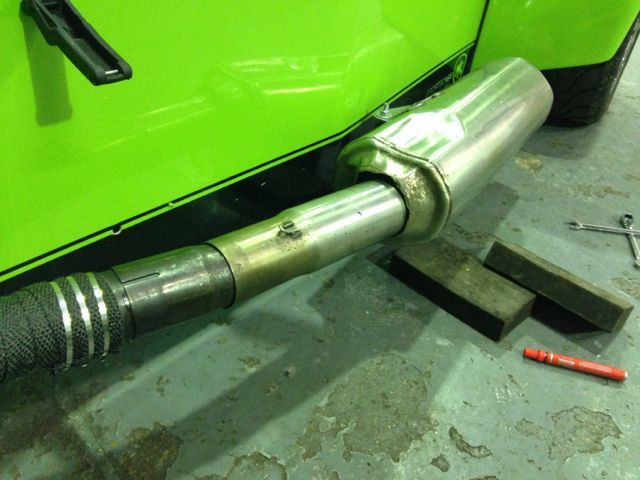
Description
Description
I wasn't sure my welding was good enough to hold the exhaust together so a friend at work had a go. It still needs some tidying up but I fairly
happy with it.
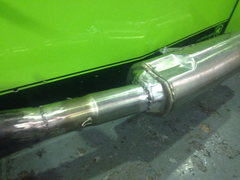 
Description
 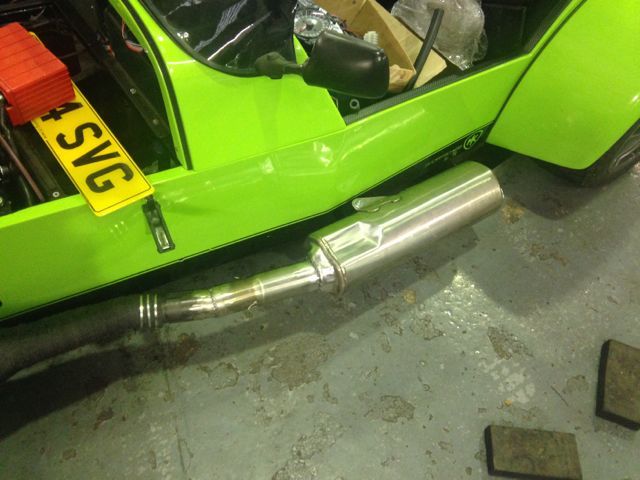
Description
Description
I did think the exhaust might be a bit noisy but the induction is a lot noisier than the exhaust.
Thanks yellowcab I hope you don't mind.
It is getting closer to the 1st proper drive now. I did take it for a little spin around the car park at work but that was before it had a silencer
on. So it was offensively loud.
The clutch is going to take a lot of getting use to because it is like a button. So I stalled it a few times.
I will try to remember to take a few more pictures for the next update.
|
|
|
CosKev3
|
| posted on 15/2/14 at 10:10 PM |
|
|
Looking good.
I like the silencer too
|
|
|