Beardy_John
|
| posted on 25/3/08 at 09:10 PM |

|
|
Sierra Loom Removal
Hi all,
Spent a fruitful bank holiday removing the engine and front end off my sierra donor. Now attention moves onto the wiring loom as I will be using
engine & dials. Has anyone managed to get there's out of the car? I can't find a way of unscrewing the fuse box or un-plugging the
cables.... very annoying.
|
|
|
|
|
Arnie
|
| posted on 25/3/08 at 09:20 PM |
|
|
Can't remember exactly how I removed the loom but it is possible and not too difficult if you just work through it a bit at a time.
I worked towards the fuse box so that the fuse box was the last thing to remove.
Regards,
Arnie
|
|
|
Macbeast
|
| posted on 25/3/08 at 09:21 PM |
|
|
As far as I remember, the fuse box is held by screws that you have to undo from inside the car from below, after removing the dash.
I never even considered reusing the loom as 1) lots of the wires have gone hard and brittle, 2) lots of the connectors are corroded and 3) there are
many more wires than you need if your build doesn't have interior lights and electric windows etc.
 red.jpg)
Maybe this'll convince you 
[Edited on 25/3/08 by Macbeast]
|
|
|
Guinness
|
| posted on 25/3/08 at 09:23 PM |
|
|
Yup. Got the entire loom out of my Sierra donor in one piece (although only ended up using parts of it!).
Basically the loom goes in at the factory as soon as the paint on the shell is dry. So to get it out, the entire interior needs to come out! The
fuse box is held down by 3 or 4 nuts that go up through the metal of the footwell to the bolts which are fixed into the underside of the fuse box.
I ended up starting in the boot with the fuel pump / rear lights etc. Once that lot was fed into the passenger compartment I used the boot as a skip
for the interior panels, linings, carpets etc.
Then once the engine was out, the engine loom / front lights etc went back into the passenger compartment.
Finally the dash came out wholesale (and ended up in the boot!). Took bloody ages!
HTH
Mike
m u s t t y p e k w i k a !
[Edited on 25/3/08 by Guinness]
|
|
|
jollygreengiant
|
| posted on 25/3/08 at 09:28 PM |
|
|
Disconnect ALL electrical cables and then feed them back into the passenger cabin (including all earths, there is more wiring than you think.). There
are then 4 nuts on the back of the fuse box (passenger side of the front bulkhead, 8mm if I remember correctly), undo these and then feed the fuse box
and all the wirring out of the car.
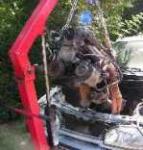
You should then end up with a pile vaguely resembling this (from a Granada)
.jpg)
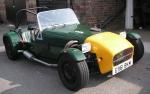
which you should be able to thin down to eventually look like this in the car
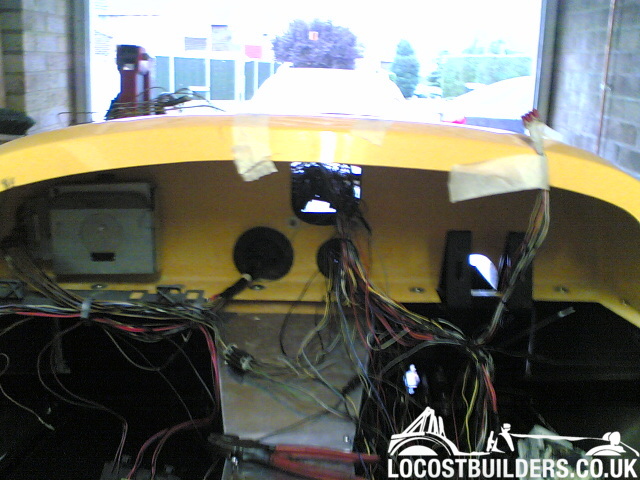
and this
.jpg)
and the dash might look like
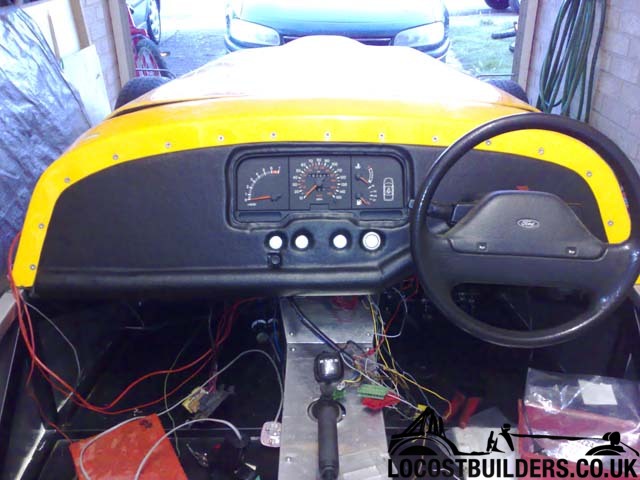
Just take your time and feed all the wiring back and then its easy.
Hope this helps.
Beware of the Goldfish in the tulip mines. The ONLY defence against them is smoking peanut butter sandwiches.
|
|
|
LBMEFM
|
| posted on 25/3/08 at 09:29 PM |
|
|
I removed one when building my Robin Hood. It takes time but it will all come out.
I then laid it on a dust sheet on the lounge floor with the aid of the Haynes manual wiring diagram and removed all of the unrequired circuits and
then shortened and re-taped it back up. It was rewarding to do and worked well, it just takes time and patience.
|
|
|
whitestu
|
| posted on 25/3/08 at 09:30 PM |
|
|
I took mine out and used it - its amazing how much wire there is.
My fuse box was held by 4 nuts. Once you get the tape off the loom it comes out, but it is a pain of a job.
When mine went back in it all worked perfectly though.
Stu
|
|
|
big_wasa
|
| posted on 25/3/08 at 09:36 PM |
|
|
This is the mondeo loom.
It took me the best part of 3 days to get it out.
I am going to cut it down to get a stand alone fuel injetion system.
 
|
|
|
RichardK
|
| posted on 25/3/08 at 09:39 PM |
|
|
If your going to reuse the loom I would mark connectors up as they get removed, but I would take out the loom complete and buy a vicky green if you
can get one cheap and like a bit of hassle or premiere one which is supposed to be really good and then just use your old loom for the various
connectors you'll need like dashboard plug, reversing switch connector etc.
Like the above says it will comne out and took me the best part of a day and try to avoid cutting it, sods law and all that, the minute you cut it, a
while down the line it'll be lost and it will be the bit you need!
Cheers
Rich
Gallery updated 11/01/2011

|
|
|
coozer
|
| posted on 25/3/08 at 09:57 PM |
|
|
I removed mine in much the same way as Mr. Guinness. Although I remember my fuse box was on the scuttle inside the engine on the DRIVERS side. I just
removed the screws holding it down and the inner bit comes out of the outer box and into the cabin through a bigish hole.
I hung mine on the wall in the garage, spread out as it was in the car and with the wiring diagram from the Haynes book stripped out everything I
didn't need. This just leaves you with a lot of wires from the ign and light switches to the fuse box, which won't have much left in it. I
moved all the relays to one side and cut a huge bit of it off!
Laying it out on the car when I've come round to wiring things in they all work splendidly
Better than spending money on a new loom that still needs fettling to work on your unique car. IMHO
Steve
1972 V8 Jago
1980 Z750
|
|
|
Beardy_John
|
| posted on 26/3/08 at 08:56 AM |
|
|
What an excellent response! Cheers guys!
Macbeast - thats exactly how my donor looks now!, all plastic removed and just chasing the wiring back. I have tried undoing the nuts on the fuse box
but they just seem to spin without coming undone. Will have another go tonight. I'll get it uot one way or another
|
|
|
Bluemoon
|
| posted on 26/3/08 at 09:00 AM |
|
|
Yep came out much as above, can't repeat enough though, mark it all up as it comes out! As said you will feed the whole loom though the fuse box
cutout and into the engine compartment... I started at the dash and worked back, watch out for the reversing light cable goes under the carpet near
the drivers seat..
I have yet to pair to loom down but judging from the amount of earth wire it looks like you should have a separate earth circuit and will not need to
use the chassis to much..
The amount of wire is amazing, for such a simple car must be worth a bit in copper...
Dan
|
|
|
Vindi_andy
|
| posted on 25/4/08 at 10:42 AM |
|
|
As previous posters I have removed said loom. Unfortunately mine was EFI DOHC with all the bells and whistles. Ended up with what looks like 30
miles of copper spaghetti. Not been brave enough to start paring it down yet. Did any of you guys that have remove the immobiliser if so can you U2U
me how you did it dont want that info on open forum. ABS system was seperate loom so that has come out and the engine loom disconnected from the main
loom so one less thing to feed through bulk head.
Cannot agree with the other guys tho LABEL EVERYTHING. Did this myself and has made life a lot easier when refitting the engine loom
|
|
|