907
|
| posted on 13/4/07 at 04:36 PM |

|
|
Mud Guards, Stick or Bolt?
Hi All
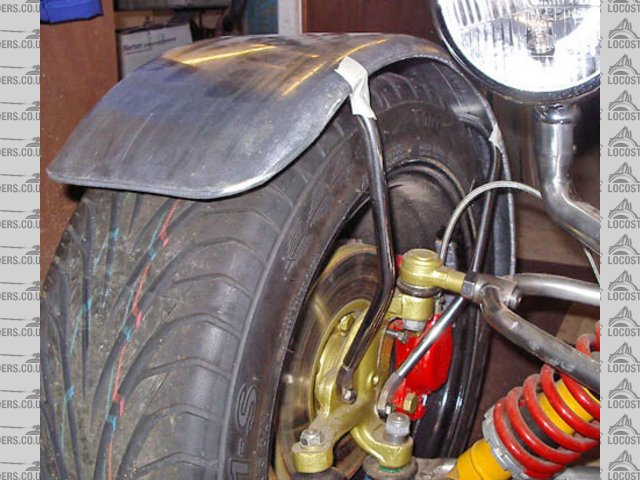
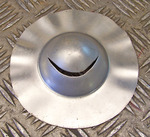
I'm making my cycle wing stays at the moment and can't make up my mind how to attach the mud guards.
Bolting them on would make it easy to remove them for periodic re polishing,
but sticking them on would be neater as there would be no fixings showing.
So my question is, if I were to use a double sided tape, i.e. Silkaflex or whatever, what size bond area would I need?
I was thinking of welding a thin strip of stainless to the stays where the white area is in the pic, or maybe in front of the pipe as well.
I assume the bigger the area of tape the stronger the joint, but don't want to go OTT.
Many thanks
Paul G
 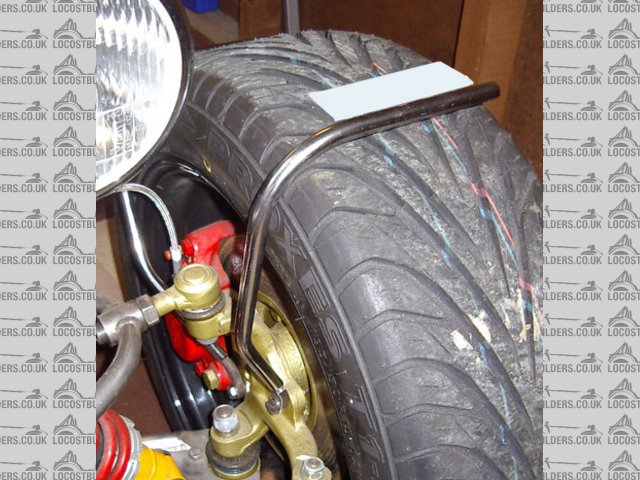
Rescued attachment mud-guard-stay-s.jpg
|
|
|
|
|
jacko
|
| posted on 13/4/07 at 04:43 PM |
|
|
Paul i use pu sealers [ tiger sealer ] sikaflex ] tex flex ] etc at work and it dose not bond to stainless steel that good if you use it make sure you
sand the s/steel to get a good grip
jacko
|
|
|
Humbug
|
| posted on 13/4/07 at 04:47 PM |
|
|
How about that magnetic rubber strip stuff  It would be easy to remove the wings for polishing, but the wings wouldn't tear if something got
caught... It would be easy to remove the wings for polishing, but the wings wouldn't tear if something got
caught...
Seriously though, I had a Westie with the wings PUd onto flat brackets (the standard ones about 3-4cm inch wide) and they were solid as a rock. On my
current ST I did the same, but found that when I had to remove one wing to fix the bracket, I could easily pull it off, which defeats the point
somewhat... anyway, for refixing I used dome headed bolts and nylocs.
Do a search on here, though, I think I remember seeing one thread where someone had glassed in a metal plate incorporating bolts facing downwards, and
fixed those through the wing stay with nylocs on the underside. With your wings, could you do something like that? May be more secure than sticking,
but give the removability you are after.
[Edited on 13.04.2007 by Humbug]
|
|
|
smart51
|
| posted on 13/4/07 at 04:49 PM |
|
|
I put two generous bead of PU adhesive on my cycle wings on each of the two cycle wing stays and my wings have held on fine. The GRP would give way
before the glue. I see no need for stainless steel fillets or anything.
|
|
|
jacko
|
| posted on 13/4/07 at 05:11 PM |
|
|
pu sealers /glue are very good to bond aluminium to aluminium --aluminium to wood or fiber glass but not that good to stainless steel
|
|
|
John Bonnett
|
| posted on 13/4/07 at 05:13 PM |
|
|
Paul how about this; best of both worlds. Bond the mudguard to your angle bracket using Wurth or similar and screw the bracket to the wingstays.
(I'm sure fixing to a curved surface will not trouble you!) I don't think I would want to trust double sided tape. I did something similar
on the Special and it worked really well. Once bonded the panel adhesive will never let go.
alb
John
|
|
|
907
|
| posted on 13/4/07 at 05:28 PM |
|
|
The mud guards are made of aluminium and the pipe is 1/2" o/d stainless.
If I bolt them the strip of s/s could be much smaller, say 20mm wide.
If I use both tape and bolts then I could get away with smaller bolts too, maybe M4 ???
(must get round to cleaning up those edges)
Thanks for the replies so far chaps.
Paul G
Rescued attachment brace-001-s.jpg
|
|
|
emsfactory
|
| posted on 13/4/07 at 07:12 PM |
|
|
Could you weld some threaded bar to the underside of the wings?
then they could be removable and wouldn't have fixings showing?
|
|
|
rusty nuts
|
| posted on 13/4/07 at 07:27 PM |
|
|
Paul , I stuck mine on using Sikaflex . The way I did it was to drill the wing stay in a couple of places on each stay where I wanted to mount the
wing. Using 4 strips of !"x1/8" strip steel with a 6mm stud welded to the underside , bolted them to the top of the stays I then gave the
underside of the wings a good clean and coated them in adhesive. Placed wings in position and left to set. They have been on now for 3 years with no
problems with the wings. The stays are a different story. Would it be possible to do it that way on yours?
|
|
|
907
|
| posted on 14/4/07 at 07:33 AM |
|
|
quote:
Originally posted by Humbug
I had a Westie with the wings PUd onto flat brackets (the standard ones about 3-4cm inch wide) and they were solid as a rock. On my current ST I did
the same, but found that when I had to remove one wing to fix the bracket, I could easily pull it off, which defeats the point somewhat... anyway, for
refixing I used dome headed bolts and nylocs.
Having read through all the replies I'm now a bit reluctant to rely solely on glue.
I am also reluctant to weld anything to the inside of the mud guards as this would anneal the ally.
Having worked the metal into a reasonable tensile state, I wouldn't want to undo the stiffness which exists at the moment.
The theory in the way I am making the stays is to have no welds or stress raisers in the area that they seem to fail.
I admit I'm making it hard for myself by using stainless, as it's not the best material for this type of thing.
I'll have a play later to see what I can come up with.
Thanks for all your replies.
Atb
Paul G
|
|
|
NS Dev
|
| posted on 14/4/07 at 08:12 AM |
|
|
I'd bolt them on with dome heads.
I thought about bonding my grp ones but decided bolting them makes replacement a lot easier, and I can see me needing to replace them at some point

I made a similar flat strip, then drilled and tapped it, so no nuts on the inside etc and easy to put them on/off
Retro RWD is the way forward...........automotive fabrication, car restoration, sheetmetal work, engine conversion
retro car restoration and tuning
|
|
|
907
|
| posted on 14/4/07 at 11:41 AM |
|
|
I've had a play, and come up with a sort of "P" clamp.
This could be drilled and bolted with tape between the guard and the clip.
Paul G
|
|
|
907
|
| posted on 14/4/07 at 11:42 AM |
|
|
Oops, forgot the pic
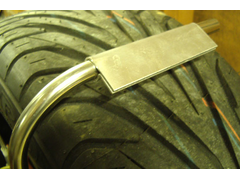 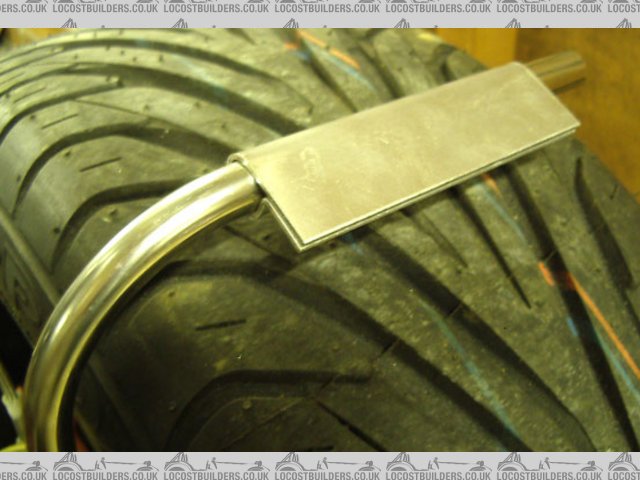
Rescued attachment brace-clamp-004s.jpg
|
|
|
NS Dev
|
| posted on 14/4/07 at 01:32 PM |
|
|
perfect, absolutely perfect, lovely job!
Retro RWD is the way forward...........automotive fabrication, car restoration, sheetmetal work, engine conversion
retro car restoration and tuning
|
|
|
NS Dev
|
| posted on 14/4/07 at 01:32 PM |
|
|
ps how the bloody hell did you form that!
Retro RWD is the way forward...........automotive fabrication, car restoration, sheetmetal work, engine conversion
retro car restoration and tuning
|
|
|
907
|
| posted on 14/4/07 at 02:24 PM |
|
|
quote:
Originally posted by NS Dev
ps how the bloody hell did you form that!
"There's not many of us old craftsmen left" 
Paul G
|
|
|
907
|
| posted on 14/4/07 at 04:00 PM |
|
|
Er, sorry about the last post Nat. 
Here's how.
Clamp & bend up 90.
Fold round 12mm bar.
(so that it's a tight fit on 1/2" pipe i.e. 12.7mm)
Clamp in vice and bend to form the "P".
Cut off
This may be of use to anyone who needs odd size clips.
Atb
Paul G
 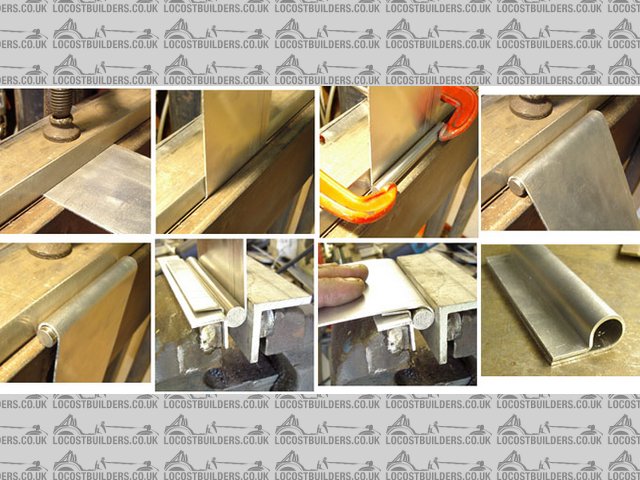
Rescued attachment P-shape-s.jpg
|
|
|
t.j.
|
| posted on 14/4/07 at 07:18 PM |
|
|

Nice job, if you have spare time you could come visit :-)
|
|
|
907
|
| posted on 15/4/07 at 06:13 AM |
|
|
quote:
Originally posted by t.j.
Nice job, if you have spare time you could come visit :-)
I am confused.
In your profile you say, "From London swim east".
By the look of your avatar I should swim south, A LONG WAY SOUTH.
Paul G
(Love it btw, could watch it for hours)
|
|
|
NS Dev
|
| posted on 15/4/07 at 09:47 AM |
|
|
LOL no worries Paul!
From your first piccy I thought the bracket was stainless, and that made me wonder how on earth you had formed that thickness of stainless into that
shape!!
Looking at the other pics I assume its ally, which makes more sense now!
Retro RWD is the way forward...........automotive fabrication, car restoration, sheetmetal work, engine conversion
retro car restoration and tuning
|
|
|
907
|
| posted on 15/4/07 at 10:30 AM |
|
|
Yup, they are 1.6mm ally, but they could be made in s/s, in which case you would make them in 1mm.
The trick is to start off with a long strip so you can get some leverage to bend it round the 12mm bar.
atb
Paul G
|
|
|


.jpg)