bart
|
| posted on 7/11/14 at 08:30 PM |

|
|
single seater my own design Bart Special
Hello All tried to post this before but ended up in for sale !
I'm new to this forum , but not new to building cars , Bikes , ect
I am currently building a totally unique single seat road car of my own design.
I'm a big chap ( both up and wide ) and was looking at first to convert a formula car.
then hit a problem " I cant get in a formula car " as there all built for, shall we say normal size people.
my back ground is engineering and I am reasonably proficient with cad.
I had built several highly modified westfield 7's before
I started out with a 2 seat EXO type car , played around with that idea for several months .
then decided that how ever you design an exo car its always going to be Ariel like.
so then decided to go single seat exo car , did not like anything I designed . so ended up with a formula type chassis.
I did several complicated designs that whilst stiff ect were going to be difficult to fabricate without the aid of a fixture.
so I went back to the drawing paper ( well cad screen ) and redesigned the car with ease of fabrication in mind.
to this end I used laser cut panels joined via round tube at first and then later square tube ( again to aid fabrication )
all the major tubes are located via the laser profiles and they also provide the suspension location.
any way to cut a long story short if any one is interested , I will post more and plenty of pics
I have the basic chassis finished and engine in / out / ect
and just about to start the suspension fabrication.
ps someone needs to tell me how to post pictures ect as I have know idea
I have tried to post pictures having a few problems
do I need a web site to post from or can I upload directly to forum .
also I cant seem to add a new conversation just edit the current one . I know i'm thick but never posted before.
[Edited on 7/11/14 by bart]
|
|
|
|
|
JoelP
|
| posted on 7/11/14 at 08:54 PM |
|
|
I'd love to see it but no idea on how to do photos!
|
|
|
mark chandler
|
| posted on 7/11/14 at 09:01 PM |
|
|
The art of photo's
It will only accept limited files so save and upload as .jpegs
Do not use any clever characters in the file name, just letters
Keep the pictures small
So now you know the gotchas at the top left hand side you will see the tool bar, click on photo archive, this is you archive, then you have a choice,
new folder and below this add photo, you can load directly into your archive or have some sub folders, to load the picture then click on choose file
and navigate to your picture and put in a brief description then tap upload
Regards Mark
|
|
|
bart
|
| posted on 7/11/14 at 09:28 PM |
|
|
ok uploaded a few pics to my acount
ok stuck now
I have managed to upload a few pics to start into my archive
but can find no way of getting them in the post ?
help newbie .
|
|
|
AndyW
|
| posted on 7/11/14 at 09:38 PM |
|
|
start of build rear view
rear view from the rear
|
|
|
mark chandler
|
| posted on 7/11/14 at 09:39 PM |
|
|
Open the picture in your archive, copy the URL above the picture and paste into your post 
|
|
|
scudderfish
|
| posted on 7/11/14 at 09:39 PM |
|
|
Above the picture it says 'forum code'. Just copy and paste that into your post like this
start of build rear view
|
|
|
AndyW
|
| posted on 7/11/14 at 09:40 PM |
|
|
As above, bit slow on my reply as forgot to add the how to in first post. Been a long day
good luck
[Edited on 7/11/14 by AndyW]
[Edited on 7/11/14 by AndyW]
|
|
|
bart
|
| posted on 7/11/14 at 09:49 PM |
|
|
ok someone seems to have posted my photos for me
neat trick !
so hear goes first pics
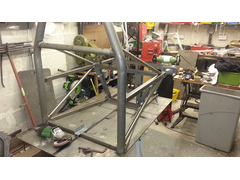
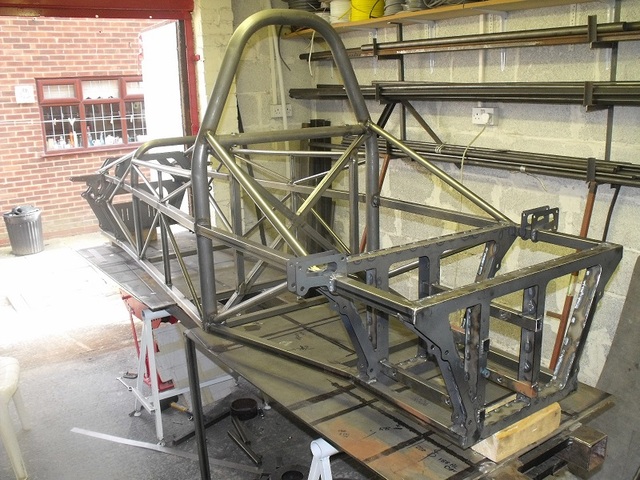
this is the start of the physical build
rear of chassis from roll bar and from the back
[img]
start of build rear view
[/img]
rear view from the rear
ill convert the rest of the chassis pics over the weekend and up load them
[Edited on 7/11/14 by bart]
|
|
|
bart
|
| posted on 7/11/14 at 10:05 PM |
|
|
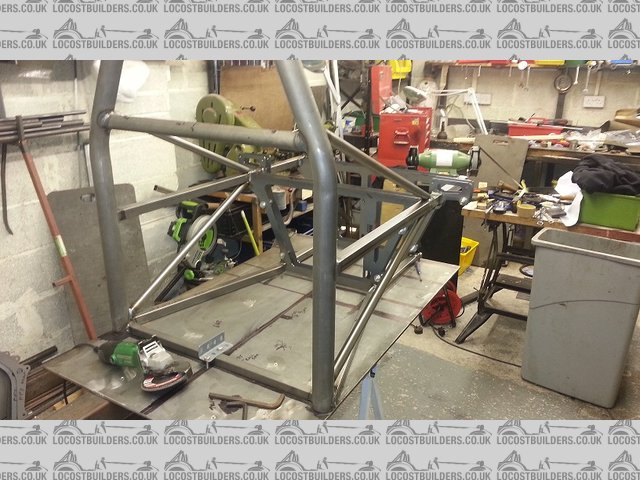
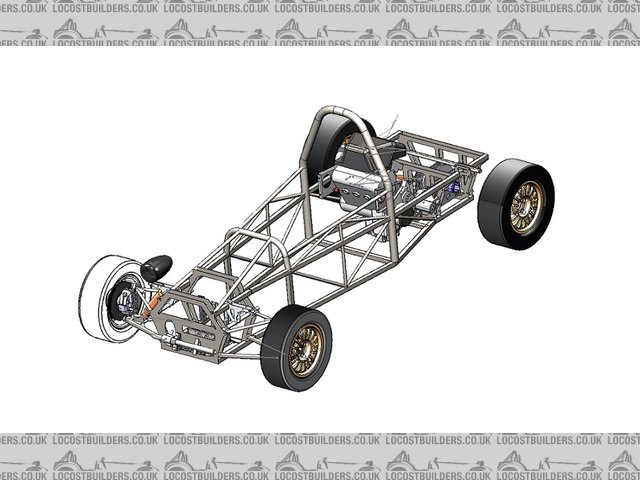
later pics of chassis from front and rear
at this stage it is more or less complete
I just had to "I" beam the laser cut profiles to give lateral strength
later I changed the front design.
[img]
later in construction
[/img]
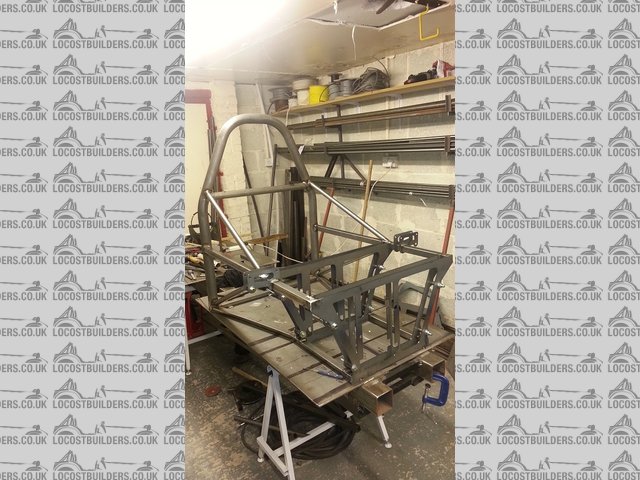
[img]
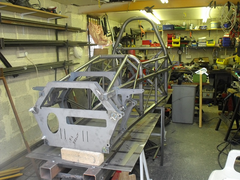 
later build front view
[/img]
don't know how much detail people want
engine is Hayabusa gen 2
if anyone wants any further info would be happy to post.
|
|
|
bart
|
| posted on 7/11/14 at 10:14 PM |
|
|
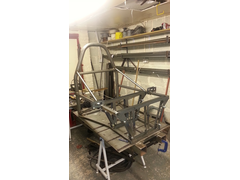
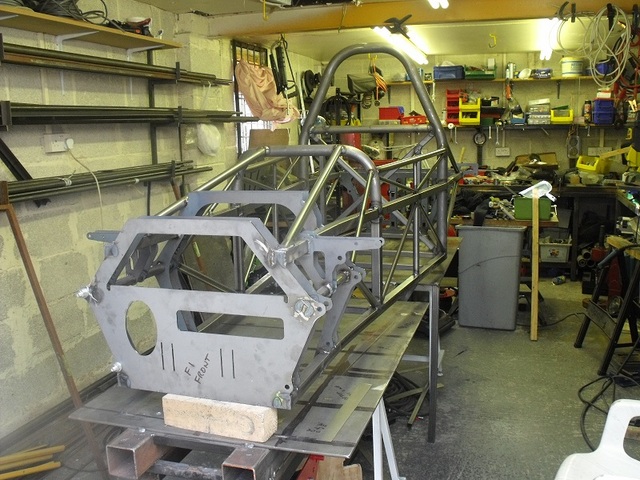
[img]
new front design
[/img]
new front end design ,
|
|
|
mark chandler
|
| posted on 7/11/14 at 11:11 PM |
|
|
Fantastic looking build, what engine will you be running and how will running a single seater limit you for track days etc?
|
|
|
bart
|
| posted on 7/11/14 at 11:54 PM |
|
|
track days and iva
Hayabusa gen 2
standard to start of with then turbo after iva
has some mods now but basically std engine
I understand some tracks allow road legal single seater , not that bothered
as it will defo be road legal
|
|
|
threadbare wallet
|
| posted on 8/11/14 at 07:51 AM |
|
|
Looks interesting.......you couldnt give enough details to us in here so dont think your bore us so give us every little bit!!!
Very few things are "really" needed.
|
|
|
big_wasa
|
| posted on 8/11/14 at 09:41 AM |
|
|
Its really good to see scratch builds with good engineering. More detail the better.
|
|
|
designer
|
| posted on 8/11/14 at 09:58 AM |
|
|
I think it's a bit complicated for a road car, but a good build.
What thickness are the lase cut panels and are you going to reinforce the edge against twist?
Is that a spring/rocker mount sticking out wide between the front wishbone pick-up points?
I know it's the 'done thing' to have the feet behind the front wheels, but you have a lot of wasted space between the pedals and
front bulkhead.
The tube from the rear, front suspension mounts and going to the dash bulkhead, tacked onto the side member seems a strange way to do it. I always
have a feeling that single side welded joints are trying to split the tube as it leaves the stress line only on one side.
|
|
|
bart
|
| posted on 8/11/14 at 01:22 PM |
|
|
all location plates are 3 mm ( but in future I would take this down to 2.5 or 2 with local reinforcement )
apart from the front plate , they as a pair way less than box tube and brackets
has the added advantage that every thing is in the correct place , no measuring on assembly. I just made some spacers to go between the plates . as
regards to reinforcement I have inserted "I" beam plates between them made from 1mm ( was going to be 0.6 but I had welding problems .
this has proved as per my calculation to be extremely strong.
I did change the front as I felt when first done the front was a bit "floaty" new design is no less stiff and looks better. also had the
added bonus that it dropped the line of sight to the front of the car ( whilst sitting in it and making brum errr brum noises )
added length came from my preferred width / length ratio. and only added 2 kg to weight .
the bitts sticking out are the locations for the shocks bot not all as also the light brackets . again I beam boxed for strength.
car has out board suspension for now , will move to inboard on my mark 2.
also during the physical build I can see where to take out 20>25% of weight from the chassis , weighs 62 kg with all brackets.
as for complicated . I beg to differ took me only 16 hrs to fabricate the bulk of the chassis , and that included cutting all of the tube .
I have now added a structure to move the brake pedals back and forth for shorter mates to drive as the seat is fixed ( thick cushions provided for
real short mates )
I have done a crude bending moment test , with frame supported either end and 150 kg + ( yes that's me ) bouncing up and down at the roll bar .
I measured 1mm flex in the chassis , I find this measurement acceptable , I would like comments on this though , with a normal man 75kg I had on 0.4
mm with a bounce . I understand that the 7 type chassis is far more than this according to some white paper I have read.
as far as the suspension is concerned this was ment only as a design test bed for a later improved version . just wanted to test the suspension
geometry and general build. besides I don't like where some inboard assembles go during a crash !
[Edited on 8/11/14 by bart]
|
|
|
bart
|
| posted on 8/11/14 at 02:16 PM |
|
|
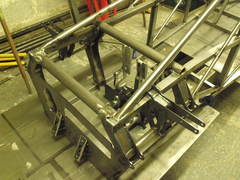
hi again pictures of engine in the frame and the sliding frame for the diff.
and yes i know the welding not that hot . im a engineer not a welder .
my welding varies from , ok > to what c--p
but i always make sure structural welds are well fused , they just don't look nice .
these pics was before i boxed in the suspension mounts so yes the do look flimsy
[img]
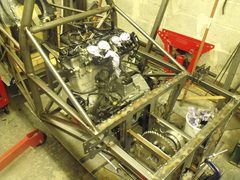 
engine in frame with diff
[/img]
[img]
 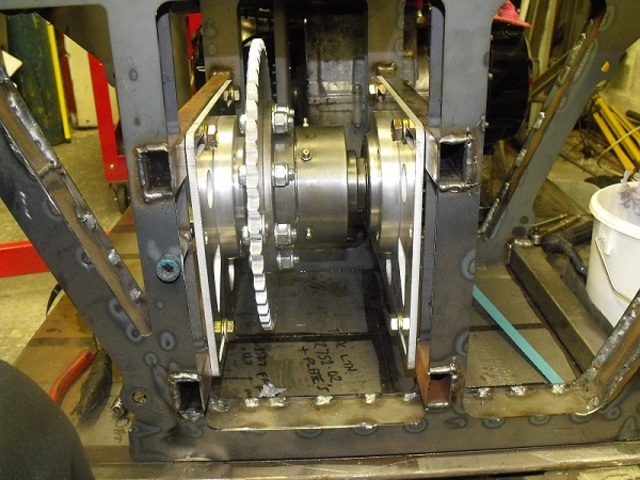
diff mount from the rear
[/img]
i also have a shopping list so if any one has the following parts i would be intrested
have a few things i need
paddle shift , mechanical or electric
side exit Hayabusa exhaust manifold ah la grass racing type
catalytic converter for iva pass
alloy 13" ford pcd wheels 35 ish offset
all in one headlights.
Quaife reversing diff , later 8 wheel design please
i know its a big list but if you don't ask then you don't get !
[Edited on 8/11/14 by bart]
|
|
|
bart
|
| posted on 12/11/14 at 05:35 PM |
|
|
stuff i did this weekend
ok I decided I needed to make a turn over fixture for the engine so I can
do the sump and stuff.
also made a three legged "milk" stool as there is no longer enough room in my garage for a garden chair.
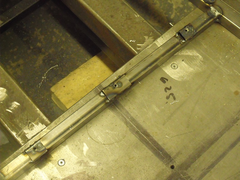
also made the brake adjustment area , so the pedals can be adjusted as the seat is fixed apart from adding cushions ect
also my kirkey seat arrived and I made a fixing frame for that in the car.
I also added side adjustment on the brake box so that I can get it just right.
ps: I also stripped my rally design escort steering rack ready for shortening , if any one is interested I will post pictures on how to do it , but
i'm sure it has been covered many times before. ps they are very easy to do !
[img]
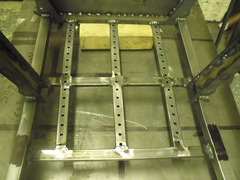 
BRAKE PEDAL ADJUSTMENT
[/img]
picture of brake pedal adjustment area
[img]
 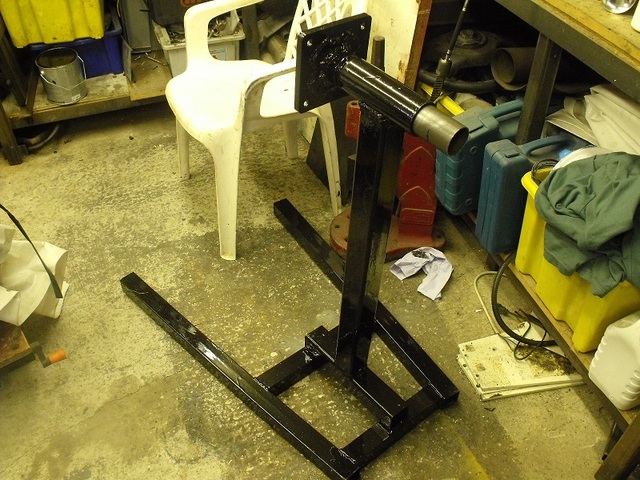
diy engine turn over
[/img]
engine turn over home made
[img]
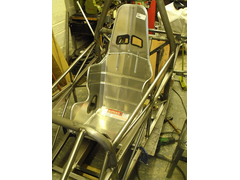 
kirkey seat
[/img]
kirkey seat , very good quality , not worth making myself
[img]
kirkey seat frame rail
[/img]
kirkey seat mount frame , front of seat
[img]
 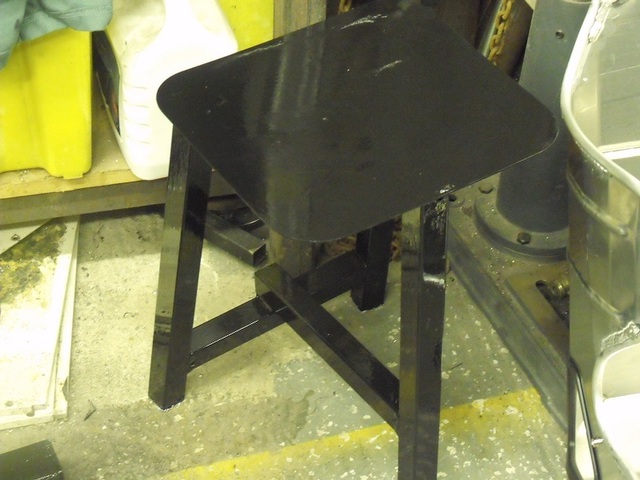
milk stall
[/img]
my three leg milk stool , much smaller and more convenient to use / move around .
my wife nearly divorced me as I put it in the lounge to dry and it stank the house out !
|
|
|
designer
|
| posted on 12/11/14 at 05:39 PM |
|
|
How long is the pedal adjustment area?
|
|
|
bart
|
| posted on 12/11/14 at 05:49 PM |
|
|
about 6" max just looks like a lot of holes as it bolts at the back and the front of pedal box.
some of the holes at the back I will never use unless I get someone 7 ft 6 in the car , got carried away drilling the holes.
hey hoe , never mind. I also did not have the seat when I did it so it was a bit of a guess where it was to go exactly.
I also allowed for a reinforcement bracket if it feels a bit flexi when in operation
[Edited on 12/11/14 by bart]
|
|
|
prawnabie
|
| posted on 13/11/14 at 04:52 PM |
|
|
Most trackdays will allow single seaters if the wheels are covered. I hope that doesn't chnge as my long term build is a terrapin single seater!
|
|
|
bart
|
| posted on 14/11/14 at 12:33 PM |
|
|
quote:
Originally posted by prawnabie
Most trackdays will allow single seaters if the wheels are covered. I hope that doesn't chnge as my long term build is a terrapin single seater!
! so do I 
[Edited on 14/11/14 by bart]
|
|
|
bart
|
| posted on 15/11/14 at 06:13 PM |
|
|
slow day / gear lever / radiator
just come in for the night
managed to get the hand brake lever in place , bit tricky that in a single seat car.
finished shortening the steering rack and mounted to the car .
I can now start to see where i'm going with the steering wheel / column etc..
seem to not have progressed very far today , lots of time spent thinking and drinking tea.
started to make the fixture today for the suspension arms , got the main plate marked out . then got called for dinner/tea.
good job as I would have been out there till midnight "its a hobby" and the wife likes to talk to me now and again ( blah blah , yes dear
, yes dear cause i'm listening )
pics to follow .
I need some advice on a gear lever , ratio's ect any advice anyone .
cant decide whether to build a mechanical flappy paddle on go stick , this would be right next to the steering wheel !
also cant decide about the radiator , rather than go expensive custom I was thinking use 2 Hayabusa ones ( already have one )
and they can be picked up cheap , any one done this ? or seen it done .
|
|
|
bart
|
| posted on 16/11/14 at 01:36 PM |
|
|
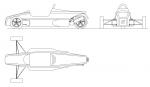
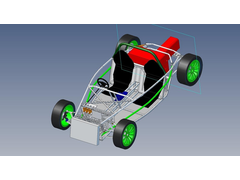
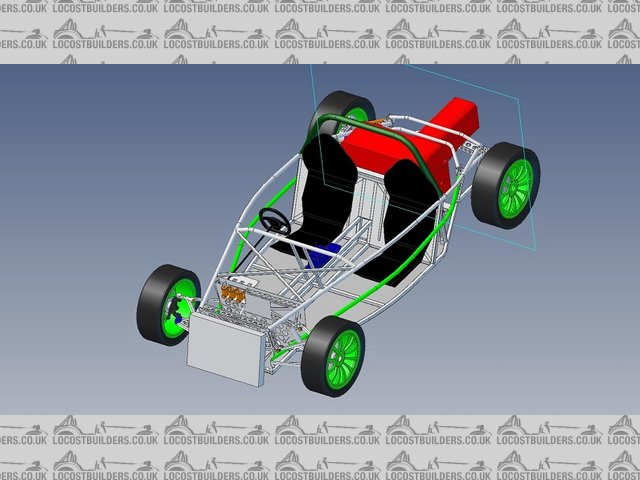
design
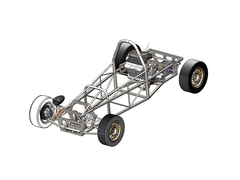
thought I would post some pictures of the design history
when I started It was a 2 seater exo
then as I progressed it became a single seat
did about 12 designs before settling on this one
I know its not complete but I only draw what is unique ie: if lh and rh are the same or symmetrical then I only draw one side.
I have not designed the body yet , felt I would get more of a feeling with a chassis in the flesh.
first pic is the old 2 seater , missing chassis bracing ect
this had a Subaru engine /gearbox , which is for sale any one , and lots of other Subaru parts.
Description
second picture is current design , but does not show the updates I have changed / incorporated
when the weather finally goes horrible I will take the time to redraw / model the car as I have built it
but its not far off the finished thing
Description
|
|
|