
T89 Designs - Project SSL Build Diary
Doctor Derek Doctors - 26/11/14 at 01:01 PM
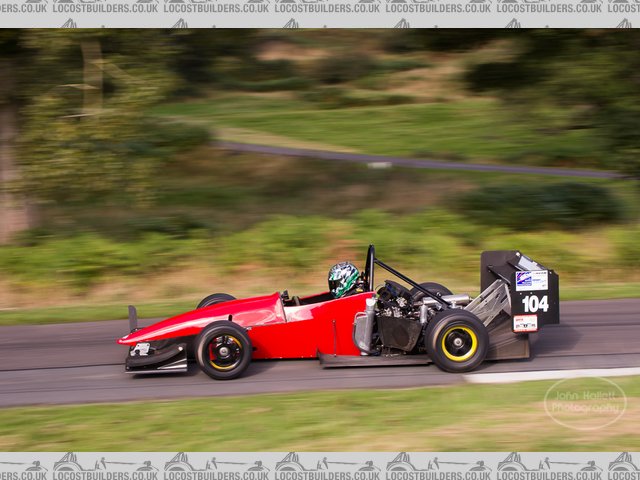
After getting the bug for sprinting at the end of last year I have decided to design and construct a single seater sprint car for 2016 using the
"Locost" ethos.
Eventually the aim is to sell the plans for the car as I will be completing full CAD models and drawings for every part, as well as mainting a full
BOM and cost list.
My aim is to combine the 'Locost' homebuilt ethos with the style of a Formula Student car Small and Super Light (hence SSL).
Using as many off the shelf and Locost parts as possible (such as Wilwood Powerlite calipers for example) that people already know about and trying to
design it to use the minimal amount of specially made parts and tooling you wold find in the average LCB members garage is also a priority.
At university we managed to build a Blue Book compliant FS car that weighed in at 220Kg so adding an extra 30Kg for a 4cyl Bike engine (rather than a
single cyl' I think 250Kg is achievable but <275Kg is likely.
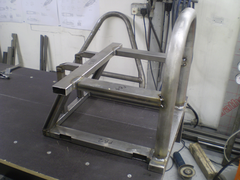
The first job has been to build somewhere to build it by creating a chassis bench in my workshop (dubbed Mega-bench). a 2m x 1m work surface will
allow me to contruct the car (minus wheels) on the bench.
Sarting Base is 2x Ex BAR Honda tool boxes:

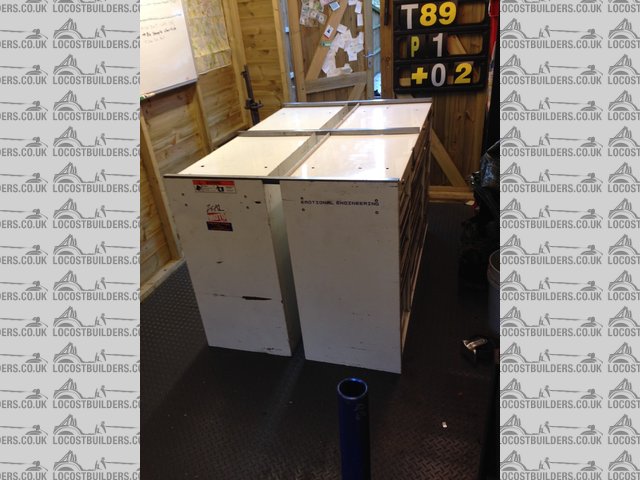
Mega Bench 1
A Steel Frame is added on top and levelled:

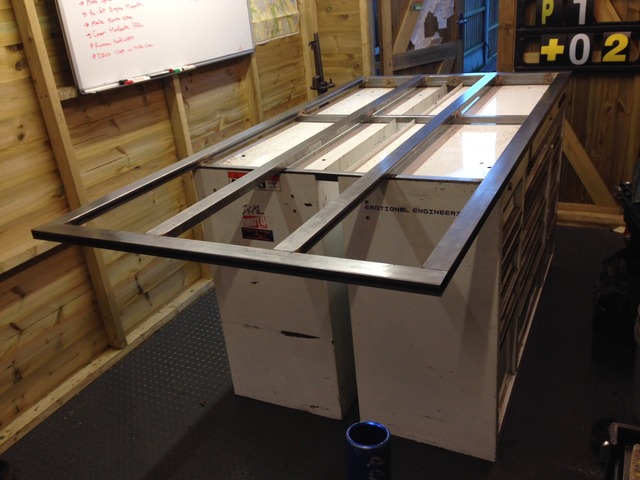
Mega Bench 2
Finally the rather lovely 2m x 1m sheet of 3mm thick hardened aluminium was added as well as an end support:

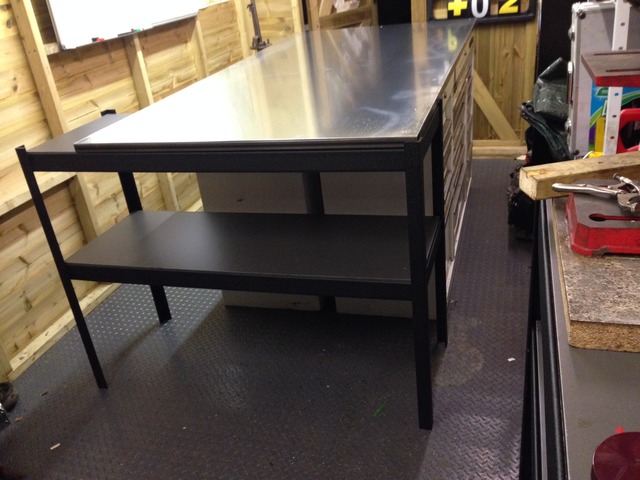
Mega Bench 3
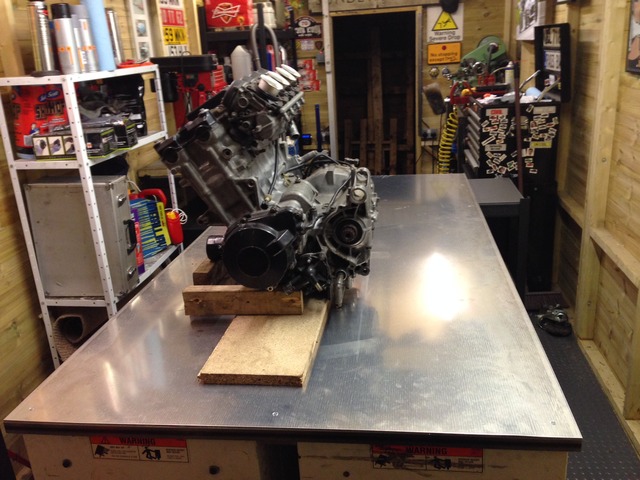
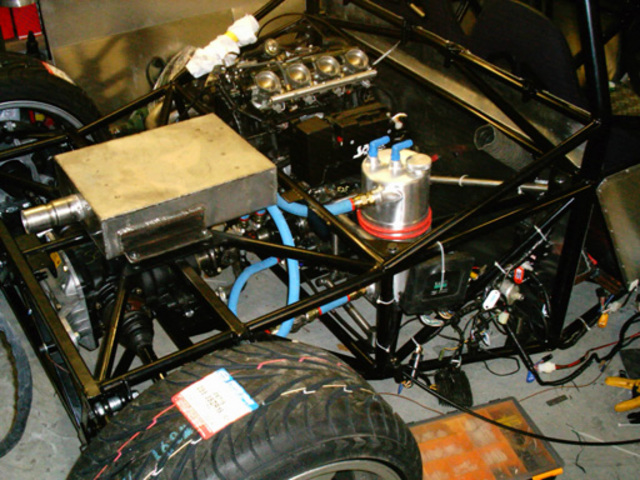
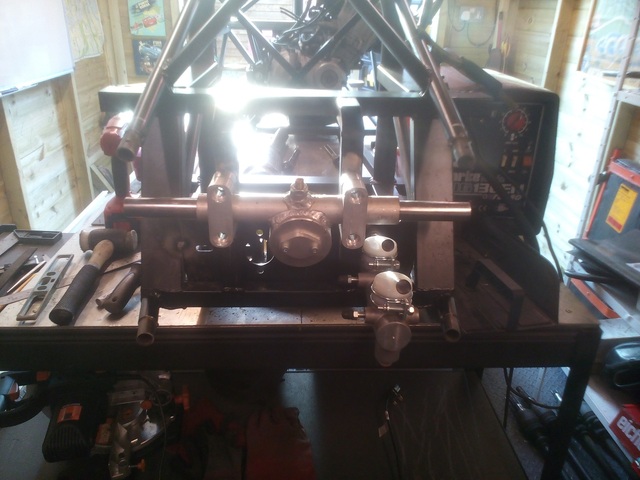
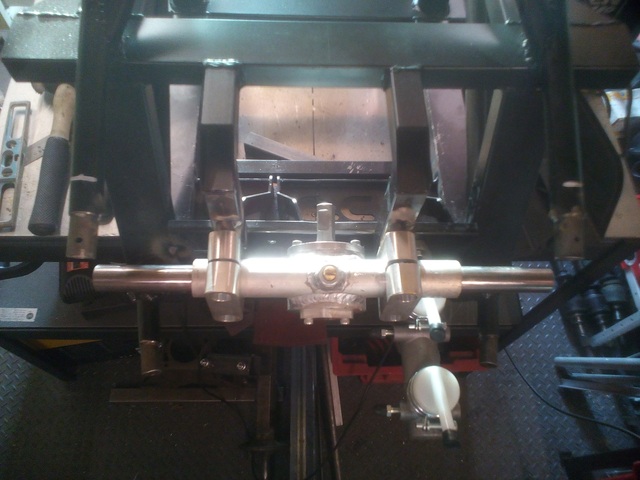
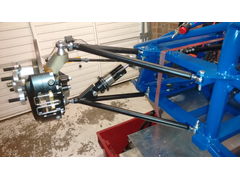
Currently the main area of progress is the drivetrain, I have decided to use virtually the same parts as my '7', partly because I know them
well and partly because I already have a spare set. So it will use (to start with anyway) an 893/919 Fireblade engine, mounted longitudinally driving
a Freelander Diff running into Westfield Megablade driveshafts with Westfield hubs in modified Sierra Drum brake bearing carriers. Rear suspension
will be double wishbone with bespoke uprights.
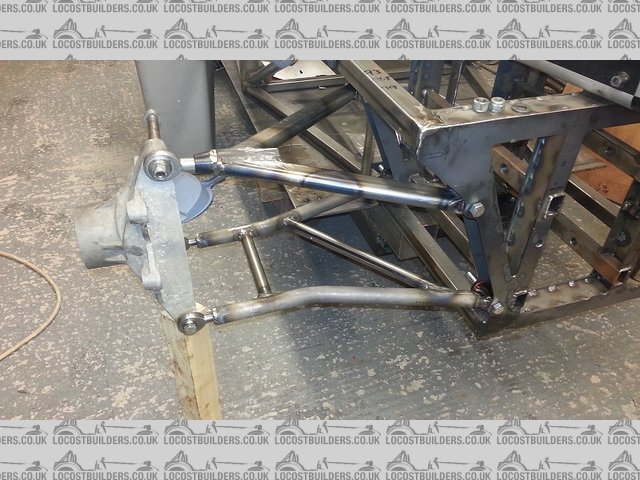
Front suspension will be double wishbone but I am aiming to use Rally Design Ally uprights, hubs and Wilwood Calipers.
Most other stuff is up in the air at the moment but I'm also working on a "blown" venturi tunnel for the underside.
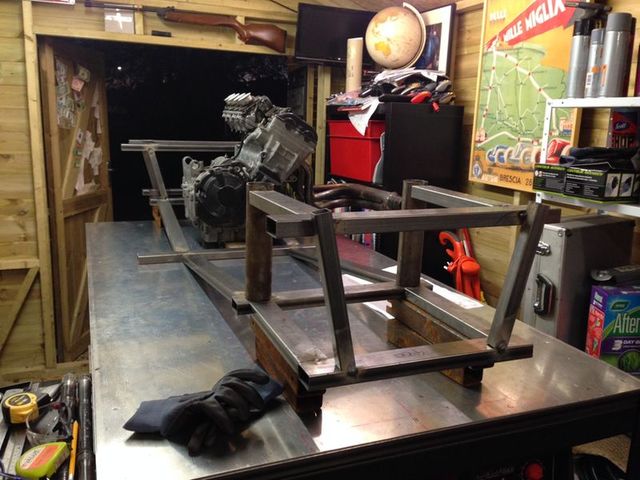
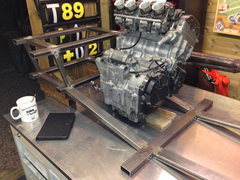
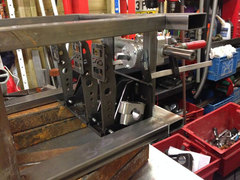
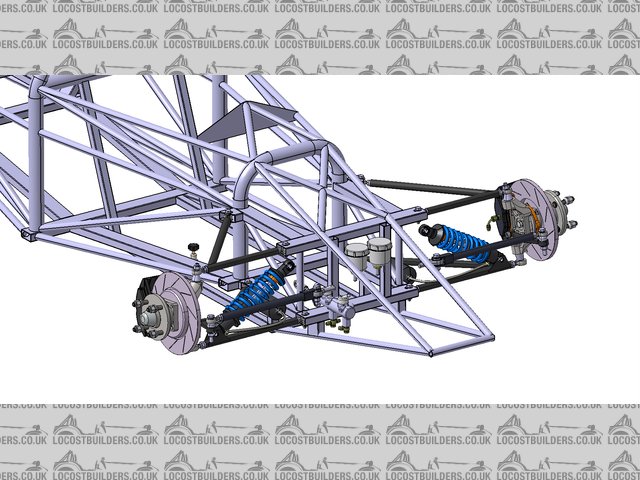
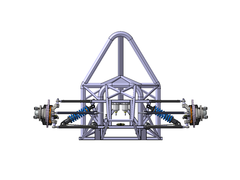
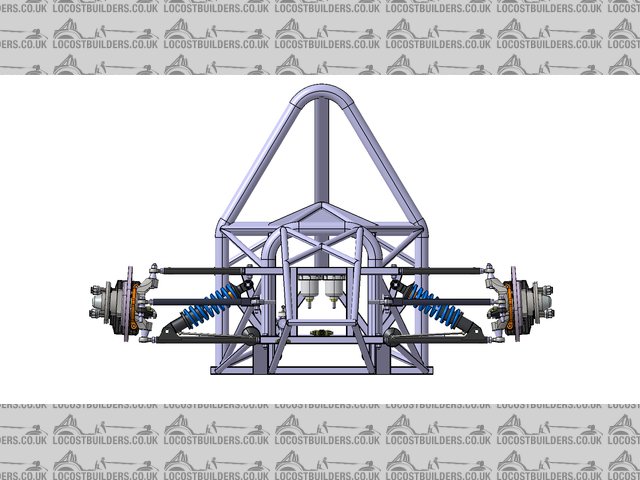
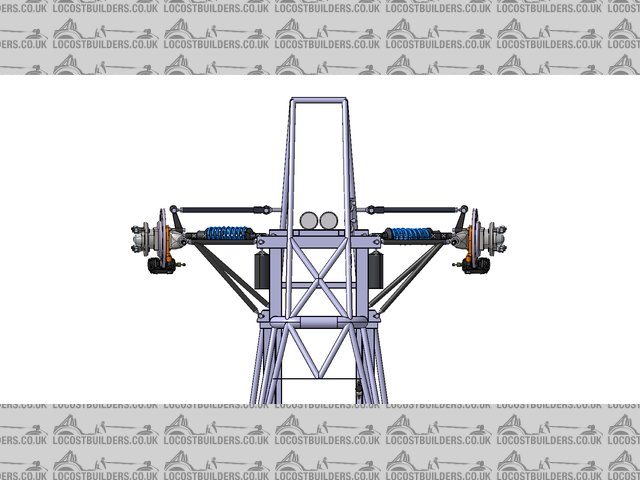
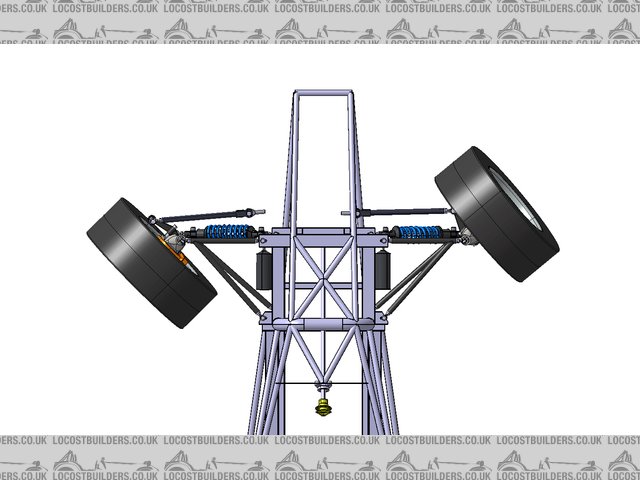
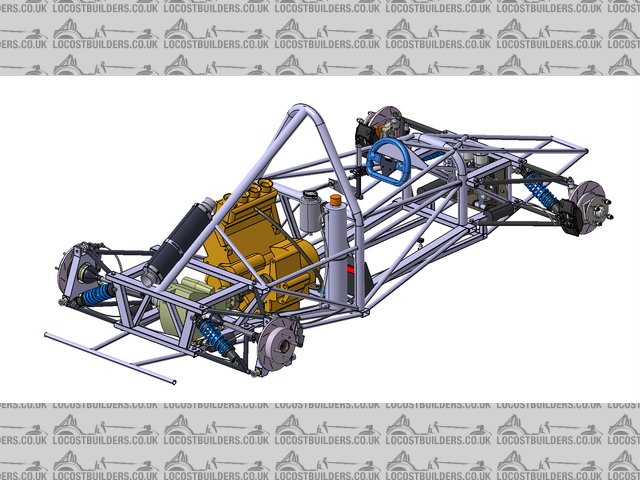
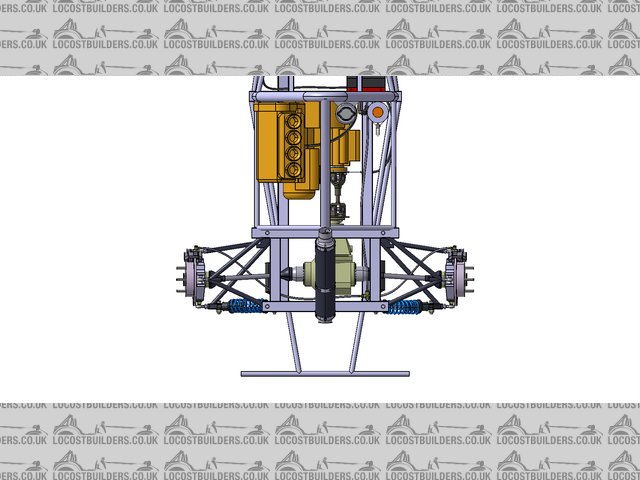
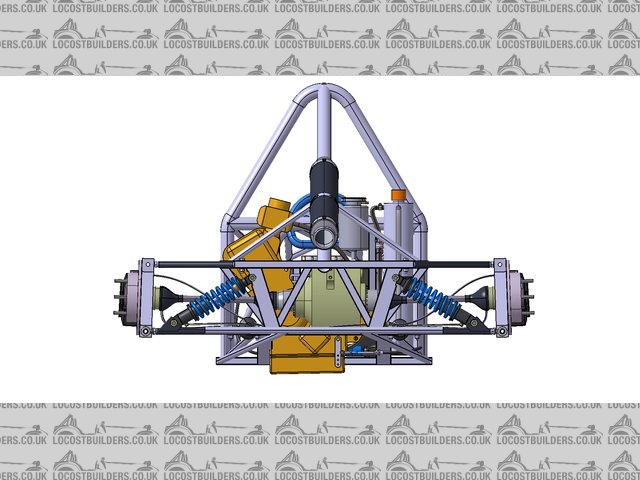
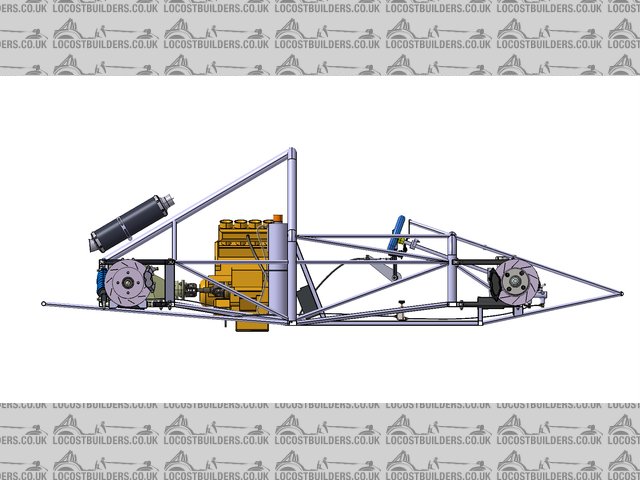
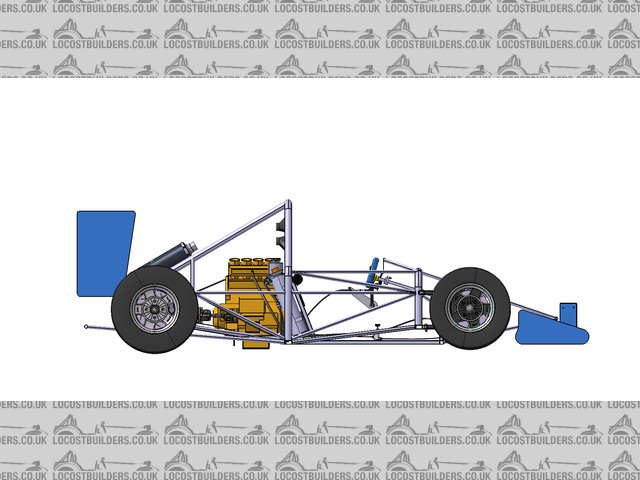
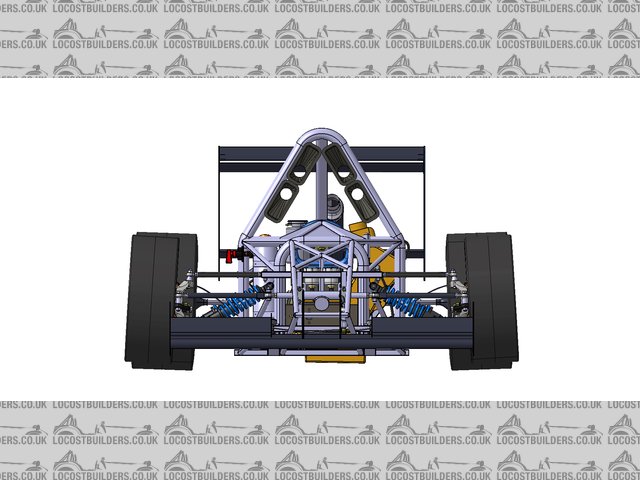
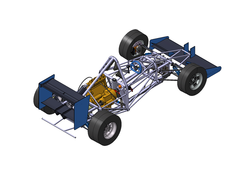
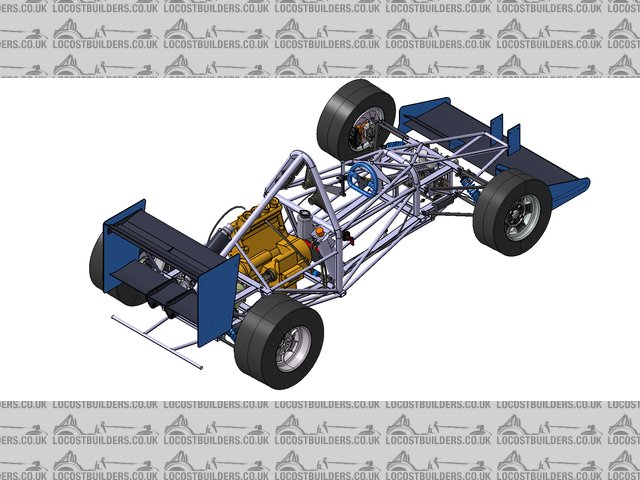
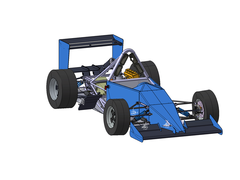
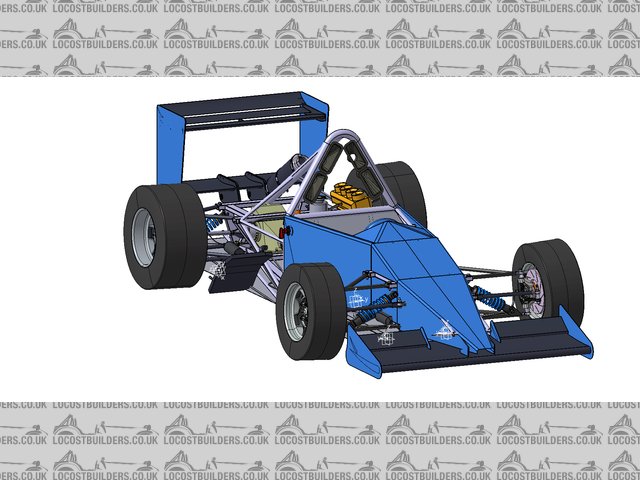
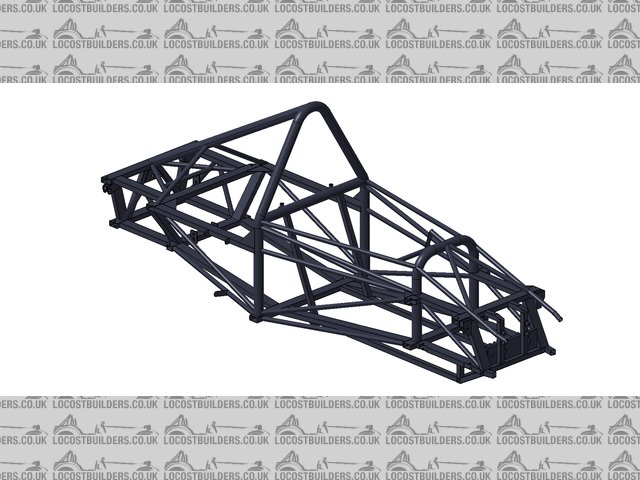
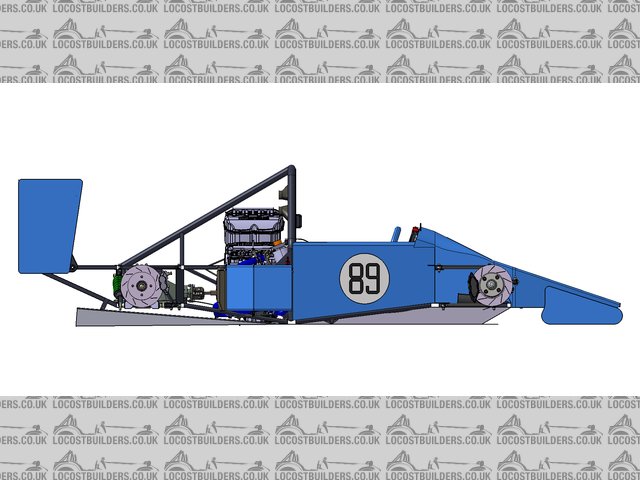
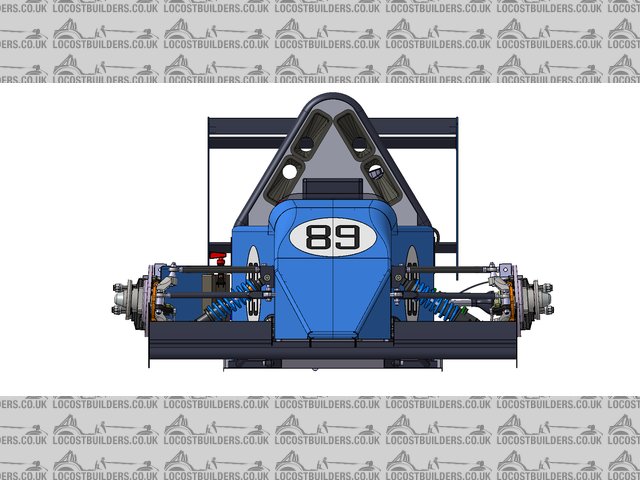
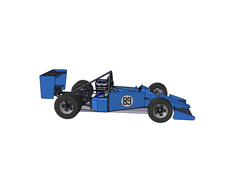
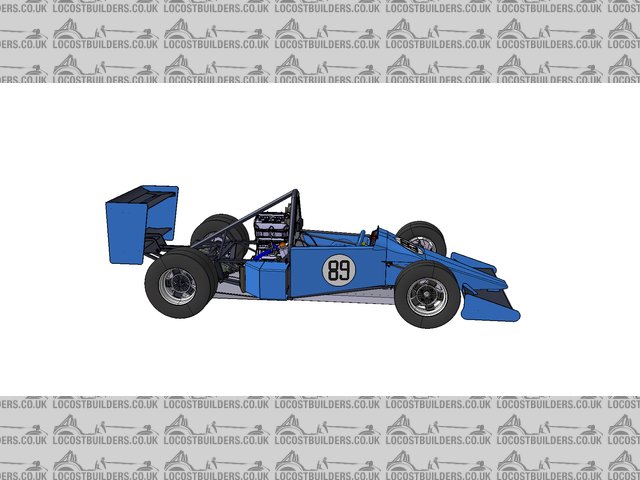
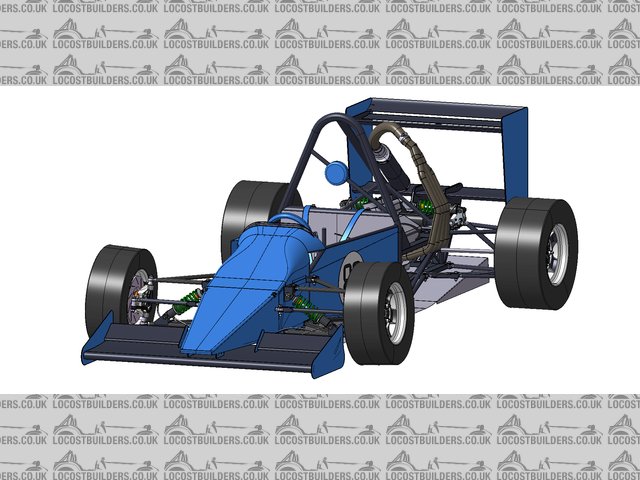
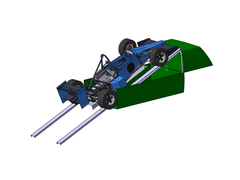
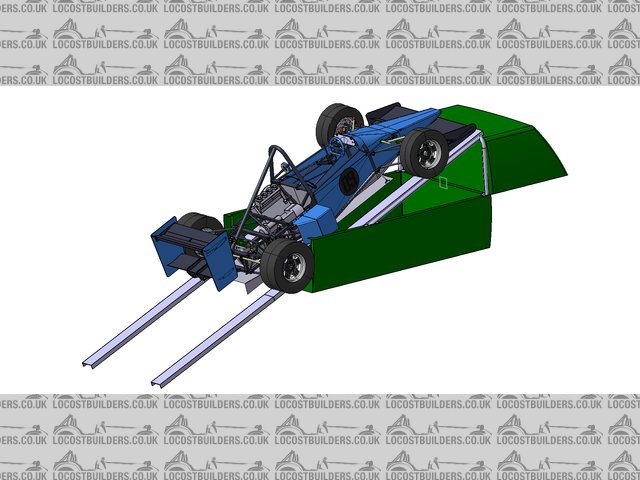
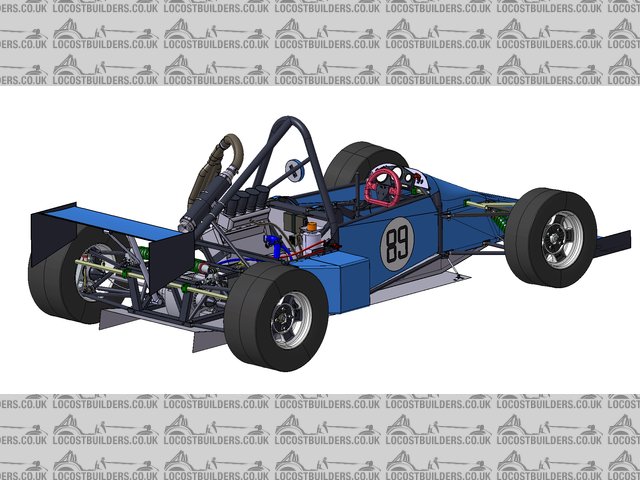
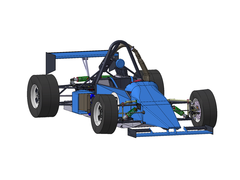
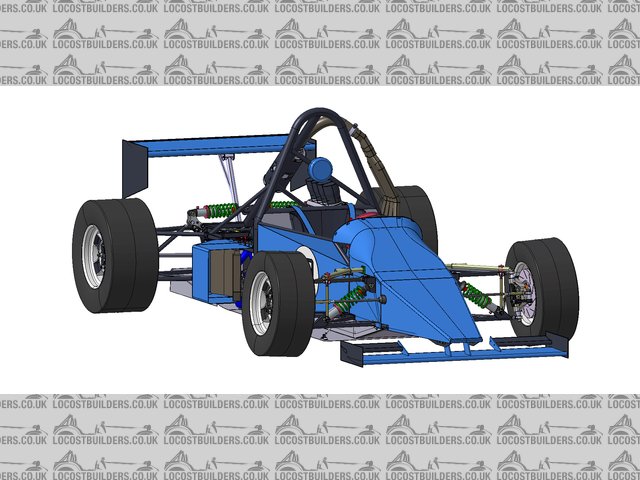
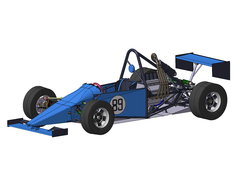
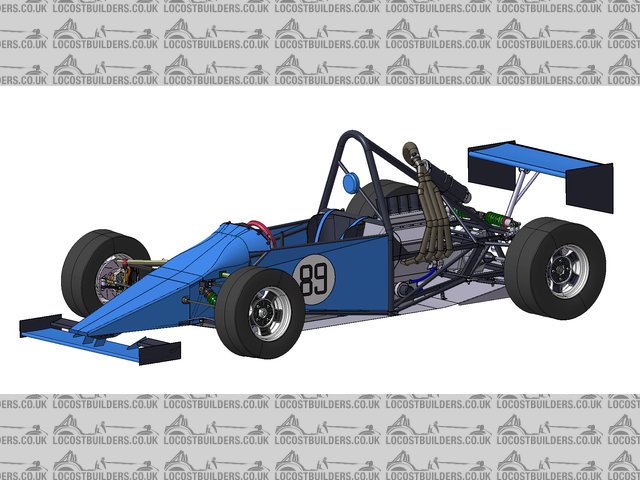
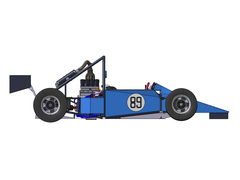
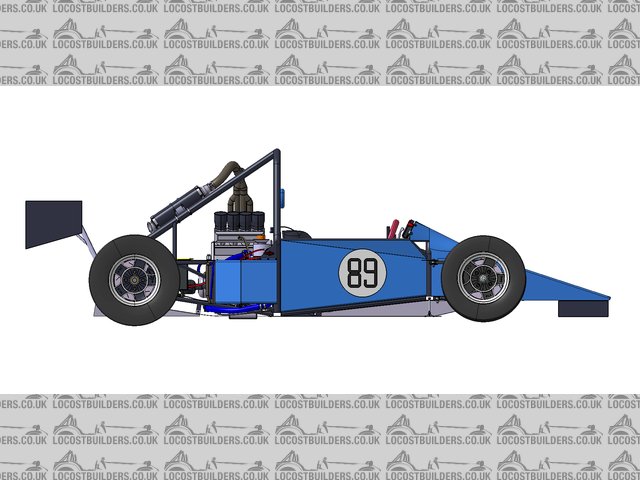
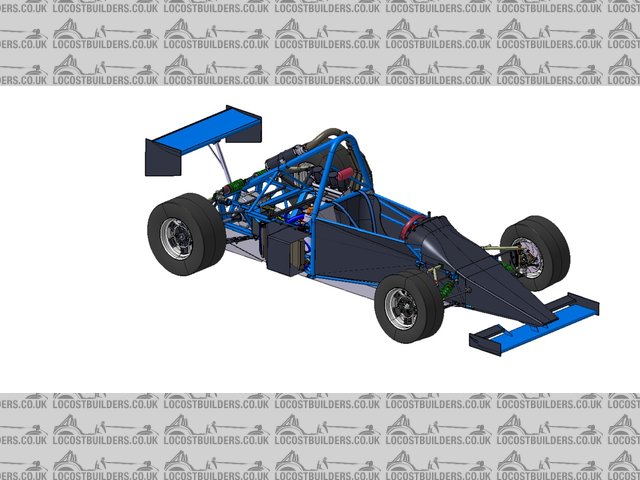
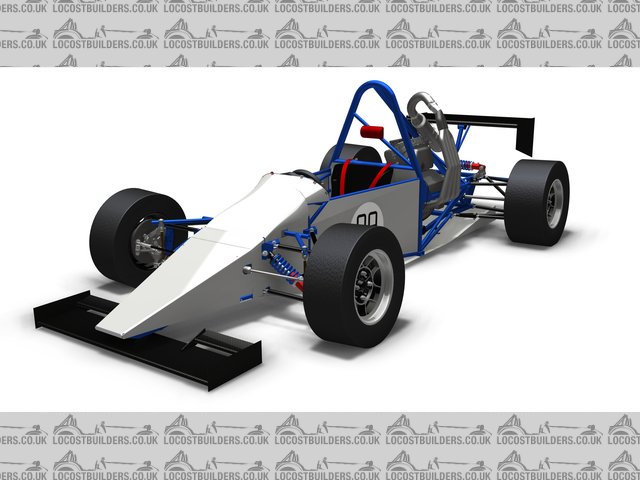
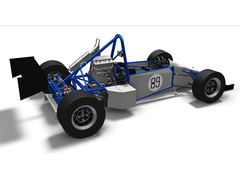
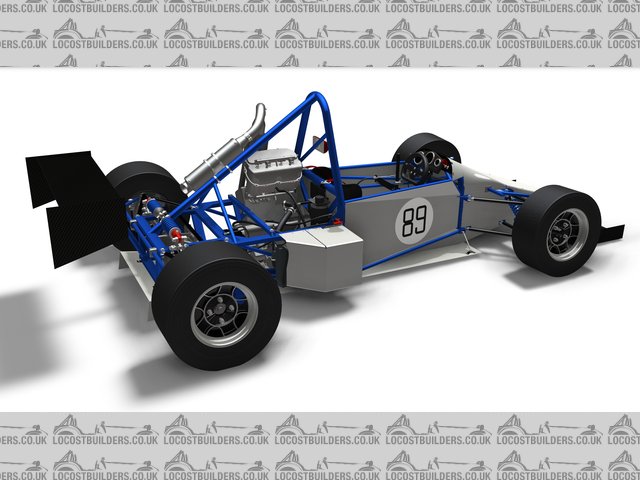
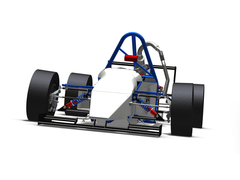
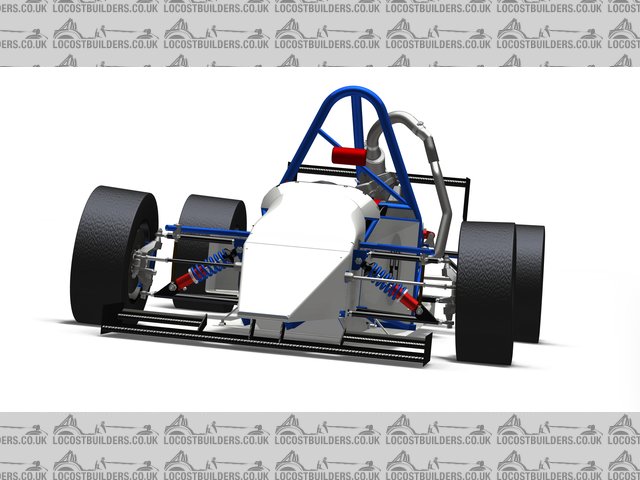
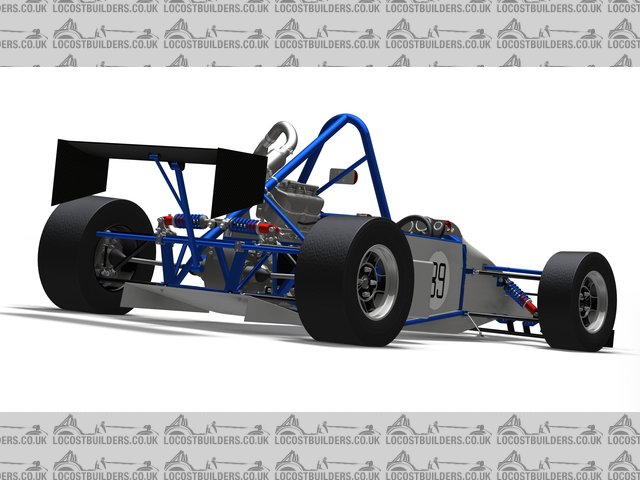
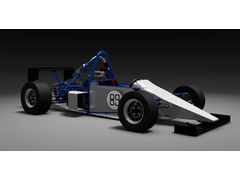
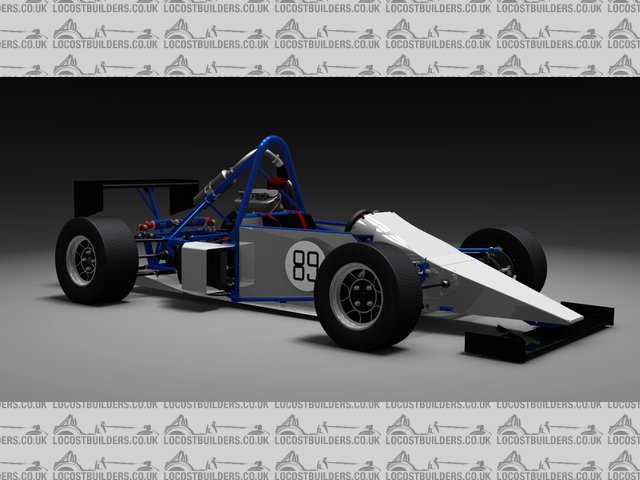
Here a are some pictures of the very early scheme for the layout, just so I could size everything up.
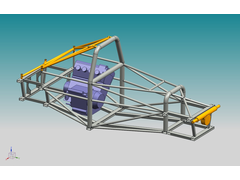

Description

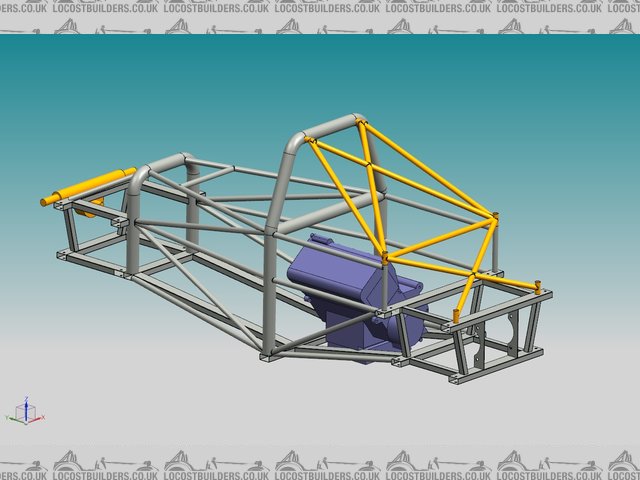
Description

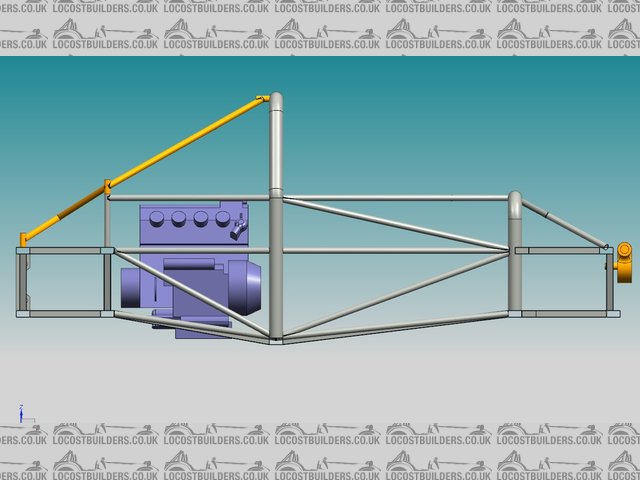
Description

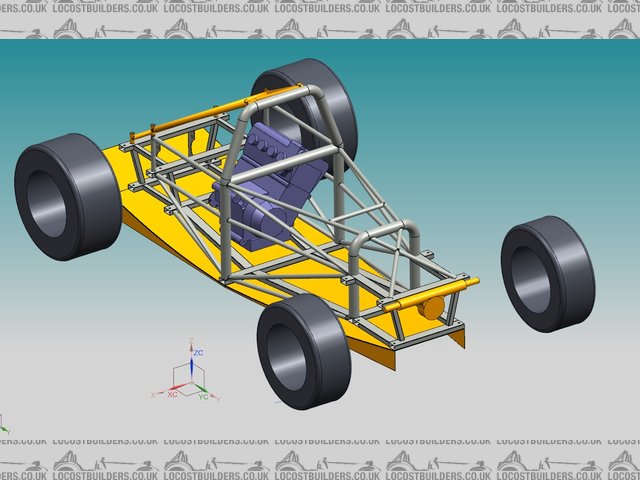
Description
More updates soon hopefully.
Ivan - 26/11/14 at 03:01 PM
Will watch this with interest.
DW100 - 26/11/14 at 04:12 PM
With the engine in this configuration I seem to remember seeing something about problems with very short propshafts or directly bolting the engine
output shaft to the diff.
I think this is why people tend to use chain drive.
Love the work bench though 
[Edited on 26/11/14 by DW100]
[Edited on 26/11/14 by DW100]
Doctor Derek Doctors - 26/11/14 at 04:55 PM
quote:
Originally posted by DW100
With the engine in this configuration I seem to remember seeing something about problems with very short propshafts or directly bolting the engine
output shaft to the diff.
I think this is why people tend to use chain drive.
Love the work bench though
]
I've seen Spire GTR's running this style and they do O.K. Theres no reason why it shouldn't work especially if done right. I'm
certainly not intending to bolt the diff directly to the engine output flange. Do you have any links to information on these problems? I always like
to have a read.
Also chain drive diffs are not exactly "Locost" and I already have a Freelander Diff.
I think the key is to make something that people can get going with and then upgrade, used freelander diffs are ~�80 on ebay, any builder can get one
and then get the car running, then you could upgrade to a Quaife ATB later if you want (as I did for �600). With a chain drive set-up you need to fork
out �500+ just to get the basic set-up to get the car running.
At the moment my entire powertrain cost has been:
893 Fireblade Engine (from a Westy): �250
Complete Exahust system: �150
Freelander Diff: �80
Megablade Driveshafts and Hubs: �50
So my near complete drivetrain comes in a �530, thats pretty much what I would have had to pay for just a chain drive diff set-up on its own.
Chain drive diffs also put alot more requirements onto the mounting set-up in terms of accuracy and strength, whereas mounting a standard diff with a
casing is pretty simple stuff.
Thanks for the workbench compliment, the hardest thing to do was lift the engine up onto it... not because of the weight but because it scratched the
lovely surface!
Ugg10 - 26/11/14 at 04:58 PM
The Fisher Menace and MEV Atomic also used this type of set up but with the engine almost next to the driver. May be worth contacting Mark Fisher or
Stuart Mills/RTR for info on thier setup.
DW100 - 26/11/14 at 05:22 PM
Ok can't seem to find any references now and have found details of old formula 750s with gearbox bolted direct to diff. So maybe I dreamt it.

Chain diffs can be done locost, have a look at most bike engined single seat hillclimbers. Most tend to use a Fiesta diff, a couple of pillow blocks
to mount it to the frame and a can over the diff to hold the oil in. you can use a split sprocket bolted direct to the diff.
[Edited on 26/11/14 by DW100]
ceebmoj - 26/11/14 at 06:25 PM
Looks good, can't weight to see the updates.
Ugg10 - 26/11/14 at 07:19 PM
Iirc the menace had a vey short Prop shaft swith a rubber cush drive between the engine sprocket and the sierra diff. I think there was also a hyabusa
menace that had a freelander diff in itas well, think this was documented in ppc at the time.
SCAR - 26/11/14 at 07:44 PM
You can get a short prop with from Paul at Spire sportscars just up the road from Derby. You may also need a stand off adaptor for the clutch (we did
for a 2007 Blade engine)
[img]

Description
[/img]
ettore bugatti - 26/11/14 at 08:04 PM
Interesting!
Doesn't the sprint class go to 600cc and then next to 1100?
Cann't wait to see what you will come up with suspension wise.
Doctor Derek Doctors - 26/11/14 at 08:15 PM
quote:
Originally posted by ettore bugatti
Interesting!
Doesn't the sprint class go to 600cc and then next to 1100?
Cann't wait to see what you will come up with suspension wise.
Yeah, not decided which way to go yet but my thinking is that if I make it to take a 1000 a 600 will definitely fit in but if I build it round a 600
now I could be snookered later.
I suspect the decision will be made by whether a CBR600 or GSXR1100 come up at the right price first.
The suspension won't be anything too mad although I am working on my own machined front uprights that will be direct replacement for the RD items
but allow adjustment of the steering arm position to correct the bump steer and Ackerman geometry.
It's the undercar aero were we are going to let loose, a full 'blown' Venturi tunnel is the ultimate aim.
[Edited on 26/11/14 by Doctor Derek Doctors]
Doctor Derek Doctors - 26/11/14 at 08:16 PM
quote:
Originally posted by Ugg10
Iirc the menace had a vey short Prop shaft swith a rubber cush drive between the engine sprocket and the sierra diff. I think there was also a hyabusa
menace that had a freelander diff in itas well, think this was documented in ppc at the time.
Cheers for the info, I will have a look into these cars. My initial thoughts were for a very short Cush drive.
Doctor Derek Doctors - 26/11/14 at 08:19 PM
quote:
Originally posted by SCAR
You can get a short prop with from Paul at Spire sportscars just up the road from Derby. You may also need a stand off adaptor for the clutch (we did
for a 2007 Blade engine)
[img]
Description
[/img]
Thanks for that picture, have been googling for one similar this afternoon. Yes I think Spire will be an early port of call.
43655 - 26/11/14 at 08:20 PM
I'm curious about your underfloor setup, what is the theory behind having a sort of back to front diffuser at the front?
Surely this will just result in a high pressure area all the way back to where the hoop is?
I would have expected a flat floor to curved diffuser would give the best result.
however this is based only on what i've seen, I don't have much experience with flow sim or aerodynamics
Doctor Derek Doctors - 26/11/14 at 08:36 PM
quote:
Originally posted by 43655
I'm curious about your underfloor setup, what is the theory behind having a sort of back to front diffuser at the front?
Surely this will just result in a high pressure area all the way back to where the hoop is?
I would have expected a flat floor to curved diffuser would give the best result.
however this is based only on what i've seen, I don't have much experience with flow sim or aerodynamics
It's a Venturi tunnel based on that of a Lotus 79, the air is massively accelerated in the centre section creating low pressure and thus
downforce. The front does create some lift and the opening needs to be tuned carefully. The next step is the 'blown' tunnel like Indycars
had in the 90's, the exhaust is blown into the front of the tunnel so the front can be further closed off to reduce lift while maintaining the
flow through the Venturi.
I would like to try and make it work just to see if I can really.
SCAR - 26/11/14 at 09:08 PM
A problem with mounting a bike engine north south in a single seater is that the chassis still ends up being as wide as a two seater due to almost the
entire engine being located to one side of the cars centre line. If your target is a very narrow (single seater) chassis you may have to mount the
engine centrally and offset the diff and run unequal length drive shafts. Also because blade engines really like to run their original airbox they end
up being quite tall so for good aero ideally need to be located directly behind the driver.
You are welcome to visit our shop and look over our part built Spire
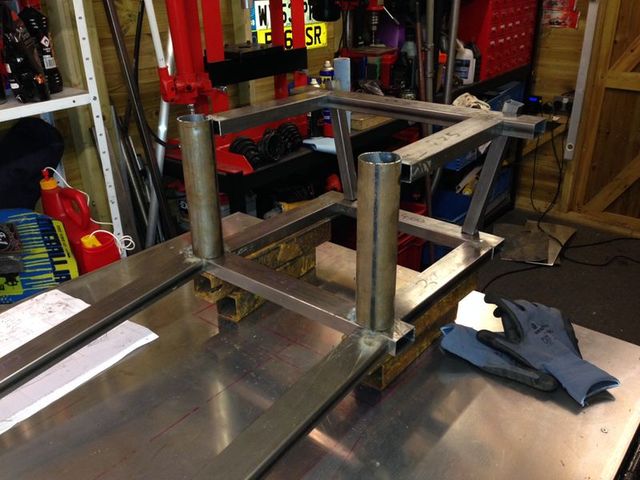
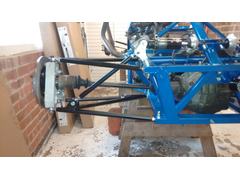
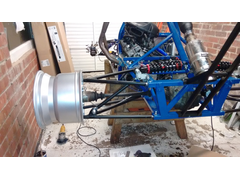
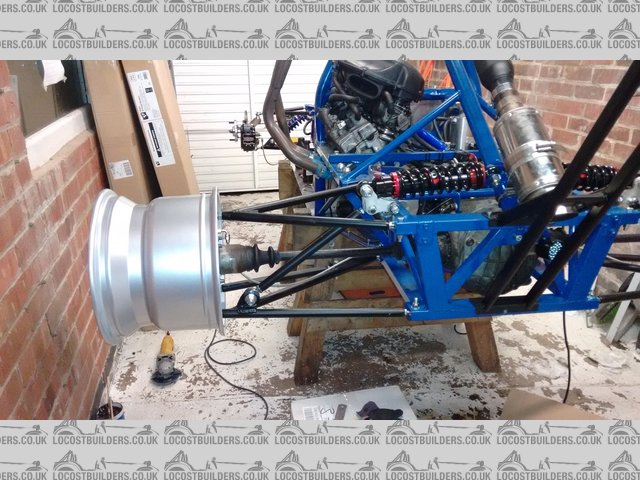
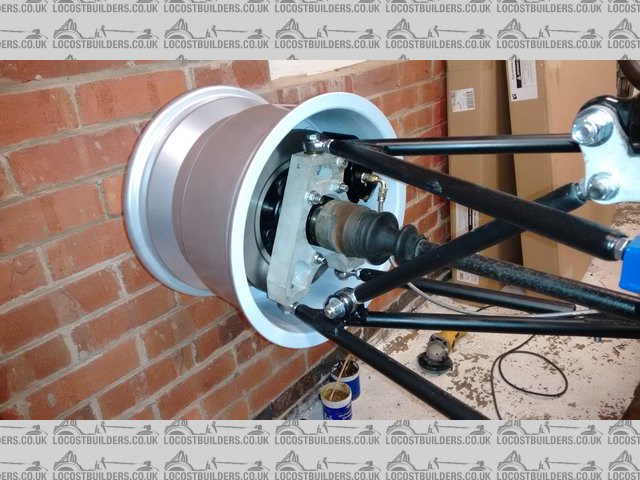
Doctor Derek Doctors - 27/11/14 at 10:30 AM
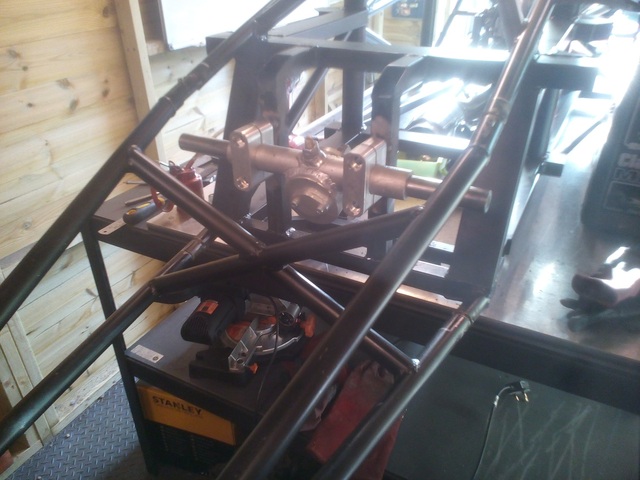
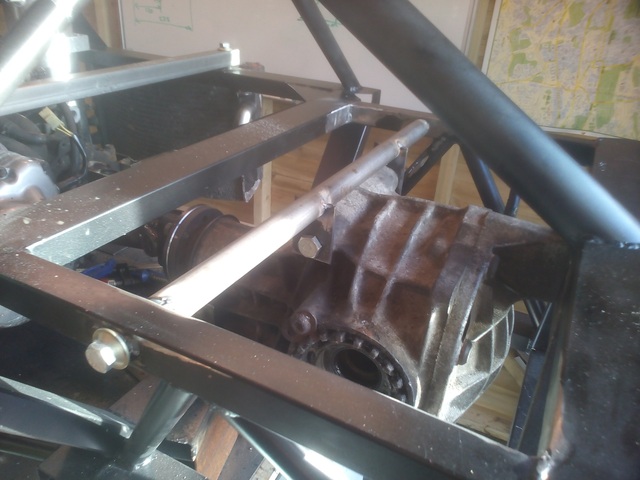
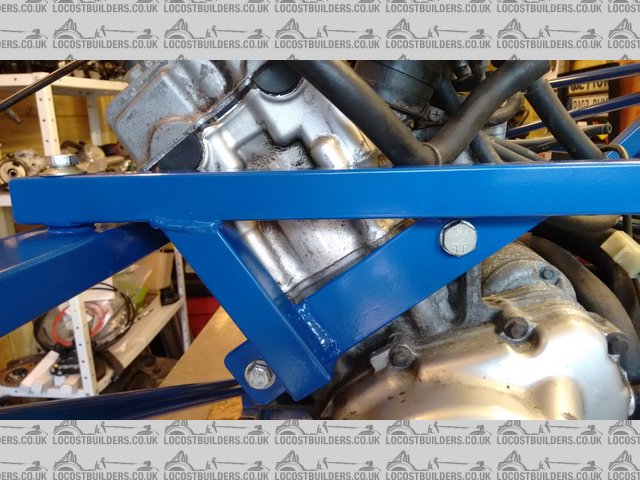
Its not much but at least I have "broken ground" now. Hopefully when the reast of the driveline is returned to me from its recent use at a
trade show I can fully lay out the rear end.

Description
bart - 27/11/14 at 04:00 PM
hi
the answer to some of your questions depend on exactly what you intend to do with the finished car.
if its just sprint / hill climb does it required reverse , a lot of race types do now.
especially if its aimed eventually at the road.
if its pure race and you stick with chain drive 275-325 kg is just achievable with some major work to keep the weight down
for road then 425-525 kg for a target is achievable , remember formula ford cars run approx. 450kg . ( I know steel wheels ect )
I am building a very similar car but my aim is at the track day / road area. ( it is also aimed to allow bigger drivers )
I looked at the layout you are proposing and ended up going for an east> west config due to offset load in a single seater as previously stated.
also watch the feet position regarding the front axel line re regs
if you want to see the pictures of mine here is the link
http://www.locostbuilders.co.uk/forum/50/viewthread.php?tid=194783
if you want further info u2u me
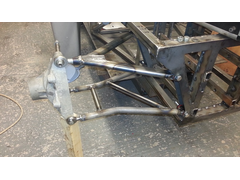
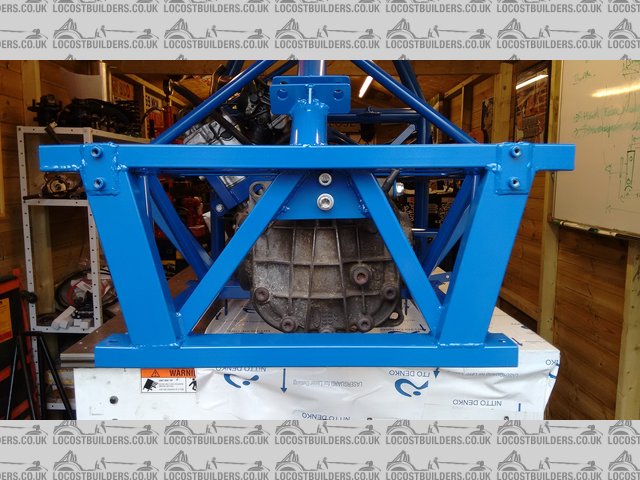
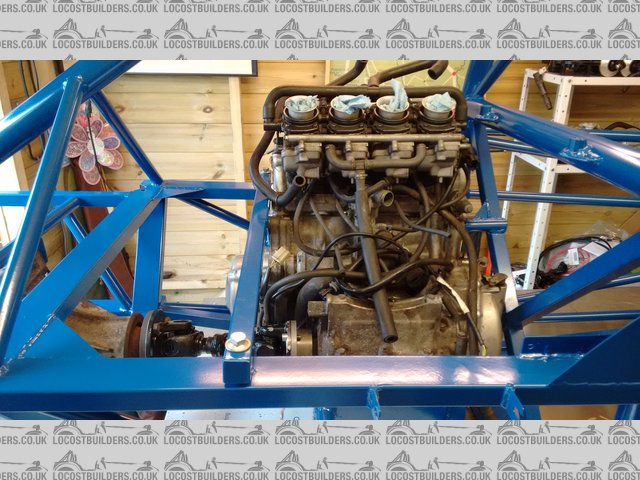
[img]
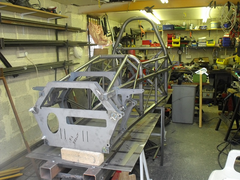
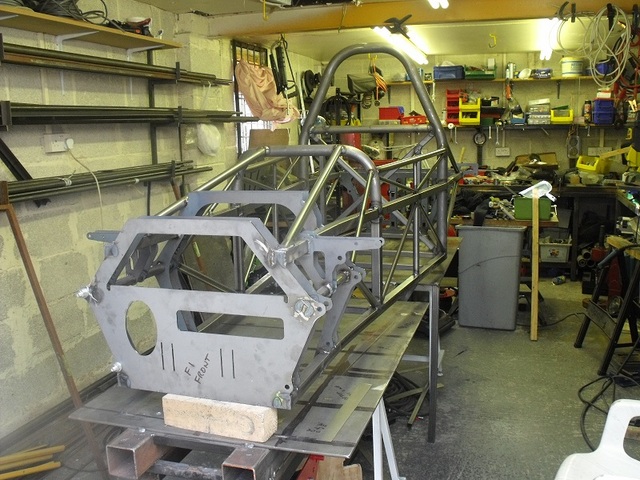
later build front view
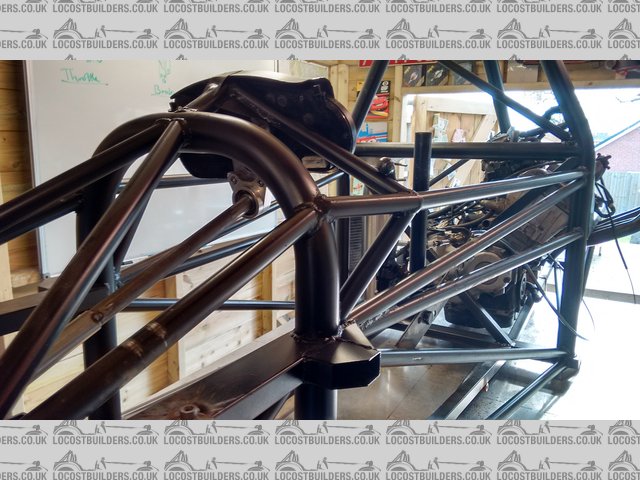
[/img]
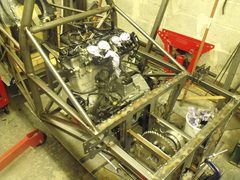

engine in frame with diff
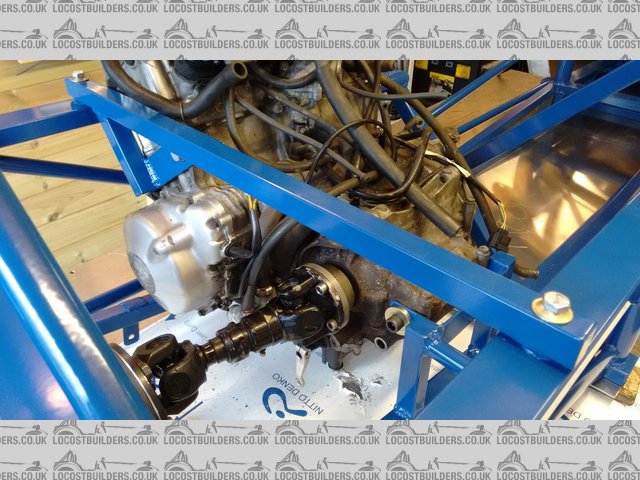
SCAR - 27/11/14 at 04:24 PM
Nice work, I think mounting the engine in an east /west aspect with offset chain drive makes the most sense in a rear engine single seater The second
photo shows the advantage of the resulting narrow chassis which should give better aero and weight distribution. Although the rgb cars are wider as
they have to be two seater they still changed to this arrangement as the chain drive significantly reduced transmission loses. Is this completely
scratch built? What are you going to do for bodywork?
Edit Checked out your build thread will follow with interest
[Edited on 27/11/14 by SCAR]
43655 - 27/11/14 at 07:41 PM
interesting, thanks, never seen it before.
Definitely sounds like something you'd need flow simulation or considerable real world testing to implement properly
Doctor Derek Doctors - 28/11/14 at 08:33 PM
To answer the debate about Longitudinal vs Transverse mount the engine in Longitudinal mount requires no more width than my shoulders (I have wide
shoulders which means I need a wide car) so the car wont be any wider than with a transverse layout, the battery, radiator, fuel tank and other bits
will be offsetting the weight. As I previously mentioned though it definitely wont be having a chain drive as I don't have the money to spend on
one and it doesn't fulfill the ethos of the project.
As for the total weight, we built and MSA compliant sprint car, which was 220kg with a 30Kg single cylinder engine, so adding an extra 35kg for an I4
and a bit extra for extra chassis and aero 275kg is definitely doable.
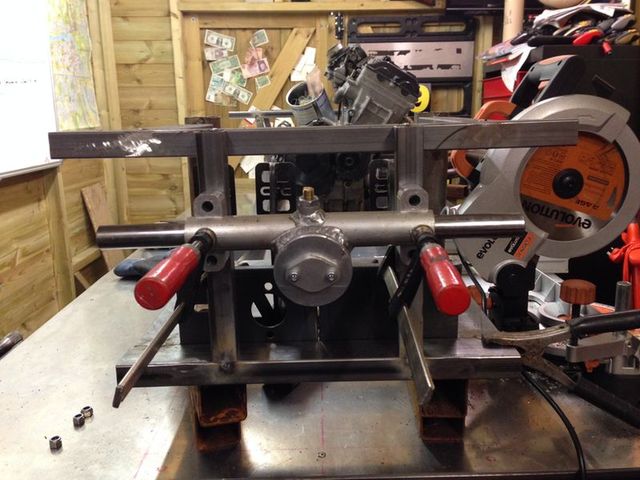
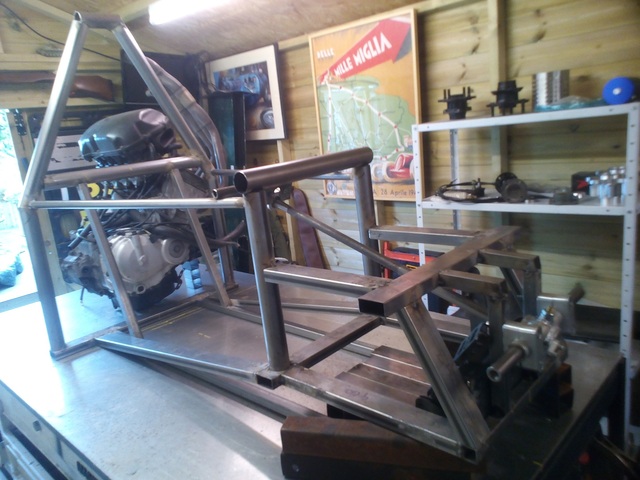
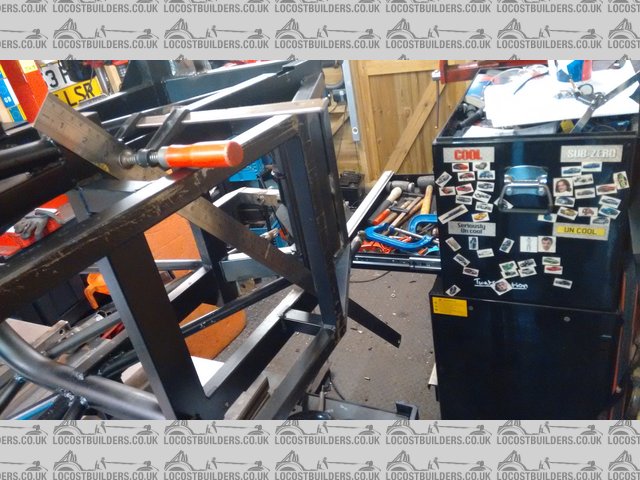
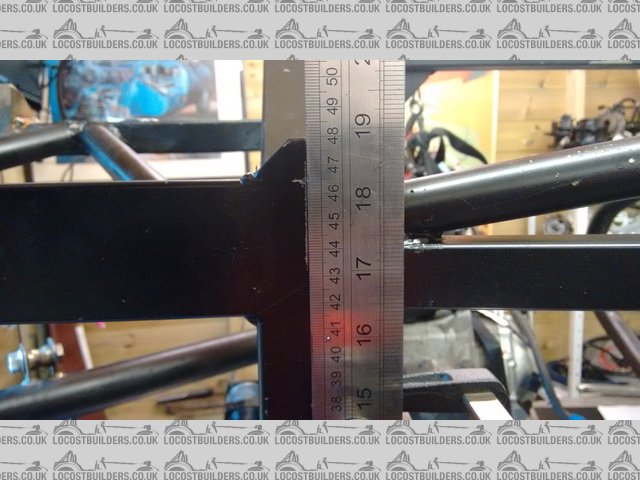
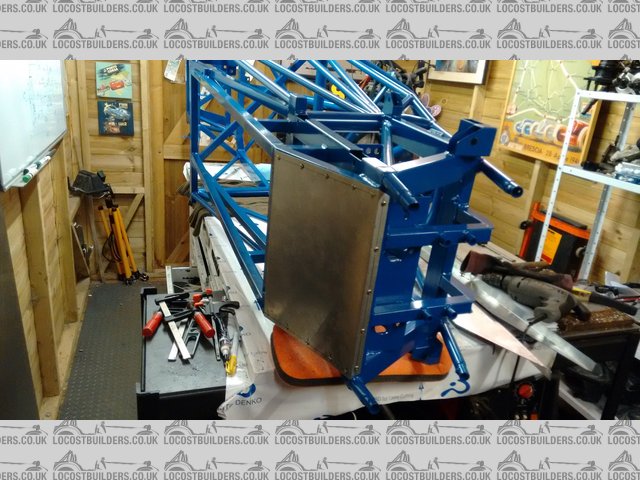
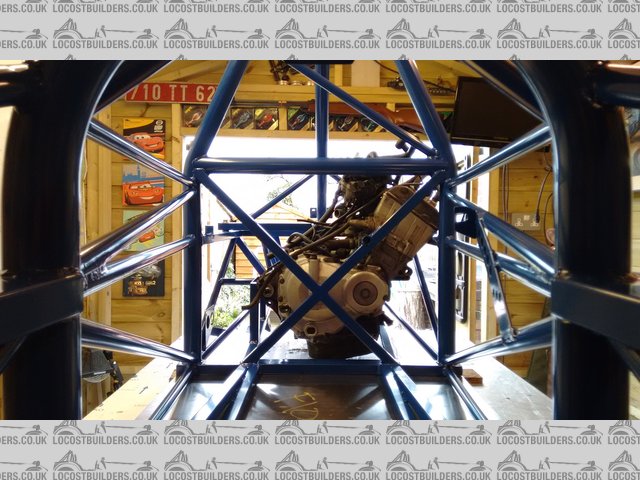
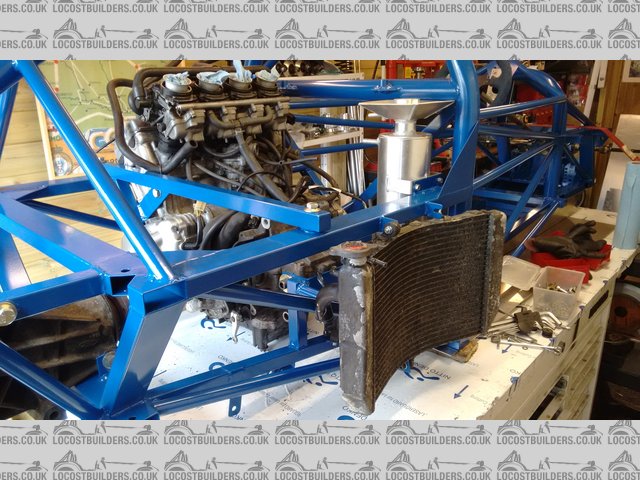
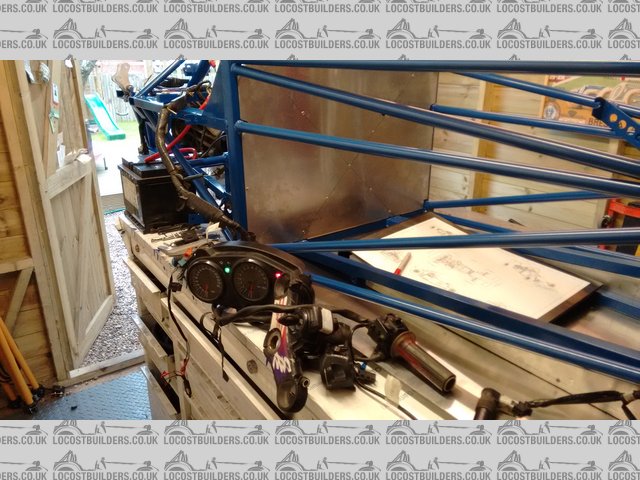
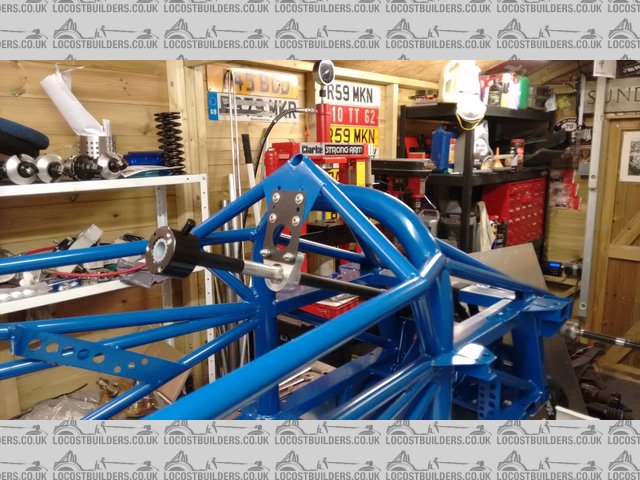
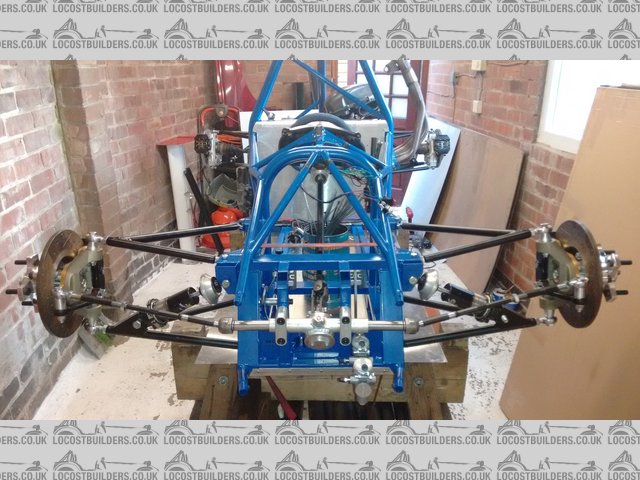
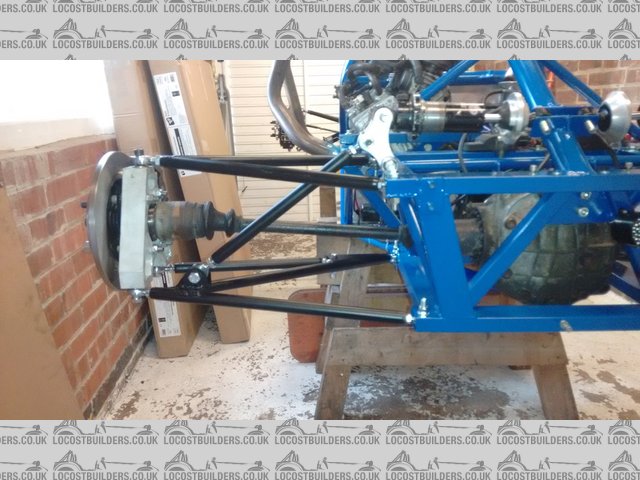
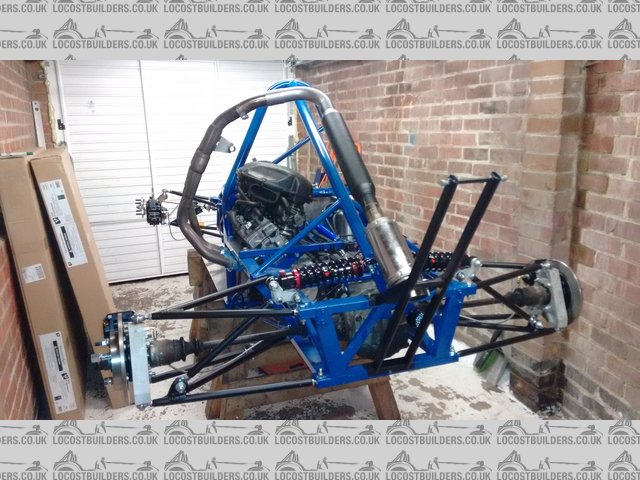
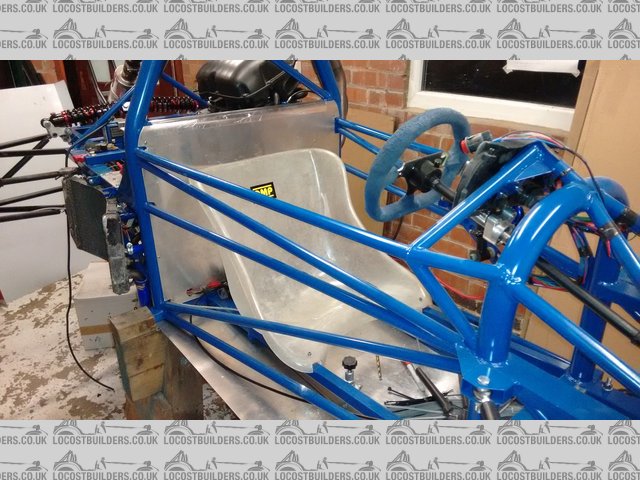
Anyway, I got a bit of time to get started this evening, I mapped the car out on the bench and tested it for fit. The chassis is definitely big enough
for me and the engine which was my first worry and the engine clears the main chassis beams which was the second main area of question.
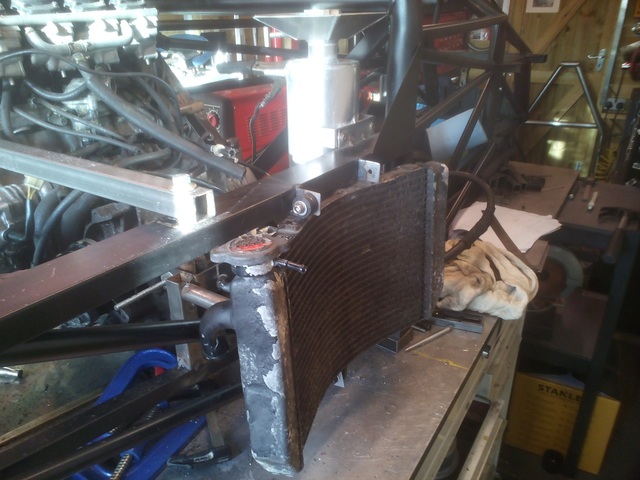
The exhaust nicely clears the predicted chassis triangulation when fitted in the forward facing position.

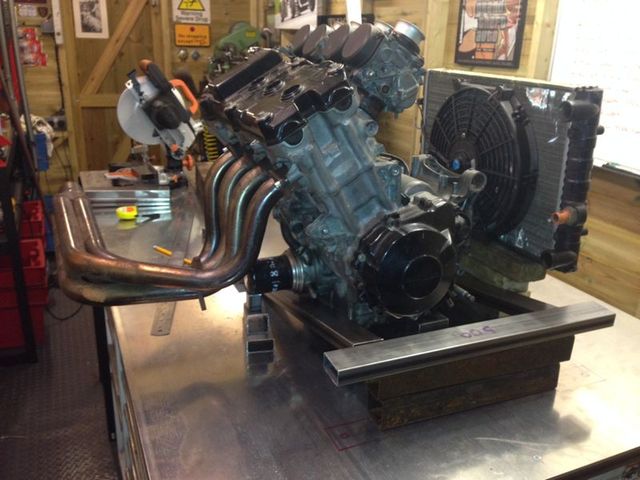
Description
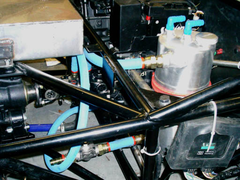
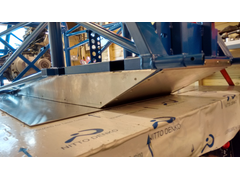
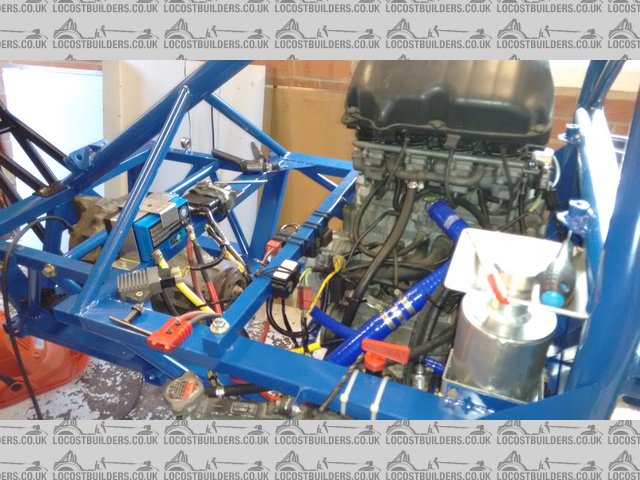
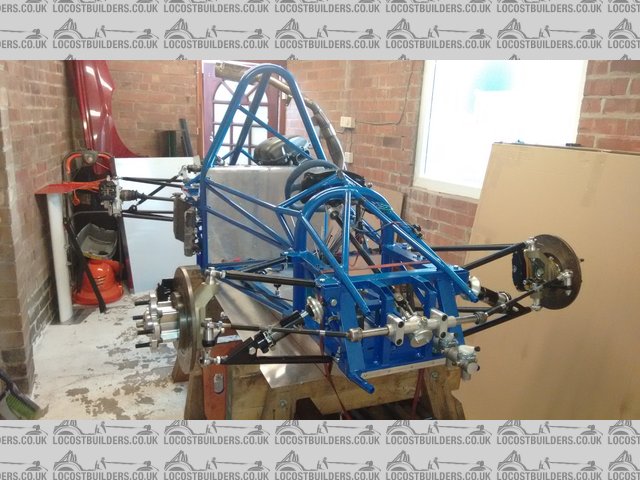
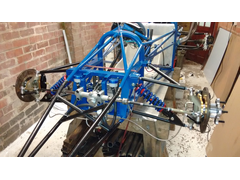
The radiator isn't in the ideal location for cooling but will be good enough for 1 minute sprints.

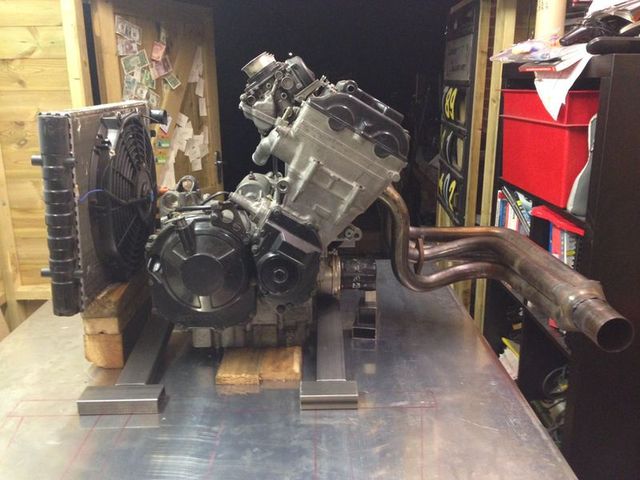
Description
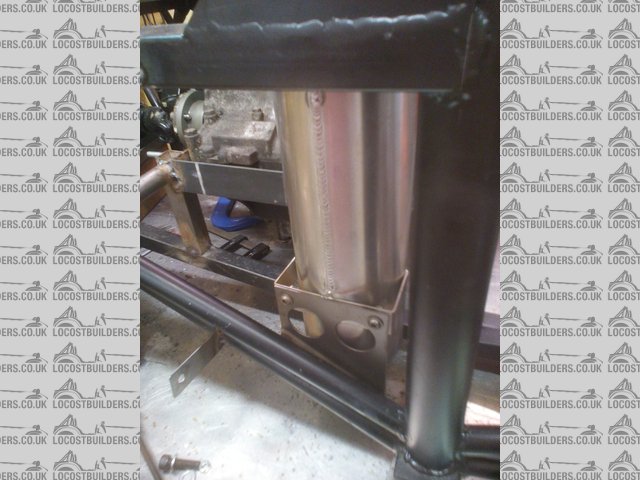
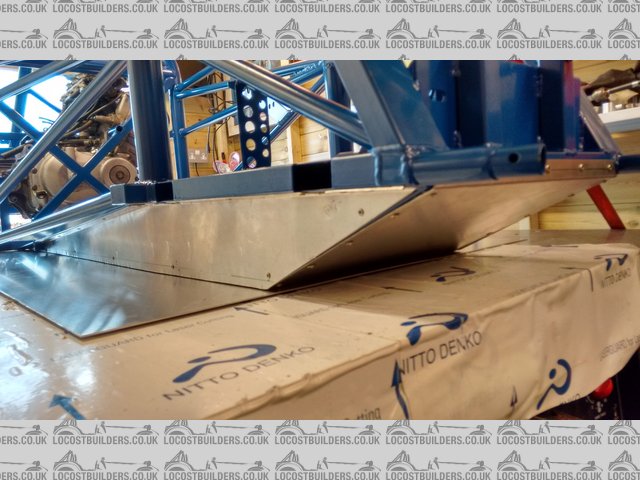
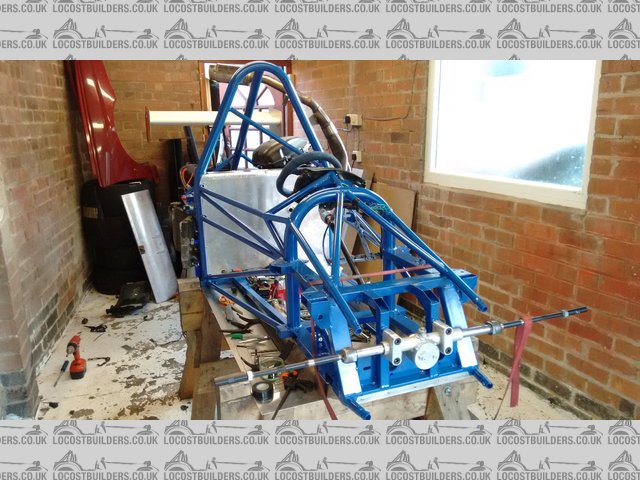
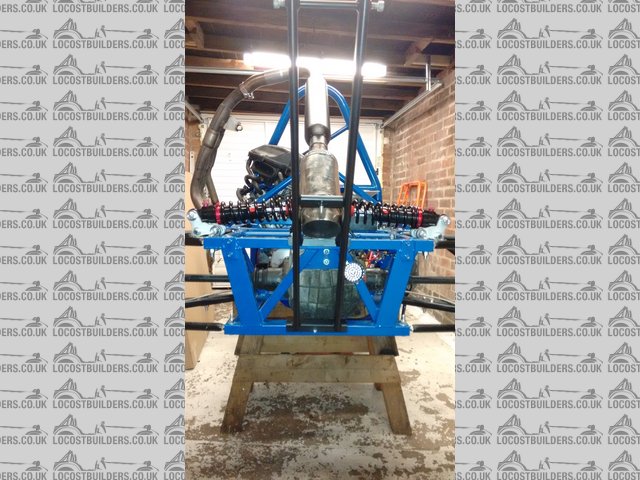
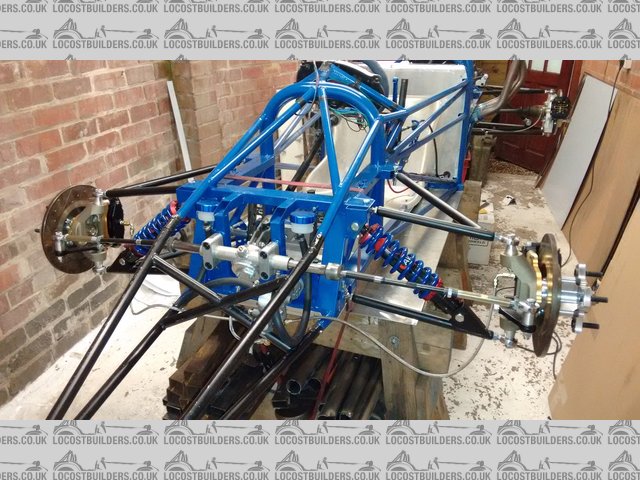
The red marking on the bench show the width of the chassis and how the engine still sits within the single seater roll cage width.

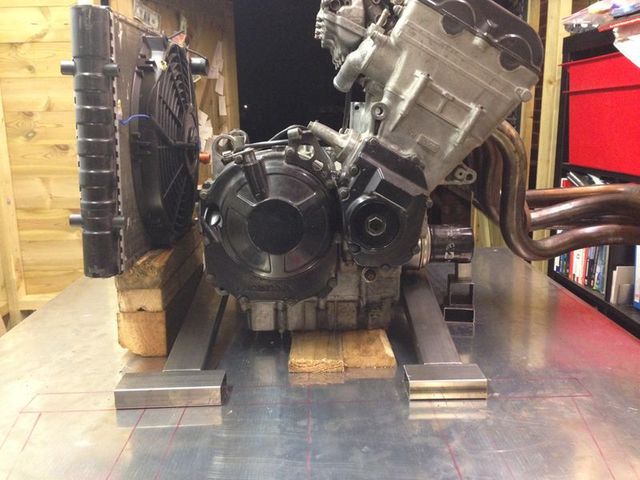
Description
bart - 28/11/14 at 09:04 PM
looking good
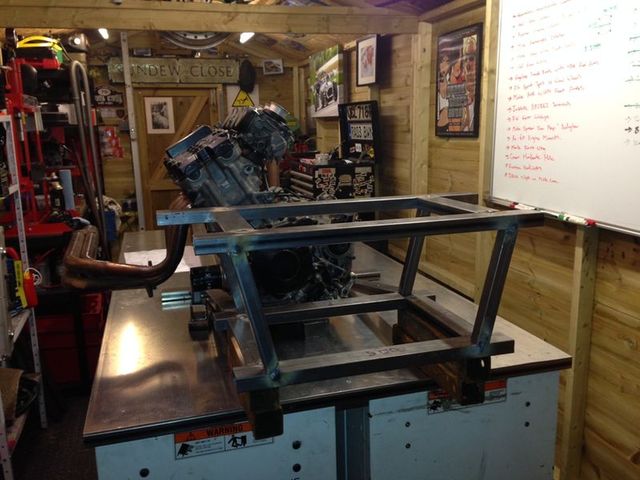
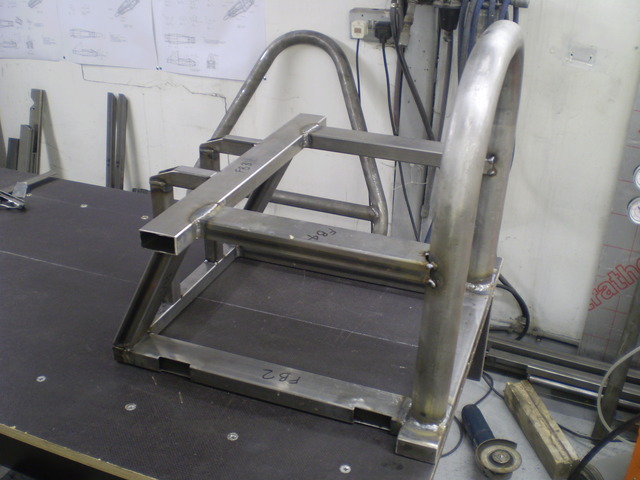
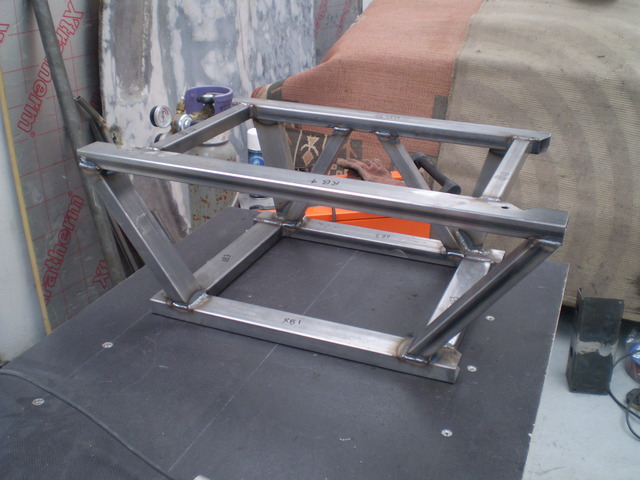
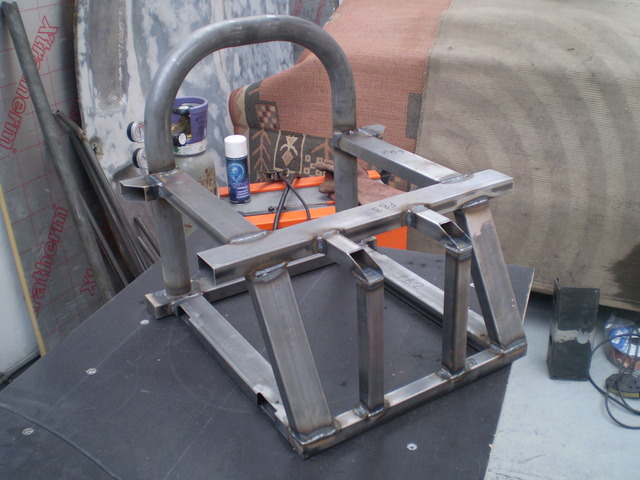
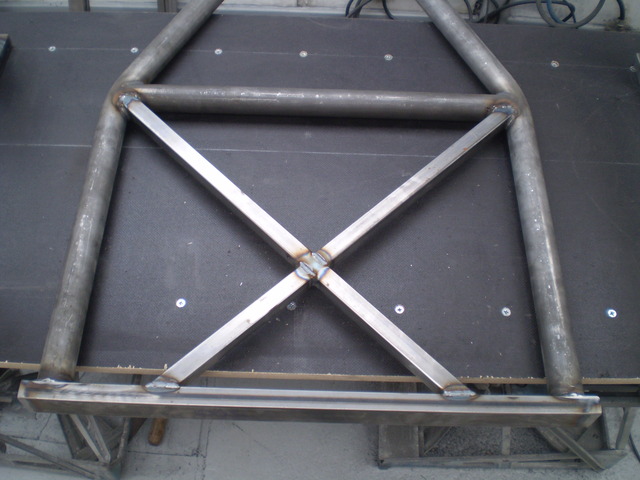
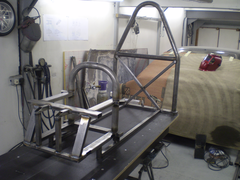
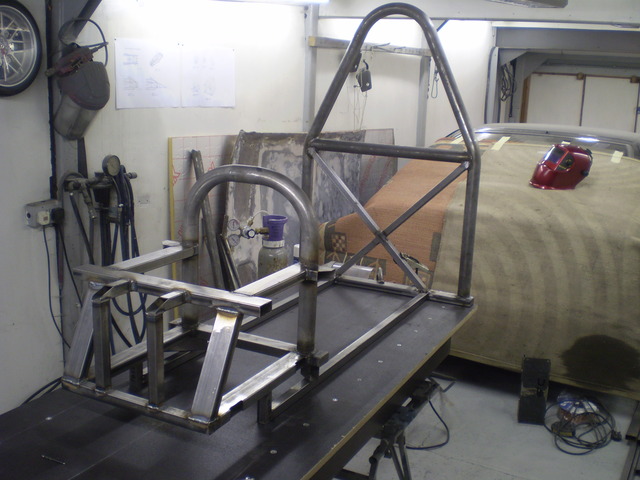
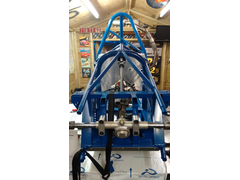
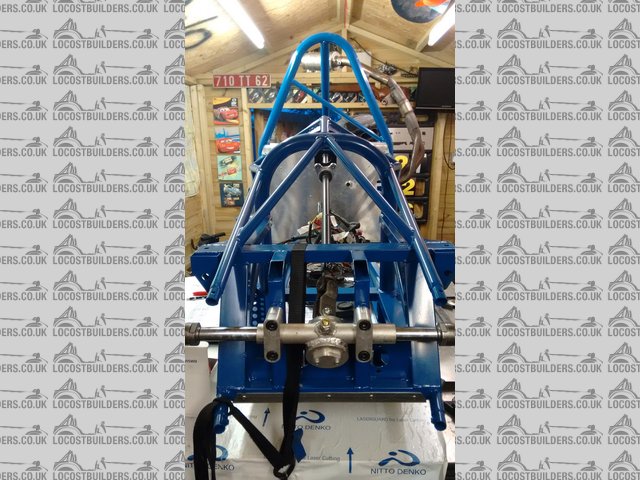
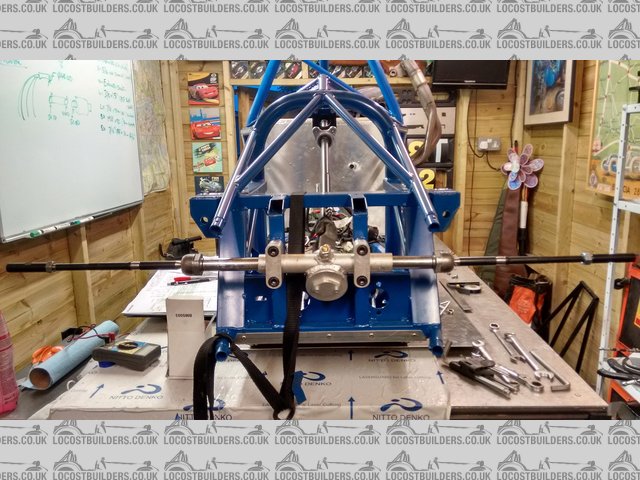
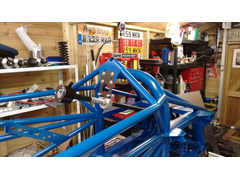
Doctor Derek Doctors - 2/12/14 at 07:29 PM
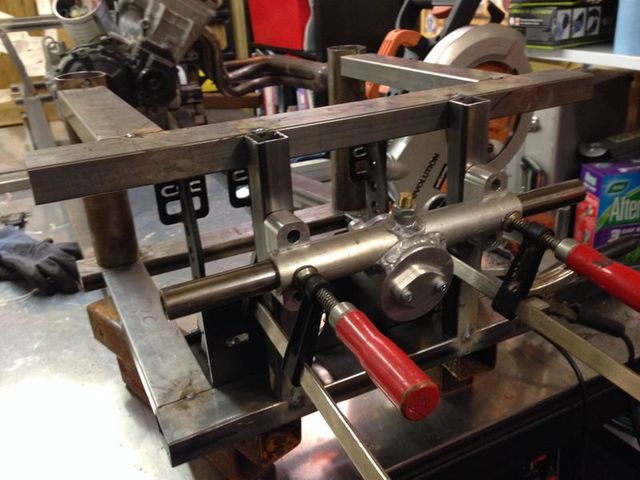
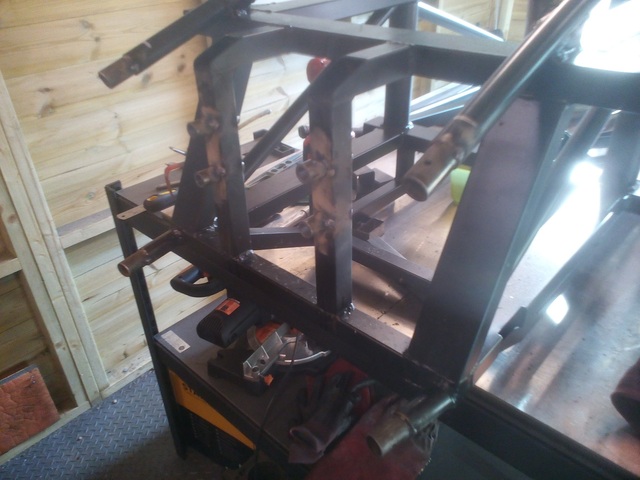
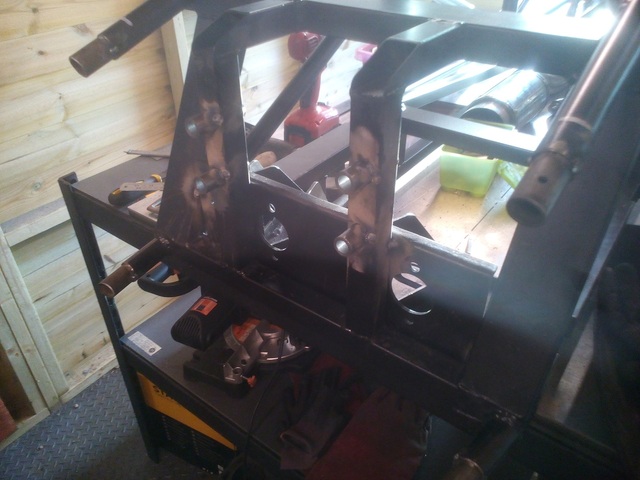
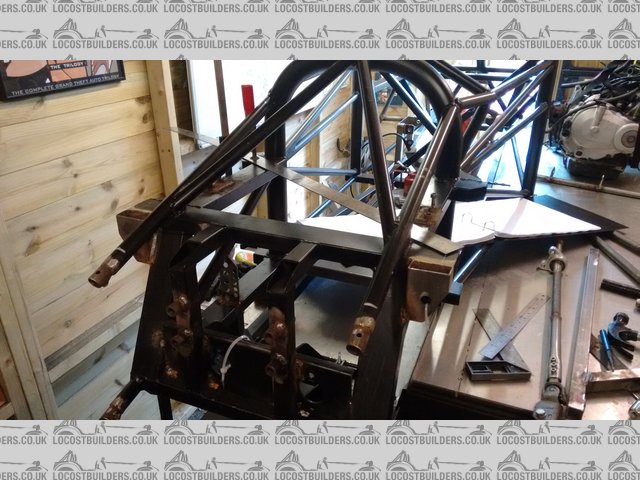
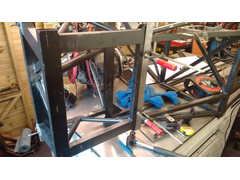
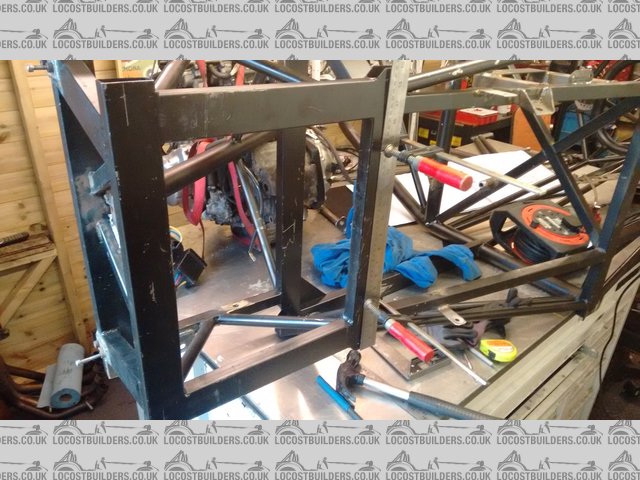
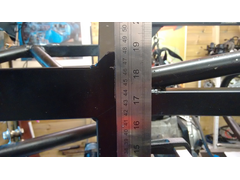
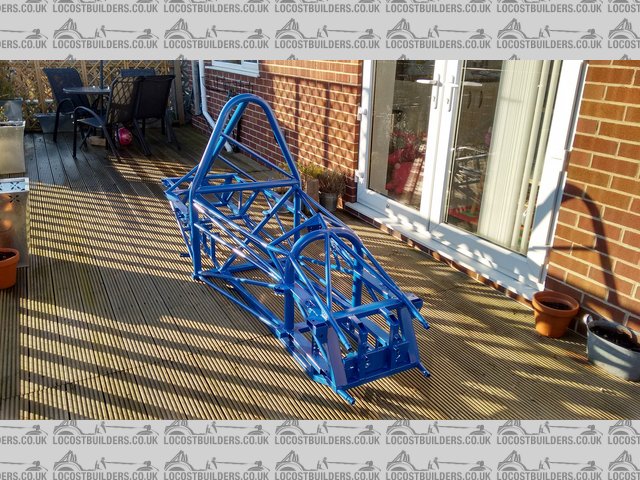
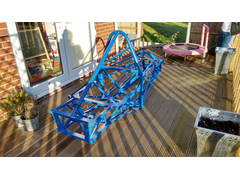
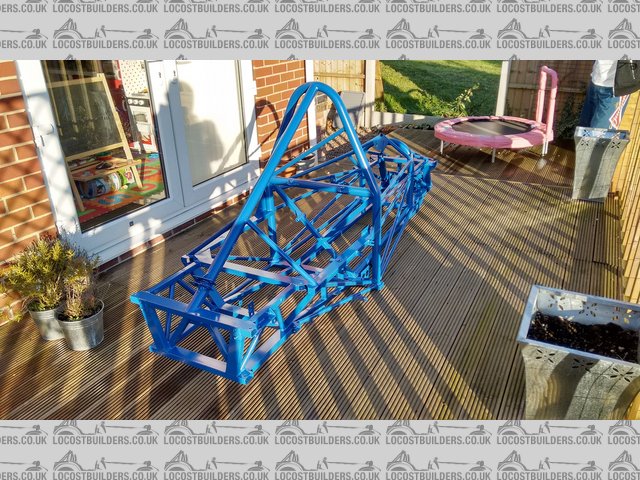
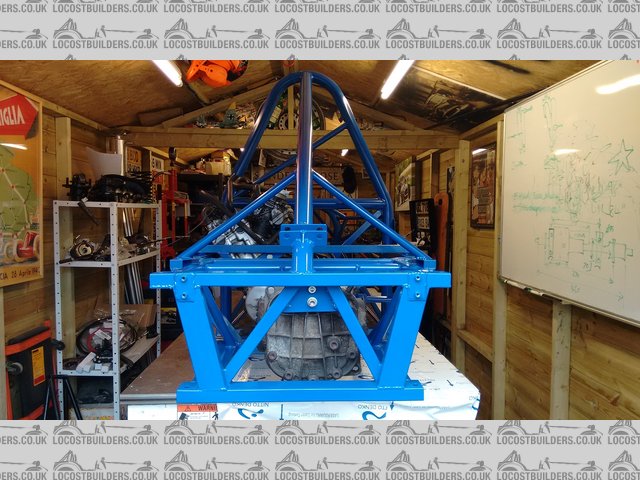
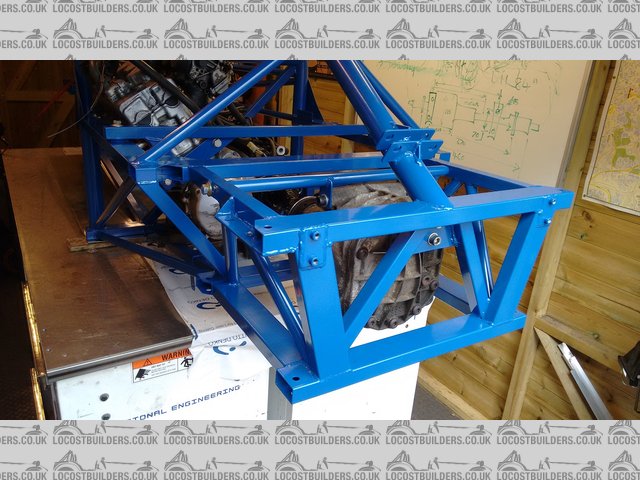
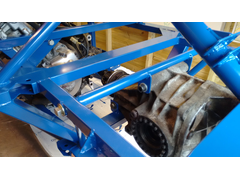
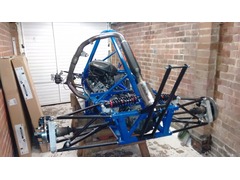
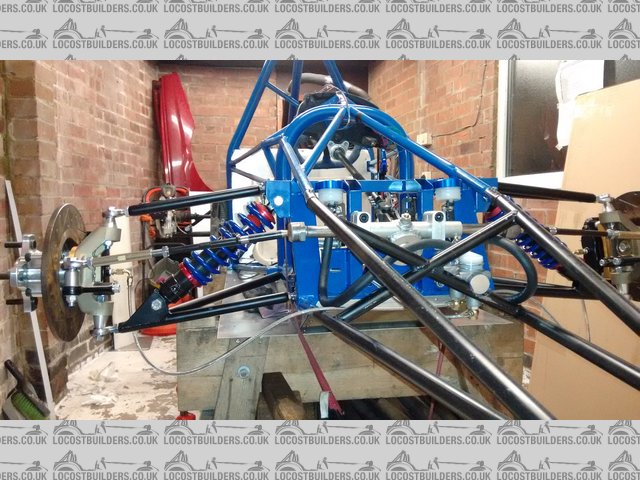
Got a bit more time in the workshop today.
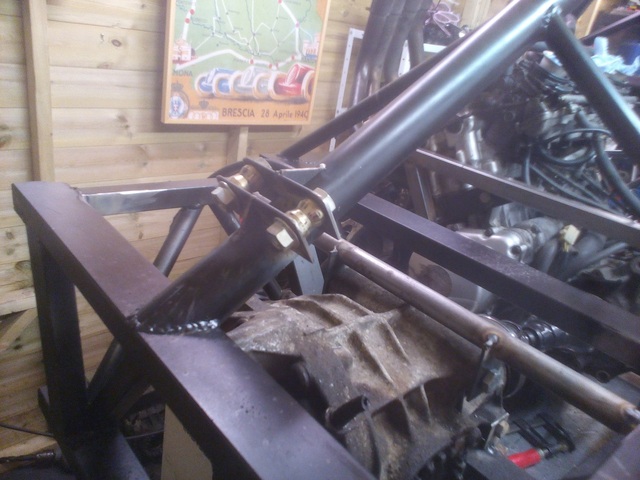
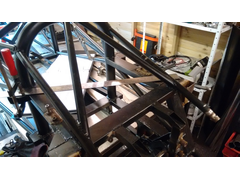
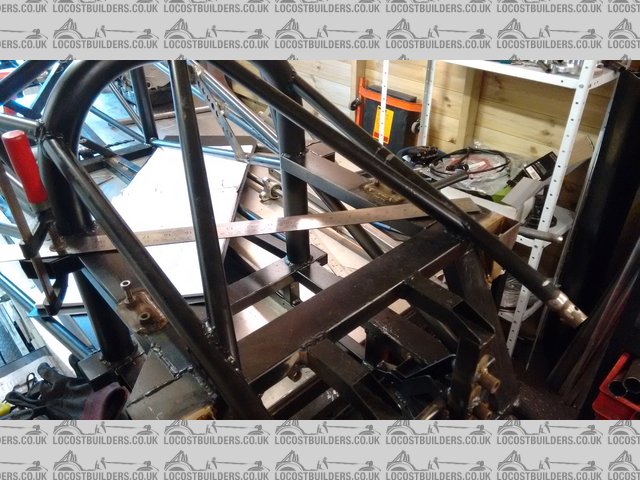
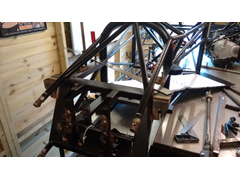
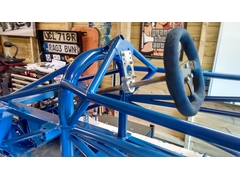
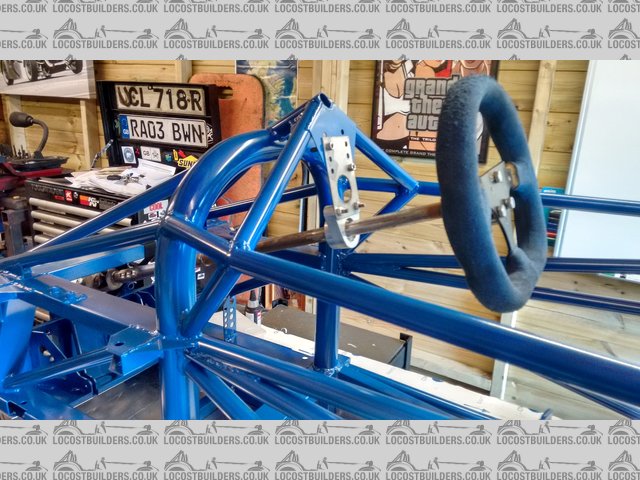
Cut and tacked together the main section of the chassis, this will allow me to sort the seating position and thus define the roll hoop heights and
also work out the positioning of the main components for the driveline (especially the diff) and the pedal box and steering rack at the front end.
Once this has been done I'll feed this back into the CAD model to update the design, I've already made a few changes from the initial CAD
model to aid assembly and welding.

Description

Description

Description

Description
bart - 2/12/14 at 08:27 PM
still looking good
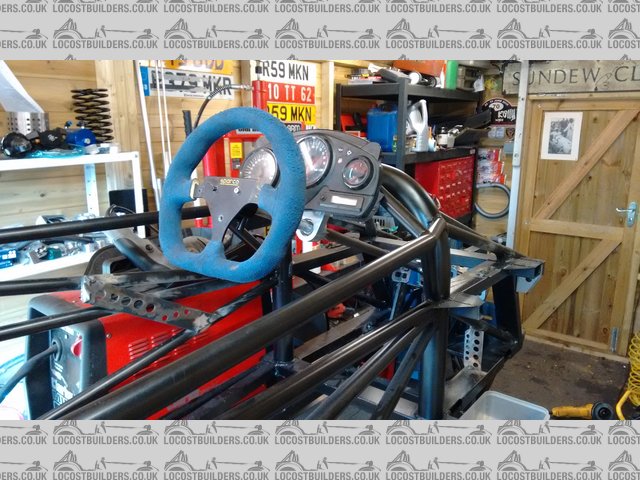
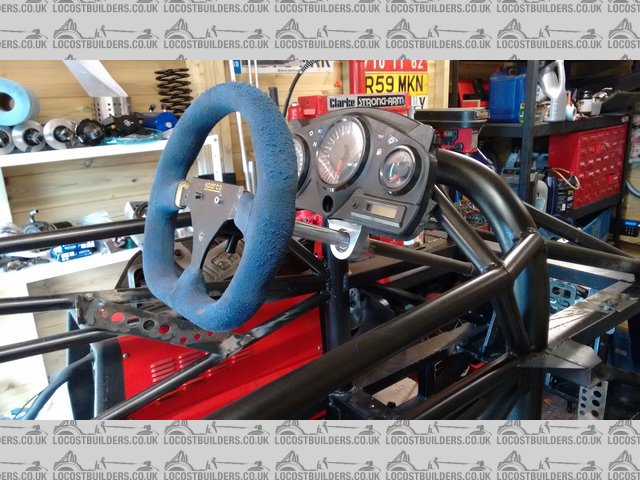
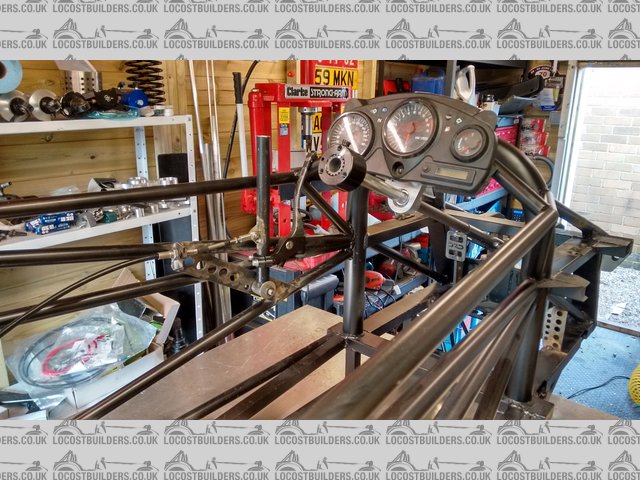
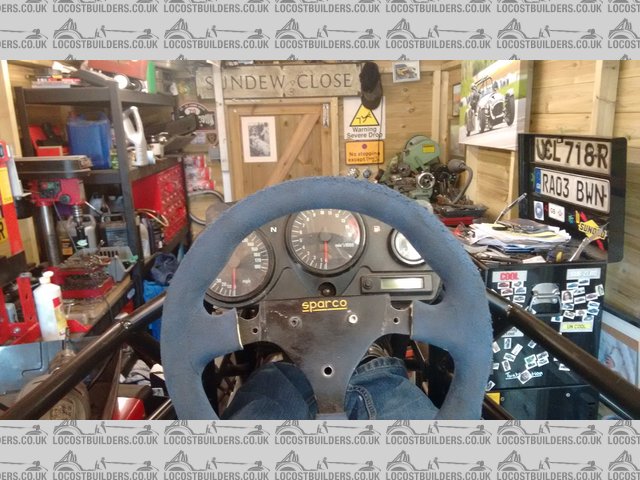
I fitted my steering wheel assembly and clocks today plus a load of fiddly bit's that take hrs. then don't look like you have done f all
.
keep going > there are dark days ahead 
what the regs regarding feet position re pedals . I mean feet position re front axel line .
[Edited on 2/12/14 by bart]
Doctor Derek Doctors - 2/12/14 at 08:46 PM
quote:
Originally posted by bart
what the regs regarding feet position re pedals . I mean feet position re front axel line .
[Edited on 2/12/14 by bart]
Regs say that feet must be behind the front axle line, the front axle line is on the very front of the chassis (the front wishbone tubes are
perpendicular to the car centreline). It's going to be a tight fit for my legs, certainly I don't think it would be comfy for anything
longer than a sprint.
bart - 2/12/14 at 08:59 PM
I could be wrong and prob am , but I thought the axel line is ctr of the wheels side to side .
if im correct the feet must not be in front of this . it locks like your cad is fsea type with feet over this line
I stand to be corrected and will be !
Doctor Derek Doctors - 2/12/14 at 10:25 PM
You are correct that the line between the front wheel centre is the sale line, this is inline with the very front of the chassis
bart - 2/12/14 at 10:38 PM
will be interesting to see your suspension design.
if your chassis does not extend forward of the wheel ctr line how do you deal with the stresses of the front a arms .
will watch with anticipation , as opposed to constipation ! lol
bart - 3/12/14 at 11:12 AM
further thoughts
the design you are proposing is very short compared to the axel ctr distance , I don't wish to sound contra sending but have you given any
thought to straight line stability , Square designs tend to swap ends alarmingly easily . all the books and good handling cars tend to be approx. 1.5
ish to 1.7 . now ready ! everybody shout !
just relating some of the design thought process that I went through.

Doctor Derek Doctors - 3/12/14 at 12:51 PM
quote:
Originally posted by bart
further thoughts
the design you are proposing is very short compared to the axel ctr distance , I don't wish to sound contra sending but have you given any
thought to straight line stability , Square designs tend to swap ends alarmingly easily . all the books and good handling cars tend to be approx. 1.5
ish to 1.7 . now ready ! everybody shout !
just relating some of the design thought process that I went through.
The wheels in the CAD model are just for ride height checking to get it down to 40mm min' ride height with the tyre sizes I want to use and are
not on the correct track width. When I have done my chassis feedback work I will start in the suspension and running gear in earnest.
Doctor Derek Doctors - 10/12/14 at 07:44 PM
Quick non-progress update.
Have decided to build a 600cc class car as I think its fits my plan a bit better. The general consensus from the sprint/hillclimb internet users seems
to be that there might be a gap for an entry level 600cc machine in the market and a few other people seem to be building cars to refill the class as
well.
I will go with a CBR600 F2/F3/F4 engine as these are readily available for <�500 as complete bikes and seem to be simple, robust and reasonably
quick.
As for other bits I'm thinking of using Westfield rear uprights (inspired by Barts build) as they will fit my megablade driveline and are readily
available, the only problem is the �500 price tag. Also I think they look like 70's F1 upright which is just a bit cool.
Barts Rear with Westy Uprights:
Description
60's Ferrari F1 Upright
http://atspeedimages.com/image.php/3e0a0100-f15a-11dc-d9a9-0019e3f8e432/branded/1967_ferrari_312_f1_right_rear_suspension.jpg
Steering Rack and pedal box I think will actually be Autograss type units from DRD Racing, they make really nice stuff and the prices are very
good.
Link to DRD parts:
http://www.shop.drdracingproducts.com/Chassis-parts_c2.htm
Anyway, hopefully will get some more build done soon and will get hold of a CBR600
All this does leave a nice 893cc Fireblade engine up for sale if anyone is interested.
tadltd - 11/12/14 at 06:01 PM
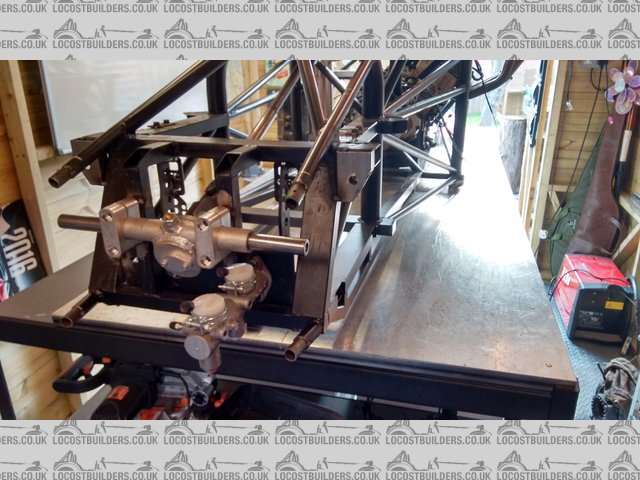
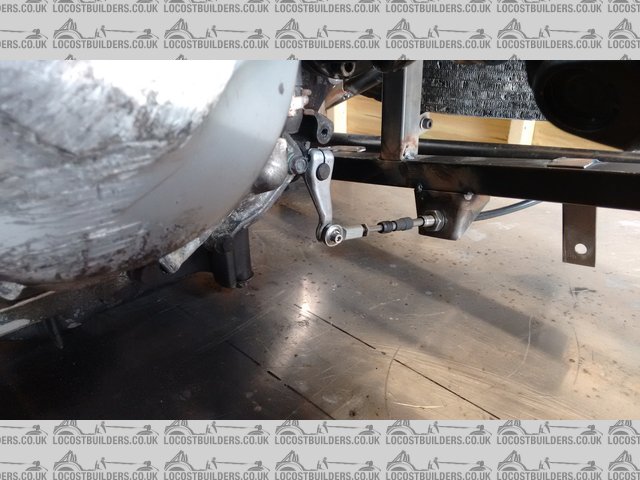
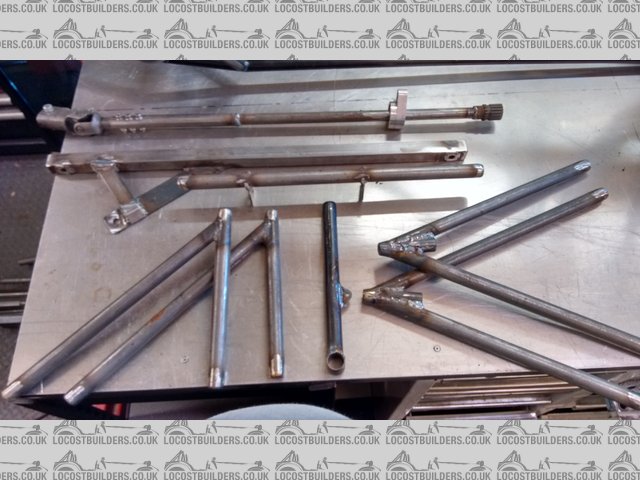
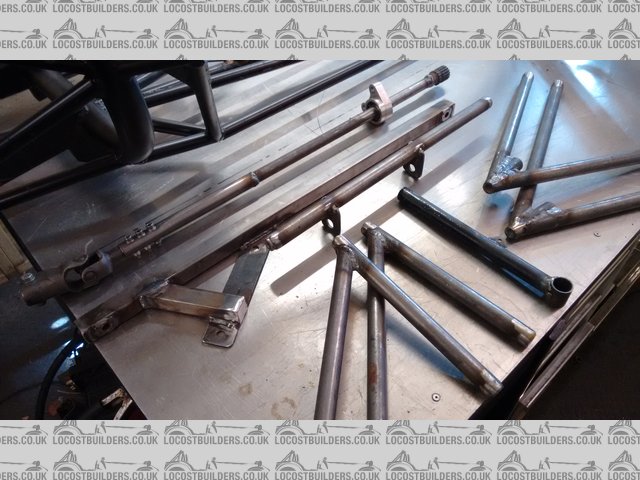
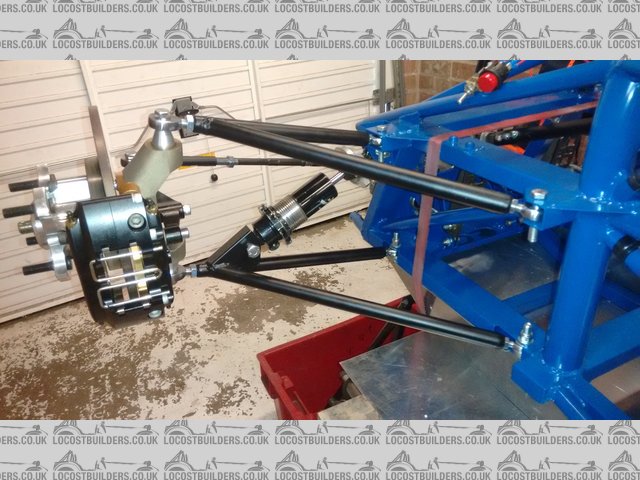
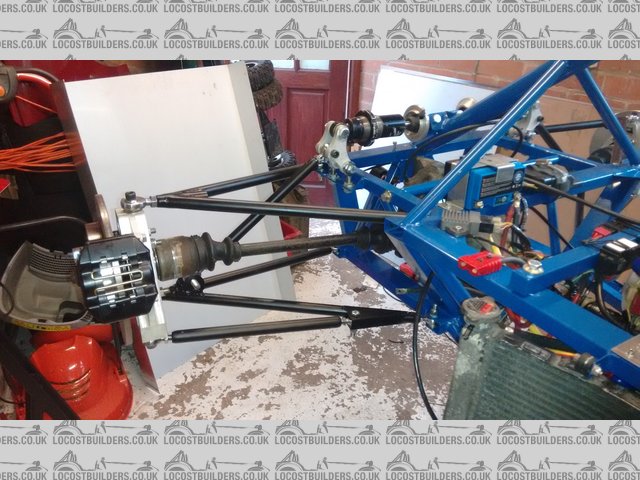
Bike-engine short prop' to diff... (circa' 2004)
(ignore the crappy silencer, this was to get through a noise test)

undies-03

undies-01
[Edited on 11/12/14 by tadltd]
Doctor Derek Doctors - 22/12/14 at 09:03 PM
quote:
Originally posted by tadltd
Bike-engine short prop' to diff... (circa' 2004)
(ignore the crappy silencer, this was to get through a noise test)
undies-03
undies-01
[Edited on 11/12/14 by tadltd]
Cheers for the pics, always good to see what's been done.
Doctor Derek Doctors - 22/12/14 at 09:10 PM
Just picked up a decent looking CBR600 '99 model year for �630 to act as the main donor. As well as the engine, electrics and clocks I'm
hoping the front brakes will provide the rear brakes for the car.
The steering rack and parts as well as the pedal box are now ordered from DRD Racing.
Hopefully the parts will get added over the Xmas hols so I'll have some proper updates.
Doctor Derek Doctors - 1/1/15 at 08:58 PM
Managed to grab a few moments over the holidays to trial fit the DRD bits (Pedal Box and Steering Rack). Both are really nice items.
I've cut and narrowed the pedal box and it fits perfectly into the front 'box' of the car

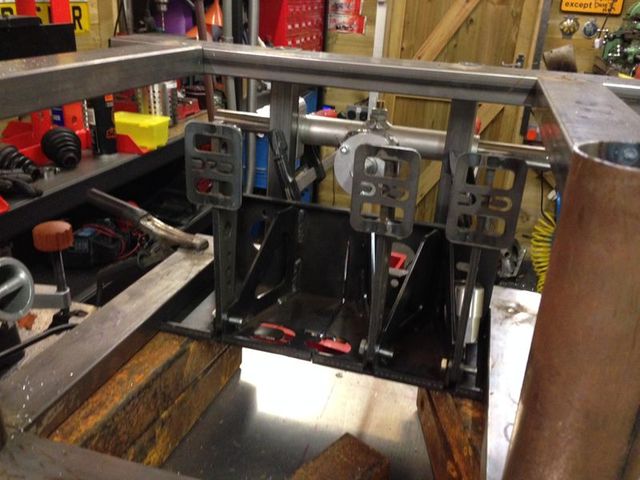
Description

Description
The DRD steering rack is a lovely little item, tiny, lightweight and 1 turn LTL, the small size means I can eliminate bump steer as well.

Description

Description
Tomorrow is a major work day as Santa is bringing me this:

Description
The aim ios to strip the engine, brakes and electric tomorrow and get the rest sold ASAP to clear some space.
bart - 16/2/15 at 01:45 AM
Owt hapnin lad.
Doctor Derek Doctors - 16/2/15 at 08:16 AM
quote:
Originally posted by bart
Owt hapnin lad.
Been concentrating on getting my Sprint Car ready for the season so not actually done any labouring on SSL. What I have been doing is collecting
together all of the parts I need. Got nearly all of the major components that will drive chassis and suspension design now. Hopefully it will all get
going again in late March.
Doctor Derek Doctors - 5/4/15 at 07:47 PM
Have finally managed to get some time in on the design work for this car, front suspension is now pretty much complete as is the braking system:

Description
Description

Description
Chassis needs updating for the coilover mounts and the steering rack model is missing but the front I'm happy with, now onto the rear end.
JoelP - 6/4/15 at 08:37 AM
I once designed a car with the front bones in that style. I concluded it could limit steering lock - but I'm guessing that for track use only you
don't really need that much lock. Looks good anyway.
Doctor Derek Doctors - 7/4/15 at 12:05 PM
quote:
Originally posted by JoelP
I once designed a car with the front bones in that style. I concluded it could limit steering lock - but I'm guessing that for track use only you
don't really need that much lock. Looks good anyway.
Worth a quick sanity check:

Description
with ET0 wheels I have 68mm of clearance to the wishbone so could run much more inset wheels and still be fine.
The limiting factor on my Seven is the cycle wing bracket and this car wont have them so will be fine.
fregis - 10/4/15 at 06:42 PM
if you move steering rack closer, you will gain more angle for inner wheel. wheel angle very depend from steering rod angle
Doctor Derek Doctors - 10/4/15 at 08:50 PM
The Ackerman is all sorted, those wheel angles in the pic are unrelated to steering geometry, the wheels have both been rotated 45� to check for
clashes.
Doctor Derek Doctors - 24/4/15 at 06:53 AM
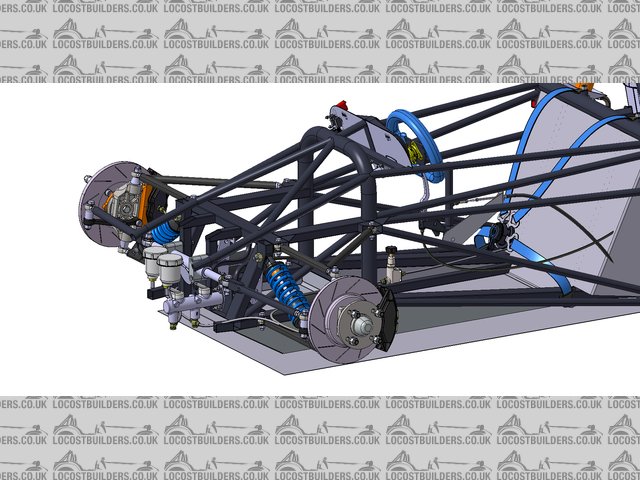
Making good progress on the design work now, rear end and driveline are pretty much done. Controls are currently WIP with positioning needing to be
set now that I can build a mock-up to see how big it is, this info can then be fed back into the design. At 5'11" and 'fat' a car
that fits me should be enough for 95% of potential customers.
A reasonably big change is that I have decided to go for two pedals and a hand clutch. Reasoning being that the clutch is only used on launch and for
down shifts and many people doing sprints/hillclimbs seriously will fit a flatshifter so the lever will only be there for emergencies anyway.
Current ISO view with a resonable amount of population in the CAD model:

Description
Plan view of the rear driveline, there is still room to shift the engine further to the right, with considered placement of batttery, ccoling and fuel
weight distribution will be 50/50 LR

Description
Rear Suspension, geo gives a mild camber increase in bump and roll with a nice damper installation ratio and rising rate.

Description
Side View, the engine model doesn't have the planned AB Performance flat sump so wont stick out of the bottom in the final version.

Description
Doctor Derek Doctors - 5/5/15 at 04:30 PM
More progress on the CAD side and in real life. The fuel tank is now complete and on order from OBP and I picked up a Formula Renault front wing for
it. Both have which have now been added into the design.
Although I have added the FR front wing a a F3 rear wing I'm not actually going to specify the wings for the car and instead include front and
rear mounting points that are universal enough for people to be able to go and buy whatever than can find second hand. Reason being that new wings are
incredibly expensive and I feel that the budget nature of the build will lend itself to resourceful builders going out and finding used single seater
wings on the 2nd hand market.
A few pics of the current car, now giving an idea of what it will look like, obviously the nose will change to mate to the wing:

Description

Description
Description
ceebmoj - 5/5/15 at 10:28 PM
Have you considered making the front frame bolt on? I ask because if you have a front impact it would make it easer to change the sacrificial
component.
Doctor Derek Doctors - 6/5/15 at 07:20 AM
quote:
Originally posted by ceebmoj
Have you considered making the front frame bolt on? I ask because if you have a front impact it would make it easer to change the sacrificial
component.
I did have a think about it but its not an eventuality worth designing for, IF someone has a front crash and IF it doesn't do any other damage
and IF you have a replacement nose box and IF you have a spare front wing it would save a day of sprinting but thats a long list of IF's to be
carrying the extra complication and weight of a bolt on part.
Instead I'm making the nose simply a tubular hanger for the wing, if it gets bent the sort of 'home build' target market who I would
hope has made/bought the car would simply cut off the bent bit and weld in new tubes. Its also one of the benefits of keeping the front of the chassis
so short, less likely to damage more critical components in a frontal impact.
JimSpencer - 6/5/15 at 08:27 AM
quote:
Originally posted by Doctor Derek Doctors
quote:
Originally posted by ceebmoj
Have you considered making the front frame bolt on? I ask because if you have a front impact it would make it easer to change the sacrificial
component.
I did have a think about it but its not an eventuality worth designing for, IF someone has a front crash and IF it doesn't do any other damage
and IF you have a replacement nose box and IF you have a spare front wing it would save a day of sprinting but thats a long list of IF's to be
carrying the extra complication and weight of a bolt on part.
Instead I'm making the nose simply a tubular hanger for the wing, if it gets bent the sort of 'home build' target market who I would
hope has made/bought the car would simply cut off the bent bit and weld in new tubes. Its also one of the benefits of keeping the front of the chassis
so short, less likely to damage more critical components in a frontal impact.
Hi
I think you'd be much better off making that bit bolt on - having done a nose box at a meeting and changed it c/w the front wings.. just like
lots of other folk - that's a standard design feature I'd be looking for.
Plus - design it right and it'll go some way to save the chassis.
Or
Make the nose cone with front wing the support and the structure itself?
Plus I'd forget F3 / FR wings - too small for sprints and hills, you'll need larger - if you go to the right place they're not too
expensive either. (can we recommend suppliers on here?)
Doctor Derek Doctors - 6/5/15 at 08:58 AM
quote:
Originally posted by JimSpencer
quote:
Originally posted by Doctor Derek Doctors
quote:
Originally posted by ceebmoj
Have you considered making the front frame bolt on? I ask because if you have a front impact it would make it easer to change the sacrificial
component.
I did have a think about it but its not an eventuality worth designing for, IF someone has a front crash and IF it doesn't do any other damage
and IF you have a replacement nose box and IF you have a spare front wing it would save a day of sprinting but thats a long list of IF's to be
carrying the extra complication and weight of a bolt on part.
Instead I'm making the nose simply a tubular hanger for the wing, if it gets bent the sort of 'home build' target market who I would
hope has made/bought the car would simply cut off the bent bit and weld in new tubes. Its also one of the benefits of keeping the front of the chassis
so short, less likely to damage more critical components in a frontal impact.
Hi
I think you'd be much better off making that bit bolt on - having done a nose box at a meeting and changed it c/w the front wings.. just like
lots of other folk - that's a standard design feature I'd be looking for.
Plus - design it right and it'll go some way to save the chassis.
Or
Make the nose cone with front wing the support and the structure itself?
Plus I'd forget F3 / FR wings - too small for sprints and hills, you'll need larger - if you go to the right place they're not too
expensive either. (can we recommend suppliers on here?)
While I appreciate the thoughts I dont think what you are saying fits the home build entry level philosiphy that I am designing/building for, which is
currently an untapped market. If I was to speicify a wing and design a nose box specifically to fit then I am adding cost and removing adaptability,
essentially it would just become an OMS Hornet which already exists and costs alot more money than I and many other home builders can afford.
Currently OMS list a Hornet for �13800 without Tyres, Engine and paint so probably around �17k all in. Whereas my aim is for someone to be able to
build my car for �6k complete. No it wont be as fast as an OMS but it wont be in the same class and I think a �10k saving will allow more people to
enter the single seater realms.
I decided to do this project because I cant afford a single seater of that type but I can build one and be resourceful and adaptable to work with
what I can find. Many people on this website are far more adaptable and better improvisers than me as well.
I look at it like a Locost and a Caterham, a book Locost isn't as fast as a Caterham but its much cheaper and hundreds of people have built them,
enjoy them, compete with them and improve them. If I could come up with "The Book Locost" of the single seater world I'd be a happy
man, actually even if I was only 1% as successful as The Book locost I'd still be happy.
In terms of the wings the car is quite small and as you can see from the pictures the front wing at least is pretty big in comparison. Also I have
managed to source a front and rear wing now for a total of �100 without much hassle, I dont think any supplier of new wings would be able to get
anywhere near that although if you have any supplier names I'd be interested to hear so I can make some enquiries.
JimSpencer - 6/5/15 at 09:39 AM
Hi
I built (though not the Tub) mine too - the one in the avatar
IMHO The most important bit is practicality:-
The car must be easy to work on.
Plus
It will need to fit in the trailer's - you normally see car's transported 'nose less, especially as with the modern design of front
wing is a good way in-front on the front axle line.
So if it's a fixed structure you'll need something to bolt onto it and then extend forward so with it and the wing removed there's not
too much in front of the front tyres?
Perhaps a sub frame that bolts to the wing and then the chassis frame itself?
Re Damage
I've made 3 nose box's too - it's very little more work to make that piece bolt on.
(The first alloy one got bent in a bump, the second one is still ok, but have now changed design to go to the dropped nose full width front wing.)
It means it's a quick fix, if not at then at least between events, they get damaged very easily, especially on the hills.
I, like a number of competitors, would normally carry a spare front wing - I've even seen them stood on - certainly the end plates are best
thought of a 'wear and tear' part.. Lol
But it's your design and hence your call
Cost
My new - carbon - front wing, I purchased new in component form (two lengths of wing profile and a large piece of carbon sheet) and then assembled to
my spec, it's max width at 1.4m, dual plane and fully adjustable - cost was �350..
Rear wing is the same.
HTH
Doctor Derek Doctors - 6/5/15 at 11:55 AM
quote:
Originally posted by JimSpencer
Hi
I built (though not the Tub) mine too - the one in the avatar
IMHO The most important bit is practicality:-
The car must be easy to work on.
Plus
It will need to fit in the trailer's - you normally see car's transported 'nose less, especially as with the modern design of front
wing is a good way in-front on the front axle line.
So if it's a fixed structure you'll need something to bolt onto it and then extend forward so with it and the wing removed there's not
too much in front of the front tyres?
Perhaps a sub frame that bolts to the wing and then the chassis frame itself?
Re Damage
I've made 3 nose box's too - it's very little more work to make that piece bolt on.
(The first alloy one got bent in a bump, the second one is still ok, but have now changed design to go to the dropped nose full width front wing.)
It means it's a quick fix, if not at then at least between events, they get damaged very easily, especially on the hills.
I, like a number of competitors, would normally carry a spare front wing - I've even seen them stood on - certainly the end plates are best
thought of a 'wear and tear' part.. Lol
But it's your design and hence your call
Cost
My new - carbon - front wing, I purchased new in component form (two lengths of wing profile and a large piece of carbon sheet) and then assembled to
my spec, it's max width at 1.4m, dual plane and fully adjustable - cost was �350..
Rear wing is the same.
HTH
A folded ally nose box is an interesting idea, might knock something up later to see how it looks. I also hadn't really considered trailer
loading but the nose on SSL will be quite high so that should be fine, the wing would need to be removed.
I think we're still quite far apart on what we think of as 'budget' for me �100 for a pair of wings is good but �350 each plus a spare
is over �1000 which would be near 20% of the total budget.
Universal mounts are the best way to go, it will allow people to buy cheap used wings for �100 and fit them and then later upgrade without major
changes to a �350 wing to imporove performance but if I specify a �350 wing mount it forces people to spend that much straight away.
Also I'm looking at a market for local club sprints which only cost ~�110 to enter so carrying a a spare �350 wing would soak up the cost of 3
events.
It really has to be entry level, lots of people I have talked to in person lament the downfall of the 600cc class and a cheap way to enter single
seater motorsport.
I'll try and post some pics of the nose box later.
ceebmoj - 6/5/15 at 09:16 PM
Interestingly it was seeing tadltd picture of the LMP. That reminded me of the crash structure on the front of that car that was folded from alloy and
also held that made me ask the question.
Doctor Derek Doctors - 8/5/15 at 03:08 PM
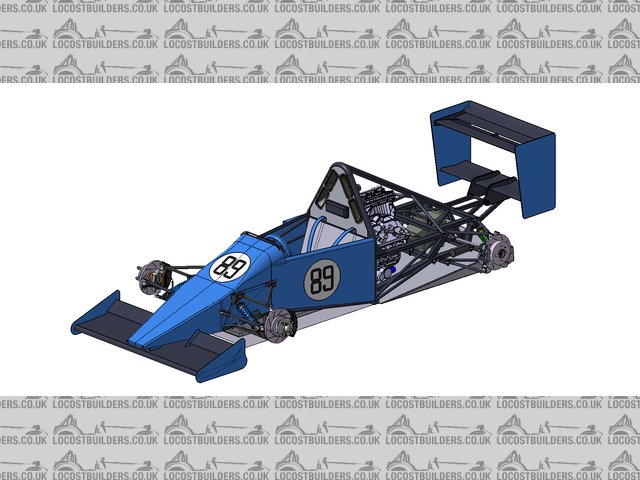
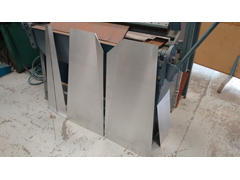
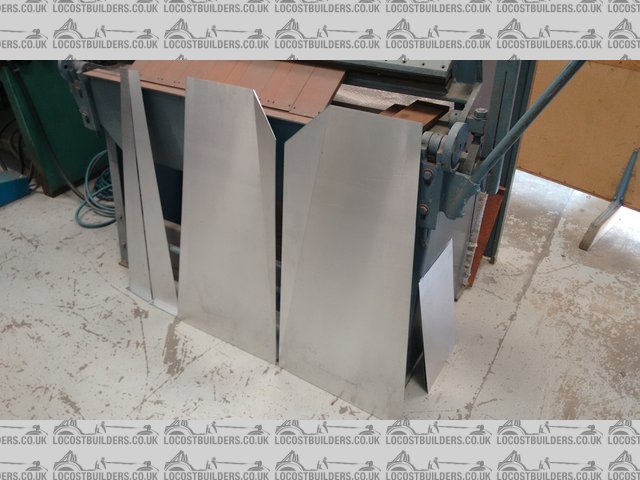
Managed to knock together a quick bodywork scheme, looks much better than I thought it would with it being made from simple riveted on aluminium
sheets.
Description


Description
Its not as sleek as an OMS Hornet but its not half bad.


Description
[Edited on 8/5/15 by Doctor Derek Doctors]
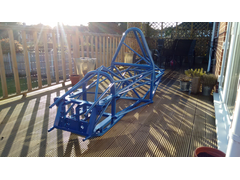
Doctor Derek Doctors - 7/8/15 at 08:56 AM
Well I've not updated this thread in a while, holidays, weddings, birthdays and sprints have been getting in the way. The last two weeks though
have seen a major surge in effort.
The chassis drawings are now complete and a chassis builder is lined up to make No. 1 once I have confirmed the height ofthe roll hoops (using a full
size mock-up) and that the engine will fit through the gap (using a 1/10th scale 3D print of the chassis and engine).
Thje rest of the design is hurtling along as well, the bodywork is advanced, the running gear is near complete, the brakes are done, the controls are
near complete and even the dreaded electronics are making progress.
The aim for 275kg and a �6k build cost is still looking good as well. The chassis is coming in at 49kg (CAD weight) which is a little heavy but its on
the 'safe' side and includes mount for everything. Often weights for 'tubs' (carbon and Ally) dont include the engine mounting
frames or roll hoops so arent true chassis weights.
I have also decided to use a hand clutch (the bike lever mounted on the gear lever) for the follwing reasons, its the lightest and simplest and
cheapest way to do it (the bike lever is simply clamped around the gear lever), many people in sprints and hillclimbs upgrade to flat shifters so the
clutch pedal is only used for the start and even without the clutch is only needed for the start and down shifts so having all of the weight of the
3rd pedal and long cable is a bit unecesary. I have used a 3 pedal florr mount though so if a clutch pedal was really wanted one could be fitted
without chassis mods,
Some pictures:
Complete Chassis:
Description
Front End:

Description
Rear End:


Description
With Body:

Description


With Wheels:

Description
Side:

Description
Front:

Description
[Edited on 7/8/15 by Doctor Derek Doctors]
daniel mason - 7/8/15 at 11:29 AM
Looks nice Callan!
I just hope that rear sub frame and diff centre are able to accept a 1000cc lump?
If so they may sell really well as budget 1000cc cars are becoming increasingly popular!
Doctor Derek Doctors - 7/8/15 at 11:42 AM
quote:
Originally posted by daniel mason
Looks nice Callan!
I just hope that rear sub frame and diff centre are able to accept a 1000cc lump?
If so they may sell really well as budget 1000cc cars are becoming increasingly popular!
Yes easily. There is very little difference in overall size between a 600 and a 1000cc lump and a Sierra diff will handle the extra power with
ease.
Also the chassis is drawn in two stages, the 1st stage is the 'basic' chassis all welded up (about 95% of the work), then stage 2 is to add
bracketry and dilling to fit specific parts like engine, diff, radiator etc. so there will likely end up being a number of versions of the stage 2
drawings to use different engine donors all based on the same stage 1 chassis drawing.
I think its starting to look quite like a smaller simplified Force PT now:
Description

Description
[Edited on 7/8/15 by Doctor Derek Doctors]
daniel mason - 7/8/15 at 11:47 AM
That's identical to mine other than the aero floor looks a bit better than mine!
Doctor Derek Doctors - 27/8/15 at 01:04 PM
Well the engine fits (in miniature):

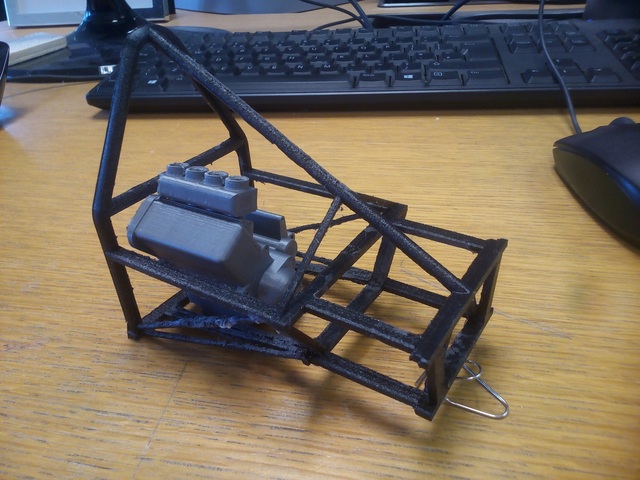
Description
Hopefully the 1/10th scale 3D print of the whole car should be done soon.
Doctor Derek Doctors - 27/8/15 at 01:09 PM
Unfortunately I couldn't print myself in miniture so I had to build afull size mock-up.

Description
Luckily I did this before I sent the chassis plans away to be made as its too short and too narrow. I have now added 100mm to the wheelbase (making it
the same as a Formula Jedi) and some width to the cockpit around the steering wheel to give more clearance for my hands.
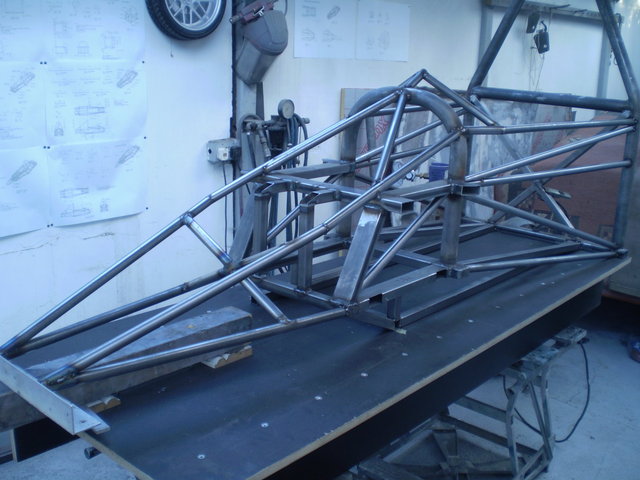
Doctor Derek Doctors - 19/10/15 at 08:58 AM
Chassis Build:
Chassis No. 1 (although annoyingly T89-002) is in production now. I'm having it made by a third party completely from the drawings without me
involved so that he can pick up any mistakes in the drawings or general errors in the envisaged design process.
Description

Description

Description

Description
Description
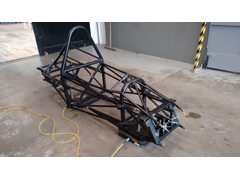
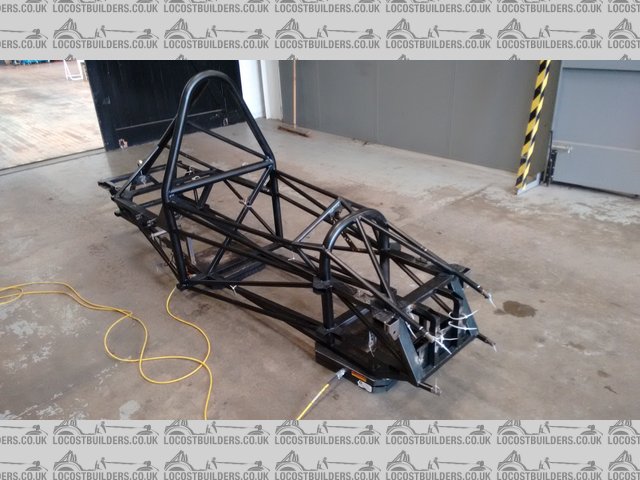
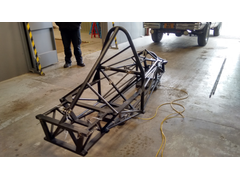
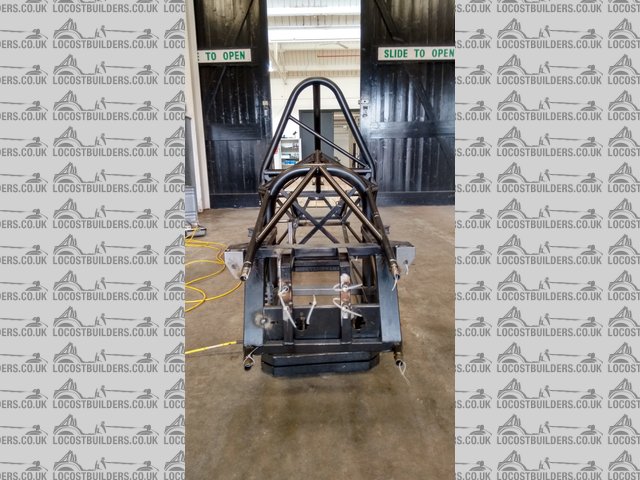
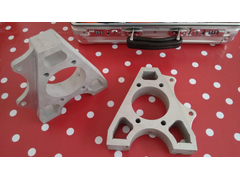
Doctor Derek Doctors - 26/10/15 at 12:23 PM
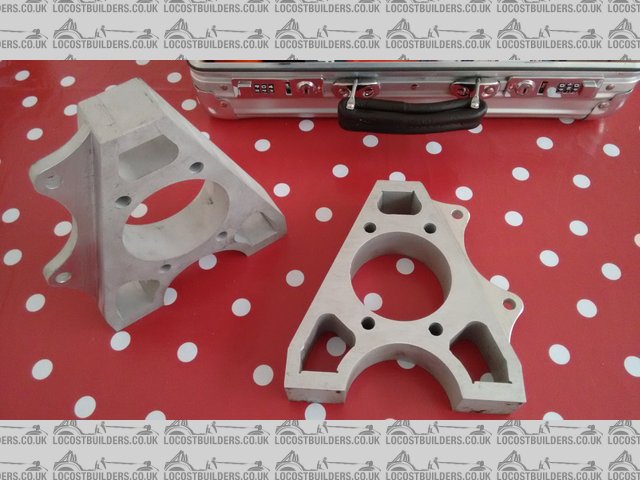
Starting to get some of the fabricated parts back now, first is the water jet cut Rear Uprights and Rear Suspension Rockers:
Rockers:

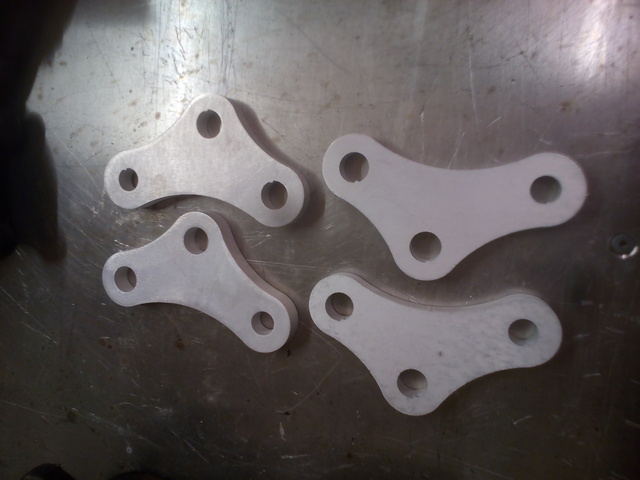
Description
Rear Uprights to take Sierra Bearing carrier and Wilwood Dynapro caliper:
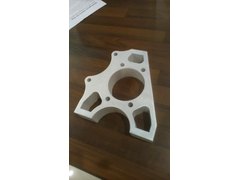
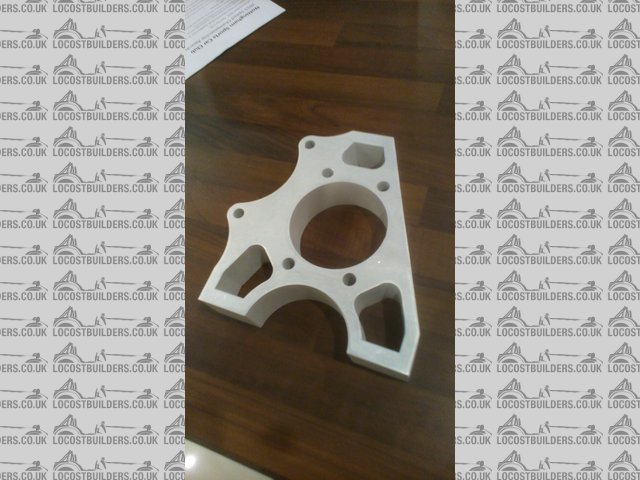
Description

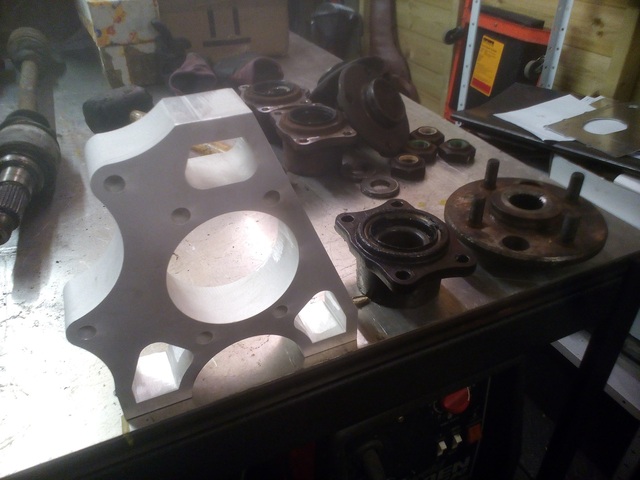
Description

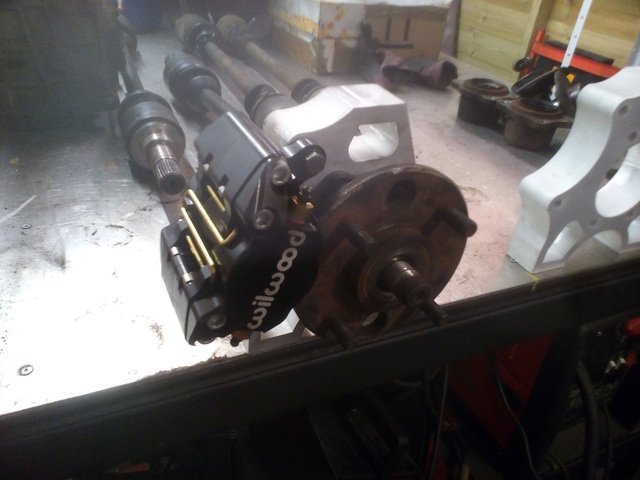
Description
The caliper mount lugs need to be milled back to get the correct caliper position but everything fits together perfectly.
Doctor Derek Doctors - 26/10/15 at 01:10 PM
Rear Suspension and driveline now fully sorted in the virtual world as well:

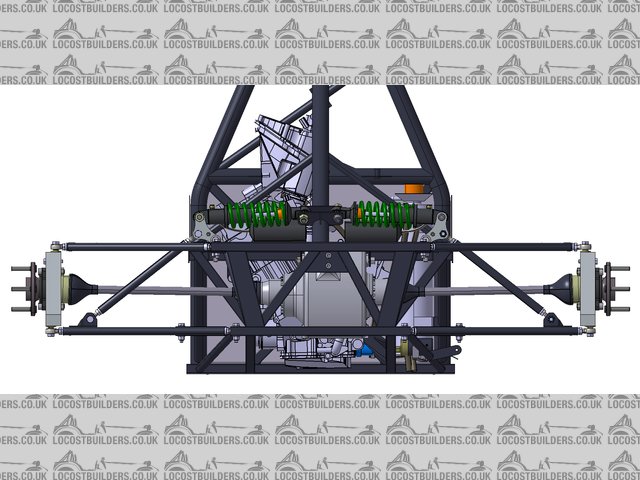
Description
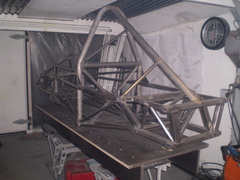
Doctor Derek Doctors - 26/10/15 at 03:00 PM
Chassis Build coming along well:

Description
Doctor Derek Doctors - 28/10/15 at 09:42 AM
Chassis finished! Cant wait to get it home and start the build in anger:

Description
Rosco86 - 28/10/15 at 10:16 AM
looking good, i think i might build a single seater next
Doctor Derek Doctors - 28/10/15 at 10:56 AM
quote:
Originally posted by Rosco86
looking good, i think i might build a single seater next
Build one of these! Plans for the homebuilder should be completed and for sale by the end of the year.
Total cost of the materials for the chassis (including ready bent MSA compliant roll hoops) was �320 and the fabricator who built that chassis did it
in a few weeks without input from myself.
StevieB - 28/10/15 at 03:51 PM
Looks great!
I'll be the first one with my hand up for plans - been watching this for a while and wanting to build a single seater for even longer.
Maybe if enough people build them, there might be some appetite for a race series - like a locost single seater class.
Doctor Derek Doctors - 28/10/15 at 04:24 PM
quote:
Originally posted by StevieB
Looks great!
I'll be the first one with my hand up for plans - been watching this for a while and wanting to build a single seater for even longer.
Maybe if enough people build them, there might be some appetite for a race series - like a locost single seater class.
Thanks, my aim all along has been to make an affordable route into single seater motorsport, if I achieve just 0.001% of the success of the Locost
Book I'll be very happy.
The car does actually meet all of the requirements for the Monoposto race series under the Homebuild chassis rules in the Mono Moto class so could be
raced straight away, its not just a car without a cause.
Hopefully I will run this car in Sprints/Hillclimbs next year for developement and then hopefully either upgrade it with or build a new car with a
bigger engine and race in Monoposto in 2017... theres enough room in there for a Haybusa or a VFR1200.
StevieB - 28/10/15 at 04:31 PM
A modern day terrapin...
mazie - 29/10/15 at 09:14 AM
I've been watching this build with a lot of interest and quite keen to build one of these myself. Will keep an eagle eye for further updates.
Great stuff so far and look forward to further updates.
Doctor Derek Doctors - 29/10/15 at 10:02 AM
Cheers Mazie. The big job thats left to do is mount the engine, I haven't been able to find an accurate CAD model of a CBR600 F4 so I need to
drop the engine into the chassis and make actaul engine mounts and then make the drawings from those.
Once thats done it will be a case of knocking out the drawings of the suspension fabrications and the asssembly drawings/BOM list and it will be ready
to go.
Couple more pics from the chassis builder: (a lick of black primer certainly makesit look more finished)

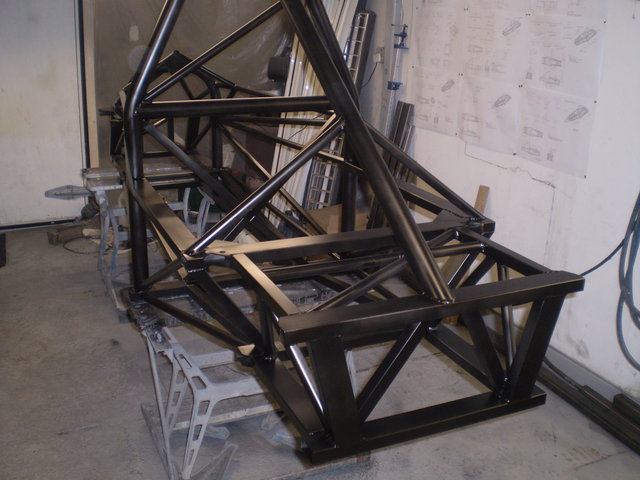
Description

Description
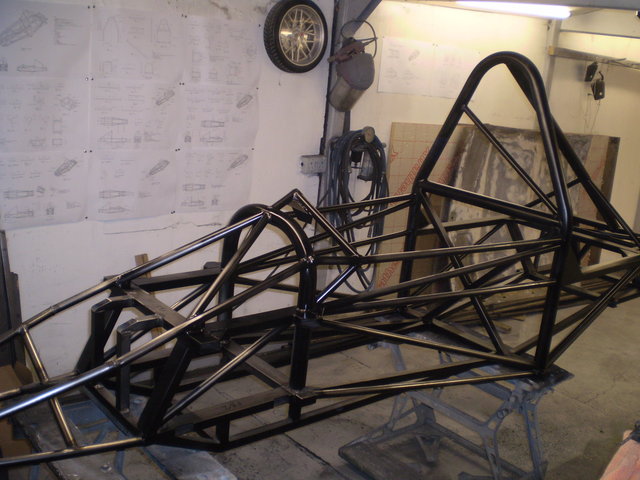
Doctor Derek Doctors - 30/11/15 at 05:54 PM
I've not updated this thread in a while, not because the project is stalled but mainly there has been alot of background activity going on. Part
being manufactured and orders placed.
I have also had to complete the last major design task which was to fit the engine to the completed chassis, make the engine mounts and then reveres
engineer them into CAD and drawings.
I have also applied to legally register the designs so that I shouldnt be ripped off once I start selling them and have also been beavering away on
making it abit more pleaseing on the eye, especially with some more svelt side bodywork.
I have also managed to fit in a little homage to my favourite race car the Tyrrell P34 if anyone can spot it.

Description
macdave69 - 30/11/15 at 06:42 PM
I too am interested in this project. I am considering something along these lines for a bit of sprinting in a couple of years. Having bought plans in
the past and currently being the proud owner of half a dozen books on building sprint cars, I would be interested in what you envisage the budget
would be to build a rolling chassis?
Doctor Derek Doctors - 1/12/15 at 10:26 AM
Interesting question. One of the benefits of designing everything and creating a full parts list and BOM is that I will be able to give an exact
figure when the design is complete. I havent done this yet but I will have a quick rough estimate.
Depending on your definition of rolling chassis though I can give some rough figures (assuming no labour costs on a home build).
For the minimum rolling chassis (chassis and suspension)
Fabricated Chassis and Suspension Materials (including MSA roll hoops at �260 and wishbone tube inserts etc etc): �350
Front RD Upright and Hub set ~�350
Rear Upright and Hub Set ~�250
So you could have a rolling chassis for <�1000
For everything except the engine and bodywork
Coilovers and Suspension parts ~�500-750
Steering Rack and Steering Parts �250
Driveshafts ~�50
Brakes ~�600
Diff �20
Propshaft �150
Fuel Tank �100
Control cables ~�50
So for another �2k you could be nearly there.
That leaves �2k for the engine, fasteners and bodywork if I am to keep below my �5k build target. If you use the donor bike that will supply alot of
the fuel and electrical system.
The big difference between my design and a normal single seater is that because mine uses Kit Car standard and Off the shelf bits there are plenty of
opportunities to by things second hand, find bargains or make your own which can save lots of money, whereas something like a Force needs Force parts
all round which are difficult to find from sources other than the original supplier. And thats not a criticism of Force, I'm just using it as an
example of how my car differs rather than just being another car in direct competition.
For instance I have managed to get two diffs for a total of �30 and driveshafts and driveshafts, bearing carriers and hubs for another �50 then I
found a brand new propshaft the right length and with one end correct in a skip at a company I do some work for, I then had the other end swapped by a
local prop' maker for �38 so saving myself �210. So my toal cost for the driveline (with two ratio options) is �120
[Edited on 1/12/15 by Doctor Derek Doctors]
macdave69 - 1/12/15 at 06:02 PM
I've just sent you a long U2U
Doctor Derek Doctors - 4/1/16 at 11:31 AM
Not been many updates in a while but I managed to get a couple of days work in over the Xmas period and have made a load of progress on the
chassis.
The chassis was built as what I call the "Basic Chassis", a blank that doesnt have any bracketry specific to the parts being used so it
would be the same for whatever engine/diff/steering/etc/etc that the builder whated to use.
The first task is turn this into the "Bracketed and Drilled" chassis with everything completed ready for final assembly. I could have had
all of the parts laser cut but I have decided to do it all by hand to make sure that it can all be made easily at home if someone didnt have access to
laser cutting.
Ignore the shoddy welding, I have only been lightly tacking everything together as the paid fabricator is coming back to weld it all up properly.
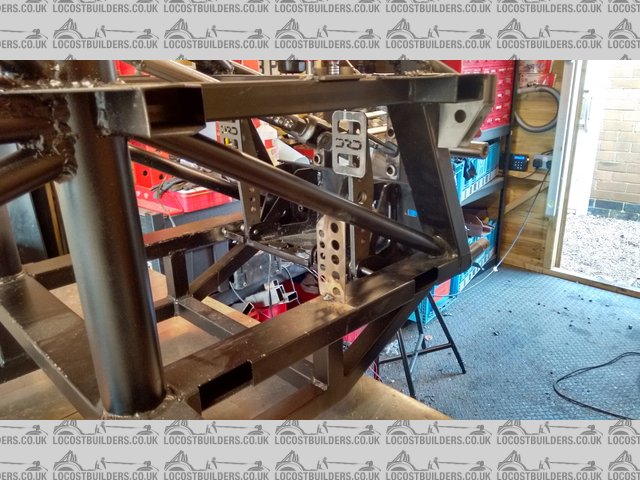
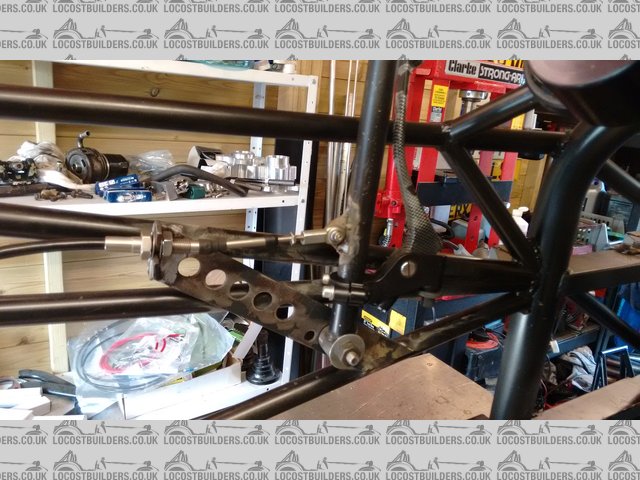
The first job was the cut the nose cone off, its made as part of the basic chassis (to ensure a perfect fit) but then cut off and brackets added so it
can be bolted back on. Also in this picture are the inserts to hold the steering rack mounting blocks:

Description
Next job was to add the DRD racing pedal box, a weld in part that adds a lot of strength to the front end.

Description
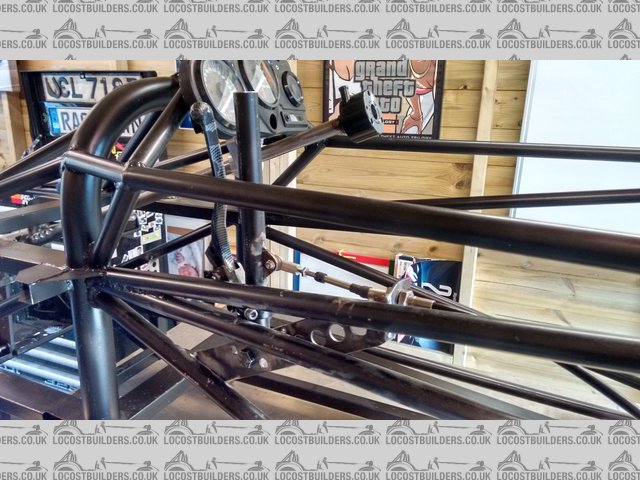
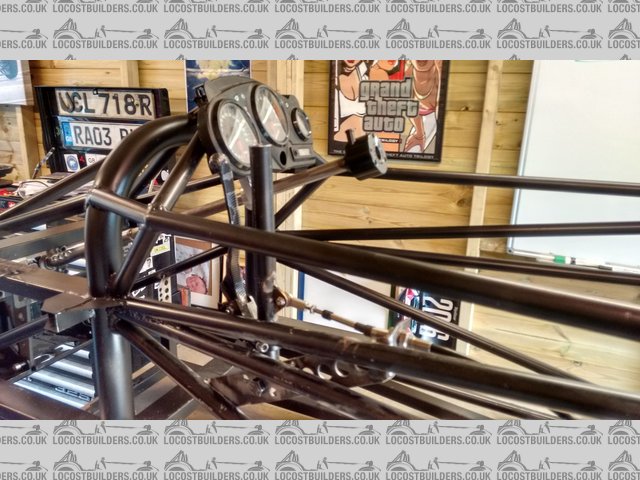
Once that was done I could finally trial fit the tight packaging for the steering rack and Brake MC:

Description

Description

Description
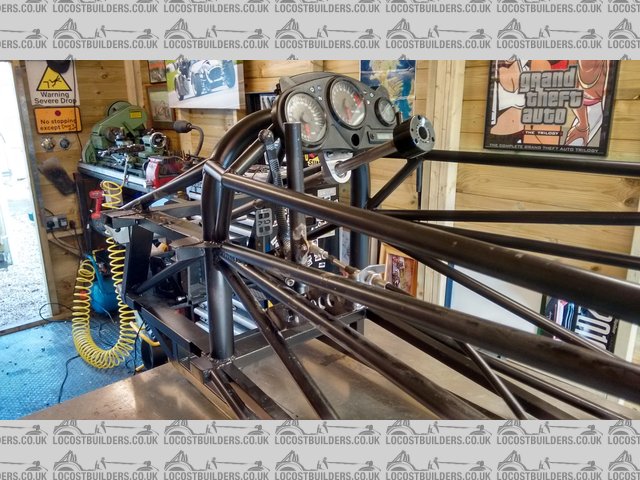
And the try the nose cone on over the top:

Description
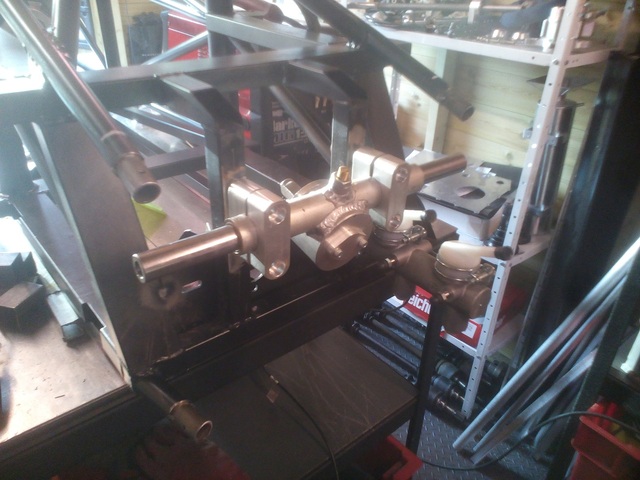
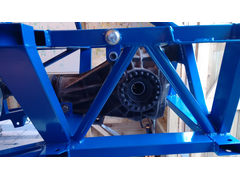
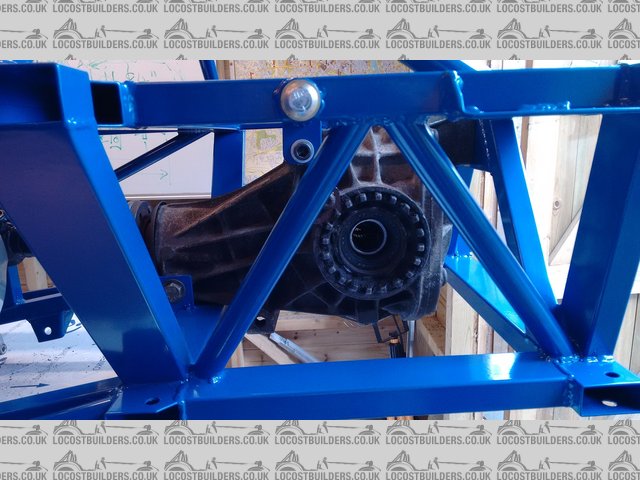
I then got onto the rear end, firstly finalising the engine and diff mounts and adding the inserts to the chassis rails to bolt to, which meant that I
could finally fit up the driveline with the propshaft to check it all works:

Description


Description
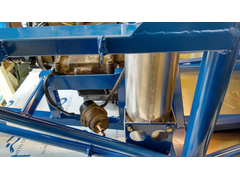
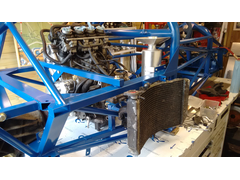
Next was radiator bracketry, it will use the bike radiator hung off the side with a fan and a small sidepod to duct air. It will eventually be a new
radiator as the one from the bike looks knackered:

Description
And the fuel tank brackets were also made:

Description
The last jobs I managed were the rear suspension brackets, namely the rocker mounts and the inboard shock mounts:

Description
Currently its looking like a reasonable length build, 39 hours for the basic chassis to be made (completely custom fabricated) and so far about 12
hours on Miscalanious brackets with maybe another 6 hours to go to do the front suspension and controls (steering/gear lever mounts). 57 hours is
quite alot but it has all been done by hand and I have been doing everything over-fastidiously on my first run through as well as feeding any issues I
find back into the designs.
Doctor Derek Doctors - 16/1/16 at 02:54 PM
Not a lot of physical progress of late but some good design work (140+ drawings now completed).
More importantly though I have received my certificate of Design Right from the Intellectual Property Office which means my work is now protected out
in the wide world from people who might use the plans to make money for themselves.
Although its only a certificate it feels like a big milestone
ChrisW - 22/1/16 at 01:20 PM
I've cleaned up the OT discussion from this thread and moved it
here.
Any off topic or trolling posts in this thread from now on will be deleted. If you wish to carry on the discussion over suspension rocker bearings
please do so in the thread linked above.
Cheers, Chris
Doctor Derek Doctors - 22/1/16 at 01:49 PM
Cheers Chris.
I have had a few people ask when plans are likely to be available for Purchase, the current aim is end of February. I have a couple of chassis bits to
draw and a few body panels and that's it. Once done its a case of checking, locking things down and then making up nice folders full of drawings
and info ready to send out.
Sam_68 - 22/1/16 at 02:04 PM
quote:
Originally posted by Doctor Derek Doctors
More importantly though I have received my certificate of Design Right from the Intellectual Property Office which means my work is now protected out
in the wide world from people who might use the plans to make money for themselves.
Did you find this a fairly pain-free experience?
I must admit, I've previously relied on the protection of the 'automatic' design right you get under law, for non-patentable designs,
but of course it's much more difficult to enforce. For the sake of a few quid (�60, isn't it?), it sounds as though it might be worth
pursuing?
Did you identify/annotate specific, unusual features, or is it 'just' the overall look-and-feel that's protected?
Doctor Derek Doctors - 2/2/16 at 05:49 PM
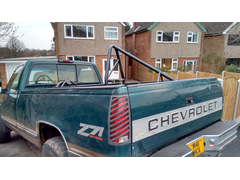
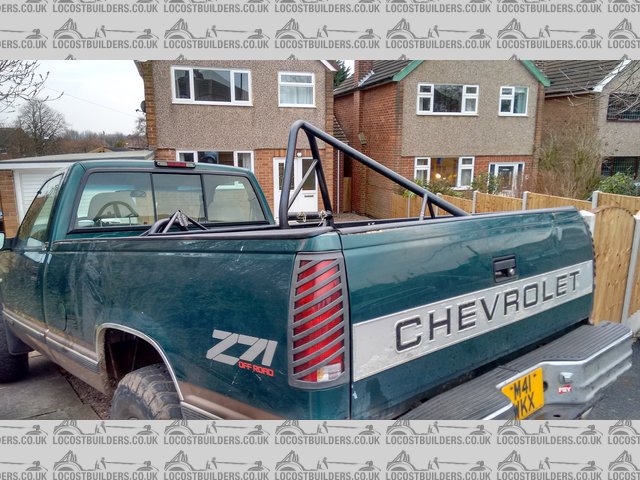
Just been having a bash at the secondary part of the project, the transportation method.
My aim is to eliminate the need for a trailer and also give myself reason to buy a pick-up, but it needed to be big enough to carry a race car which
means getting something from 'murica (which also means a V8 engine...). Late last year I found a 1995 Chevy K1500 with the extra long 2.55m bed
and a 6.5 Turbo Diesel V8:
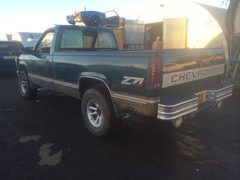

Description
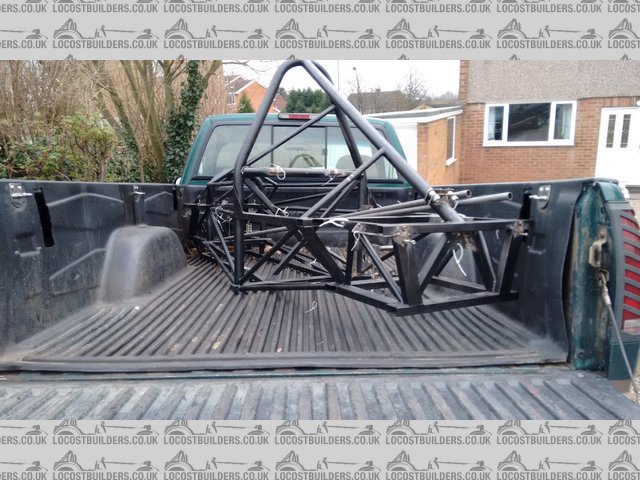
Which according to my plan should carry the car like this:
Description
Still plenty of work to do on the truck conversion (managed to get a winch of CHNSS1 today which has helped) but cant wait to take it racing.
Sam_68 - 2/2/16 at 08:29 PM
quote:
Originally posted by Doctor Derek Doctors
My aim is to eliminate the need for a trailer and also give myself reason to buy a pick-up
This is man-maths at its finest.
I salute you, Sir!
[Edited on 2/2/16 by Sam_68]
daniel mason - 2/2/16 at 09:22 PM
Is the race car not supposed to be faster than the tow car Callan?
Doctor Derek Doctors - 2/2/16 at 09:46 PM
It may be 6.5 litres of Detroit muscle Dan but it most certainly isn't fast!
The engine is soooooo lazy and the auto-box isn't in a hurry either. It is though a really nice cruiser, surprisingly comfy ride and the cab is a
nice place to be. At 70mph its like being in a big smooth car.
CNHSS1 - 2/2/16 at 09:48 PM
Love the polar opposites of racer and pickup! Small light and technically able and yhen a bloody Yank Tank! Priceless 
Doctor Derek Doctors - 24/2/16 at 12:23 PM
Just a quick update on the progress on the plans for those who are interested in buying.
I have just a couple of bodywork drawings to finish now. Then its a case of Checking and PDF'ing everything ready to sell. I've even managed
to write out some build notes.
Hopefully I can get a printer sorted within a couple of weeks with the aim of being able to send out packs by mid-March at the very latest ready for
the nice spring weather and new projects time.
Each pack will be in its own A3 folder as its going to be over 200 pages in total! I always wanted to make it a "complete" set of plans and
might have succeeded.
I would like to get a little bit of feedback on pricing as this is something that I have been struggling with. Opinion has been swinging between cheap
and plentiful ( A La' Locost Book) or priced to reflect the detail aimed at genuine builders (more like Kit Aeroplane plans).
My current thoughts are somewhere in between and with modular options:
Basic Pack (Fabrication Drawings only + Parts list): �100+VAT
Full Pack (All Drawings + Build Guide + Parts List + Calculations): �150+VAT
Build Aids (Jig plate drawings/Tube Wraps/Etc): �25+VAT
Aero Upgrade Pack (I'm talkinng to an aerodynamicist about doing this): �25+VAT
Constructive thoughts welcome.
Just wish I had some time to get some work done on the actual car!
Sam_68 - 24/2/16 at 04:44 PM
quote:
Originally posted by Doctor Derek Doctors
...Then its a case of Checking and PDF'ing everything ready to sell. I've even managed to write out some build notes.
Hopefully I can get a printer sorted within a couple of weeks with the aim of being able to send out packs by mid-March...
Are you intending to supply as PDF electronic copies, or paper copies, or both?
Obviously there are potential copying issues with both, but PDF would make life a whole lot easier for you? Is it possible to protect PDF's with
individual passwords or electronic 'fingerprints', so that if one did get released into the public domain, you'd know who to go
after?
What are the 'calculations' you list? I must admit I'd be nervous about giving away that sort of underlying design knowledge free of
charge, but then you know know cautious I am about IP in general!
Its a shame you won't have a finished, proven car before going on sale with plans - I can imagine that it would reassure a lot of people both in
terms of the car's performance, and that solutions had been worked out for any issues, before they part with their money?
Doctor Derek Doctors - 24/2/16 at 06:01 PM
quote:
Originally posted by Sam_68
quote:
Originally posted by Doctor Derek Doctors
...Then its a case of Checking and PDF'ing everything ready to sell. I've even managed to write out some build notes.
Hopefully I can get a printer sorted within a couple of weeks with the aim of being able to send out packs by mid-March...
Are you intending to supply as PDF electronic copies, or paper copies, or both?
Obviously there are potential copying issues with both, but PDF would make life a whole lot easier for you? Is it possible to protect PDF's with
individual passwords or electronic 'fingerprints', so that if one did get released into the public domain, you'd know who to go
after?
What are the 'calculations' you list? I must admit I'd be nervous about giving away that sort of underlying design knowledge free of
charge, but then you know know cautious I am about IP in general!
Its a shame you won't have a finished, proven car before going on sale with plans - I can imagine that it would reassure a lot of people both in
terms of the car's performance, and that solutions had been worked out for any issues, before they part with their money?
Everything will be detailed fully when I do a "Plans for sale Advert" properly but to answer your points (I have been thinking about this
for months).
Only paper copies will be supplied with an individual water mark. All bound up in a nice folder. The PDF's are for archiving and to print from. I
will offer a page replacement service as well to customers so if welding/spillage/fingerprints ruin a page I'll send new ones out at cost price
(IE the price of a stamp)
The calculations will be things like weights, costs and sizes. I am also going to include the suspension movement and spring rate calculations so that
people can easily tune the car.
The actual car will follow shortly after completion of the plans (~2 months) as completing the plans will free up the time to work on the car. So I
suspect only a few people will purchase plans before that. I don't forsee any significant changes now as the fabrications are nearly complete for
the Dev' car and nearly everything else is purchased.
Any changes to the plans based on the build of the car will be issued free-of charge to anyone who has already purchased the plans. So no-one should
be disadvantaged.
I plan on this being a long term project with a Phase 2.0 update coming at a later date and some concept work has already begun on that.
tilly819 - 25/2/16 at 06:30 PM
Looking good
Tilly
Doctor Derek Doctors - 26/2/16 at 08:01 AM
Cheers Tilly, hows Uni going?
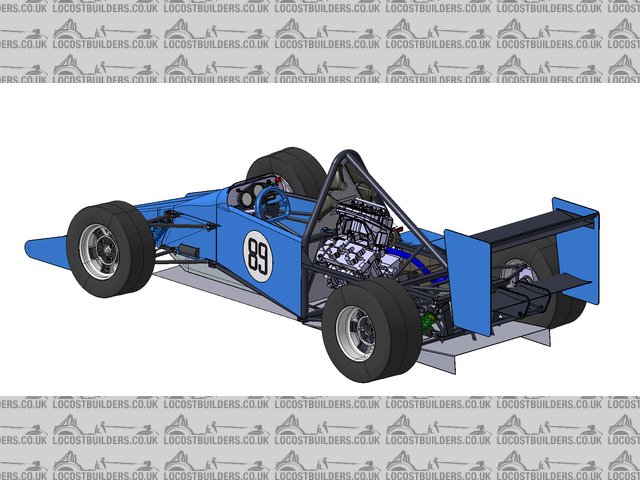
Just thought I would load up probably the 'final' CAD pictures with everything now completed. I have also modelled up a set of Jedi Wings
(that I have bought for it from Dan) to give an idea of what the final car should look like. I have been using a set of F3/FR2.0 wings in CAD which
are a bit oversized.

Description
Description
Description
Description
Hopefully I will get a chance to do a full CAD render using a package I have picked up but work should be concentrating on building the car and
finishing the last drawings now.
Doctor Derek Doctors - 3/3/16 at 04:33 PM
Currently trying to decide what colour to have the chassis powder coated. Thinking I might go for Black/Carbon panels over electric blue to keep the
corporate colour scheme but highlight the chassis more:

Description
I tried Black/Carbon over a Red chassis but it looks like a McLaren-Honda...
Doctor Derek Doctors - 21/3/16 at 05:25 PM
A good few new build pictures, all chassis bracketry is now complete with all of the bolt on bits trial fitted. Lots of work went into checking that
all of the controls worked correctly. The chassis is going for final weld tonight and then off for Powder Coating next Monday:
Cockpit:

Description
Description
Description
Description

Description

Description

Description
Drivers View:

Description
Front End

Description

Description
Gear Actuation:

Description

Description
Finally having a large Chevy Truck is paying off, chassis went straight in the back with the tailgate able to shut. No messing:
Description

Description
Took the chassis to be weighed today as well, very pleased as the weight in CAD was 55Kg and the weight on the scales was 56Kg so taking into account
the weight of the weld its pretty much exactly as predicted. It looks tiny in real life out of th workshop:
Description

Description

Description
Rosco86 - 21/3/16 at 11:33 PM
Looking good, will be running soon then!
rdodger - 22/3/16 at 04:57 PM
Loving this!
Will you be selling the chassis, wishbones etc or just the plans?
Sam_68 - 22/3/16 at 05:12 PM
quote:
Originally posted by Doctor Derek Doctors
Took the chassis to be weighed today as well, very pleased as the weight in CAD was 55Kg and the weight on the scales was 56Kg so taking into account
the weight of the weld its pretty much exactly as predicted.
Any idea what the torsional stiffness that you're getting from that weight is, either on FEA or in reality (have you/do you intend to test)?
Doctor Derek Doctors - 22/3/16 at 05:21 PM
quote:
Originally posted by rdodger
Loving this!
Will you be selling the chassis, wishbones etc or just the plans?
I'll probably offer them to order. A couple of potential customers have asked if I could supply a chassis and the answer of course is
"yes" but I would have them made on a per order basis rather than holding stock.
Likely cost would be similar to that of "kit car" chassis plus an "MSA cage" that you usually pay extra for. Of course you get
the MSA ROPS built into this car.
Doctor Derek Doctors - 25/3/16 at 09:24 PM
Plans are now finished and for sale:
http://www.locostbuilders.co.uk/viewthread.php?tid=203232
20% Discount for the bank holiday launch.
Doctor Derek Doctors - 1/4/16 at 09:33 AM
Have got most of the fabricated parts back now, Engine Hanger, Diff Hanger, Gear Lever, Steering Column and Upper wishbones. Just waiting on the
pushrods and upper wishbones now:
Description

Description
Doctor Derek Doctors - 4/4/16 at 11:15 AM
I completed the final chassis preparation this weekend and dropped it off this morning for Powder coating.
One of the neat features (well I think so anyway) is that the suspension pickups are all on two flat planes, which means that they can be drilled
after the chassis welding is complete and there is line of site to cross measure between all of the suspension mounting points. Ensuring that the
suspensions is aligned side to side and front to back.
This means that any distortion from welding or inaccuracy in the chassis does not affect the suspension geometry (as long as its not completely
off).
Cross measuring the front before drilling:
Description
Description
Description
Measuring the suspension pick-up for the rear end before drilling:
Description
Description
I also picked up a set of Formula Jedi wings this weekend, thanks to Dan Mason for doing these at a really good price.
daniel mason - 4/4/16 at 06:15 PM
Chassis looked really nice Callan!
Doctor Derek Doctors - 6/4/16 at 07:58 AM
Cheers Dan, appreciated.
A colleague of mine has generously done some renderings from the CAD model, I may be biased but I have to say that its turned out to be quite a pretty
little car especially as it is all driven by function. I really like the 90's Tyrrell-esque colour scheme as well.

Description
Description
Description

Description
I particularly like this 'moody' shot, I'm really glad that the chassis is being powder coated blue now:
Description
Rosco86 - 6/4/16 at 08:07 AM
looks very smart! cant wait to see a finished one in the flesh!
Doctor Derek Doctors - 7/4/16 at 07:50 PM
Chassis collected from the powder coaters today, its looks amazing in bright blue:

Description
Description
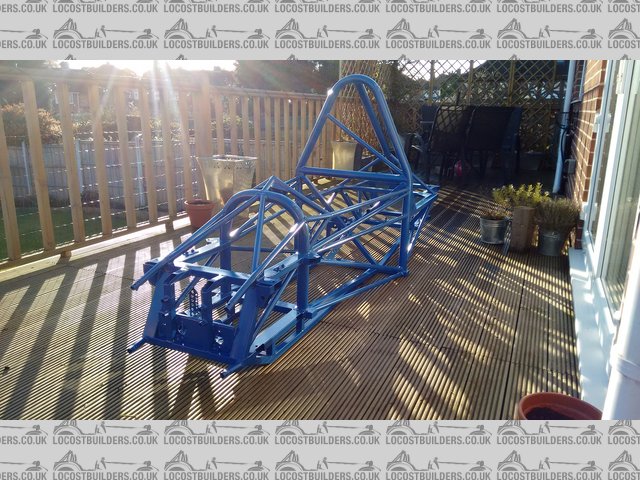
Description
Collecting the aluminium for the panels this week and then its on with the final push to assemble it.
MitchMk3 - 12/4/16 at 01:34 AM
This is a great looking build. I like the idea of a full set of plans for the car as well.
A few questions:
What diff and rear end did you end up using? The build diary mentions both Freelander and Sierra gear.
With the rear uprights how do you envisage home builders accessing/making them?
Would you supply any electronic drawings for people to have parts laser cut locally? (I'm in Australia)
Doctor Derek Doctors - 12/4/16 at 07:54 AM
I have just sent you a U2U Mitch which should answer all of your questions.
Doctor Derek Doctors - 22/4/16 at 01:14 PM
Some good progress on the sales and design front recently. I have just picked up a complete MX5 rear end so that I can do the much-requested MX5
Driveline option:

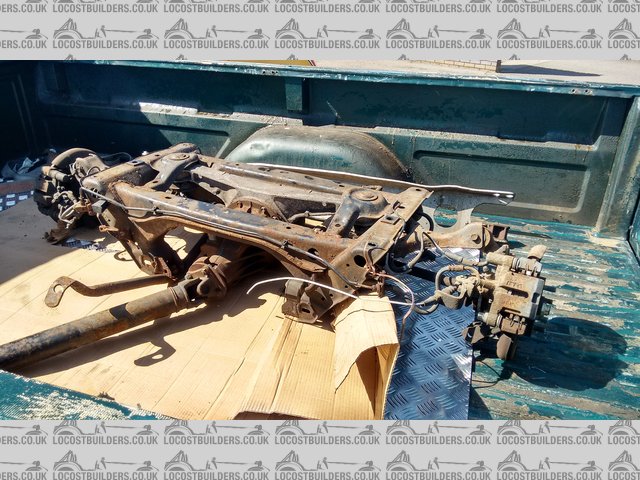
Description
Also the final build up has started, its not much but the Bib went on last night and all of the floor/bulkhead panels are now cut and folded:
Description
Doctor Derek Doctors - 25/4/16 at 07:00 PM
I have been pushing on with final assembly this weekend. Thanks to my mates for helping lift the engine in.
The chassis is now panelled, engine & drivetrain are in and the steering and loads of other bits are being built up.

Description

Description

Description

Description
(yes I know the propshaft need re-phasing)

Description

Description
Description
Description

Description
Description

Description
Description
Steering drop plate needs a stiffening rib adding:
Description
Rosco86 - 25/4/16 at 07:40 PM
Looking good now pal
Dopdog - 28/4/16 at 12:37 PM
quote:
Originally posted by Rosco86
Looking good now pal
yeah great job looking forward to seeing it
Doctor Derek Doctors - 13/5/16 at 10:03 AM
A good few updates on progress. I have now set a deadline to be running at the NSCC Curborough Sprint on July 2nd so I now have a looming deadline to
finish the car. Realistically I have 5 weeks to get it done so that I can get everything ready to go.
Sales are also doing well, numbers are modest but my goal was simply to sell more than Zero and I have long since surpassed that. Lots of interest and
I think sales will accelerate when the car is out in the world competing.
Anyway some pictures:
Rear uprights machined (just need holes drilling for suspension pick-ups:
Description
Front Hubs:

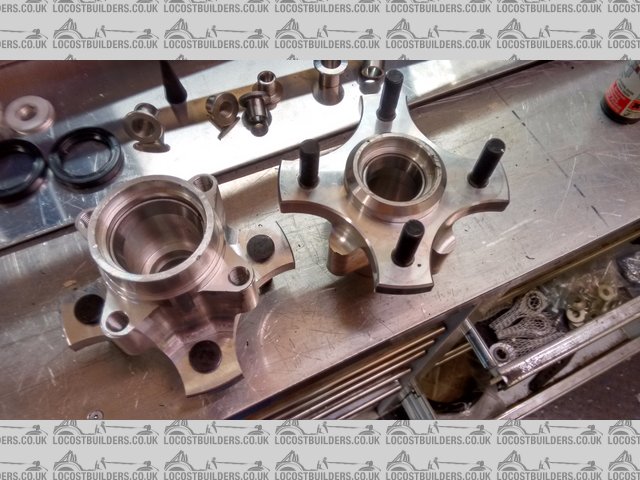
Description
I piggybacked the original bike woring loom onto the car and started the engine at the weekend. I have since chopped the loom down to remove the
unnecessary bits and started it up again to check I didn't knacker anything and it all works fine:
Description
Steering in and looking good:
Description

Description
Description
Doctor Derek Doctors - 31/5/16 at 02:16 PM
So I managed to wrangle from 11am Saturday to 11am Monday as uninterrupted 'garage time'.
I ordered up every part I thought I would need, bought some beer and pizza and moved the TV into the garage (ready for Monaco "wow", Indy
500 "awesome" and Top Gear "oh dear" ) . Managed about 29 hours work in total and took the car from a "Chassis with an
Engine" to an almost rolling car.
The drivetrain is complete, tested and run up. The suspension is all fitted but just waiting on Coilovers and a couple of bolts, the controls are all
fitted and the brakes are nearly done.
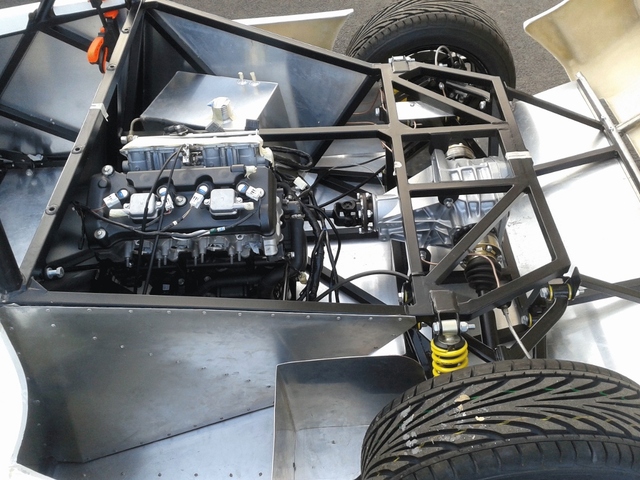
Engine bay all finished:

Description
Rear Wing and Post Fitted:

Description

Description
Front Suspension Fitted (note that the dampers are just dummies and are 2" too short)

Description
Description
Description
Rear Suspension Done (the rear dampers are also Dummies that are too short)

Description

Description

Description
Description
Really now its just a case of getting and fitting the dampers, making the bodywork and finishing the brake lines.
[Edited on 31/5/16 by Doctor Derek Doctors]
Doctor Derek Doctors - 13/6/16 at 03:33 PM
The rear end is now complete (well aside from commissioning), all of the suspension and driveline are built up. The exhaust is done (in true
'locost' style it cost �27). I ran it up through the gear yesterday and all works perfectly.
To complete the front end I now just have to fit the front struts (when the springs arrive) and finish one brakeline when the fitting arrives.
Anyway; Exhaust, its not too everyones taste but it is proper 'Locost', the manifold and rear can from the donor bike, with e universal
silencer and a 90� bend.

Description
Rear suspension is now also finished:
Description
Hopefully I'll have pictures of the finished front end tonight and then its just panelling.
The car has to be finished within 7 days.... to leave me two weeks to get ready for its debut at Curborough on July 2nd.
big_wasa - 13/6/16 at 04:09 PM
The mx5 option you mentioned a few posts back, will that include front and rear uprights or are you thinking just the diff ?
Doctor Derek Doctors - 13/6/16 at 04:22 PM
quote:
Originally posted by big_wasa
The mx5 option you mentioned a few posts back, will that include front and rear uprights or are you thinking just the diff ?
Its actually complete, have sold quite a few of the MX5 version (mainly outside of the U.K as the rest of the world don't have the access to
Sierra diffs like we do). Anyway, it uses the MX5 Diff, driveshafts, rear uprights, rear hubs and brake calipers. The geometry on the front uprights
was so far removed from what I'm using there was no way they would fit but the rear geometry was almost the same as what I had.
The chassis is the same for the two versions but the rear wishbones and propshaft are different.
The MX5 version is heavier but its cheaper and also gives the option of a handbrake.
At some point I want to get round to doing a hybrid version that uses the MX5 diff and driveshafts but my aluminium rear uprights and Wilwood brakes.
So people can have the availability of the MX5 diff but without the weight penalty.
big_wasa - 13/6/16 at 08:05 PM
I will keep watching progress
Rosco86 - 13/6/16 at 08:34 PM
Looking good, I might have a ride over to see it on the 2nd
daniel mason - 13/6/16 at 08:55 PM
Have you entered Blyton in July Callan? There's a good number in 5a already entered
Doctor Derek Doctors - 13/6/16 at 10:59 PM
quote:
Originally posted by daniel mason
Have you entered Blyton in July Callan? There's a good number in 5a already entered
I'm going on holiday with my little family the weekend after Curbourogh, I need to spend some time with my little family after the last couple of
weeks and I think my stress levels might reached coronary levels by then!
Think I'll run a couple of sprint in August
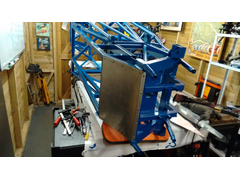
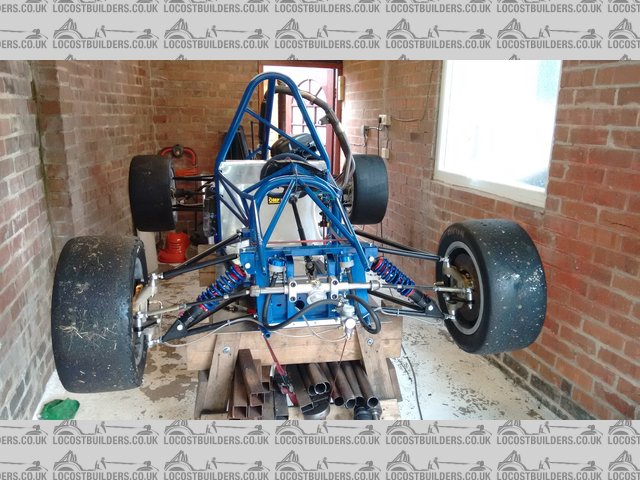
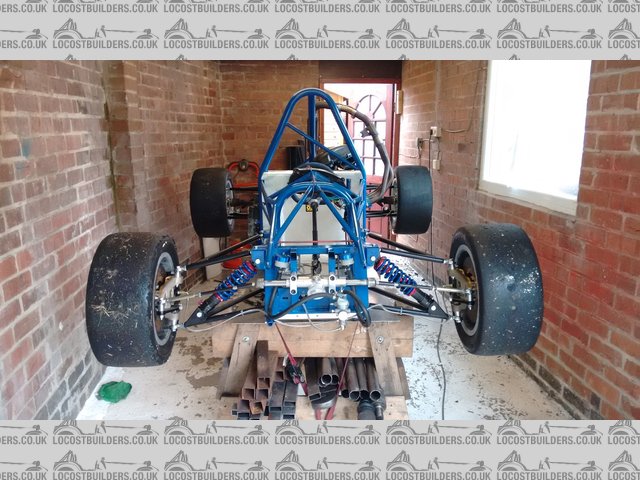
Doctor Derek Doctors - 15/6/16 at 02:03 PM
Front Suspension and Brake Lines were finished off last night. Obviously its on full droop being up on the stands:
Description

Description
Also instead of using the standard "Foam Bag" seat I have just used a low price OMP Kart seat, it fits perfectly and is rather
comfortable:

Description
Just the harness to bolt in and then its bodywork.
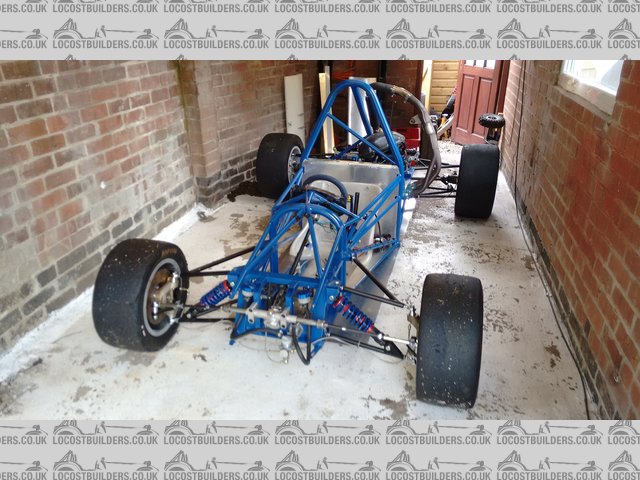
Doctor Derek Doctors - 17/6/16 at 09:40 AM
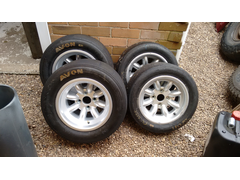
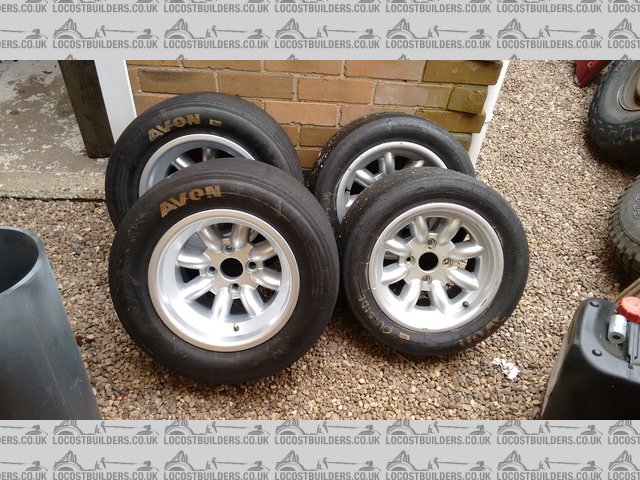
Tried the 9x13 Revolution wheels on last night, everything clears and they look wiiidddddeeeee!
Description

Description
phelpsa - 17/6/16 at 10:20 AM
What size slicks are going on there? 8/22?
Doctor Derek Doctors - 17/6/16 at 11:07 AM
230/570 Radials, seem to be a common size without requiring mega expensive wheels. The Revolutions were �114 each for the rear.
[Edited on 17/6/16 by Doctor Derek Doctors]
Neville Jones - 17/6/16 at 01:15 PM
Are you going to compete with this car???
You can 'overtyre' a car, and that little light(ish) car doesn't need anywhere near those size tyres, particularly with the
power in it.
Then there's the weight of the big tyres, added to the big wheels. The extra is going to be a significant percentage of the total weight.
�114 for the 9" Revolution wheels, is that second hand, or are they not the lightened competition wheels that Revolution do that cost over �150
normally?
Intrigued, to say the least.
We estimated that by swapping to 10" wheels for the 600 car, we could save near to 10kg's over the 13" wheels, and possibly a lot more.
10" quad bike wheels weigh about 2.5 kg's, and less than �200 for 4. Hoosier tyres on the other hand, aren't cheap, even worse are the
Dunlops. and Avons.
Cheers,
Nev.
[Edited on 17/6/16 by Neville Jones]
phelpsa - 17/6/16 at 01:58 PM
quote:
Originally posted by Neville Jones
Are you going to compete with this car???
You can 'overtyre' a car, and that little light(ish) car doesn't need anywhere near those size tyres, particularly with the
power in it.
Then there's the weight of the big tyres, added to the big wheels. The extra is going to be a significant percentage of the total weight.
�114 for the 9" Revolution wheels, is that second hand, or are they not the lightened competition wheels that Revolution do that cost over �150
normally?
Intrigued, to say the least.
We estimated that by swapping to 10" wheels for the 600 car, we could save near to 10kg's over the 13" wheels, and possibly a lot more.
10" quad bike wheels weigh about 2.5 kg's, and less than �200 for 4. Hoosier tyres on the other hand, aren't cheap, even worse are the
Dunlops. and Avons.
Cheers,
Nev.
[Edited on 17/6/16 by Neville Jones]
I think the aim is to be a fun car rather than competitive?
Unfortunately there aren't any really competitive tyres made in 10" at the moment. Avon are making one in A92 but the 16" OD makes them
impractical. Hoosier LC0s are too floppy for anything over 150kg's and R25Bs take too long to heat up.
The competitive 600 cars used to run 6.2/20 13 crossplys in A45 on the front and 8.0/21 13 in A92 on the back, but Avon have discontinued the A45
compound now. Personally I'd be looking at 7" front and 8" rear in A92 or even A15. They're common second hand, pretty cheap new
and will last a couple of seasons.
[Edited on 17-6-16 by phelpsa]
CNHSS1 - 17/6/16 at 07:54 PM
Its worth noting that using smaller rolling radius slicks 20" vs 21" or 22", the tyre footprint is significantly altered.
A92 fronts and possibly rears for hills, but may need to be A15 rears for long sprints (Ty Croes for instance)
daniel mason - 17/6/16 at 09:54 PM
A15's all round for me on a mix of hills and sprints.
Neville Jones - 18/6/16 at 08:22 AM
We've got 13" slicks here, which were destined for single seaters. ( Don't ask. My son would get in strife if I made it public. ) A
bit different to the norm, and very sticky when you get the skin off, from very cold to hot.
Unlike nearly all slicks, these don't harden with use, just get a dry surface on the top after three or so days. Take the skin off, and
you've got a tyre that sticks to a smooth concrete floor, cold. Sounds like tearing gaffer tape off when you move them. They come plastic
wrapped. Getting the skin off needs some time and 80 grit sandpaper though!
Nearly every major tyre maker does slicks, you just have to be prepared to venture from the accepted standards to find what works. Tyre chemistry and
chemical formulations are as many as the stars in the sky.
Cheers,
Nev.
Doctor Derek Doctors - 20/6/16 at 01:01 PM
Wheels and tyres fitted and most of the bodywork cut and folded:


Description
Description
Description
Doctor Derek Doctors - 20/6/16 at 01:03 PM
The running gear is now all done (apart from a geo set-up), brakes are bled and everything is ready to go. Just need bodywork (still), craning it down
off the chassis stands was a tense moment:


Description

Description
Description

Description

Description
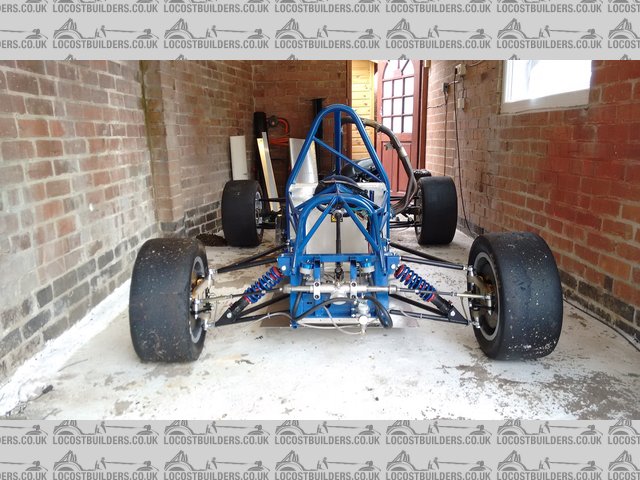
Doctor Derek Doctors - 20/6/16 at 01:12 PM
But I still needed a racecar transporter.
1995 Chevy K1500 Long Bed, converted to a racecar transporter, its a bit limited to cars with a <2400mm ( ~94" ) wheel base and very little
overhang but it means not having the storage issue or faff of a trailer and being able to drive around in something I like driving.
I think it may be the best "petrolhead" thing I have done:
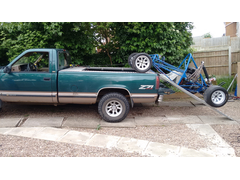
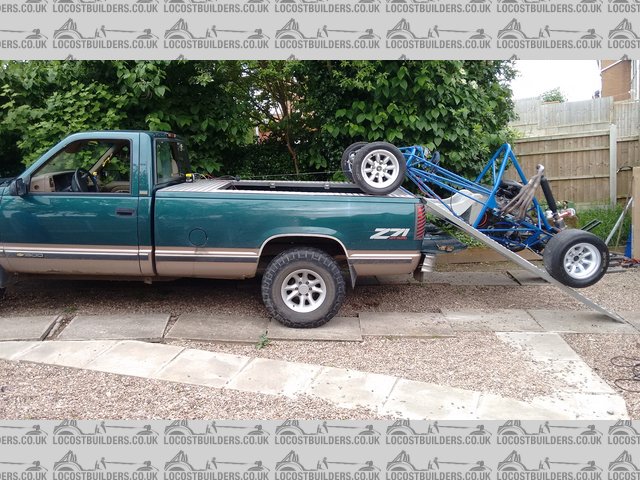
Description


Description

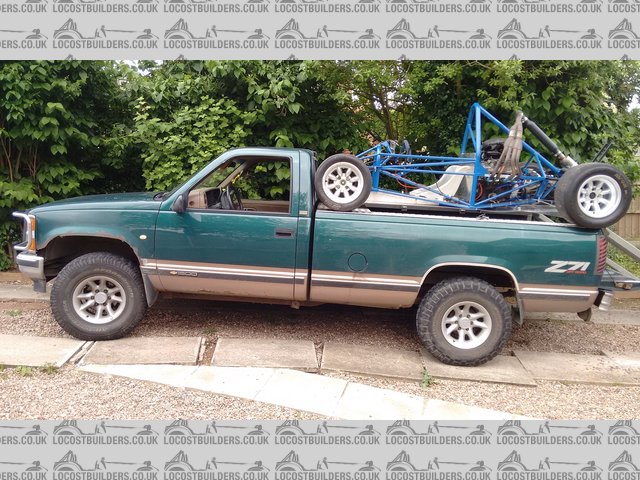
Description

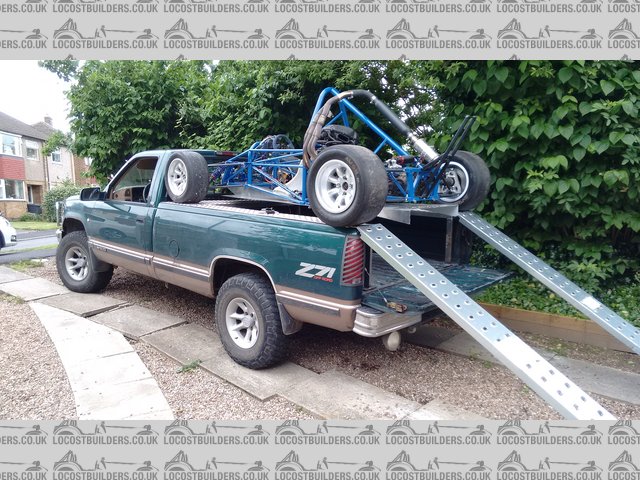
Description

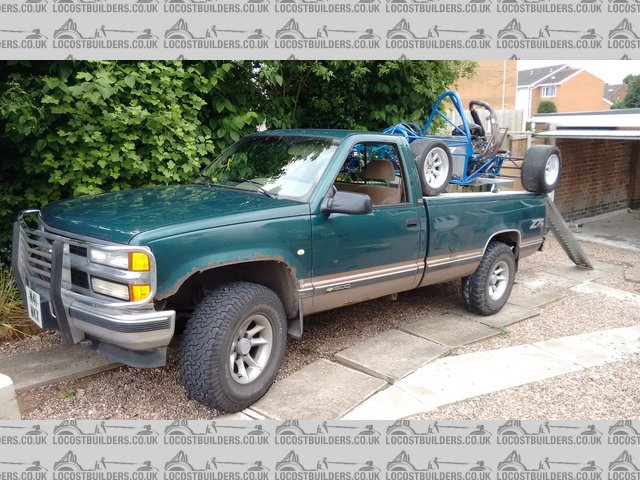
Description

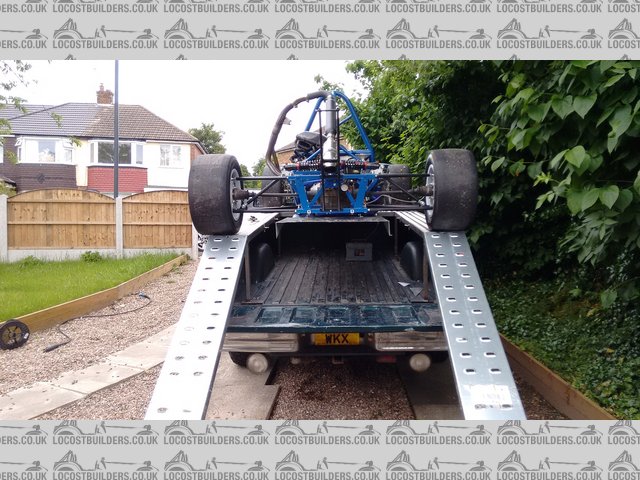
Description
[Edited on 20/6/16 by Doctor Derek Doctors]
Rosco86 - 20/6/16 at 01:58 PM
looks wicked, also looks great on the truck, be nice to see it with the body work on, how much simpler is a build with no IVA to worry about!!
Doctor Derek Doctors - 20/6/16 at 02:19 PM
quote:
Originally posted by Rosco86
looks wicked, also looks great on the truck, be nice to see it with the body work on, how much simpler is a build with no IVA to worry about!!
Its the same, just replace "IVA" with "MSA"..... actually it is simpler but the MSA stuff is usually things that need to be
correct early in the design/build so if you get them wrong it can be very difficult to fix (see all of the ROPS debate on Uphill Racers at the moment)
prawnabie - 20/6/16 at 02:52 PM
Are you still going to make Curborough on Saturday? I will planning on coming for a look in the morning...
Doctor Derek Doctors - 20/6/16 at 03:03 PM
quote:
Originally posted by prawnabie
Are you still going to make Curborough on Saturday? I will planning on coming for a look in the morning...
I'm planning on it, if I'm not there you'll find me in a straight jacket being carted away as my brain has finally overloaded.
It's very much going to be a shakedown debut, pottering round to make sure it all works and get some pictures and data.
But then again when that light goes green...
Doctor Derek Doctors - 30/6/16 at 04:03 PM
I finished off the front wing and nose panel last night, doesn't look half bad:
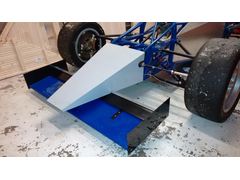
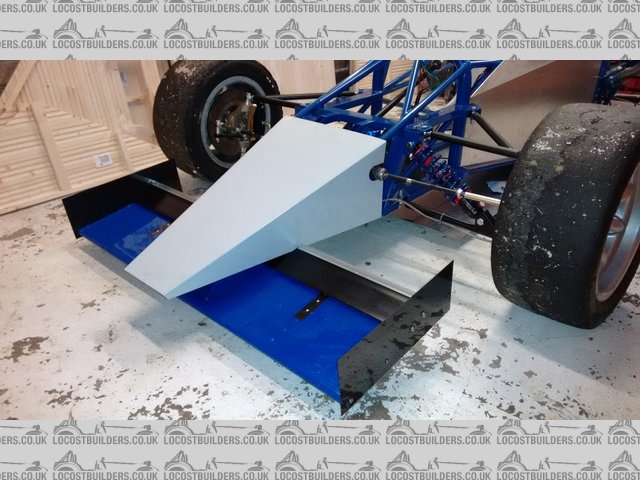
Description

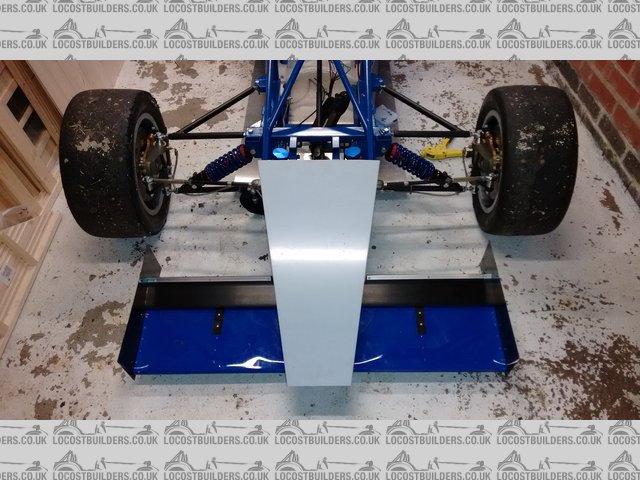
Description
Also, sorry to let people down but I wont be at Curborough this weekend. I mentioned it on Facebook but it became clear that the amount of work I was
doing was affecting my health and my family life and also making me a miserable basterd (even more so than usual) which wasn't fair on anyone.
I'm still cracking on with the final jobs but at my own pace. I'd say August is a realistic target.
ftaffy - 1/7/16 at 02:30 AM
Its looking amazing, great work and dont fret about pushing back the due date. No point building it and then it becoming the thing of hatred.
Waiting to see videos of it in action!
Cheers,
Taffy
Doctor Derek Doctors - 1/7/16 at 03:29 PM
I got my set of Terrapin plans through earlier in the week so thought I would knock up a quick 3D model of the Terrapin chassis based on the plans for
a quick comparison.
I deliberately never looked at the Terrapin plans before I started my project (so that I wouldn't just be making a knock off) but did use a
number of Staniforth books for reference. I quite surprised and pleased out the comparison particularly on the size and position of the chassis
tubes.
Anyway:

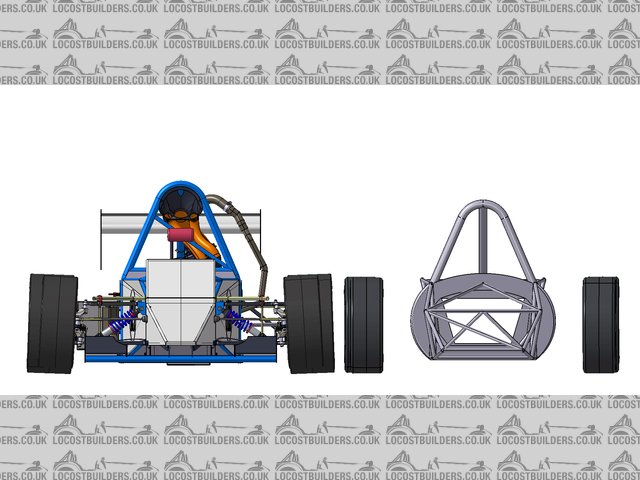
Description

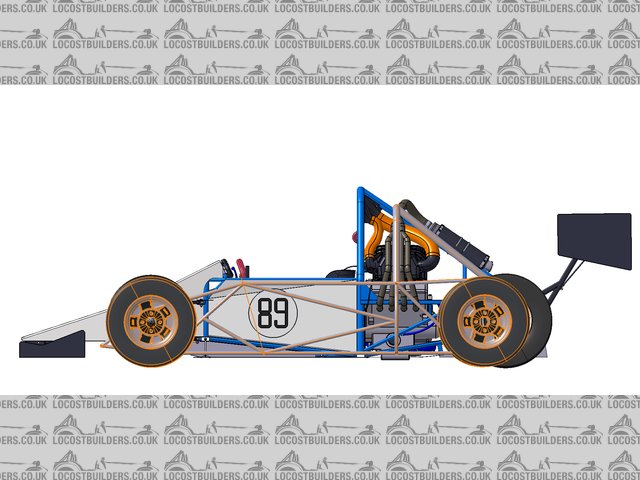
Description

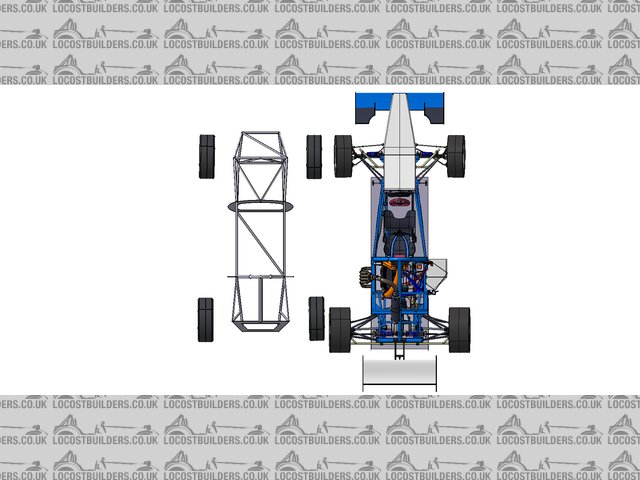
Description

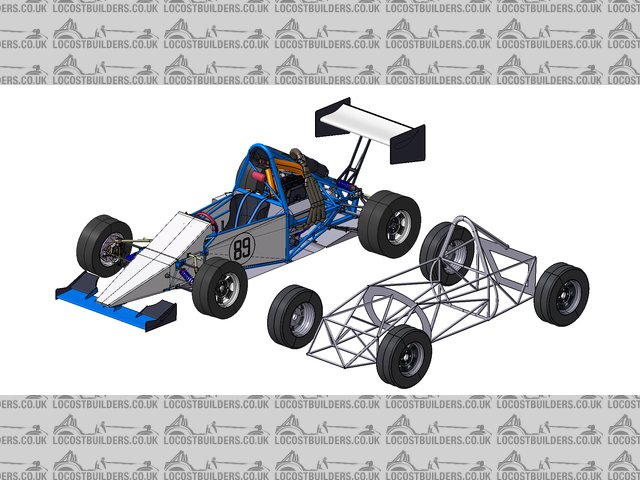
Description
Doctor Derek Doctors - 25/7/16 at 03:07 PM
I've had these printed up by a guy I'm working alongside and think they are a great little finishing touch for the car. They are printed in
ABS so are pretty darn sturdy. The set comprises of two adaptors that fit into the ram-air intake of the original Honda airbox and a roll hoop mounted
air-intake. So much easier than manufacturing something from Ali' or GRP and they fit perfectly, the main limitation is the size, the roll hoop
intake is right on the limit of size in all three directions.
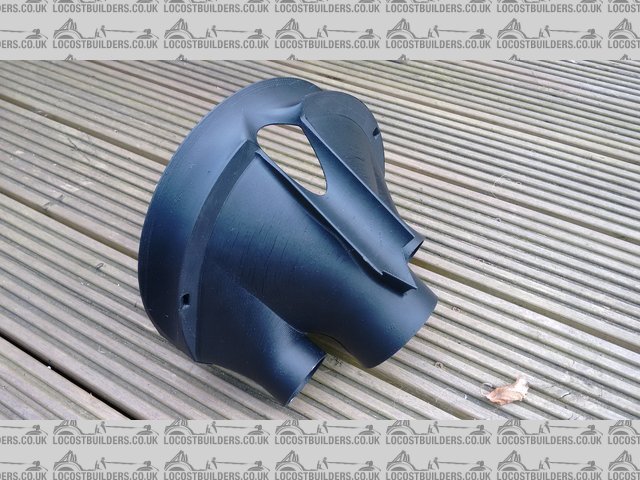
Description
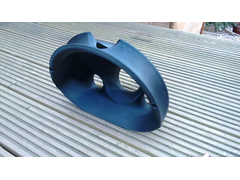
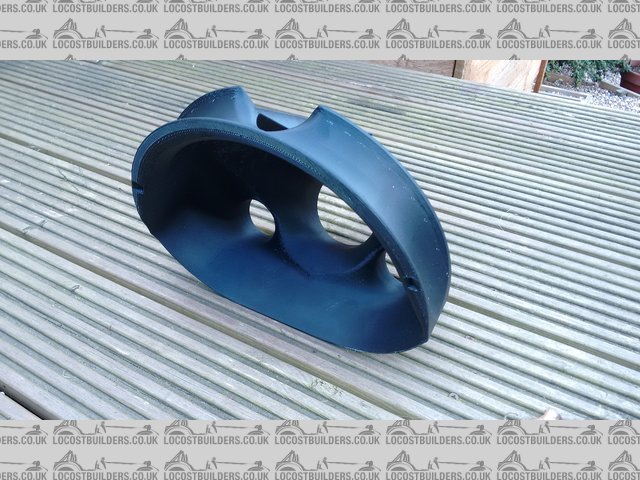
Description
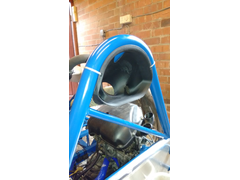
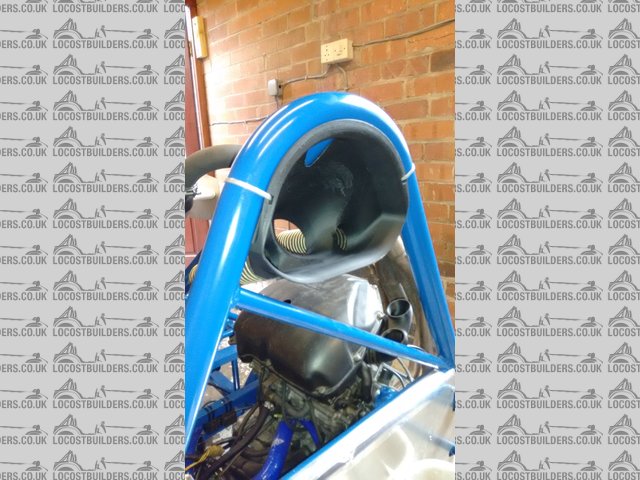
Description

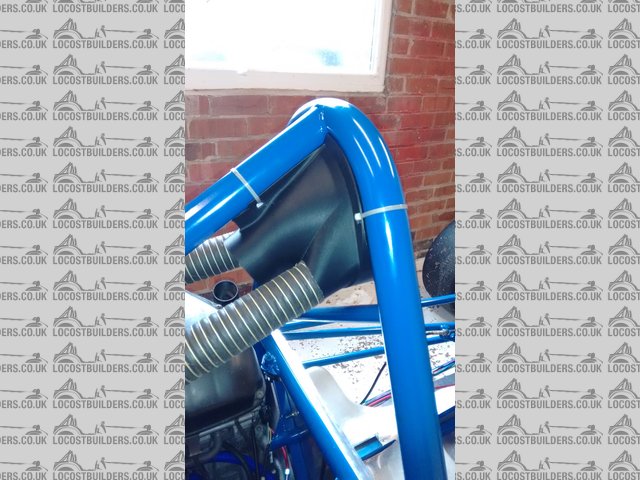
Description
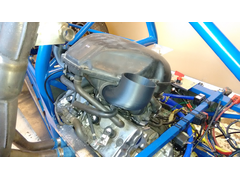
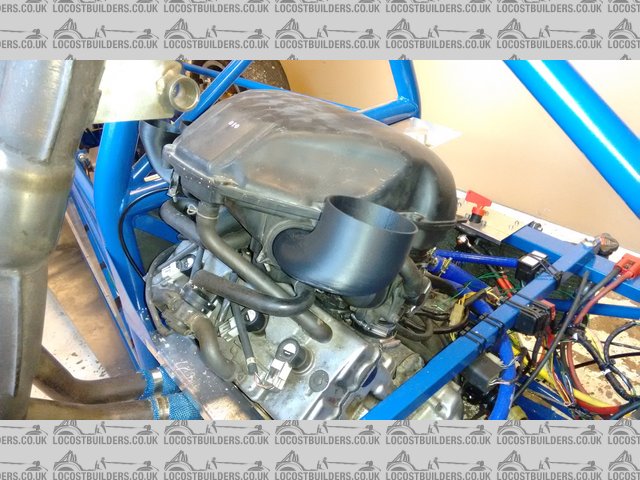
Description


Description
Just waiting for the connector hose to arrive and they can be plumbed up.
Doctor Derek Doctors - 25/7/16 at 03:16 PM
I have been asked a few times when the car is going to debut and if I can post some more general pictures so thought I would answer both.
I am now booked in for a test at Curborough on August 25th, hopefully its just a few last jobs to get done now and it should be ready to run.
And here are a load of general pictures I took last night:
Rear wing post, adjuster and exhaust:

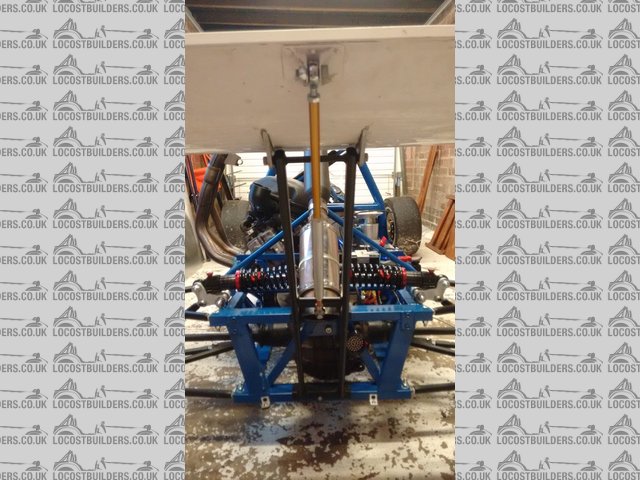
Description
Exhaust tail pipe:

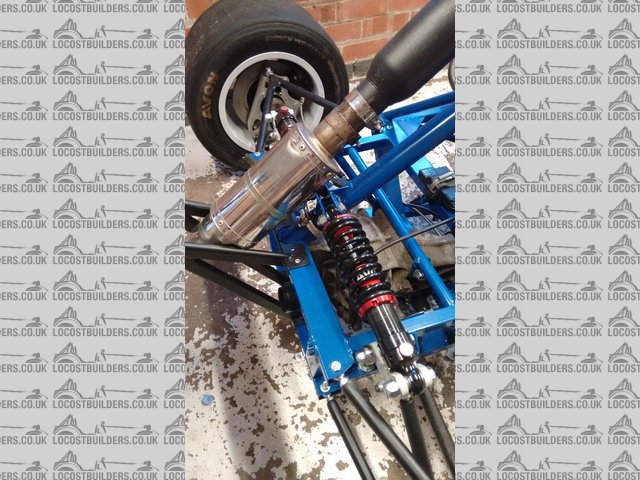
Description
Engine bay (still some tidying up to do):
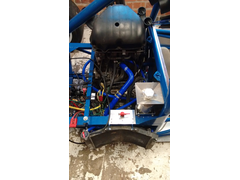
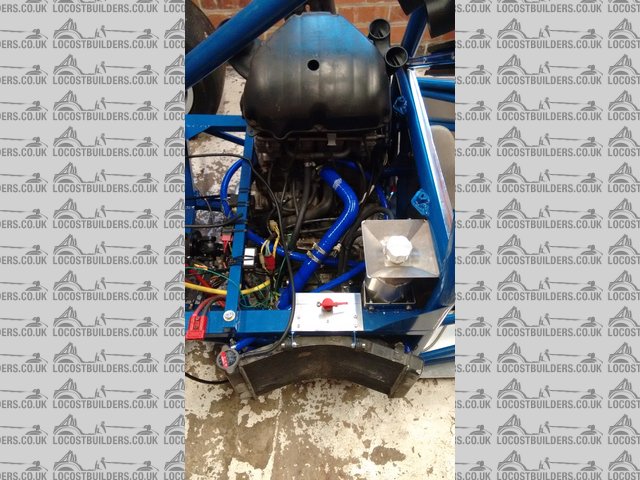
Description
Seat (harness just requires bolting in):
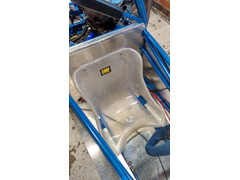
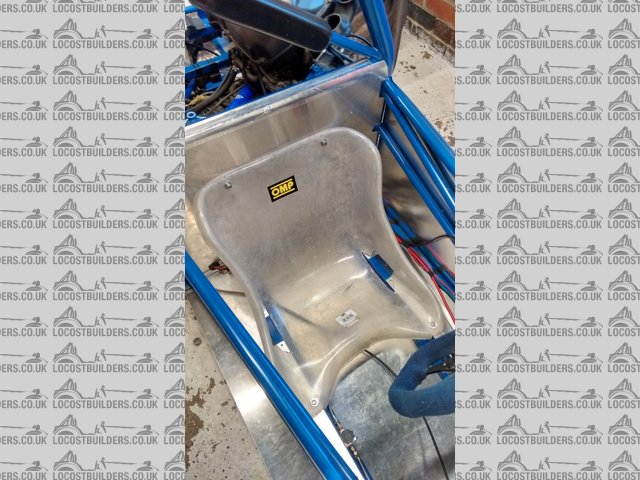
Description
Gear and Clutch Lever:

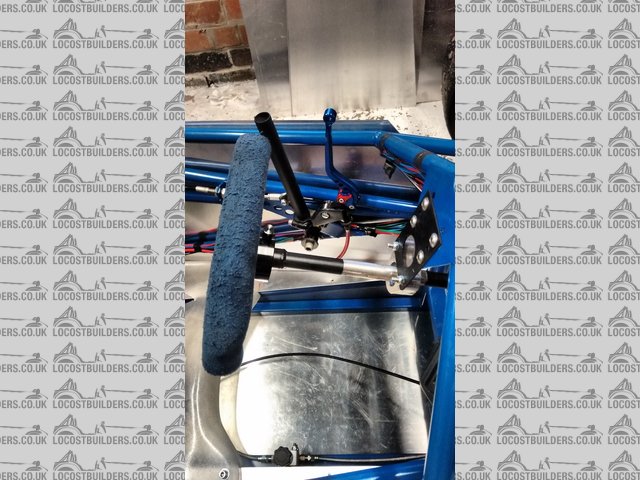
Description
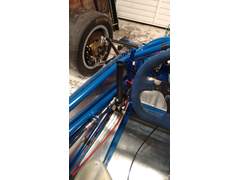

Description
Front Corner:

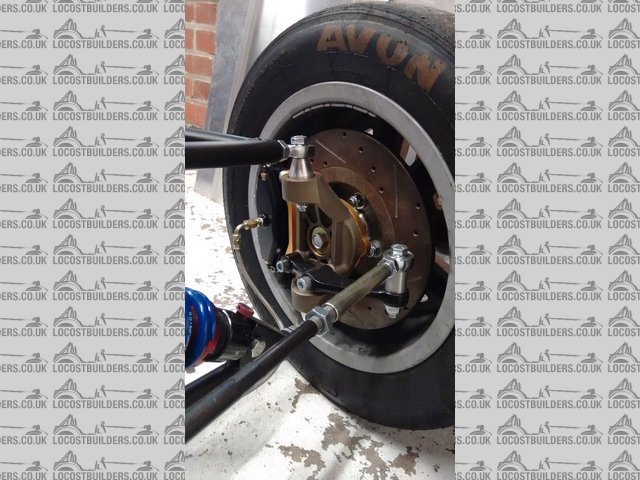
Description
Front End:

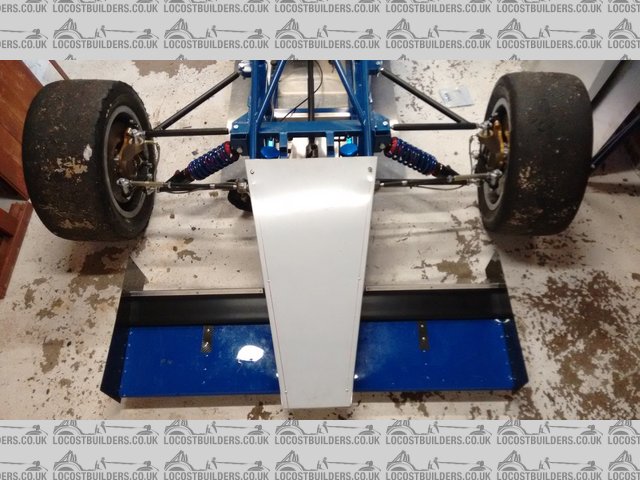
Description
Exhaust (total cost of �27):

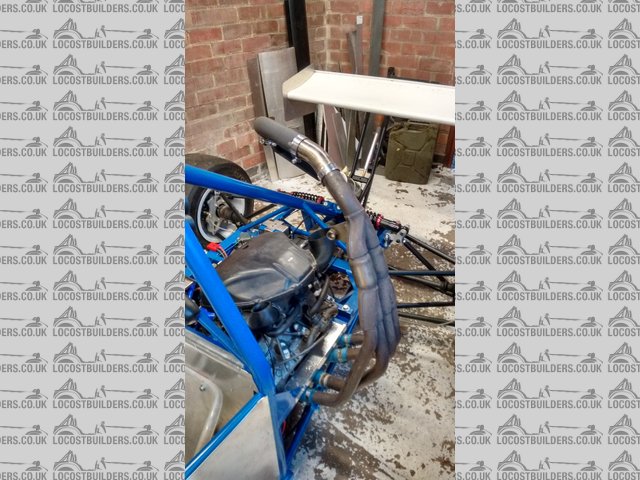
Description
Rear Corner:

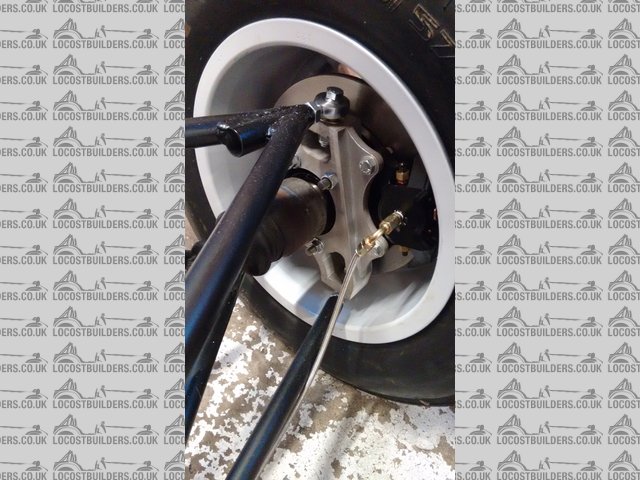
Description

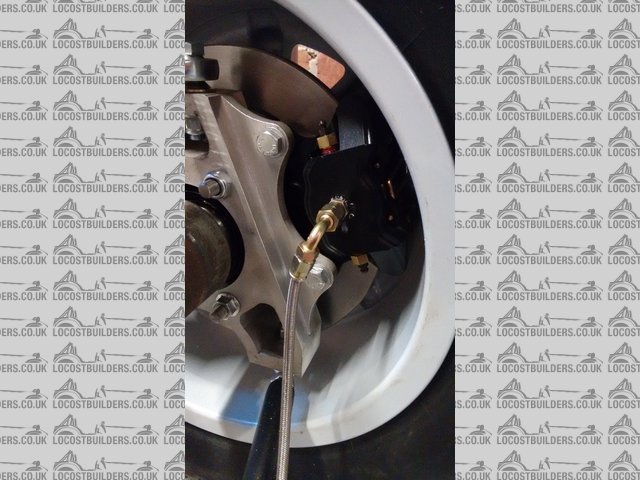
Description
Currently Untidy wiring:
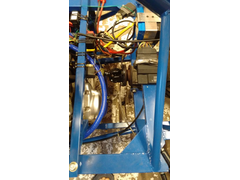
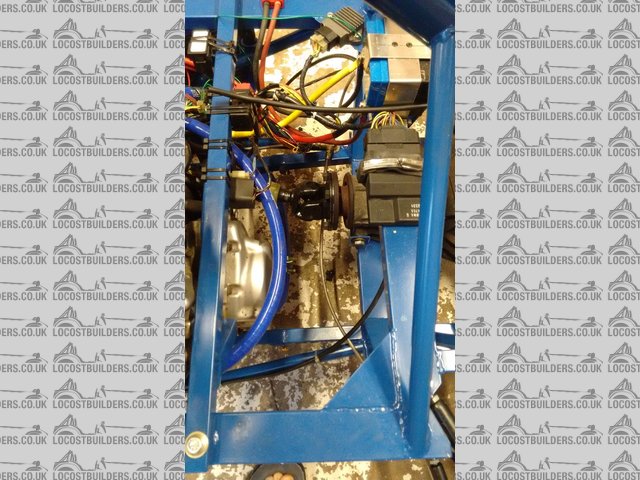
Description
Pedals:

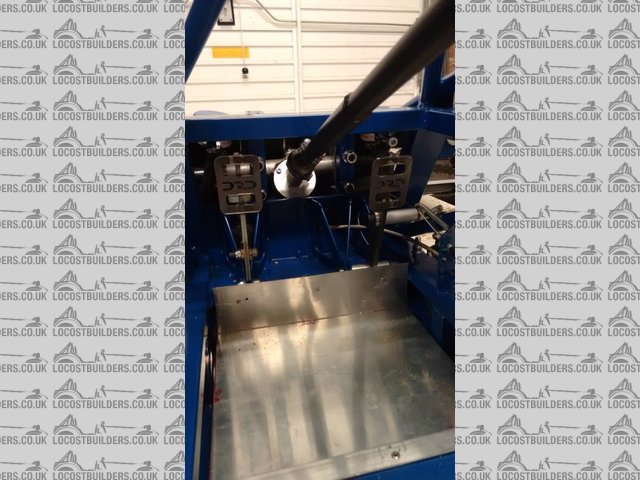
Description
[Edited on 25/7/16 by Doctor Derek Doctors]
worthidlj - 25/7/16 at 04:53 PM
Those 3D printed parts look very smooth and very nice!
Do you know what printer he used to make them and if he did any post processing to smooth the surfaces?
Cheers,
David
Doctor Derek Doctors - 26/7/16 at 09:19 AM
quote:
Originally posted by worthidlj
Those 3D printed parts look very smooth and very nice!
Do you know what printer he used to make them and if he did any post processing to smooth the surfaces?
Cheers,
David
I don't really know anything about the printer apart from the fact its a personal printer and not some massive industrial thing so quite
reasonably priced.
I do know that there is no post processing, the ABS just seems to come out really nice. It can look a bit rough where support material has been cut
away though.
I have had a set of T89 Centre caps made for my truck in the same way and they look even better.
Doctor Derek Doctors - 29/7/16 at 02:42 PM
Managed to get the car set-up over the last couple of nights and borrow some corner weights... pretty pleased with the results. I have been aiming at
330Kg for a ready-to-run car and ended up at 327kg with 2l of fuel on-board but the wings removed (they were driving me mad getting in the way while
doing the set-up work).
I'm mainly pleased because my car is about as heavy as you would ever build one, it has the lower cost steel pedals and coilovers, a slightly
heavier earlier chassis design, a cheap (and ruddy heavy) Jetex Silencer as well as a steel bike end can and a set of rally spec wheels that
aren't light at all. Also there is plenty of weight to be removed in optimising bolt length and weight reduction on the rear hubs.
Also despite the nay-sayers I have managed to keep the weight offset to a minimum with just 6kg across the rear wheels (without jacking the RH side
up) which I'm happy with.
I think with a little bit of simple weight reduction 310Kg is achievable for a complete car.

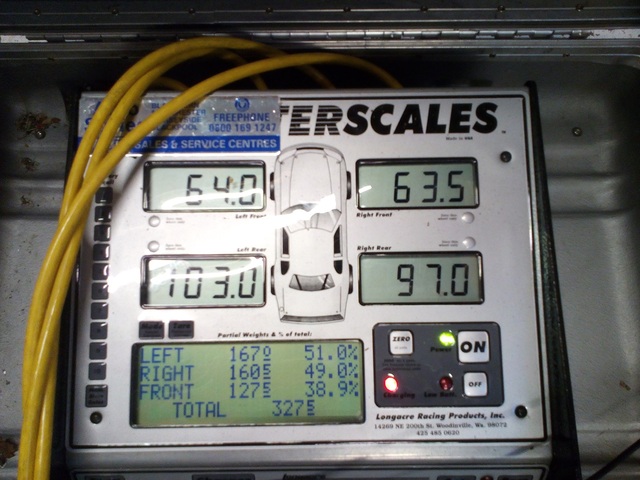
Description
Fcck2000 - 6/8/16 at 10:01 AM
This is the first place I come to when I visit this forum. What you've done and how well you've done it is seriously impressive. Please keep
the updates coming and be sure to take plenty of videos when up and running.
Paul
daniel mason - 6/8/16 at 10:21 AM
Well done Callan. Some good testing needed now!
40inches - 6/8/16 at 12:57 PM
quote:
Originally posted by Fcck2000
This is the first place I come to when I visit this forum. What you've done and how well you've done it is seriously impressive. Please keep
the updates coming and be sure to take plenty of videos when up and running.
Paul
Agree 100%
daniel mason - 6/8/16 at 01:10 PM
And to top it all off,he's an honest,likeable guy! What's not to like?
It would be great to have a few more 1000cc race cars out next year!
Doctor Derek Doctors - 6/8/16 at 03:35 PM
Cheers guys, encouragement always appreciated.
As mentioned we are booked to run on the 25th of August and its literally only finishing touches left to do. If that goes well I want to enter the
NSCC champ' event at Harewood in September.
Doctor Derek Doctors - 7/8/16 at 08:40 PM
Managed to grab a few moments over the weekend and the little job I managed was to remove the seized on Jedi wing end plates, clean them up and fit my
own stickers. Its a little thing but it seems like a huge step to be fitting my own branding to my own car:

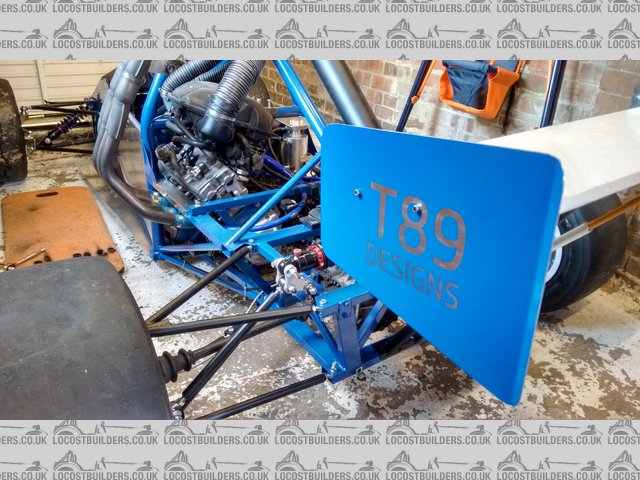
Description

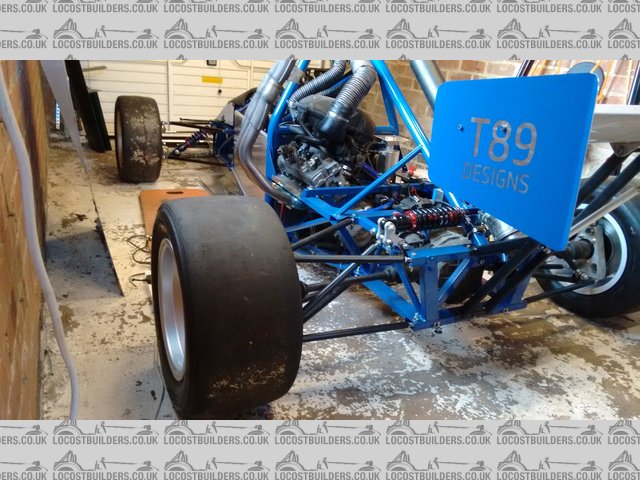
Description
Also some new 3D printed Ram-Air intakes were completed for a customers cars to fit a GSXR600 engine:
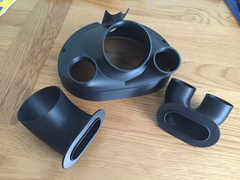

Description
Doctor Derek Doctors - 25/8/16 at 09:03 PM
Went for the initial shakedown and some testing at curborough today.
The car was excellent, even better than I expected. I was particularly pleased with the really predictable neutral handling. Steering, brakes,
suspension and chassis were all superb.
Only teething problems were a slipping clutch (i should have forseen this on an engine with 41k on the clock) and some overheating caused by a faulty
fan switch. Oh and the rain, the bloooooodddyyyy rain!
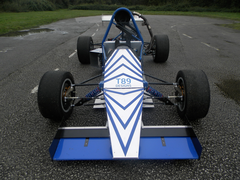
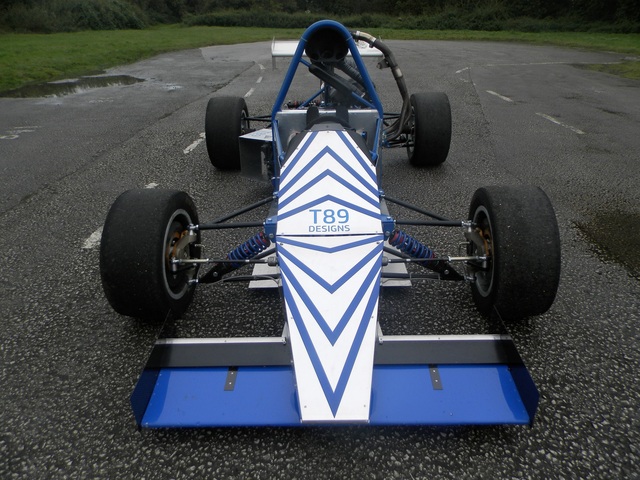
Description
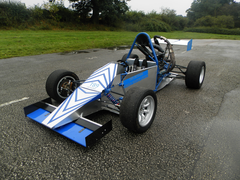

Description
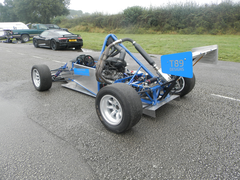

Description
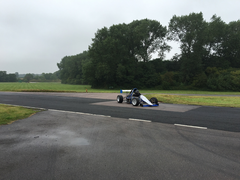
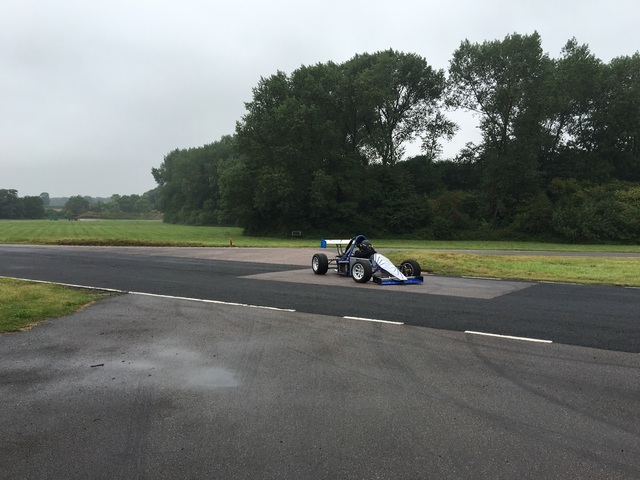
Description

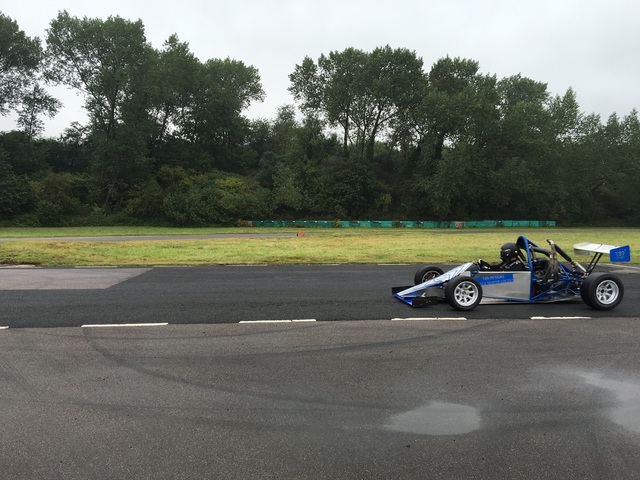
Description
StevieB - 25/8/16 at 10:09 PM
It looks really good - still waiting to move house but still want to get some plans once I'm in and set up!
Sam_68 - 26/8/16 at 05:04 AM
Looks very good - more simple and Jedi-like than I expected, in the whole (which is a good thing)!
When is its competition debut?
z2000 - 26/8/16 at 11:47 AM
Top job there! Looks epic, really nice design and you've pulled off the build really well.
If I had more garage space I'd be buying the plans now, but it'll have to wait for a while.
Have you got an up to date approx. total spend to build the car?
craigdiver - 27/8/16 at 08:36 PM
Looks awesome, street legal version?
Doctor Derek Doctors - 27/8/16 at 08:42 PM
Cheers all.
Competition debut most likely next year now. Engine needs to come out to replace the clutch but I might use that opportunity to stick a 1000cc lump in
there (for development work of course).
Approx build cost (like any Locost) is as little or much as you want really. If you do all the work yourself and search for a bargain on the engine
and a few other bits a rolling chassis and power train could be done for �2.5k but then you could blast �4k on a set of shocks and �5k on an engine if
you were so inclined.
Doctor Derek Doctors - 27/8/16 at 08:44 PM
quote:
Originally posted by craigdiver
Looks awesome, street legal version?
News coming soon on that.
craigdiver - 27/8/16 at 08:52 PM
quote:
Originally posted by Doctor Derek Doctors
quote:
Originally posted by craigdiver
Looks awesome, street legal version?
News coming soon on that.
You tease
big_wasa - 28/8/16 at 07:29 AM
Yes it looks fantastic.
No chance of working the mx5 front uprights ? As a good pair can be had for 1/10 the cost of the RD's fitting with "Locost" ethos and
more of a single donor option.
So the Rd uprights are �195
Pair of hubs �80
Grease caps, bearings and studs �35
Total with vat �372 give or take...
Besides I have a set of mx5 ready for a project and your little car would suit my little garage
[Edited on 28/8/16 by big_wasa]
Doctor Derek Doctors - 28/8/16 at 08:47 PM
I had a look at the MX5 front uprights but its not something I'm going to do. Unlike the rear MX5 uprights (which were near identical geometry to
what I had already) the fronts are very very different. Basically there would be 3 options to make them fit:
1) A completely different front chassis arrangement (money and time)
2) A lot of re-work and adaptors for the front uprights (even more money and time)
3) Just have the worse geometry (and compromise the car)
And whichever one you choose you also end up with more un-sprung mass.
Doctor Derek Doctors - 28/8/16 at 08:50 PM
quote:
Originally posted by craigdiver
quote:
Originally posted by Doctor Derek Doctors
quote:
Originally posted by craigdiver
Looks awesome, street legal version?
News coming soon on that.
You tease
When I can confirm the plan I will give more details but a project is starting for a car-engine based version, re-designed with IVA in mind. It will
be very much based on a single donor driveline but with very few compromises to the original ethos.
big_wasa - 28/8/16 at 09:25 PM
Ok thanks for the reply. The reason I buy plans like yours, like the books is I am no designer.
You have got me really interested in the car engine version.
Give us a hint on donor ?
[Edited on 29/8/16 by big_wasa]
MitchMk3 - 29/8/16 at 02:30 AM
quote:
Originally posted by big_wasa
Yes it looks fantastic.
No chance of working the mx5 front uprights ? As a good pair can be had for 1/10 the cost of the RD's fitting with "Locost" ethos and
more of a single donor option.
So the Rd uprights are �195
Pair of hubs �80
Grease caps, bearings and studs �35
Total with vat �372 give or take...
Besides I have a set of mx5 ready for a project and your little car would suit my little garage
[Edited on 28/8/16 by big_wasa]
I looked into this myself as you have pointed out the cost difference is significant enough to explore.
Without going into the obvious geometry differences, the crux of the problem is the low steering arm on the mx5 uprights that attach the ball joint
from underneath. On the chassis as is, the steering rack would have to be where the brake master cylinder is. Hence either significant chassis or
upright changes.
Doctor Derek Doctors - 29/8/16 at 05:21 PM
Cheers Mitch, put much more succinctly than I managed.
A hint? Simple, Lightweight, compact and cheap. And not 4cyl. (No its not a Smart car)
[Edited on 29/8/16 by Doctor Derek Doctors]
Doctor Derek Doctors - 29/8/16 at 06:13 PM
A couple of early photos (don't worry I'm buying the un-watermarked versions... I'm not that stingy)
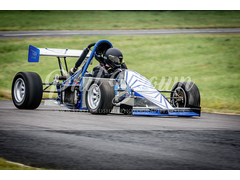
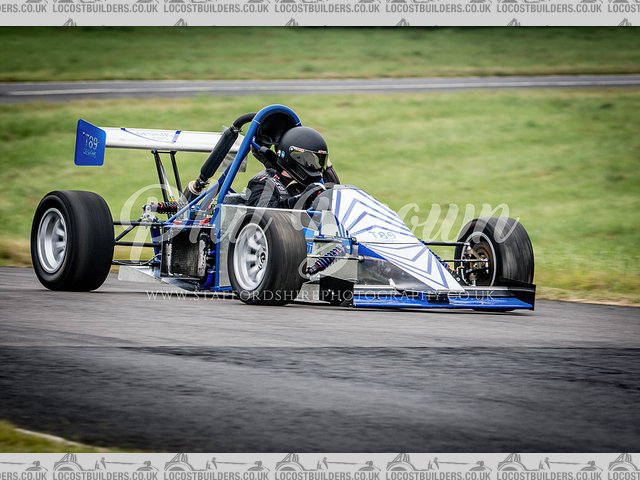
Description
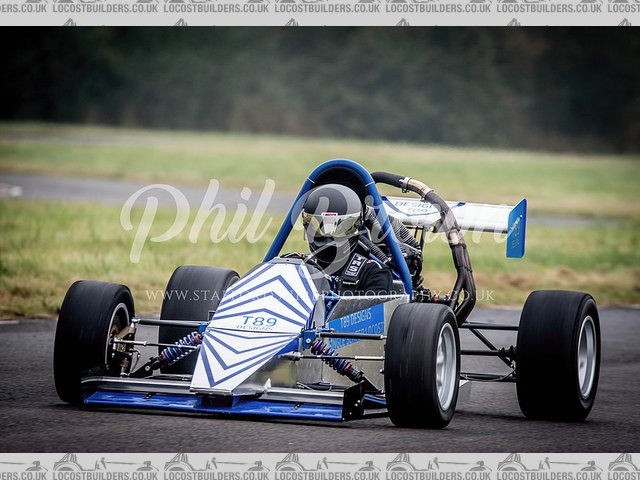
Description
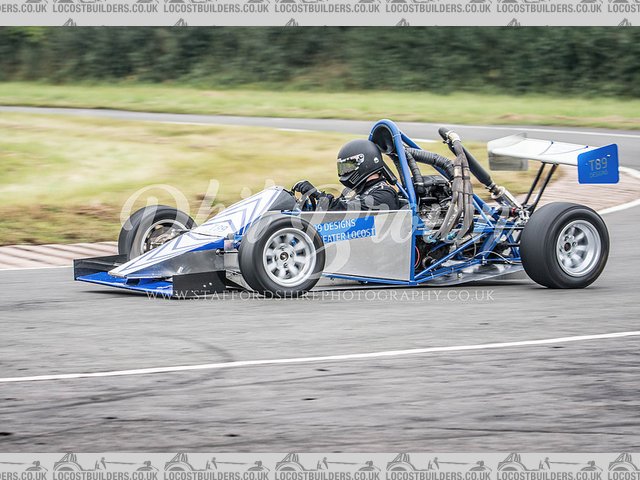
Description
Doctor Derek Doctors - 19/9/16 at 07:49 PM
Have decided to sell the car so somebody can use it properly, possible opportunity to run it as a works team with factory support and some
sponsorship.
Advert:
http://www.locostbuilders.co.uk/forum/34/viewthread.php?tid=205885&page=1#pid1725330
Doctor Derek Doctors - 17/7/17 at 09:29 PM
I thought I better book-end this project diary before I start a new one for a new car.
I didnt sell the car in the end, it was upgraded to the latest version (PH1.2), loads of weight reduction and performance parts and I have started
competing in it. It ruddy aweseme! Everything is was hoping it would be and massive fun.
Some pictures from Croft:
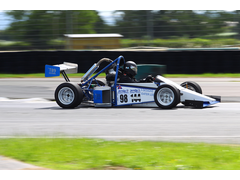
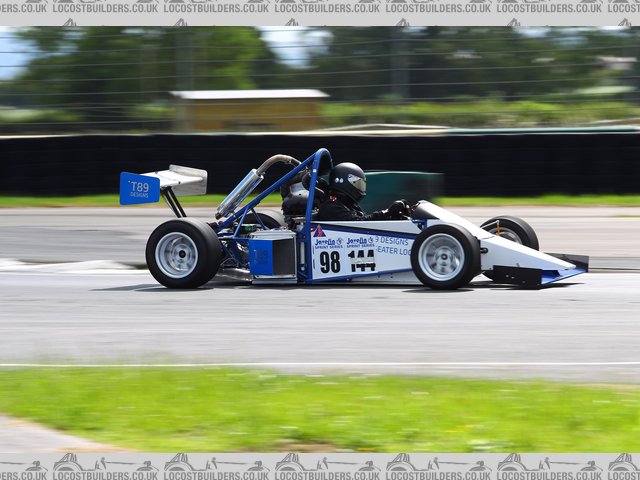
Description
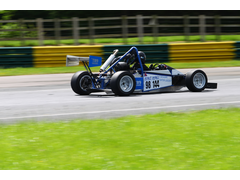
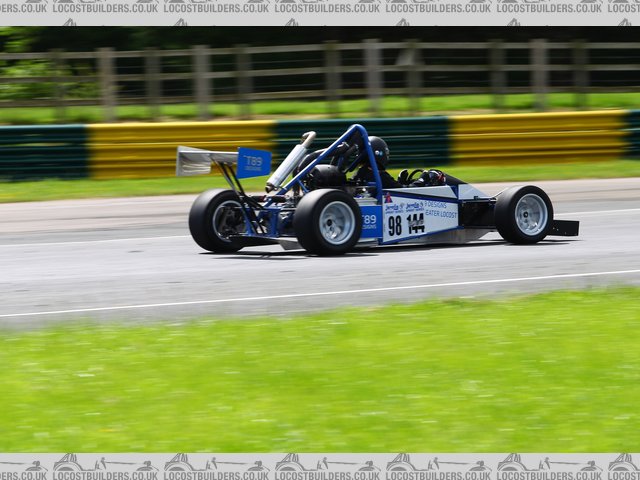
Description
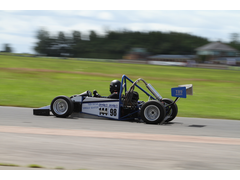
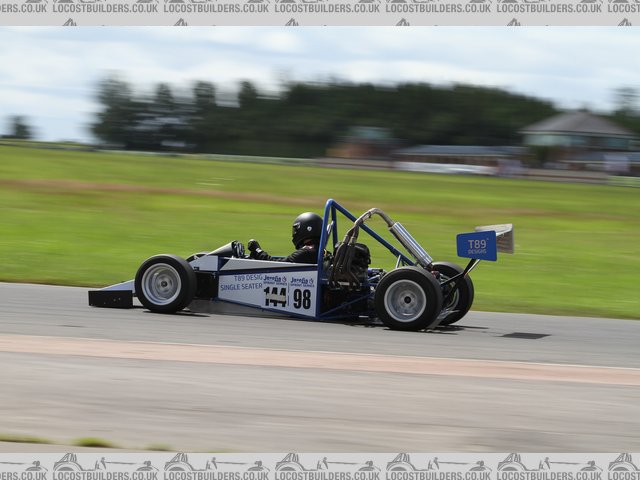
Description
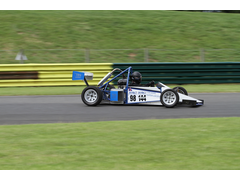
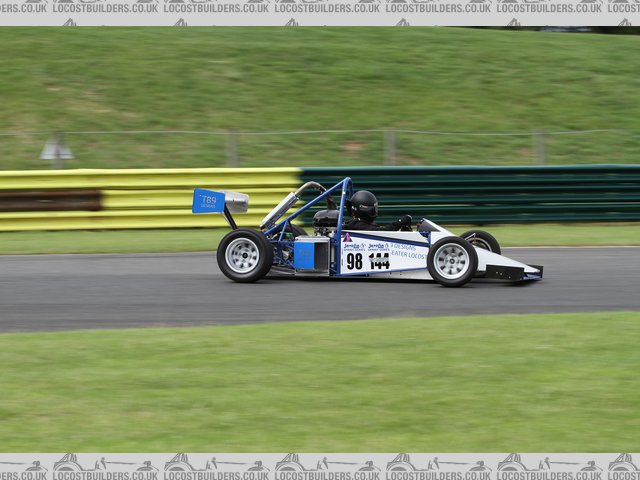
Description
And now, time for the Roughshark!


