mackie
|
| posted on 29/1/04 at 02:43 PM |

|
|
Mounting of alternator on a Rover V8
The alternator needs mounting on the top of the engine. What's the best way to do this with a standard SD1 front cover? It's seems to sit
too far forward for the tensioner arm to bolt to anything, does anyone make an adapter of some sort do we need a different pulley and water pump
too?
Also, am I right in thinking that a remote oil filter kit is required because it fouls the steering column (MK2 escort rack).
Cheers,
Mackie
|
|
|
|
|
Julian B
|
| posted on 29/1/04 at 03:56 PM |
|
|
Thats a very good question and one that i am struggling with as well. Have a look at Tim Hovered's site
as he has a bit about this. It seems that the alternator can be relocated if you throw enough cash at the problem. Not very low cost! RPI engineering
will machine a grove in your damper(front flywheel) and sell you a new water pump with a new pulley and a different alternator bracket but thats
approaching £200 ish which is a bit silly. I think the problem is that the belt hits the diagonal chassis member so the idea is to get the belt back
towards the engine as far as possible. I have half solved the problem. On my sd1 engine it had a crank pulley for the power steering pump. I have
removed the original crank pulley and inverted it and placed it on the water pump. The power steering pulley then used for the main crank pulley. Well
i'm confused so let a picture paint a thousand words.

I still have the alternator/mount problem to solve but im bloody determined that to solve this one without spending any wonga
Cheers
PS sorry but i dont know about the remote oil filter
|
|
|
mackie
|
| posted on 29/1/04 at 04:16 PM |
|
|
Ditto about not shelling out. I'm sure we can come up with a solution between us...
I shall investigate.
|
|
|
Alistair Mc
|
| posted on 29/1/04 at 04:30 PM |
|
|
Dont know about the v8 but I had problems with sapce mounting my altenator on my v6 ford engine, ended up mounting it the forwad of the engine.
because its rectified it works in either direction. This may or may not help, thought it was worth mentioning
|
|
|
Alistair Mc
|
| posted on 29/1/04 at 04:33 PM |
|
|
Dont know about the v8 but I had problems with sapce mounting my altenator on my v6 ford engine, ended up mounting it the forwad of the engine.
because its rectified it works in either direction. This may or may not help, thought it was worth mentioning
Rescued attachment car013.jpg
|
|
|
Alistair Mc
|
| posted on 29/1/04 at 04:35 PM |
|
|
sorry about that I appear to have sent that twice, there are more pics on www.alt-media.net/v6_locost
|
|
|
mackie
|
| posted on 29/1/04 at 05:04 PM |
|
|
That, sir, is cunning. It looks like a very similar alternator to ours, so if it can go the other way round it may just work.
It's certainly worth a go!
Cheers.
|
|
|
mackie
|
| posted on 29/1/04 at 05:15 PM |
|
|
That's Hovered guy is jammy, first a Rush and now a Fury.
Jealous.
|
|
|
Donners90
|
| posted on 29/1/04 at 06:16 PM |
|
|
Not necessarily on TOP of engine
G3OFF is building a Viento with a TVR V8. On the Luego website there is a photo of the front of his engine and the alternator is mounted below the
level of the cylinder heads!! Maybe it's worth asking him where he got the bracket??
I hope you don't mind G3OFF, but I've attached this photo of your engine  ...and mighty fine it is too!! ...and mighty fine it is too!!
[Edited on 29-1-2004 by Donners90]
Rescued attachment DSC00044.jpg
|
|
|
stephen_gusterson
|
| posted on 29/1/04 at 06:22 PM |
|
|
alastair MC
you can mount it conventionally.
there are some tapped holes on the passenger side of the engine on which you can bolt a mounting bracket.
this is what I did
- the 2nd belt goes to the power steering pump
[Edited on 29/1/04 by stephen_gusterson]
Rescued attachment alt.jpg
|
|
|
mackie
|
| posted on 29/1/04 at 07:39 PM |
|
|
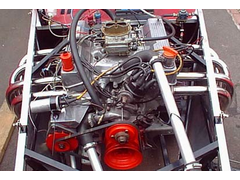
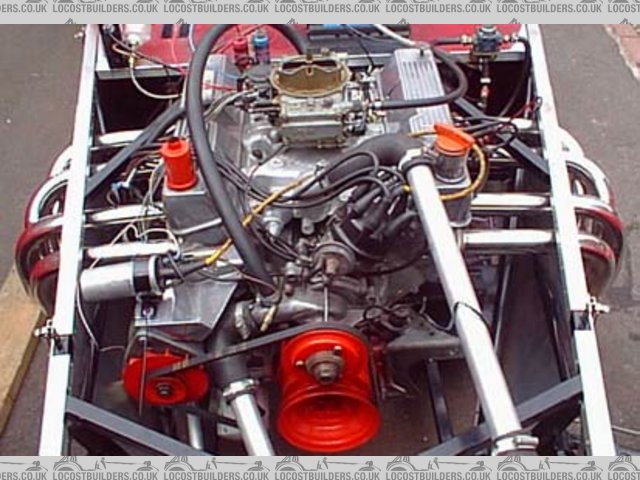
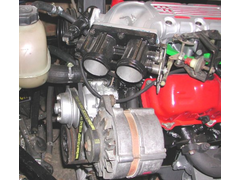
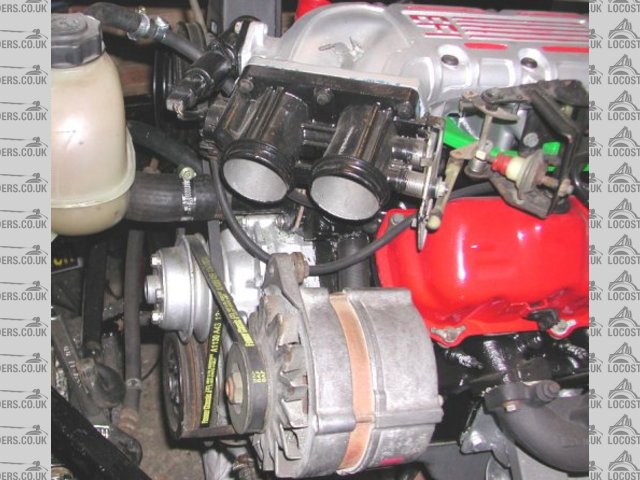
We have this:

If it will fit then bingo, but the Viento is another 2in wider than ours and a bit taller too.
I guess we shall just try it and see, if it doesn't fit then we can worry about it then.
|
|
|
Donners90
|
| posted on 29/1/04 at 08:42 PM |
|
|
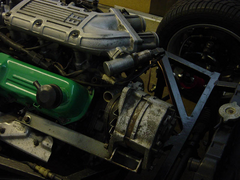
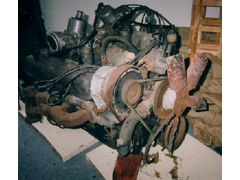
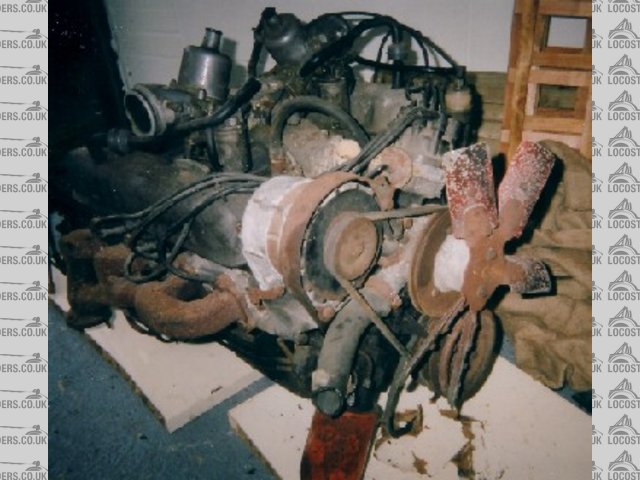
I've not long finished rebuilding a P5 engine and the alternator sits on top of the bracket, however it can be adjusted to come closer to the
centre of the engine by using a shorter belt. The alternator bracket is also much smaller than the one in your photo.
I've got this one to hand. It is the engine when I got it. Not very clear but it shows the rough location. I'll take some closer photos
tomorrow and post them for you.
Rescued attachment Enginebefore.jpg
|
|
|
Donners90
|
| posted on 30/1/04 at 10:51 AM |
|
|
Alternator pics
Mackie,
I've added some pics of the location of the alternator on the P5 to my archive. There are some shots of the bracket too.
Hope this helps.
|
|
|
Simon
|
| posted on 30/1/04 at 10:54 AM |
|
|
Mackie,
http://www.locostbuilders.co.uk/photos.php?action=showphoto&photo=2004_0109Image0003.JPG
from my photo archive.
Doddle - flat plate wilth holes drilled for mounting (so in same place as orig bracket!)) flat bar out perpendicular, with a couple of drilled tags
(for alt bolt), and a couple of reinforcment pieces.
Engine has been run and it works
Just needs an adjuster bar fitting
Here's a quick doodle.
ATB
Simon
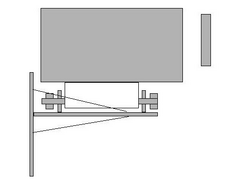 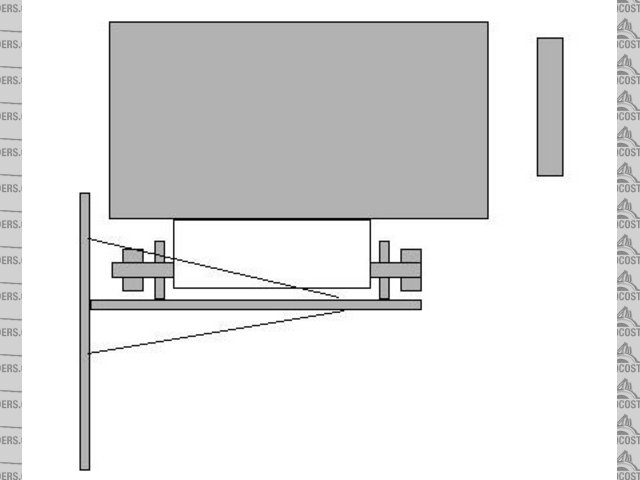
Rescued attachment alt mount.jpg
|
|
|
Alistair Mc
|
| posted on 30/1/04 at 01:11 PM |
|
|
stephen
Thanks for the segestion Looked at that first, my car is book width at the front and I had no room at all, this is why I had to go for the more
unconventional approach, works fine in car, bracket was a pain to make, the one in the image was a first prototype, its much stronger now
regards
alistair mc
|
|
|
craig1410
|
| posted on 30/1/04 at 01:24 PM |
|
|
Mackie,
A mate of mine who is building an RV8 Locost has mounted his alternator down where the power steering pump used to be but forward a bit so that it
drives from the water pump and crank pulleys. To avoid hitting the tubes S and T at the front he has used a small idler pulley on a ball bearing shaft
to deflect the belt away from the chassis rails. This is a very elegant solution and keeps the top of the engine clear for stuff like radiator pipes
and remote oil filter feed pipes. I think this is the way I will go.
Another option is to just use the power steering pump drive from the crank rear pulley. This is slightly smaller diameter and will not drive the
alternator quite as fast but given the very small electrical demands of the Locost this shouldn't cause a problem with charging the battery. I
calculated the difference in RPM and it wasn't all that bad. Something like 1750RPM alternator speed at 750RPM engine speed instead of 1950
alternator RPM at the same idle speed with the front crank pulley driving.
The only problem this leaves me is how to tension the belt from the crank to the water pump but again an idler pulley could be used. There is even a
perfect place to mount the idler where the alternator adjustment slotted bar used to go.
I'm not sure which of the above I'm going to go with yet.
Cheers,
Craig.
ps. I'll post a photo of my mates setup when I get home tonight.
|
|
|
Julian B
|
| posted on 9/2/04 at 10:24 AM |
|
|
Hi Guys
I thought i would post a quick update on the Alternator mounting probs. I managed to modify the existing SD1 bracket to take a Lucas LRA101. Exchange
cost at Lucas Service is about £25+vat but i think this one is used on the Escort and many others so you should get one in a scrappy for a few
quid.
There are loads of full size pics on my website here but here is a small image of my solution. I have as
yet to fit the engine but i think it should fit now going by what others have done.

|
|
|
mackie
|
| posted on 9/2/04 at 12:10 PM |
|
|
Looks good Julian.
Thanks everyone for your tips.
We are nearly at test run stage now. All that's left to figure out really is the electronics (hohoho) and some sort of coolant plumbing for test
running it, could really do with a stack of flexy coolant pipes but they cost a fortune new. On the plus side we found a scrapped range rover at the
hemel scrappy with a complete EFI engine in it which served us well for getting pretty much all the pipes we needed plus a spare airflow meter all for
pretty much no money.
I'd say it's probably wise to have a rad even for a quick bench run but I don't want to spend loads. Any tips for jury rigging
something just for a test run?
|
|
|
craig1410
|
| posted on 9/2/04 at 12:53 PM |
|
|
Mackie,
You should be able to get away with filling up the block and inlet manifold (bleed it through to make sure it is full!) and then just connect the
hoses together that would normally run to the heater matrix. This will allow water to circulate through the bypass mechanism. You can then just link
the top and bottom radiator hoses (or just blank them off) and it should be okay for a good few minutes worth of safe running. Ideally rig up an old
gallon plastic container with a bit of tubing and connect this to your bottom hose and then leave the top hose open with a bit of hose on it to direct
the water away from the engine. When the thermostat opens the hot water will pour out of the top hose and the plastic contained will empty itself into
the bottom hose.
Personally I wouldn't bother with the last bit and just link the top and bottom hoses. I would only run the engine for 2 or 3 minutes at a time
and make sure you have a temperature gauge connected just in case you have an airlock and start overheating.
HTH,
Craig.
|
|
|
mackie
|
| posted on 9/2/04 at 01:37 PM |
|
|
Yeah that's kind of what I was thinking.
It's just a matter for making up a suitable pipe then.
I'm pleased to report that the engine pumps oil and is not completely seized (I could turn it by hand with the plugs out) 
|
|
|