Nickp
|
| posted on 2/8/15 at 10:37 AM |

|
|
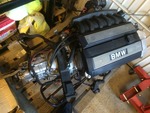
Well I got the engine as far back as it'd go and low enough to clear the Equinox bodywork by a few mms. In that positionI had the sump about
75mm below the chassis!! So in my opinion it definitely needs chopping, unfortunately.
I've seen those manifolds too but I'm going to try with the std ones first in true Locost fashion.
|
|
|
|
|
MBrown
|
| posted on 2/8/15 at 11:22 AM |
|
|
I'll watch your results then before I get a new manifold and will have another look at the sump when it's back in, and it might be best to
eventually set it up with a dry sump system 
[Edited on 2/8/15 by MBrown]
|
|
|
Nickp
|
| posted on 3/8/15 at 04:23 PM |
|
|
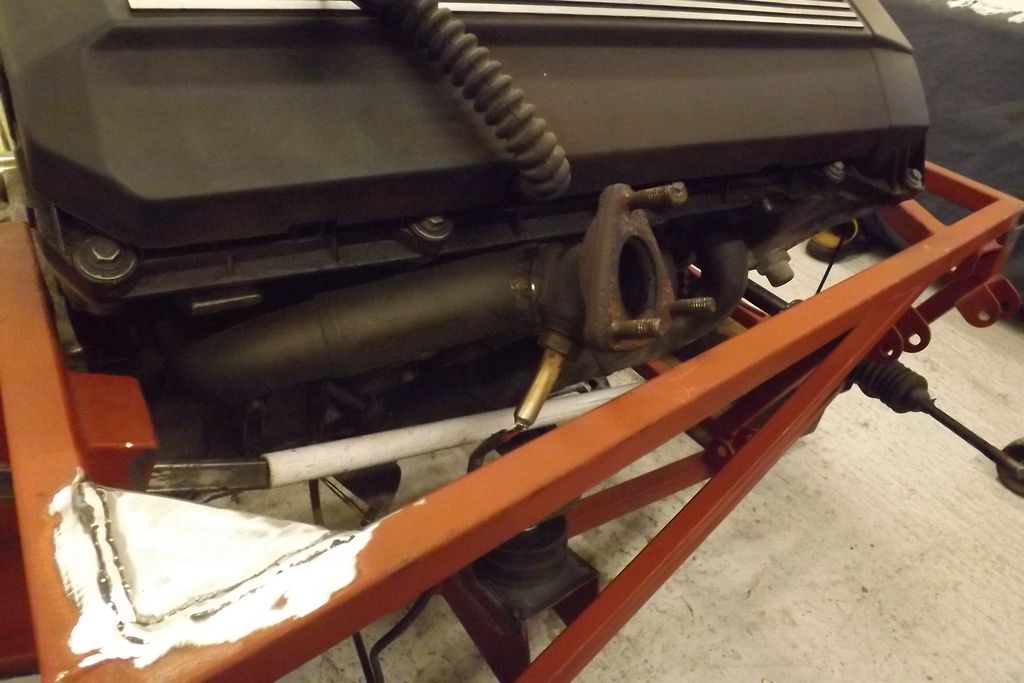
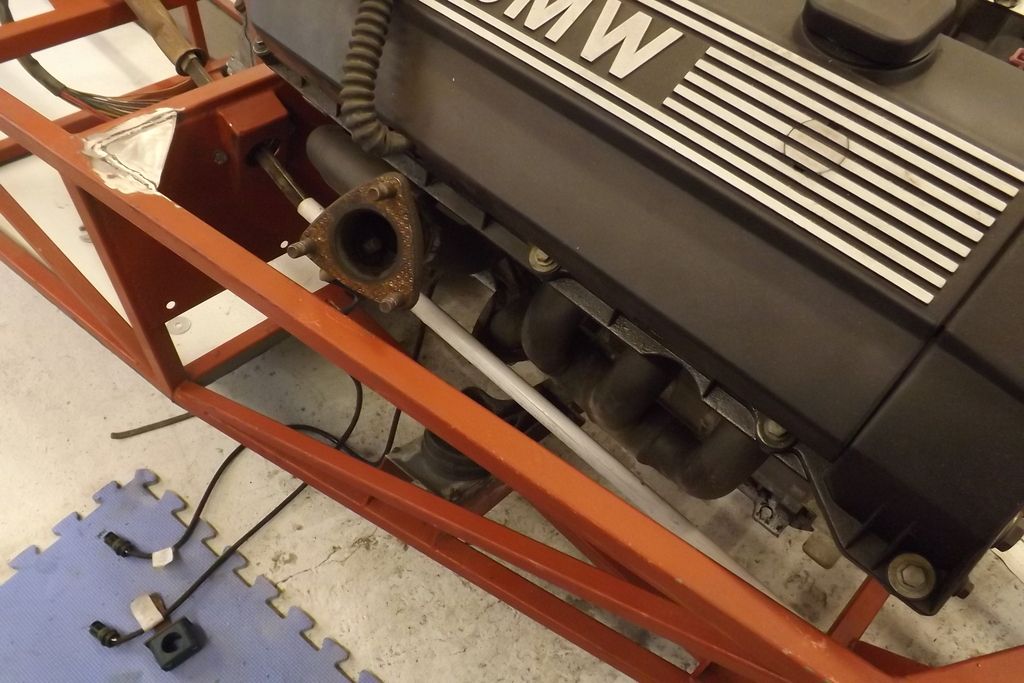
I've just had a go at the rear manifold. Chopped the outlet and lambda sensor off. Spun it round to clear the head and get a better angle to
poke it out of the side of the bonnet. I intend to poke the front one out just below this one before joining them up.
|
|
|
Nickp
|
| posted on 3/8/15 at 04:43 PM |
|
|
Here's my finished sump-
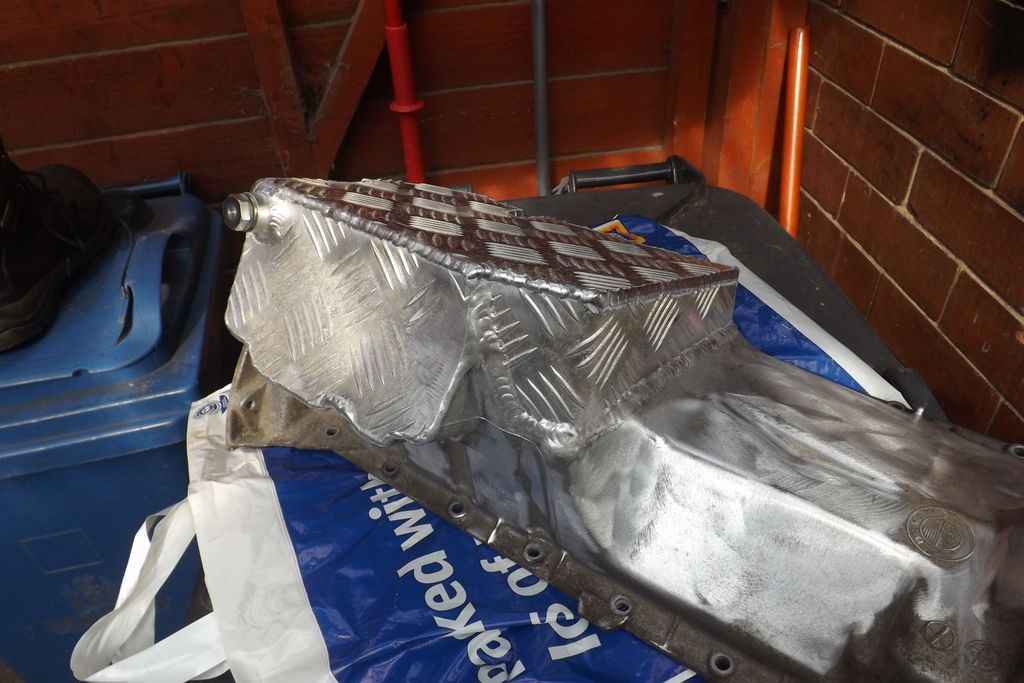
Have you seen the price of an M52 dry sump kit?? Deffo not locost!! 
|
|
|
MBrown
|
 posted on 3/8/15 at 05:36 PM posted on 3/8/15 at 05:36 PM |
|
|
Oh, I might have a problem with doing that with the exhaust manifold due to my bracing in the engine bay......
[Edited on 4/8/15 by MBrown]
|
|
|
Nickp
|
| posted on 3/8/15 at 05:51 PM |
|
|
quote:
Originally posted by MBrown
Oh, I might have a problem with doing that with the exhaust manifold due to my bracing in the engine bay...... 😕
Dunno yet, I'll investigate that next
|
|
|
MBrown
|
| posted on 4/8/15 at 06:18 PM |
|
|
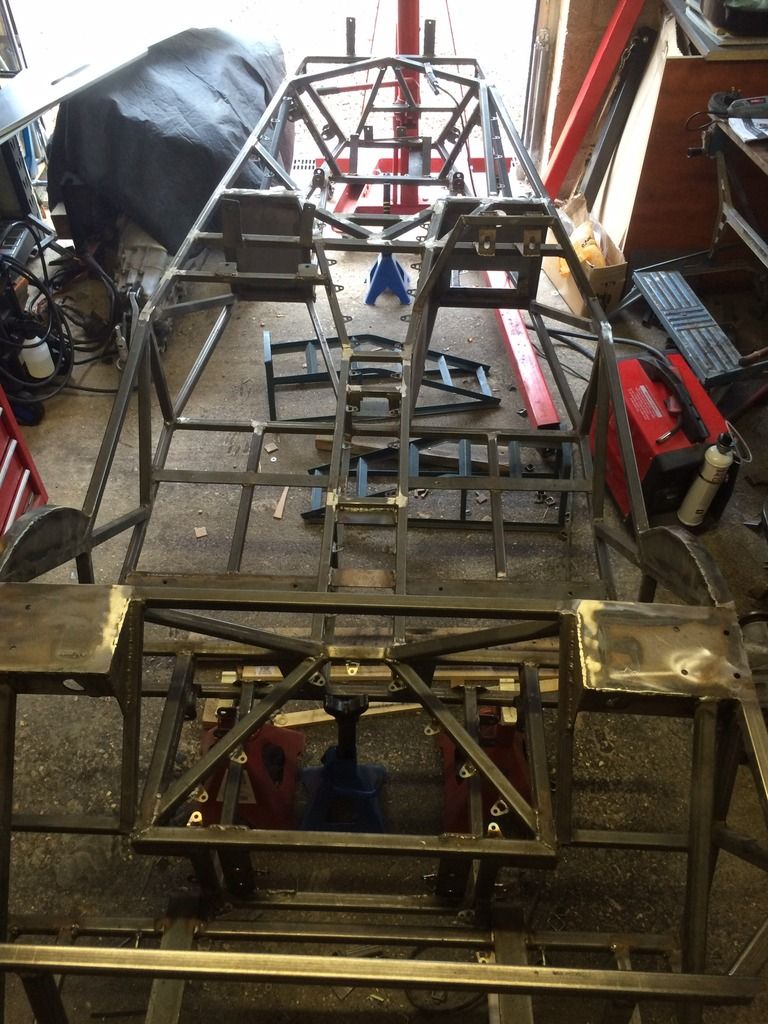
Today I have spent what seems like forever welding on 100 brackets! I decided I didn't want to drill the chassis repeatedly to then rivet the
fuel, brake lines and electrics so I managed to find these which were 100 for £40. They also have the added benefit of keeping the chassis sealed,
which hopefully should make it last longer without rusting slowly inside. This also means that when i bolt P clips to them, I can change, replace or
repair any fuel lines etc without the need to drill rivets and therefore not leaving any bits of rivet rattling around in the chassis. I spaced them
out every 10cm, and 100 seemed to be enough to cover every possible route for electrics, fuel lines and brake lines.

[Edited on 4/8/15 by MBrown]
|
|
|
MBrown
|
| posted on 6/8/15 at 07:44 PM |
|
|
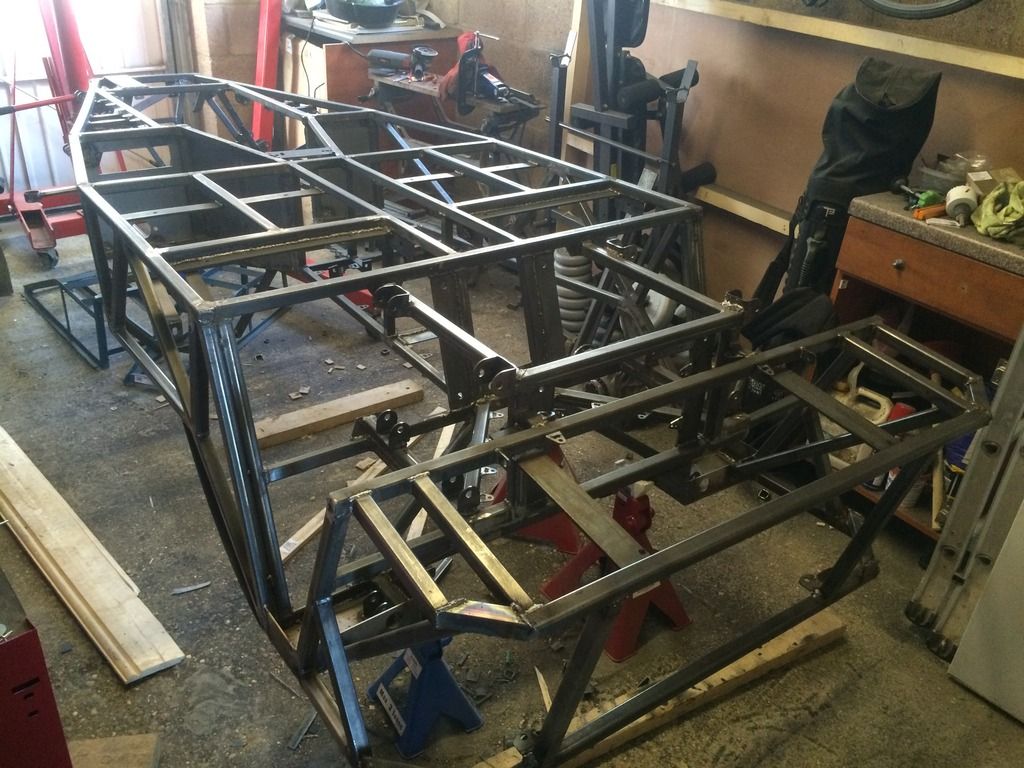
Chassis finally finished! Thanks all for the advice and guidance!
|
|
|
Slimy38
|
| posted on 6/8/15 at 08:20 PM |
|
|
Nice idea, and I understand your concern around rattling rivets!! I guess with a BMW engine you're not overly worried about minimising weight,
so a few extra brackets won't make much difference.
Where did you get them from?
|
|
|
MBrown
|
| posted on 6/8/15 at 08:29 PM |
|
|
I got them here:
ebay brackets
Definitely easier than drilling many many holes..... and as you pointed out I have a relatively heavy engine so I wasn't too worried about
adding the extra weight. I also used slightly thicker metal for my chassis so it is approx 25kg heavier than the usual but it is a lot stronger.
|
|
|
ceebmoj
|
| posted on 6/8/15 at 09:34 PM |
|
|
I did a similar thing on mine but used washers bent at 90 and tacked the corners to the chassis.
|
|
|
Slimy38
|
| posted on 6/8/15 at 10:06 PM |
|
|
quote:
Originally posted by ceebmoj
I did a similar thing on mine but used washers bent at 90 and tacked the corners to the chassis.
Ah, much more my style (and price range!)
|
|
|
MBrown
|
| posted on 7/8/15 at 06:24 AM |
|
|
I tried the washers idea but the heat from welding left them too easy to break off, I could've got some heavier duty washers but then saw those
brackets
|
|
|
Slimy38
|
| posted on 7/8/15 at 10:33 AM |
|
|
quote:
Originally posted by MBrown
I tried the washers idea but the heat from welding left them too easy to break off, I could've got some heavier duty washers but then saw those
brackets
Stainless washers I guess? I did a bit of digging last night, with most washers either being BZP, galvanised or stainless, I have the option of
poisoning myself or working with brittle metal after welding.
Or I could just use the 2mm steel I have and make some of my own!
By the way, what's your plan with regards to fixing? Are you still using rivetted p clips in the holes or something else?
|
|
|
MBrown
|
| posted on 7/8/15 at 12:29 PM |
|
|
I managed to find some mild steel washers relatively cheaply, that then avoids poisoning and saves the time of making something:
http://m.ebay.co.uk/itm/M5-Mild-Steel-Washers-14-5mm-O-D-X-5-4mm-I-D-X-1-4mm-Thk-/141718028183?nav=SEARCH
The above washers are quite small, the same person did have an auction with some that were 19 mm OD, so message him if you do want a bigger size, the
19mm OD didn't cost much more.
with my brackets I have bought some short bolts so will bolt lines in place- again may add a small amount of weight but makes it so easy to repair or
alter later on.
Hope that helps
[Edited on 7/8/15 by MBrown]
[Edited on 7/8/15 by MBrown]
|
|
|
Vipo
|
| posted on 11/9/16 at 07:23 PM |
|
|
Hi there, sorry for the stupid question but your chassis a standart o 442?
|
|
|
MBrown
|
| posted on 12/9/16 at 08:18 AM |
|
|
Hi, it is the standard Haynes Roadster chassis from the Haynes Roadster book completed by Chris Gibbs
|
|
|
craigdiver
|
| posted on 13/9/16 at 09:16 PM |
|
|
quote:
Originally posted by Nickp
I've just had a go at the rear manifold. Chopped the outlet and lambda sensor off. Spun it round to clear the head and get a better angle to
poke it out of the side of the bonnet. I intend to poke the front one out just below this one before joining them up.
I was hoping to take the 6 outlets through the side of the chassis then combine them into two 3 into 1 and bring two exhausts along the side of the
car. Is there any good reason to take the exhaust over the engine bay upper chassis rail? (Will it interfere with the steering column?)
Cheers
Craig
If it ain't broken, fix it anyway (just because).
Building - BMW powered Haynes Roadster/442E hybrid.
Volvo C30 T5 Polestar
|
|
|
craigdiver
|
| posted on 13/9/16 at 09:23 PM |
|
|
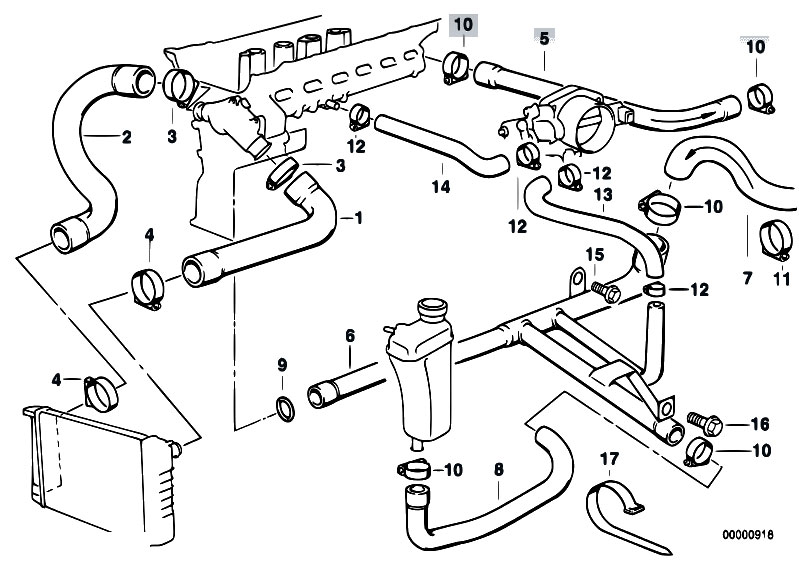
Cooling system
Mark,
Wonder if you can help, I'm confused by the cooling ststem on these engines, appears to be two circuits, cylinder block fed from the water pump
and a second circuit through the cylinder head. Do you know how this setup will be plumbed in with a radiator and expansion tank?
I found this diagram but cannot make sense of it...
 post img post img
Craig :-)
If it ain't broken, fix it anyway (just because).
Building - BMW powered Haynes Roadster/442E hybrid.
Volvo C30 T5 Polestar
|
|
|
MBrown
|
| posted on 25/9/16 at 02:41 AM |
|
|
Hi Craig,
I haven't yet plumbed mine in so I don't know exactly, I did work it out from the manual several months ago but would have to have another
look. From a quick google I think this is a slightly better picture. Most of the connections should remain exactly the same. The only one that you
would have to change is the one on the upper right hand side of the picture. The two pipes going away from the engine on the upper right hand side go
to the heater in the car and return from it, so if you don't use a heater then these two can just be connected together. I will be using a
heater so my connections should be exactly the same. There are a couple of other people who have completed their builds with this engine - Steve
Wallace being one and he has been incredibly helpful.
Hope this helps,
Mark
|
|
|
craigdiver
|
| posted on 25/9/16 at 07:48 AM |
|
|
quote:
Originally posted by MBrown
Hi Craig,
I haven't yet plumbed mine in so I don't know exactly, I did work it out from the manual several months ago but would have to have another
look. From a quick google I think this is a slightly better picture. Most of the connections should remain exactly the same. The only one that you
would have to change is the one on the upper right hand side of the picture. The two pipes going away from the engine on the upper right hand side go
to the heater in the car and return from it, so if you don't use a heater then these two can just be connected together. I will be using a
heater so my connections should be exactly the same. There are a couple of other people who have completed their builds with this engine - Steve
Wallace being one and he has been incredibly helpful.
Hope this helps,
Mark
That is a massive help, my donor had three hoses going to a double solenoid assembly before going through to the heater matrix, I suspect it bypasses
the flow to the matrix when not needed.
Thanks Mark
If it ain't broken, fix it anyway (just because).
Building - BMW powered Haynes Roadster/442E hybrid.
Volvo C30 T5 Polestar
|
|
|