corrado vr6
|
| posted on 16/7/13 at 06:32 PM |

|
|
Joining 2 pieces of fibreglass
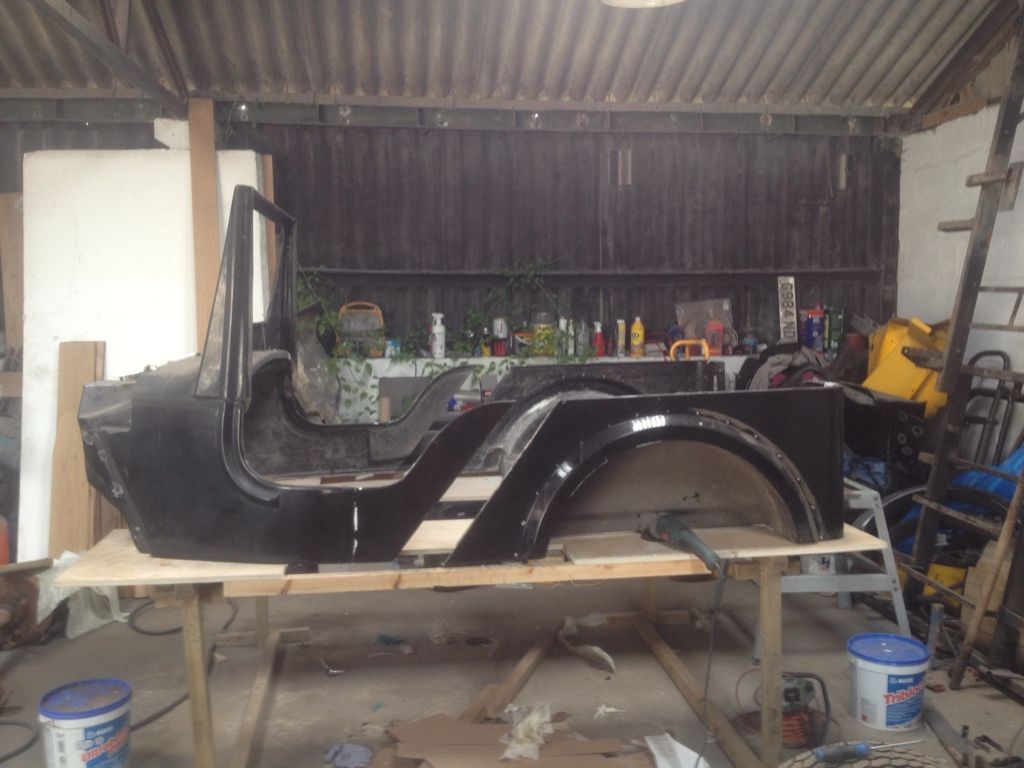
Hi there, I've basically cut my jago body in two for it to be extended to fit a Suzuki chassis
Now I'm joking it back together and obviously don't want it to crack if I can help it, I have already made my mould to lay up against so
that's sorted, I was going to feather both sides of the join down in thickness, then re fibreglass both sides and add a ply strip across the
area to help with strength, is there like a scrim tape like for plastering I should use or does my plan sound sufficient?
Cheers Greg
http://r1indy7.wordpress.com/
|
|
|
|
|
jossey
|
| posted on 16/7/13 at 07:04 PM |
|
|
It should be fine.
I did my rear panel similarly.
I just used fibreglass cloth as what you call scrim and then used normal fibreglass for the rest.
I grinded off a sloped edge at the finish side to help it fill easier to look good.
Just try not build up the rear of the panel too much where it meets the chassis so it doesn't pretrude.
Thanks
David Johnson
Building my tiger avon slowly but surely.
|
|
|
mark chandler
|
| posted on 16/7/13 at 07:04 PM |
|
|
If you butt two straight edges together expect to see the join, if you have a serrated edge then the join is much easier to hide. And the joined edge
is much longer.
|
|
|
plentywahalla
|
| posted on 16/7/13 at 09:25 PM |
|
|
Best practice is to grind a 12:1 feather. That is to say that if the GRP is 1/4 inch thick then the feather is 3 inches wide. Surfaces should be left
rough and the join built up with ever wider pieces of cloth.
Rules are for the guidance of wise men ... and the obedience of fools. (anon)
|
|
|
corrado vr6
|
| posted on 16/7/13 at 09:33 PM |
|
|
So the outer side, should I be building it up with just cloth?
I have 450g chopped strand matting would this be ok or should I get some cloth?
Ill make my current straight cut wavey and feather the edges so thanks for those pointers
http://r1indy7.wordpress.com/
|
|
|
Smoking Frog
|
| posted on 17/7/13 at 09:57 AM |
|
|
quote:
Ill make my current straight cut wavey and feather the edges so thanks for those pointers
Yes it's a good idea not to have a straight butt joint. A zigzag pattern to both edges will increase the strength of the joint if it's
critical, like a saw blade on a larger scale.
|
|
|
corrado vr6
|
| posted on 17/7/13 at 08:10 PM |
|
|
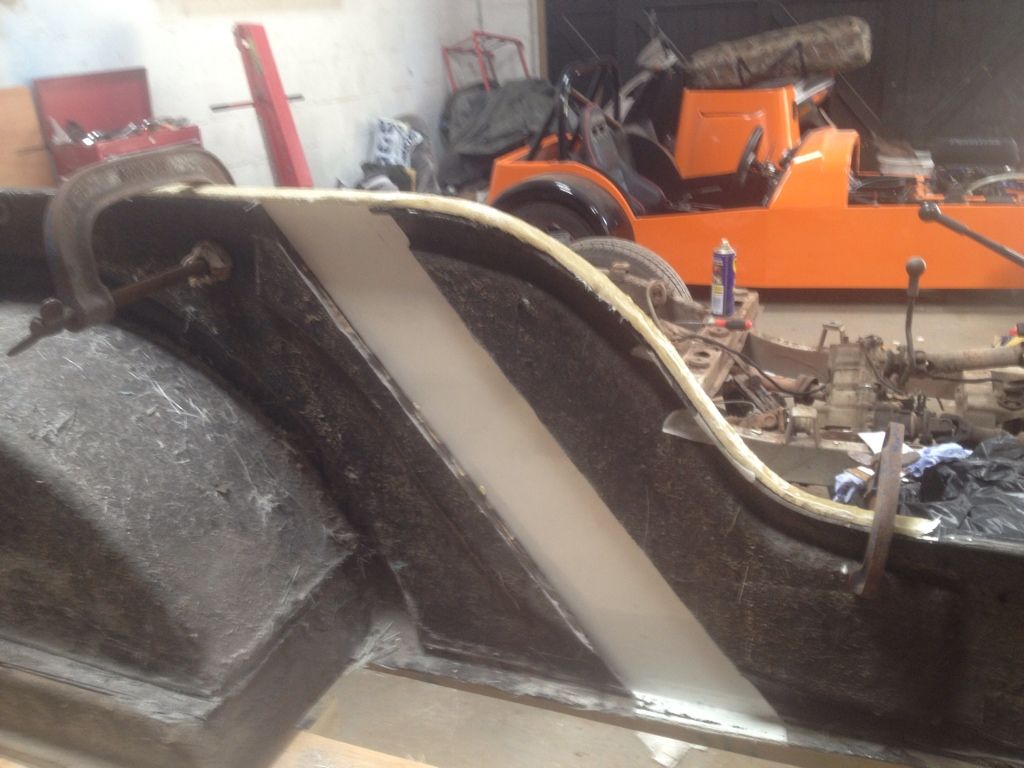
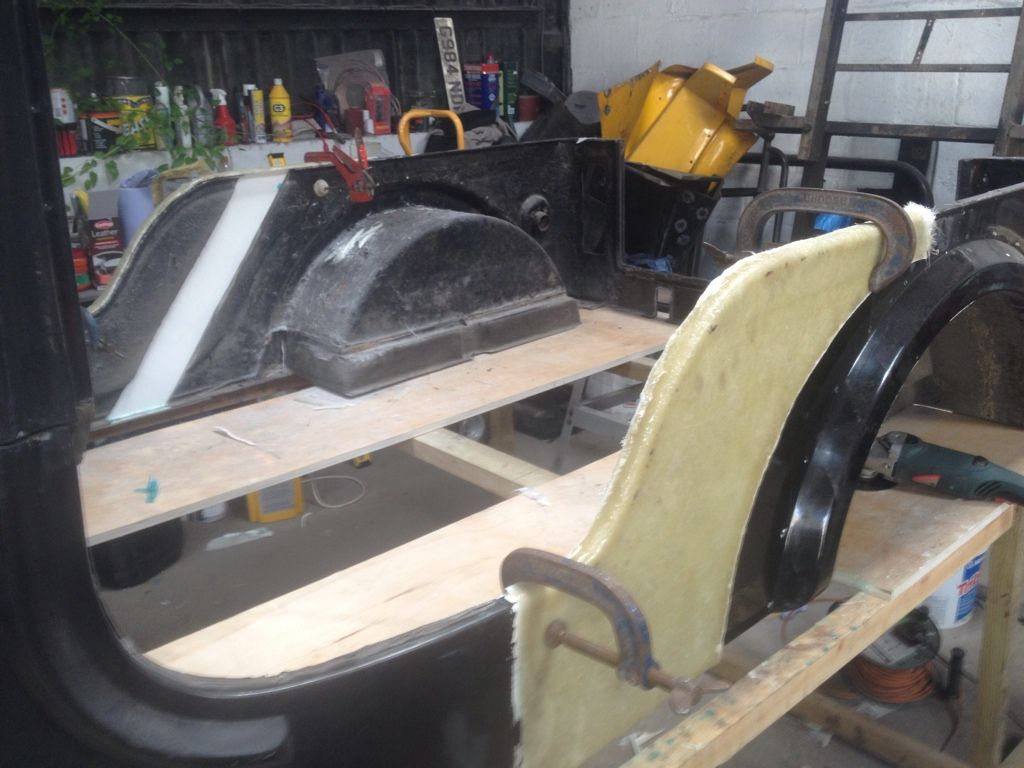
ok so as far as cloth, is this what i need?
here
so working on the inside of the join do i need to feather the edges then use the cloth or just normal matting for this side?
Then when i come to do the outer edge ( the bit you will see) do i then need to feather the edges and apply the cloth for strength?
Ill post a pic up in a sec so its clear of how im going about this
Sorry to be a pain about something that maybe really easy but just trying to educate myself and get it as good as possible and strong of course
http://r1indy7.wordpress.com/
|
|
|
corrado vr6
|
| posted on 17/7/13 at 08:13 PM |
|
|
http://r1indy7.wordpress.com/
|
|
|
plentywahalla
|
| posted on 17/7/13 at 08:22 PM |
|
|
quote:
Originally posted by corrado vr6
So the outer side, should I be building it up with just cloth?
I have 450g chopped strand matting would this be ok or should I get some cloth?
Ill make my current straight cut wavey and feather the edges so thanks for those pointers
Some Woven Rovings will give you a stiffer moulding. If you want to use some then start with CSM and then alternate WR with CSM, don't lay up
two layers of WR together with polyester resin.
Rules are for the guidance of wise men ... and the obedience of fools. (anon)
|
|
|
plentywahalla
|
| posted on 17/7/13 at 08:36 PM |
|
|
Just seen the pics.
There appears to be some core material, balsa or foam? I would cut all that core material out and work with just the outer skin, working from the
inside. Start with gel coat against the mould face. Then replace the core and lay up a new inner skin over all. That will give the best support to the
repair.
Rules are for the guidance of wise men ... and the obedience of fools. (anon)
|
|
|
corrado vr6
|
| posted on 17/7/13 at 08:43 PM |
|
|
Thanks for your reply, yes your right it's 12mm ply which I have since cut out, so are you saying I won't need any cloth within the repair
at all?
So remove ply (done)
Make straight cut a zig zag
Feather inner edges
Apply mould release to mould
Put acetone applied with a cloth on old fibreglass to soften
Apply gel coat to the mould
Then layer up the thickness using fibreglass matting
Add my ply support back in bridging both parts of the extension
Glass in the ply support
Remove mould after its cured
So on the outside would I then need to feather the edges and apply fibreglass or with what's on done on the inner edges sufficiently strong
enough to help prevent cracking?
http://r1indy7.wordpress.com/
|
|
|
plentywahalla
|
| posted on 17/7/13 at 10:05 PM |
|
|
Your repair schedule sounds good. There no real need for Woven Rovings in the lay up in your application.
It is always better to work from both sides if you can, particularly in large flat areas, to prevent cracking in the gel. What I have done before is
work exactly as your have described and then after removing the flash mould grind a narrow strip about 2 inches wide along each joint line. I then lay
up a couple or three layers of mat keeping the surface a mil below the surrounding gel face. Then gel the strip and fair up.
The repair is then 3/4 on the inside and 1/4 on the outside and it minimises the final fairing and helps you keep the original shape. This is more
practical with a larger repair area than you have, but anything that you can do from the outside will help.
Rules are for the guidance of wise men ... and the obedience of fools. (anon)
|
|
|
corrado vr6
|
| posted on 17/7/13 at 10:20 PM |
|
|
Cool thanks for that 
http://r1indy7.wordpress.com/
|
|
|