Chopskee
|
| posted on 26/10/14 at 08:51 AM |

|
|
Finally starting Viento 1UZFE build
Hi everyone. I bought a Viento rolling chassis nearly 2 years ago that I had great intentions of cracking on with straight away, like everything lack
of time has stopped me from starting the build until now... Over that time I have been gathering parts and have no excuses now not to start!
I have decided to go with a 1UZFE 4.0 Ltr V8 VVTi engine from a 1999 Lexus LS400 and a Toyota R154 5 speed box from a Toyota Supra, I'll also
be using a Ford Scorpio Cosworth LSD, I now have all the parts ready to fit.
So I've finally done a trial fit of the engine and have came up with a few issues so far. The oil filter is on the passenger side and clashes
with the diagonal tube so will require a remote filter plate. The alternator on the passenger side clashes with the steering shaft so either a smaller
alternator or extra UJ's will be needed so nothing that cant be sorted out.
The biggest issue I have is the height of the engine as at the minute I have around 4" clearance under the sump but I could really do with
dropping it a further 1/2" to clear the engine cover. My question is would 3-1/2" ground clearance under the sump be pushing it? Could
some of you guys running V8's do a ground clearance measurement on their cars to see what others are running please?
Also what sort of gap have you left between the rear of the engine rocker covers to the two diagonal cross members at the rear of the engine bay?
I'm thinking 1/2" should be enough?
Thanks in advance
|
|
|
|
|
Andybarbet
|
| posted on 26/10/14 at 09:32 AM |
|
|
Sorry, I can't help with your questions but good luck, another luego builder is good :-)
Maybe upload some pictures & some of the other Viento builders can take a look. It's always worth putting your rough location in too, there
might be a Viento builder close to you.
Mine is a Velocity so much smaller, no chance of fitting an engine like yours in, the zetec looks tight in the smaller chassis.
Give a man a fish & it will feed him for a day, give him a fishing rod & you've saved a fish.
|
|
|
rusty nuts
|
| posted on 26/10/14 at 10:24 AM |
|
|
Again I can't help with your questions, I don't know of any Luegos with that engine. It might be a good idea to have a look at Steve
Wallaces build ,he used a BMW lump but may have had similar problems .There was a few Viento's around with large V8s from the states that may be
worth looking for on here as well a s a V10 from a Dodge Viper so yours should have plenty of room. Before building up the suspension do a search on
here for crush tubes, it's been covered several times and will save you some grief. HTH Mel
About time some progress was made with yours Andy!
|
|
|
Andybarbet
|
| posted on 26/10/14 at 10:37 AM |
|
|
Too right rusty - unfortunately a new position at work has been eating my time up this year :-(
I have a winter plan though, get engine/gearbox/throttle bodies/alternator & mount all sorted & bolted together so that once spring is here I
can bolt it all in, these are all jobs that i can do in the odd spare hour here & there - im also reading up on wiring in advance.
Give a man a fish & it will feed him for a day, give him a fishing rod & you've saved a fish.
|
|
|
rusty nuts
|
| posted on 26/10/14 at 11:24 AM |
|
|
quote:
Originally posted by Andybarbet
Too right rusty - unfortunately a new position at work has been eating my time up this year :-(
I have a winter plan though, get engine/gearbox/throttle bodies/alternator & mount all sorted & bolted together so that once spring is here I
can bolt it all in, these are all jobs that i can do in the odd spare hour here & there - im also reading up on wiring in advance.
Its amazing what you can get done in the odd hour here and there
|
|
|
rusty nuts
|
| posted on 26/10/14 at 11:32 AM |
|
|
Chopskee, it might be worth carefully checking your chassis if it has been powder coated, mine {amongst others}had the coating peeling off in sheets
after the car had been on the road a couple of years, I ended up dismantling the car and stripping off the coating before getting all previously
powder coated components shot blasted and then repainting before reassembling. Another thing to check is the suspension mountings on the Viento , I
believe the front mounting are 10mm out side to side, easier to sort out before building. I don't know however which side is correct or indeed
if it is all the mountings on one side. JollyGreen Giant may be able to help or know who does know
|
|
|
wilkingj
|
| posted on 26/10/14 at 12:22 PM |
|
|
Yes check the powder coating, they didnt do a brill job on the preparation of the chassis before the coating was applied.
Basically if it were me, I would strip it off and prep the chassis and redo it.
Also while its just a chassis, I would seal all around the floor pan and chassis rails on the OUTSIDE, as its not seam welded all the way around.
I did mine inside AND outside with Grey Stripe Seam sealer. Just paint it on, easy job. Messy but easy.
Then paint over that to get the colour right.
Strength wise, its fine. However you will get water inbetween the chassis members and the flooplan, and it will rust.
Trust me I know ALL about Water in Vientos!!
I am VERY glad I sealed up all these water trap points whilst I could still get at them during the build.
Can be almost impossible afterwards.
I also sealed the vertical propshaft tunnel ally panels on the inside of the tunnel. Namely to stop water seeping between the chassis rails and the
ally panels.
I know it sounds a bit OTT, but if you keep the vehicle for a long time, then it will pay dividends in preventing corrosion setting in.
Also sprayed the entire underside with stone chip coating over the top of the powder coating.
Cant be seen, but helps to protect the powder coating from the road stones etc.
Also you will need to check the suspension bushes as they are another known problem, the inner steel crush tubes are a few thou too short, and it nips
up the suspension, making it squeak at best, and solid at worst. Just a simple job of removing a few thou from the widest (outer) ends of each
bush.
Its been covered on this forum (check the archives), and is a very easy fix. Just takes a bit of time.
It makes a HUGE difference to the ride and handling by getting this right.
If the oil filter is in the way, see if there is a remote filter kit available for that engine.
You lot are making me regret selling my V8 Viento, and worse still NOT buying ot back when it came up for sale a month ago..
Boo Hoo Hoo.....
Happy memories getting soaked up the A1 going to Newark ... Eh Rusty!!
Geoff
EDIT:
Its little and often. even to cutting a bracket one night, priming it the next, and top coat the night after.
Lots of little bits will get it done.
You WILL go through time where it seems overwhelming, and "Why did I take this on" We have all been there. Its quite normal!
There is MORE help and advice than you will ever need on here.
Finally post plenty of PICTURES.
2 reasons, its a good record, which you may need later for registration etc.
Also so the people on here an see how its going, and to add they advice etc. Its easy to make a mistake without realising it. These Photo's will
help you enormously.
Oh and please put your approx location in your profile, as it helps when you want something or are offering help etc.
Cheers
[Edited on 26/10/2014 by wilkingj]
1. The point of a journey is not to arrive.
2. Never take life seriously. Nobody gets out alive anyway.
Best Regards
Geoff
http://www.v8viento.co.uk
|
|
|
Chopskee
|
| posted on 26/10/14 at 11:01 PM |
|
|
Thanks for all the replies, alot of good info to look at.
Geoff, My Viento chassis has no welded in floor pan, it came with a full set of stainless steel panels to be riveted on. Did yours have a welded steel
floorpan?
I think my chassis was one of the later ones produced and the powder coat looks not too bad. Is this something that only comes apparent after a couple
of years on the road?
Is there anyone near the North West that have a Viento? I live in Wybunbury in Nantwich Cheshire. Would be good to have a look at other builds.
Kyle
|
|
|
Jackaroo
|
| posted on 29/10/14 at 09:25 AM |
|
|
Hi Chopskee
Good luck with your build I'll be closely monitoring what you post as I am the only Viento owner down here in the Southern hemisphere in South
Africa I know of. I don't know of any Vientos in Aussie, New Zealand or South America so I feel quite lonely but very proud of my car!
I have the Rover 3.5 engine with 3.9 fuel injection bits on top running on Spitronics management coupled to Supra W58 gearbox and standard Sierra
3.36:1 ratio diff. I have been thinking for quite a while how the Lexus V8 would fit as I definitely would go that route when the 'ol RV8 give
up the ghost as the parts down here in SA are just to expensive to overhaul now due to our ridiculous exchange rate (+/- R18/£)
The Lexus 1UZ-fe and 1UZ-fe vvt-i are very affordable here as they get imported from Japan by the containerfulls. One such company supplying
everything Lexus V8 - http://www.lexusv8solid.co.za/home
Please post lots of photos as you progress as I will be very interested in the final fitting of that lovely V8!
Regards
Gerrie
|
|
|
wilkingj
|
| posted on 29/10/14 at 10:31 AM |
|
|
quote:
Originally posted by Chopskee
Thanks for all the replies, alot of good info to look at.
Geoff, My Viento chassis has no welded in floor pan, it came with a full set of stainless steel panels to be riveted on. Did yours have a welded steel
floorpan?
I think my chassis was one of the later ones produced and the powder coat looks not too bad. Is this something that only comes apparent after a couple
of years on the road?
Is there anyone near the North West that have a Viento? I live in Wybunbury in Nantwich Cheshire. Would be good to have a look at other builds.
Kyle
Sounds like yours is a later chassis.
Mine came with a welded in floor.
The powder coating is OK. However they only washed / degreased the chasis before powder coating. If it were me I would have sand blasted it to give it
something to key into.
ANY finishing coat is completely dependent on how well you do ALL the prep work.
Good prep work = Good finish. Namely do it right first time, and only have to do it the once.
My mate is Foreman Sprayer at Marshalls Special Bodies. He sprays everything, and knows a lot! So I take notice of him.
Thats his mantra.. Good Prep = Good finish.
I knew about the powdercoating, as some come off after a month when I dropped a hammer or whatever on the chassis.
Hence me Stone Chip coating and sealing the underside and tunnel panels.
The weather is the UK is never great, and you dont want your pride and joy to rust in places that are a pig to get at once its fully built!
They only stitch welded the floor on at the factory. ie several 2" long welds. The problem is NOT to bend the chassis due to the heat.
Pop rivets are fine.
Use Blind Rivets so there isnt a hole for water ingress (into the chassis - hence the waxoyl inside!).
If you have a small compressor, then invest in an air driven rivet gun. Believe me its worth it, as you put a shedload of rivets in a Kit Car.
I used all stainless rivets. More cost, but they are stronger. Also the Air rivet gun makes them easy to put in.
I also had as much stainless in the paneling as possible.
Spray Waxoyl in all the holes first. Preferably do inside every chassis rail that you drill a hole in. You dont want it rusting from the inside.
I'm an Ex Land Rover man (Had 5 of them!) and am totally convinced on the goodness and usefulness of Finnegans Waxoyl. Wonderful stuff albeit a
bit messy to use. It does what it says on the tin!
Just before riveting the floor. Clean the waxoyl off the outside of the chassis members and then fix the panel down with the right grade of sikaflex.
This will enhance the ridigity of the chassis. (Rivet AND Glue)
(once its glued down you WONT get it off again.. well not very easily. So get this right first time!
Also invest in some Clecko's for the size of rivets you are using. I had 3 and 4mm ones.
You insert these in some of the holes when drilling the panels. They will hold the place exactly in place so ALL the holes in the panels remain in
alignment. A VERY useful tool when doing panelwork.
You will accumulate a lot of tools during the build. You may be able to borrow some off people. Just ask, they can only say no.
Its another reason for your location in your profile. Which you have done 
Do post plenty of pictures... There are advantages to you as well as us seeing how you are doing.
Cheers
Geoff
1. The point of a journey is not to arrive.
2. Never take life seriously. Nobody gets out alive anyway.
Best Regards
Geoff
http://www.v8viento.co.uk
|
|
|
Irony
|
| posted on 29/10/14 at 12:59 PM |
|
|
I am still building my Viento after 5 years (my excuse is two house renovations and a baby) and now it's not far off done. You won't
regret buying the Viento. They are a joy to work on, so much space!
I have pushed my RV8 as far back as I could so it's within 1/2 inch of the diagonal cross members. The further back the better your 50/50
weight distribution. When you look at the Viento the engine sits almost right in the middle of the car making it closer to a mid-engined car rather
than front engined.
I haven't driven my car on the road yet but the engine doesn't catch the cross members when revving. One member on here suggested a
mountain bike rear suspension damper attached to the top of the engine somehow. I think this could work but for my own installation I don't
need it.
I thought that the Lexus V8s didn't really come with a manual gearbox, How have you managed to bolt the Supra box on? Or is my information
just duff?
|
|
|
Chopskee
|
| posted on 29/10/14 at 10:00 PM |
|
|
Hi Gerrie, Must be nice to have something different on the road to everyone else. I've been to Cape town 3 times with work now and still
haven't been able to make it up table mountain. Maybe one day! Such a beautiful country. I think when I was down there in 2012 it was R12 to £1
and it was cheap then.
I'm a massive fan of the Lexus 1UZFE engine. I have owned a few Mk4 Lexus LS400's with the later 4ltr VVti engine and they are so smooth.
290 BHP standard, all aluminium and ridiculously cheap. My Lexus LS400 which I've actually just sold today had 139k miles on it and ran like a
new car. I heard that the Lexus salesmen used to balance a £1 coin on its edge on the engine while it was running to show how smooth it was. I changed
the timing belt last year and thought I would try it myself, couldn't believe it when it worked! not bad for a 15 year old car. I've got a
video on my phone but I'm not sure how I could post it on here?
I'll add some photos along the way!
Kyle
|
|
|
Chopskee
|
| posted on 29/10/14 at 10:13 PM |
|
|
quote:
Originally posted by wilkingj
quote:
Originally posted by Chopskee
Thanks for all the replies, alot of good info to look at.
Geoff, My Viento chassis has no welded in floor pan, it came with a full set of stainless steel panels to be riveted on. Did yours have a welded steel
floorpan?
I think my chassis was one of the later ones produced and the powder coat looks not too bad. Is this something that only comes apparent after a couple
of years on the road?
Is there anyone near the North West that have a Viento? I live in Wybunbury in Nantwich Cheshire. Would be good to have a look at other builds.
Kyle
Sounds like yours is a later chassis.
Mine came with a welded in floor.
The powder coating is OK. However they only washed / degreased the chasis before powder coating. If it were me I would have sand blasted it to give it
something to key into.
ANY finishing coat is completely dependent on how well you do ALL the prep work.
Good prep work = Good finish. Namely do it right first time, and only have to do it the once.
My mate is Foreman Sprayer at Marshalls Special Bodies. He sprays everything, and knows a lot! So I take notice of him.
Thats his mantra.. Good Prep = Good finish.
I knew about the powdercoating, as some come off after a month when I dropped a hammer or whatever on the chassis.
Hence me Stone Chip coating and sealing the underside and tunnel panels.
The weather is the UK is never great, and you dont want your pride and joy to rust in places that are a pig to get at once its fully built!
They only stitch welded the floor on at the factory. ie several 2" long welds. The problem is NOT to bend the chassis due to the heat.
Pop rivets are fine.
Use Blind Rivets so there isnt a hole for water ingress (into the chassis - hence the waxoyl inside!).
If you have a small compressor, then invest in an air driven rivet gun. Believe me its worth it, as you put a shedload of rivets in a Kit Car.
I used all stainless rivets. More cost, but they are stronger. Also the Air rivet gun makes them easy to put in.
I also had as much stainless in the paneling as possible.
Spray Waxoyl in all the holes first. Preferably do inside every chassis rail that you drill a hole in. You dont want it rusting from the inside.
I'm an Ex Land Rover man (Had 5 of them!) and am totally convinced on the goodness and usefulness of Finnegans Waxoyl. Wonderful stuff albeit a
bit messy to use. It does what it says on the tin!
Just before riveting the floor. Clean the waxoyl off the outside of the chassis members and then fix the panel down with the right grade of sikaflex.
This will enhance the ridigity of the chassis. (Rivet AND Glue)
(once its glued down you WONT get it off again.. well not very easily. So get this right first time!
Also invest in some Cleco's for the size of rivets you are using. I had 3 and 4mm ones.
You insert these in some of the holes when drilling the panels. They will hold the place exactly in place so ALL the holes in the panels remain in
alignment. A VERY useful tool when doing panelwork.
You will accumulate a lot of tools during the build. You may be able to borrow some off people. Just ask, they can only say no.
Its another reason for your location in your profile. Which you have done
Do post plenty of pictures... There are advantages to you as well as us seeing how you are doing.
Cheers
Geoff
Thats a good tip with the waxoyl, I hadnt thought of that. I used to be an airframe mechanic in the RAF so have done a bit of airframe repair work in
the past. Ive bought some 4mm gripper pins of this guy on ebay who also sells cleco. Im looking forward to doing this part of the build.
Sheet metal fasteners 25 off 5/32 (4.0mm)
The gripper pins are the same idea, just take slightly longer to fit. Ive also bought some aircraft spec 5/32"(4mm) cherrymax rivets to fit the
panels, they are very strong and the stem breaks inside sealing the hole.
I'm looking forward to doing this part of the build. The part I'm not looking forward to is the electrical side as I am useless at it!
I'll be running a standard ecu and have a donor car to work from so I'm hoping it shouldn't be too painful....
|
|
|
Chopskee
|
| posted on 29/10/14 at 10:26 PM |
|
|
quote:
Originally posted by Irony
I am still building my Viento after 5 years (my excuse is two house renovations and a baby) and now it's not far off done. You won't
regret buying the Viento. They are a joy to work on, so much space!
I have pushed my RV8 as far back as I could so it's within 1/2 inch of the diagonal cross members. The further back the better your 50/50
weight distribution. When you look at the Viento the engine sits almost right in the middle of the car making it closer to a mid-engined car rather
than front engined.
I haven't driven my car on the road yet but the engine doesn't catch the cross members when revving. One member on here suggested a
mountain bike rear suspension damper attached to the top of the engine somehow. I think this could work but for my own installation I don't
need it.
I thought that the Lexus V8s didn't really come with a manual gearbox, How have you managed to bolt the Supra box on? Or is my information
just duff?
Would you be able to measure the ground clearance for me? either than or how far does the sump protrude from the bottom of the chassis rails?
You're right, they never made a manual box for the 1UZFE. Ive bought a kit from the States from these guys ;
http://www.xatracing.com/adplandki.html
Got the adapter plate(which is a beautiful piece of kit) but I am geeky in that way! lightened flywheel, uprated clutch and ARP bolts. Wasn't
cheap but is well made.
So has anybody done a build thread or have most just put pictures on their photo archive? I'm new to all this so let me know whats the norm.
Thanks,
Kyle
|
|
|
SteveWallace
|
| posted on 30/10/14 at 06:02 PM |
|
|
As mentioned earlier in this thread, I have a Viento with a straight 6 BMW engine in which has been on the road for a few months now. I'll
measure the sump to ground clearance the next time that I'm in the garage. I was a bit worried about ground clearance when I go the engine and
even considered raising the bonnet and scuttle a bit, but its been fine.
I have one of the later chassis that did not come with a welded in floor. My powder coat has been fine and has only come off where I've done
something stupid.
There are quite a lot of build photos in my archive and I live just off J26 of the M1, so if your ever passing this way, let me know and you would be
welcome to call in and take a look.
|
|
|
Chopskee
|
| posted on 31/10/14 at 08:18 AM |
|
|
That would be great Steve and thanks for the offer. I'll take you up next time I'm down your way.
|
|
|
SteveWallace
|
| posted on 31/10/14 at 11:38 AM |
|
|
Just measured my sump to ground clearance and its 3". I've not had any problems at that height but then again, I've not tried to go
over any speed bumps yet.
I did however take it to Donington Kit car show this year and, as others will report, the access road to the club areas was like an off road rally
stage. I got over that intact except for one big bounce causing one of my cycle wings to flex enough for the tyre to catch the edge trim and pull a
bit off.
|
|
|
wilkingj
|
| posted on 3/11/14 at 09:36 AM |
|
|
To stop the engine rocking when being revved up, Luego used a couple of anti roll bar drop arms between the back of the heads and the top chassis
rail. You can see on attached to the bolt by the earth strap. They used double ended arms and cut them in half and welded a sleeve over them to get
the length and angles right. Its a dead easy job and works well.
You would need to do both sides so its equally stressed.
OK wont be exactly the same for your engine, but it is a workable solution, and well worth doing.
You can see the black arm (and its sleeve) in the pic. One end is attached to the back of the head, and the other to the top diagonal rail by the bolt
holding the earth strap on.
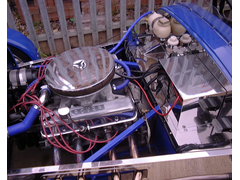 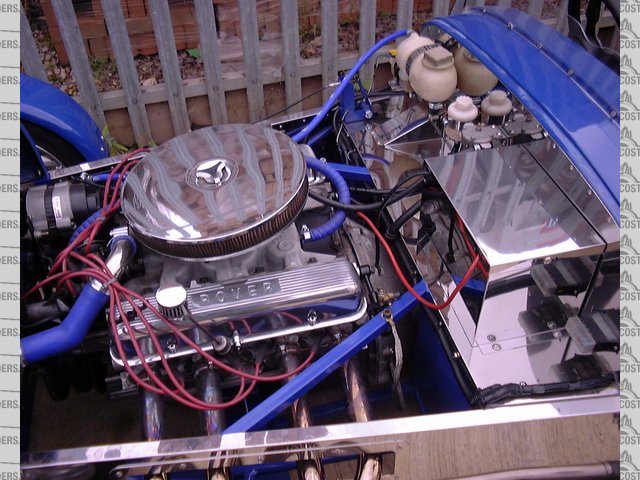
Rover V8 Engine
1. The point of a journey is not to arrive.
2. Never take life seriously. Nobody gets out alive anyway.
Best Regards
Geoff
http://www.v8viento.co.uk
|
|
|
Jackaroo
|
| posted on 3/11/14 at 03:13 PM |
|
|
I have also measured the sump clearance on my car and it is 105mm, that's just over 4 inches! I am quite surprised as I was always worried that
it will be a tad too low but I'm sure that it will be able to clear a brick lying on the road. The chassis height is 180mm in front and 170mm at
the back in front of the lower wishbone so I need to adjust the rear springs up a little more.
Regards
Gerrie
[Edited on 3/11/14 by Jackaroo]
[Edited on 3/11/14 by Jackaroo]
|
|
|
chrisj
|
| posted on 30/11/14 at 06:35 PM |
|
|
I had a clearance problem on the sump and went for a low profile baffled sump solution after too many heart in mouths over speed bumps. (It also helps
on track days). The main snag point now is the bottom of the bell housing so take care to measure that as well !
|
|
|
chrisj
|
| posted on 30/11/14 at 06:38 PM |
|
|
For the steering to clear the manifold the solution was to weld a rose joint half way down the length of the column which keeps it more more or less
straight with only a minor deflection to the rack.
|
|
|
froggy
|
| posted on 30/11/14 at 07:47 PM |
|
|
Not 100% relevant but my chassis is a few inches wider than a std 7 , the viento is wider too isn't it?
Alternator is a mini Denso type , I binned the water /oil exchanger and used a gm oil filter . Gearbox is r154 with mr2 flywheel and heavy duty clutch
. Mr2 fork and bearing and Classic mini slave Cyl which worked out around £1000 cheaper than buying off the shelf stuff .


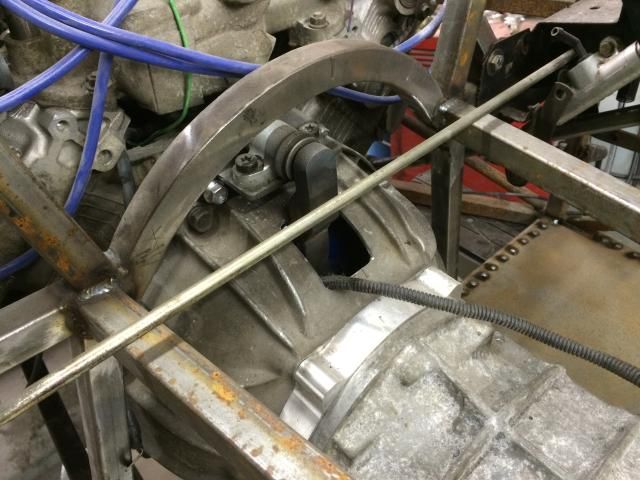
[IMG]http://i144.photobucket.com/albums/r187/froggy_0[IMG]
|
|
|
wilkingj
|
| posted on 9/12/14 at 01:09 PM |
|
|
Viento is 6" (150mm) wider, 12" (300mm) Longer and 4" (100mm) Taller than a Locost / Std / ORIGINAL Se7en.
Tons of room under a Viento bonnet.
Happy Xmas to everyone..
Geoff

1. The point of a journey is not to arrive.
2. Never take life seriously. Nobody gets out alive anyway.
Best Regards
Geoff
http://www.v8viento.co.uk
|
|
|
Irony
|
| posted on 7/8/15 at 10:11 AM |
|
|
Constantly thinking of upgrading mine even though it's not on the road yet. If I did upgrade I would probably go with a 1UZFE. When I started
my build I wanted to go down a well trodden route because my knowledge was severally limited. I was browsing a website and I found this contact info
for a fella who specialises in 1UZFE conversions. Might be of use to you.
Linky
|
|
|
Irony
|
| posted on 2/9/15 at 09:09 AM |
|
|
Any updates on this?
|
|
|


.jpg)