bart
|
| posted on 30/12/14 at 10:35 PM |

|
|
Subaru impreza ( hand brake front cable that is )
brought a whole damaged car and stripped it
still got engine and gearbox to sell and lots of other bits
?????????? any one interested ????????
[Edited on 30/12/14 by bart]
BE ALERT > BRITAIN NEEDS LERTS
|
|
|
|
|
bart
|
| posted on 31/12/14 at 09:24 PM |
|
|
loads a pics
hello all , and happy new year
well dawn broke and the tnt man arrived.
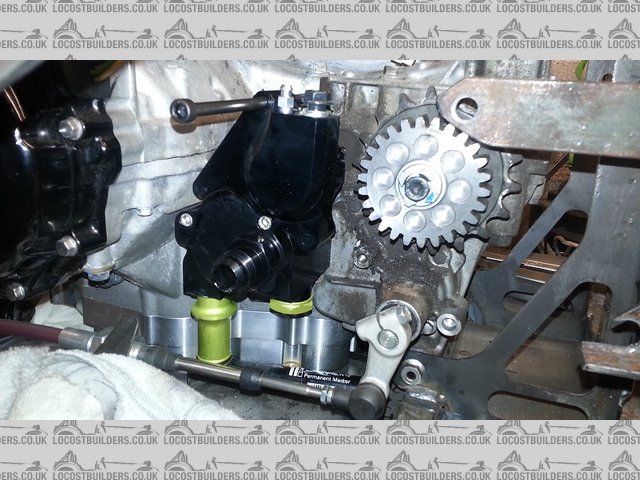
the titan dry sump kit oh yeh !----- quick hide the receipt before the wife sees it !
had a cup o tea and a good rummage through the box . then out to the garage .
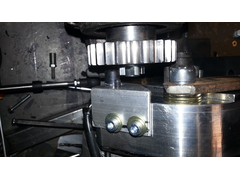
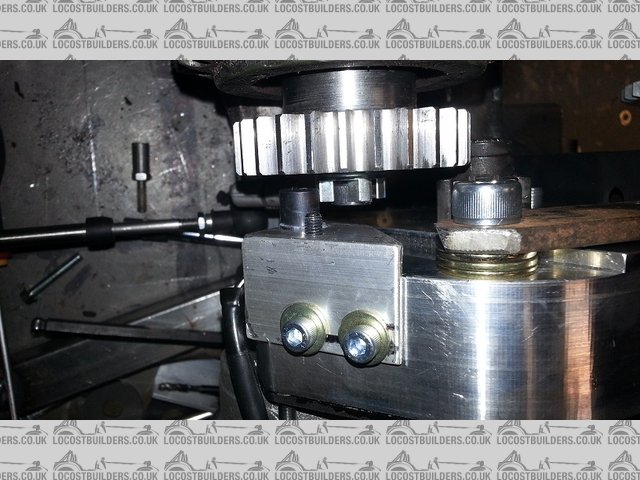
spent a lot of time today in a small area
first I modified the brackets for the reverse starter and wired it up temp to see if all works , another small adjustment then all ok.
second modified the cog that replaces the lock nut on output shaft for reverse so as to do away with the spacer .
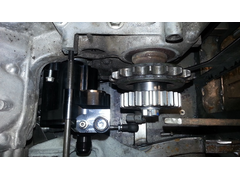
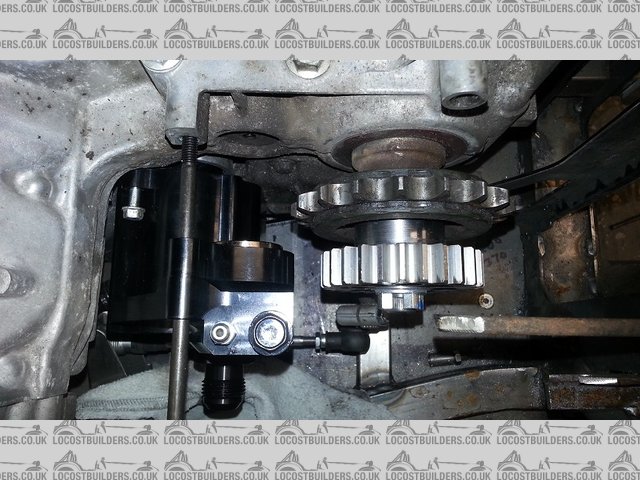
then decided that I would temp fit the dry sump pump and slave clutch to see if all fits ok
"yes" all fits ok , titan dry sump looks good and should be easy to fit
then decided to alter the cog again so that I could retain the original Suzuki speedo counter
as per pics did this and made a small alloy bracket for pulse counter , that bolts to the reverse counter.
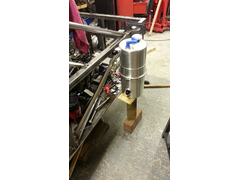
then had a play with position of dry sump tank , its going outside the frame in the side pods
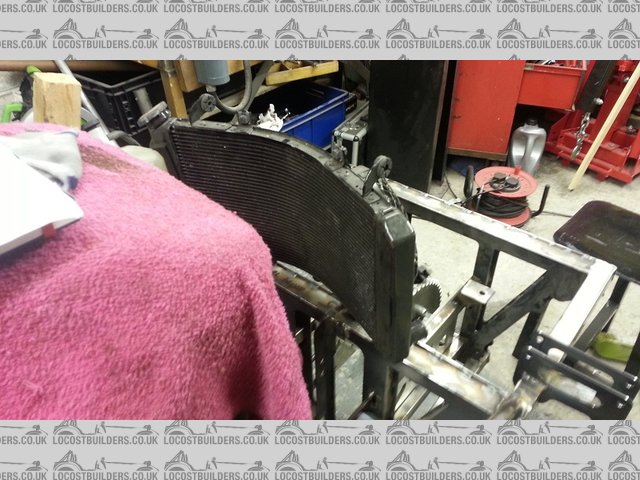
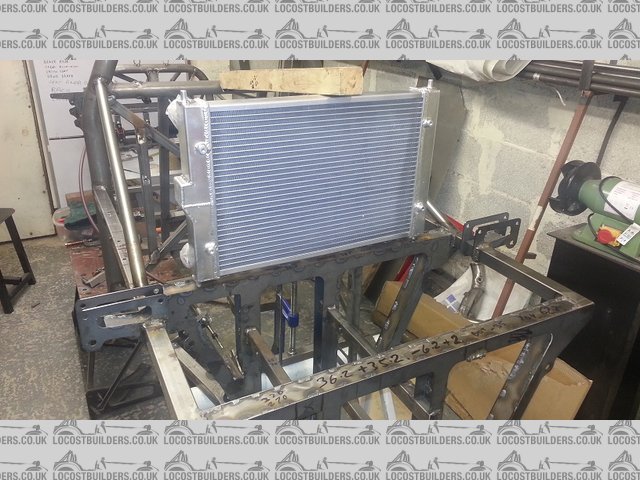
then to finish decided I best start thinking seriously where the rad will go , so there is a pic of suggested rad position.
I will not be using the original rad but it was just to get ideas.
todays pics in no particular order.
Description
Description
Description
Description
 
Description
Description
if any info on dry sump needed just ask and I shall do my best to inform 
BE ALERT > BRITAIN NEEDS LERTS
|
|
|
bart
|
| posted on 2/1/15 at 09:35 PM |
|
|
steering deja vu and layout
hello all
LH steering rack arrived today
stripped it ready for shortening , a bit of deja vu as I have done this before on the rh rack
ps new rh escort HD 2.4 quick ratio rack for sale been shortened by 100 mm exactly and done properly by machining
with brackets
£ 150 sound fair u2u me if interested
lh deja vu
 
Description
the rest of the pics today are just layout tries
 
Description
side view of sump tank and oil rad
Description
rear
this is all starting to give me body ideas ! now
the last pic shows second try at radiator placement , card in the pic is the size of the small polo rad , going to go for wider by 50mm polo rad as it
will be less shrouded by air box . works out quite good means the back of the car will have a wide tunnel f1 style
Description
[Edited on 2/1/15 by bart]
BE ALERT > BRITAIN NEEDS LERTS
|
|
|
Steve Hignett
|
| posted on 3/1/15 at 07:22 AM |
|
|
quote:
Originally posted by bart
hello all,
the last pic shows second try at radiator placement , card in the pic is the size of the small polo rad , going to go for wider by 50mm polo rad as it
will be less shrouded by air box . works out quite good means the back of the car will have a wide tunnel f1 style
[Edited on 2/1/15 by bart]
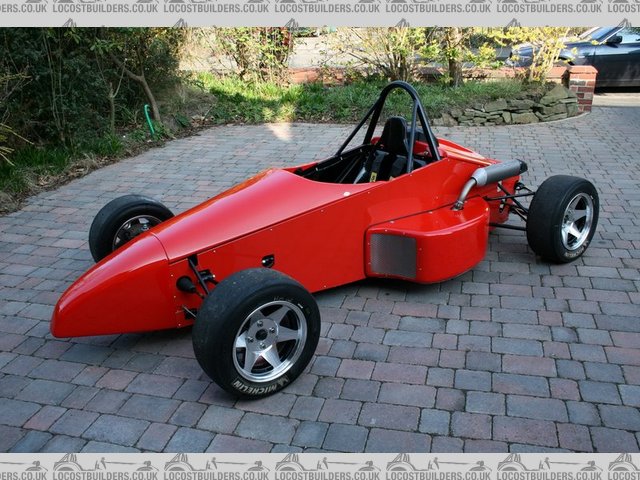
Here's "one I made earlier" mate, just for rear body comparison?
They were later fitted with a taller F1 style air intake, the same shape and size as the roll bar, but I like the lines of it as it was when I
finished it as per the above photo rather than with the F1 style back bodywork.
Another point when looking at the photo below, I'm sure others have asked, as you going to fit side pods?
Cheers,
Steve.
on his drive
|
|
|
bart
|
| posted on 3/1/15 at 01:02 PM |
|
|
looks good steve.
re body thoughts
there are some givens
1) must be road legal
2) must be modern looking or even radical ( design that is )
3) must cover all the bits ie : exhaust , oil tank , side mounted electrical on side of driver area
4) be a aero dynamic , and potential for down force if required.
thought !! if I make the car enclosed it makes getting in and out very difficult ( instead of " its a long way to the top" - its more of
its a long way to the middle ! ) so I think the car must tapper to the middle but this makes it very un aero dynamic I believe.
going to the auto show next week might get some inspiration
and so :
thinking so far
1) could go fully enclosed ie: radical / spire ect
2) rear enclosed front cycle wings
3) enclosed body out to cycle wings back and front
so that's my thoughts so far
all suggestion's will be digested and taken note of

BE ALERT > BRITAIN NEEDS LERTS
|
|
|
bart
|
| posted on 4/1/15 at 08:04 PM |
|
|
off fixture bed on stands and tank in
hi all
well today was a busy day
first I stripped the bits out of the chassis ie: engine diff ect ect
took chassis out side , then took my build fixture table outside , painted it to stop rust and left it there to dry , I suspect it will take weeks due
to the temperature.
had a good clean up and put the chassis back in on stands
fitted the petrol tank for the first time , due to it having to be loaded from underneath . " it fits" that's a relief .
fitted the tank suspension units and decided on another clamp required at the top of the tank , I had already suspected this its was just conformation
, will weld the brackets on tomorrow . also have a mod to breather on engine to weld up.
off to machine the LH rack tomorrow . oh ! and I have run out of m6 nuts LOL
plenty to do this week
dry sump the engine
uprate clutch ect ect .
some pictures of the tank in situ
 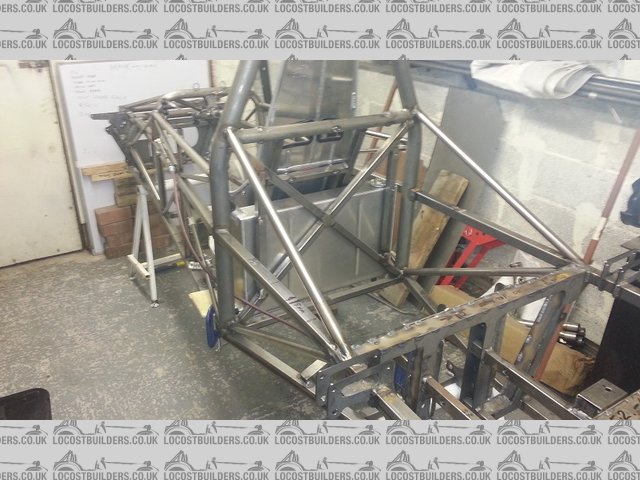
Description
Description
more pics to follow tomorrow , it been a long day and i'm off to soak in a hot bath .
ps offer : if any one wants to borrow a decent fab table u2u me . its flat and 3 mtr long
BE ALERT > BRITAIN NEEDS LERTS
|
|
|
Rosco86
|
| posted on 5/1/15 at 01:09 PM |
|
|
looking good
|
|
|
bart
|
| posted on 6/1/15 at 11:07 PM |
|
|
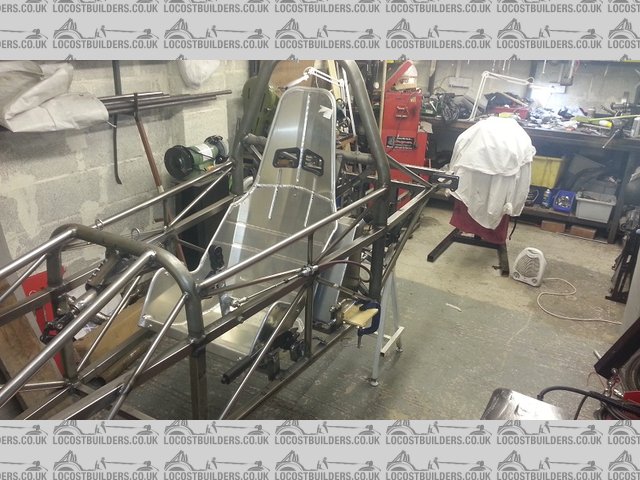
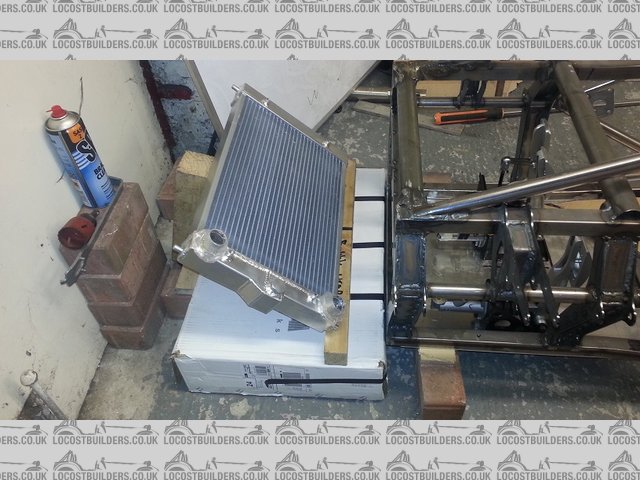
ally rad and steering
hi all
ally rad I ordered arrived today
its a polo rad but slightly longer than 1.0 ltr job , considering where its going I thought that the extra width would get me out of the engine shadow
some what . it all going to be ducted any way.
shown not quite in position as it will be 50mm further forward and 50mm down.
 
Description
Description
finished shortening the LH rack today , reassembled and trail fitted , mad the steering column and I am now happy with the result .
all angles under 20 deg and I also fitted the collapsible part of a ford ka column for safety and IVA .
need to make some rack spacers and finish welding but all should now be plane sailing . ( famous last words )
also fitted the modified dry sump tank , and the modified fuel tank brackets , sorry no pics I forgot.
 
Description
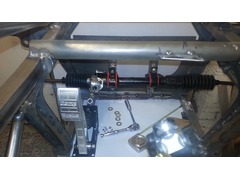 
Description
finally shot showing collapsible part
 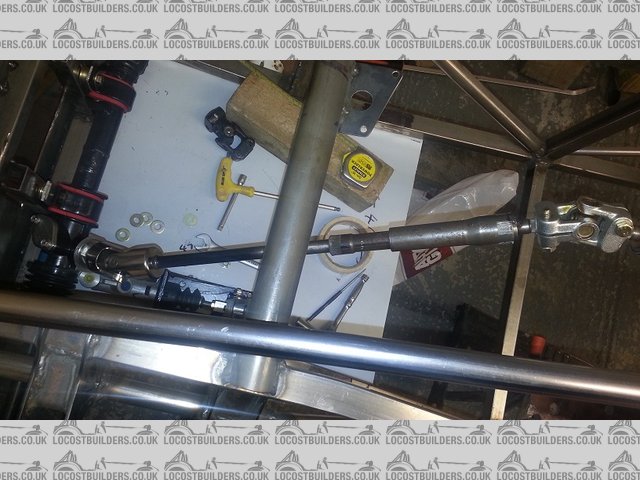
Description
BE ALERT > BRITAIN NEEDS LERTS
|
|
|
bart
|
| posted on 7/1/15 at 09:35 PM |
|
|
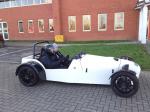
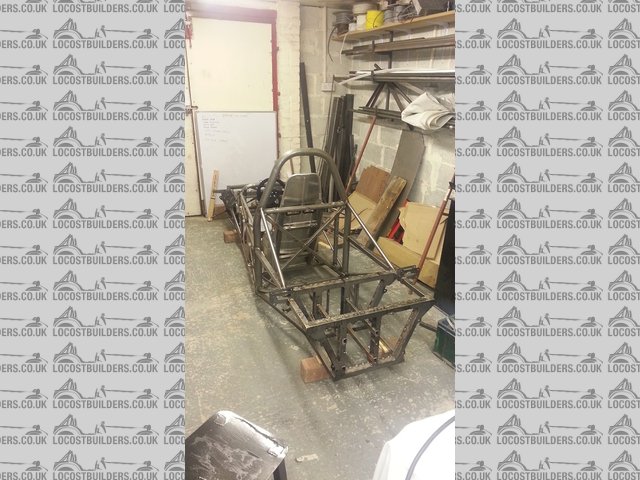
hi all ,bit of a revelation day
got the steering rack spacer made , checked length of front coil over required, then decided to drop the chassis down to the correct level off the
floor , ( first time )
wow what a difference , bit of a revelation feels totally different , feel happier that the body work that is forming in my mind will work and fit ,
total confidence boost
picture does not do it justice .
" full steam ahead captain "
Description
BE ALERT > BRITAIN NEEDS LERTS
|
|
|
wylliezx9r
|
| posted on 7/1/15 at 10:21 PM |
|
|
Looking good keep up the good work.
I spent a lot of money on booze, birds and fast cars. The rest I just squandered.
George Best
|
|
|
bart
|
| posted on 14/1/15 at 08:46 PM |
|
|
hello all
no post for a little while , I went to the auto sport show ( same as last year ! ) and then spent a couple of days thinking about the body ( did a
few small jobs nothing to shout about )
I started off thinking that I was going to enclose the whole rear end in a moulding bit like the back end of a squire or similar
here is one of the sketches I did to play with that idea.
I think it would look unbalanced if I did not enclose the front as well , also that posses problems getting in , and I just don't like the whole
body enclosed . enough said , also think "bat mobile" or flying dick !
Description
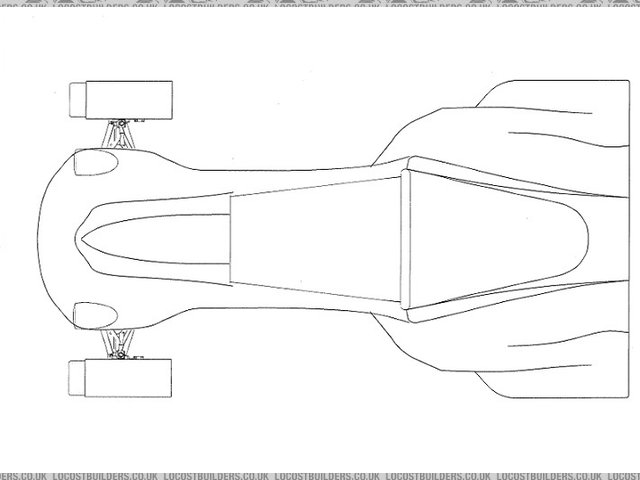
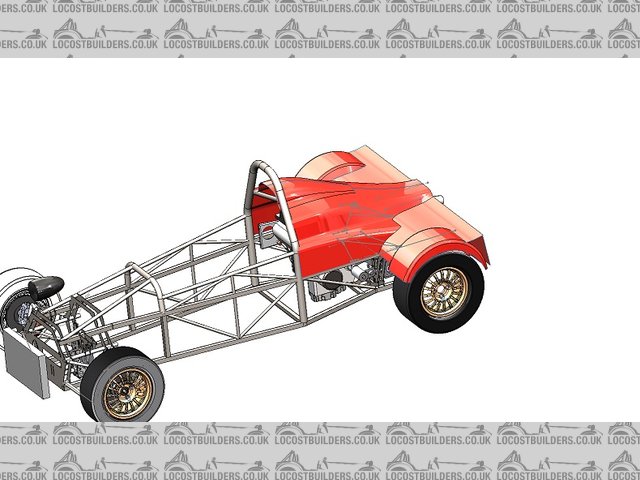
so Monday I dropped that idea and went to a single seater formula type thing . so ill end up with cycle wings and side pods.
here are some pics of my first mock up to get a feel off things
Description
Description
no where near settled but food for thought , all comments accepted
I have also moved the exhaust to the left hand pod with a side exit exhaust
and moved the rad to the front of the car ( lower back and better cooling )
Description
I haver also finished position for front floor and the front floor / brake plate.
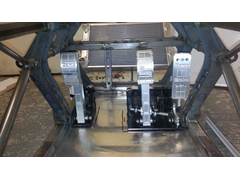 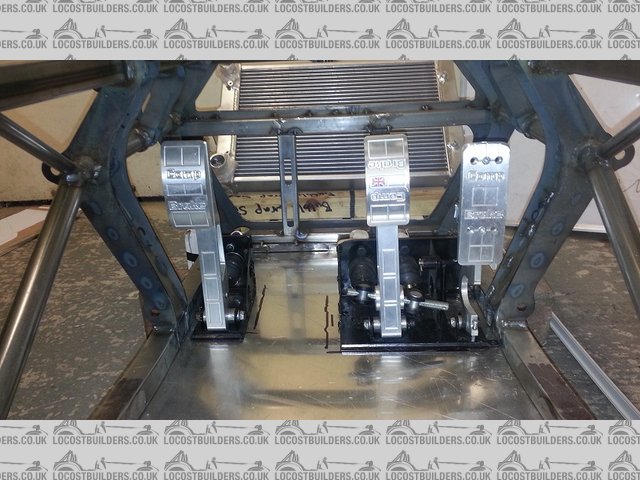
Description
why start body now I hear you say !
the reason I have started body design is it will allow me to finish the chassis and floor ect, so I know where my mounting points will be and so on
also position minor stuff like dry sump tank header ect .
also finished my seat belt installation , have a four point in the car at the moment but have put bosses in for five point if (I can loose enough
weight
BE ALERT > BRITAIN NEEDS LERTS
|
|
|
wylliezx9r
|
| posted on 14/1/15 at 09:52 PM |
|
|
I quite like your first sketch to be honest and i think you would get away with it as its a single seater similar to the caparo t1.
 
I spent a lot of money on booze, birds and fast cars. The rest I just squandered.
George Best
|
|
|
bart
|
| posted on 15/1/15 at 09:19 PM |
|
|
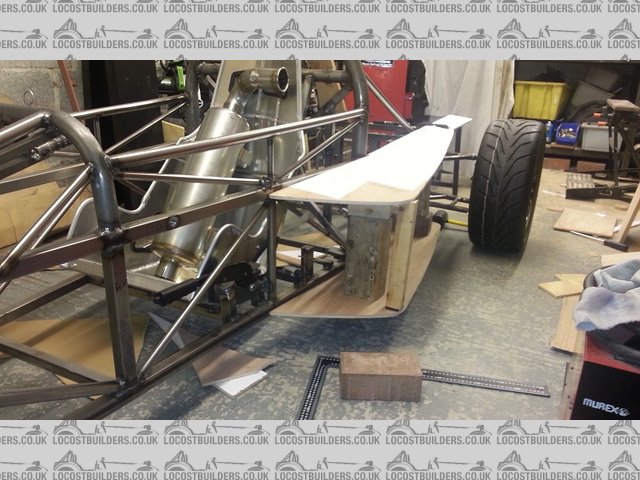
further side pod action
hi all
more side pod action
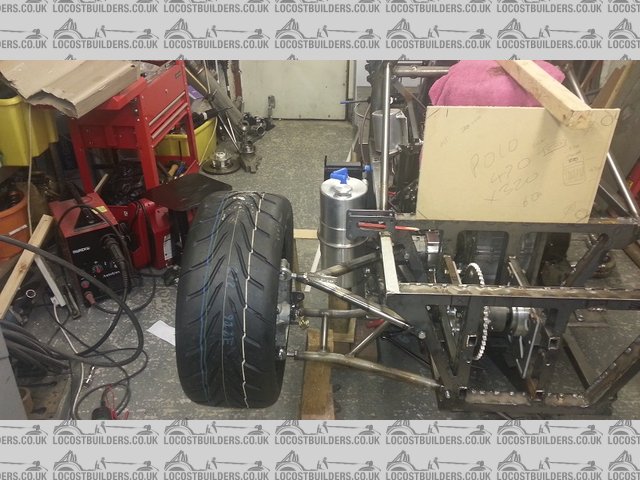
started to make the side pods in Ernest today , made a LH and a RH frame that will take foam when finished for further shaping
when both fitted it looks quite balanced front to back and front to rear , I am pleased so far , still welcome comments.
Description
Description
[Edited on 15/1/15 by bart]
BE ALERT > BRITAIN NEEDS LERTS
|
|
|
bart
|
| posted on 17/1/15 at 08:30 PM |
|
|
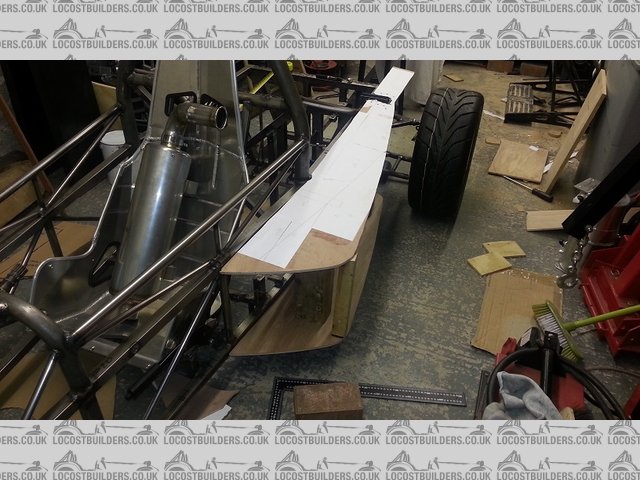
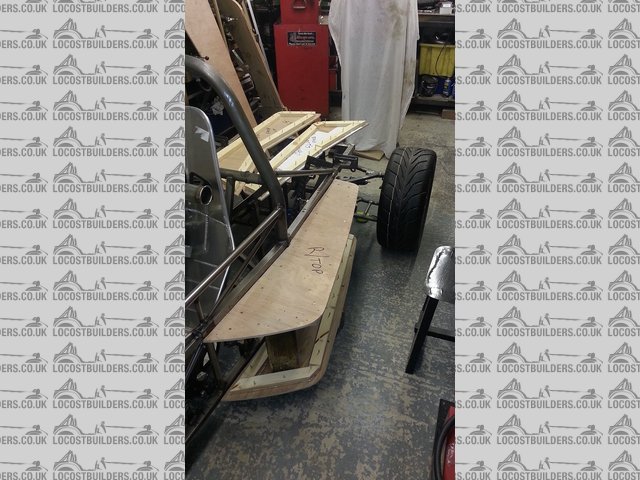
hello all
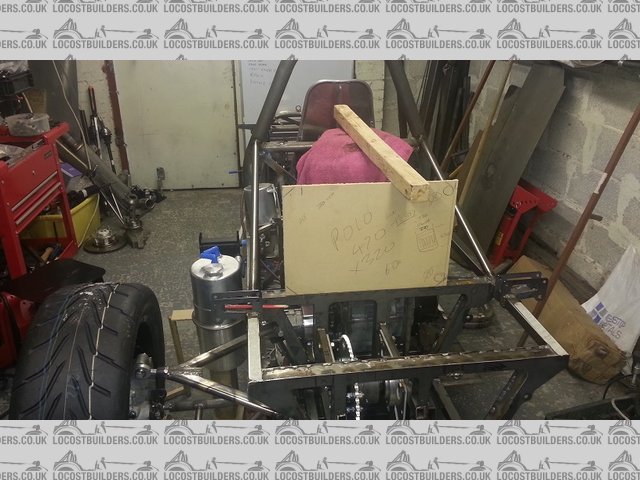
further progress with side pods ,
as you can see the lh ( looking from front of car , I know don't say ) is not as advanced as the rh , mainly cause I ran out of steam . will
need to add foam for radii ect when both finished .
I have been having a good think and spent many hours playing with ideas for the rear end , and I am nearly there ref knowing what I am going to do .
going I think with fixed fenders , having the side pods helps a lot. garage looks like a wood yard , daren't weld anything !
 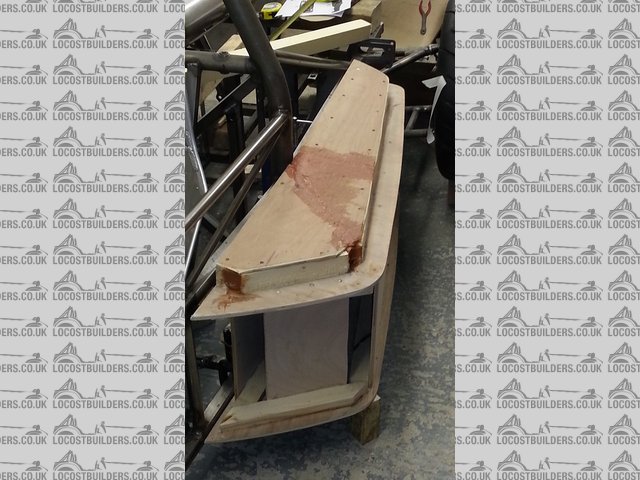
Description
 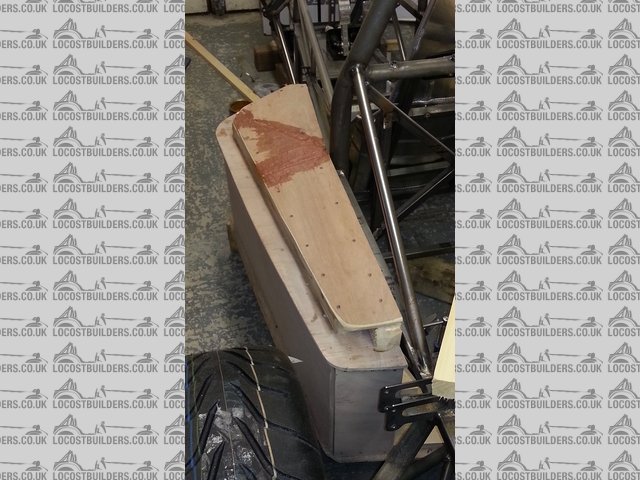
Description
Description
as I say above lh not as advanced as the rh.
should get them to the same state tomorrow , but and its a big but , tax return needs doing , keep putting it off but it has to be done !
BE ALERT > BRITAIN NEEDS LERTS
|
|
|
bart
|
| posted on 18/1/15 at 09:19 PM |
|
|
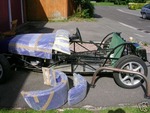
first play at rear end
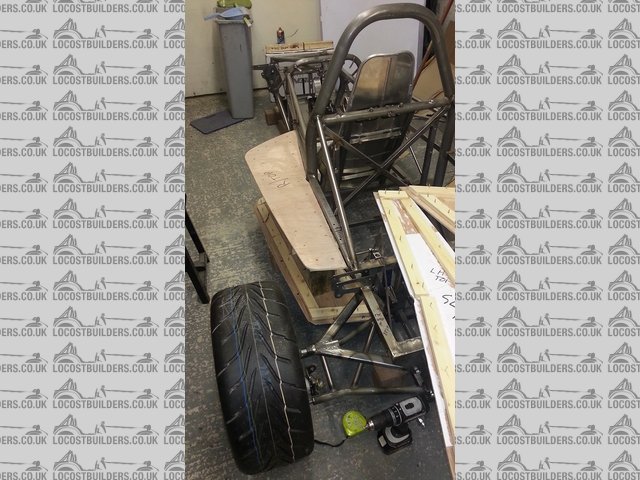
hi all
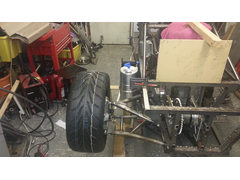
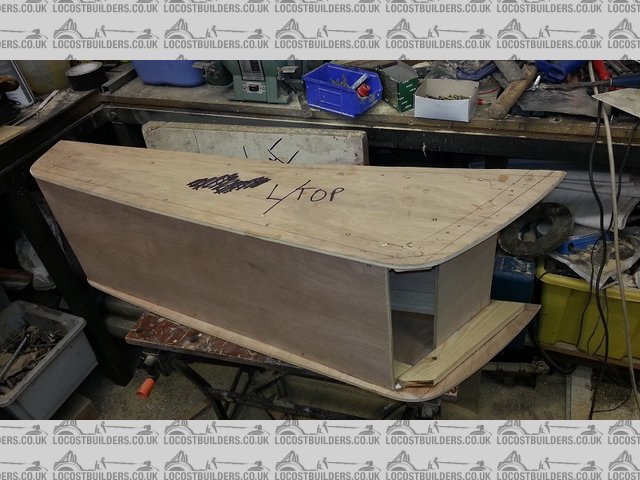
brought the lh side pod up to the same level as the rh , and started to play with the rear deck height and shape
the wheel in the pic is above its normal top level so this would be where the wheel arch sits. early days yet but playing around helps form ideas ,
contemplating moulding the whole back end in one piece . might be to much and difficult to lift off , could hinge it ! so many considerations
 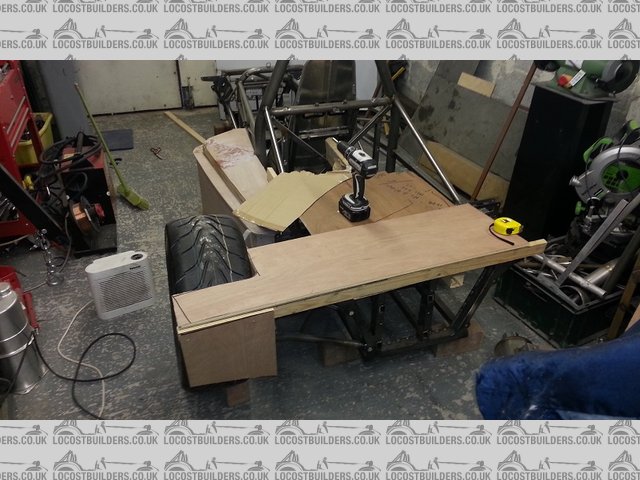
Description
BE ALERT > BRITAIN NEEDS LERTS
|
|
|
Smoking Frog
|
| posted on 18/1/15 at 09:55 PM |
|
|
Never get bored looking at your progress pics. Keep them coming. Makes me what to build one.
|
|
|
bart
|
| posted on 23/1/15 at 01:03 AM |
|
|
hi all
been a bit quite I know , but lots of thinking going on.
i'm pretty much happy with the side pods , (I need to wait for warmer weather to progress )
so have moved on to giving serious thought to the rear engine cover and rear wheel guards / arches
I have been drawing up in solid works cad , now all the work I have overdone in solid works has been using solids , and never used surface modelling (
just never needed to in my line of engineering ) so in order to progress with body design i'm having to rapidly teach myself surface modelling ,
so its slow progress as far for end results
but i'm starting to get to grips with it now
below is a pic of my efforts so far by know means finished ( about 95% to go id say ) but we all have to start somewhere

Description
[Edited on 23/1/15 by bart]
BE ALERT > BRITAIN NEEDS LERTS
|
|
|
bart
|
| posted on 24/1/15 at 12:36 AM |
|
|
further rear thoughts
further rear thoughts , not sure if I like it , may dump this idea and try again
still here is a pic
Description
BE ALERT > BRITAIN NEEDS LERTS
|
|
|
wylliezx9r
|
| posted on 24/1/15 at 08:29 AM |
|
|
I would make the rear arches seperate to the tub to break it up.
I spent a lot of money on booze, birds and fast cars. The rest I just squandered.
George Best
|
|
|
bart
|
| posted on 27/1/15 at 01:49 AM |
|
|
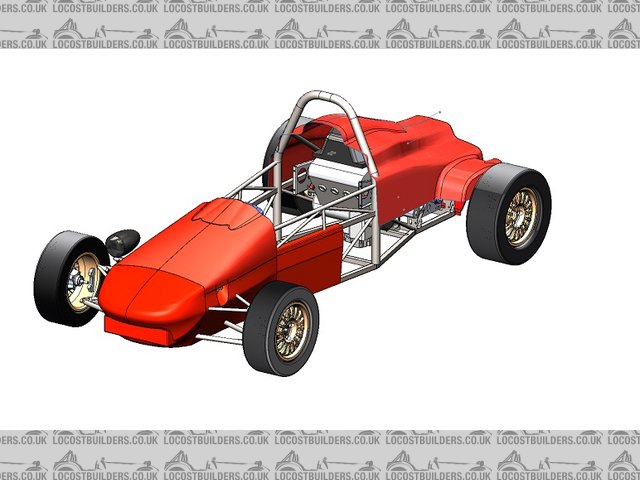
further rear progress
hi further progress
as per past suggestion ( although I was already sort of going there )
separate wheel arches at the back
still work in progress
starting on the front "bonnet" and pointy bit so I can see it all blending into one harmonious look
 
Description
BE ALERT > BRITAIN NEEDS LERTS
|
|
|
cloudy
|
| posted on 27/1/15 at 08:19 AM |
|
|
Looking good - for a first stab at solidworks surfacing that's mighty impressive! (Solidworks makes that job very tricky!) 
James
www.warnercars.com
|
|
|
bart
|
| posted on 27/1/15 at 11:01 AM |
|
|
thanks for the encouragement
its been hard word as you know cloudy
sort of goes like this " ahhh the joys of surface modelling !
tea
try
tea
try
you tube
try
tea
tea
more tea
try
have a kip ! ( brain hurting )
tea
try
you tube
Google search
try
tea
limited success, model crash , try again
it helps a little that I have reasonable solid modelling skills, but as you know "surfacing " is almost totally different .
lost count of the number of solid works crashes . but I do save different versions regularly so I can always go back
ect ect ect , so on and so on
any way time for a brew !
anybody have a 3 axis cnc router worth an ask ?
BE ALERT > BRITAIN NEEDS LERTS
|
|
|
bart
|
| posted on 30/1/15 at 12:02 AM |
|
|
moving forward
latest direction , still learning
front nose cone needs to be longer , job for tomorrow
also the front top cover needs more shape Mañana
 
Description
 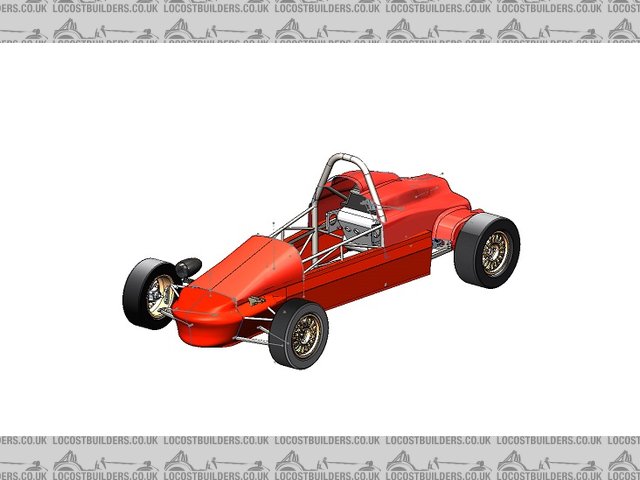
Description
[Edited on 30/1/15 by bart]
BE ALERT > BRITAIN NEEDS LERTS
|
|
|
cloudy
|
| posted on 30/1/15 at 09:16 AM |
|
|
Looking good - would a convex curve to the top of the nose work better?
www.warnercars.com
|
|
|
bart
|
| posted on 31/1/15 at 07:08 PM |
|
|
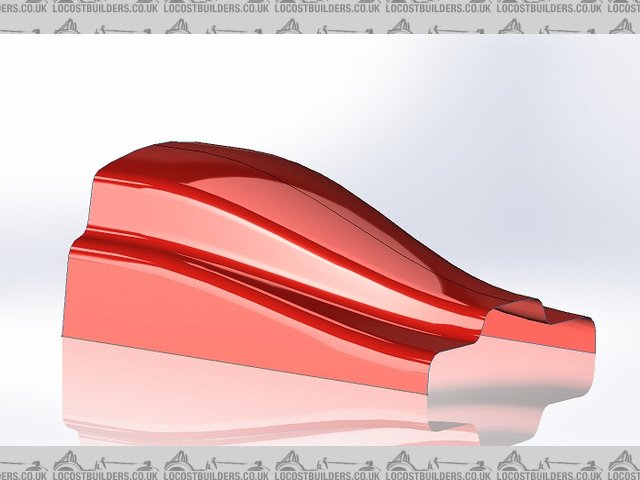
body update
further progress
the number plate is built into the front nose
side view looks like a shark so thinking I am going to call the car the ****** isurus which is a very large extinct shark of the mako family I
believe.
still not finished but getting there
need to add side pods redo rear panel
alter top rear panel
make cot pit cowl , and a few more bits
then I need to start building the bucks and moulds
never done that before so should be fun !!!! need warmer weather though .
just got to decide how to make the shapes , pay for full 3 axis cnc foam milling or cnc skeleton and fill in with foam
side panels I think will be made from ply wood I think not sure on others
still lots of design work to do .
Description
 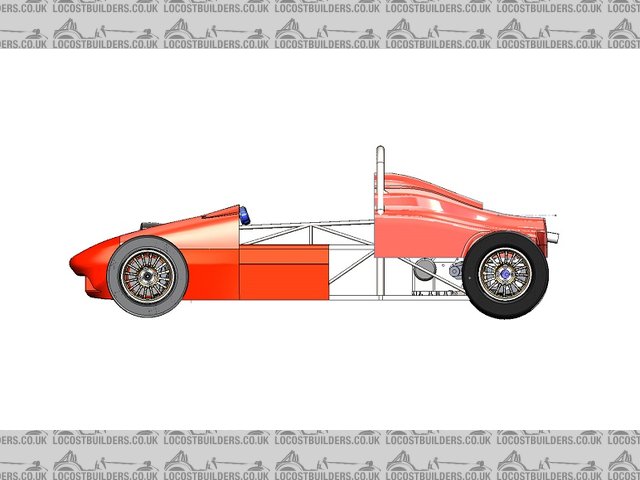
Description
shark !! ?????? or am I just seeing things ?
 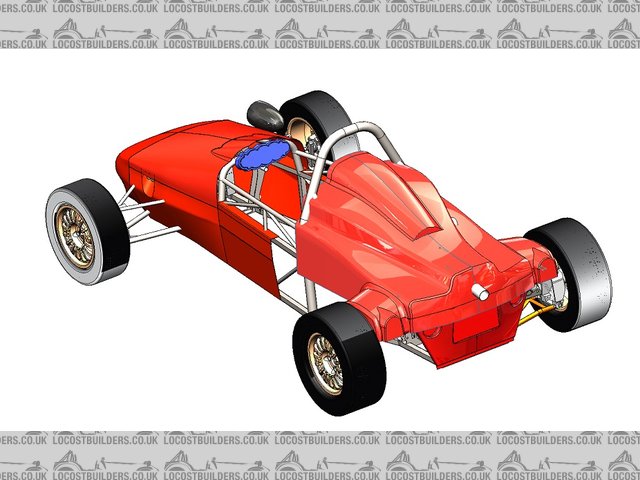
Description
BE ALERT > BRITAIN NEEDS LERTS
|
|
|