Sierra
|
| posted on 25/2/15 at 06:55 PM |

|
|
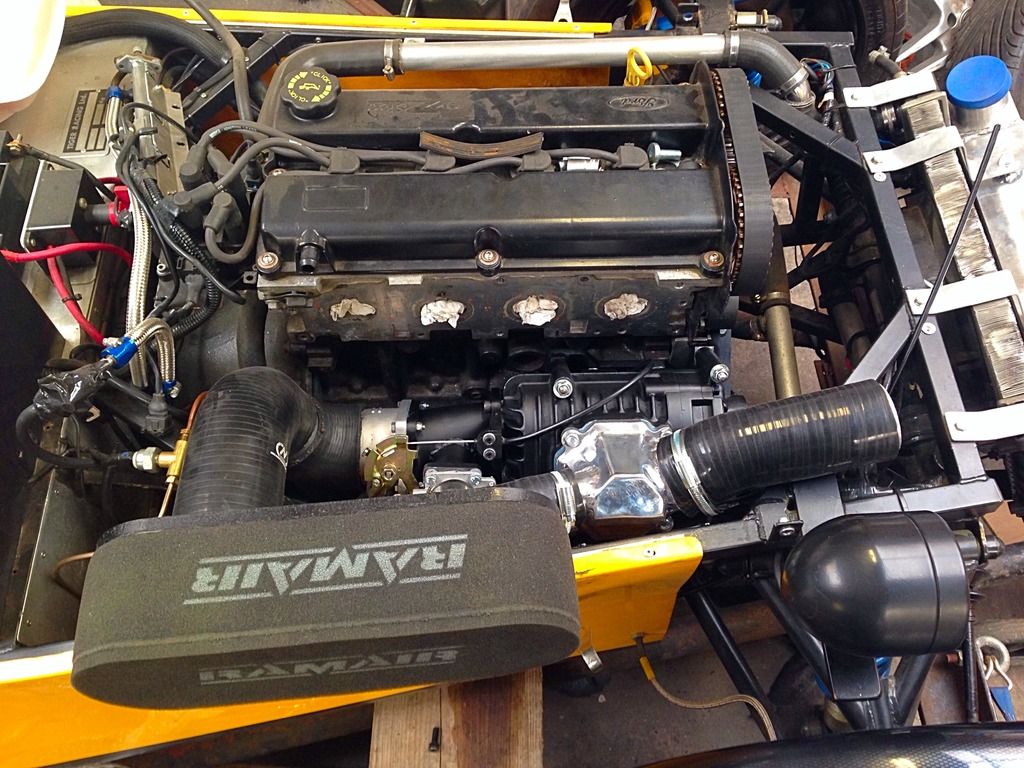
Small update. I've move the radiator back and tilted it, mounted the intercooler just in front with a couple of top brackets.
I'm a bit concerned about the pipe work going to the top of the radiator now, because of the tilt I've had to fit a tight bend hose that
will then have a 90' bend to original level. Will this still flow ok and allow water to get to the radiator?

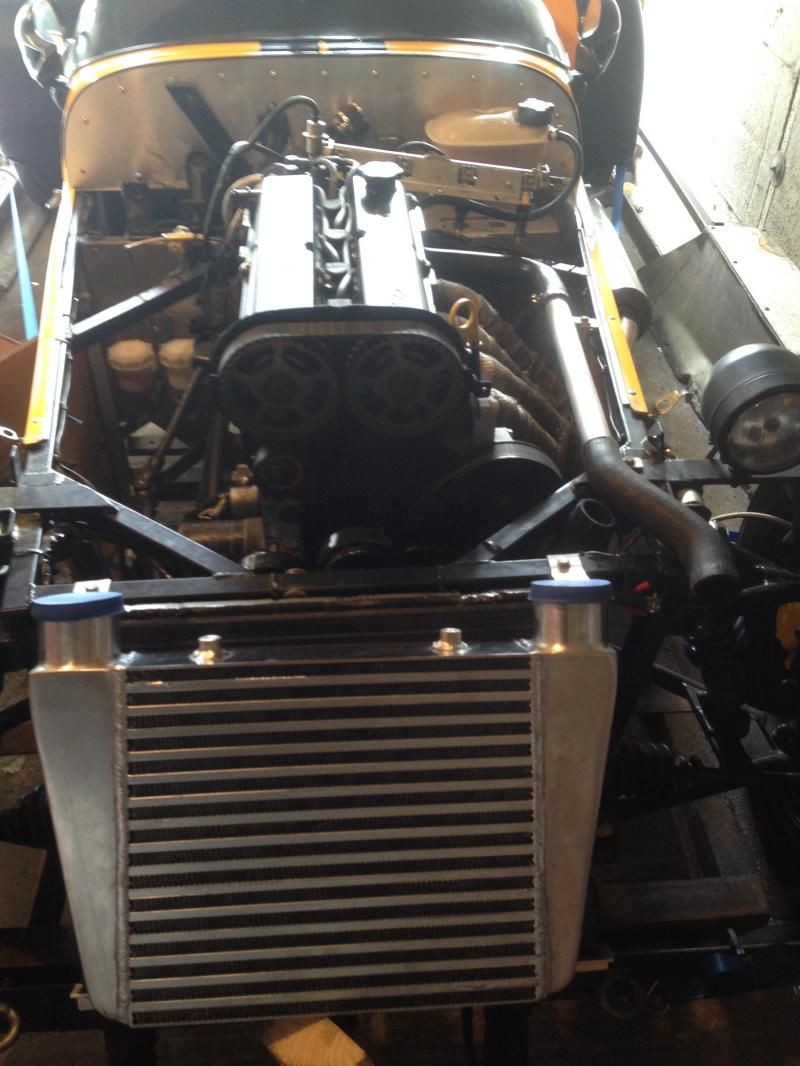

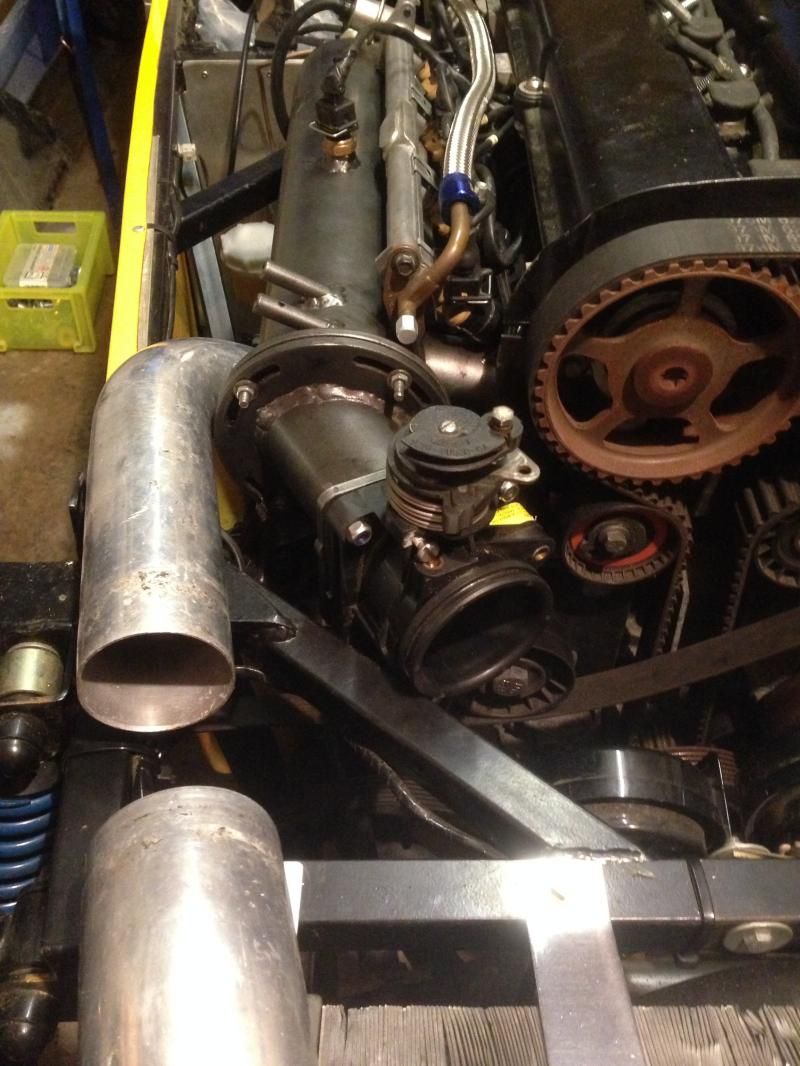
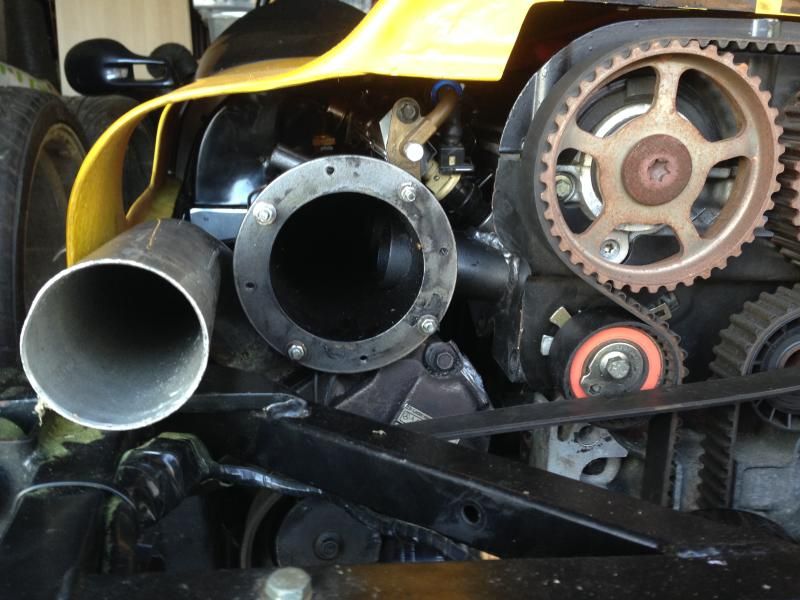
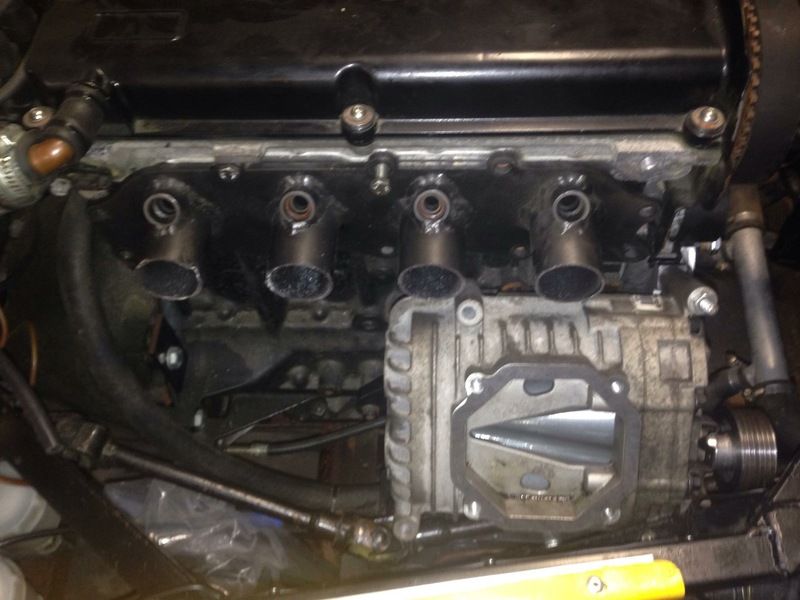
You can see in the below pictures how the inlet ports will need extending and angled to give room for the supercharger underneath.
|
|
|
|
|
bi22le
|
| posted on 25/2/15 at 07:20 PM |
|
|
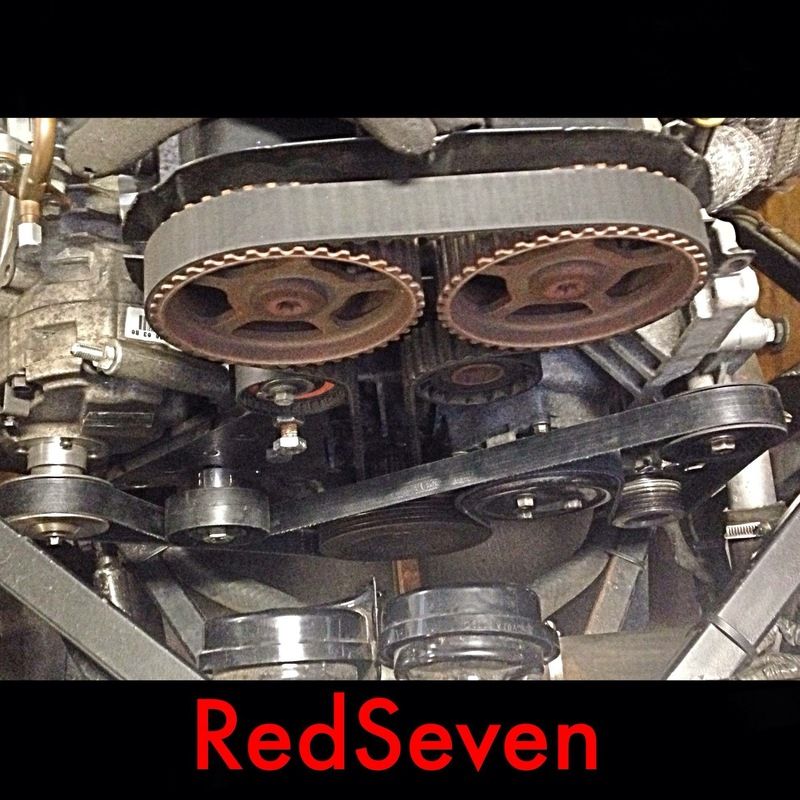
Any pics of your belt route and how you have tensioned it?
Just thought it would be good as reference ( for me when i start mine!)
Track days ARE the best thing since sliced bread, until I get a supercharger that is!
Please read my ring story:
http://www.locostbuilders.co.uk/forum/13/viewthread.php?tid=139152&page=1
Me doing a sub 56sec lap around Brands Indy. I need a geo set up! http://www.youtube.com/watch?v=EHksfvIGB3I
|
|
|
Sierra
|
| posted on 25/2/15 at 07:40 PM |
|
|
Unfortunately no, the supercharger hasn't been mounted yet.
|
|
|
Sierra
|
| posted on 2/3/15 at 10:09 PM |
|
|
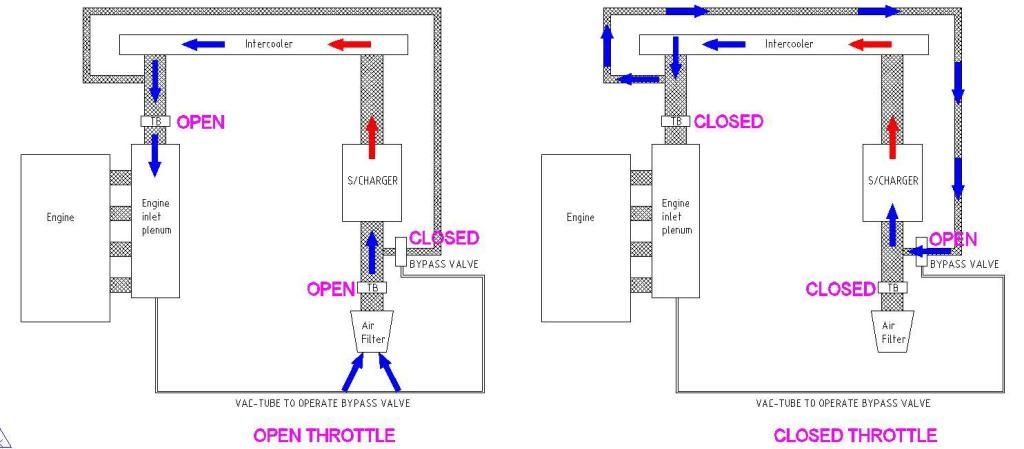
So after a lot more reading it seems that what I originally planned to do with using a bov just won't be the best way.
From the research it seems there are only 2 options that can be used with my setup, both have there advantages but was wondering if anyone can give
anymore negatives as to why one shouldn't be used.
Option1

Or
|
|
|
jeffw
|
| posted on 2/3/15 at 10:46 PM |
|
|
Just FYI I'm running 660cc injectors at 3.5bar to make 400BHP.
|
|
|
Sierra
|
| posted on 3/3/15 at 08:38 AM |
|
|
Thanks jeff, yours is a whole different beast lol
Did you have to get a new upgraded fpr
|
|
|
jeffw
|
| posted on 3/3/15 at 11:14 AM |
|
|
Bosch 3.5Bar fixed FPR. We found the adjustable ones moved around over time which messed the map up.
|
|
|
Sierra
|
| posted on 6/3/15 at 10:54 AM |
|
|
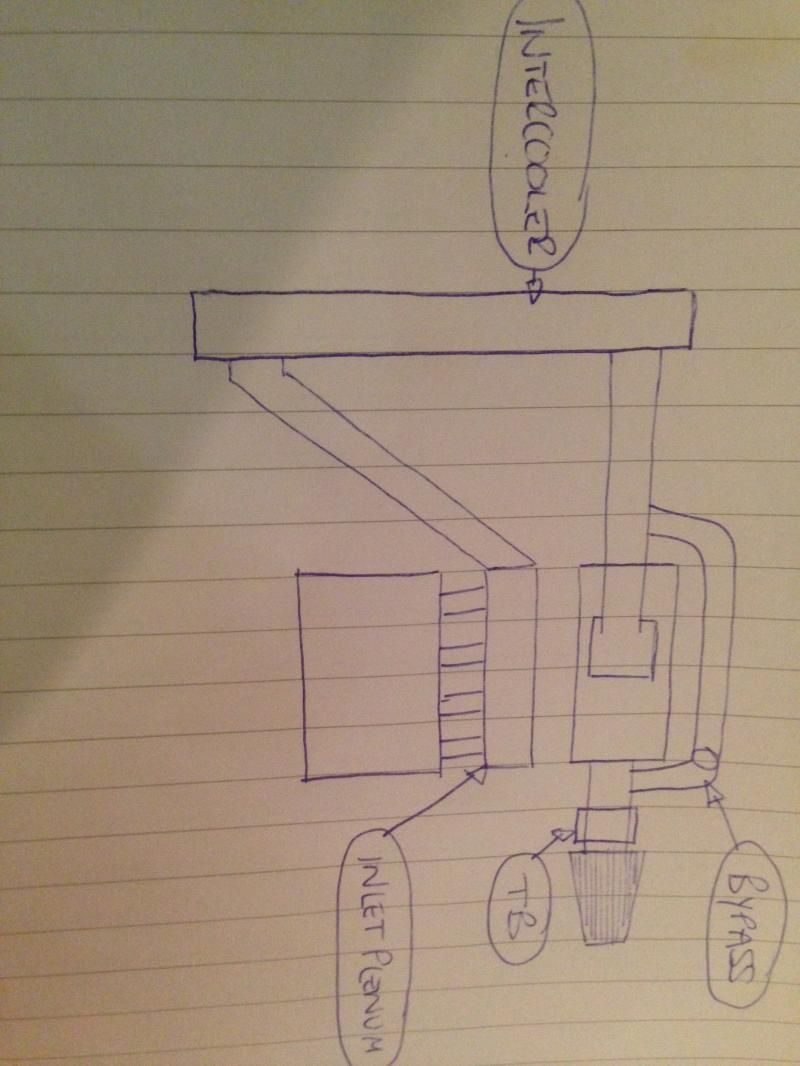
Right with regards to the above diagrams I've decided to go with a slightly different setup lol
It's now going to be
Air filter > dummy tb > bypass > charger > intercooler > ford tb > inlet
Now I'm using dual tb's because of the large volume of air if only using 1 pre charger. Thing is would I be better having other end of the
bypass valve to charger outlet or pipe after intercooler?
|
|
|
richardm6994
|
| posted on 6/3/15 at 02:30 PM |
|
|
Hi Steven,
I've emailed you this diagram which is pretty much what you're saying and what we've been discussing over our emails.......
|
|
|
Sierra
|
| posted on 6/3/15 at 03:40 PM |
|
|
That's the one thanks Richard.
Be interested to see what people think to this instead of bypass directly into charger outlet.
|
|
|
Sierra
|
| posted on 12/3/15 at 11:46 AM |
|
|
Any opinions anyone?
|
|
|
old_timbo
|
| posted on 16/3/15 at 12:08 AM |
|
|
I have a supercharged Pinto. Im using the standard injection manifold and throttle body, an Eaton M62 blower, BMW mini bypass valve, turbo dump
valve, Megasquirt. The bypass is from the outlet of the blower back to the inlet via the bypass valve. The bypass valve is vacuum actuated from the
inlet manifold. I have a second bypass which uses a turbo dump valve set up as a pressure relief valve which also dumps back to the inlet. Max. Boost
is about 12 psi and the pressure relief valve is set at about 14 psi.
I found that the bypass valve sometimes didnt open sufficiently to deal with the flow from the blower. This typically happened at 70 mph (3000rpm) on
small throttle openings when cruising. There would be insufficient vacuum to open the bypass. This often resulted in a loud pop as a pipe blew-off.
The pressure relief valve set at slightly above max boost dealt with this. This set-up has given me a good, responsive, linear, throttle.
Incidentally the Eaton is a blower. A blower just moves air from a to b. A supercharger compresses air internally. So in theory when using an Eaton,
other than a small increase due to friction heat soak etc., most of the temperature rise takes place in the system downstream of it where compression
takes place. Therefore taking the bypass- off straight after the charger is not a problem. My inlet air temp. doesnt increase until I start using the
boost, and it quickly cools down again afterwards.
|
|
|
Sierra
|
| posted on 16/3/15 at 11:00 AM |
|
|
Thanks for the info. Have you got any pictures of your setup? Also what figures did you get from your setup?
|
|
|
old_timbo
|
| posted on 16/3/15 at 11:29 PM |
|
|
Just before I took it to get properly mapped the std Pinto pistons died (collapsed ring land). I'd done about 2000 miles blown which was enough
to prove the concept and work up in steps from an initial 3 psi boost. I was hoping for 190 - 200 bhp; certainly went real quick and no need to rev
with all the torque. I've just about finished rebuilding the engine with stronger lower comp pistons (8.3 instead of about 9.7). I'll take
some pictures with it all assembled before I stick it back in. In the mean time I've uploaded a picture of the blower on the bench and what it
looks like in the car (RH 2B). The blower is under the inlet alongside the engine where the dizzy, fuel pump and oil filter usually are, so not easy
to see.
|
|
|
sandwich
|
| posted on 17/3/15 at 11:22 AM |
|
|
Would the above setup in the picture by richardm6994 work with ITBs like Jenveys or AT?
|
|
|
Sierra
|
| posted on 23/3/15 at 05:22 PM |
|
|
Can anyone tell me if I'd have to buy arp conrod bolts and also a decompression plate?
|
|
|
Sierra
|
| posted on 16/4/15 at 09:59 AM |
|
|
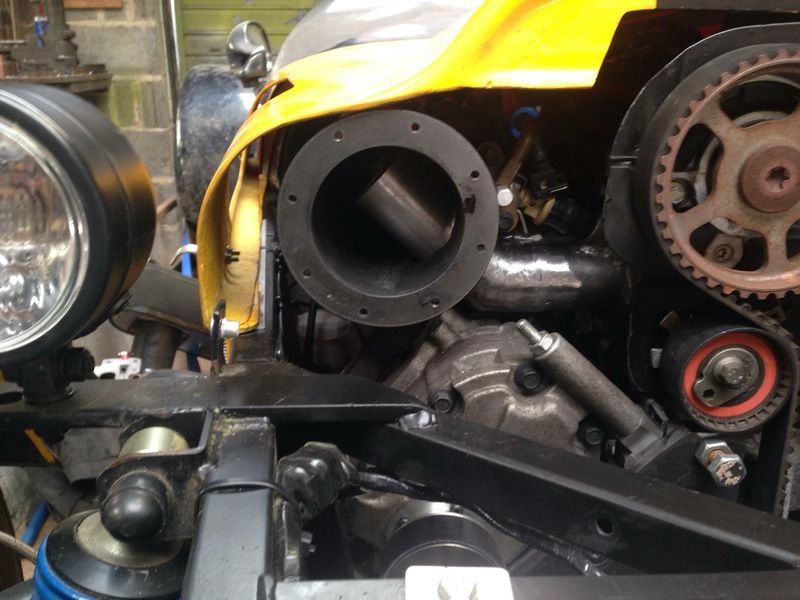
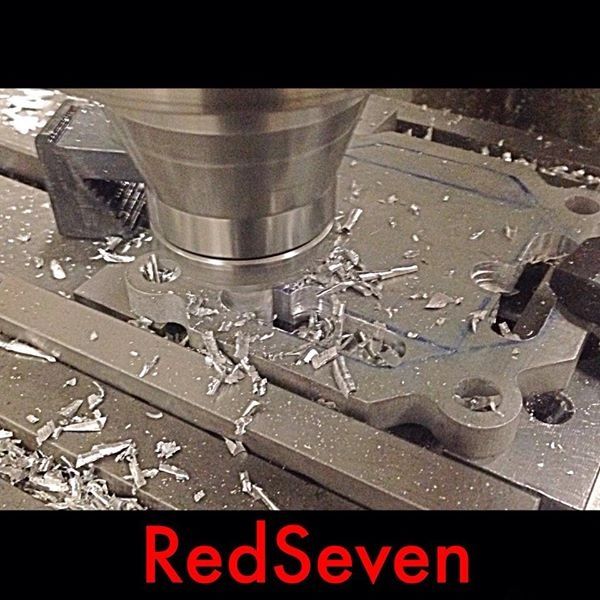
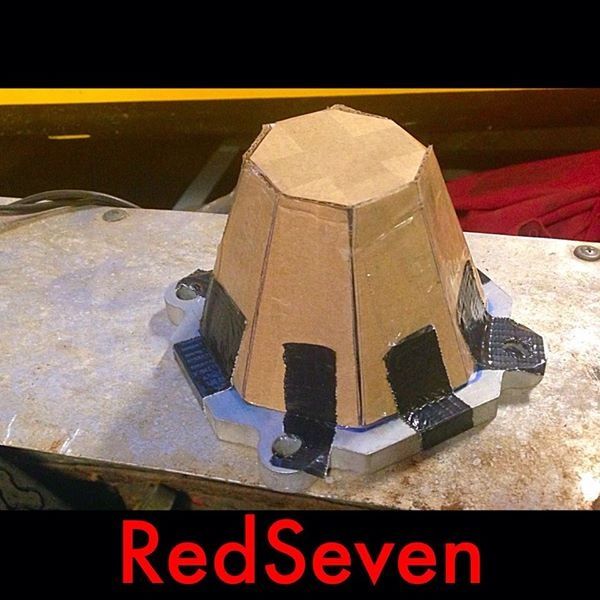
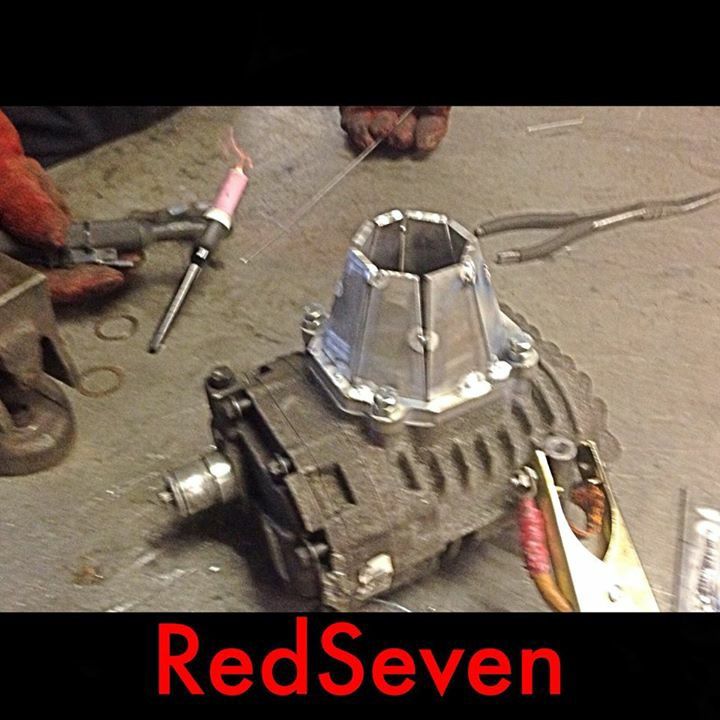
Well the project has now begun and the fun and games of getting the m62 charger mounted.
The car is with Richard at redseven engineering who is currently doing an amazing job and showing how skill full he really is.
Front bracket being made for m62

Finished front bracket

Test mounted to the engine
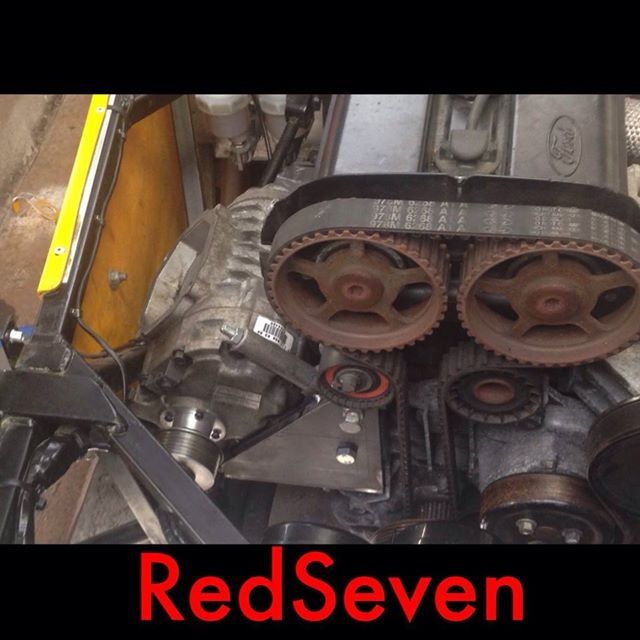
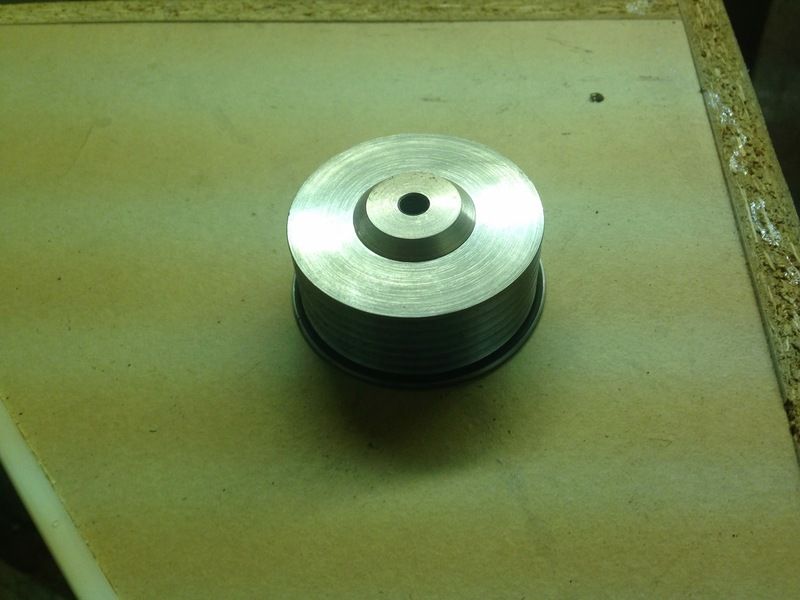
60mm pulley made
[Edited on 16/4/15 by Sierra]
|
|
|
Sierra
|
| posted on 20/5/15 at 09:23 AM |
|
|
A bit more of an update on the build
Charger fully mounted
All pulleys aligned
Inlet tubes extended at an angle
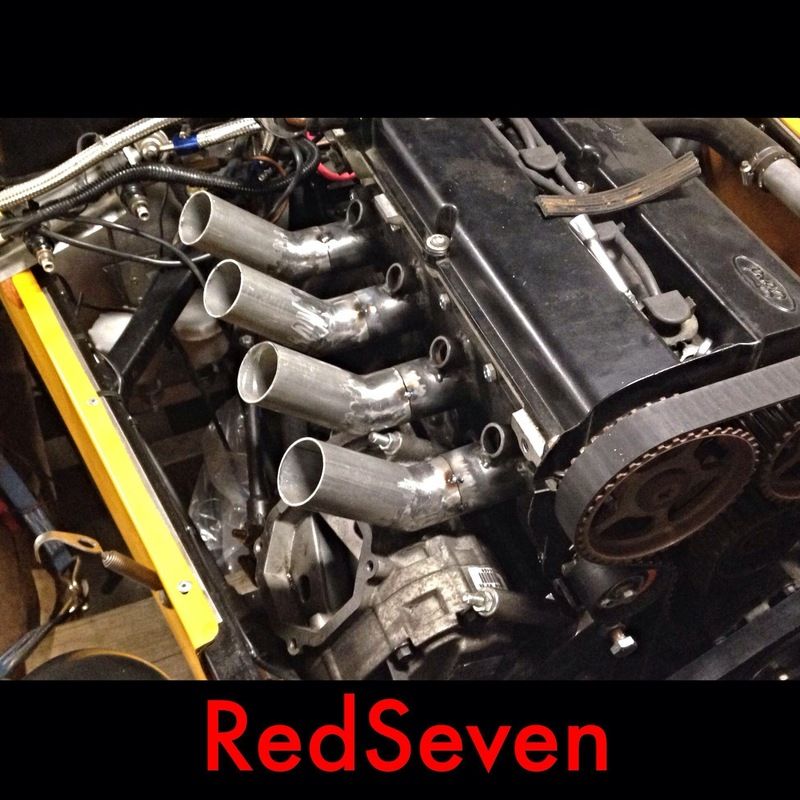
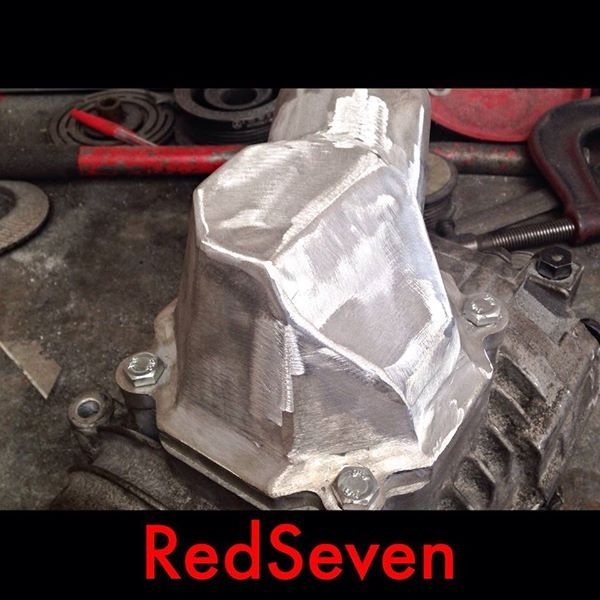
You can see here that there's some clearance issues for the charger outlet
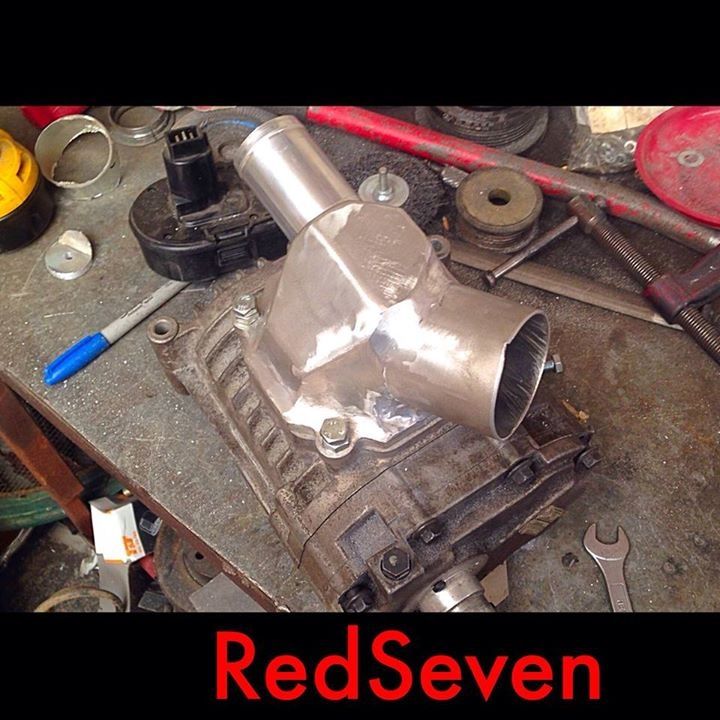
Outlet being made
Mock up and build of outlet
Tube added for recirc valve
Inlet being made with pre charger tb

With recirc
With throttle cable
All in place

|
|
|
Oddified
|
| posted on 20/5/15 at 09:39 AM |
|
|
Looking good 
What is the recirc valve off??.
Ian
|
|
|
rdodger
|
| posted on 20/5/15 at 09:48 AM |
|
|
quote:
Originally posted by Oddified
Looking good
What is the recirc valve off??.
Ian
BMW MINI
|
|
|
Sierra
|
| posted on 20/5/15 at 08:28 PM |
|
|
Yes it's from a bmw mini, hopefully that will be all I need.
|
|
|
richardm6994
|
| posted on 30/5/15 at 05:55 PM |
|
|
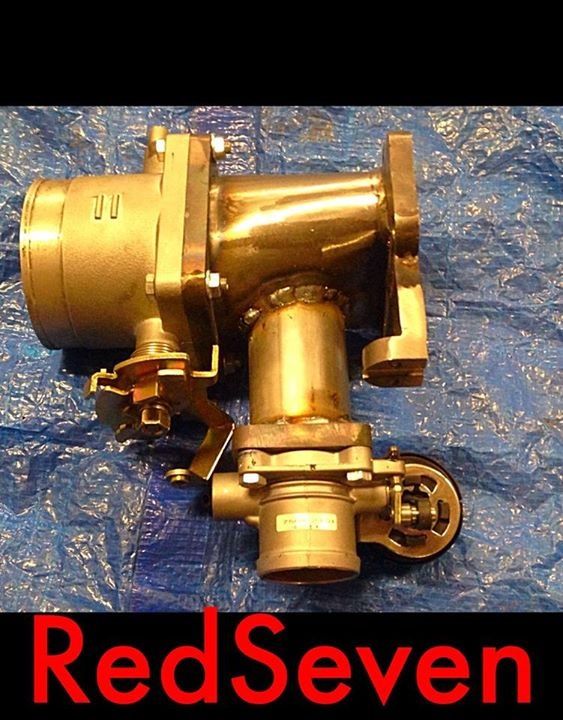
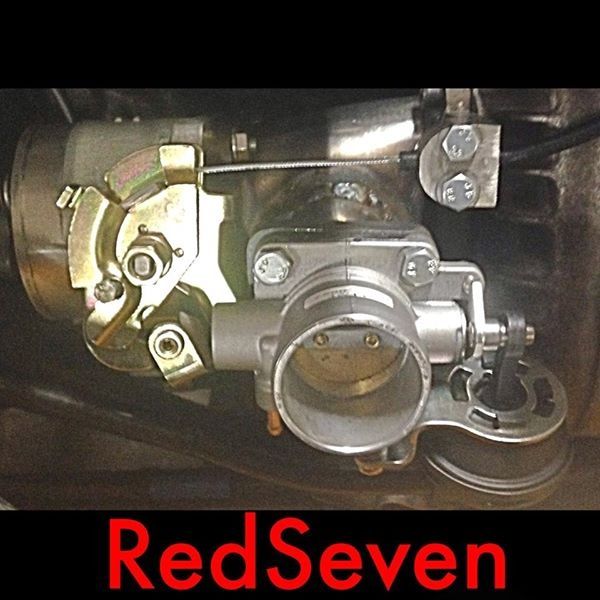
Just a couple of photos before the supercharger gets hidden by the engine intake plenum.


|
|
|
jeffw
|
| posted on 30/5/15 at 09:42 PM |
|
|
Looking good....
|
|
|
richardm6994
|
| posted on 11/6/15 at 11:07 AM |
|
|
finally got the engine started yesterday.....I'm going to spend tonight tidying everything up and touching up some paintwork but here's a
short video from last night.......
https://www.youtube.com/watch?v=tpCT09RnM_0
|
|
|
Fcck2000
|
| posted on 11/6/15 at 11:42 AM |
|
|
quote:
Originally posted by richardm6994
finally got the engine started yesterday.....I'm going to spend tonight tidying everything up and touching up some paintwork but here's a
short video from last night.......
https://www.youtube.com/watch?v=tpCT09RnM_0
Crikey watch your bloody fingers in that cam belt, made me wince watching your fingers going so close to an open running belt. Get the cam cover back
on ;-)
Looks a really neat installation from what I can see.
Paul
Tiger SSC
220bhp on standard MZR Duratec engine with throttle bodies and mild camshaft upgrade.
|
|
|