John Bonnett
|
| posted on 22/10/20 at 06:21 PM |

|
|
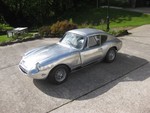
I'm not sure. The scuttles and wheel arches line up well but the Fiesta screen is higher than the F type and as you said right from the outset
EB the screen will be a problem.
I've just bent a piece of 6mm in the rough shape of the roof at the crown with the slope down of 18 degrees to match the Jag. It's
difficult to imagine how it might look without a bit more form work.
The seats are just laid in but in a postion where I can barely reach the pedals. So the normal seating postion will be several inches further forward
than they are and even in their currenrt position there is adequate head room.
I was hoping (and still am) to use the Fiesta rear window because it is heated and I have it but ideally it should be a bit narrower and taper in
towards the bottom rather than out. I could use polycarbonate but I really do want to have a heated screen. On my travels I haven't come across
anything that might fill the bill. Ideas anybody?

[Edited on 22/10/20 by John Bonnett]
|
|
|
|
|
ettore bugatti
|
| posted on 22/10/20 at 08:39 PM |
|
|
A Fiat 126 rear screen will be narrow enough, not expensive second hand.
Looks like about 930mm wide at the bottom.
Try and play with the angle of the rear screen a bit in plan view, a bit steeper to accomodate the extra height of the front Fiesta screen might
help.
It is a trade-off between overhang and the angle of the belt line.
|
|
|
John Bonnett
|
| posted on 22/10/20 at 08:59 PM |
|
|
The Fiat rear screen is narrower by about 30mm and quite a bit more at the bottom of the Fiesta one but I think a deeper screen would look better
perhaps like one from an MGB GT. They are heated but quite costly. It's a shame I sold my B without taking any measurements.
I can certainly play with the angle of the back to help it blend in with the height of the windscreen so thank you for that tip.
|
|
|
John Bonnett
|
| posted on 23/10/20 at 04:08 PM |
|
|
I've moved a bit further towards making the driver's side footwell having put in some of the supporting pieces. These include the forward
sill extension and a channel piece bolted to the outrigger. A linking tube joins the pedal box to the sill. The floor will sit underneath and be
sanwiched between the chassis and the underside of these tubes.

[Edited on 23/10/20 by John Bonnett]
|
|
|
steve m
|
| posted on 23/10/20 at 05:06 PM |
|
|
The rear screen part really depends on if your going to make an opening tailgate, or just a small boot opening, that would fall under the rear bottom
of the screen
The boot option would be my choice, as it could incorporate a much stiffer body also. possibly the fiesta rear screen could be used
steve
Thats was probably spelt wrong, or had some grammer, that the "grammer police have to have a moan at

|
|
|
John Bonnett
|
| posted on 23/10/20 at 05:21 PM |
|
|
quote:
Originally posted by steve m
The rear screen part really depends on if your going to make an opening tailgate, or just a small boot opening, that would fall under the rear bottom
of the screen
The boot option would be my choice, as it could incorporate a much stiffer body also. possibly the fiesta rear screen could be used
steve
Steve, I take your point about body stiffness which is toatally valid but I would really like to have an opening tailgate for maximum access to the
load area as the way I'm planning things it will not be easy to load from the cabin. So what I'm thinking is to use the same arrangement
as the Octavia where the edge of the tailgate is the edge of the glass. This doesn't waste any space with pillars either side and as you suggest
the Fiesta screen might be an option.
.

|
|
|
Mr Whippy
|
| posted on 23/10/20 at 10:38 PM |
|
|
Is that the seat belt location on the pillar? it looks crazy high and far too forward of the seat.
|
|
|
John Bonnett
|
| posted on 24/10/20 at 07:40 AM |
|
|
quote:
Originally posted by Mr Whippy
Is that the seat belt location on the pillar? it looks crazy high and far too forward of the seat.
If it is too high. I guessed wrong when I put it in. As I mentioned, the seats were just laid in at least 4 inches further back than they will be in
their normal position.
The photo shows the seat in the driving position and actually the seat belt mounts and the B post look pretty good to me.

[Edited on 24/10/20 by John Bonnett]
|
|
|
John Bonnett
|
| posted on 24/10/20 at 03:44 PM |
|
|
Change of scene today. I'm working on the seat mountings and have finished a half set with just the outer brackets to be added. I'm using
M8 threaded inserts onto which I turned a short shank. The inserts were pushed up from underneath against the shoulder and then welded in. In this way
thay can never pull out.


[Edited on 24/10/20 by John Bonnett]
|
|
|
John Bonnett
|
| posted on 25/10/20 at 05:15 PM |
|
|
The driver's seat mountings are now done and welded in and the seat in place. I set the mountings at half way and there's loads of
adjustment in either direction.
I have also made a start on the driver's side footwell which is slightly complicated by the pedal box and the column passing through at the
top.


|
|
|
John Bonnett
|
| posted on 26/10/20 at 06:15 PM |
|
|
A bit more done on the footwell panel. The position of the pillow block bearing has made things a bit awkward so a forward facing enclosure had to be
formed. This was made in two parts, the first being a folded right angle stretched to the curvature suiting the cut-out in the footwell panel and plug
welded in position. The closing piece was made using a hammerform and will be plug welded together. Once assembled, I'll put a hole in for the
steering column.
A bit of trimming and tapping to close any gaps is obviously still needed.
Although this is a very small panel it keeps throwing up problems the next being that the accelerator pedal hits the panel before it reaches the stop.
So that needs addressing before the piece can be finally laid to rest.


[Edited on 26/10/20 by John Bonnett]
[Edited on 26/10/20 by John Bonnett]
|
|
|
John Bonnett
|
| posted on 27/10/20 at 07:43 PM |
|
|
Today I addressed the power bulge needed for the accelerator pedal. Starting in the time honoured way of making a cardboard template and then
transferring it onto a piece of steel sheet. This was folded and inserted into the aperture and plug welded on the back. Job done.


|
|
|
ettore bugatti
|
| posted on 27/10/20 at 09:55 PM |
|
|
It has a very WO2 fighter cockpit feel to it, love the look.
|
|
|
John Bonnett
|
| posted on 28/10/20 at 07:44 PM |
|
|
Not the best of days today principally because I failed to notice that the clutch pedal that came with the pedal box was for a pendulum system not
floor mounted and so totally wrong for this application. My first mistake was to cut an aperture in the panel to accommodate the cable adapter that
bolts on separately to the outside of the pedal box. Once done and the adapter bolted up it was obviously wrong because it operated the pushrod in the
wrong direction. So clearly the adapter needed to be inverted leaving a redundant hole in the panel. Of course even when fitted the other way up the
pedal still didn't work and it was then that the penny dropped with the realisation that the cable clevis needed to be above the fulcrum on the
pedal and not below it. With the pedal modified ( cable type pedals are available for fifty quid) the pedal now pulls on the cable which is a result
of sorts but sad about my panel which I'll try to repair invisibly without distorting it.
I cannot achieve a straight pull because of the constraints of various fixtures and so I may use either a guide similar to those used by some
handbrake installations or a pulley.
Plenty to think about and plenty to get on with. Photos when I'm in a better frame of mind.
|
|
|
Mr Whippy
|
| posted on 28/10/20 at 10:29 PM |
|
|
saying that your making fantastic progress...  I can tell already this will be a top notch car I can tell already this will be a top notch car 
|
|
|
John Bonnett
|
| posted on 29/10/20 at 07:24 AM |
|
|
quote:
Originally posted by Mr Whippy
saying that your making fantastic progress... I can tell already this will be a top notch car
timely comment and very much appreciated, thank you. Every project has its highs and lows and sometimes it is encouragement like this that is just
what's needed. Thank you so much. Today is another day so forward we go!
|
|
|
McLannahan
|
| posted on 29/10/20 at 10:48 AM |
|
|
This has been a fascinating read, and I take my hat off to you in your engineering skills!
You've made amazing progress, and seem to be taking such care and thought behind each decision.
Looking forward to the next instalment - great work!
|
|
|
John Bonnett
|
| posted on 29/10/20 at 11:08 AM |
|
|
quote:
Originally posted by McLannahan
This has been a fascinating read, and I take my hat off to you in your engineering skills!
You've made amazing progress, and seem to be taking such care and thought behind each decision.
Looking forward to the next instalment - great work!
That's very kind of you to say that but actually my skills are very limited and much of my progress is down to good friends both on this forum
and elsewhere who offer guidance and advice to keep me out of the elephant traps along the way. What I do have is time and having no deadlines I can
afford to backtrack if necessary so that I can get everything is as good as I can possibly make it.
This is a classic example of making it up as you go along and much of it will be uncharted territory for me although this is the third scratch build.
The windscreen frame was a first and so will the doors and sills, challenges I'm looking forward to.
I've gone into this in the knowledge that some things would need to be altered but first it is necessary to have something to alter and so it is
with the basic frame. It has to be there to see how it needs to be changed. But more of that later. I've got yesterday's debacle to
rectify as the mission for today.
|
|
|
HowardB
|
| posted on 29/10/20 at 11:16 AM |
|
|
Fantastic progress and amazing attention to detail. I recall following the GT6 with great interest, what was the other car that you built John?
Howard
Fisher Fury was 2000 Zetec - now a 1600 (it Lives again and goes zoom)
|
|
|
John Bonnett
|
| posted on 29/10/20 at 01:42 PM |
|
|
quote:
Originally posted by HowardB
Fantastic progress and amazing attention to detail. I recall following the GT6 with great interest, what was the other car that you built John?
Back in the 90s my son who was still at school at the time decided to build a 7 type sports car which unfortunately pre-dated Ron's book by
about a year. Had we had the information from the book we could have built a chassis very much lighter but it worked out okay. We even went up to
Oundle school to meet Ron and saw the boys building their Locosts in a factory unit almost like a production line. Our car was based on a MK5 Cortina
with a scratch built chassis and eventually had a Jondel N/A Cosworth YB. Chris and I campaigned it in a couple of Curborough and Goodwood sprint
series with some success. The car was sold and I believe a bike engine was fitted and as far as I know it still exists although I have no idea where
it is.
The second project was the trials car which proved to be hugely reliable and took my wife and I to France more than once and to the Isle of Sky as
well as being a competitive Class 8 classic trials car gaining good results in Chris's capable hands.
Both hugely enjoyable projects and nice to know that the trials car is still being used competitively.


[Edited on 29/10/20 by John Bonnett]
|
|
|
jps
|
| posted on 29/10/20 at 02:57 PM |
|
|
quote:
Originally posted by John Bonnett
[Edited on 29/10/20 by John Bonnett]
Nice to see the 'locost' beam deflectors, I fit the same ones when we go abroad!
|
|
|
HowardB
|
| posted on 29/10/20 at 04:47 PM |
|
|
quote:
Originally posted by John Bonnett
quote:
Originally posted by HowardB
Fantastic progress and amazing attention to detail. I recall following the GT6 with great interest, what was the other car that you built John?
Back in the 90s my son who was still at school at the time decided to build a 7 type sports car which unfortunately pre-dated Ron's book by
about a year. Had we had the information from the book we could have built a chassis very much lighter but it worked out okay. We even went up to
Oundle school to meet Ron and saw the boys building their Locosts in a factory unit almost like a production line. Our car was based on a MK5 Cortina
with a scratch built chassis and eventually had a Jondel N/A Cosworth YB. Chris and I campaigned it in a couple of Curborough and Goodwood sprint
series with some success. The car was sold and I believe a bike engine was fitted and as far as I know it still exists although I have no idea where
it is.
The second project was the trials car which proved to be hugely reliable and took my wife and I to France more than once and to the Isle of Sky as
well as being a competitive Class 8 classic trials car gaining good results in Chris's capable hands.
[Edited on 29/10/20 by John Bonnett]
More and more impressed John - you have a good set of skills there!
Howard
Fisher Fury was 2000 Zetec - now a 1600 (it Lives again and goes zoom)
|
|
|
John Bonnett
|
| posted on 29/10/20 at 04:54 PM |
|
|
Although filling up the redundant hole has taken all my workshop time today the end result has been well worth the time. There was little bit of
distortion but not very much. Here's how I did it.
First you need to watch Trev's video.
https://www.youtube.com/watch?v=AhpPkksmI4c
So much really good stuff on his channel and the inspiration seems to waft over the ether.
Distortion is the enemy because the panel is largely flat. It is important not to weld into sharp corners because this causes a heat build up and
consequent buckling. So the first job was to enlarge the cut out with some large radius bends and I also tried to use the swage as a stiffener. For
some reason the new swage came out a bit wonky which I don't really understand why. The next job was to cut out the blank and put in the swage.
Cut oversize and then litle by little sanded until it was the best possible fit with minimal gaps. After inserting it I clamped it so that it was
flush and where it was exactly flush put in a tack. At each point hammer and dolly to make sure all was flush for the next tack and so on. Filling in
the gaps was done in many different steps each run being no more than 10mm and the weld immediately cooled with a damp (not wet) rag to absorb the
heat.
Not quite the invisible repair that I has hoping for but bearing in mind where the panel will be fitted I don't think it will show up unless
you're looking for it.


|
|
|
Mr Whippy
|
| posted on 29/10/20 at 10:06 PM |
|
|
How are you forming the beads in that panel? Is it using one of those hand cranked machines I see for about £100? I have to also fabricate an engine
bulkhead and trans tunnel for the 2b and those would help stiffen up the sheets hugely before welding and allow me to use thinner sheet. Advice much
appreciated, thanks.
|
|
|
John Bonnett
|
| posted on 30/10/20 at 07:33 AM |
|
|
quote:
Originally posted by Mr Whippy
How are you forming the beads in that panel? Is it using one of those hand cranked machines I see for about £100? I have to also fabricate an engine
bulkhead and trans tunnel for the 2b and those would help stiffen up the sheets hugely before welding and allow me to use thinner sheet. Advice much
appreciated, thanks.
I'm using a bead roller, hand cranked, that I bought quite a few years ago secondhand from a machinery dealer for about £350. I think it's
Edwards although there is no label. As you can see, I'm no expert and some practise is needed to get the best results. As with all tools the
advice is to try to avoid DIY quality and buy the best you can possibly afford.
You'll find some good information on using bead roller and tooling on Lazze's YouTube channel
https://www.youtube.com/watch?v=4jT7jjC6_MU
This one from Eastwood looks very good
https://www.frost.co.uk/eastwood-elite-8in-heavy-duty-bead-roller/?awc=18872_1604045478_8f47cc0ae221000a5da88fcc426ee63c
[Edited on 30/10/20 by John Bonnett]
[Edited on 30/10/20 by John Bonnett]
[Edited on 30/10/20 by John Bonnett]
|
|
|