Mansfield
|
| posted on 5/1/07 at 07:38 PM |

|
|
Welding trials destruction photos
I have been trialing my welding abilities prior to the main event with my poor underpowered Clarke 105EN.
All of the destruction tests I did show failure of the parent metal and although penetration could be more convincing, I am pleased with the
results.
I dont know how to post multiple pictures so its 3 seperate posts with comments.
What do you think?
 
Rescued attachment P1050043a.jpg
|
|
|
|
|
Mansfield
|
| posted on 5/1/07 at 07:40 PM |
|
|
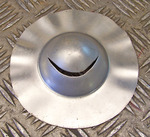
This was probably my neatest, you will see the extent of the penetration in the next picture.
 
Rescued attachment P1050039a.jpg
|
|
|
Mansfield
|
| posted on 5/1/07 at 07:42 PM |
|
|
I should have cut through the 45deg weld instead of the 35deg weld but it looked too pretty to destroy it. I suspect I will have better than halfway
penetration on the uncut weld, but hte welder wont go any higher.
 
Rescued attachment P1050038a.jpg
|
|
|
Mansfield
|
| posted on 5/1/07 at 07:44 PM |
|
|
105EN on MAX, 0.6mm wire, pushing the weld as advised by the kind folks on here - special thanks to Mark Allanson.
|
|
|
jollygreengiant
|
| posted on 5/1/07 at 07:45 PM |
|
|
I would suggest, a little bit slower on the wire speed and a bit slower traveling along the work piece. Other than very good.
Beware of the Goldfish in the tulip mines. The ONLY defence against them is smoking peanut butter sandwiches.
|
|
|
Avoneer
|
| posted on 5/1/07 at 07:46 PM |
|
|
I can't see much wrong with them.
Bloody nice welds actually.
Pat...
|
|
|
ayoungman
|
| posted on 5/1/07 at 07:57 PM |
|
|
Get started on the real thing now if I were you. They look just fine to me. HTH
"just like that !"
|
|
|
nitram38
|
| posted on 5/1/07 at 07:57 PM |
|
|
Very nice!
You can knock the weld splatter balls off by sliding the edge of a file against them at right angles, or use anti splatter spray before you weld. 
|
|
|
Mansfield
|
| posted on 5/1/07 at 07:58 PM |
|
|
Thanks for the nice comments - I would love to go slower its happening too quick for me as I think like a gas welder. I will try that next time.
|
|
|
DIY Si
|
| posted on 5/1/07 at 08:29 PM |
|
|
Looks good. Don't be afraid of upping the power either. I found it easier to run with a higher power (Sip 130T on 5th setting) and a lower wire
speed (somewhere in the first 1/8 of the dial). May just be me odd though, wouldn't be the first time!
Let your plans be dark and as impenetratable as night, and when you move, fall like a thunderbolt.
Sun Tzu, The Art of War
My new blog: http://spritecave.blogspot.co.uk/
|
|
|
Danozeman
|
| posted on 5/1/07 at 08:29 PM |
|
|
They look good to me nice and neat. Maybe knock the wire speed down just a touch.
As said the splatter is easily removed with a tap.
You can crack on building it now...
Dan
Built the purple peril!! Let the modifications begin!!
http://www.eastangliankitcars.co.uk
|
|
|
RazMan
|
| posted on 5/1/07 at 08:45 PM |
|
|
I only wish I could weld that nicely 
What are you waiting for? ............ get building !! 
Cheers,
Raz
When thinking outside the box doesn't work any more, it's time to build a new box
|
|
|
rebelrider
|
| posted on 5/1/07 at 10:29 PM |
|
|
I suggest leaving your settings as they are there is no visible signs of cold lap or to much under cut if you turn your wire speed down much more the
under cut of the parent material will get worse. keep up th good work.
|
|
|
RazMan
|
| posted on 6/1/07 at 12:19 AM |
|
|
Whooaaa rebelrider 
Can you reduce your avatar size to 200 wide and not 1600
Cheers,
Raz
When thinking outside the box doesn't work any more, it's time to build a new box
|
|
|
907
|
| posted on 6/1/07 at 01:03 AM |
|
|
Hi
May I complement you on your inspection technique?
Cutting welds open is much more scientific than bashing them with hammers.
Super.
Paul G
|
|
|
rebelrider
|
| posted on 7/1/07 at 05:36 PM |
|
|
ooooer was a trifle big wasnt it
|
|
|
Mark Allanson
|
| posted on 7/1/07 at 08:12 PM |
|
|
Welds look fine and easily strong enough and neat.
Tiny insignificant criticism, the red arrow shows a little bit of insufficient penetration - not a problem in this case though.
I agree with 907, slicing the welds, especially at the corners or the start/stop of the welds can be very enlightening, file them smooth and then
polish with 1000WD and examine with a loup (you should etch with nitric acid to show the granular structure, but getting the stuff without getting
arrested by the anti terrorism police is a problem ) )
 
Rescued attachment Penetration.jpg
If you can keep you head, whilst all others around you are losing theirs, you are not fully aware of the situation
|
|
|


%20(WinCE).JPG)