DaveFJ
|
| posted on 19/2/07 at 11:59 AM |

|
|
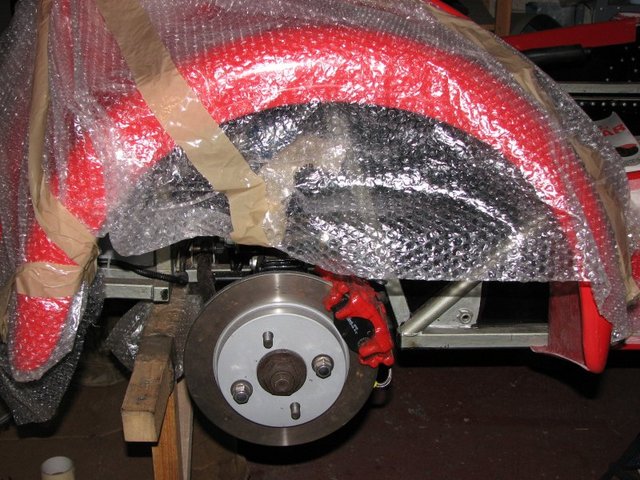
Got my bodywork at last!
Got my bodywork at last!
Seems to fit OK - certainly better than i was expecting after all the horror stories on here!
A little annoyed that the bonnet are all now 'zetec' bonnets with a bulge on the side....
Bonnet also seems to be very long (about 3 inches to cut off)
I can't quite work out what needs to be 'adjusted' to allow the front corner zetec bulge to sit down on the nose cone.
Anyone fitted this type of bonnet and got any hints?
Also the returns on the wrap over part where you get in/out of the car are about 3 inches long. - just wondering how much to cut them down by? I can
fit the body work and get it sit almost all the way down on one side and completely the other but there is a bit of strain on the returns so possible
source of cracking.....
It looks almost like a car now!!! 
 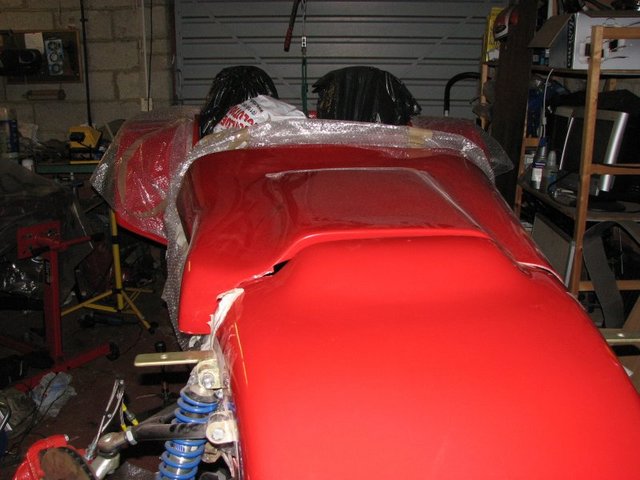
bodywork1
Bodywork2
[Edited on 19/2/07 by DaveFJ]
Dave
"In Support of Help the Heroes" - Always
|
|
|
|
|
macnab
|
| posted on 19/2/07 at 12:10 PM |
|
|
should pass the SVA easily will all that bubble wrap, no sharp edges at all
|
|
|
macnab
|
| posted on 19/2/07 at 12:11 PM |
|
|
what a relief not having to paint it
looks good
|
|
|
ayoungman
|
| posted on 19/2/07 at 12:11 PM |
|
|
Nice one. I think the priority is to ensure the rear wheel arches are centred properly. I've got one of the earlier bonnets without the bulge,
so I'm afraid I can't help . Maybe Tiger are improving on the bodywork of the Avon.
As per the returns on the sides, Mine were trimmed right back to about 15mm, enough to locate over the top tubing.
[Edited on 19/2/07 by ayoungman]
|
|
|
DaveFJ
|
| posted on 19/2/07 at 12:22 PM |
|
|
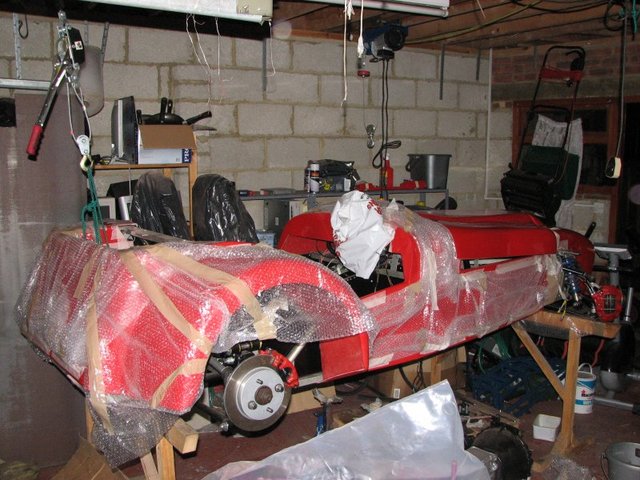
flash lines wll need quite a bit of work and there are a few defects but they are all in 'out of sight areas...
rear arches seem to wrong at first sight (not tried fitting a tyre) but it may be that, despite my best efforts, my wishbones are on wrong.....
Also my dash seems a little rearward.. i have seen other Avons with the Sierra hazard swith on top of the columnn nut mine sits halfway into the
dash....?
so - some fiddling to do yet!
rear arch
Dave
"In Support of Help the Heroes" - Always
|
|
|
soggy 3
|
| posted on 19/2/07 at 12:31 PM |
|
|
now the fun starts
|
|
|
soggy 3
|
| posted on 19/2/07 at 12:34 PM |
|
|
I wondered why you hadnt updated your website i presumed you already had the bodywork.
|
|
|
ayoungman
|
| posted on 19/2/07 at 02:03 PM |
|
|
I'll photo mine tonight to give you some reference points if thats helpful. I think that no two Avons are going to be the same tho'
The pedal support bracket that goes up and over the top of the pedal assembly is flush with the bulkhead on mine. Don't cut anything yet until
you've seen the rear wheel arch positions though. Resist the temptation to get the thing on until your certain about it being right. I put mine
on and was probably a little too keen
My overlaps are like this, the grp is quite thick, so they don't fit onto the tubes
enough.link to archive
[Edited on 19/2/07 by ayoungman]
"just like that !"
|
|
|
DaveFJ
|
| posted on 19/2/07 at 02:08 PM |
|
|
Good to hear...
my bulkhead is against the support bracke so it sounds like it is in the same position as yours. Ihave not cut away the areas yet where the roll bar
fits and the GRP lines up with the crossmember quite nicely - although about 5mm above it!
Has no-one else fitted the new style bonnet 
Dave
"In Support of Help the Heroes" - Always
|
|
|
scoobyis2cool
|
| posted on 19/2/07 at 02:21 PM |
|
|
I'm sorry but how can anyone be expected to pay any attention to your post when you have an avatar like that? 
Pete
It's not that I'm lazy, it's that I just don't care...
|
|
|
macnab
|
| posted on 19/2/07 at 03:00 PM |
|
|
hmm why not double its size!! just for extra effect
|
|
|
Howlor
|
| posted on 19/2/07 at 03:13 PM |
|
|
Go careful with those luv otherwise you might av someones eye owt!
|
|
|
Avoneer
|
| posted on 19/2/07 at 06:05 PM |
|
|
The Zetec bonnet has been around since the start.
Me and three of my mates were one of the first to buy Avons (pre-radiator brackets being fitted to the chassis).
One of them had a Zetec and bonnet was as poor a fit as any Tiger with the "engineered" gap to let under bonnet heat out on each side.
But it will go (sort of) with a bit of fiddling.
Like "ayoungman" said - don't do anything until you get the wheels on and base everything around getting the wheels central in the
arches.
And when you get it on its wheels, don't swear when you realise that Tiger are still supplying front shockers that are too short and rest on the
bump stops when the bones are horizontal - another Tiger feature.
I had to trim my sides where they lip over right back to the top of the tubes (read - no overhang at all). The internal diameter of the lip was less
than the tube it was trying to hook over!
Good luck.
Pat...
No trees were killed in the sending of this message.
However a large number of electrons were terribly inconvenienced.
|
|
|
tractorboy
|
| posted on 19/2/07 at 08:08 PM |
|
|
coming along nicely dave . not quite so climbing frame-esque now . the bodywork looks like a big improvement on the early ones. hope to catch up with
you soon .cheers scott
|
|
|
Rudy
|
| posted on 19/2/07 at 08:38 PM |
|
|
My Avon will have the Sierra hazard swith positioned ok becouse I modified steering supports, before it was like yours. So do not rivet it now becouse
maybe you will have to remove it again.
A question: what is flash lines?
Sorry about my English
|
|
|
Lightning
|
| posted on 19/2/07 at 09:36 PM |
|
|
It looks the same colour as my one was. If its any help I found that the colour match was Mitsubishi Monza red.
If your bonnet is 3" long, that is a good thing as mine was a bit too short.
See my archive.
By the way, the guy that bought my car has knocked out 2nd gear. Hes putting in a 2005 engine. Thats engine no.3!
Steve
|
|
|
DaveFJ
|
| posted on 19/2/07 at 10:11 PM |
|
|
Gaaarrrrrggghhhhh
I don't know where I am going wrong now.....
The rear arches were so far out (tyre almost touching rear arch) that I figured the suspension must be put together wrong......
so.. I turned the bottom wishbone over so that the weld line was forward... this has resulted in no change in position except the rose joints are hard
up against the rear of the mounting points......
tried flipping the top bone and it was way off lining up...
only thing I can think of now is trying to swap the rear hub carriers.... but they must be right surely because the calipers are where everyone else
has them......?
really annoyed - thought I had the suspension sussed!
Dave
"In Support of Help the Heroes" - Always
|
|
|
Avoneer
|
| posted on 19/2/07 at 10:48 PM |
|
|
Welds to the back.
Pat...
No trees were killed in the sending of this message.
However a large number of electrons were terribly inconvenienced.
|
|
|
shades
|
| posted on 19/2/07 at 11:08 PM |
|
|
Dave, I had the same problem with the wheel sitting too far back in the arch. There is a before and after pic in my archive. I also havs a sketch on
how I have set up the wishbones and where the welds go... Looking good in red though
Thanks
Adrian
|
|
|
Ian D
|
| posted on 21/2/07 at 10:59 PM |
|
|
Dave,
In the book it quotes a distance from the front of the scuttle to the front of the battery tray. Check this and see what you have got. Mines resting
on but the Ford hazzard switch is under the dash. Ive cut it off. At the rerar of the cockpit mine does not rest down on the rollbar tube. I spoke
with Tiger who said that right. Im looking at how I undr fill this gap and get a finish.
Not had the courage to drill and fix it yet.
Ian
|
|
|
DaveFJ
|
| posted on 22/2/07 at 08:42 AM |
|
|
Well, I have had my suspension off on one side and tried every possible combination with no effect....
I have returned it all to the way it was because I beleive this was correct according to everything I have read on here.....
I tried moving the bodywork backward as far as i could sensibly and the wheel is better but still not central.
so i am puzzled. the rear lip is about .5" above the flat plate it is supposed to rivet to but if I lift it an extra .5" the wheel arch
lines up beautifully!
seriously considering packing it out with a 1" piece of ERW.....
I am no where near final fixing yet because I still need to get a roll bar fabricated and need to do a few other minor jobs before it can finally go
on for good. So I'm not really pressed to get it right immediately but, I wanted to get it fettled and into position so that it is ready when i
am!
Dave
"In Support of Help the Heroes" - Always
|
|
|
carlgeldard
|
| posted on 22/2/07 at 09:17 PM |
|
|
Happy days I remember it well. I'm sure the bodywork is supposed to if a different chassis. Glad to see some things haven't changed. I
wouldn't like to give any advice on how to fit yours without seeing some decent photos but I very much doubt you need any 1" packing just
more cutting and trimming.
Carl
[Edited on 22/2/07 by carlgeldard]
|
|
|
carlgeldard
|
| posted on 22/2/07 at 09:22 PM |
|
|
Photo 6 might answer some of your questions.
Avon bodywork
Carl
[Edited on 22/2/07 by carlgeldard]
|
|
|
soggy 3
|
| posted on 23/2/07 at 01:11 AM |
|
|
How well did the test go did you pass first time?
|
|
|
carlgeldard
|
| posted on 23/2/07 at 02:40 PM |
|
|
Yes first time pass
Here!!!!!!!
Carl
PS This was a long time ago now.
|
|
|


%20(WinCE).JPG)