Markp
|
| posted on 16/8/23 at 08:00 PM |

|
|
3d printer
Has anyone used their printer to make anything for the cars? Loads of possibilities now. Id like to make a fuse holder lid 😂
|
|
|
|
|
Slimy38
|
| posted on 17/8/23 at 07:23 AM |
|
|
I did... and it melted!!!
Longer version, I needed a phone holder, so I drew something out with Fusion 360, then printed it out with PLA. After a reasonably warm day, I found
my phone no longer fitted. Essentially the average car environment exposes printed objects to temperatures that are higher than the glass transition
temperature of PLA (around 60 degrees). I reprinted it with ABS which has a higher temperature of 105, and that has worked fine. The only problem is
that my 3d printer (an Anet A8) really struggles with ABS so it took several attempts to come up with something that actually stayed in the shape I
wanted.
I would expect a fuse holder lid would work fine, but given under bonnet temps will quite easily exceed 60 degrees then you'll need to do it in
something more than PLA.
|
|
|
christim
|
| posted on 17/8/23 at 09:48 AM |
|
|
Yes! It's a game changer especially for custom builds
As above, PLA is no good because of the heat. I'm using PETG which turns out fine on my Ender 3 S1
So far I've made a mount for the idle air control valve to go onto the plenum:
Draft in PLA

Final in PETG

Some air duct vent flanges:

Electric conduit y connectors:

And currently designing a duct to get air to the heater from the filter box:

|
|
|
coyoteboy
|
| posted on 17/8/23 at 10:13 AM |
|
|
I made a replacement bonnet release lever but I don't own a 3D printer - always seemed like too much of a faff so I outsourced it. These days,
the MOQ costs and postage costs are making it seem more sensible to own one.
|
|
|
BenB
|
| posted on 17/8/23 at 11:58 AM |
|
|
Agree PETG is a nice option as temp resistant- surface finish isn't quite as nice in my experience. ABS just needs careful handling and
preferably heated chamber. For small parts I've found it works well.
I created a custom heater duct using mine. 3d printing really shines in this kind of application. It was a complex lofted shape and CNCing it out of a
chunk of something would be horrendous.
What I want to try next is making custom inlet trumpets using 3d printed wax, investment casting and a big jug of molten ali!!! I'm somewhat wary
of the furnace etc required especially after watching a video of something inadvertently putting wet ali into a furnace!! Quite spectacular molten
aliminium fountain as the water immediately turned to steam.
Recently I got into CNC and if wasn't for the tricky shape of inlet trumpets I'd consider making them on my CNC mill. Trouble is the long
tubular nature doesn't really lend itself to a mill. CNC lathe would be great. Except I don't have one of those yet  I should just bite
the bullet and get a furnace- if nothing else I'd be able to make use of the mill chips! I should just bite
the bullet and get a furnace- if nothing else I'd be able to make use of the mill chips!
|
|
|
coyoteboy
|
| posted on 17/8/23 at 12:30 PM |
|
|
CNC lathe is a cnc mill lying on its back with the tool and part swapped. Lots of folk run mills as lathes with some careful reconfiguring g
|
|
|
brumster
|
| posted on 17/8/23 at 07:44 PM |
|
|
Lots of 3D printed bits on mine too... and some CNC milled stuff too!
Mocked up a badge (got the final one printed online as finish is quite important on something like a badge)....


Fog lamp IVA angle spacers....

PCB stand-offs for fuse board....

Heater matrix inlet duct that takes air from the top of the bonnet line into the windscreen demisters...

...and the windscreen ducts themselves...

Load spreaders for the wing mirrors (helps reduce mirror shake massively)

The small air inlet scoop for the heater....

IVA seat belt mount covers (these were temporary, obviously!)

A re-profiled throttle linkage to get full WOT on the throttle bodies with my pedal movement....

|
|
|
Mr Whippy
|
| posted on 18/8/23 at 07:52 AM |
|
|
Getting a 3D printer and learning a simple 3D modelling software like tinkercad (also free) is a great investment and opens up endless
possibility's that you have not even considered. Filaments are constantly evolving and there's one for almost any requirement now. These
days i have three printers almost in constant use building my rc models, components, usually for other people (as once people find out that you have
one...) and now even a full size Dalek!
The Enders are great budget printers, their only limit is the size they can print but most items are build from components so that isn't really
an issue. All my machines are from Creality which is a good make.
Take the plunge you won't regret it if and ONLY IF you put in the effort to master them. One caveat, I do know a lot of people, mostly engineers,
who bought printers and it ended up sitting unloved on a shelve but the route cause for that was simply they did not make any attempt to learn how to
use it properly and it is a steep (near vertical) learning curve. But Youtube is your fiend for when (not if) you have a problem, or just ask on here!
|
|
|
Steef74
|
| posted on 18/8/23 at 01:20 PM |
|
|
I agree, I bought a elegoo neptune plus. It has a build volume of 32x32x40 cm which can print most of stuff.
I first wanted to print a new steering cowl, when uploading a model online they charge around 90 euro's...
So buying one yourself is cheaper if you are planning to print a lot.
I mainly use Polymaker ASA which has the strength of ABS and is heat resistant ( up tp 90 degrees) and UV resistant.
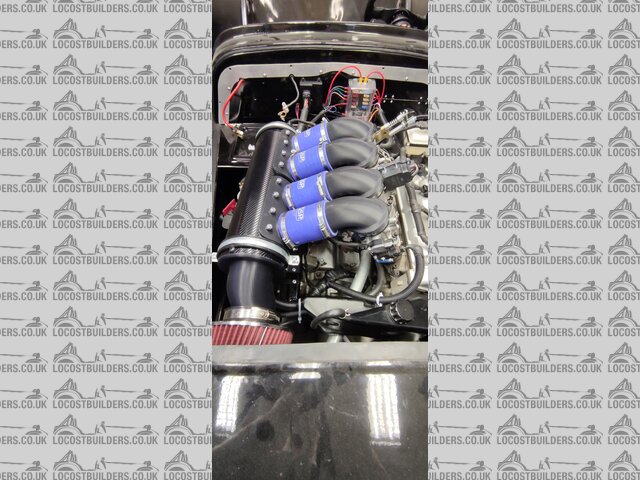
I printed a Air injection inlets, airbox, steering cowl and a lot of bits and pieces.
I use fusion 360, with a free student license.. easy to learn and a lot of video's on youtube.
I also put the printer in a enclosed case, with a temp meter and smoke detector. It is important to keep a steady temp when printing abs or asa.
Otherwise you can have bad layer adhesion or cracks..
recently added a raspberry Pi with octoprint, so I can monitor my prints with a webcam and add some nice plugins...
 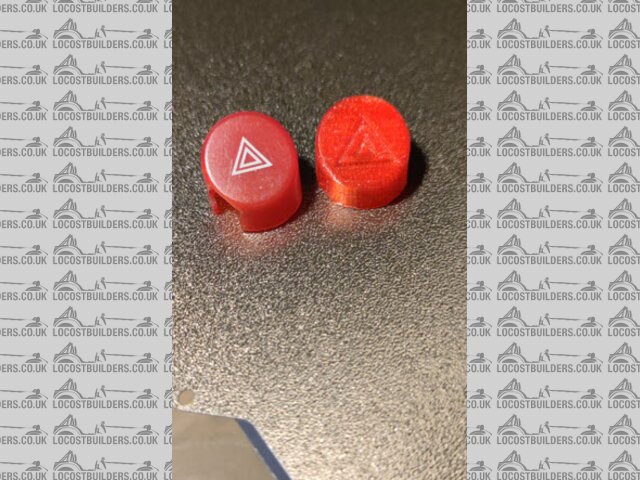
warningbutton
Description
[Edited on 18/8/23 by Steef74]
|
|
|
Mr Whippy
|
| posted on 18/8/23 at 01:58 PM |
|
|
Sounds like you are doing great work, the inlets are impressive. If the material handles that then most car parts are possible.
[Edited on 18/8/23 by Mr Whippy]
|
|
|
Slimy38
|
| posted on 18/8/23 at 05:07 PM |
|
|
quote:
Originally posted by brumster
IVA seat belt mount covers (these were temporary, obviously!)
I like that idea, just ripe for falling off post-IVA...  Did the inspector comment on them? Did the inspector comment on them?
|
|
|
coyoteboy
|
| posted on 21/8/23 at 10:27 AM |
|
|
quote:
Originally posted by Mr Whippy
Take the plunge you won't regret it if and ONLY IF you put in the effort to master them. One caveat, I do know a lot of people, mostly engineers,
who bought printers and it ended up sitting unloved on a shelve but the route cause for that was simply they did not make any attempt to learn how to
use it properly and it is a steep (near vertical) learning curve. But Youtube is your fiend for when (not if) you have a problem, or just ask on here!
lol, engineers are the only people I can imagine who care enough to spend that much time perfecting the mess that calibration and setup seems to be
with cheap units. Most non-engineers I meet who have one create horrible stringy messes and give up and post it on ebay within a month.
The problem I see with the FDM printers is the very obvious layer pattern in parts, which seems to be ubiquitous in cheap home printers. SLS creates
much more pleasant and usable finish visually but they're beyond DIY costs.
[Edited on 21/8/2023 by coyoteboy]
|
|
|
Mr Whippy
|
| posted on 21/8/23 at 10:57 AM |
|
|
quote:
Originally posted by coyoteboy
quote:
Originally posted by Mr Whippy
Take the plunge you won't regret it if and ONLY IF you put in the effort to master them. One caveat, I do know a lot of people, mostly engineers,
who bought printers and it ended up sitting unloved on a shelve but the route cause for that was simply they did not make any attempt to learn how to
use it properly and it is a steep (near vertical) learning curve. But Youtube is your fiend for when (not if) you have a problem, or just ask on here!
lol, engineers are the only people I can imagine who care enough to spend that much time perfecting the mess that calibration and setup seems to be
with cheap units. Most non-engineers I meet who have one create horrible stringy messes and give up and post it on ebay within a month.
Possibly, but in my experience, it's modelers like myself who are the primary users of these machines as they are a total gift when it comes to
that. Out of my offices entire engineering team none of them had managed to do anything more than printing some novelty gifts, usually rude ones
They are quite simple to use once you understand how they actually function and how to deal with bed adhesion. People do tend to give up too easily
when it goes wrong.
|
|
|
coyoteboy
|
| posted on 21/8/23 at 11:20 AM |
|
|
I think the problem with engineers like myself using them is that in order to get a properly toleranced, strong, functional part is very hard and
might take multiple attempts. 10 hours of setup time eclipses the cost of buying from a 3d printing company. That's why I outsource for sure,
especially small stuff. But as the part size increases the line blurs. I was recently quoted 350 for a small dash bezel 250x150x20mm, at which point I
start to rethink. 😊
|
|
|
Mr Whippy
|
| posted on 21/8/23 at 11:58 AM |
|
|
Yeah getting companies to print your stuff of like Shapeways can be a very expensive way to use 3d printing that's for sure, practically printing
money.
|
|
|
Slimy38
|
| posted on 21/8/23 at 12:32 PM |
|
|
quote:
Originally posted by Mr Whippy
They are quite simple to use once you understand how they actually function and how to deal with bed adhesion. People do tend to give up too easily
when it goes wrong.
For me it's the totality of the failure. Things like bed adhesion, extruder collisions, that sort of thing. It just takes one 'hiccup'
to turn several hours of work into spaghetti.
Things that are my own mistakes I can live with. To much overhang, part orientation based on expected loads, forgetting to set the 'iron last
layer' flag, that sort of thing. That for me is an engineering process where you learn from your mistakes. But when you have everything spot on
and for some random reason it decides that the third identical print of the day will slide straight off your bed, that's when it starts to be
hard work.
|
|
|
harmchar
|
| posted on 28/8/23 at 11:29 AM |
|
|
[img]https://ibb.co/86Hz1yS[/img]
zzr1100 carb tops. Printed in PETG and painted to suit colour scheme.
 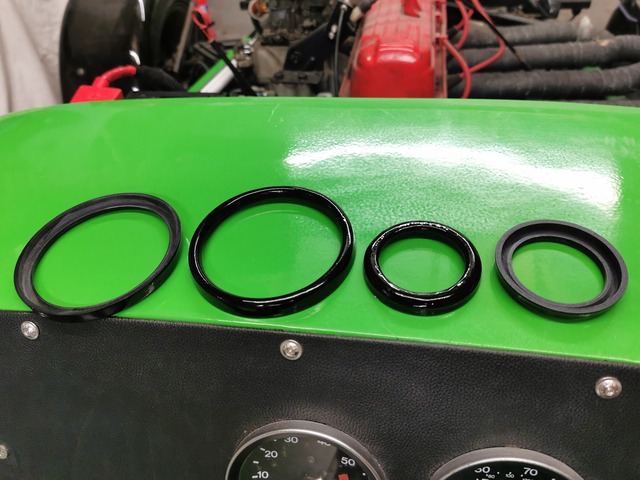
Description
IVA friendly dial covers with round edge.
[Edited on 28/8/23 by harmchar]
|
|
|
Mr Whippy
|
| posted on 28/8/23 at 12:07 PM |
|
|
quote:
Originally posted by Slimy38
quote:
For me it's the totality of the failure. Things like bed adhesion, extruder collisions, that sort of thing. It just takes one 'hiccup'
to turn several hours of work into spaghetti.
Things that are my own mistakes I can live with. To much overhang, part orientation based on expected loads, forgetting to set the 'iron last
layer' flag, that sort of thing. That for me is an engineering process where you learn from your mistakes. But when you have everything spot on
and for some random reason it decides that the third identical print of the day will slide straight off your bed, that's when it starts to be
hard work.
Thinned cheap white glue & water, about 10% glue. That's it the secret to bed adhesion. Forget all the BS hairspray, gluestick crap, just
smear it on, heat the bed to 60 degs and let it dry then print. I've printed over 50kgs of parts (now loosing track) never have adhesion
failures. Also -
1) check in the slicer that layer 1 actually touches the bed
2) check you level the part in the slicer relative to the bed which is just a selection setting in the part rotation menu in Cura
3) use a brim on parts that have corners, on large parts I take it out to 10 lines
4) use Z-hop over printed parts to avoid extruder collisions
5) use Tree for supports as they are brilliant (should be default)
Many of my prints last almost a week so you need to be confident you have the setup correct
|
|
|
coyoteboy
|
| posted on 28/8/23 at 01:30 PM |
|
|
quote:
Originally posted by Mr Whippy
quote:
Originally posted by Slimy38
quote:
For me it's the totality of the failure. Things like bed adhesion, extruder collisions, that sort of thing. It just takes one 'hiccup'
to turn several hours of work into spaghetti.
Things that are my own mistakes I can live with. To much overhang, part orientation based on expected loads, forgetting to set the 'iron last
layer' flag, that sort of thing. That for me is an engineering process where you learn from your mistakes. But when you have everything spot on
and for some random reason it decides that the third identical print of the day will slide straight off your bed, that's when it starts to be
hard work.
Thinned cheap white glue & water, about 10% glue. That's it the secret to bed adhesion. Forget all the BS hairspray, gluestick crap, just
smear it on, heat the bed to 60 degs and let it dry then print. I've printed over 50kgs of parts (now loosing track) never have adhesion
failures. Also -
1) check in the slicer that layer 1 actually touches the bed
2) check you level the part in the slicer relative to the bed which is just a selection setting in the part rotation menu in Cura
3) use a brim on parts that have corners, on large parts I take it out to 10 lines
4) use Z-hop over printed parts to avoid extruder collisions
5) use Tree for supports as they are brilliant (should be default)
Many of my prints last almost a week so you need to be confident you have the setup correct
A week?! Yikes. High stakes!
|
|
|
harmchar
|
| posted on 28/8/23 at 03:56 PM |
|
|
Just noticed that one of my uploaded photos never worked. Are you guys able to add photos to your archive folders?
|
|
|
Mr Whippy
|
| posted on 29/8/23 at 06:05 AM |
|
|
quote:
Originally posted by harmchar
Just noticed that one of my uploaded photos never worked. Are you guys able to add photos to your archive folders?
The link that use to show the picture at full size does not seem to work for me, instead i use the one that zooms.
|
|
|
Slimy38
|
| posted on 29/8/23 at 07:13 AM |
|
|
quote:
Originally posted by Mr Whippy
1) check in the slicer that layer 1 actually touches the bed
2) check you level the part in the slicer relative to the bed which is just a selection setting in the part rotation menu in Cura
3) use a brim on parts that have corners, on large parts I take it out to 10 lines
4) use Z-hop over printed parts to avoid extruder collisions
5) use Tree for supports as they are brilliant (should be default)
Many of my prints last almost a week so you need to be confident you have the setup correct
Great points, thank you. This is what I have;
1. Yeah, the first layer I do with a visible 'squish', that seems to be the most effective for me.
2. Yep, I made that mistake very early on, including managing to print a part right on it's corner!! Now I determine the bed surface in Fusion
360 and continue it from there.
3. Brims work well for me too, although I tend to only go for three. Ten seems excessive but I guess if you're not having failures then it must
be right, I'll try and increase it.
4. Z hop failed for me, my carriage doesn't like coming back down. I could do some fettling but often I end up with one thread being out of sync
with the other, and then it binds up. The best option I have is the option to 'go around' the part, I can't remember what it's
called. But even then, when it's actually printing it can sometimes get caught on a previous layer.
5. I try and avoid supports as much as possible, combining with suggestion 2 I can 'mostly' get away with it. Tree is nice to look at, but
again I do often find the tree itself suffers from adhesion as it's usually only one thickness at the base. Once the tree goes over the supported
section just fails and if the tree falls into the part then it just gets worse. I wonder if there is an option to brim the tree, I'll have to
take a look in the settings.
I will try the glue solution, the masking tape option does work for me 95% of the time so that's all I have, direct on the hot bed.
|
|
|
Mr Whippy
|
| posted on 29/8/23 at 12:00 PM |
|
|
I'm wondering if you are oiling the z axis screws? My machines are quite oily using 3 in 1 oil on the screws, roller bearings & feed cogs. I
sounds like yours is too tight. I'd certainly suggest ditching the tape as it's unnecessary and just another thing to fail. Keep at it as
you'll only get better the more you use it!
I was working on the files for my Dalek last night getting them ready for the printer, only around 450 parts to make just for the dome and neck, hmm
that's going to take a while... just ordered more filament
|
|
|
Steef74
|
| posted on 30/8/23 at 02:01 PM |
|
|
I also had some failures, but those were due incorrect Z offset, first layer needs indeed to be squished on the bed.
I recently installed octoprint on a raspberry pi and added a webcam, must say this surely is more comfortable and you can install plugins that can
even stop the print if it sees the part has come off, saving filament
I also order 3KG filaments roles. I KG is quit expensive.
If you order a printer look at:
Temp of the bed and nozzle, the higher the more types you can print like Nylon / carbon enforced ABS.
Direct drive is the way to go, although most are direct drive
Bigger is better, with my printer I can go to max 32x32x40 cm, which will make sure I can print most stuff.
A lot of STL's can be downloaded. but investing time in tinkercad, fusion360 will pay of.
PEI print bed, it really stick well, if offset is correct stuff will not come of.
Buy or build a simple an enclosure, the fumes from ASA, ABS can be nasty. I made one from wood.
An enclosure will also make sure temp is stable which will increase the strength and layer adhesion
Install a fire detector next to the printer ( I have a temp sensor and fire detector in the housing, using ZWave I can remotely shut down the
printer)
Best decision I made for printing parts for my MK Indy so far.
|
|
|
Stot
|
| posted on 1/9/23 at 03:33 PM |
|
|
Among other things, I made some hub caps.
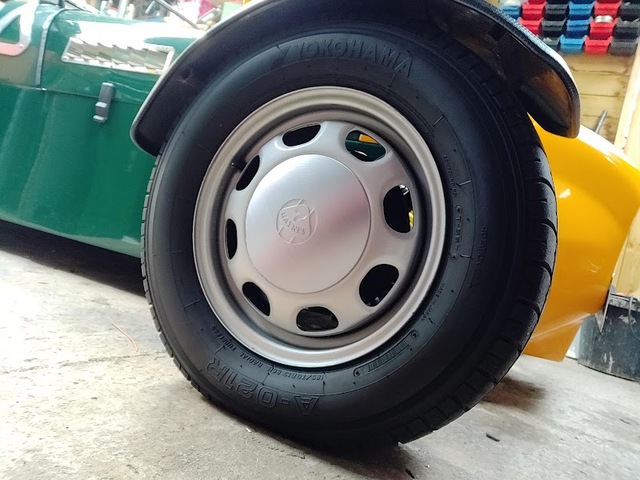
Didnt last long.
Cheers
Stot
|
|
|


