Slater
|
| posted on 27/4/20 at 06:04 PM |

|
|
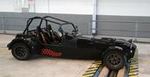
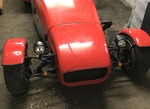
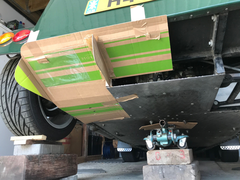
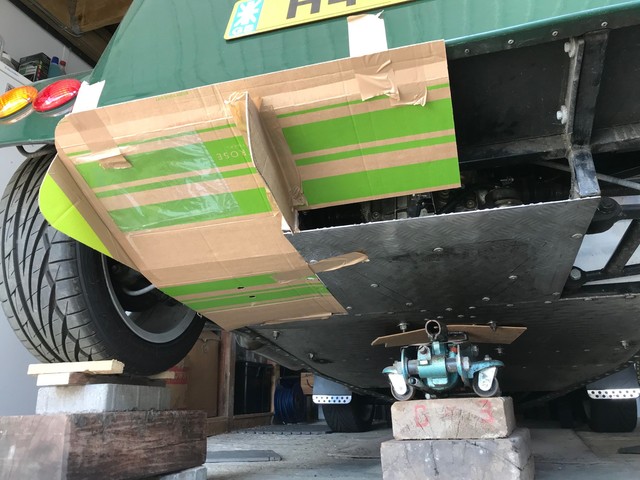
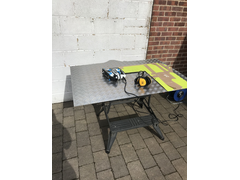
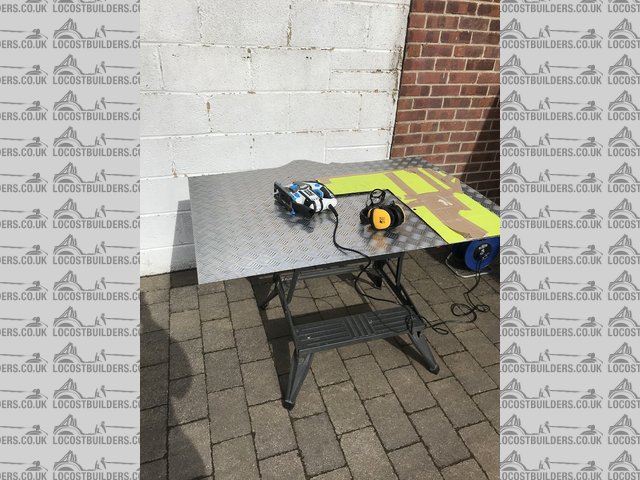
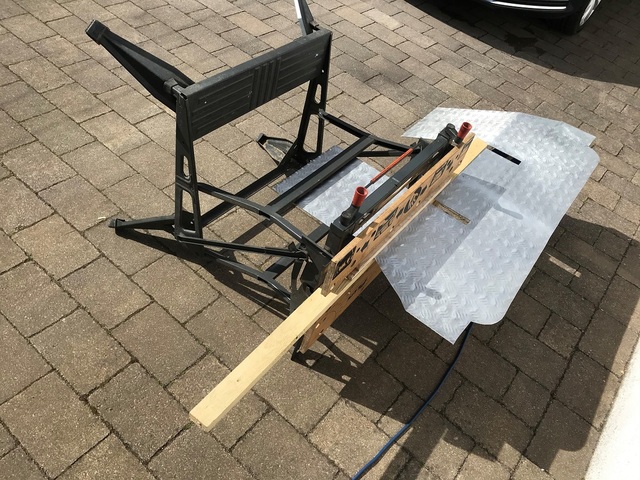
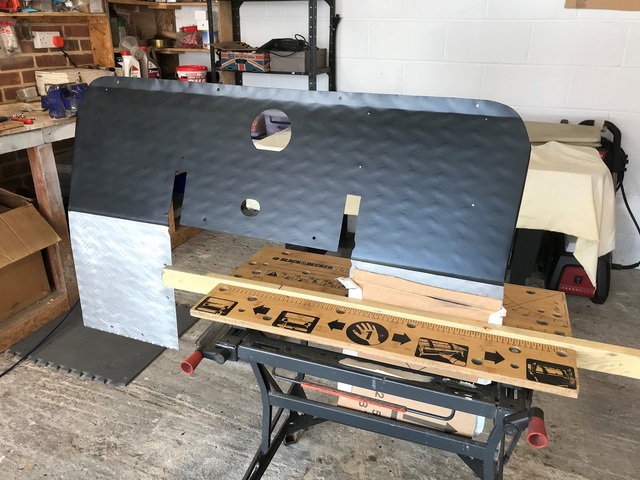
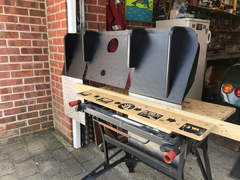
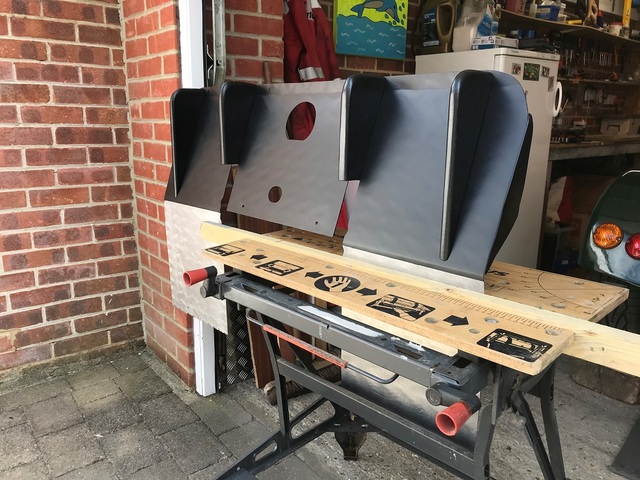
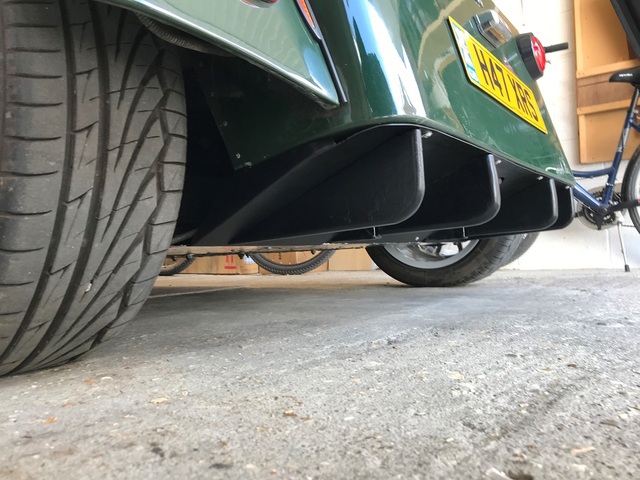
Planning to make rear diffuser
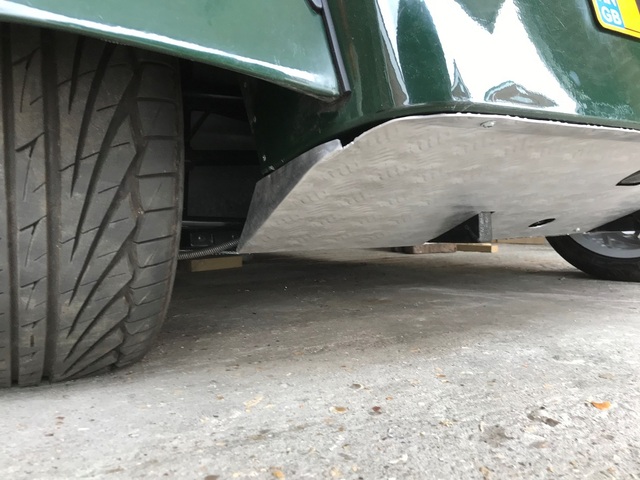
Here is my 1st attempt CAD template of a half rear diffuser, I'm planning on using a sheet of 2mm checkerplate, smooth side down, that I have in
the shed, painted matt black.
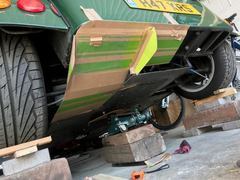
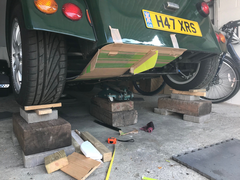
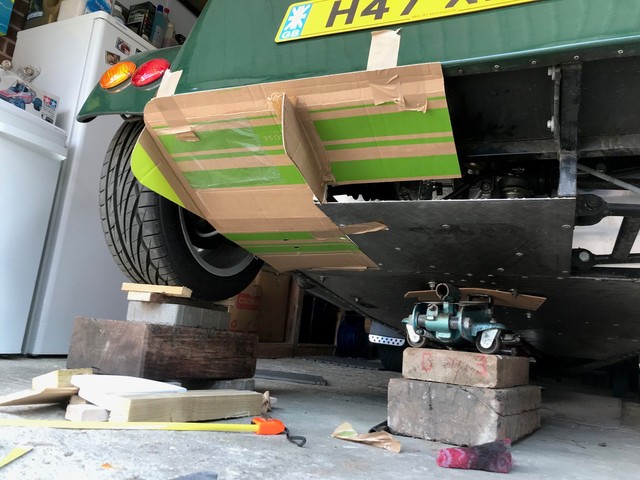
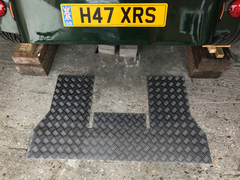
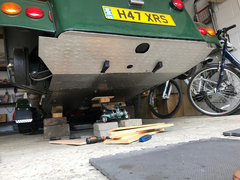
I plan to fit some 1" x 1", 3mm ali angle brackets to the chassis rails then use the face parallel to the ground to mount the diffuser
with screws into rivnuts, so it will flush with existing floor and be easily removable. The rear edge will just go into the rear chassis rail with
screws/steel rivnuts and also 15 mm spacers so some air can escape above the diffuser.
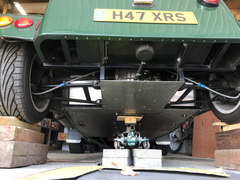
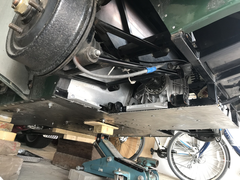
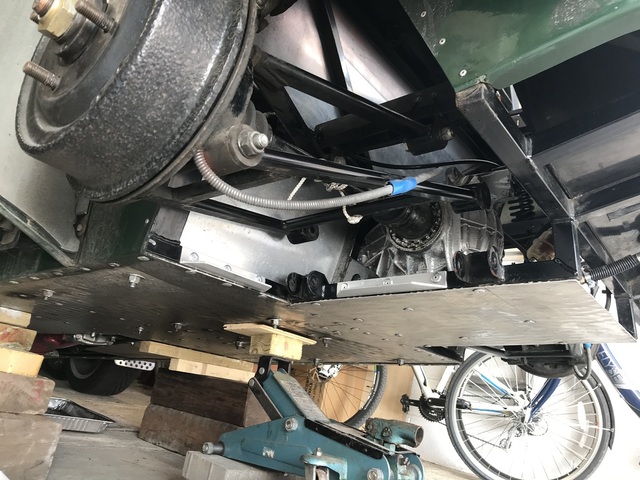
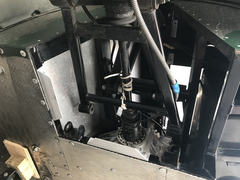
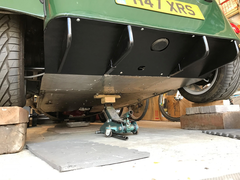
The rear 100mm of the current ali floor under the diff you can see in the pics will be cut on either side and bent up slightly to meet the
diffuser.
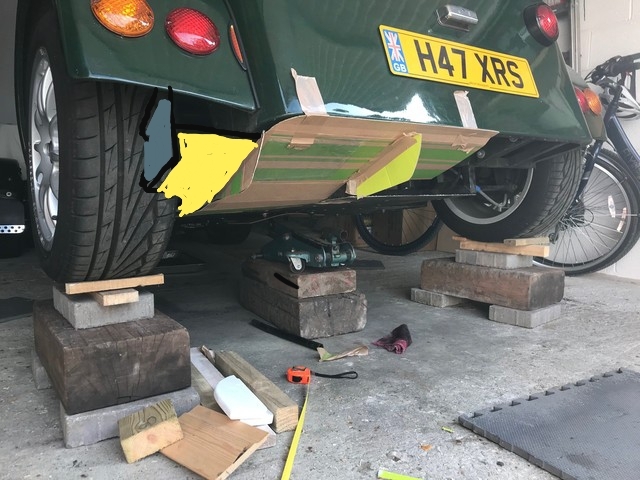
Any comments on the design before I start cutting metal? Note the real one will be full width, not just on the left side. 
The purpose is mainly to tidy up the back end of the car rather than increase the performance, but it will be interesting to see if it makes any
difference, not that I would be able to tell, as I don't often reach the limits of the car.
[img]
Diffuser 1 27Apr20
[/img]
[img]
Diffuser 2 27Apr20
[/img]
[img]
Diffuser 3 27Apr20
[/img]
[img]
Diffuser 4 27Apr20
[/img]
Why do they call Port Harcourt "The Garden City"?...... Becauase they can't spell Stramash.
|
|
|
|
|
Daf
|
| posted on 28/4/20 at 08:55 AM |
|
|
Keep the pictures coming of how you get on - I've got a delivery coming from the metalstore tomorrow and making a diffuser is my job for the
weekend!
|
|
|
roadrunner
|
| posted on 28/4/20 at 12:24 PM |
|
|
I like the look of that.
Would like to make one to out of ABS plastic.

|
|
|
gingerprince
|
| posted on 28/4/20 at 12:39 PM |
|
|
quote:
Originally posted by Slater
Here is my 1st attempt CAD template of a half rear diffuser
Is this Cardboard Aided Design rather than the more common Computer Aided Design? 
|
|
|
roadrunner
|
| posted on 28/4/20 at 01:04 PM |
|
|
|
|
|
nick205
|
| posted on 28/4/20 at 02:39 PM |
|
|
Looks good.
I considered (but never got round to) making one for my MK Indy. I didn't feel so much it would have the effect a diffuser may have on a super
car, but more that it would smooth the airflow under the rear of the car and prevent the rear tub acting like a bit of a parachute whilst you're
driving.
Keep the photos coming please. I don't have my car any more, but am still interested to see how you progress with this. It seems like a decent
use of "lockdown" time to me.
|
|
|
Slater
|
| posted on 29/4/20 at 10:00 AM |
|
|
OK chaps, good plan, I will turn this thread into a wee build thread of the diffuser.
and yes gingerprince, I have used the "cardboard aided design" idea many times during the kit building and modifications.
Why do they call Port Harcourt "The Garden City"?...... Becauase they can't spell Stramash.
|
|
|
nick205
|
| posted on 29/4/20 at 10:21 AM |
|
|
Carboard Aided Design is a well tested and proven technique for moving from ideas to real solutions. I too have used it quite a few times - even been
guilty of dragging cardboard back out of the recycling bin for the purpose
|
|
|
gingerprince
|
| posted on 29/4/20 at 10:34 AM |
|
|
quote:
Originally posted by nick205
Carboard Aided Design is a well tested and proven technique for moving from ideas to real solutions. I too have used it quite a few times - even been
guilty of dragging cardboard back out of the recycling bin for the purpose
Fully approve of the cardboard method, just never heard it referred to as CAD before
|
|
|
nick205
|
| posted on 29/4/20 at 02:18 PM |
|
|
quote:
Originally posted by gingerprince
quote:
Originally posted by nick205
Carboard Aided Design is a well tested and proven technique for moving from ideas to real solutions. I too have used it quite a few times - even been
guilty of dragging cardboard back out of the recycling bin for the purpose
Fully approve of the cardboard method, just never heard it referred to as CAD before
I think that term for it's been around for a few years.
I used to be a CAD engineer working with 2D and 3D software. It's fair to say I spent a little of that time drawing up things for myself
For the home engineer cardboard is a cheap and fast way of testing out shape ideas before committing to metal, wood, etc.
|
|
|
loggyboy
|
| posted on 29/4/20 at 04:56 PM |
|
|
I would consider trying to get it closer to the tyre to seal the gap. Add another fin at the end and maybe leave a small gap under the arch so its not
an airdam.
Diffuseifes
Mistral Motorsport
|
|
|
Nile_rt
|
| posted on 29/4/20 at 05:08 PM |
|
|
I remember from my aerodynamics class that you don't want a diffuser to be any steeper than 7degrees from horizontal.
|
|
|
Daf
|
| posted on 29/4/20 at 07:39 PM |
|
|
quote:
Originally posted by Nile_rt
I remember from my aerodynamics class that you don't want a diffuser to be any steeper than 7degrees from horizontal.
I think a couple of degrees difference on a diffuser on a 7 type car is the least of your worries when you look at the shape of the rest of the car
|
|
|
Slater
|
| posted on 1/5/20 at 01:31 PM |
|
|
Thanks for the extra comments, it's more to clean up the lower rear end of the car than to increase my downforce. The kick up angle is approx 20
degs, which is the minimum I can get within the constraints of the wishbone suspension mounts and bottom of rear tub.
I cut the sheet yesterday using jigsaw with fine saw blade, I still have to finish off the rear corners. I also riveted some brackets onto the chassis
made from Ali angle (1" x 1.5" x 3mm thick). I have some M6 rivnuts / bolts to mount the diffuser onto these brackets. More brackets to
be fitted today....
Before:
[img]
diffuser 1may20
[/img]
[img]
diffuser 13 1May20
[/img]
[img]
diffuser 11 1May20
[/img]
[img]
diffuser 12 1May20
[/img]
[img]
diffuser 14 1May20
[/img]
Why do they call Port Harcourt "The Garden City"?...... Becauase they can't spell Stramash.
|
|
|
Daf
|
| posted on 1/5/20 at 02:20 PM |
|
|
Keep the updates coming - plan on starting mine tomorrow so I need the inspiration! looking good
|
|
|
Slater
|
| posted on 4/5/20 at 07:40 PM |
|
|
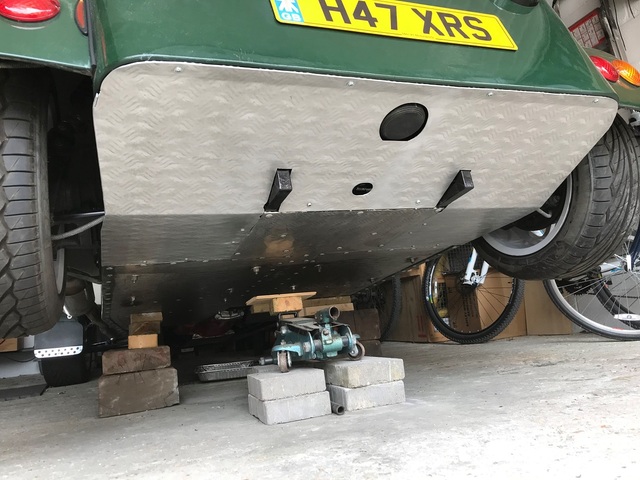
I've added some more brackets, these are at an angle, then spent a while bending, drilling and fettling the ali sheet to fit.
The two main bends I did using my B&D workmate after scoring through the checkers on the sheet with 1mm cutting wheel on grinder, but the bend at
the rear edge was too difficult for the workmate as sheet was too wide and workmate jaws where bending, so I ended up just hanging the rear 30mm over
a bit of wood and beating it with a mallet, not ideal, but I don't know anyone with sheet folder, anyway, it looks Ok after a bit of adjusting
with a pair of adjustable spanners. I had to cut out some sections to clear the fuel tank sump and allow access to my ball valve in the fuel line.
I used M6 Rivnuts fitted to the Ali brackets and have attached it as per last pic. Still have to fix the rear edge, finish off both rear corners,
then make some fins and mount them... and paint it.
[img]
 
diffuser 21 4May20
[/img]
[img]
diffuser 35 4May20
[/img]
[img]
diffuser 22 4may20
[/img]
[img]
diffuser 23 4May20
[/img]
[Edited on 5-5-20 by Slater]
Why do they call Port Harcourt "The Garden City"?...... Becauase they can't spell Stramash.
|
|
|
Daf
|
| posted on 6/5/20 at 10:20 AM |
|
|
Looking good, I like the way you've got cut outs for the chassis around the diff area.
|
|
|
Slater
|
| posted on 10/5/20 at 05:56 PM |
|
|
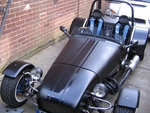
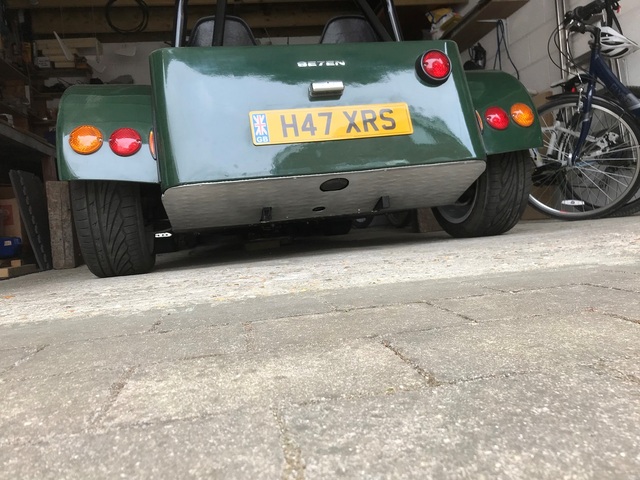
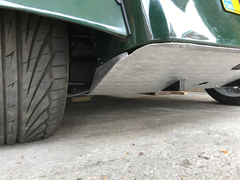
I've tidied up the rear corners, fitted the diffuser and went for an "essential" drive today to the shop for food supplies. It has
transformed the handling, I can go round corners way quicker now and I reckon I could defo drive the car upside down with all the extra downforce.
Seriously though, I'm not sure if it handles any different, but it does seem quieter, maybe as air flow under car is smoother or because the
noisy diff area has been closed in?
[img]
diffuser 1 10May20
[/img]
[img]
diffuser 42 10May20
[/img]
[img]
diffuser 44 10May20
[/img]
I still have got to finish off the fins, fit them and paint it.
Why do they call Port Harcourt "The Garden City"?...... Becauase they can't spell Stramash.
|
|
|
roadrunner
|
| posted on 10/5/20 at 06:43 PM |
|
|
Looks tidy.
Looking forward to seeing the fins fitted.
|
|
|
Slater
|
| posted on 17/5/20 at 12:11 PM |
|
|
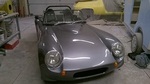
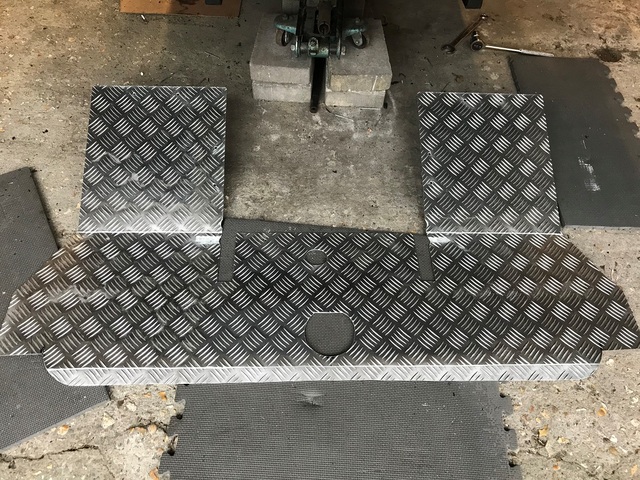
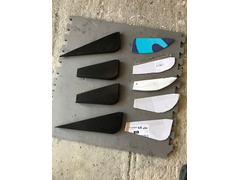
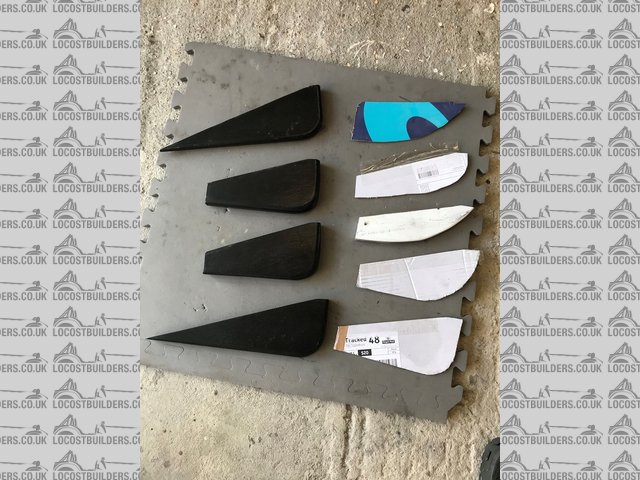
OK, it's finished..... here's the fins fitted and all sprayed satin black, I'm quite pleased with it.
I made some CAD templates to see what fin shape was best and ended up with the bottom right shape, then made 4 fins. They are made from carbon, in
it's original form....otherwise known as wood.
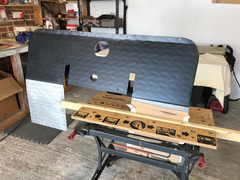
I shaped, sanded, primed and painted the fins with cheap gloss black which I applied too thick, so it ran and did not dry properly, doh. I ended up
spraying satin black. You can still see the runs, but as it's under the car I will just try to not to look too close.
[img]
diffuser 60 17may20
[/img]
Sprayed the slopey bit of the Ali with Wurth acid etch primer, then satin black, and screwed on the 4 fins and mounted the diffuser to the car with M6
domehead screws and loctite via the rivnuts previously installed.
Overall cost was 27 quid, as I had the ali sheet, spray paint and carbon "cough"..wood in the garage, so I just had to buy the ali angle
for the brackets and some rivnuts/bolts etc. It has added 4 kg to the car, but hopefully the extra downforce will mean I can now drive upside down.

[img]
diffuser 61 17May20
[/img]
[img]
Diffuser 62 17May20
[/img]
[img]
diffuser 63 17may20
[/img]
[img]
diffuser 64 17may20
[/img]
Why do they call Port Harcourt "The Garden City"?...... Becauase they can't spell Stramash.
|
|
|
Schrodinger
|
| posted on 17/5/20 at 05:20 PM |
|
|
Looks very good
Keith
Aviemore
|
|
|
steve m
|
| posted on 17/5/20 at 11:29 PM |
|
|
"but hopefully the extra downforce will mean I can now drive upside down. "
for about .0001 of a second, unless you have done an equally good job at the front
steve
Thats was probably spelt wrong, or had some grammer, that the "grammer police have to have a moan at
|
|
|
Deckman001
|
| posted on 18/5/20 at 01:28 PM |
|
|
Looks really good to me too, I had a chance to look under my car this afternoon, it looks ripe for something similar if i get past IVA at some point
Jason
|
|
|
Gord
|
| posted on 21/5/20 at 06:44 PM |
|
|
I'm in the prosses of making an aluminium diffuser, from everything that I have read they recommend leaving a small gap between the bottom of
the tub and the end of the diffuser, where it is bolted to the chassis rail.
The idea for it is to let out in trapped air that gets into the tub.
|
|
|
Deckman001
|
| posted on 22/5/20 at 07:23 AM |
|
|
quote:
Originally posted by Gord
I'm in the prosses of making an aluminium diffuser, from everything that I have read they recommend leaving a small gap between the bottom of
the tub and the end of the diffuser, where it is bolted to the chassis rail.
The idea for it is to let out in trapped air that gets into the tub.
Interesting thought, obviously needs to be incorporated if the boot space is even reasonably sealed.
Good shout !!
Jason
|
|
|