Steve Hignett
|
| posted on 4/7/11 at 09:33 PM |

|
|
Hi Fred,
Your post above (on 29th I think), you make a comment about how difficult it was to remove off the pattern, and I'm not surprised!
Did you ever consider making the rad-outlet dip in the bonnet as a seperate part of the bonnet mould? A flange round the edge and dropped in and then
obv through from above?
Obviously, you're not going to do it now, and I don't know whether it would be better or impossible from the Pics, but I just wondered
whether it had crossed your mind or not?
Rgards,
Steve
And keep up the fabulous progress!!!
|
|
|
|
|
Fred W B
|
| posted on 5/7/11 at 08:12 AM |
|
|
Hi Steve
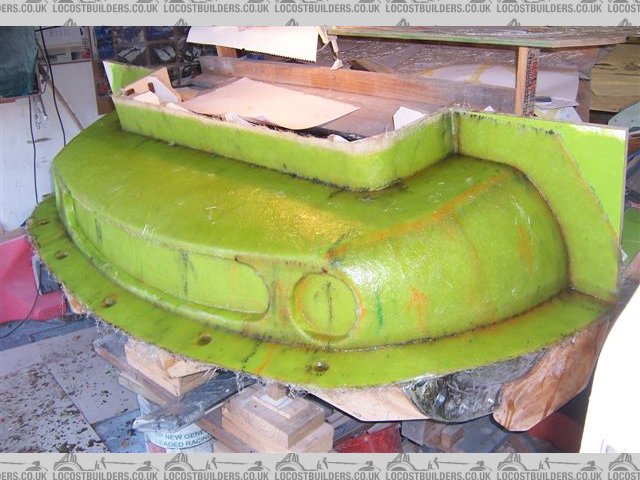
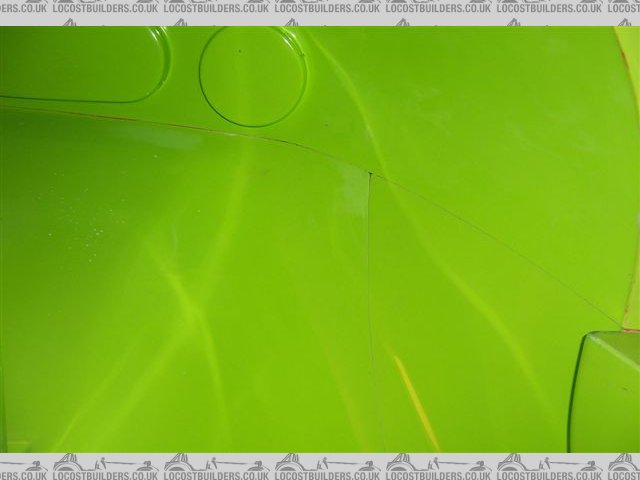
I think I can see on the mold some small areas in the depth of the nose duct where it "hung up" . Possibly this is because that is where
it was physically much more difficult to apply and rub out the wax, so maybe my preparation was not as through in that area.
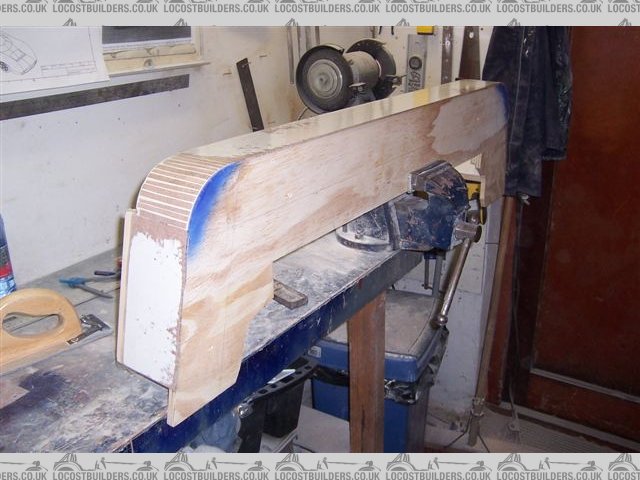
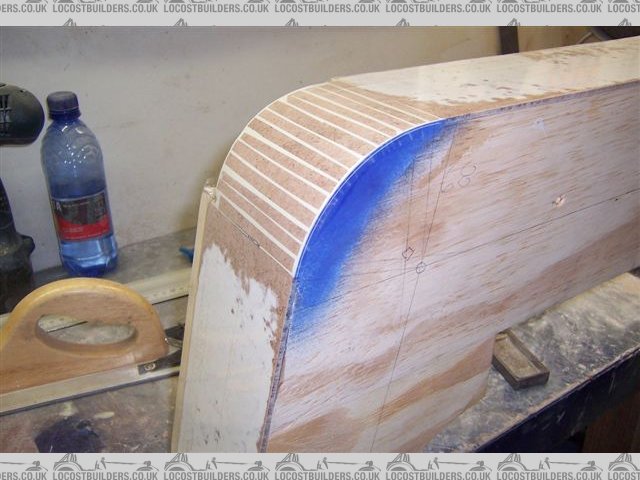
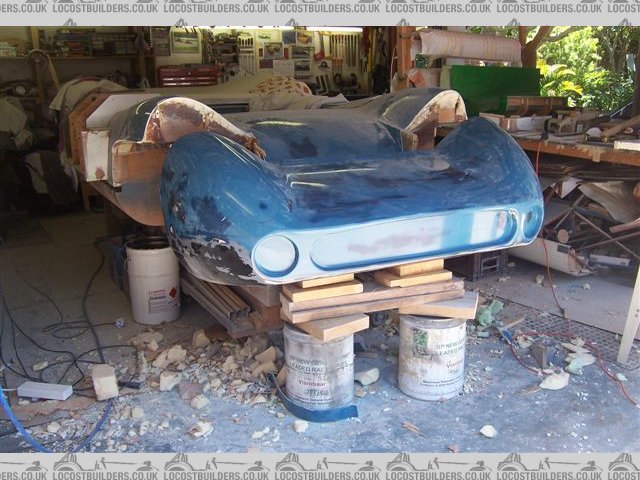
I did consider (in fact agonized over) making the duct section a separate section, and I suspect I will still regret not doing so. This as the return
section under the nose goes back a long way, such that now I will probably have to work though a gap between the front side of the duct return and the
rear edge of the under nose piece when laying up some of the detail inside the front of the nose. I think I will have to make my under nose return
shorter than on other T70's to make this possible. This is the section of the pattern I am working on now - see the last pic above. Thanks to
another forum member I know that the GD goes back under the nose (from the bottom of the front opening in the centre) 385 mm. The rough surface you
see on the pattern now is a bit longer than that.
So far I have tried to do all my moulding work "in one", but I have seen it stated that large mouldings can be done in sections, and
because of the above problem might it be more practical to layup the part surface in the majority of each separate mould piece before assembling the
mould pieces together and completing the nose?
How does one do that? Is it a case of stopping the gel coat application say 30 mm short of the join lines, and then tapering out the part layout just
short of the edge of the gel. Then bolting the mould pieces together, applying gel over the joint sections, and then completing the layup? Would the
result be satisfactory, or must I make every effort to do the nose layup 'in one"? I'm starting to think that might be very
difficult.
As you can see I am still learning this stuff as I go along.
Cheers
Fred W B
You can do it quickly. You can do it cheap. You can do it right. Pick any two.
|
|
|
ceebmoj
|
| posted on 5/7/11 at 08:25 AM |
|
|
Hi,
I cant comment from experience of having done it my self. However if you look on you tube there are a large number of videos by a guy called
"how to build a b1 bomber" and he sprays the gel cote in to the mold sections then lays up the mold sections timing the edges once they
have gone very tacky and then glues the sections together however this seams to lead to some very long days while he does all the layup.
|
|
|
suparuss
|
| posted on 6/7/11 at 12:54 PM |
|
|
Hi Fred, looks like you are making lots of progress! looking very nice indeed. ive just finished and mounted the main body shell on my car which
although ive done it in 2 halves it was still 2 fairly large but really complicated pieces to lay up so really needed to be laid up in sections.
i put the gelcoat on the whole thing and then put the first layer of glass over that on the whole thing. once you are at this stage you can sart to
lay up in sections as your resin will be air inhibited meaning that you can leave the section you dont want to do yet and it wont fully cure until you
do lay more glass over it. just needs a quick sand and then prime with some acetone as usual.
id only lay up thin sections at a time so that you are gradually building up the thickness over the whole part, if you go thick in one area before
moving to the next you may get un-predictable warpage.
Cheers,
Russ.
|
|
|
Fred W B
|
| posted on 6/7/11 at 06:23 PM |
|
|
Thanks Russ
quote:
ive just finished and mounted the main body shell on my car
Well done, so where are the pics then?
Cheers
Fred W B
You can do it quickly. You can do it cheap. You can do it right. Pick any two.
|
|
|
Fred W B
|
| posted on 18/9/11 at 08:59 AM |
|
|
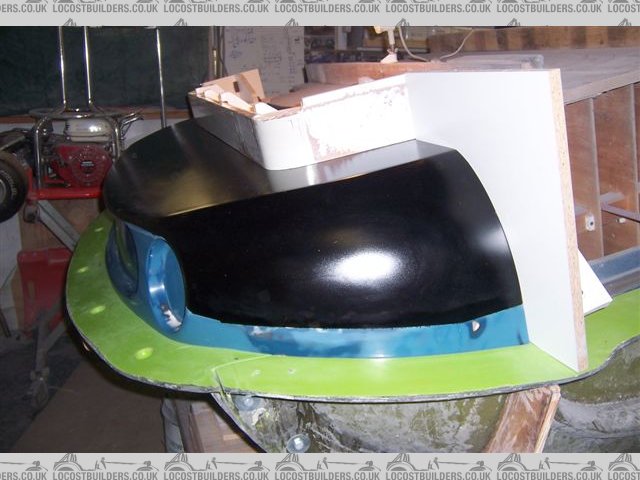
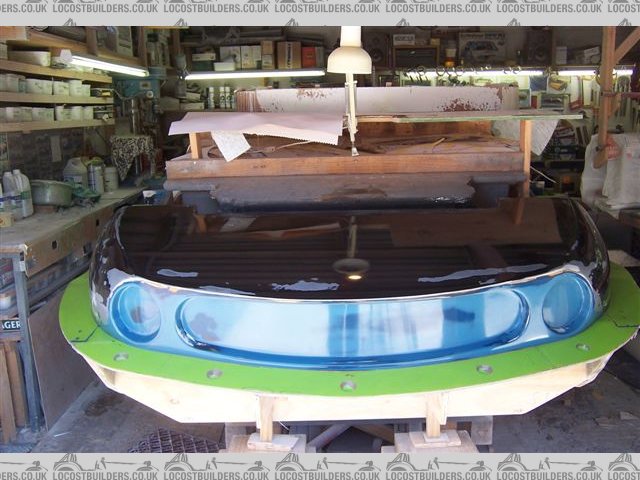
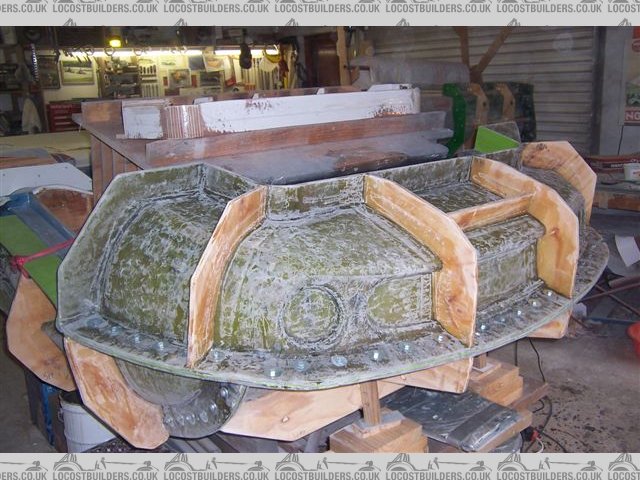
Slow progress.
Worked up the surface on the nose underface, made the formers for the flanges and now waxing.....
Cheers
Fred W B
[Edited on 18/9/11 by Fred W B]
You can do it quickly. You can do it cheap. You can do it right. Pick any two.
|
|
|
chrsgrain
|
| posted on 18/9/11 at 06:12 PM |
|
|
Great reflections - must be like glass.....
Chris
Spoing! - the sound of an irony meter breaking...
|
|
|
scootz
|
| posted on 18/9/11 at 06:16 PM |
|
|
I love these updates! 
It's Evolution Baby!
|
|
|
Fred W B
|
| posted on 19/9/11 at 04:17 PM |
|
|
Thanks for the kind responses Guys
Cheers
Fred W B
You can do it quickly. You can do it cheap. You can do it right. Pick any two.
|
|
|
Steve Hignett
|
| posted on 25/10/11 at 01:36 AM |
|
|
Managed to get anymore done recently, Fred?
|
|
|
Fred W B
|
| posted on 25/10/11 at 05:48 PM |
|
|
Not actually thanks Steve, circumstances have dictated that I have not had any Garage Time at all over the last 6 weeks.
I am hoping to get on with starting the layup of the last bit of the nose mould this weekend though.
Cheers
Fred W B
You can do it quickly. You can do it cheap. You can do it right. Pick any two.
|
|
|
Fred W B
|
| posted on 30/10/11 at 04:42 PM |
|
|
Got the first 2 layers onto the last part of the nose mold. Now need to tidy up the edges around the nose openings.
Cheers
Fred W B
You can do it quickly. You can do it cheap. You can do it right. Pick any two.
|
|
|
Fred W B
|
| posted on 30/11/11 at 04:54 PM |
|
|
Tiny update. Last section of nose mould completed
Cheers
Fred W B
You can do it quickly. You can do it cheap. You can do it right. Pick any two.
|
|
|
ceebmoj
|
| posted on 30/11/11 at 08:02 PM |
|
|
Missed the last update. looks like you are making good progress.
|
|
|
violentblue
|
| posted on 5/12/11 at 01:45 AM |
|
|
get on it already, I want to see this thing complete
a few pics of my other projects
|
|
|
obr_technology
|
| posted on 9/12/11 at 08:07 PM |
|
|
This is absolutely amazing.
I teach CAD here in the UK and am now going to show this thread during my next lecture as I think its amazing, the range of skills you have used and
an attention to detail that I could only dream of.
Please keep us updated and again, absolutely amazing.
|
|
|
Fred W B
|
| posted on 11/12/11 at 06:23 PM |
|
|
Hi Guys, Thanks for the encouragement.
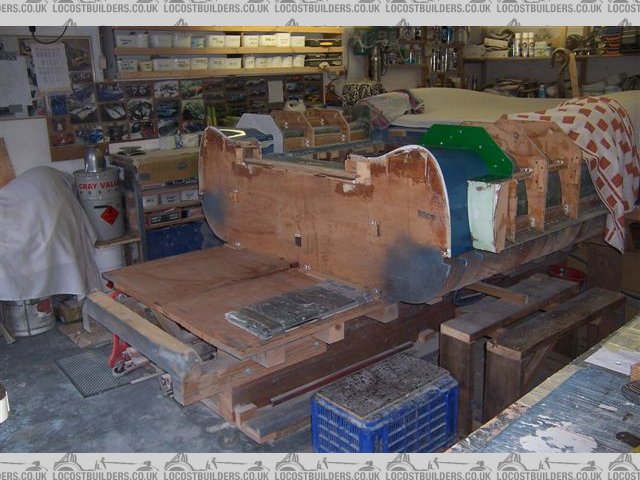
So one night this week I invited some mates over to help lift the nose pattern, and we demoulded the nose again. Then moved the nose mould sections to
storage. I assembled the complete nose mould and finally I can see inside it.
The dark specs you see in the detail pics are bit of plastacine
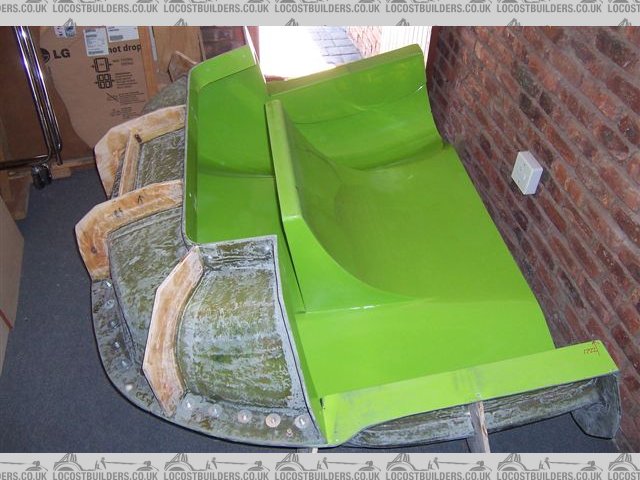
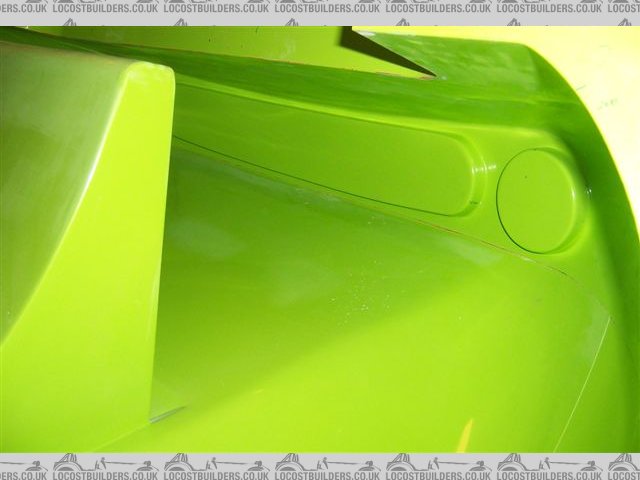
[Edited on 11/12/11 by Fred W B]
You can do it quickly. You can do it cheap. You can do it right. Pick any two.
|
|
|
scootz
|
| posted on 11/12/11 at 06:28 PM |
|
|

It's Evolution Baby!
|
|
|
Fred W B
|
| posted on 11/12/11 at 06:32 PM |
|
|
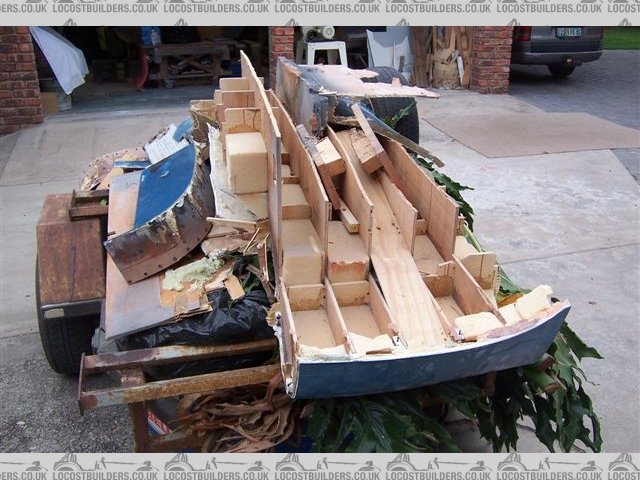
This weekend I cut the front off the nose, to keep to one side to use later to sort the headlight recess/covers detail, and scrapped the rest of the
nose pattern.
I have retained the scuttle section of the pattern as I still have to do something about the returns and internal details in the scuttle.
Now I can get on with the tail mould. The door moulds are still on the pattern so I can mark the forward edges of the tail section.
Cheers
Fred W B

You can do it quickly. You can do it cheap. You can do it right. Pick any two.
|
|
|
iank
|
| posted on 11/12/11 at 07:37 PM |
|
|
No going back now, though the moulds are looking fantastic quality.
--
Never argue with an idiot. They drag you down to their level, then beat you with experience.
Anonymous
|
|
|
chrsgrain
|
| posted on 12/12/11 at 04:31 PM |
|
|
Awesome! Moulds look great.
I'm sure you weren't sentimental about it, but that's still a lot of work to be scrapping...
Chris
Spoing! - the sound of an irony meter breaking...
|
|
|
scootz
|
| posted on 12/12/11 at 04:46 PM |
|
|

It's Evolution Baby!
|
|
|
smart51
|
| posted on 14/12/11 at 05:09 PM |
|
|
Was cutting up the buck hard given all the hard work put into making it?
Looks like a first rate job. Keep up the good work.
|
|
|
bertie_bas205
|
| posted on 15/12/11 at 01:39 AM |
|
|
You have some skills Sir......
Bertie.
|
|
|
jabbahutt
|
| posted on 15/12/11 at 08:05 AM |
|
|
I'm not sure I'd of been able to scrap all that hard work as easily as that. Top draw workmanship, wish I had 2% of the skills
demonstrated
|
|
|