djtom
|
| posted on 1/12/08 at 12:37 AM |

|
|
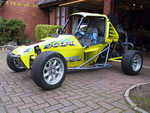
winter rebuild - zetec turbo super six - updated 08-04-09
Following the last trackday of the year I've decided that it's time for a complete stripdown and rebuild of the Super Six. Hopefully this
will give me a chance to fix all the niggling bits that have been annoying me, and also to improve the cosmetics of the tatty beast.
A season of trackday abuse has highlighted the weak points of the car, so the priority is to address these.
One of the main aims will be to make some new wishbones - probably widetrack - with new mounting brackets on the chassis as the Tiger design is so
woefully poor that I've bent both lower wishbones as nothing properly locates the bottom wishbone.
Also the cooling system needs rethinking, probably with some ducting to handle heat extraction behind the rad and some vents at the back of the engine
bay to get some more air flow through. I also want to redo the wiring loom, fabricate an anti-roll bar, make a new exhaust manifold and downpipe, fit
an LSD (and possibly convert to DeDion), repaint the body and strip and repaint the (rusty!) chassis.
Oh, and build my spare Zetec up with the forged pistons, steel rods and other nice bits that came cheap on ebay.
Busy times ahead!
Some pics of the stripdown:
.jpg)
Start of the stripdown
.jpg)
Rollcage off, front end stripped
.jpg)
Wastegate gasket. I suspect some of my horses escaped through here. I noticed in the last session at Brands that I was down on power. This has
happened several times throughout the season - I suspect that as the wastegate pipe heats up it expands and pushes the wastegate away from the
manifold, allowing the gasket to rupture. Might need an expansion joint in the wastegate downpipe. The turbo manifold gasket also keeps blowing, so
I'm pretty sure that this is the cause. I think a new manifold design is in order.
I'll update this thread with pics as I go.
Tom
[Edited on 1/12/08 by djtom]
[Edited on 4/12/08 by djtom]
[Edited on 8/4/09 by djtom]
|
|
|
|
|
RK
|
| posted on 2/12/08 at 06:10 PM |
|
|
sorry wrong place
[Edited on 2/12/08 by RK]
|
|
|
djtom
|
| posted on 4/12/08 at 11:41 PM |
|
|
More stripping down today - got the engine and box out and stripped most of the front end down. Lots of rust, dirt and a hell of a lot of gravel still
in every nook and cranny from the last misadventure into the Druids gravel trap at Brands (thanks Dad!).
Found a weird narrowed chassis tube - no idea why it's like that, although I have a feeling that the alternator may have been located on that
side when the XFlow was in there. Not great for torsional rigidity!
.jpg)
Spent a few minutes tarting up a spare cam cover as well - not convinced I like the colours but they were what was to hand and I was bored!
.jpg)
Started to strip the scuttle off as well - think I'm going to modify it so that you can take the scuttle off and leave the dash and bulkhead in
place so that you can get to the dash wiring more easily. It actually needs narrowing a bit as well as it's wider than the chassis rails by
about 10mm each side. The tub sides have been spaced out from the chassis rails to match it - bodge.... Typical Tiger fibreglass tolerances, I'm
assured :-( Not sure how to narrow it easily - I've never played with fibreglass before, but cutting it in half , removing 20mm and sticking it
back together looks like the best option.
.jpg)
Dirty engine bay!
.jpg)
Bits of car everywhere!
More to follow next time I get in the garage.
Tom
|
|
|
HOL
|
 posted on 24/12/08 at 05:00 PM posted on 24/12/08 at 05:00 PM |
|
|
Im going to be following this very carefully.
I am hopefully picking up a Zetec Super Six in the next few weeks. I was aware that Zetec Turbo kits were available and 2+2 had also crossed my
mind.
But it is nice to find someone locxal to me doing all the R&D in advance 
Do you have any picks of the wishbone mounts. Do they just need filleting??
|
|
|
djtom
|
| posted on 30/12/08 at 11:31 PM |
|
|
No close ups of the wishbone brackets I'm afraid - I seem to forget to take some every time I go in the garage - I'll try to get some next
time!
The stripdown continues - as you'll see below from the pics. The more I uncover the more I am determined to do it properly when I rebuild it -
the original builder was a bit of a bodge artist! Check out the thickness of the bead of tigerseal - it was seriously about 12mm thick! (mind you, it
was probably needed to handle Tiger's fibreglass manufacturing tolerances, which are measured in cm....)
.jpg)
More panels off, rear wings off and wiring loom removed:
.jpg)
That's where all the wiring went.....
.jpg)
Side panels removed now
.jpg)
Look at this abomination of a front end! I reckon that there are about 5kg of unnecessary metal here. The angry grinder will be used to rationalise
this mess!
.jpg)
Not far to go now - just the rear end to strip down
.jpg)
Ebay shopping has commenced - I've bought a bunch of flapdiscs and thin cutting blades for the grinder, so chassis surgery will commence soon. I
intend to widen the transmission tunnel enough to fit a MT75 gearbox, trim various spare brackets off the chassis and sort out that front end by
adding some proper wishbone mounts, removing several spare tubes etc etc.
The only thing holding me up now is the lack of a welder! Anyone selling a mig welder in the South East? Cash waiting....
More updates soon
Tom
|
|
|
carpmart
|
| posted on 31/12/08 at 07:02 AM |
|
|
Good thread this, it inspires me to think about a tidy up of my own car!
Please keep the updates regular!
I would put a separate wanted advert in for the welder as its a little 'lost' in this post!
You only live once - make the most of it!
Radical Clubsport, Kwaker motor
'94 MX5 MK1, 1.8
F10 M5 - 600bhp Daily Hack
Range Rover Sport - Wife's Car
Mercedes A class - Son's Car
|
|
|
MikeRJ
|
| posted on 31/12/08 at 01:42 PM |
|
|
What size tubing does the chassis use, looks a lot larger than the Locosts 25mm stuff?
|
|
|
HOL
|
| posted on 31/12/08 at 03:40 PM |
|
|
I got my car, so ill be following even more closely now.
Is your cage an original tiger one??
|
|
|
djtom
|
| posted on 31/12/08 at 05:02 PM |
|
|
@HOL - I'll sort some closer pics of the turbo conversion as per your request on the Tiger forum.
It's a cage from a Caterham Roadsport that I modified a bit - I cut the mounts off and fabbed some new ones. It had the distinct benefit of
costing 150quid s/h rather than the 650 that Tiger want.... I also had to make a rear tub for the chassis though as on a super six there's
nothing for the rear stays to fit to. It also at least provides a bit of protection for the tank against rear impacts - again, I'll take some
pics.
@MikeRJ - tubing is a mixture of 40mm and 25mm box I think. Might be 50mm even. Not the lightest chassis, I guess. I suppose I'll have to add
more power to make up for it :-)
Tom
|
|
|
HOL
|
| posted on 20/1/09 at 09:20 PM |
|
|
quote:
Originally posted by djtom
@HOL - I'll sort some closer pics of the turbo conversion as per your request on the Tiger forum.
It's a cage from a Caterham Roadsport that I modified a bit - I cut the mounts off and fabbed some new ones. It had the distinct benefit of
costing 150quid s/h rather than the 650 that Tiger want.... I also had to make a rear tub for the chassis though as on a super six there's
nothing for the rear stays to fit to. It also at least provides a bit of protection for the tank against rear impacts - again, I'll take some
pics.
Tom
Any pics of the rear tub yet???
I want at least a rear full cage on mine, which would need the 'down' pipes. But, I note your comment about there being no rear
bodywork.
Im getting parts together to fix up the body and tidy the metalwork. (Sort of 30% of what you are doing though ). ).
|
|
|
djtom
|
| posted on 26/1/09 at 11:07 PM |
|
|
Some posts I wrote but never got around to uploading:
12/1/09
It's been a while since last update - snowboarding holiday, Christmas and work all got in the way a bit! Got a few bits done last week, but no
progress on the Tiger this week the Clio blew its head gasket so the week got spent fixing that.
Well, 3 evenings spent clearing enough space in the garage to get the thing in there and then 4 evenings stripping it down and replacing the head
gasket and timing belt. Which is a pig of a job in a unheated single garage without a lift unless you have double jointed arms and fingers. Fun fun.
I was thinking of scrapping it but its at least worth a few hundred quid if its running and I didnt have anything ready to replace it with, so it
was worth spending £44 and a few nights in the garage. If anyone has an old school Volvo 240 estate they want to get rid of Id be interested the
next car needs to be a big estate! Also tempted by anything estate shaped with a v8 under the bonnet - BMW 530 / 540 estate?
|
|
|
djtom
|
| posted on 26/1/09 at 11:09 PM |
|
|
15/1/09
Stripped all riveted panels off the chassis. Hard work. Tigerseal sticks like sh1t to a blanket. Still, done now. Just need to pop down to Spa
Aluminium and buy some thin sheet to repanel with now. What thickness does everyone use? 0.8mm? Also need to pick some card up to make some
templates.
I have a feeling that I need to spend about a week with a flap-disc in a grinder to get the powdercoat, rust and tigerseal remains off the chassis.
The neighbours and girlfriend are not going to be pleased! Not a job I'm looking forward to...
Axle out:
.jpg)
Rusty training arms - now treated to some nice fresh paint
.jpg)
MT75 box to check for size:
.jpg)
[Edited on 26/1/09 by djtom]
|
|
|
djtom
|
| posted on 26/1/09 at 11:31 PM |
|
|
16/1/09
Got some steel tube now I bought some 25mm box section from Maidstone Engineering who are happy to sell small lengths and then found out that my
mate Mark was about to order some steel to build himself a trailer. He offered to add in a couple of bits of ¾ round for me and also gave me some old
Landy drag links which are made out of bomb-proof tubing. These will be used for the lower wishbones. I also salvaged a big bit of 5mm steel plate out
of a skip on the industrial estate. Bonus.
|
|
|
djtom
|
| posted on 26/1/09 at 11:32 PM |
|
|
17/1/09
Found a MIG welder locally and for the right price many thanks to Sean. Ive tested it out and it works fine - its a Sealey SuperMig 120. Its
fairly small (100A?) but with 0.6mm wire on full power it welds 25mm box section just fine. Should be ideal for chassis modifications! For heavy stuff
like welding thick tube to 5mm plate for the lower wishbones Ive got the old arc welder which does a good job on heavier stuff.
|
|
|
djtom
|
| posted on 26/1/09 at 11:33 PM |
|
|
18/1/09
Its now completely stripped down to a bare chassis and refurbishing parts has started. The trailing arms are wearing a nice coat of black Hammerite,
and de-rusting and painting of various other bits is underway. I intend to start chopping the chassis about this weekend. I havent got a T5 gearbox
yet but I do have a MT75 which isnt far off the same size, so if I modify the transmission tunnel to fit an MT75 with a bit of room to spare it
should be ok. Following chassis mods Ill strip the old flaky powder coat off with a flapwheel in the grinder, prime and repaint before putting it
back together. If only it was as easy as it sounds....
|
|
|
djtom
|
| posted on 26/1/09 at 11:41 PM |
|
|
19/1/09
Im still wondering what to do about the rear end of the car. I want to fit an LSD, but I have a problem in that they are not available for a type A
(Koln) Cortina axle (unless you pay £700 from Quaife not an option!). Current options are:
---- Buy Type B (Atlas) Cortina axle and fit LSD from 2.8i Capri axle (drops straight in).
o Likely cost: £50 for Cortina axle, £400+ for LSD because all the rally boys want them.
o Plus: no mods to chassis, keeps same track, keeps same brakes, keeps same prop, light.
o Minus: Need to redrill hubs to 4 x 100, expensive, need to fab brackets for axle.
---- Buy Capri axle and fit that whole.
o Likely cost £400+
o Plus: no mods to chassis, keeps same track, keeps same brakes, keeps same prop, light.
o Minus: Need to redrill hubs to 4 x 100, expensive, need to fab brackets for axle.
Fit Isuzu Piazza Turbo axle that happens to be knocking around in the garage.
o Cost: £235 (axle, but Ive already bought it), £20 (prop adaptor), £15 (disk pads), £15 (brake bias)
o Plus: Have axle already, gives disk conversion on rear, is already 4 x 100 stud pattern
o Minus: needs prop adaptor or new prop, narrows track by 4 ins, heavy, spares could be hard to find, brake pads missing, will need brake bias
doodah.
Fit Sierra LSD with De Dion axle.
o Cost: £100 (de dion), £30 (sierra beam), £20 (steel), £90 lsd diff
o Plus: De-dion handling
o Minus: Lots of fab work (diff mounts, de-dion, will be hard to make pick-up points on de-dion etc etc
Not sure which I prefer at the moment
aargh!
|
|
|
djtom
|
| posted on 26/1/09 at 11:59 PM |
|
|
Have been having a think about the rear end, but no conclusions yet... although I bought a complete Sierra rear beam yesterday as it was close and
fairly cheap. At least I can measure the different options now.
In the meantime I have been measuring up the transmission tunnel and surprise! the MT75 almost fits! Well, the box fits without the massive metal
donut thing attached anyway. I don't see the point in having the donut attached - it's for shock absorption in the drivetrain, but even
without it there's not much room at the front of the propshaft. I'll widen the front but see if I can narrow the rear of the tunnel to
give the passenger side a bit more room.
Checking size with a spare block:
.jpg)
Side view:
.jpg)
I'd love to move the whole lot back, but there's no way I can narrow the footwells any more to give the tunnel any more room at the front
- the pedals are already seriously close together.
Rear view:
.jpg)
And for HOL - here are some pictures of the rear tub that I made to support the back of the cage. The cage mounts on the two brackets sticking up at
the rear. Lowered bit on the right is to accommodate the fuel filler. As you'll see on yours, without making something similar you'll
struggle to fit a cage. Tiger's solution is to bolt some brackets to the diagonal down stays - it's a fairly crappy solution really. There
are some photos in an old thread on the tiger forum somewhere.
.jpg)
.jpg)
And that brings us up to date.... :-)
|
|
|
HOL
|
| posted on 27/1/09 at 01:29 PM |
|
|
Thanks forn the pics Tom.
I was thinking of a rear cage only now and fitting the rear drops directly to the rear lower end of the car. MNR do a kit, that looks like it will
work.
quote:
Fit Sierra LSD with De Dion axle.
o Cost: £100 (de dion), £30 (sierra beam), £20 (steel), £90 lsd diff
o Plus: De-dion handling
o Minus: Lots of fab work (diff mounts, de-dion, will be hard to make pick-up points on de-dion etc etc
Not sure which I prefer at the moment
aargh! quote:
This is my preference, but my wheels are multifit, so i have no pcd issues.
Im going to be taking my bodywork off soon to repaint my own chassis, - so if you can get your frame and a de dion tube over to Chatham one weekend,
you can stick it in the (double) garage next to mine and take measurements/mock it up.
I have a vested interest, in so far as I would copy/mimic the resulting design later.
[Edited on 27/1/09 by HOL]
|
|
|
djtom
|
| posted on 27/1/09 at 02:35 PM |
|
|
@ HOL - I did consider fitting the rear stays to the lower chassis member at the rear, but the tank gets in the way on mine. Yours may be different I
guess, but the tank uses all available room between the two diagonals and due to the angle the tank sits at there was no room for rear stays between
it and the bodywork unless thay are at the same angle the rear uprights are at on my added rear tub. As kinking the rear stays is a no-no, I decided
against doing that.
Tom
|
|
|
HOL
|
| posted on 27/1/09 at 08:04 PM |
|
|
quote:
Originally posted by djtom
@ HOL - I did consider fitting the rear stays to the lower chassis member at the rear, but the tank gets in the way on mine. Yours may be different I
guess, but the tank uses all available room between the two diagonals and due to the angle the tank sits at there was no room for rear stays between
it and the bodywork unless thay are at the same angle the rear uprights are at on my added rear tub. As kinking the rear stays is a no-no, I decided
against doing that.
Tom
Ill definietly have the same problem. In which case I will copy your design.
Have you seen the GTS De Dion? Its been built to fit the 'book chassis' and brackets for the escort axle. I am am wondering if the S6
axle used the same spacing.

I have had a look at the book dimensions and bracket locations and wondered how much out they all are on the S6 chassis.
On the book car the forward links are level with this upright section.

The book measurements to the back edge of that upright from to the centreline of the axle/hub/roll bar/shockmount: vertical line is 310mm.
(how long are the tiger trailing arms/).
The book does not give measurements for the axle brackets themselves, but the chassis width (to the inside edge of the box section) is 1016mm.
(How wide are the fittings on the cortina axle?).
You never know? It might fit with just one/or two brackets?.
[Edited on 27/1/09 by HOL]
|
|
|
mark chandler
|
| posted on 4/2/09 at 12:01 AM |
|
|
Tom
There is another option on you axle, chop out the LSD and housing from the Izuzu axle and let it into you existing axle then cut the halfshafts and
join to suit.
You could even extend the axle a bit to better fill the arches, really wide track !
|
|
|
Hugh_
|
| posted on 5/2/09 at 09:45 PM |
|
|
Looking good Tom!
Work on the Locost had stalled completely from late October until now if I'm honest. But I've got some minor things done in the last
couple of evenings, and have the day off tomorrow so hoping to get cracking with it again in earnest.
|
|
|
djtom
|
| posted on 25/2/09 at 12:17 AM |
|
|
28/1/09
Mark - thanks for the thought but that sounds even more of a nightmare than fabricating the de-dion!
Which, by the way is the way I'm almost certainly going to go.... just need to find some suitable tubing to make the thing now.
I've picked up a sierra rear beam complete for £30 (non-LSD unfortunately!) and here you can see it against the cortina axle:
.jpg)
However this is the problem - look how far inboard the trailing arm mounts and shock mount are on the cortina axle! Not sure how to mount these on a
de-dion tube - it'd have to extend in a long way.
.jpg)
I can move the shock bracket outboard on the chassis by up to 3 1/2 inches, but unless I want to remake the trailing arms with more angle (not
really!) I'm a bit stuck with the position of them. Although I suppose I could make nice new rose-jointed ones...
Chassis mods are ongoing - slowly. I'm now so thoroughly bored with trying to remove the old tigerseal, powdercoat and rust with an anglegrinder
and flapdisc that I'm seriously considering getting the chassis shotblasted. It might cost a bit but it'll save ages and ages of horrible
work!
Tom
|
|
|
djtom
|
| posted on 25/2/09 at 12:25 AM |
|
|
12/2/09
Bored of thinking about the back end, so I've been hacking up my front wishbones to make a widetrack kit. Mark kindly gave me some Land Rover
drag link tube (about 4mm wall and bulletproof!) which seems ideal after bending both lower wishbones last year.
Hacking the old ones up to reuse the top plates and bushing tubes:
.jpg)
New wishbone tube:
.jpg)
Loosely cut to size:
.jpg)
I've gone 50mm per side wider, so that should make a difference! I'll freely admit that it is mostly for cosmetic appearance as the Super
Six is so much wider at the rear, but more front-end grip on turn in can only be a good thing, especially as I will be fitting an anti-roll bar that
will lose some of it again.
Tom
|
|
|
djtom
|
| posted on 25/2/09 at 12:37 AM |
|
|
22/2/09
Still not decided on how to make a de-dion, so I've ignored that problem and have decided to tart up some spare wheels instead! They are a set
of multispoke 13" alloys that I bought cheaply (£30!) and came from a BMW E21 (sadly not with the Yokos on though...)
I had to use a flap wheel in the drill to remove about 20 years of brake dust from the inside of the wheels, but after that and a little rub down with
some sandpaoer I think the surface should be "keyed" enough for some primer.
Drill attack:
.jpg)
Primered:
.jpg)
One of the wheels had a bad reaction to the primer:
.jpg)
This has since been rubbed back and will shortly be having a second coat.
Rain stopped painting, so my incredibly short attention span then turned to taking some throttle bodies apart to make a throttle body plenum using
some GSXR600 TBs and a Nissan Pulsar plenum cover that I got cheap.
Removing the secondary butterflies:
.jpg)
Then I got bored of that too (I think I must have ADHD or something!) and went back to the chassis to test out the clearance for the prop now I have
tacked the first bits of the tunnel in place:
.jpg)
It cleared by miles so the tacks were then welded fully. Can't really do much more until I finally decide on a rear axle setup...
Tom
|
|
|