grazo
|
| posted on 22/4/15 at 12:40 PM |

|
|
Flatshifter
Graham from Flatshifter again,
Please do not forget if anyone ever needs any replacement set up / installation manuals on any of our
products please email us and we will email you a copy asap.
Regards
Graham mail@flatshifter.com or 01206 322557
|
|
|
|
|
kentmagpie
|
| posted on 22/4/15 at 12:47 PM |
|
|
quote:
Originally posted by grazo
Hi Guys,
Graham from Flatshifter, please call or email me if you are still not sure.
The reason the manual does not say measure down from the center of the gear selector shaft 110mm is that this method does not allow for gearbox play,
the 25 mm in each direct is correct and very simple but hard to explain, so i have started saying to measure from the center of the gear selector
shaft to the point you have connected the gearshift actuator and if that point is not very close to 110mm then you have made a mistake.
Above is a picture of the gear shift actuator incorrectly installed, why !! because they have just connected to the standard linkage which is far too
short instead of extending it to the correct length ie about 110mm we say about 110mm as every gearbox is different and you must follow the
directions below to get the exact position .
Hi ,
Some of the most common mistakes to definitely avoid that customers commonly make when installing the Flatshifter Max electric gear selector
systems.
Any questions problems etc. please do not hesitate to call or email us. mailto:MAIL@FLATSHIFTER.COM 01206 322557
Max electric gear selector system
If you imagine you are connecting the Max actuator to your gear lever ( some people do) when you put it into gear the gear knob moves a lot further to
put into gear that the bottom of the gear-lever, but at some point down the gear lever there is a point where the lever has moved exactly 25mm to be
fully into gear that is where the actuator would connect to, the same applies to the drop link directly on the gear selector linkage, but often it
will need extending. IT IS NOT THE LINKAGE THAT NEEDS TO BE 110MM LONG BUT THE DISTANCE BETWEEN THE CENTER OF THE GEAR SELECTOR SHAFT AND THE ACTUATOR
Drop link MOUNTING POINT (which will be about 25mm of travel)
No 1
The Max electric gearshift system actuator has an effective stoke of 25mm (1) in either direction, since the effort produced is progressive over the
length of this travel it is very very important to utilise the full 25mm stroke. This will dictate the point along the length of the link from the
gear selector shaft or gear-lever at which the actuator has to be connected. In most instances this will be at or towards the end of the lever.in this
instance near enough is not good enough i.e. if the actuator is placed in the position where 23 mm of movement is used to put fully in gear the
actuator will try to extend to 25 mm ie it is trying to damage something if it is was fitted say at 27 mm then the actuator will still only move 25
mm so it will not be fully into gear & you will get missed gears.
Please pay close attention to all angles and measurements in your installation manual and please remember NEAR ENOUGH IS NOT GOOD ENOUGH.Normally a
measurement of approx 110mm is required from the center of the gear selector shaft to the position the actuator connects to the gear selector arm /
drop link , often this will require the link to be extended if not the Max system will not work properly This LAST POINT IS VERY VERY IMPORTANT and
is the most common mistake when installing the Max system.
No 2 Applies to both systems do good quality electrical connections and attach earth & live wire etc preferably back to your vehicle`s battery if
possible.
No 3 Do not solidly mount the actuator use the swivel mounting supplied it needs to move to follow the arc of the gear selector arm etc..
No 4 If it does not work properly you have not fitted it properly.
No 5 Check the gear linkage for free play; this represents an effective loss of stroke. Tighten or replace any ball joints or other linkages as
necessary
Check that you have the correct level of oil in your gearbox, if the oil level is low the gears will run hot after a short period and become tight.
Check that the clutch is clearing properly, any clutch drag will cause the gears to mesh and prevent you changing gear cleanly.
Check that the chain is in good condition and correctly adjusted with not to much slack.
Please pay close attention to all angles and measurements in your installation manual THEY ARE VERY IMPORTANT .
Any questions problems etc. please do not hesitate to call or email us. mailto:MAIL@FLATSHIFTER.COM 0044 1206 322557 OR 01206 322557
Graham is brilliant. Always got time for people 
|
|
|
Autoflock Motorsport
|
| posted on 22/4/15 at 01:11 PM |
|
|
cant wait to get back to the car now and het measuring, feeling positive now about it all, bring on anglesey next week
Kind regards
Raj
http://www.locostbuilders.co.uk/forum/23/viewthread.php?tid=183445
|
|
|
daniel mason
|
| posted on 22/4/15 at 04:41 PM |
|
|
See you there!
|
|
|
Autoflock Motorsport
|
| posted on 22/4/15 at 10:24 PM |
|
|
Make sure you come over and say high, you wont miss me, I will be the one going the slowest, or broke down
Kind regards
Raj
http://www.locostbuilders.co.uk/forum/23/viewthread.php?tid=183445
|
|
|
Autoflock Motorsport
|
| posted on 22/4/15 at 10:28 PM |
|
|
well peeps I went to the unit and measured the actuator rod to gear selector shat length. Will let the pic do the talking.

Kind regards
Raj
http://www.locostbuilders.co.uk/forum/23/viewthread.php?tid=183445
|
|
|
grazo
|
| posted on 23/4/15 at 12:00 AM |
|
|
Hi ,
If you refit the actuator rod on to the gear box then measure the amount of distance traveled when putting it into gear it will be a lot less
than 25 mm, please use the 25mm as per your instruction manual.
graham (Flatshifter)
|
|
|
Autoflock Motorsport
|
| posted on 23/4/15 at 07:38 AM |
|
|
quote:
Originally posted by grazo
Hi ,
If you refit the actuator rod on to the gear box then measure the amount of distance traveled when putting it into gear it will be a lot less
than 25 mm, please use the 25mm as per your instruction manual.
graham (Flatshifter)
I know graham, this is just one of the things I already thought would of been done corectly when this was built, not my doing. Find it hard to see
how something like this could be missed as its in bold writing in the instructions, annoying really, only thing you have to adhere to is "angle
to be 90 degrees and linkage to be 110mm"
Friggin ell we will be designing rockets next lol
I will try and make a new bracket this weekend and see how I get on. Even though im finding fault after fault im actually enjoying it as im elarning
more and mroe about the car as I go along
Kind regards
Raj
http://www.locostbuilders.co.uk/forum/23/viewthread.php?tid=183445
|
|
|
Autoflock Motorsport
|
| posted on 24/4/15 at 07:56 AM |
|
|
Hope im not hijacking the thread but my progress/mistakes may be useful to someone on this subject.
Last night I started to modify the linkage to the correct length.


Kind regards
Raj
http://www.locostbuilders.co.uk/forum/23/viewthread.php?tid=183445
|
|
|
Autoflock Motorsport
|
| posted on 24/4/15 at 07:59 AM |
|
|
when I fitted it, it now puts the connection angle out of 90, so I propose to slide the actuator through the mounting bracket which will move it away
from the linkage rod achieving the desired 90 degree. This will however mean that the actuator/solenoid tube thing itself will be mounted with the
bracket off set to one side instead of in the middle. I cant see this being too much of a problem for one track day but it will be getting remounted
correctly on the chasses to that it can be centralised again.
Hope this makes sense, pics to follow tonight
Any comments welcome as im doing this off my own back with serious lack of talent in this department.
[Edited on 24/4/15 by Autoflock Motorsport]
Kind regards
Raj
http://www.locostbuilders.co.uk/forum/23/viewthread.php?tid=183445
|
|
|
Autoflock Motorsport
|
| posted on 27/4/15 at 09:14 AM |
|
|
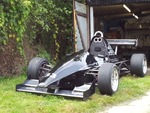
Well here is my setup finished I hope, 90degree angle and 110mm rod length. Had to relocate the actuator though which has raised it up, dont think it
will affect the handling too much


Kind regards
Raj
http://www.locostbuilders.co.uk/forum/23/viewthread.php?tid=183445
|
|
|