FuryRebuild
|
| posted on 22/3/12 at 08:14 PM |

|
|
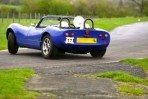
Fury Rebuild with Duratec Install - build diary
I thought I'd create a build-diary thread to keep a lot of the posts I'm going to make about my fury and the duratec install in one
place.
As well as keeping a record here, I am also running a blog at furyrebuild.co.uk, where I'll keep the
kind of collated material that may be useful and more suited to a web-site format (such as the page of bolt sizes, and the page of weight-loss as
parts are sourced and fitted, as well as other ramblings about building things (such as pissing people off in the postoffice queue this morning) ).
If you want to stalk me further, there's a facebook page under "furyrebuild.com" so you can see what's going on without
needing to worry about friending me on FB.
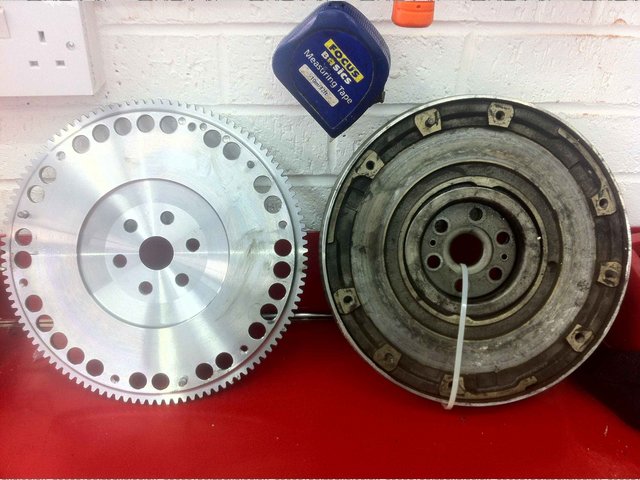
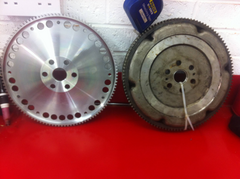
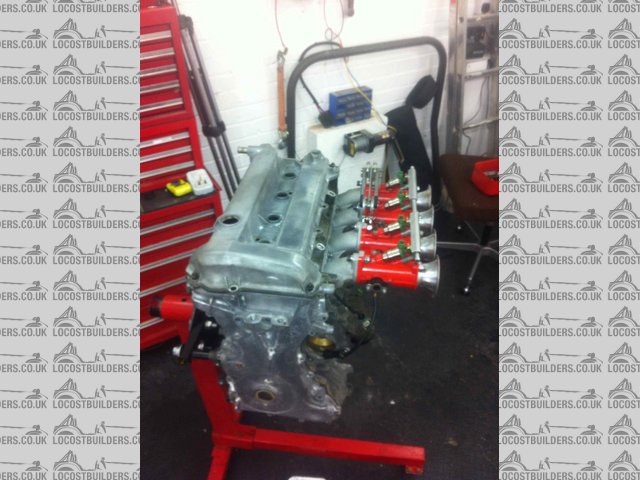
Without further ado, I thought I'd at least do an interesting weightloss post, which is - I've got my new lightweight flywheel. 12.3 down
to 3.7 KG, I think. This should make it interesting.
Here are the photos for your onanistic pleasure:
Front On
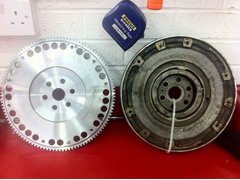 
Description
Side On
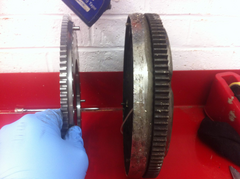 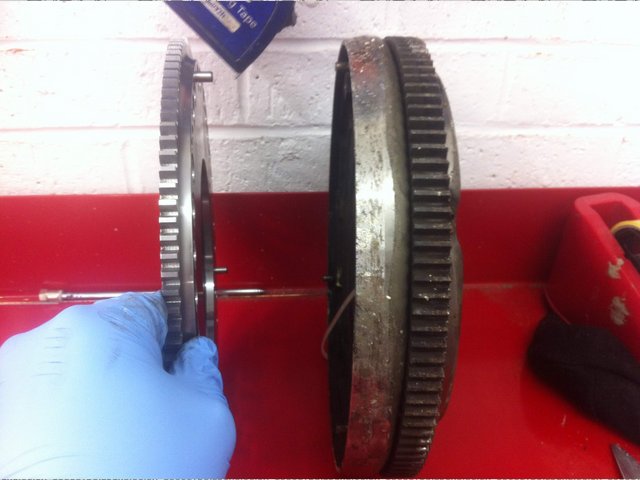
Description
Arse On
 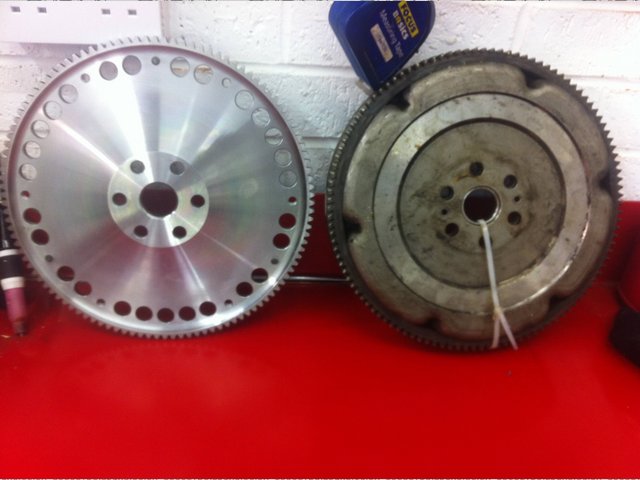
Description
When all you have is a hammer, everything around you is a nail.
www.furyrebuild.co.uk
|
|
|
|
|
big-vee-twin
|
| posted on 22/3/12 at 10:07 PM |
|
|
That new flywheel makes the original look like a right porker, mine is an ST150 so not as big as that similar to yours but without the holes.
Keep up the good work, I'm not far away from you being in York.
Regards
Kev
Duratec Engine is fitted, MS2 Extra V3 is assembled and tested, engine running, car now built. IVA passed 26/02/2016
http://www.triangleltd.com
|
|
|
nick205
|
| posted on 23/3/12 at 09:34 PM |
|
|
Is the OEM one a DMF type flywheel.....? Looks gargantuan by comparison.
|
|
|
FuryRebuild
|
| posted on 23/3/12 at 11:38 PM |
|
|
Yup. Dual mass = many pies.
When all you have is a hammer, everything around you is a nail.
www.furyrebuild.co.uk
|
|
|
nick205
|
| posted on 25/3/12 at 07:50 PM |
|
|
So do most modern petrol cards have DMFs as well then?
If so all the down talk on diesels seems a little ripe (not aimed at the OP BTW, just a general observation)
|
|
|
FuryRebuild
|
| posted on 28/3/12 at 04:01 PM |
|
|
more good work follows
So, it was an interesting weekend on the car.
I managed to get my pinto out (no problem) and separated from the gearbox. Box is out and drained. I've got the shiny new bits from RWD
Motorsport so it gave me a chance to measure the weight savings between the cast bellhousing (so used to save space) and the new shiny ally one. My
running total of weight saved and how is here (click me).
As well as that, many bits were put into the garden and power-washed. It looks like the lawn has survived when i washed the block although I do have
some footage of the oil pump being pumped to get the last of the crap out of it. To say it is obscenely biological is an understatement.
Now I have the new bellhousing and block, I can bolt them together and offer them up to the transmission tunnel. I ordered the hydraulic clutch option
which means I can get it nicely back and deep into the transmission tunnel. I'm going to chop about 2" out of the tunnel passenger side to
allow the bellhousing to go back as far as the startermotor. It's going to mean moving part of a leg over and repanelling part of the tunnel,
but bearing in mind it all needs to come off to get powder-coated, it's no big deal.
Once I get the details about the Dave Walker head on my pinto (got most of them, just waiting for the massive valve sizes) then I'll get that up
for sale. It's currently sat on a pallet with the oil still in (Valvoline racing oil - seems a shame to waste it).
At the moment, it seems to be clean, tidy, repair rather than the really interesting stuff of fabricate, weld, hammer, glue, bolt.
No pictures yet, but lots of video to edit and process.
When all you have is a hammer, everything around you is a nail.
www.furyrebuild.co.uk
|
|
|
FuryRebuild
|
| posted on 29/3/12 at 12:29 PM |
|
|
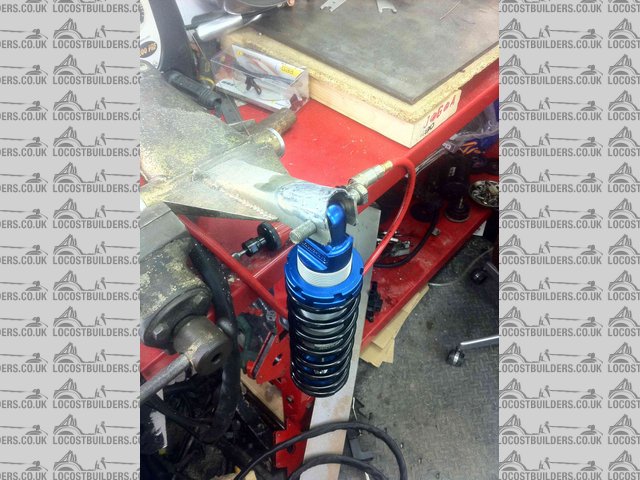
Modifying the front rockers for gaz shocks from spax
Well, I have two small problems with the front rockers and the new gaz shocks (from spax).
The first issue is one of manufacturing in the bad old fisher fury days. The spax shockers (and gaz) had the fairly universal bolt size of 1/2".
Fisher drilled everything out to 12mm and fitted 12mm bolts. The end results was that much of the suspension was looser than it should have been, and
relied on friction between the bracket walls and the outside of the housing of the thing being bracketed to keep it in place. This meant frequent
tightening of the rear end and a general WTF sentiment from me. Whenever I've found this, I've reamed the holes out to 1/2" and used
the correct bolts. On the lower wishbone bushes, you can actually grab the wishbone and heave, and hear a slight clunk as the 1/2" bush moves on
the 12mm bolt. However, the new guys who have the car are much more quality focused.
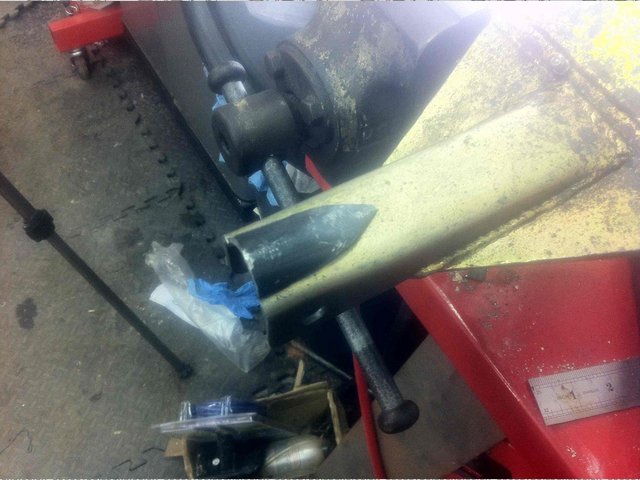
Secondly, it's one of fitment and clearance. The spax are on bushes and the gaz are on rose-joints. I'm not complaining - I wanted an
upgrade in shocks. This means the housing/mounting arrangement on the new shocks is slightly larger, and won't fit the rocker arm, as you can
see here:
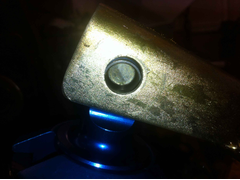 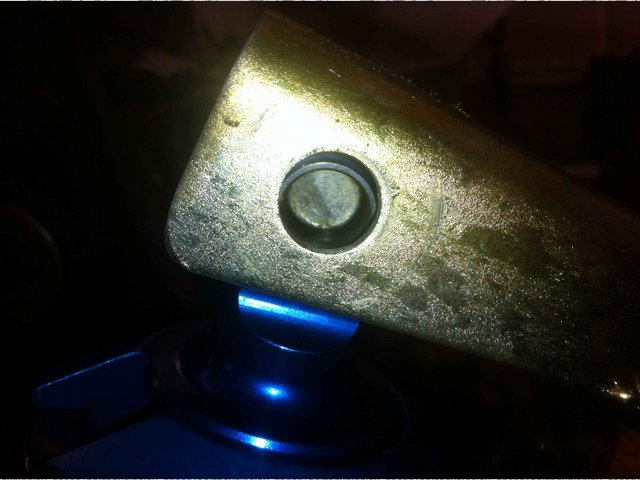
Description
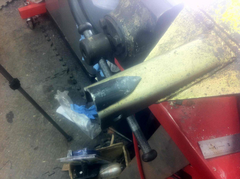
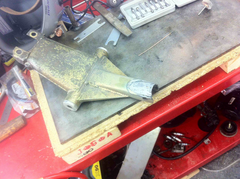
There's not much in it, but modifying the hole is a dumb idea. So, the top of the rocker arm needs to be recessed and then reinforced, so:
Firstly, chop a hole to fit the shocker:
 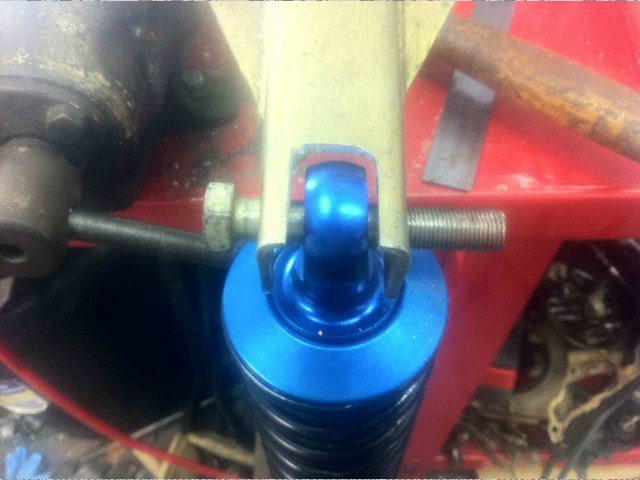
Description
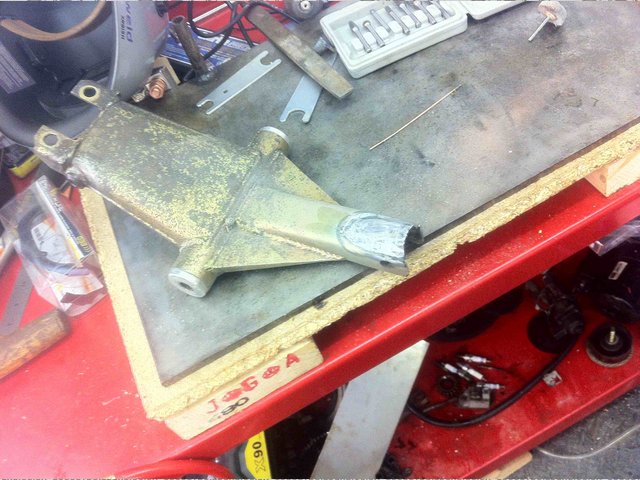
Secondly, make a little hat to fit on top of the home to reinforce it. This was 40mm OD, 2mm wall thinness pipe, with a 1x6 cm slice taken out of it,
then tapered to a point at the back (for no other than aesthetic reasons).
Description
Next, tig it into place and polish it.
Description
If you make several mistakes tigging it into place, then get your tungsten carbide kit out and polish and blend it into the mating surface to look
like you meant it to be like that. My mistakes were:
1) not removing enough of the place from the weld area - it coughed some crap into the weld.
2) initially getting the current wrong - I started with 50A to nicely melt the 2mm plate, but got way better results with 75A to melt the rocker arm
3mm metal. The welds came together then.
then, admire the end result, before taking the lessons learned onto the other rocker arm and then the powder coaters.
Description
When all you have is a hammer, everything around you is a nail.
www.furyrebuild.co.uk
|
|
|
pjay
|
| posted on 29/3/12 at 08:52 PM |
|
|
quote:
Originally posted by FuryRebuild
My running total of weight saved and how is here (click me).
In terms of weight saving I went from a car - 641Kg Pinto to 612Kg Duratec (confirmed via re-corner weighting).
More details in http://viatron.websitetoolbox.com/post/S6-Duratec-conversion...-4754094?trail=180
[Edited on 29/3/12 by pjay]
|
|
|
FuryRebuild
|
| posted on 6/4/12 at 09:20 PM |
|
|
A good days work
Well, I've been busy stripping like a £20 tart.
I now have the entire front of the car back to the chassis, apart from the brake master cylinders and pedal box. I'm leaving them in situ just
at the moment because I need to convert the clutch pedal from cable to hydraulic. The plan is to cut the necessary circular hole in the right place
and fir a bearing in place in the pedal to take a clevis acting on the master cylinder.
I've started to take the side panels out, drilling out rivets and whatnot. One option would be to leave them in place and get them powder coated
with the rest of the chassis, but I just don't know if the rush has got in behind them. I'm going to go with plan-B. Get the chassis
blasted (a nicely keyed surface then) and epoxy the panels in place, securing with advel stainless rivets. These have upwards of 3000PSI clamping
force rather than the crappy soft alloy ones. You can't put them in with a hand riveter, but luckily I have an air-riveter. I may get the
chassis done, then epoxy them in place. Assuming the job is done well, I will be putting epoxy onto epoxy - not a bad idea if it's keyed first.
Saying that, just writing that down makes me want to go with plan-A.
I've also got the rear hubs and half-shafts out, and everything split down as needs be (again, the original IRS installation rear hub carriers
are rusting to buggery).
The half-shafts are in good condition. I will probably replace the handbrake cable. I've changed one without the car being stripped down and
it's a hellacious job.
I kinda wished I hadn't stripped things back so quickly - it means I don't have a rolling chassis in order to work with when I bend up
some side-intrusion bars. I still have the side pods and tub handy, so can certainly mock most stuff up.
The rear shocks are off as well - all that's left is the diff and diff-carrier then it's back to the bare chassis.
SBDev have got my bits ready, so I can proceed with the engine rebuild. I will at least need to get the sump on before I start offering
engines/bellhousings up to gearboxes and cutting the tunnel to get it as far back as possible.
Should be a good day tomorrow - the strip down will be complete and I'll start looking at how I'm going to tig in the new roll-bar.
When all you have is a hammer, everything around you is a nail.
www.furyrebuild.co.uk
|
|
|
FuryRebuild
|
| posted on 17/4/12 at 05:43 PM |
|
|
the hassle of routing cables
I've added a post on my blog about welding in brackets on the diff-carriers to reposition handbrake cables and speedo sensor mounts.
There are pictures if you want them. I'm knackered and have a lot to do tonight, so won't be cross-loading them here.
click here to see the post
When all you have is a hammer, everything around you is a nail.
www.furyrebuild.co.uk
|
|
|
FuryRebuild
|
| posted on 10/5/12 at 09:38 AM |
|
|
Time for further updates - I've been keeping the blog up to date as well (over here)
which has some different content on. You can read about three men and a festival of rubber.
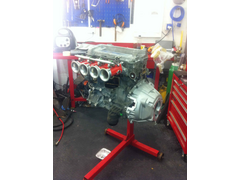
I've now done a dry-build of the engine in order to start positioning and chopping the chassis. It's going to be interesting moving this
back into the tunnel as well as widening the tunnel to take the wider pedal box.
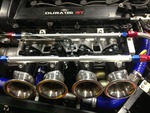
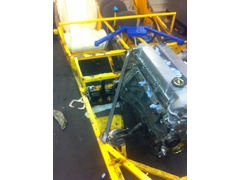
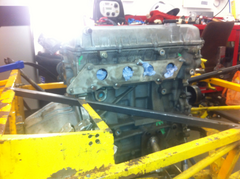
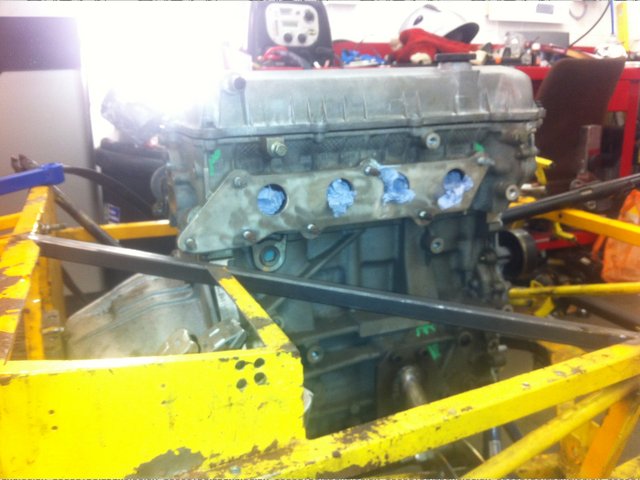
Here's the engine front-on with throttle bodies and front plate.
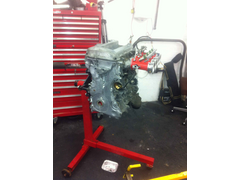 
Description
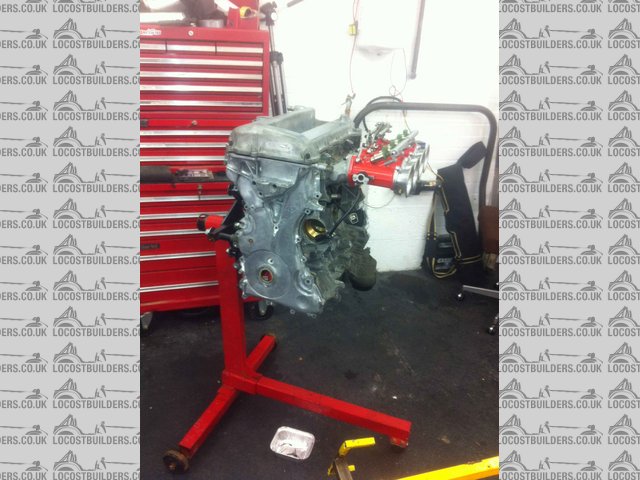
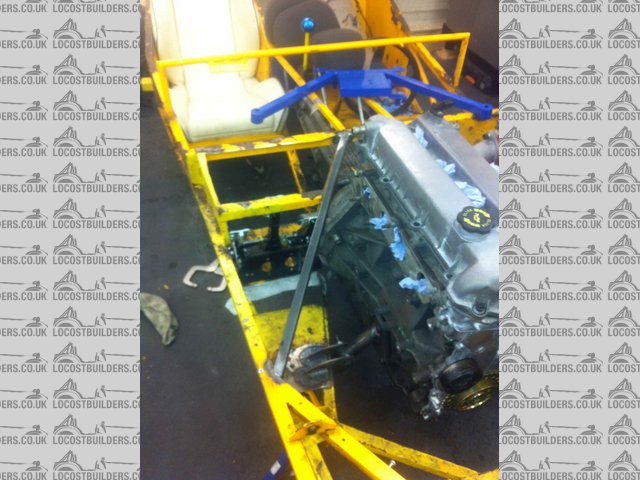
slightly higher up, showing the polished ally top. it also shows off how mucky the block is - I think I'll have to polish that before I complete
the build.
Description
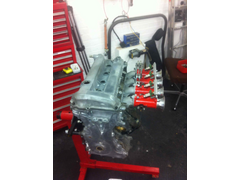
and finally side on showing the bell-housing and scruffy block
 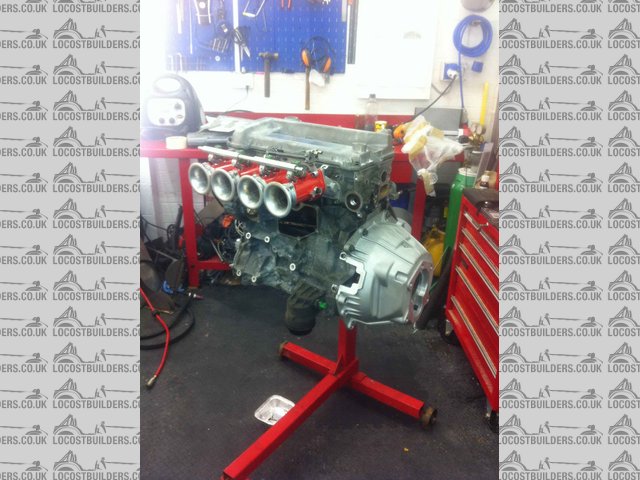
Description
One point of note was the throttle bodies fitting the alloy manifold - there was no way was I able to get a bolt (socked headed cap screw) into the
throttle body to screw into the thread on the manifold, so I had to drill out the threads on the manifold and use lock-nuts. Not ideal, but the kind
of tailoring that shouldn't put anyone off.
When all you have is a hammer, everything around you is a nail.
www.furyrebuild.co.uk
|
|
|
big-vee-twin
|
| posted on 11/5/12 at 07:26 AM |
|
|
Looking good, I gave my block a good clean but to be fair over time it just goes grey and fluffy again and I'm not on the road yet, give it a
good clean down but I wouldn't spend to much time polishing it
Duratec Engine is fitted, MS2 Extra V3 is assembled and tested, engine running, car now built. IVA passed 26/02/2016
http://www.triangleltd.com
|
|
|
FuryRebuild
|
| posted on 17/5/12 at 07:24 PM |
|
|
blog update mainly - sumps and dry-build
I've put another two posts into the blog covering progress with the dry build and the sump kit.
I'm getting close to offering up the engine to the chassis and chopping where necessary. Very exciting stuff. If I get a flyer this weekend then
I'll ready to send the chassis off for a strip and coat in 2 weeks. Here's hoping.
When all you have is a hammer, everything around you is a nail.
www.furyrebuild.co.uk
|
|
|
pjay
|
| posted on 17/5/12 at 08:51 PM |
|
|
Looking good!
Notice you have a bit of powdering corrosion on the timing chain cover. I've found GT85 is great to stop the corrosion - mask off, spray it on
and leave it to dry.
Any idea what changes you think might be necessary to the chassis?
Earlier on in the year I was helping Furyous with his Duratec conversion and we weren't sure whether the front of the chassis might need to be
modified (one of the diagonal pieces by the nearside front of the sump).
|
|
|
Furyous
|
| posted on 18/5/12 at 06:30 AM |
|
|
quote:
Originally posted by pjay
Looking good!
Notice you have a bit of powdering corrosion on the timing chain cover. I've found GT85 is great to stop the corrosion - mask off, spray it on
and leave it to dry.
Any idea what changes you think might be necessary to the chassis?
Earlier on in the year I was helping Furyous with his Duratec conversion and we weren't sure whether the front of the chassis might need to be
modified (one of the diagonal pieces by the nearside front of the sump).
This was the problem I had.
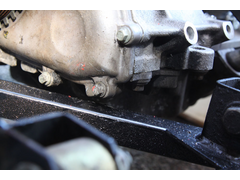 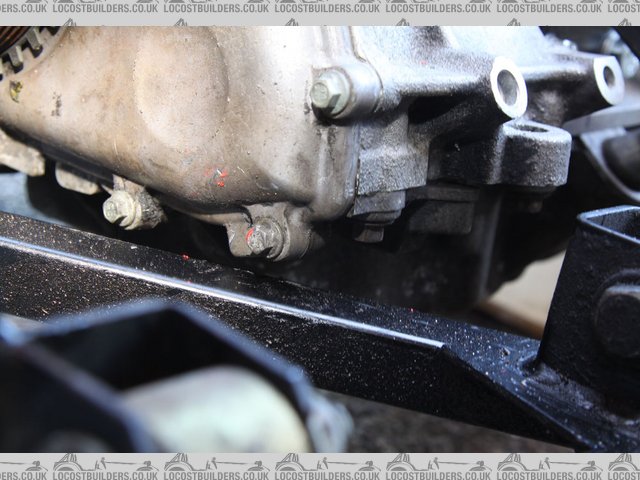
Description
The rail comes under the front cover bolt in the corner.
Looking at this picture:
http://www.furyrebuild.co.uk/wp-content/uploads/2012/05/tacked-with-gates-in.jpg
It seems like I would have some trouble with this sump.
The MX5 bell housing is quite wide compared to the Type 9 housing, so the engine and box can't go any further back without widening the
transmission tunnel.
|
|
|
FuryRebuild
|
| posted on 18/5/12 at 10:28 AM |
|
|
Hi Furyous
The sump at the moment bolts nicely to the block and whilst it aligns with the type-9 there aren't any bolt-on points. The sump isn't
structural so attachment to the bellhousing isn't necessary. It can easily be strengthened to take that attachment.
It's as wide as the block and as deep as the oil-filter housing so it shouldn't make your job worse. Chopping the chassis to get the mazda
bell-housing in is the concern I would think.
In my original pinto installation, I managed to get it so the back of the bellhousing was aligned with the passenger footwell and with 3mm clearance
when it sat in front. It was a right challenge getting the clutch to work.
I did have to make some modifications to the chassis - when I crashed it at harewood I took the opportunity to re-seat my pinto a little lower (also
meant I didn't need to modify the new bonnet to make it fit).
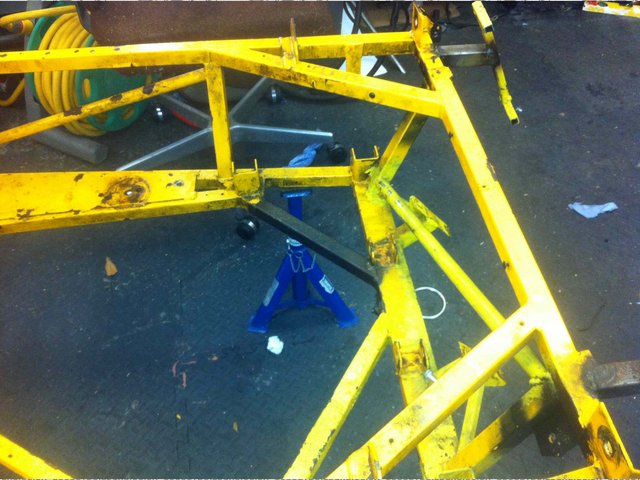
Here's the first change where I moved the cross member over to accomodate the clutch arm. It's a little messy now and I will tidy it up
and apply triangulation from the chopped member to the new member.
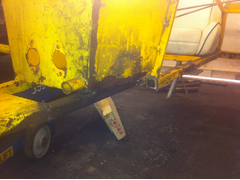 
Description
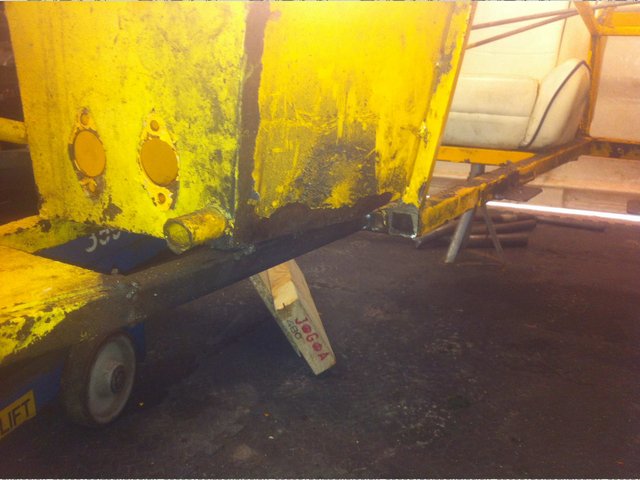
When I lowered the engine and moved it a little further over make it fit in the tunnel, I then found that the alternator fouled the following
cross-member, and the exhaust was also now lower which meant the steering column fouled things as well - result was to move this cross-member down. I
need to tidy the welds up.
Description
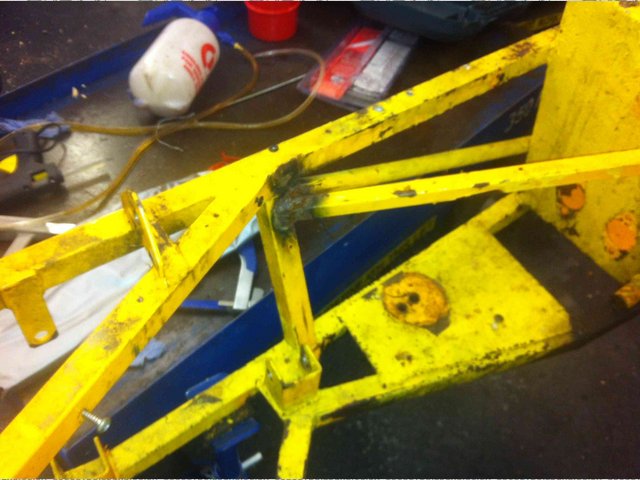
This final one shows how the sump then fouled the same cross-member I think yours did, so I moved it an inch as well. It's now the right
shape.
What's also worth noting is the extra cross-bracing I put in place - the steering rack stood on pegs but with no cross-bracing which meant to me
that all the steering load forces were going into the chassis by bending the pegs, so I cross-braced them (more visible on the right hand side of the
photo) and the whole front which took the suspension loads was an open square shape, so I triangulated that as well. For good measure I replaced the
rack bushes with stiffer ones.
The end result is that you can think the car around corners and the slightest jink on the wheel can move you 3 ft over the road - ideal for missing
slippery manhole covers.
It has also meant that I need to counsel those driving it that they need BOTH HANDS ON THE WHEEL EVEN WHEN CRUSING. If they hit a brick the car
would be off and they'd lose control. Also to keep thumbs in a safe place lest they get broken. After all, it's more or less a race car,
not a fiesta 
Description
When all you have is a hammer, everything around you is a nail.
www.furyrebuild.co.uk
|
|
|
FuryRebuild
|
| posted on 31/5/12 at 08:50 PM |
|
|
Chopping the footwell
I've updated the blog here with a lot of photos and
narrative about chopping the footwell to make the OBP pedal box fit. I'll upload the photos later and add the text later.
When all you have is a hammer, everything around you is a nail.
www.furyrebuild.co.uk
|
|
|
FuryRebuild
|
| posted on 20/6/12 at 04:47 PM |
|
|
I've got a new post up about taking my OBP pedal box to pieces, chopping an inch out of it to make it fit, and nailing it back together
again.
it's here: http://www.furyrebuild.co.uk/. I'll parcel it up for a thread on the forum, but that
involves moving the photos around and importing them - the site seems to struggle with more than a couple of external links to embedded photos.
When all you have is a hammer, everything around you is a nail.
www.furyrebuild.co.uk
|
|
|
Rich J
|
| posted on 20/6/12 at 05:02 PM |
|
|
Done something similar on my Striker when changing from Crossflow to Vauxhall 1600 power. The same difficulties arose with an OBP set up in the
narrow footwell. Luckily I managed to get a used Tilton one on Fleabay for less money than the new OBP! Have'nt been that lucky since!!


Keep up the good work
|
|
|
FuryRebuild
|
| posted on 20/6/12 at 07:48 PM |
|
|
Hi Rich
I really like what you did with the footwell to get the pedals in - I feel I may follow that.
I couldn't bring the front of the pedal box forward much - the car's not made for big-uns, and i'm only 5'8. Now that
I've also virtually removed 2" from the passenger compartment, it's going to get trickier. The loss of 2" comes from putting
the roll-over hoop in behind the driver - it's 40mm T45 and is designed to go in right down to the floor.
Thanks for the photos - really appreciate the update.
When all you have is a hammer, everything around you is a nail.
www.furyrebuild.co.uk
|
|
|
FuryRebuild
|
| posted on 21/6/12 at 07:17 AM |
|
|
The new chassis rail is in
So, welded it in last night. It was really tricky to get all the intersecting plane angles right and to get the fitments close enough to get a good
gap for tigging. Got there in the end.
This is the top-shot. The angle just 'feels' right and intersects the horizontal top of the pedal box nicely. I think I'm going to
chop out all the remaining metal in the pedal box now, and go for a new enclosure. I'll keep the 1.5mm mild steel thickness of the original
design. Rather than stitch 1 inch, gap 3 as the current design is, I'll stitch one, gap one. If I'm in a bad enough shunt to need the
pedal box straightening, actually straightening it is the last of my worries.
Description
Next we have the weld quality. I'm reasonably pleased bearing in mind it's not the easiest place to get to. I added extra filler around
the corners because I found it had a tendency to undercut there. The scattering of holes there are for the mounting of the tub, and other things I
attached straight to the chassis. They look a little random, but when you take the mounting patterns of the components into account, they make
sense.
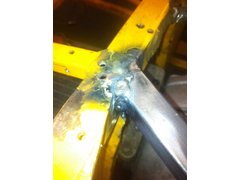 
Description
Finally, this is the view from the exhaust's perspective. there's 50mm clearance between the cross member and the bottom of the flange.
There's also clearance now for the exhaust stud. If I find the exhaust is getting a little close to the steering column then I'll add a
little bend into it's travel to give decent clearance.
Description
When all you have is a hammer, everything around you is a nail.
www.furyrebuild.co.uk
|
|
|
DH2
|
| posted on 21/6/12 at 08:27 AM |
|
|
I too am playing similar games with my Stylus chassis at present:
 
Though I binned the OBP pedal box in favour of making mine from (mostly) scratch:
DH2
|
|
|
FuryRebuild
|
| posted on 21/6/12 at 08:36 AM |
|
|
DH2
I'm impressed. Although, why did you decide to move away from the OBP box? Was it just the size of the unit? I assume everyone there is 7ft tall
with size 15 feet.
I did think mine was very nicely made and had a nice feel and travel for the pedals.
Cheers
Mark
When all you have is a hammer, everything around you is a nail.
www.furyrebuild.co.uk
|
|
|
DH2
|
| posted on 21/6/12 at 09:01 AM |
|
|
quote:
Originally posted by FuryRebuild
I'm impressed. Although, why did you decide to move away from the OBP box? Was it just the size of the unit? I assume everyone there is 7ft tall
with size 15 feet.
I did think mine was very nicely made and had a nice feel and travel for the pedals.
Thanks - the photos are no doubt flattering!
I moved away from OBP for a few reasons:
- I had the 'universal' set rather than the 'race' set, and the pedal pivot points are too high, so the pedal doesn't
pivot in the same arc as your foot pivots about the ankle.
- Yes, the size of the set was a problem - I would have had to chop the throttle pedal off to make it fit due to the width of the unit and shape of
the Stylus sills. The throttle pedal will have to be top-mounted.
- I have a couple of friends who have un-positive experience of the 'race' set, though that was for racing rather than road use - they
flex too much under hard braking due to their 'lightweight' construction.
- I was offered the laser cut pedal blanks I am now using for the price of a beer.
I am 6ft and relatively small feet at size 7 or 8. Also only have 5 toes per foot, none of which are webbed ;-) But I'm not a native
fen-lander!
I'm putting the baby-Duratec in mine - Zetec SE / Sigma engine, you can see the family connection between the engines.
DH2
[Edited on 21/6/12 by DH2]
|
|
|
Furyous
|
| posted on 21/6/12 at 12:07 PM |
|
|
Mark, where do your exhausts point to in relation to the wheel? I've been welding my manifold up and I've had to make #1 twist back a bit
to clear the wheel arch. It's got about 10mm of clearance from the arch where it is now so I think I'll have to cut the corner off the
arch. I don't think my headers are going to be matched length but they won't be a long way off.
I should get on and take some photos of what I've been doing to update my thread.
|
|
|