John Bonnett
|
| posted on 9/12/13 at 05:49 PM |

|
|
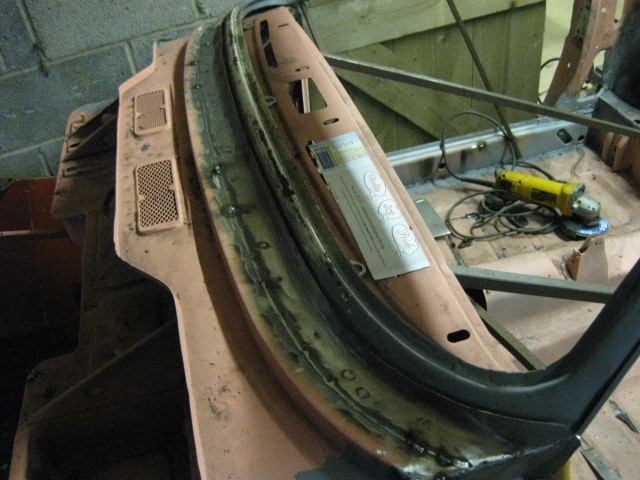
A couple more pieces in place ready for scribing, trimming and welding together. This leaves just the sill extension to make which will then finish
the panels for the rear wing.

|
|
|
|
|
John Bonnett
|
| posted on 21/12/13 at 06:49 PM |
|
|
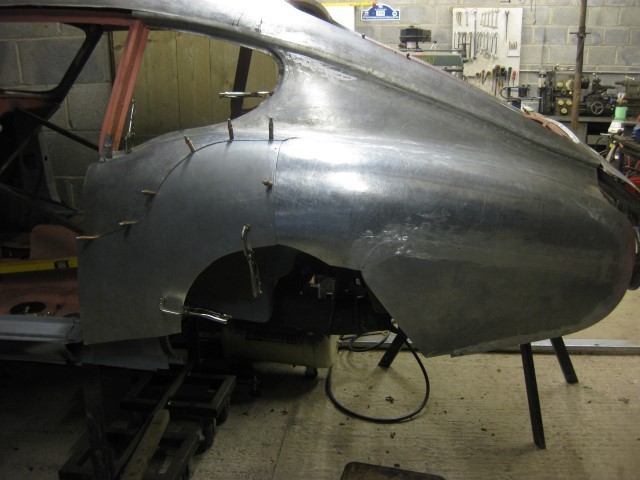
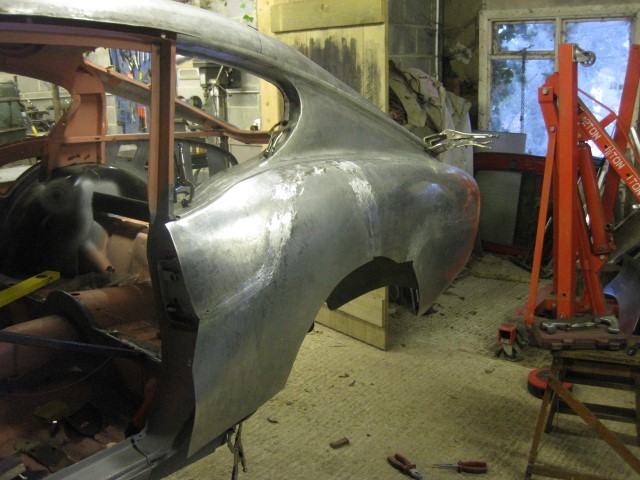
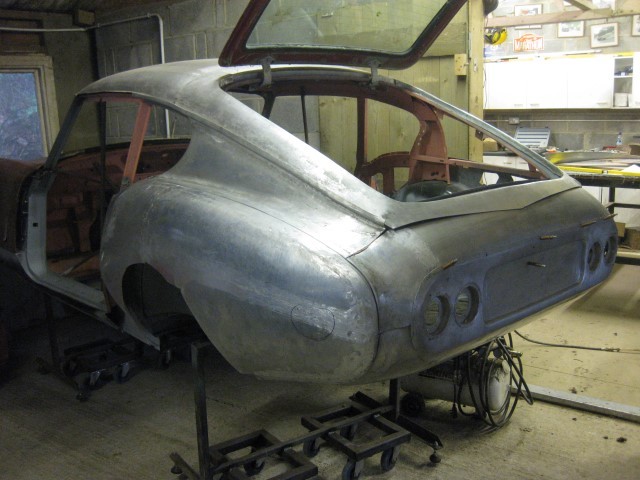
Although there is a fair bit of planishing to be done, the left hand rear wing is pretty much there apart from the sill extension piece which should
be fairly straightforward (famous last words!)
I'm making the rear valence in three pieces, the return which fits to the steel boot floor, the centre single curvature piece and the end panels
which have quite a lot of shape. Here are a few pictures which bring everything up to date as of today.


|
|
|
John Bonnett
|
| posted on 30/12/13 at 06:11 PM |
|
|
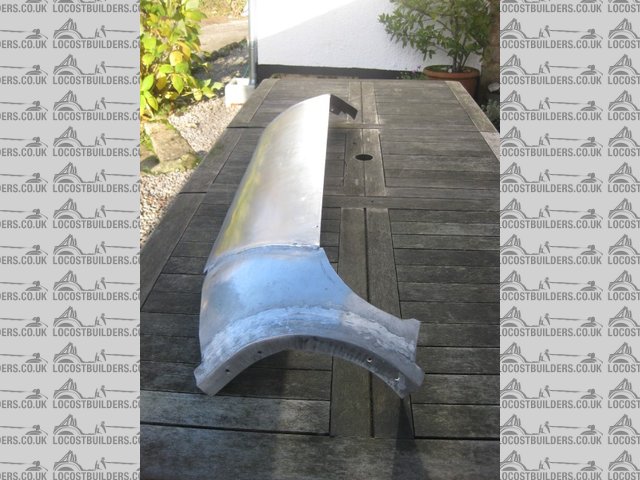
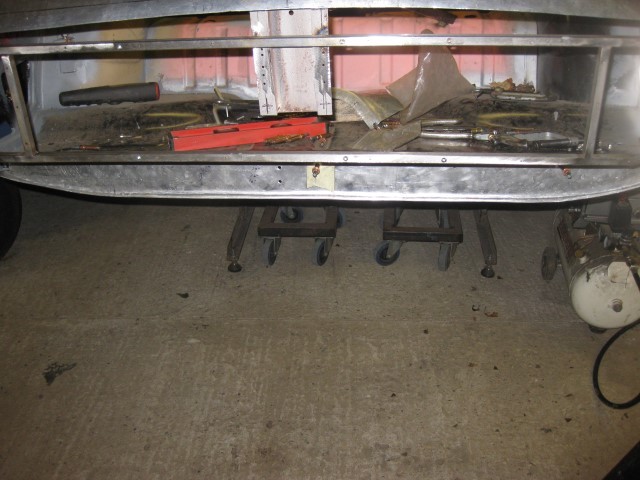
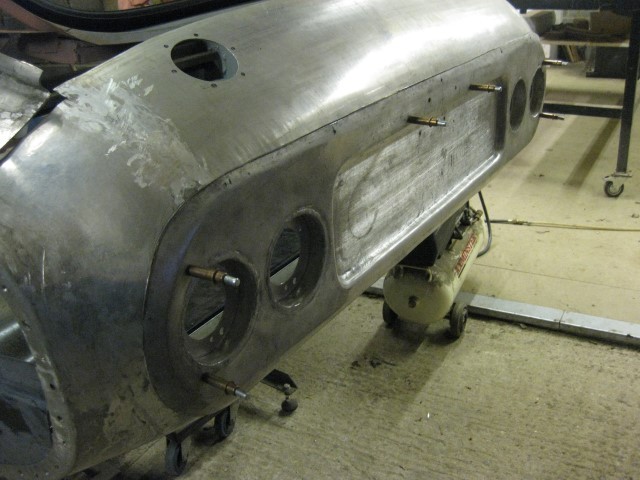
With the Trials car to prepare for the Exeter which is this coming weekend, time has been a bit limited on the project. But, a bit of progress which
is better than no progress. I've formed both ends of the rear valence and welded them to the centre section and the trial fit looks quite
promising. Just the return to weld on and that's the panel finished.

|
|
|
ceebmoj
|
| posted on 31/12/13 at 08:55 AM |
|
|
Looks great, what are you planning for the wheel arch shape?
|
|
|
John Bonnett
|
| posted on 31/12/13 at 01:43 PM |
|
|
quote:
Originally posted by ceebmoj
Looks great, what are you planning for the wheel arch shape?
The aluminium will be dressed over the inner wing return and bonded to it. So there will be no wheel arch extension as on the GT6.
I've taken a bit of licence with the design not because I think I can improve it but just to make things easier for a novice metal shaper.
|
|
|
John Bonnett
|
| posted on 18/1/14 at 05:16 PM |
|
|
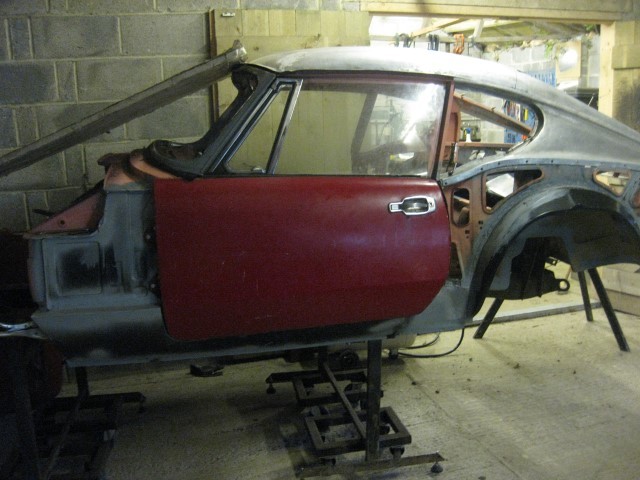
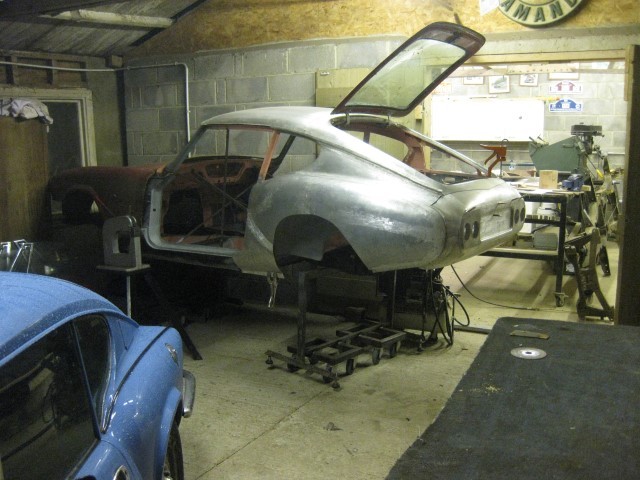
Work on the shell and the panels is still progressing nicely. A bit more remedial work needed to the scuttle but for the shell the end is in sight and
I've broken the back of the panelling. Here are a few pictures bringing everything up to date.


|
|
|
ceebmoj
|
| posted on 18/1/14 at 06:13 PM |
|
|
Looks great. Is the body going to stay on this floor pan or are you making a tubula chassis? If it stays on this floor pan how do you deal with
galvonic carosan where the steel and aloy meet?
|
|
|
John Bonnett
|
| posted on 18/1/14 at 06:56 PM |
|
|
quote:
Originally posted by ceebmoj
Looks great. Is the body going to stay on this floor pan or are you making a tubula chassis? If it stays on this floor pan how do you deal with
galvonic carosan where the steel and aloy meet?
Good questions there. Essentially it is still a GT6 with aluminium panels so we're sticking with the original chassis. I'll be using
Duralac which is a zinc chromate paint to insulate the aluminium from the steel and help prevent corrosion. The panels will be bonded to the
stiffening structure using panel adhesive which should also help the insulation. in any event, it will last me out!
|
|
|
ceebmoj
|
| posted on 18/1/14 at 07:01 PM |
|
|
I used duralac with bolts on the Elise should it be used with steel bolts in an alloy block?
|
|
|
John Bonnett
|
| posted on 26/1/14 at 09:38 PM |
|
|
The panel work is still progressing quite well with the left hand rear wing finished apart from forming a return to fit the inner wing and B post.
The rear valence has to be welded to the panel adjacent to the tailgate aperture before the number plate panel can be welded on.
[Edited on 26/1/14 by John Bonnett]
[Edited on 26/1/14 by John Bonnett]
|
|
|
rdodger
|
| posted on 26/1/14 at 09:43 PM |
|
|
Really starting to come together now. Looks fantastic!
|
|
|
John Bonnett
|
| posted on 26/1/14 at 09:54 PM |
|
|
quote:
Originally posted by rdodger
Really starting to come together now. Looks fantastic!
That's really kind of you. Thank you. Welding up small panels is relatively easy and straightforward but welding the number plate panel will
make for a very large and cumbersome pice which is going to take me right out of my comfort zone. Whre is Trev D when I need him?
|
|
|
Jimmy-boy
|
| posted on 6/2/14 at 08:55 PM |
|
|
wow just wow
|
|
|
John Bonnett
|
| posted on 9/2/14 at 02:45 PM |
|
|
A little more progress to report with a couple of pictures.
Initially, my idea was to form a scuttle in aluminium hence the reason for using a MK2 bulkhead with the detachable windscreen frame. The plan has now
changed and I intend to stay with the whole thing in steel. I see no reason to keep the screen frame as a detachable item which with rubber seals top
and bottom will always be the source of potential leaks of both rain and wind. So it's going to be welded in permanently which hopefully will
add to the stiffness and integrity of the whole shell. Here are a couple of pictures showing the lower intermediate piece formed to suit the frame and
the scuttle. The scuttle was cut to accept a joddled edge of the mating part leaving a flush joint. The top piece is work in progress and yet to be
finished.

The panel adjacent to the tailgate aperture is now welded to the lower rear valence and the assembly trimmed ready for welding in the number plate
panel.

So tomorrow, is the day set aside to tackle the big challenge (for me) of welding in the number plate panel. I hope to have some more pictures very
soon.
|
|
|
stevebubs
|
| posted on 9/2/14 at 04:41 PM |
|
|
quote:
Originally posted by John Bonnett
The panel work is still progressing quite well with the left hand rear wing finished apart from forming a return to fit the inner wing and B post.
The rear valence has to be welded to the panel adjacent to the tailgate aperture before the number plate panel can be welded on.
[Edited on 26/1/14 by John Bonnett]
Looking really good; I notice you have the tailgate attached...any pictures of the rear end with it closed?
|
|
|
John Bonnett
|
| posted on 9/2/14 at 04:47 PM |
|
|
quote:
Originally posted by stevebubs
quote:
Originally posted by John Bonnett
The panel work is still progressing quite well with the left hand rear wing finished apart from forming a return to fit the inner wing and B post.
The rear valence has to be welded to the panel adjacent to the tailgate aperture before the number plate panel can be welded on.
[Edited on 26/1/14 by John Bonnett]
Looking really good; I notice you have the tailgate attached...any pictures of the rear end with it closed?
Thank you Steve. No at the moment, I don't have a picture of the car with the tailgate shut. In order to get a realistic picture of what it will
look like, I really need the back end assembled, perhaps after tomorrow. Let's see how it goes.
|
|
|
stevebubs
|
| posted on 9/2/14 at 09:25 PM |
|
|
quote:
Originally posted by John Bonnett
Thank you Steve. No at the moment, I don't have a picture of the car with the tailgate shut. In order to get a realistic picture of what it will
look like, I really need the back end assembled, perhaps after tomorrow. Let's see how it goes.
Looking forward to it...enjoyed the Canamsa build, and this has taken its place in my bookmarks...
|
|
|
John Bonnett
|
| posted on 12/2/14 at 07:57 AM |
|
|
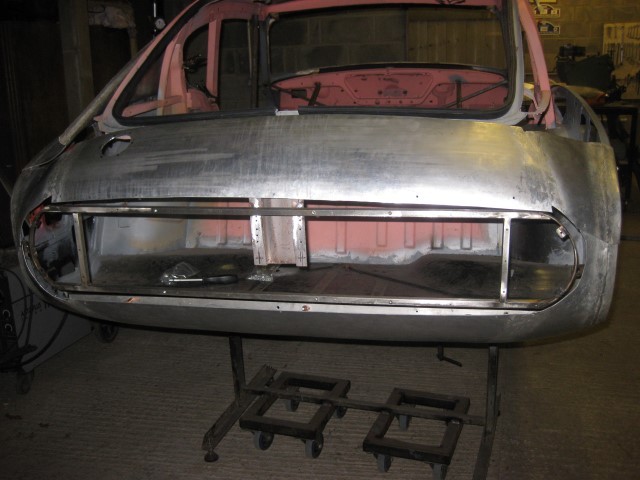
The panel is now successfully welded in and because I was able to do a lot of the welding with the assembly fixed to the car everything kept its shape
and the whole job proved to be very much easier than I feared.

I'll post a few more pictures once the panel is planished and fitted back onto the car.
[Edited on 12/2/14 by John Bonnett]
|
|
|
John Bonnett
|
| posted on 12/2/14 at 11:03 AM |
|
|
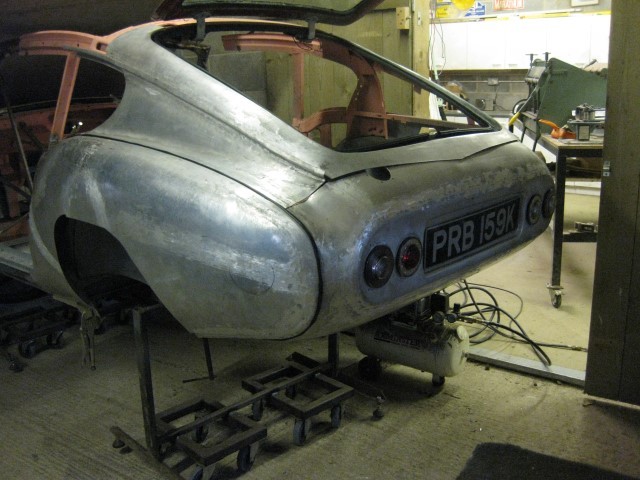
The panel needs a lot more planishing but I was anxious to check that despite the welding, it still fitted the car and that the lights still fitted
into their apertures. Fortunately, all is well so I can relax now.
|
|
|
rdodger
|
| posted on 12/2/14 at 02:54 PM |
|
|
Brilliant as usual John.
Have you considered taking moulds off it when it's finished and selling a few bodies?
|
|
|
John Bonnett
|
| posted on 12/2/14 at 03:16 PM |
|
|
quote:
Originally posted by rdodger
Brilliant as usual John.
Have you considered taking moulds off it when it's finished and selling a few bodies?
Now there's a thought
|
|
|
rdodger
|
| posted on 12/2/14 at 04:11 PM |
|
|
I'm thinking your body in lightweight GRP over a spaceframe with full cage. The perfect home for Claire's Mazda V6 on MX5 gearbox kit.
The more I think about it the more I like it! 
|
|
|
John Bonnett
|
| posted on 12/2/14 at 06:29 PM |
|
|
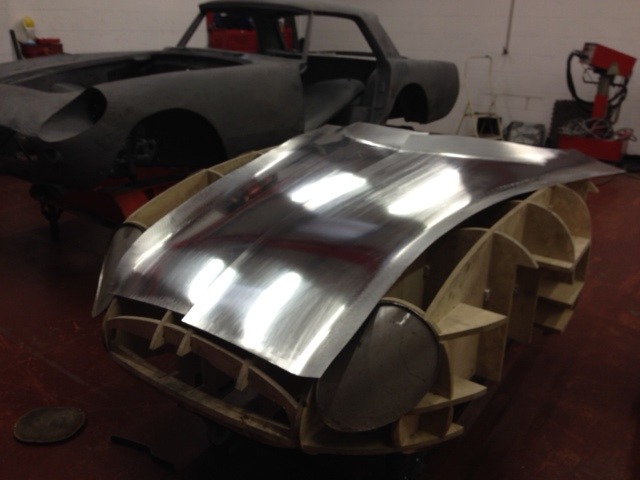
A colleague of our Trev D has very kindly agreed to make a bonnet skin for me and he has just made a start on it. And what a good start.
|
|
|
rdodger
|
| posted on 12/2/14 at 06:56 PM |
|
|
Is that the Alfa TZ one?
|
|
|
John Bonnett
|
| posted on 12/2/14 at 07:03 PM |
|
|
quote:
Originally posted by rdodger
Is that the Alfa TZ one?
Yes it is; well done. Dimensionally it is very close to the GT6 bonnet and I think it is absolutely stunning.
|
|
|